Project 1 - Wiper control system and Vehicle speed calculation for ABS using Wheel Speed sensor
- Wiper control system
Develop Simulink/state flow model for wiper control system based on the given conditions.
Description of Challenge:
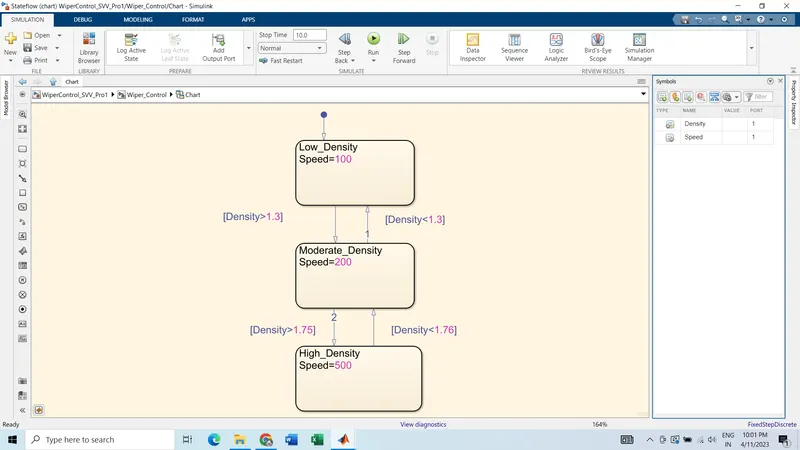
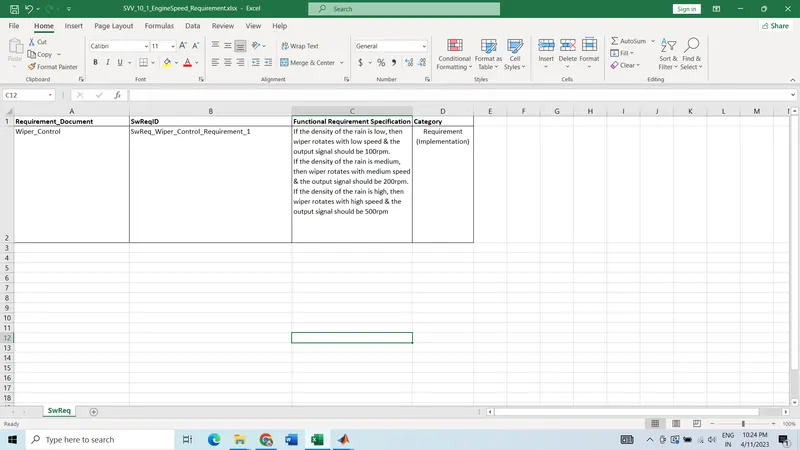
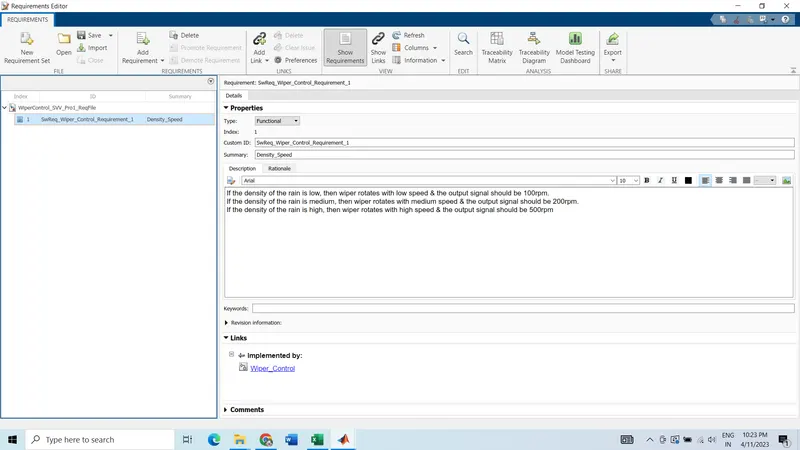
- If the density of the rain is low, then wiper rotates with low speed & the output signal should be 100rpm
- If the density of the rain is medium, then wiper rotates with medium speed & the output signal should be 200rpm
- If the density of the rain is high, then wiper rotates with high speed & the output signal should be 500rpm
Note: Rain density input comes from the external sensor, for the simulation purpose constant block with knob can be taken.
Implementation of Wiper Control System
Introduction: A wiper control system is a system that controls the operation of a vehicle's windshield wipers. Windshield wipers are used to clear rain, snow, or debris from the windshield to improve visibility while driving.
The wiper control system is an important safety feature of a vehicle, as it helps to ensure good visibility in inclement weather conditions. Regular maintenance and inspection of the wiper control system, including the wiper blades and motor, can help to ensure that it operates effectively and safely.
Objectives:
- Simulink Model
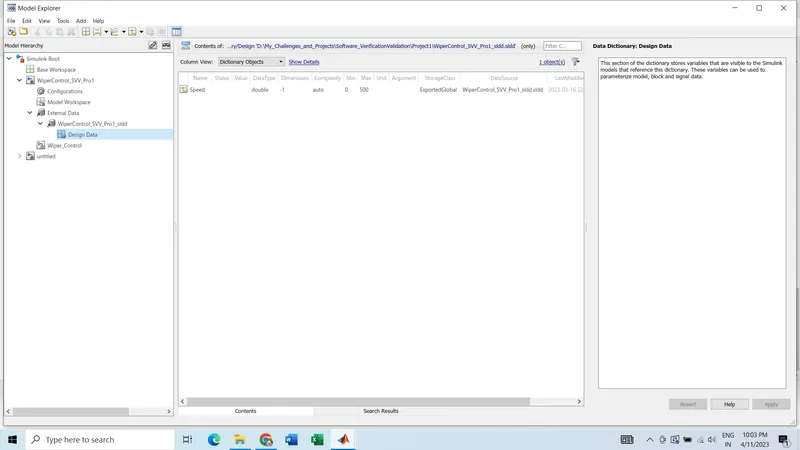
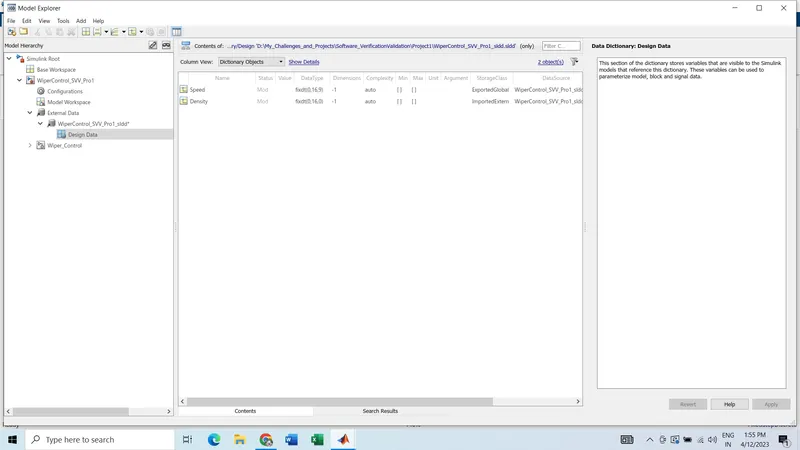
- sldd file creation
- Requirement Tagging along with report generation
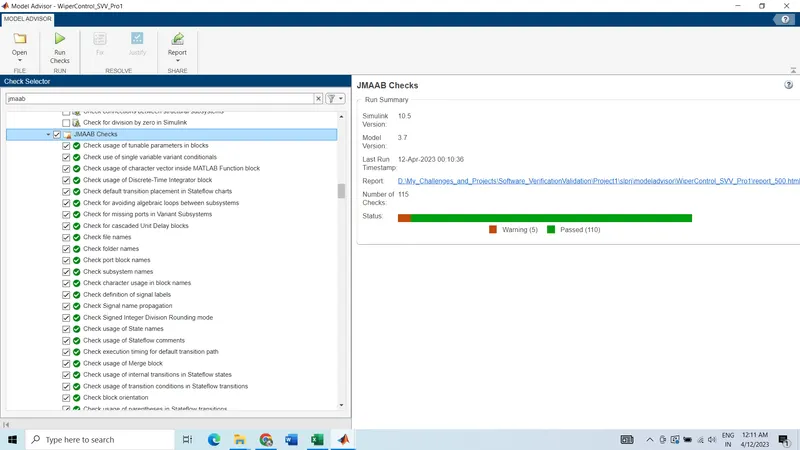
- Model advisor check along with report generation
- Using Fixed Point tool
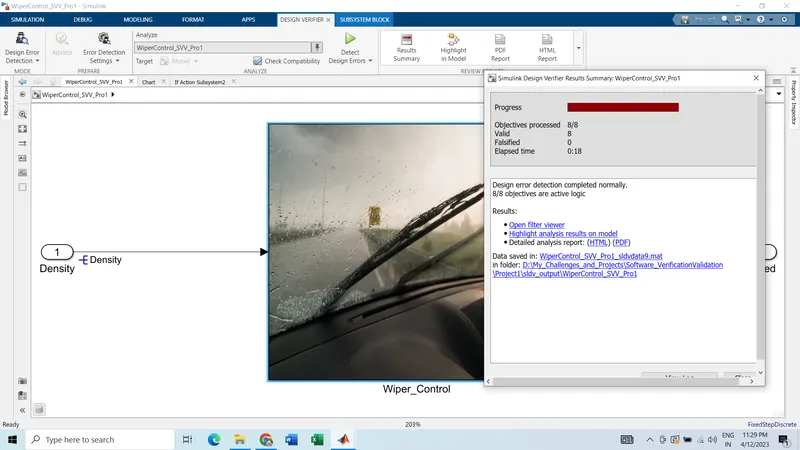
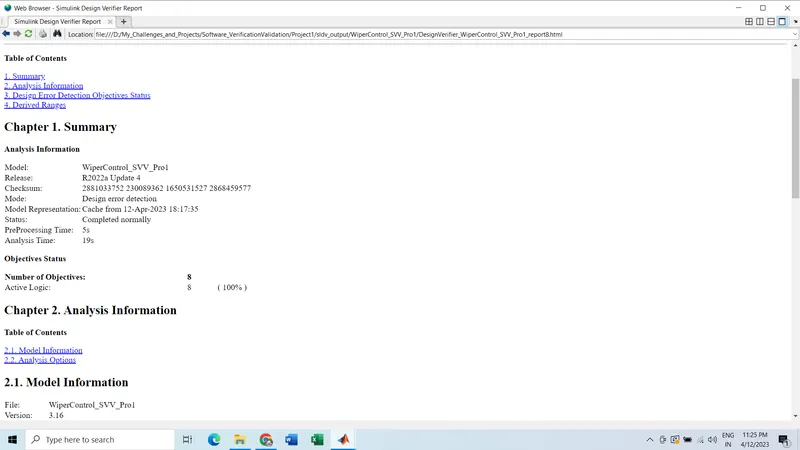
- SLDV design error detection along with report generation
- MIL Harness and Coverage report
- SIL Harness and Coverage report
- SLDV Test generation report creation
- Auto code generation
- Polyspace Bug finding process
- Baseline Testing with report
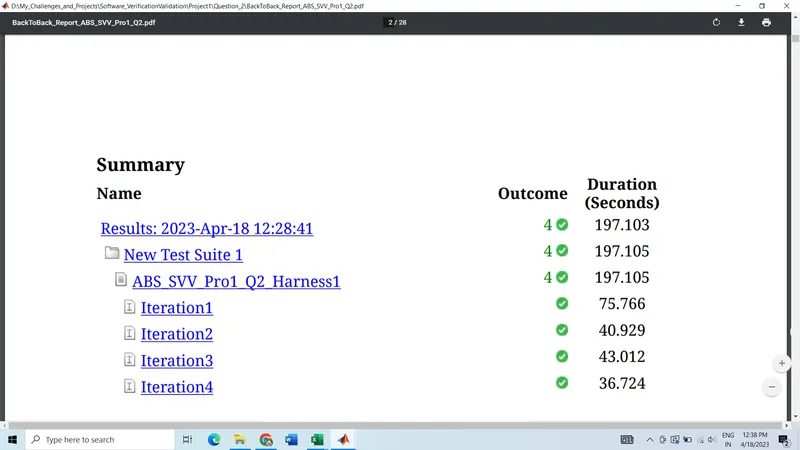
- Back to Back Testing with report
Designed Model:
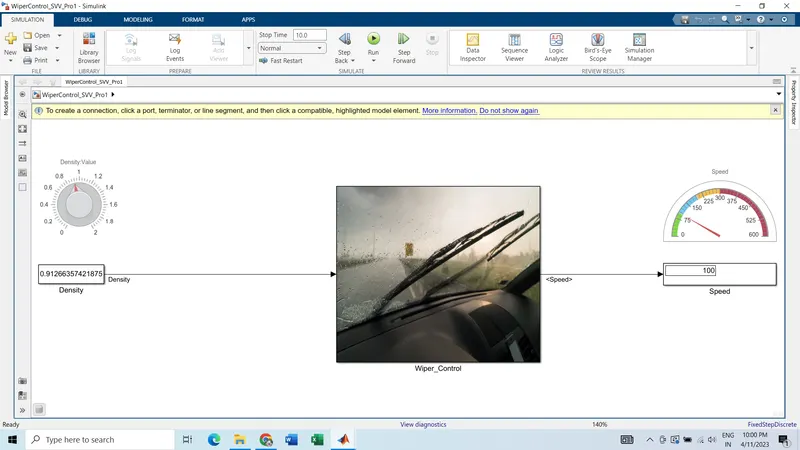
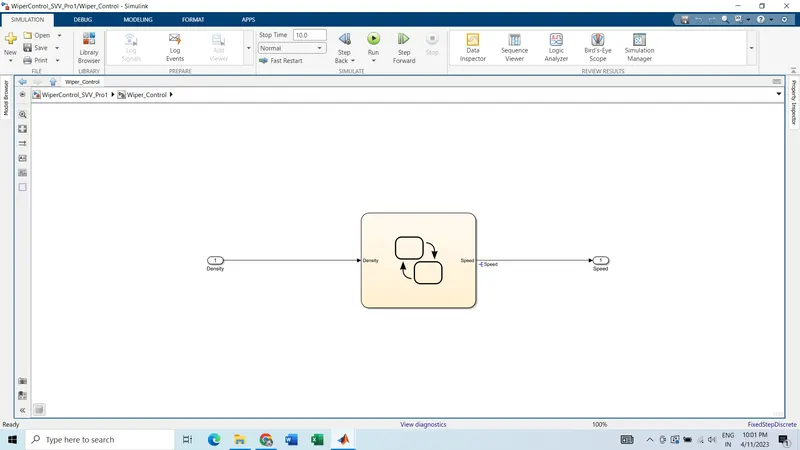
Inside the subsystem:
SLDD File :
Requirement Tagging :
- From Excel:
- Requirement Editor tool:
Model Advisor Check(JMAAB) :
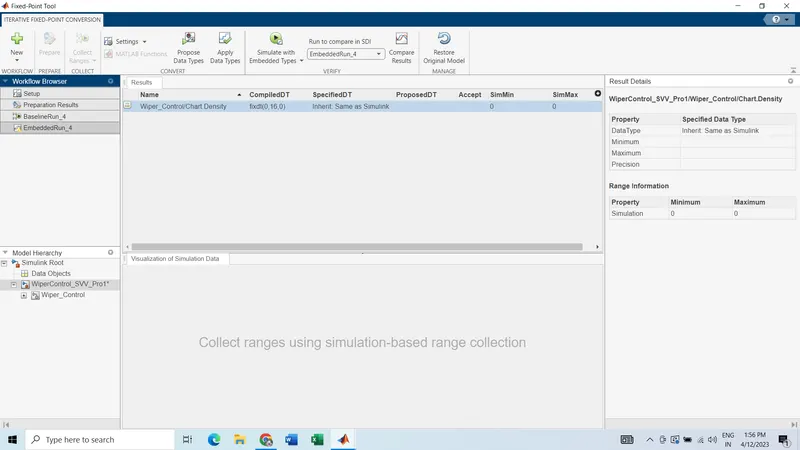
Fixed Point Tool:
Proposing data type by the tool:
After proposal by the tool, the change in data dictionary:
Design Verifier Tool:
Report:
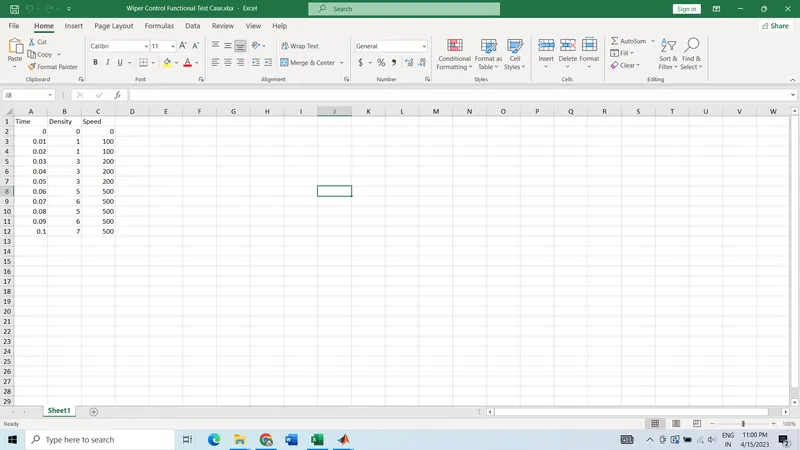
Functional Test Case:
Excel File:
MIL Harness with coverage result:
- Harness:
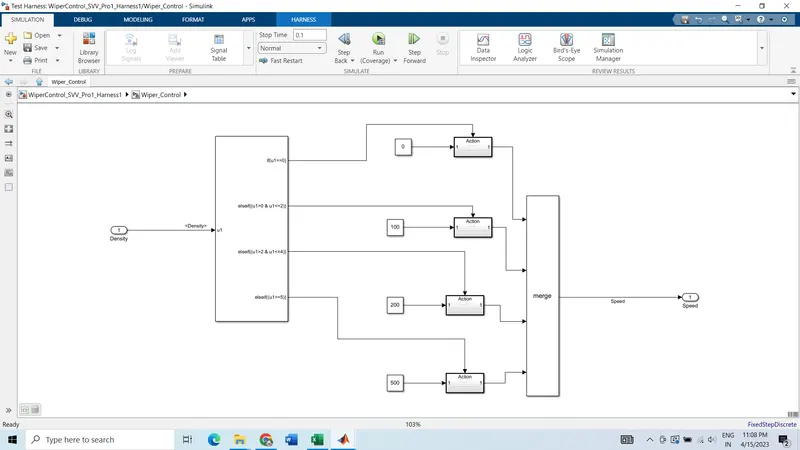
- MIL Result:
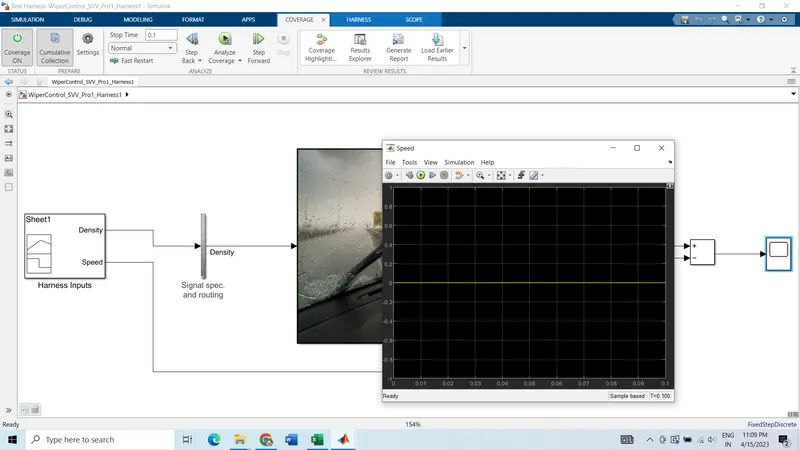
- Coverage Result:
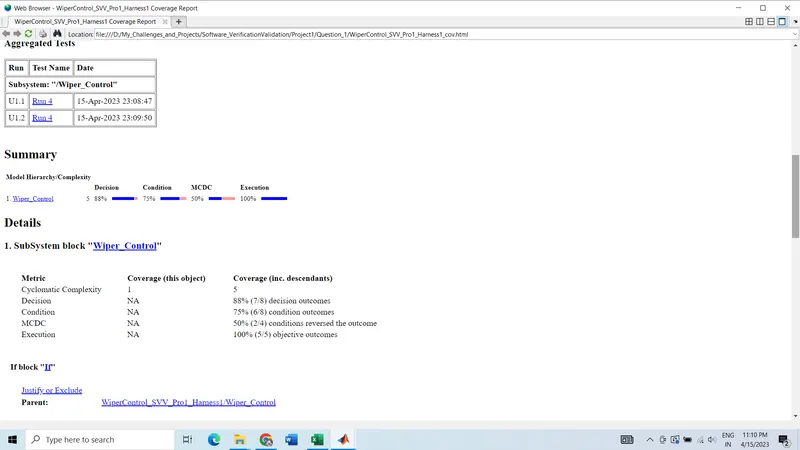
SIL Harness with coverage result:
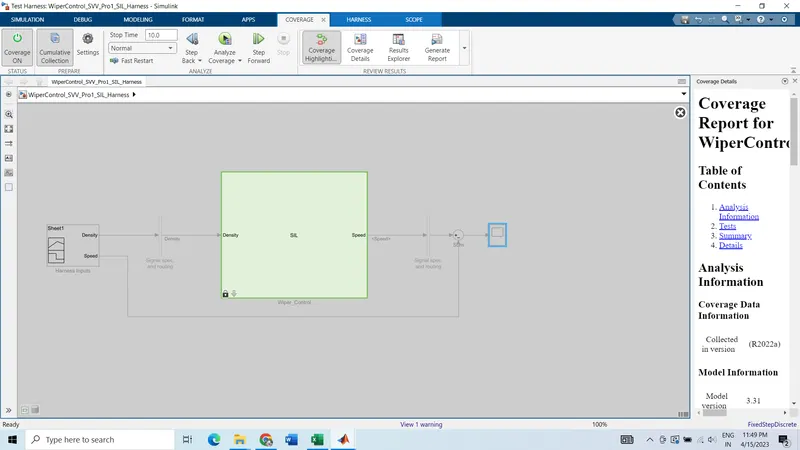
- SIL Harness:
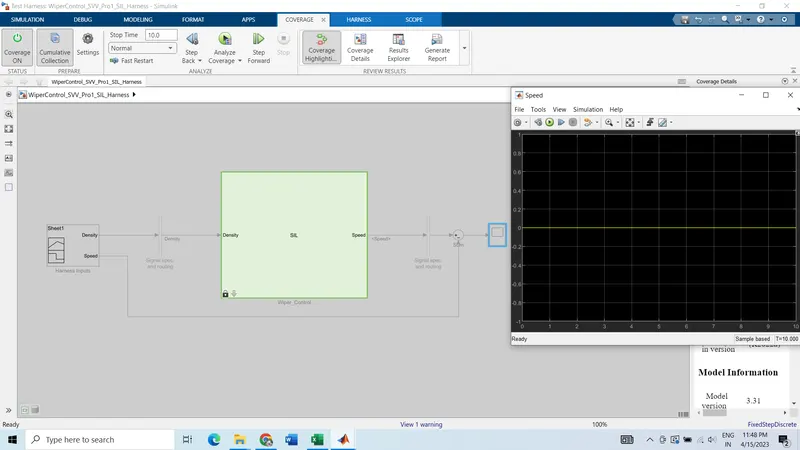
- SIL Result:
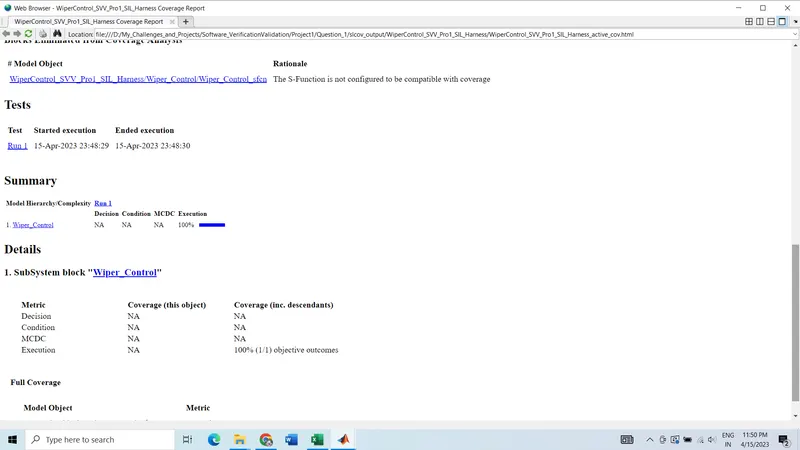
- SIL Coverage Result:
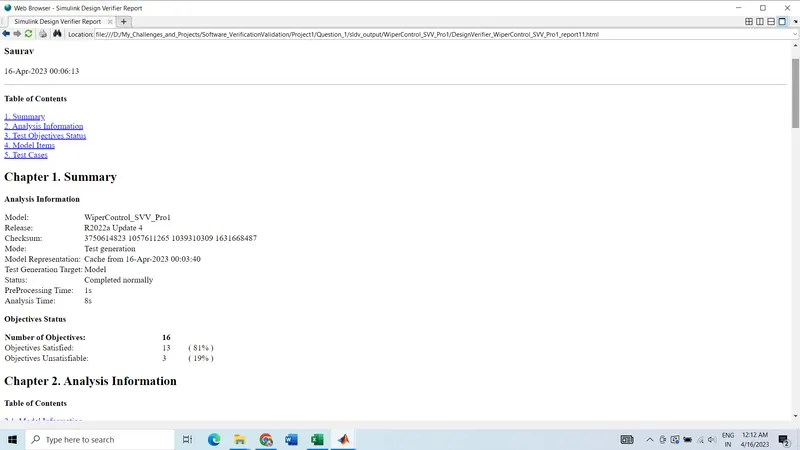
SLDV Test Generation Report:
Polyspace Bug Finder and Code Prover:
Polyspace Bug Finder and Polyspace Code Prover are both software testing tools developed by MathWorks for detecting and analyzing software defects.
Polyspace Bug Finder is primarily used for identifying coding errors and security vulnerabilities in software code. It uses advanced static analysis techniques to detect potential run-time errors, such as buffer overflows, null pointer dereferencing, and division by zero. It also performs data flow analysis to detect issues such as uninitialized variables and dead code.
Polyspace Code Prover, on the other hand, is designed to provide formal verification of software code. It uses mathematical methods to prove that the code satisfies certain correctness properties, such as absence of run-time errors, functional correctness, and compliance with coding standards. It can analyze both control flow and data flow to prove program correctness, and generates a mathematical proof of the absence of run-time errors.
Polyspace Bug Finder:
- First we need to generate the code by using Embedded C tool which is the inbuild part of the MATLAB.
- Go to Polyspace and click on 'start a new project' and give a project name.
- Check the option 'Use default location'. If you want to save in different location, uncheck the box and select the location from configuration option.
- You will be redirected to the new window which will be divided into two part. One is for Project Browser and another one is for Configuration.
- First go to configuration and do some required changes.
- Under the Target & Compiler,
- source Code language: C
- C standard version: defined by compiler
- compiler: Generic
- Target Processor type: x86_64
- uncheck the 'Division Round Down'
- Pack alignment value:defined by compiler
- uncheck the box for 'Ignore pragma pack directives'
7. Coding standard and coding metrics,
- Check MISRA C:2004 (You can check any other option as per requirement)
- check the box of 'Calculate Code Metrics'
8. Bug Finder Analysis,
- Make sure the default check box in=s enabled for Find defectes
9. Reporting,
- Check for Generate Report
- Code Prover report: Developer
- Bug Finder report: Bug Finder Summary
- Output Format: PDF
10. Save and Run Bug Finder(Make sure the option Bug Finder from the drop down menu)
11. Result list and details both will be appeared in the next window and from there you can verify all the results.
Polyspace Code Prover:
- Now to run the Code prover, few configuration settings should be introduced.
- Beside the result details, Configuration option will be there. Go there.
- Environment Settings,
- Check the 'Code from DOS or window file system'
- Check the 'Stop Analysis if a file does not compile' (Note: You have to uncheck if tool is not run)
4. Code prover Verification,
- In Check behaviour: Check the 'allow negative operand for left shifts' and 'consider non filite float'
- Precision: Choose the level: 2
- Verification level: software safety analysis level 2
5. Save and Run Code Prover. (Select 'Code Prover' from drop down menu)
6. In the left window, Result coulmn will be appeared and Here click into the Result Details. A graph will come along with all other details.
7. Here a color coding is used to determine the result:
- Green: Codes are checked and it is valid
- Grey: Parts of the code is checked but can not be executed.
- Black: Part of the code is not chekced. This will be checked by correcting the tool level analysis settings.
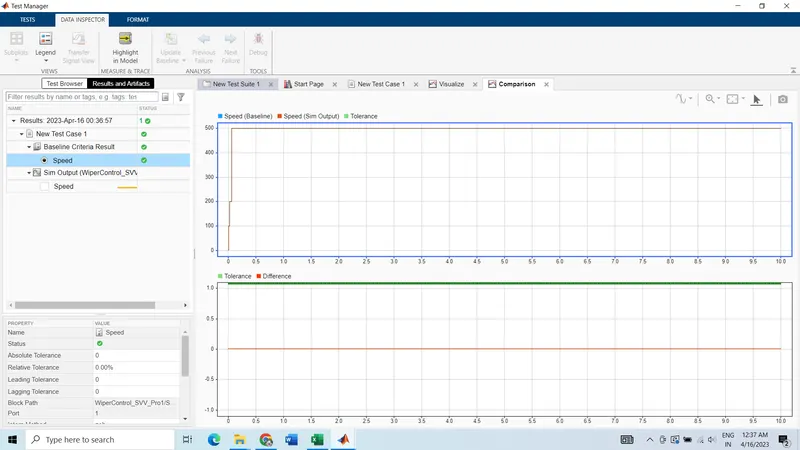
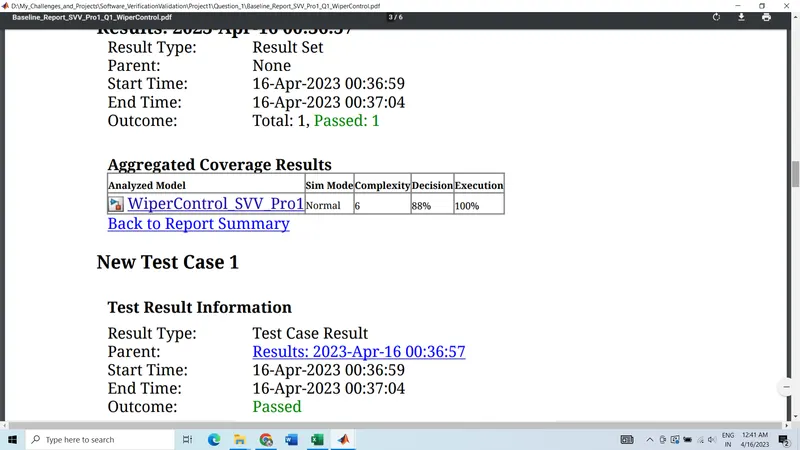
Baseline Testing:
- Result:
- Report Summary:
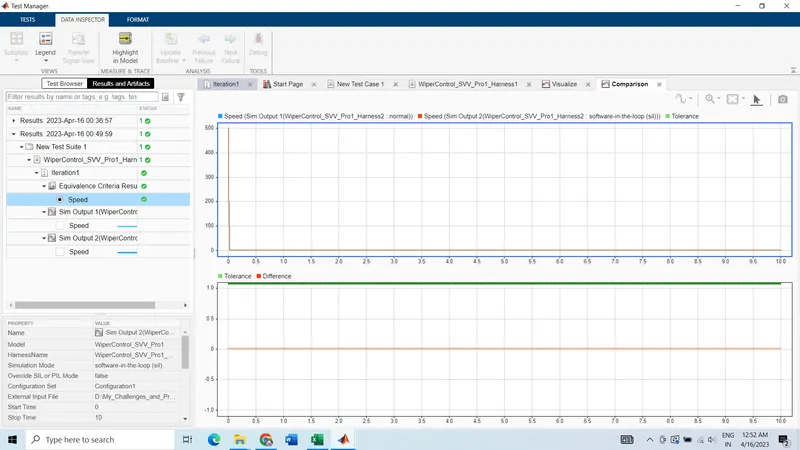
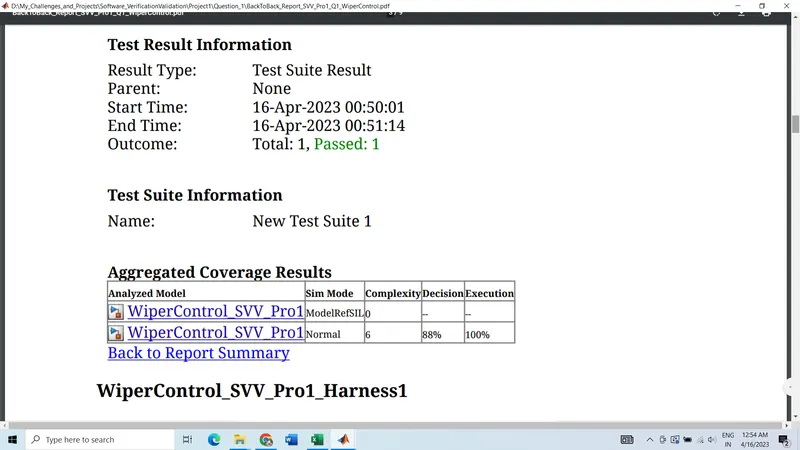
Back to Back Testing:
- Result:
- Report:
2.Vehicle speed calculation for ABS using Wheel Speed sensor
Develop Simulink/state flow model for the vehicle speed calculation unit inside the ABS system for the below conditions.
Description of Challenge:
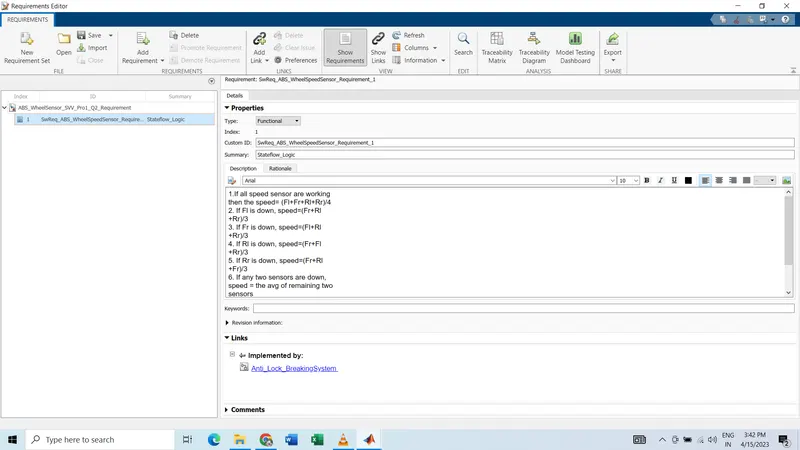
fl, fr, rl and rr are the wheel speeds of front left, front right, rear left and rear right respectively.
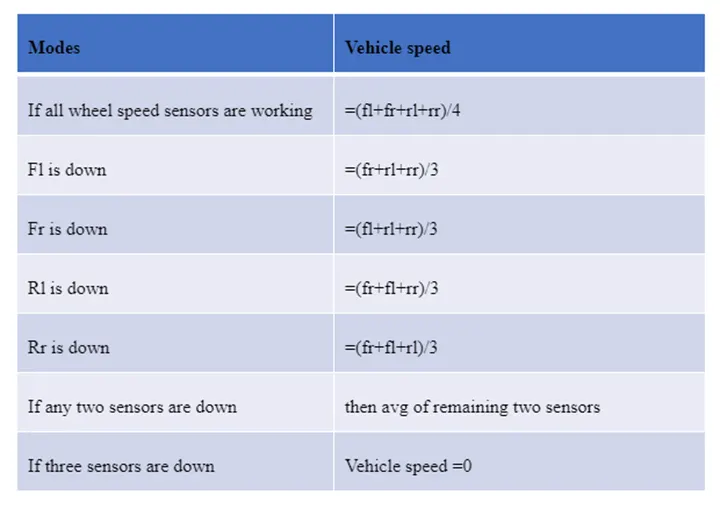
Implementation of Anti-Lock Braking system
Introduction:
ABS, or Anti-lock Braking System, is a safety feature installed in modern cars and motorcycles that helps prevent the wheels from locking up during sudden stops or emergency braking. When the wheels lock up, the vehicle loses traction, and the driver may lose control of the vehicle.
ABS works by monitoring the speed of each wheel using sensors. When the system detects that a wheel is about to lock up, it will release the brake pressure momentarily and then reapply it rapidly. This process is repeated multiple times per second, allowing the wheel to slow down without locking up and maintaining traction with the road surface.
The ABS system is controlled by a computer module that receives signals from the wheel speed sensors and uses complex algorithms to determine the appropriate brake pressure for each wheel. ABS is usually paired with Electronic Stability Control (ESC) systems, which help to further improve the vehicle's stability and prevent skidding during sudden maneuvers.
Overall, ABS is a critical safety feature that helps drivers maintain control of their vehicles during emergency braking situations.
Objectives:
- Simulink Model
- sldd file creation
- Requirement Tagging along with report generation
- Model advisor check along with report generation
- Using Fixed Point tool
- SLDV design error detection along with report generation
- MIL Harness and Coverage report
- SIL Harness and Coverage report
- SLDV Test generation report creation
- Auto code generation
- Polyspace Bug finding process
- Baseline Testing with report
- Back to Back Testing with report
Designed Model:
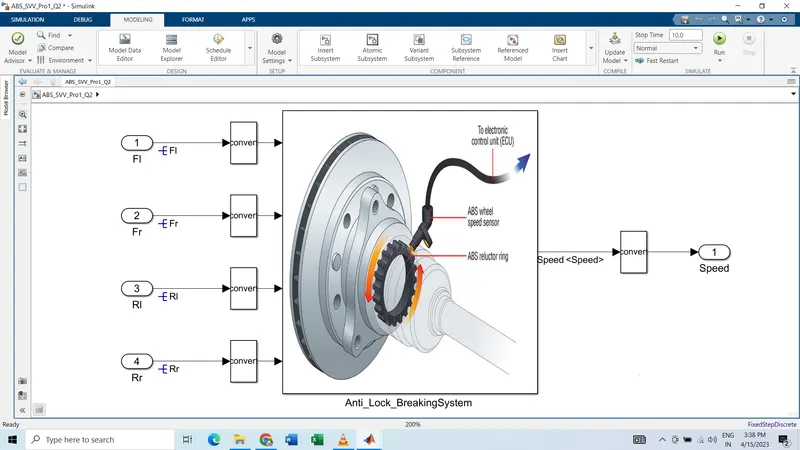
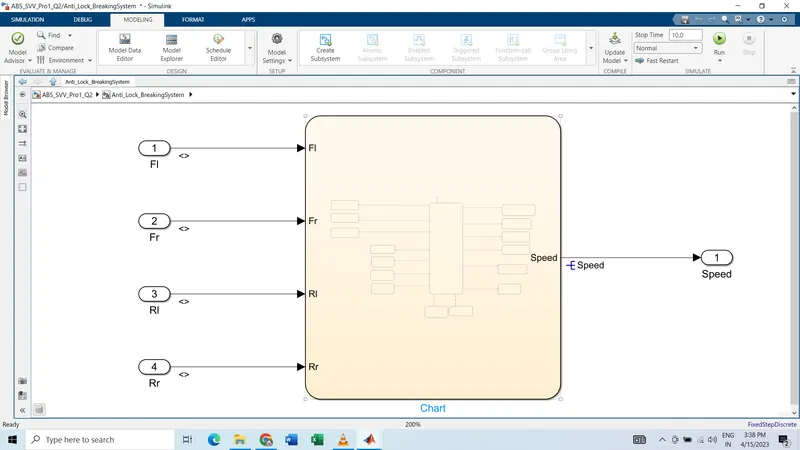
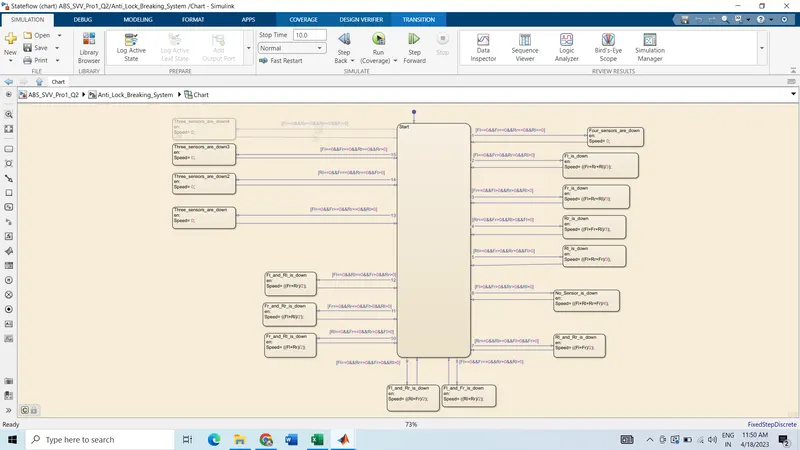
Data Dictionary:
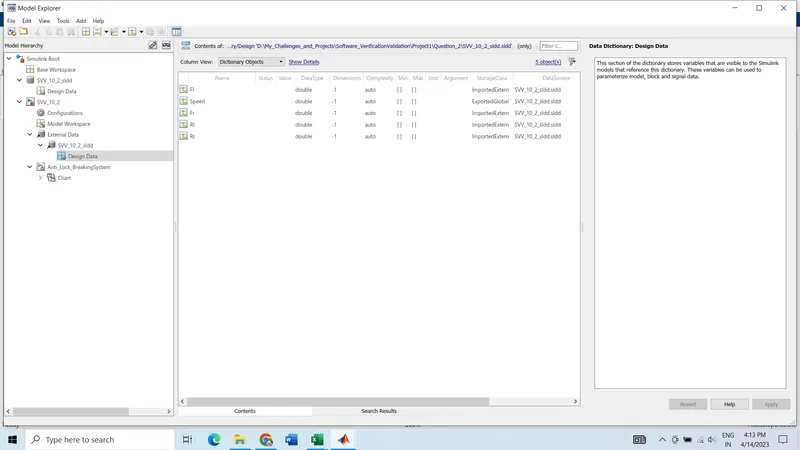
Requirement Tagging Report:
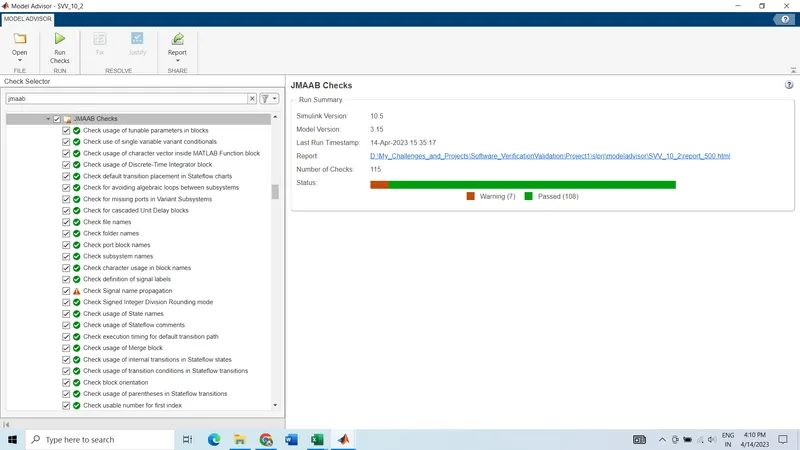
Model Advisor(JMAAB) Check:
Fixed Point Tool:
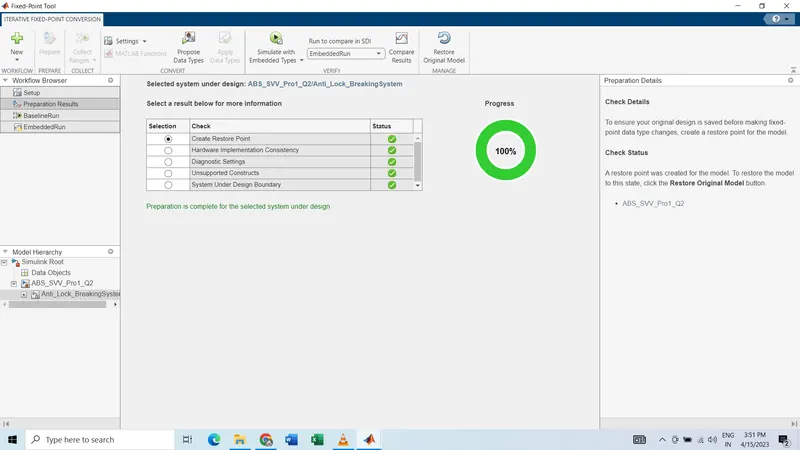
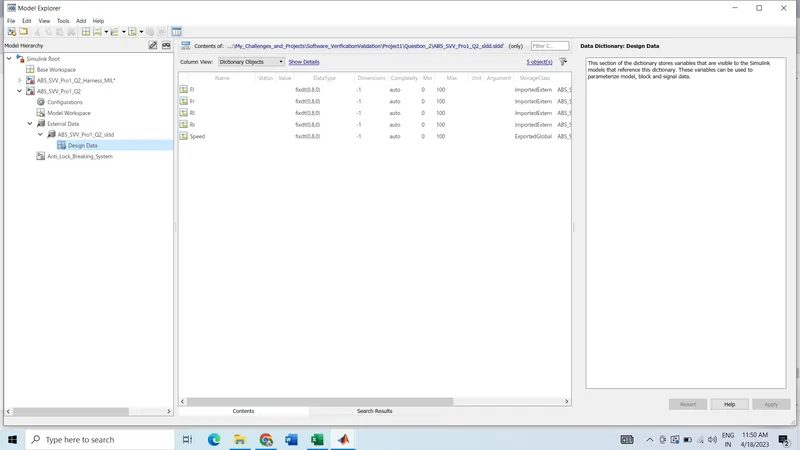
- Modification od data dictionary:
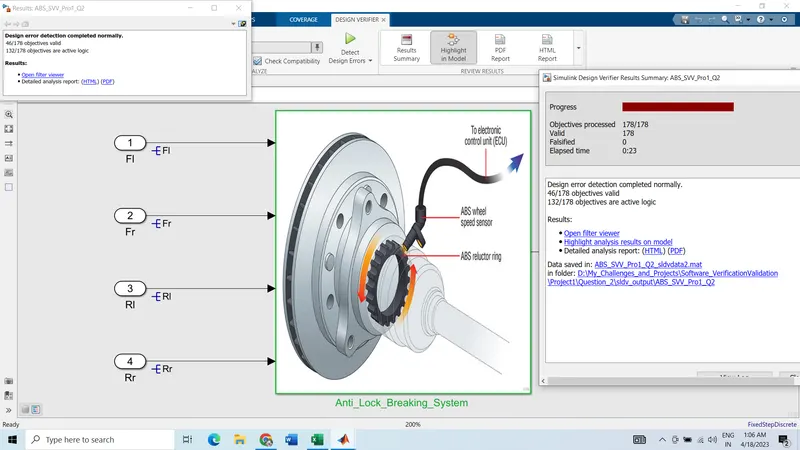
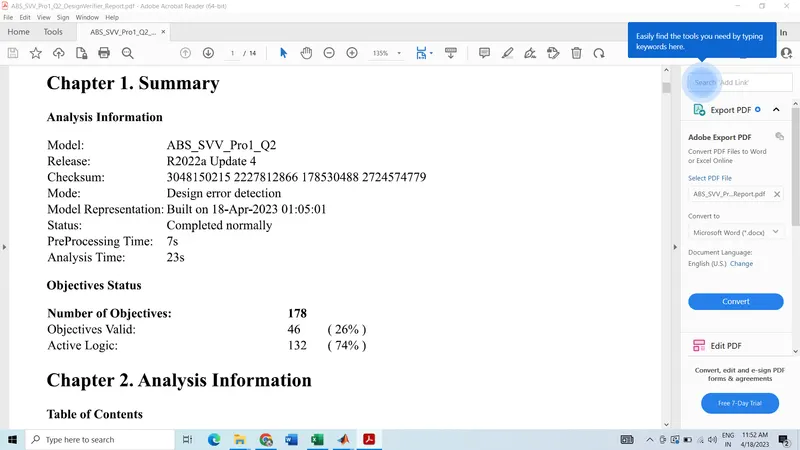
SLDV(Simulink Design Verifier) Tool:
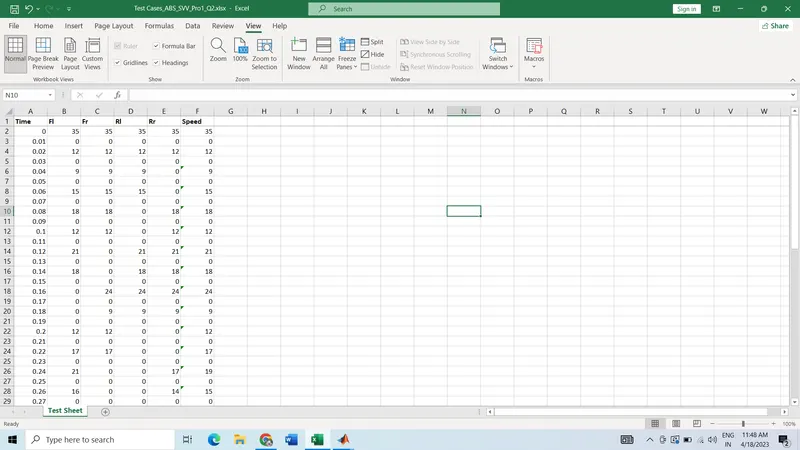
Functional Test Case:
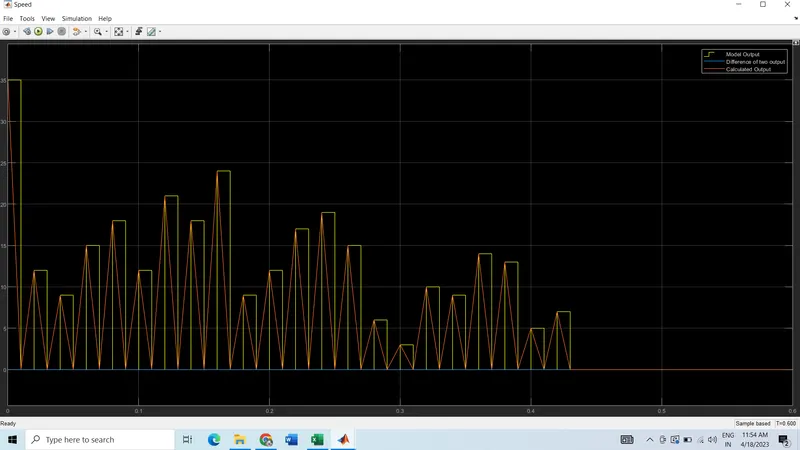
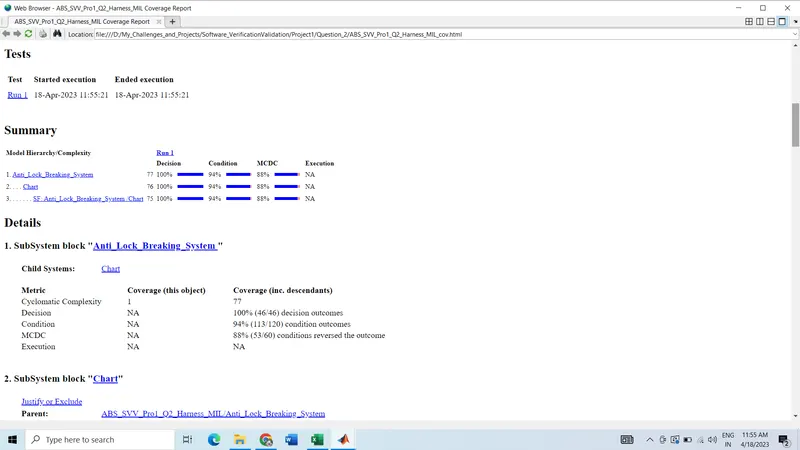
MIL Testing:
- MIL Harness:
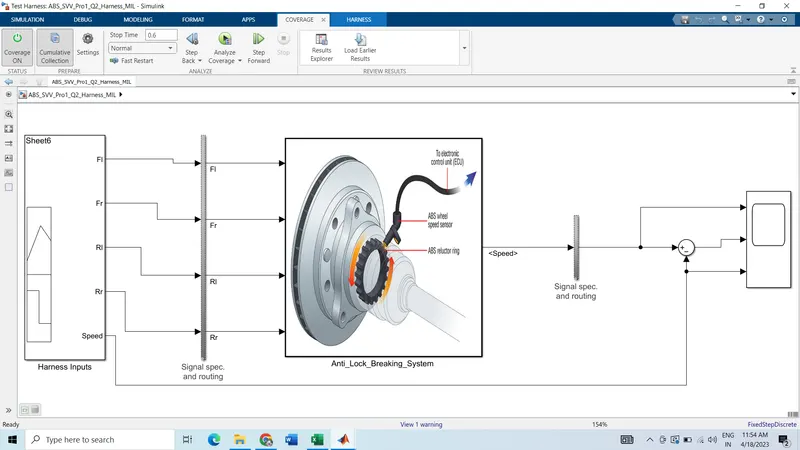
- MIL Result
- MIL Coverage Report:
SIL Testing:
- Generated Code Files have been attached.
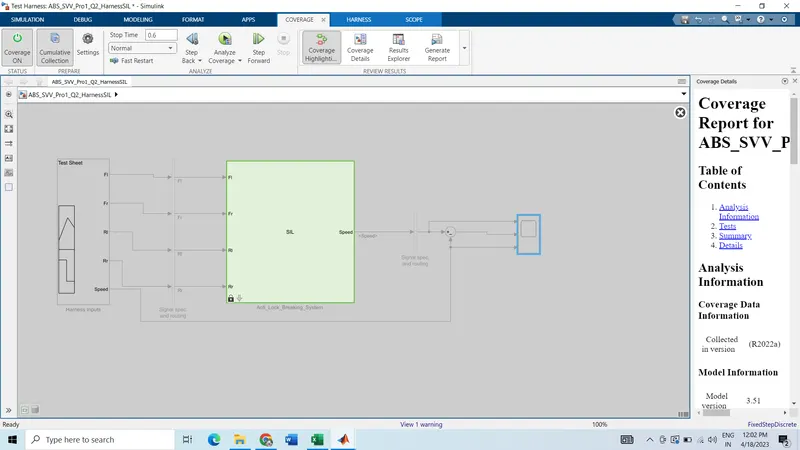
- SIL Harness
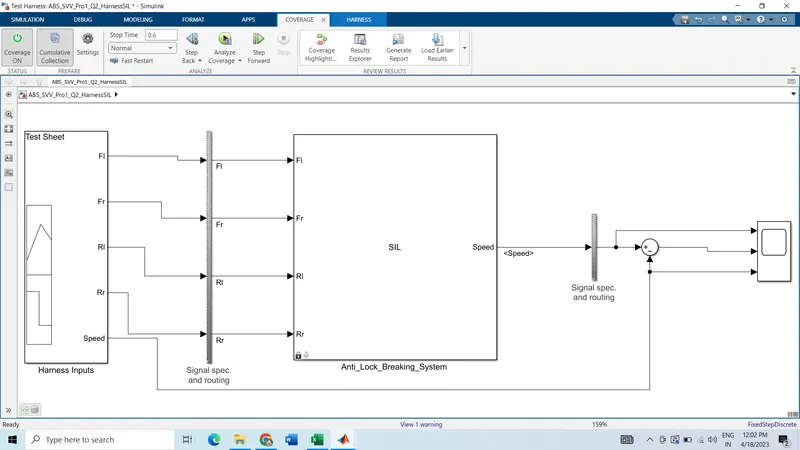
- SIL Result:
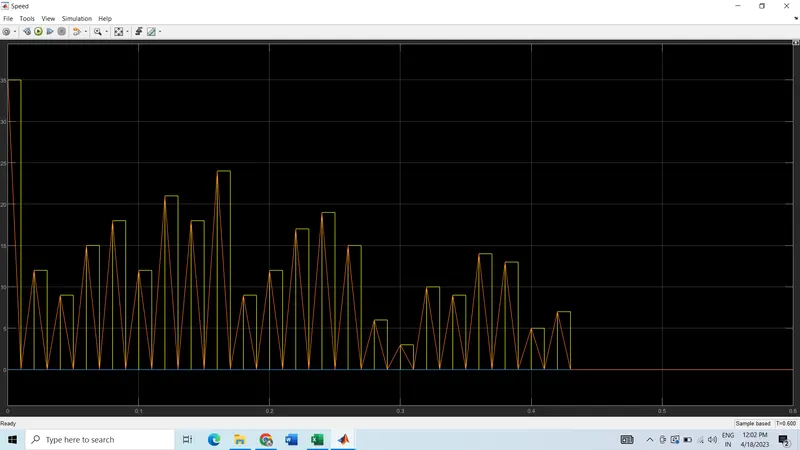
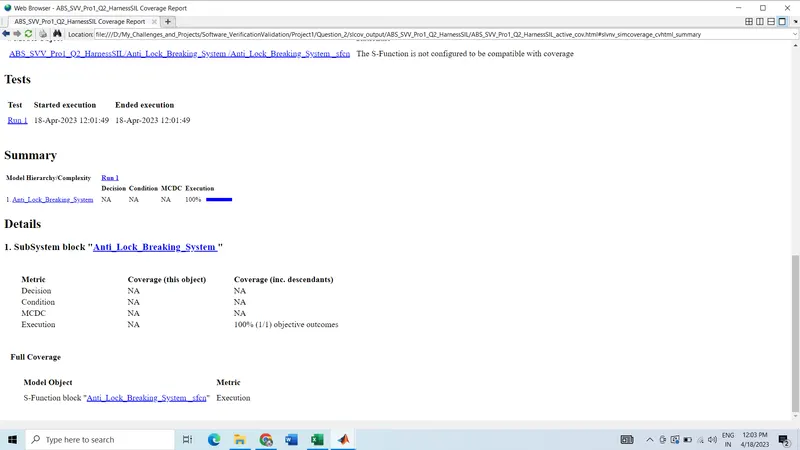
- SIL Coverage Result:
Polyspace Bug Finder and Code Prover:
Polyspace Bug Finder and Polyspace Code Prover are both software testing tools developed by MathWorks for detecting and analyzing software defects.
Polyspace Bug Finder is primarily used for identifying coding errors and security vulnerabilities in software code. It uses advanced static analysis techniques to detect potential run-time errors, such as buffer overflows, null pointer dereferencing, and division by zero. It also performs data flow analysis to detect issues such as uninitialized variables and dead code.
Polyspace Code Prover, on the other hand, is designed to provide formal verification of software code. It uses mathematical methods to prove that the code satisfies certain correctness properties, such as absence of run-time errors, functional correctness, and compliance with coding standards. It can analyze both control flow and data flow to prove program correctness, and generates a mathematical proof of the absence of run-time errors.
Polyspace Bug Finder:
- First we need to generate the code by using Embedded C tool which is the inbuild part of the MATLAB.
- Go to Polyspace and click on 'start a new project' and give a project name.
- Check the option 'Use default location'. If you want to save in different location, uncheck the box and select the location from configuration option.
- You will be redirected to the new window which will be divided into two part. One is for Project Browser and another one is for Configuration.
- First go to configuration and do some required changes.
- Under the Target & Compiler,
- source Code language: C
- C standard version: defined by compiler
- compiler: Generic
- Target Processor type: x86_64
- uncheck the 'Division Round Down'
- Pack alignment value:defined by compiler
- uncheck the box for 'Ignore pragma pack directives'
7. Coding standard and coding metrics,
- Check MISRA C:2004 (You can check any other option as per requirement)
- check the box of 'Calculate Code Metrics'
8. Bug Finder Analysis,
- Make sure the default check box in=s enabled for Find defectes
9. Reporting,
- Check for Generate Report
- Code Prover report: Developer
- Bug Finder report: Bug Finder Summary
- Output Format: PDF
10. Save and Run Bug Finder(Make sure the option Bug Finder from the drop down menu)
11. Result list and details both will be appeared in the next window and from there you can verify all the results.
Polyspace Code Prover:
- Now to run the Code prover, few configuration settings should be introduced.
- Beside the result details, Configuration option will be there. Go there.
- Environment Settings,
- Check the 'Code from DOS or window file system'
- Check the 'Stop Analysis if a file does not compile' (Note: You have to uncheck if tool is not run)
4. Code prover Verification,
- In Check behaviour: Check the 'allow negative operand for left shifts' and 'consider non filite float'
- Precision: Choose the level: 2
- Verification level: software safety analysis level 2
5. Save and Run Code Prover. (Select 'Code Prover' from drop down menu)
6. In the left window, Result coulmn will be appeared and Here click into the Result Details. A graph will come along with all other details.
7. Here a color coding is used to determine the result:
- Green: Codes are checked and it is valid
- Grey: Parts of the code is checked but can not be executed.
- Black: Part of the code is not chekced. This will be checked by correcting the tool level analysis settings.
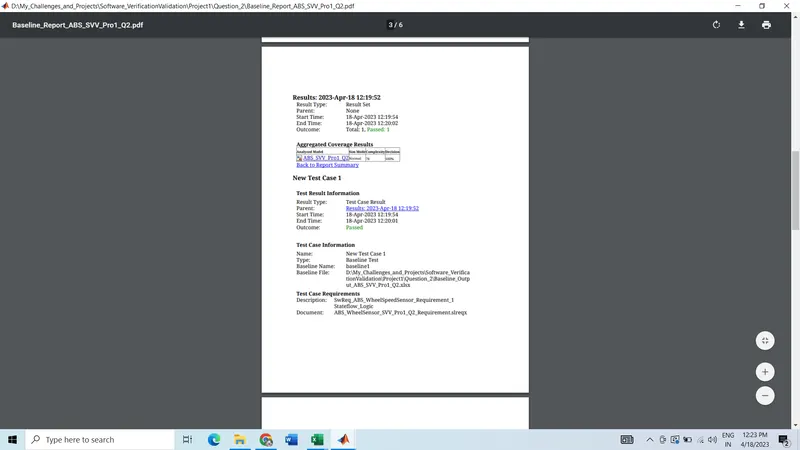
Baseline Testing:
- Result
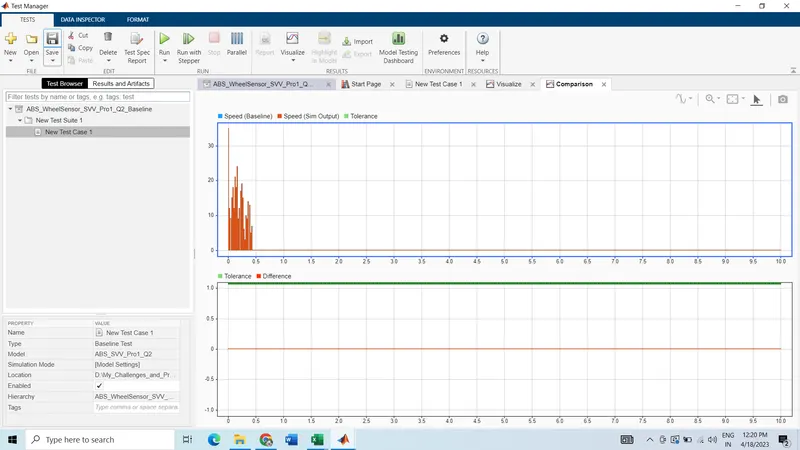
- Report
Back To Back Testing:
- Result:
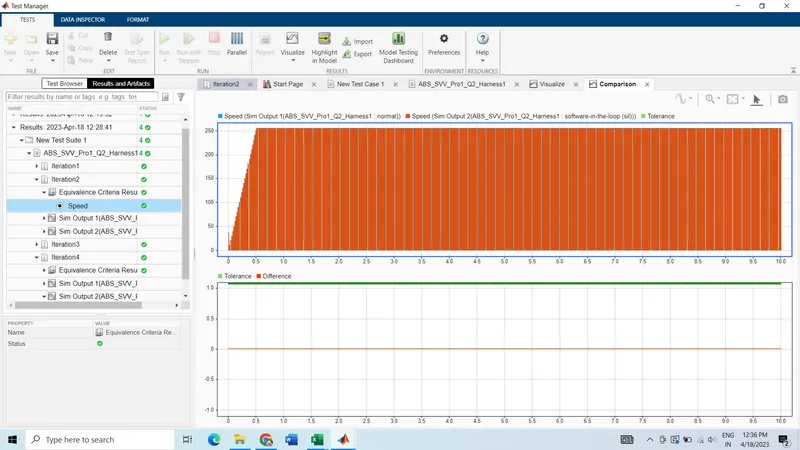
- Report: