Project-1: Modelling an electric Car with Li-ion battery
Project 1
MATLAB model of Electric car with Lithium-ion Battery
Objective:
To create a MATLAB model of an electric car which uses Lithium-ion battery and suitable motor. The vehicle speed control is implemented by using PI controller to generate accelerator and brake commands.
Software used:
- MATLAB / Simulink
Main components:
- Drivecycle
- Driver
- Power converter
- Motor
- Battery
- Vehicle body
Model:
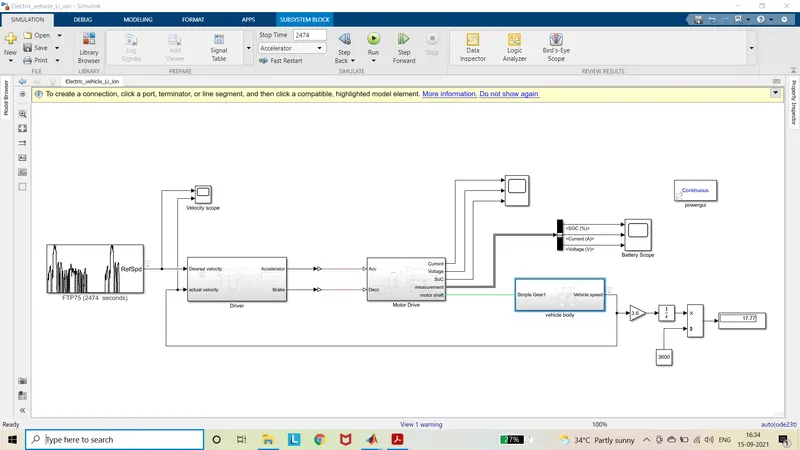
Blocks used:
- Drivecycle source
- Memory
- Integrator
- Derivative
- Product
- Subtract
- Saturation
- Switch
- Constant
- Gain
- To workspace
- In
- Out
- Controlled Voltage source
- Controlled Current source
- Controlled PWM voltage
- H bridge
- Current sensor
- Voltage sensor
- DC motor
- Ideal rotational motion sensor
- Rate transition
- PS – Simulink converter
- Simulink – PS converter
- Battery
- Rate transition
- Discrete time integrator
- Solver configuration
- Terminator
- PS terminator
- Electrical reference
- Mechanical rotational reference
- Simple gear
- Tire (magic formula)
- Vehicle body
- PS constant
- Bus selector
- Powergui
- Scope
Explanation and Configuration of Components used:
For better understanding let us go from backward.
Vehicle Body:
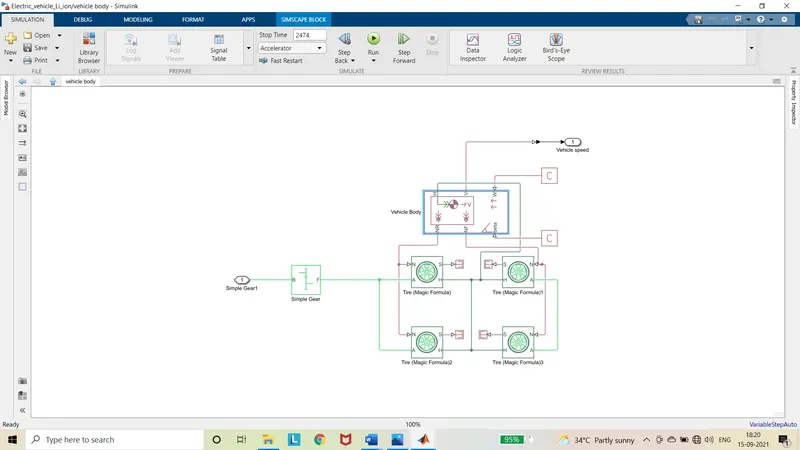
Vehicle Body block:
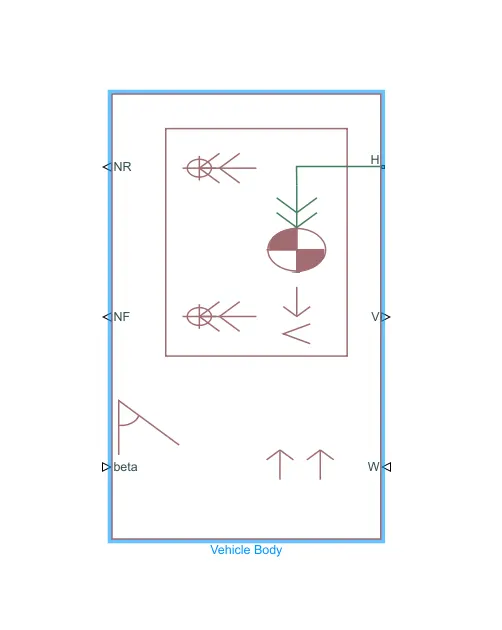
This block represents a two-axle vehicle body in longitudinal motion. The block accounts for body mass, aerodynamic drag, road incline, and weight distribution between axles due to acceleration and road profile. We can also include pitch and suspension dynamics or additional variable mass and inertia. The vehicle does not move vertically relative to the ground.
Connection H is the mechanical translational conserving port associated with the horizontal motion of the vehicle body. Connections V, NF, and NR are physical signal output ports for vehicle velocity and front and rear normal wheel forces, respectively. Connections W and beta are physical signal input ports corresponding to headwind speed and road inclination angle, respectively. M represents the additional mass.
All the parameters are kept as default.
Tire (Magic formula):
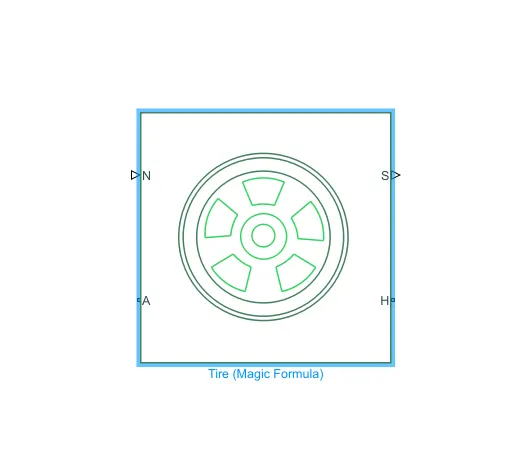
This block represents the longitudinal behaviour of a highway tire characterized by the tire Magic formula. The effects of tire inertia, stiffness, and damping can be included.
Connection A is the mechanical rotational conserving port for the wheel axle. The rotational output from the Simple gear is given to this port. Connection H is the mechanical translational conserving port for the wheel hub through which the thrust developed by the tire is applied to the vehicle. The H port from the vehicle body is connected to this port. Connection N is a physical signal input port that applies the normal force acting on the tire. The NR and NF from the vehicle body is given to this port accordingly. Connection S is a physical signal output port that reports the tire slip.
The parameters are kept default and rolling resistance is neglected.
Simple Gear:
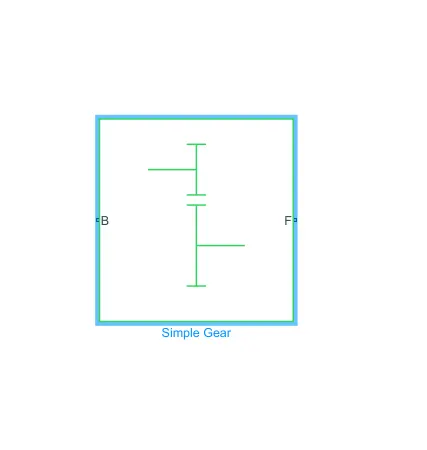
This block represents a fixed-ratio gear or gear box. The gear meshing and viscous bearing losses can be included if needed.
Connections B and F are base and follower which are mechanical rotational conserving ports. It specifies the relation between base and follower rotation directions with the Output shaft rotates parameter.
Configuration:
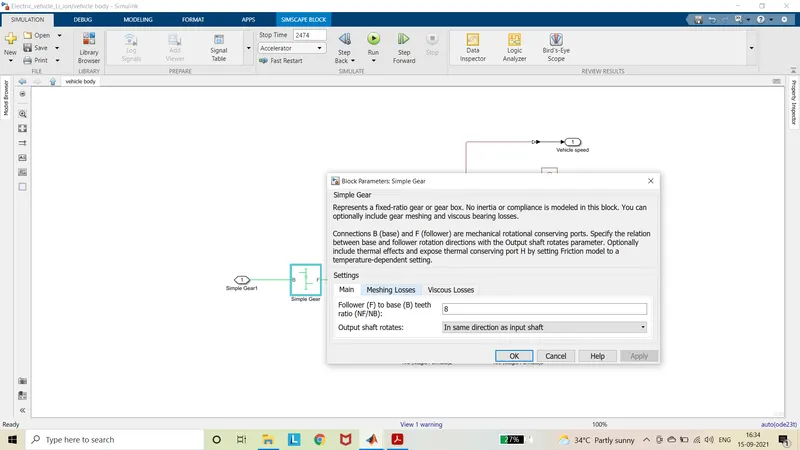
The value of gear ratio is changed to 8 and direction of rotation of output shaft set as same as input shaft.
Motor Drive:
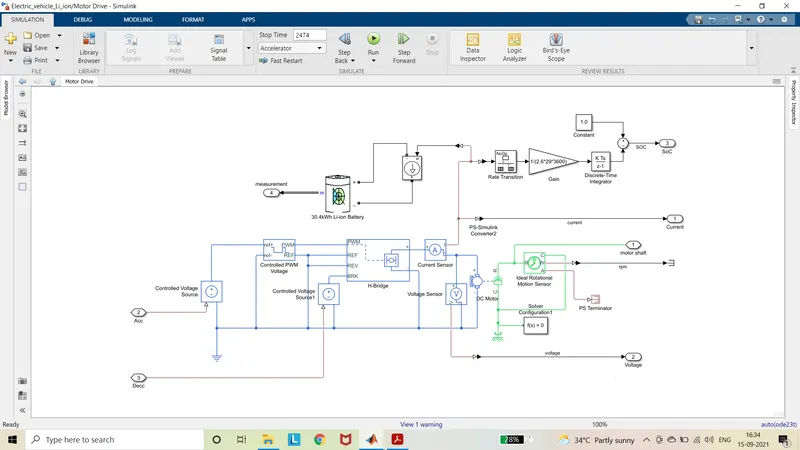
Controlled voltage source:
The block represents an ideal voltage source that is powerful enough to maintain the specified voltage at its output regardless of the current passing through it. The output voltage is V = Vs, where Vs is the numerical value presented at the physical signal port.
The input to the physical signal port is given from the Accelerator and brake command of the driver.
Controlled PWM voltage:
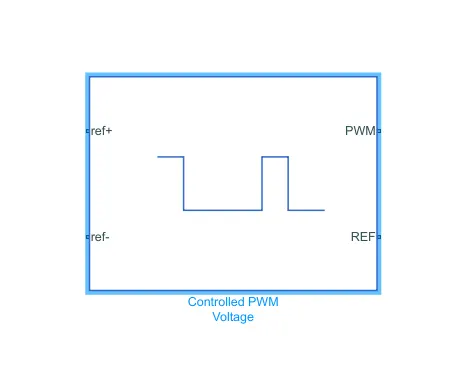
This block creates a Pulse-Width Modulated (PWM) voltage across the PWM and REF ports. The output voltage is zero when the pulse is low, and is equal to the Output voltage amplitude parameter when high. Duty cycle is set by the input value. The voltage from the controlled voltage source is given to the ref+ port. The ref- port is connected to the ground.
The Simulation mode can be set to PWM or Averaged. In PWM mode, the output is a PWM signal. In Averaged mode, the output is constant with value equal to the averaged PWM signal.
Configuration:
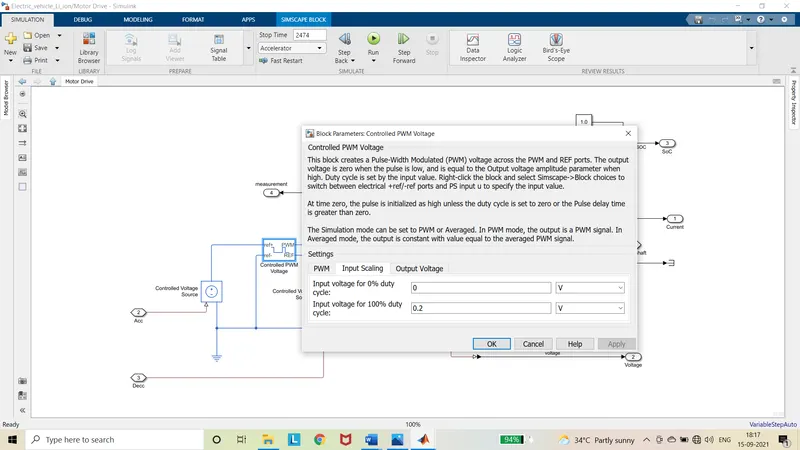
The simulation mode is set to averaged for the faster simulation. The output voltage at 100% duty cycle is set to 0.2V. Other parameters are set to default.
H – Bridge:
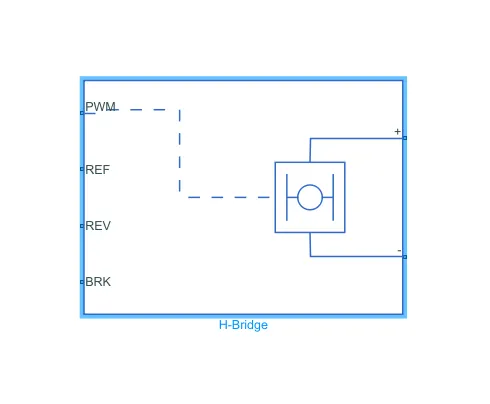
This block represents an H-bridge motor drive. The block can be driven by the Controlled PWM Voltage block in PWM or Averaged mode. In PWM mode, the motor is powered if the PWM port voltage is above the Enable threshold voltage. In Averaged mode, the PWM port voltage divided by the PWM signal amplitude parameter defines the ratio of the on-time to the PWM period. Using this ratio and assumptions about the load, the block applies an average voltage to the load that achieves the correct average load current. The Simulation mode parameter value must be the same for the Controlled PWM Voltage and H-Bridge blocks.
If the REV port voltage is greater than the Reverse threshold voltage, then the output voltage polarity is reversed. If the BRK port voltage is greater than the Braking threshold voltage, then the output terminals are short circuited via one bridge arm in series with the parallel combination of a second bridge arm and a freewheeling diode. Voltages at ports PWM, REV and BRK are defined relative to the REF port. The PWM port and REF port is connected to the PWM output port and REF output port of controlled PWM voltage. The REF and REV ports are connected to the ground. The BRK port is connected to the controlled Voltage source which is controlled by the Deceleration command from the Longitudinal Driver.
Configuration:
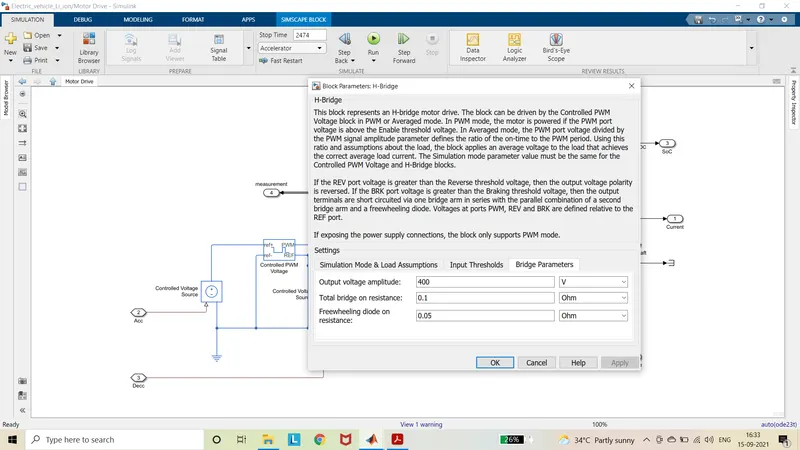
The simulation mode is set to averaged. The regenerative braking is set to always enabled. Output voltage amplitude is set to 400V which is given to brushed DC motor. Other parameters of the blocks are set to default.
DC motor:
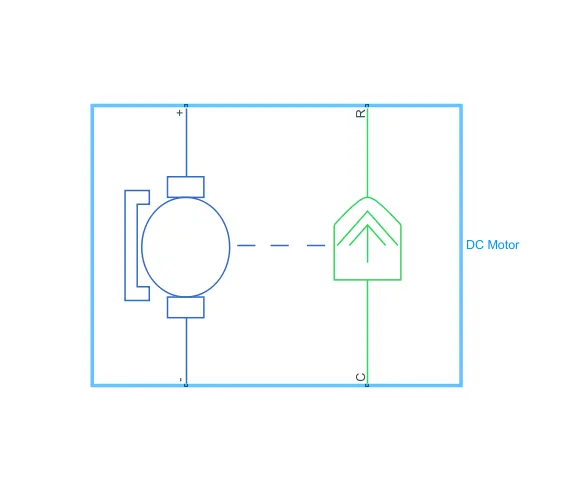
This block represents the electrical and torque characteristics of a DC motor. It assumes that no electromagnetic energy is lost, and hence the back-emf and torque constants have the same numerical value when in SI units.
When a positive current flows from the electrical + to - ports, a positive torque acts from the mechanical C to R ports. Motor torque direction can be changed by altering the sign of the back-emf or torque constants. The input to the motor is given by the H-Bridge. The port C is connected to ground and the port R is the mechanical rotational port connected to the simple gear.
Configuration:
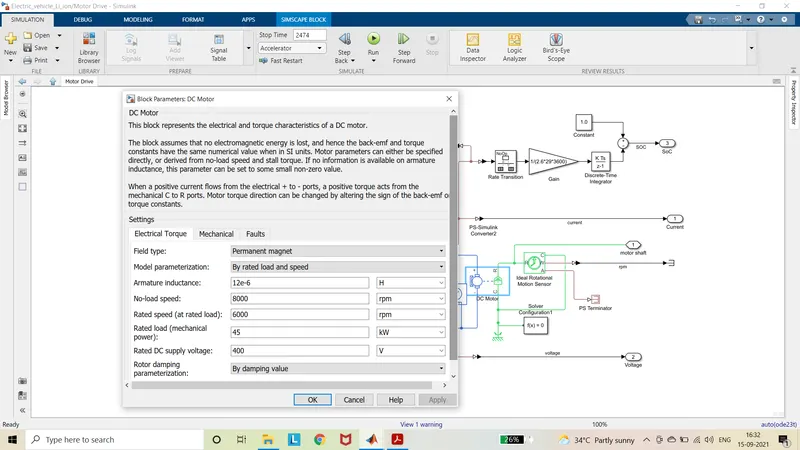
The model parameterization is set to by rated load and speed. The no load speed and rated speed is set to 8000 rpm and 6000 rpm. The rated load is set to 45kW. And Rated Dc supply voltage is set to 400V. All other values are set to default.
Current Sensor and Voltage Sensor:
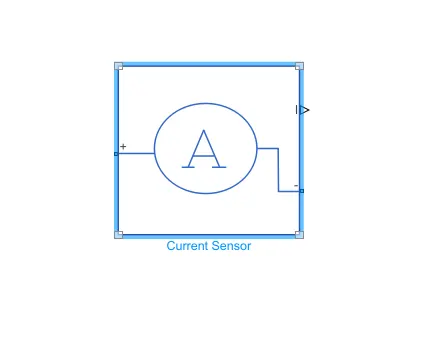
The ideal current sensor is a device that converts current measured in any electrical branch into a physical signal proportional to the current. It is used to measure the current to motor.
Connections + and - are conserving electrical ports through which the sensor is inserted into the circuit. Connection I is a physical signal port that outputs current value.
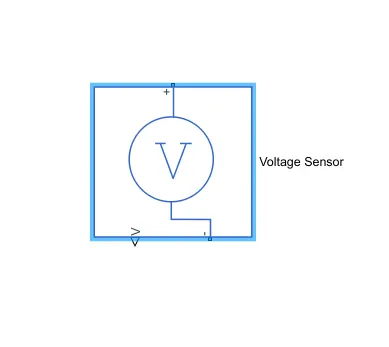
The ideal voltage sensor is a device that converts voltage measured between any electrical connections into a physical signal proportional to the voltage. It is used to measure the voltage applied to motor.
Connections + and - are conserving electrical ports through which the sensor is connected to the circuit. Connection V is a physical signal port that outputs voltage value.
Controlled Current Source:
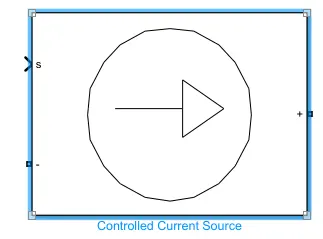
An ideal current source is powerful enough to maintain the specified current through it regardless of the voltage across it. The output current is I = Is, where Is is the numerical value presented at the physical signal port. This physical signal port is connected to the physical signal port of the current sensor. The positive this block is connected to the negative of battery and negative port to positive of the battery for the charging of battery.
Battery:
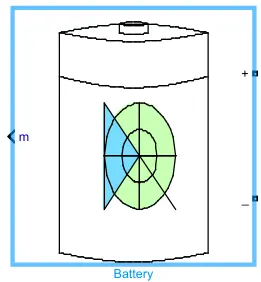
The battery is used to deliver and store the energy. The measurement port is used to visualize the state of charge, voltage and current of the battery.
Configuration:
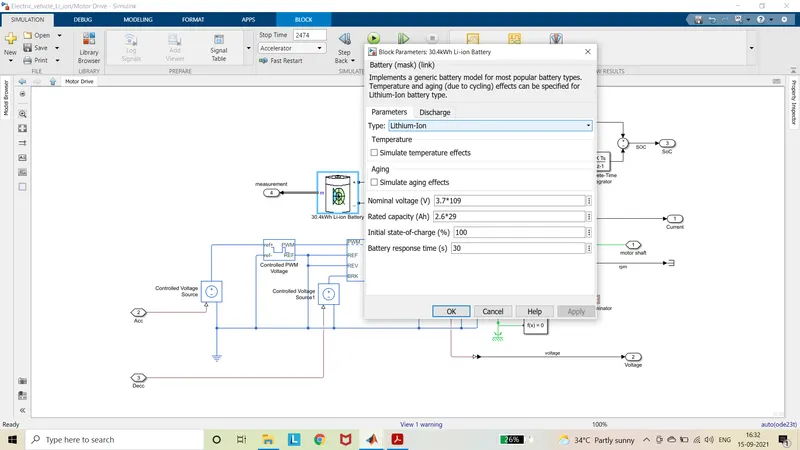
The nominal voltage is set to 3.7*109 V and current directionality is enabled. Battery charge capacity is set to finite and the Ampere hour rating is set to 2.6*29 Ah. All other parameters are set to default.
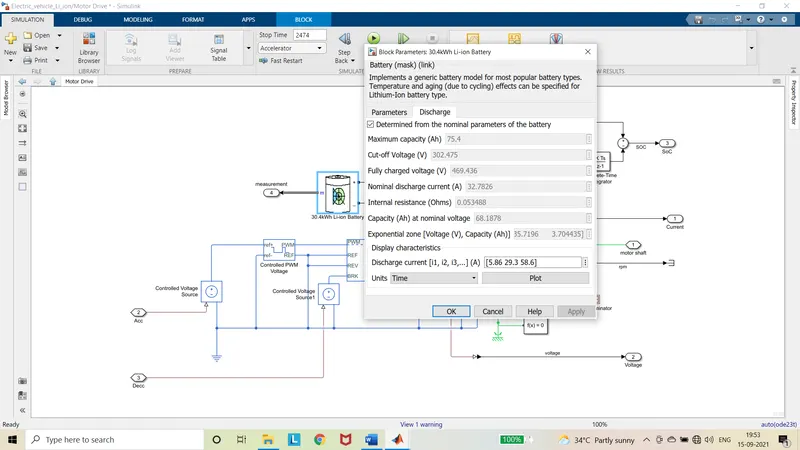
Here 109 cells are connected in series to get the voltage of around 400V and 29 cells are connected in parallel to get around 75Ah capacity. The total capacity of the battery pack is 30.4kWh. And total of 3161 cells are used.
SOC (State of Charge):
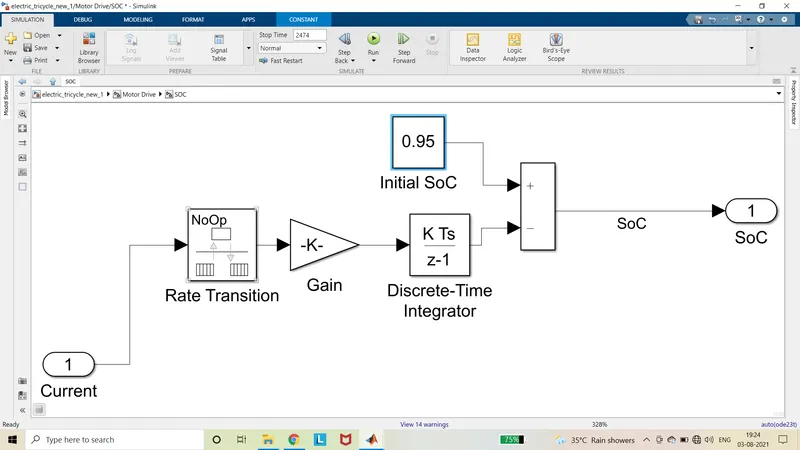
Rate transition handles data transfer between different rates and tasks. It is used to convert to continuous to discrete. Discrete time integrator is used to accumulate the input signal.
Gain of SOC:
Configuration:
The value of gain is set to 1/(2.6*29*3600). Where AH is set to 500.
Driver Subsystem:
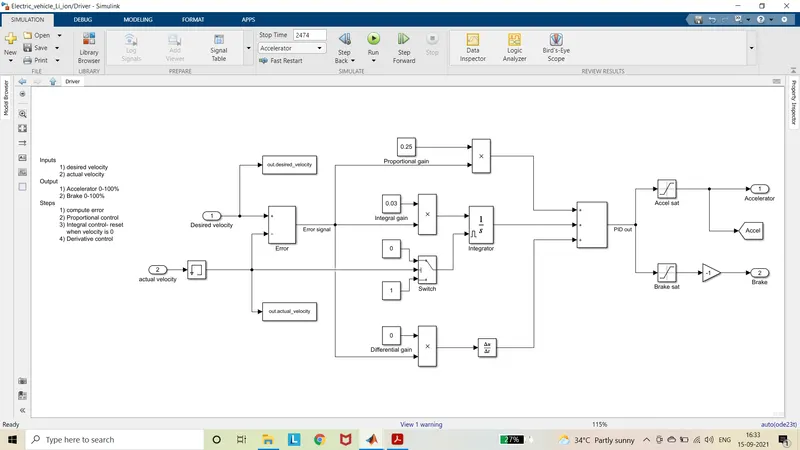
The desired velocity from the drivecycle source is compared with the actual velocity from feedback to get the error signal. This error signal is then fed to PID controller. The derivative part of controller is made zero to only use PI controller. The proportional gain is used to reduce the instantaneous error. The integral gain is used to reduce the steady state error. It accumulates the all the error from the previous value and removes the error. Due to integration the integral windup occurs. This results in the sudden overshoot. So, we have to use anti-windup. Hence external reset has to done. Whenever the velocity becomes zero the integrator has to be set. So that the accumulated errors are removed when velocity becomes zero. The output of the controller is -1 to +1. When the output is between 0 to +1 it is given as accelerator command. When the output of controller is between -1 to 0 is for brake is multiplied with -1 to give brake command.
Configuration:
The proportional gain is taken as 0.25 and the integral gain is taken as 0.03.
Drive Cycle Source:
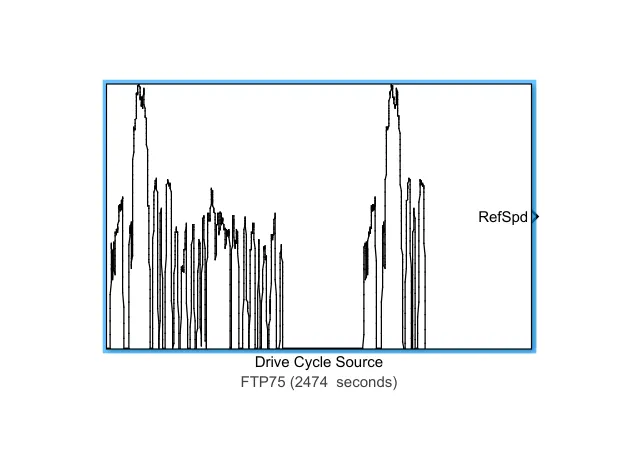
Drive cycle source generates a standard or user-specified longitudinal drive cycle. The block output is the vehicle longitudinal speed. You can import drive cycles from:
- Predefined sources such as FTP75, WOT, US06, etc
- Workspace variables, including arrays and time series objects
- mat, xls, xlsx, or txt files
It is set to FTP75 and the simulation time is updated.
Finally, the velocity from the vehicle body is converted from m/s to kmph by adding the gain of 3.6. It is then integrated and divided by 3600 to get the distance in kmph. This is displayed in the display.
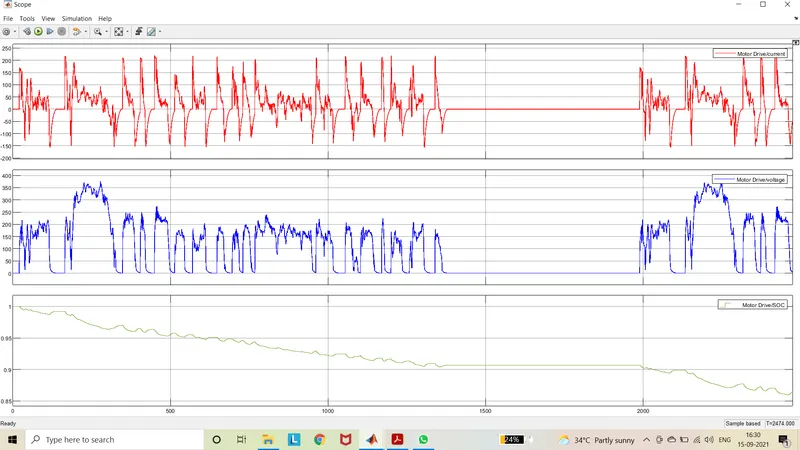
The output speed and the reference speed are given to the speed comparison scope. The voltage across motor, current and speed of motor and SOC and voltage of battery is given to another scope.
By modelling and configuring with above values the model is simulated.
Output:
Velocity Scope:
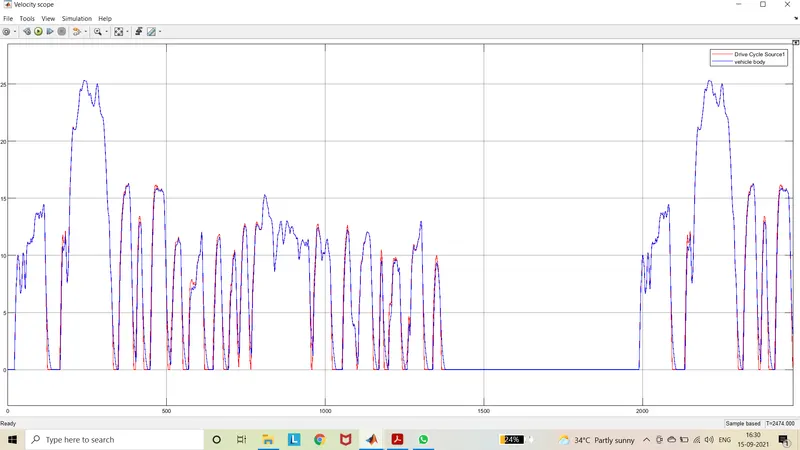
Summary:
From the above plot, it is observed that for the given desired velocity, the driver subsystem controller gives the optimum accelerator and brake command to get the actual velocity of the vehicle. These velocities are then compared for the analysis. The gain values for the controller are given according to that the actual velocity of the vehicle varies. To get the actual velocity as the desired velocity the gain values are given optimally. From the above output plot, the output velocity follows the input desired velocity.
Battery Scope:
Summary:
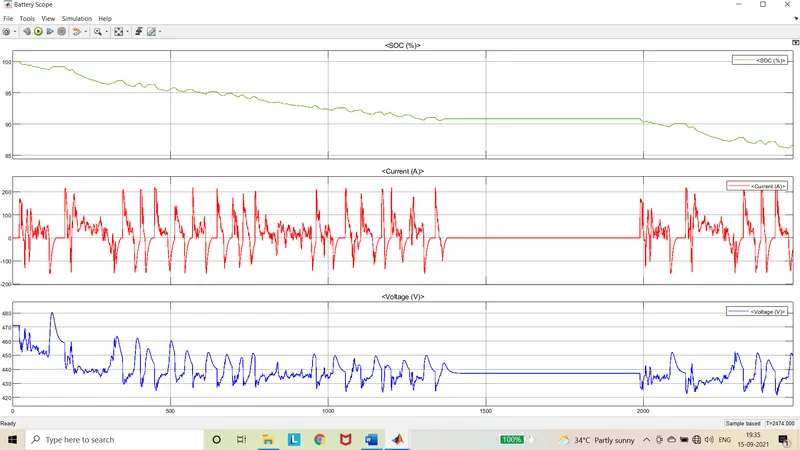
From the above it is observed that, the positive current from the battery is used for the motor operation and the negative current is used for charging the battery. The fully charged battery is around 470V, the voltage of the battery gets reduced when discharging while connected to load. And the voltage of battery increases when charging. The battery power cannot be used once the voltage of the battery get reduced below the nominal cutoff voltage of 302 V. When the battery is operated below the cutoff voltage the battery gets depleted permanently. The state of charge of battery after the completion of drivecycle (simulation) is 86.8%.
Output Scope:
Summary:
From the above plot, the voltage across the motor, current for the motor and state of charge of battery is visualized. The voltage across the motor is varied due to the accelerator and brake command according to the desired velocity which is visualized in the second display of plot. Whenever the positive current is given to the motor it corresponds to the accelerator command. The negative current is due to brake command which is due to regenerative braking. This negative current is also called as regenerative current. This current is used to charge the battery. The positive current is discharging from the battery. According to this the state of charge of battery increase and reduce.