Project 1 (Mini Project on Vehicle Direction Detection
EV BATCH-17
Aim:
- To development of MATLAB Simulink model as per requirement.
- To tag the requirements to the simulink model; tagging requirement 1 & requirement 2 to their corresponding subsystems is fine.
- To create MBD compliant changes, Data Dictionary creation & code generation is added advantage, and that is not scope of this project.
- If choosing code generation, Storage class for Input signals: ImportedExtern; Storage class for Output signal: Export to File; Storage class for local signals: localizable; Storage class for calibration signals: Const.
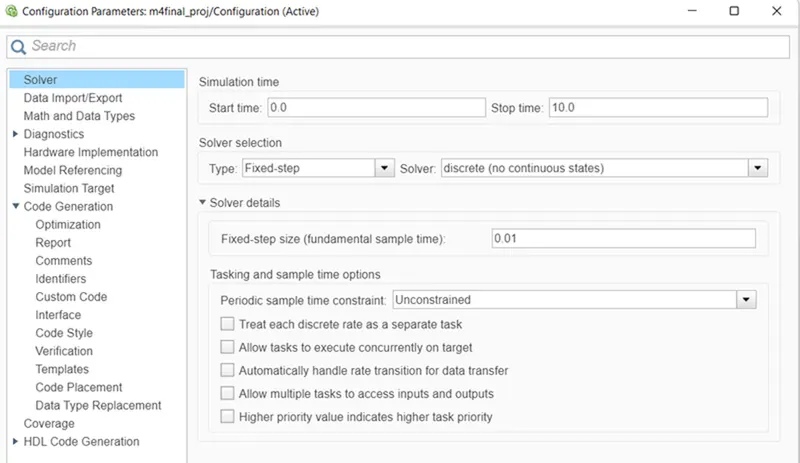
- To choose sample time for all signals as 0.01s
Theory:
>> Vehicle Direction Determination:
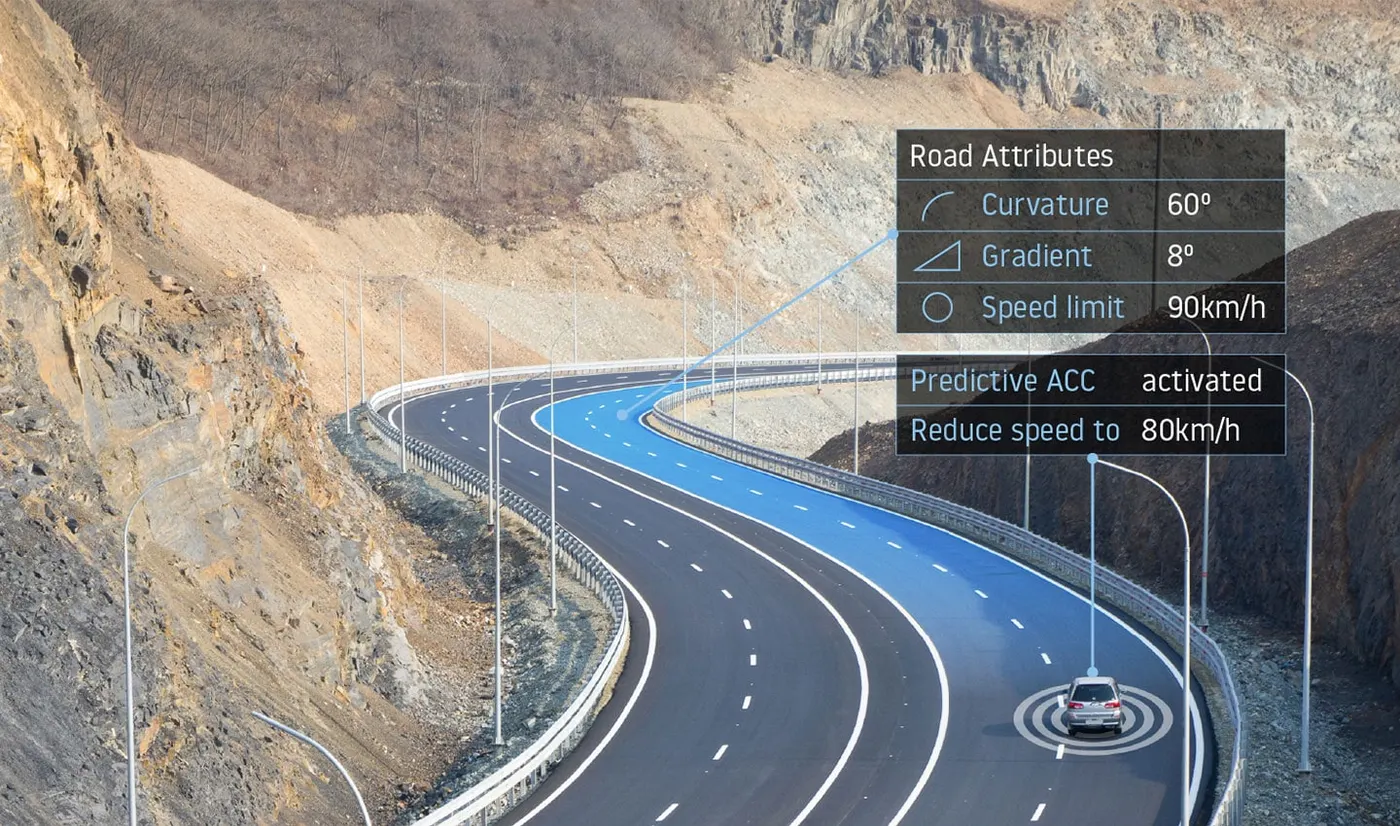
Identifying the direction of the vehicle is one of the important & diverse features in Autonomous driving & Advanced Driver Assistance Features. This particular sub-feature of identifying the direction of vehicle is basically identifying the direction the vehicle is taking based on the camera input.
- Camera reads the road signs & stores into its memory with unique values for left turn, right turn & straight drive.
- Depending on the direction it is taking, final indication is given to the driver – as an indication if he is driving in the recommended direction or not.
- Vehicle Direction Determination can also be coupled along - side features like GPS systems to identify whether the vehicle is reaching its destination in an optimized manner.
- This sub feature can also be used along with Lane Detection, Highway Warning, Ramp Entry / Exit in Wrong Way Detection etc.
Explanation:
- To create the word document for given question for better understanding and do requirement tag and that word document will place one particular folder for this whole model use that folder
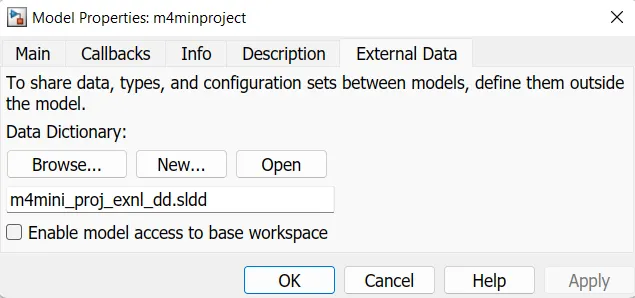
- Then open the matlab and then open simulink blank model. Then go to modeling tab and click on the link to data Dictionary in the design data
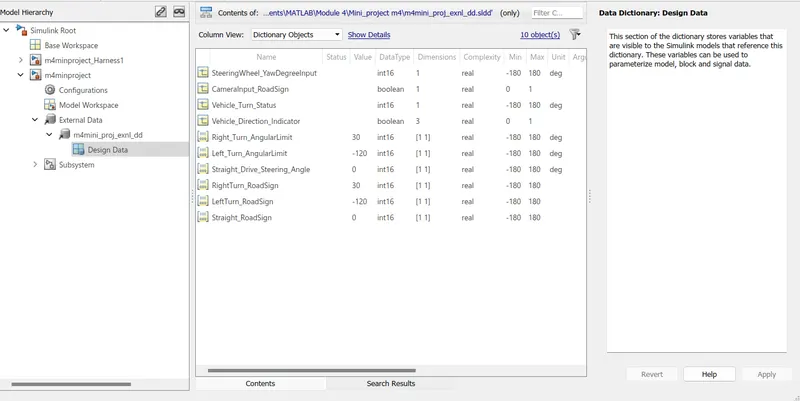
- Then create one new file of SLDD file for data and open the that file in model explorer and add signals and date in that file is shown in give below figure
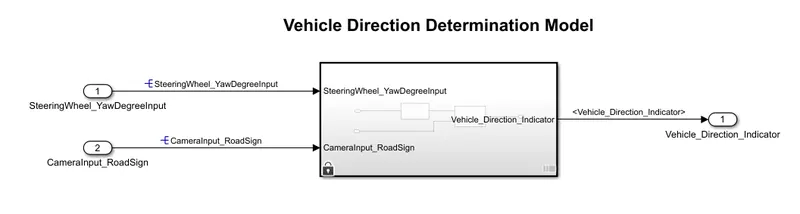
- Then go to Library and add required block for builed the Vehicle Direction Determination model for given requirements
- After that made connections as the requirement for the block it will given below
>> Requirement - 1:
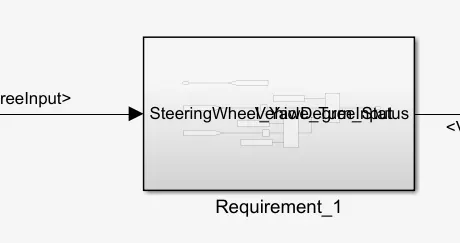
- Steering wheel input as yaw rate (Signal name: SteeringWheel_YawDegreeInput) is the input for this system.
- This is compared against 3 angular values, one each for left turn, right turn & straight drive (Calibration Values: Right_Turn_AngularLimit, Left_Turn_AngularLimit, Straight_Drive_Steering_Angle) to say which specific direction the steering wheel is turning towards.
- Use switch blocks to compare & develop this requirement. Keep this requirement in a subsystem & output of this requirement is a local signal (Signal Name: Vehicle_Turn_Status).
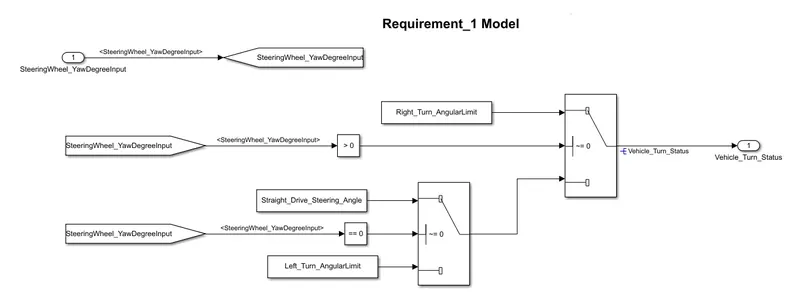
- For Requirement-1 Model use blocks of Input, Output, constant, Campare to zero, Switch, Goto and From Blocks and made connections by giving in the requirements
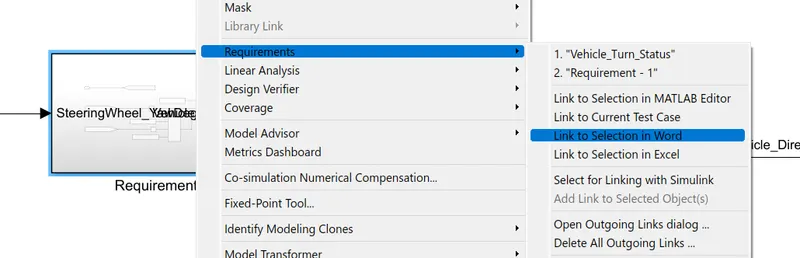
- After made this block we made a Requirement tag for lead vehicle by right clicking on the block then clink on the requirement then click on the link to selection in word.
>> Requirement – 2:
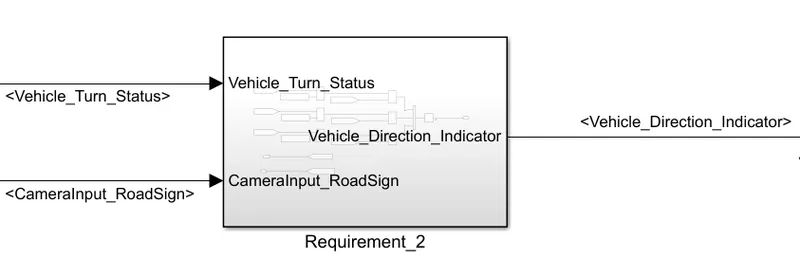
- Keep this requirement as a separate subsystem. Inputs to this requirement are local signal from requirement 1 (Signal Name: Vehicle_Turn_Status) & an input signal from camera (Signal Name: CameraInput_RoadSign), which confirms the occurrence of a road sign.
- Signal Vehicle_Turn_Status is compared against calibration values (Calibration Values: RightTurn_RoadSign, LeftTurn_RoadSign, Straight_RoadSign), if each of them is found equal, then each of the three corresponding output is compared against the camera input signal,
- Using a logical operator block, only one among them is finally given as output signal (Signal Name: Vehicle_Direction_Indicator).
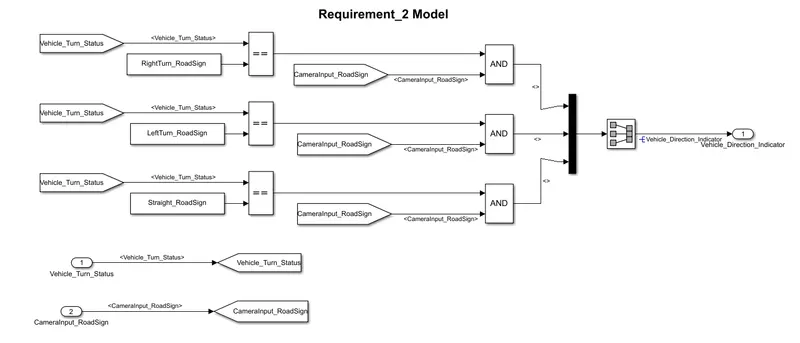
- For Requirement-2 Model use blocks of Input, Output, constant, Logical operator, Relational operator, Goto and From Blocks and made connections by giving in the requirements
- After made this block we made a Requirement tag for lead vehicle by right clicking on the block then clink on the requirement then click on the link to selection in word.
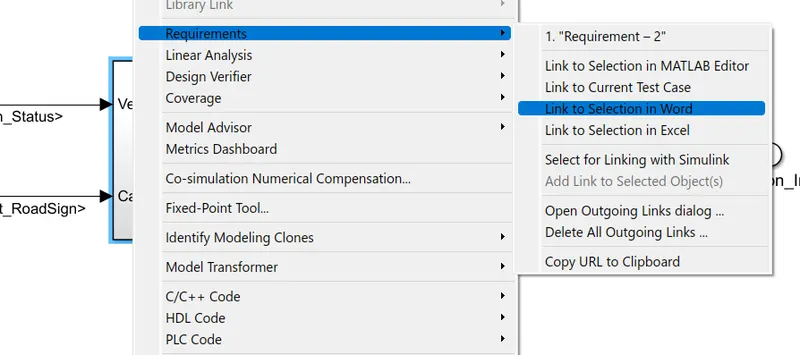
- After completion of all the connections the model has ready its shown like given below fig

- After create the model then go to model settings and then click on the solver confirmation parameters the change the solver selection type to fixed and solver to discrete and then change the solver step size to 0.01sec then click on okey, its shown in below figure.
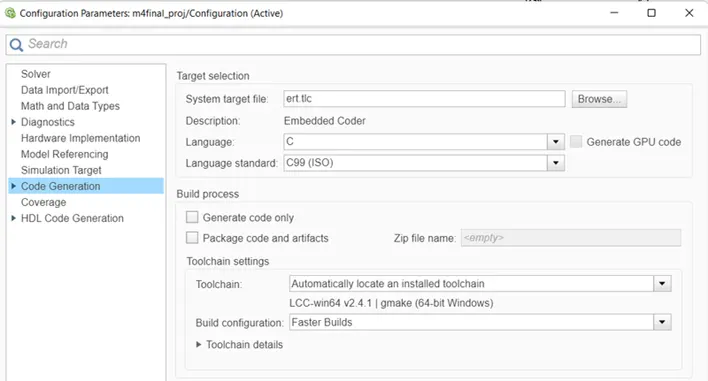
- After that go to code generation and change the systen target file to ert.tle (embedded coder) then click on okey.
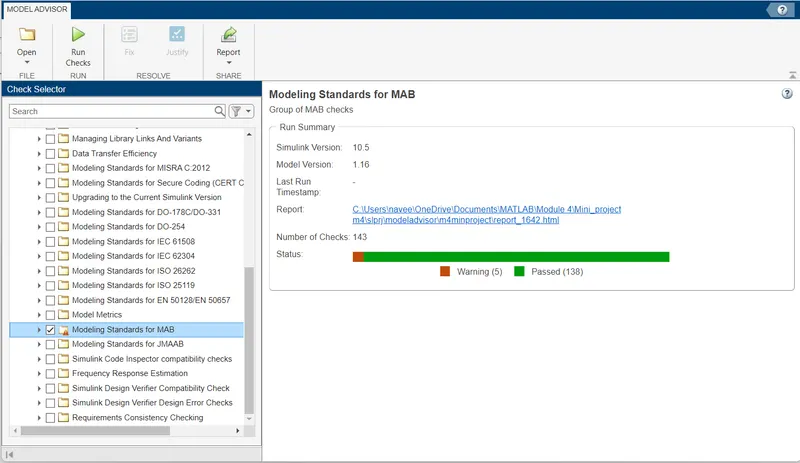
- After completion of all this steps go to modeling tab and click on the model advisor then select the system selector and then click on the modeling standards for MAB then click on the run check. This is for checking of designed model in the standards of MAB
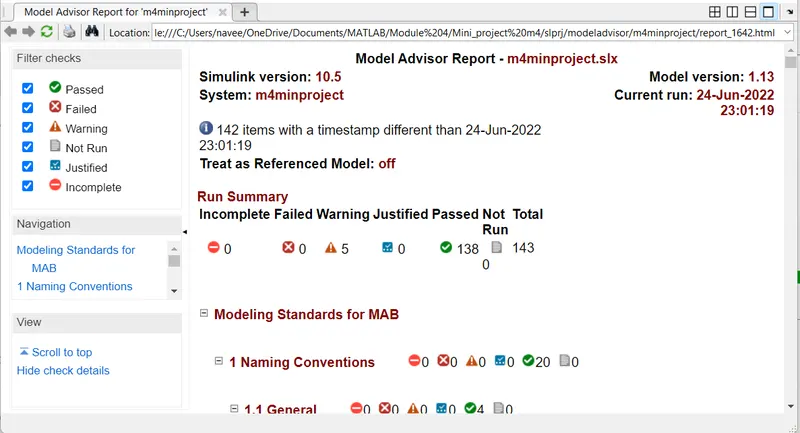
- After that generat a report of model check in HTML file then name that report and select the path for report that is shown in given below figure
- Then report shown like this
## MIL Test:
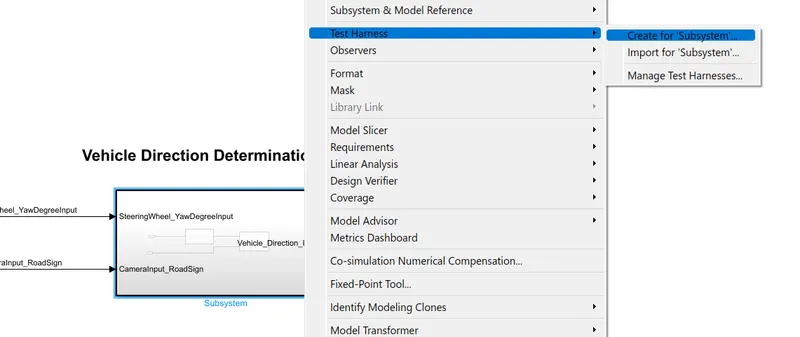
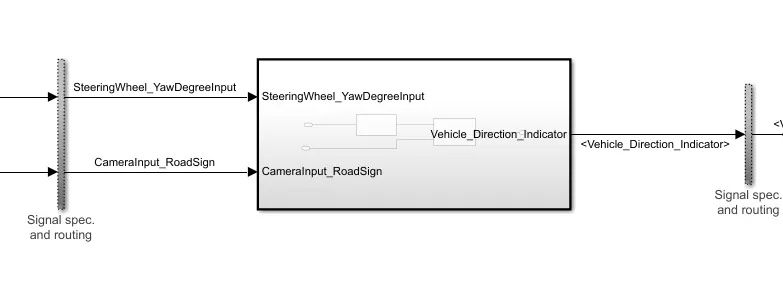
- After model advisor check we have to create a test harness for desinged model by right clicking the subsystem then goto test harness and then click the create for subsystem.
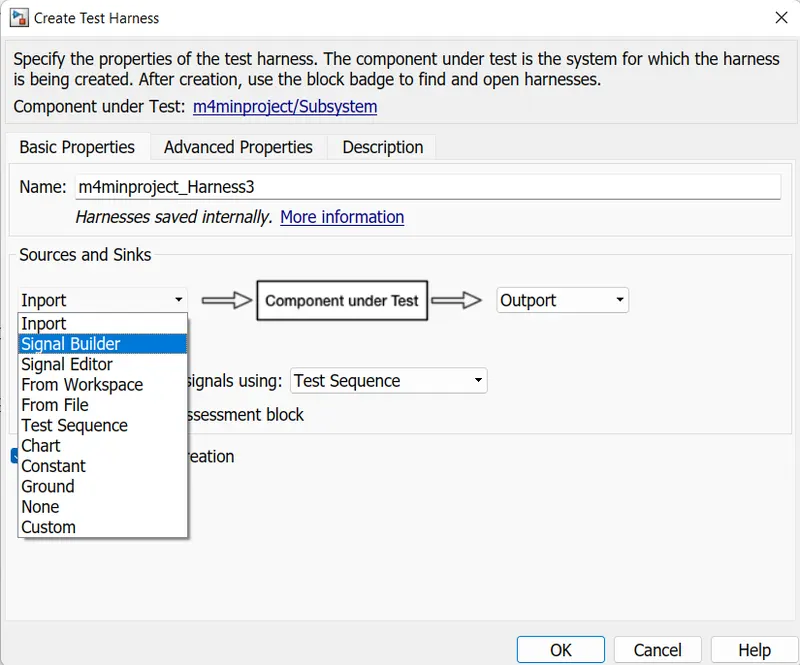
- Then chgange the input to signal builder and then click okey then test harness of MIL is created its shown in below figure
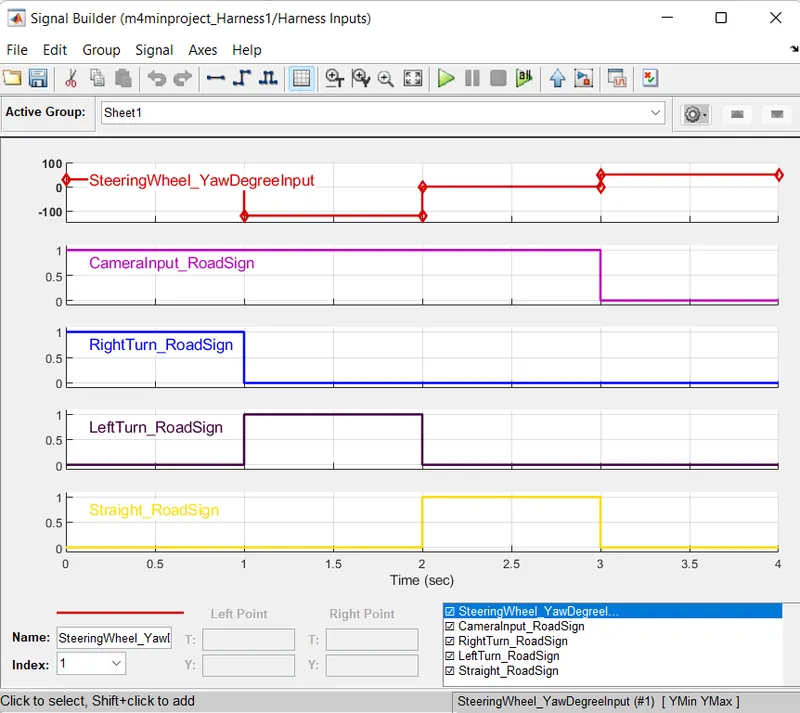
- After that import data to signal builder by double click on the signal builder then goto files and then click on import to file then import a excel file then shown like a below given fig
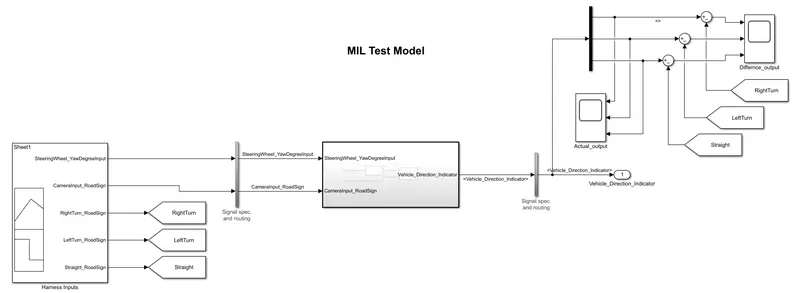
- Then made connections per connecting the scope for difference of outputs and actual outputs that connections given below
- Then run the simulation and observe the graphs and results
>> Actual Output:
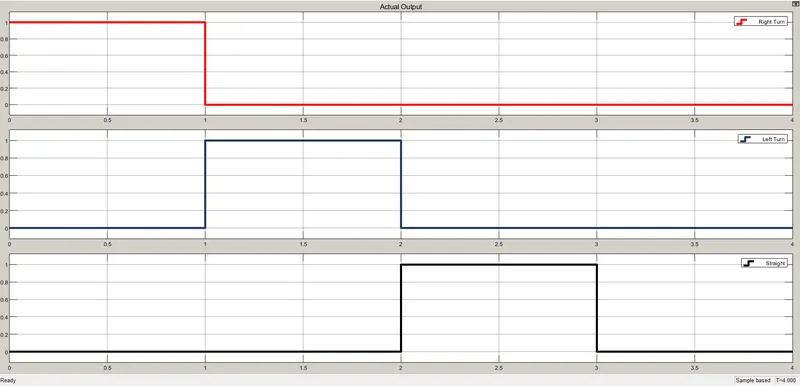
- In actual output we observe that signal builder experted output will same as to actual output
>> Differnce graph:
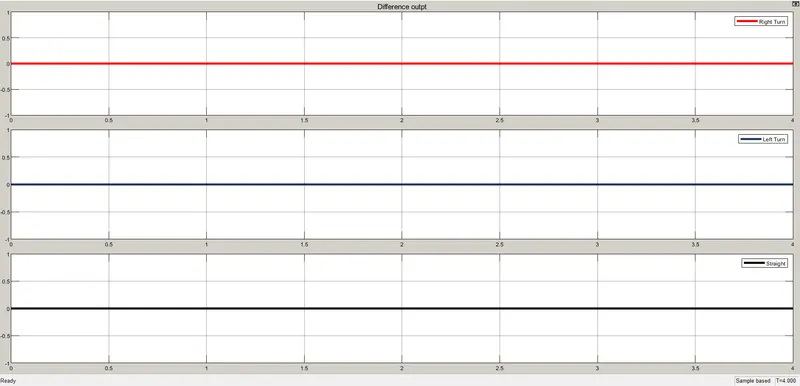
- In above given graph of Differences is observed that difference of expected output and actual output is zero
## SIL Test:
- After model advisor check we have to create a test harness for desinged model by right clicking the subsystem then goto test harness and then click the create for subsystem.
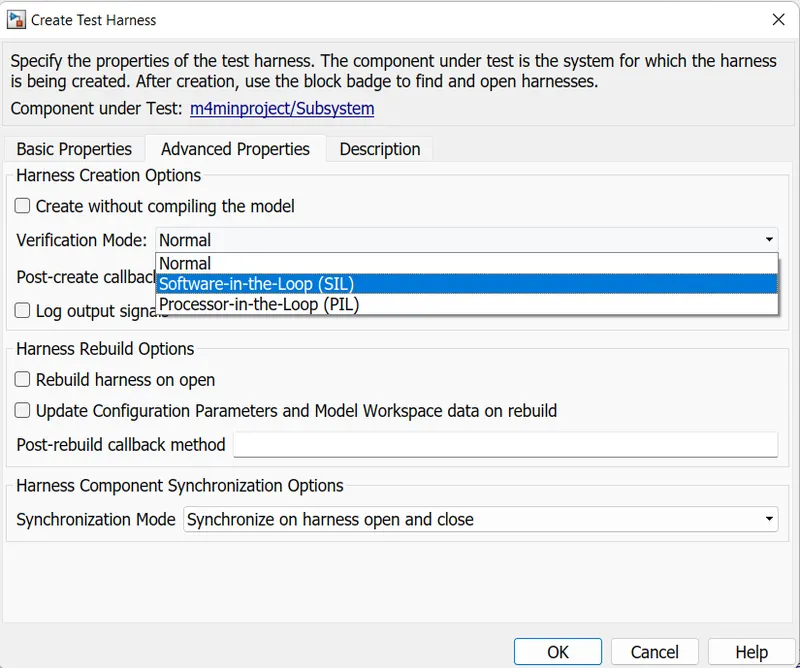
- Then chgange Basic properties of the input to signal builder and then change the advance properties of verification mode to Software in loop (SIL) then click okey then test harness of SIL is created its shown in below figure
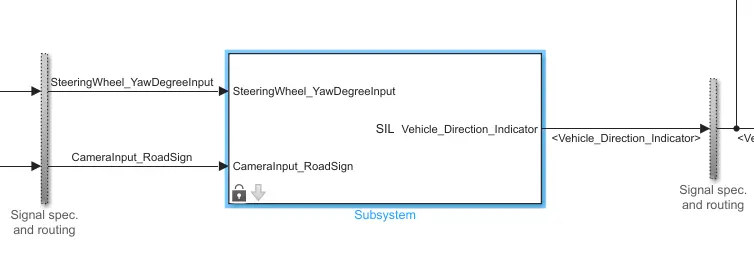
- After that import data to signal builder by double click on the signal builder then goto files and then click on import to file then import a excel file then shown like a below given fig
- Then made connections per connecting the scope for difference of outputs and actual outputs that connections given below
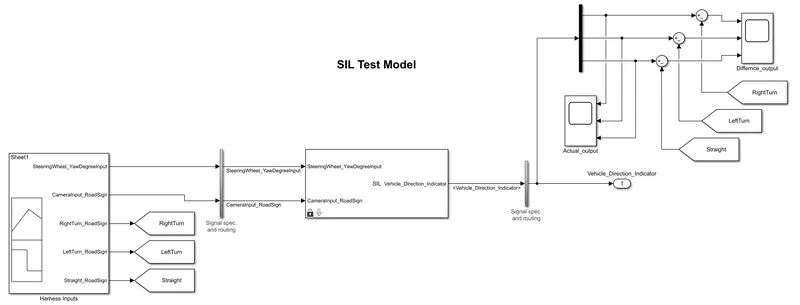
- Then run the simulation and observe the graphs and results
>> Actual Output:
- In actual output we observe that signal builder experted output will same as to actual output
>> Differnce graph:
- In above given graph of Differences is observed that difference of expected output and actual output is zero
>> The two Test herness will appear like given below figure
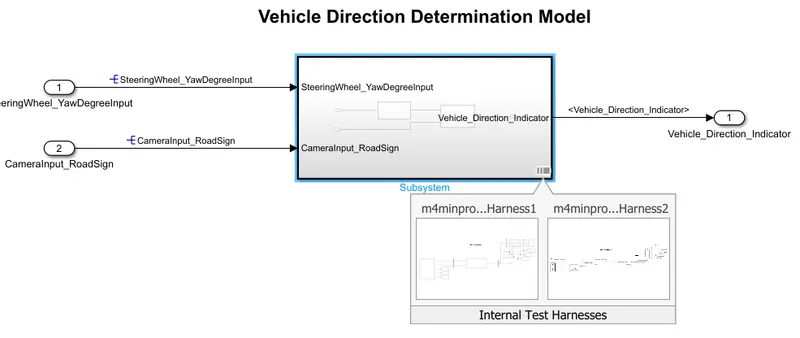
- After completion of MIL and SIL Tests then Go to apps tab and click on the embedded coder, then that new tab will open that is C code tab.

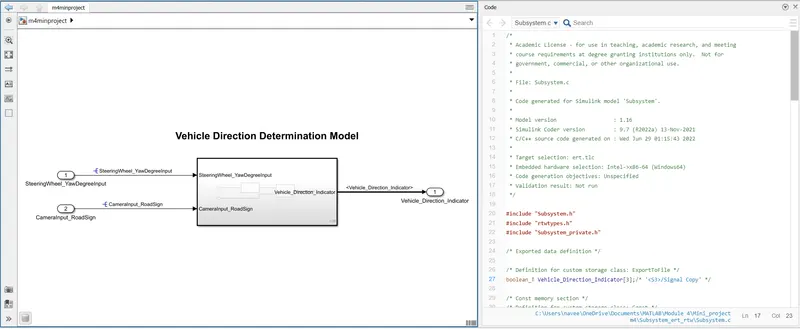
- On that tab Click on the build then the code will generate then it appears like gien below figure
Results:
- The resultent code is given below