Project 1 (Mini Project on Vehicle Direction Detection
#Objective of Mini Project:
- Development of MATLAB Simulink model as per requirement.
- Tag the requirements to the simulink model; tagging requirement 1 & requirement 2 to their corresponding subsystems is fine.
- MBD compliant changes, Data Dictionary creation & code generation is added advantage, and that is not scope of this project.
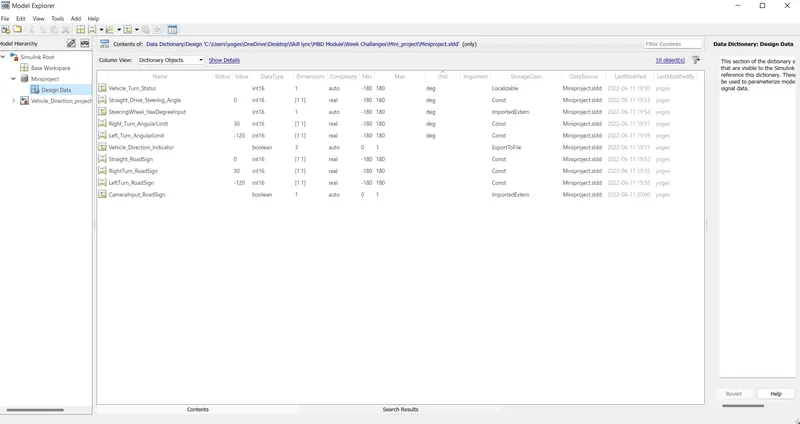
- If choosing code generation, Storage class for Input signals: ImportedExtern; Storage class for Output signal: Export to File; Storage class for local signals: localizable; Storage class for calibration signals: Const.
- Choose sample time for all signals as 0.01s.
AIM:
Identifying the direction of the vehicle is one of the important & diverse features in Autonomous driving & Advanced Driver Assistance Features. This particular sub-feature of identifying the direction of vehicle is basically identifying the direction the vehicle is taking based on the camera input.
Camera reads the road signs & stores into its memory with unique values for left turn, right turn & straight drive. Depending on the direction it is taking, final indication is given to the driver – as an indication if he is driving in the recommended direction or not.
Vehicle Direction Determination can also be coupled along - side features like GPS systems to identify whether the vehicle is reaching its destination in an optimized manner. This sub feature can also be used along with Lane Detection, Highway Warning, Ramp Entry / Exit in Wrong Way Detection etc.
Developing The SIMULINK Model:
In These Mini project We craete first SIMULINK model as per given task and conditions in the Documentation.
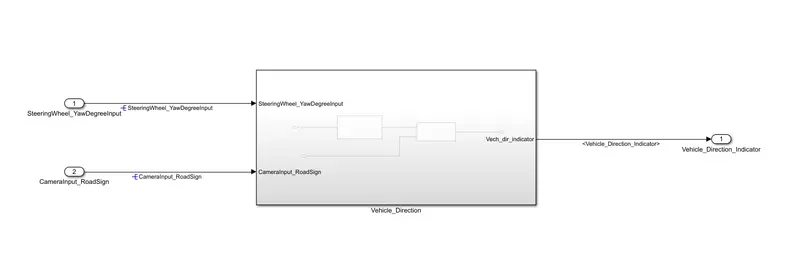
so frist we create the Main subsystem 'Vehicle_Direction' along with two inputs 'CameraInput_RoadSign' & 'SteeringWheel_YawDegreeInput' respectively 'Vehicle_Direction_Indicator' as shown in below:
The main subsystem 'Vehicle_Direction' is again contains the two subsytem which are the 'Requirement 1' & 'Requirement 2' as shown in below :
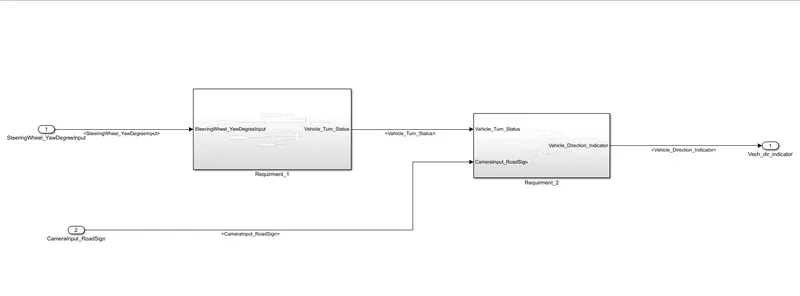
'Requirement 1' :
- Steering wheel input as yaw rate (Signal name: SteeringWheel_YawDegreeInput) is the input for this system.
- This is compared against 3 angular values, one each for left turn, right turn & straight drive (Calibration Values: Right_Turn_AngularLimit, Left_Turn_AngularLimit, Straight_Drive_Steering_Angle) to say which specific direction the steering wheel is turning towards.
- Use switch blocks to compare & develop this requirement. Keep this requirement in a subsystem & output of this requirement is a local signal (Signal Name: Vehicle_Turn_Status).
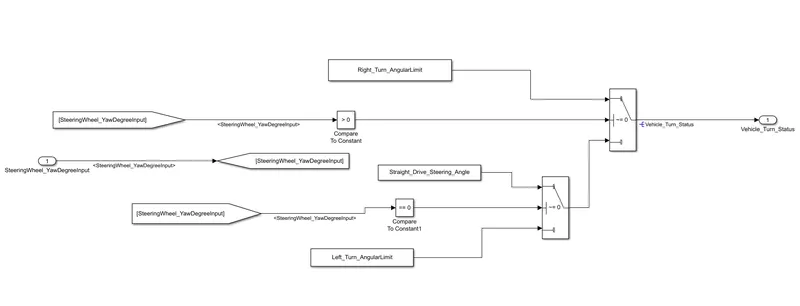
So We make the 'Requirement 1' subsystem as per given in the Requirement 1 describtion as above .
'Requirement 2':
- Keep this requirement as a separate subsystem. Inputs to this requirement are local signal from requirement 1 (Signal Name: Vehicle_Turn_Status) & an input signal from camera (Signal Name: CameraInput_RoadSign), which confirms the occurrence of a road sign.
- Signal Vehicle_Turn_Status is compared against calibration values (Calibration Values: RightTurn_RoadSign, LeftTurn_RoadSign, Straight_RoadSign), if each of them is found equal, then each of the three corresponding output is compared against the camera input signal,
- Using a logical operator block, only one among them is finally given as output signal (Signal Name: Vehicle_Direction_Indicator).
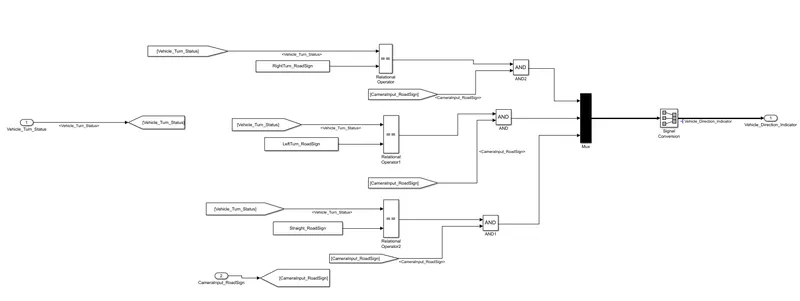
So We make the 'Requirement 2' subsystem as per given in the Requirement 2 describtion as above .
Requirement Tagging Of Simulink Model :
The Requirement Tagging as provided in the Requirement Word document are tagged to their corresponding subsystem in simulink model.
The steps require for the Requirement Tagging in simulink is as below:
1.Hightlight the Requirement statement in the word document.
2.Go to simulink model and right click on subsystem which you make as Requirement and you wish to Requirement Tagging for that particular system.
3.After that select Requirement and then "Link to selection in word'.
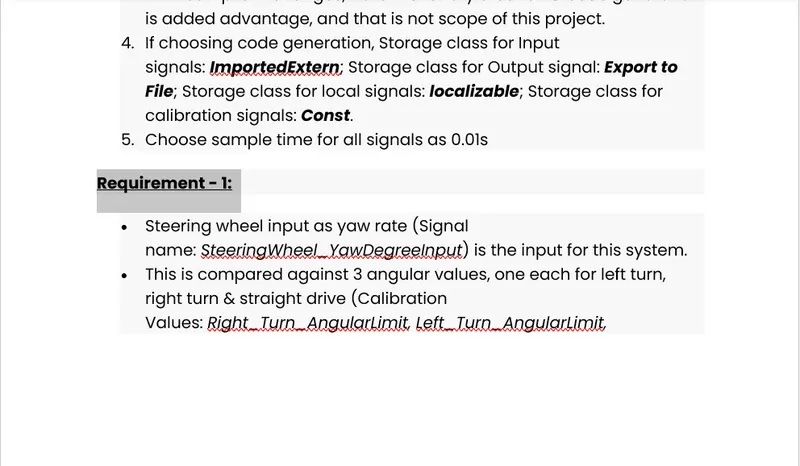
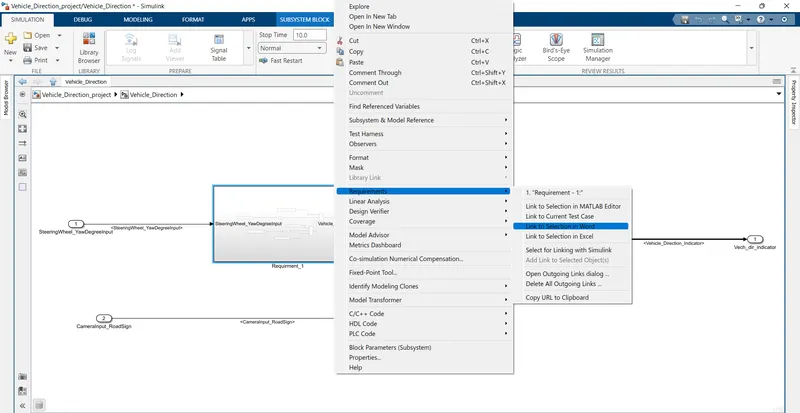
After the done with createing the simulink model,subsytem as per Requirments than do Requirement Tagging now we have to link Simulink Data Dictionary file to simulink model .
Creation of Simulink Data Dictionary file (SLDD):
A Simulink data dictionary consists of four sections: Design Data: Contains the variables and data types that define parameters, signals, and design data that determine the behavior of the model. Design data created or imported in a dictionary are stored in this section.
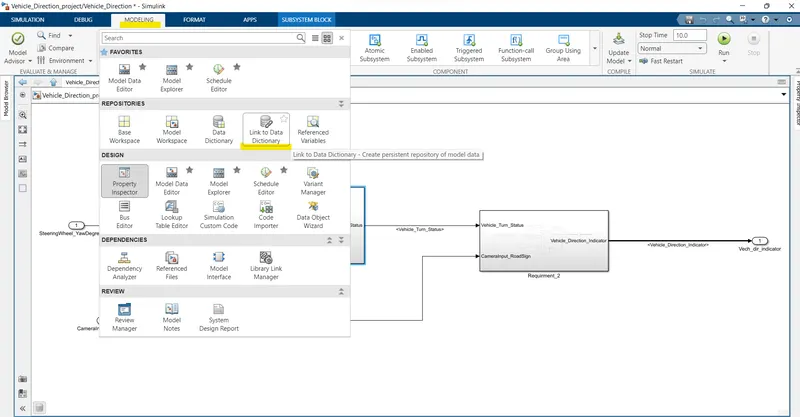
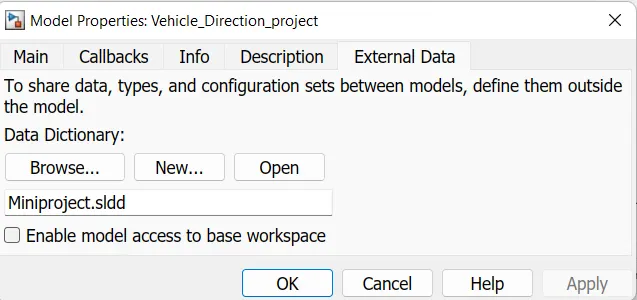
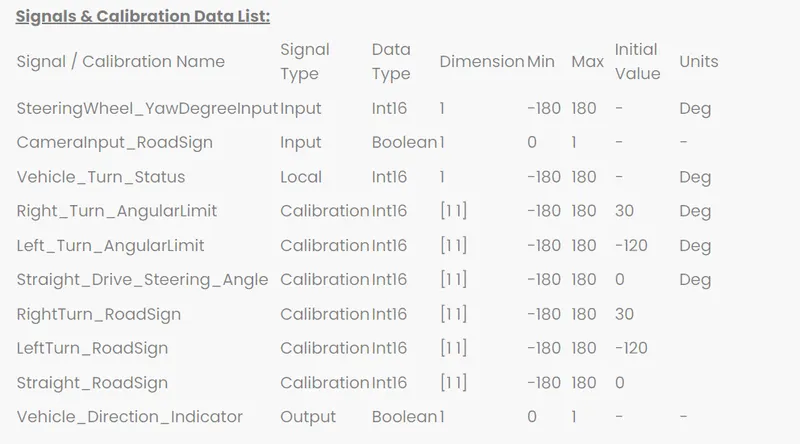
Created Simulink Data Dictionary file (SLDD) in simulink model by using above Signals & Calibration Data list is as below:
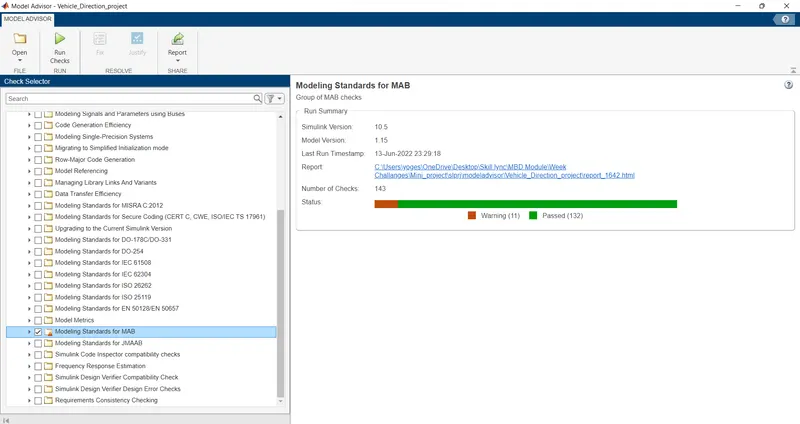
MAAB Guidelines check in Model Advisor :
ADVISOR, NREL's ADvanced VehIcle SimulatOR, is a set of model, data, and script text files for use with MATLAB and Simulink. It is designed for rapid analysis of the performance and fuel economy of conventional, electric, and hybrid vehicles.
so check is performed using "Model Advisor" tool in simulink to see whether the developed model meets the modeling standareds for MAAB.
Creation code of Simulink model:
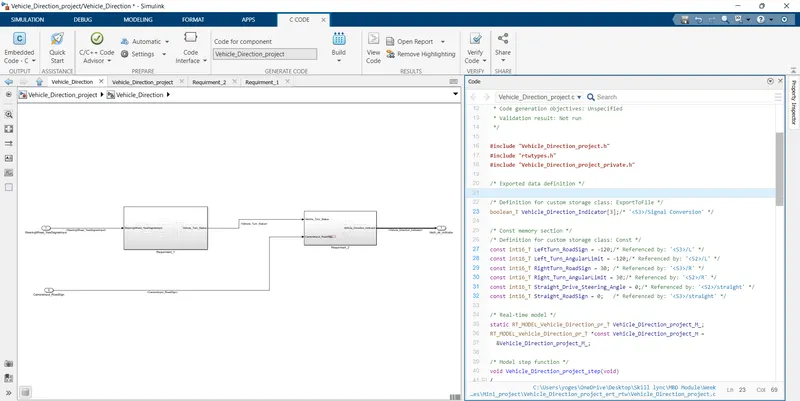
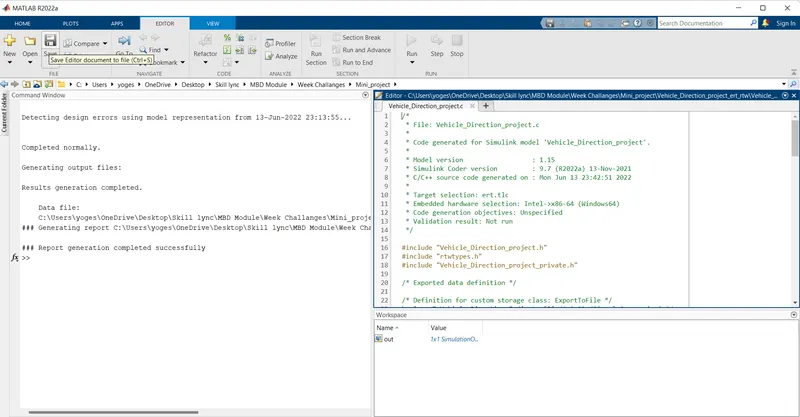
In these Code Generation is take placed by using the using Build Coder.For craete the code by using Build coder we have to follow below step
First in main menu tab g0 to apps than to 'Embedded coder'tab after click on the that tab we have seen the option build just click on that option

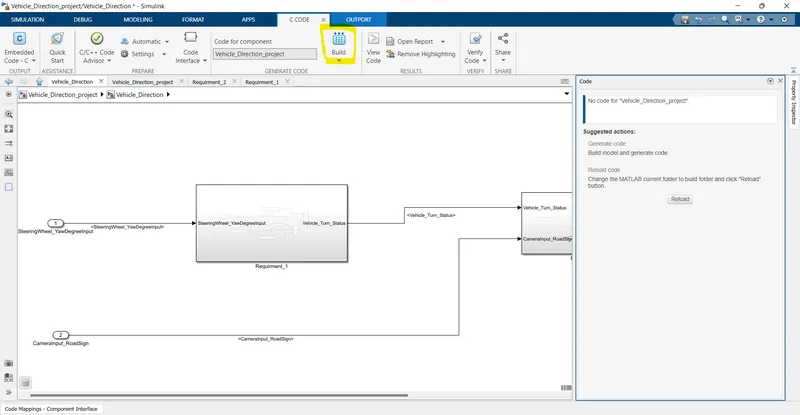
After click on the build option the code of simulink model is build as below as ouput of code:
OUTPUT: