Project 1 Hood
Hood Design
Objective
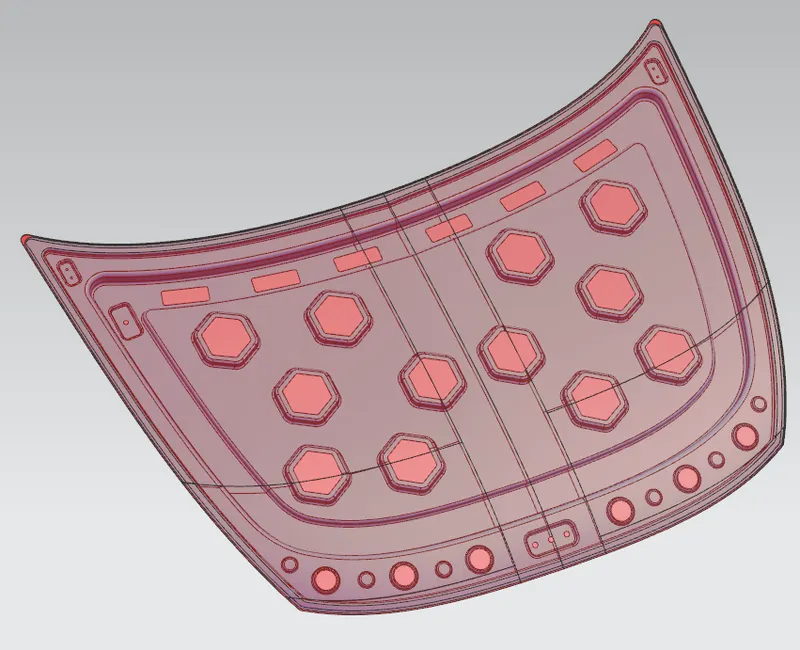
1. To design and model a Car Hood with the Outer Panel, Inner Panel, Hinge and Striker emboss
2. Provide the required emboss definitions and the Mastic data.
Software Used
Siemens NX
Introduction
The Hood is an opening body panel which is the frontal BIW enclosure component in a front-engine vehicle. It consists of an outer and inner panel. The inner panel provides strength while the outer panel functions as a metal cover. It is a very critical component because of the frontal crash requirements and pedestrian and passenger safety requirements. The design of the hood is vital since it affects the aerodynamic flow around the car.
Major parts of a Hood
Support Rod/Gas Stay
It is a device used for supporting the engine hood in its open position. This component plays the primary role in determining the opening angle of the hood. Its length varies for different regions depending upon the average human height. European regions require a larger opening angle compared to Asian regions. Gas stay requires no manpower and is engaged into support position automatically as the hood opens, unlike the Support Rod. It can be kept unmounted on the Grommet in the hood or the engine compartment. The Support Rod can be given curvatures for increased strength, not exceeding 35mm which is the industry standard limit.
Inner and Outer Panel
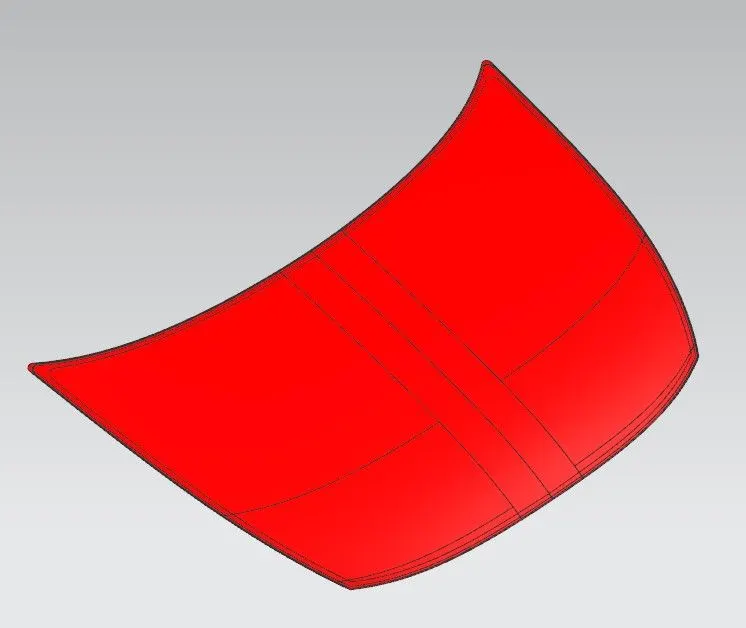
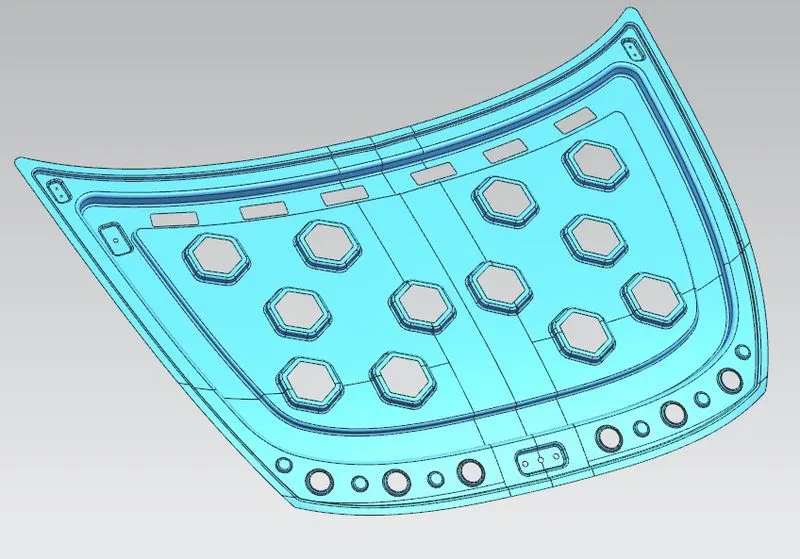
The inner panel provides strength while the outer panel functions as a metal cover. They are 0.65-0.75 millimetres (mm) thick. To improve NVH (Noise, Vibration and Harshness) i.e to reduce these levels, Mastic Sealants are used.
Outer and Inner Panels
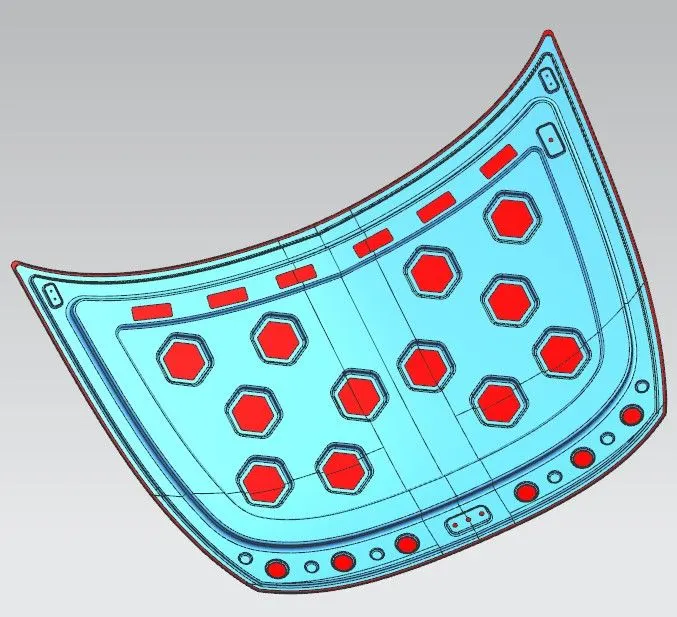
Mastic Sealants improves the strength locally at around 80mm diameter. They are positioned between the inner and outer panel of the hood in such a way that it covers most of the hood region. They are made of hard Rubber and are introduced as a paste thereby joining the inner and outer panel with a thickness of 5mm.
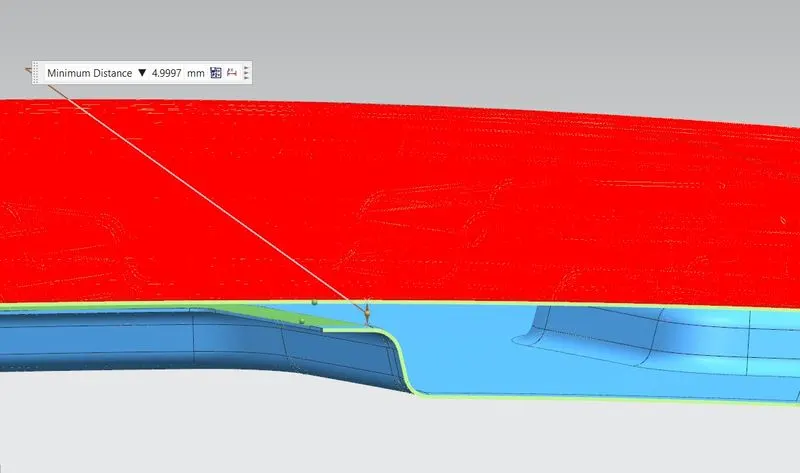
Mastic Sealants are preferred over Spot Welding to join the inner and outer panel because the latter reduces the aesthetics of the car, especially the outer panel which is the styling surface.

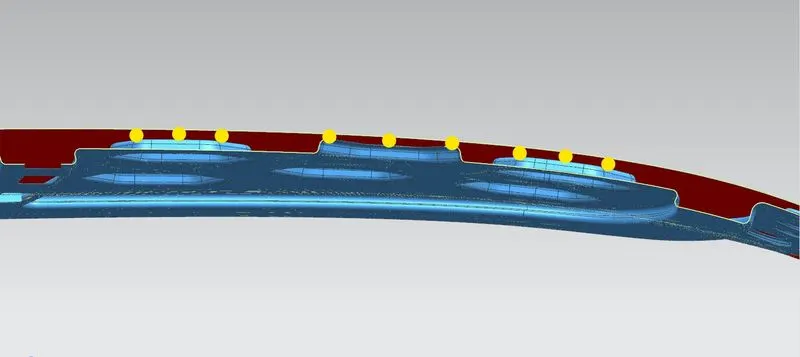
Mastic Data ( shown in yellow dots)
Hinges and Striker
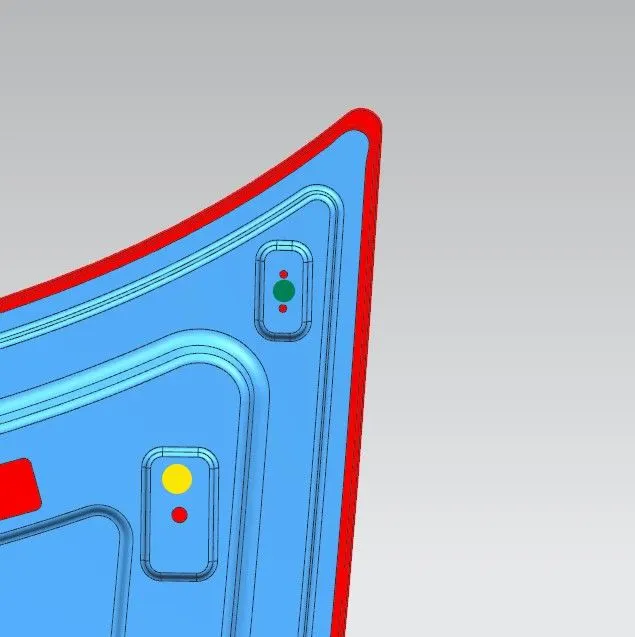
Hinges enable the opening and closing of the Hood. The Latch & Striker forms the locking mechanism of the hood with the engine compartment. One part of the Hinge is mounted to the engine compartment and the other to the inner panel of the Hood, on both sides.
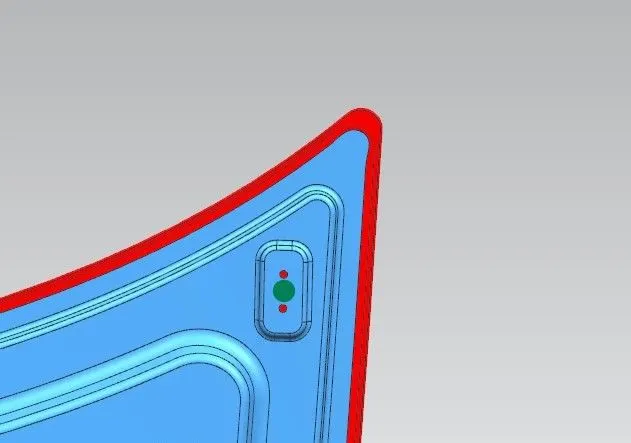
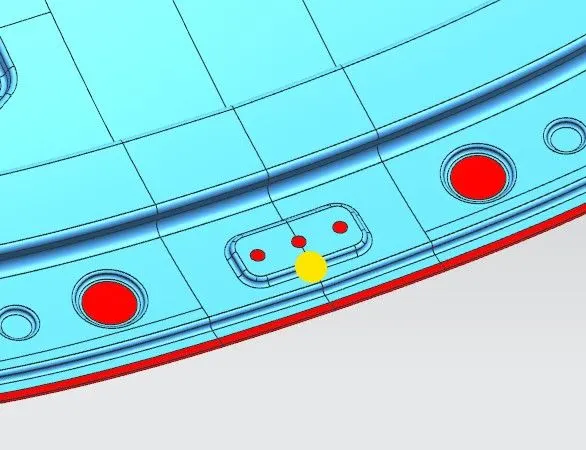
Hinge (Green dot) and Striker (Yellow) Embossments
The Hinge Axis point, which is the midpoint of the axis of the Hinges, should be aligned with the striker through the trajectory of the Hood opening and closing. If the Striker is exactly perpendicular to the trajectory, then the Hinges can be fixed accordingly on the inner panel. Embossing is done at the Hinge and Striker placements to compensate for the additional load by adding reinforcements.
Hinge Axis point aligned (through the dotted line) with the Striker (perpendicular to the trajectory)
Designing
There is a Master Sketch for every region which would be adaptable to different situations which give us the dimensions of the part to be designed. The inner panel including all its embosses are designed by offsetting the outer panel. The maximum gap between the inner and outer panel in the master sketch is 25mm, under which the Engine compartment is situated. This specification is given taking into consideration pedestrian safety. Process of Deep Drawing is used in manufacturing the inner panel and the design considerations are kept in mind for the same.
Embossing
Embossments are added to the inner panel to improve the stiffness of the part. The embossing is done in such a way as to perform the Deep Drawing direction smoothly.
Honeycomb Emboss definitions on both sides of the inner panel to enable efficient crumpling
The design of the embosses should be the guide for the part to crumple, absorbing the force and preventing it from reaching the passengers and thereby reducing the impact force drastically.
The manufacturing process involved in making different features of the sheet metal
Deep Drawing
Deep drawing is the process of converting blank sheet metal into cylindrical containers with a flat or hemispherical base. It is a combination of metal forming process & sheet metal process If the ratio of height to diameter of the product is greater than 0.5 then this drawing operation is known as deep drawing.
- It consists of die, punch, blank holders.
- After the application of drawing force, the blank of material forms & takes shape of the punch or shape made onto the punch. To avoid frictional resistance between blank & die, lubricant is used.
- The applications of the deep drawing process are kitchen utensils, cylindrical containers, fire extinguishers
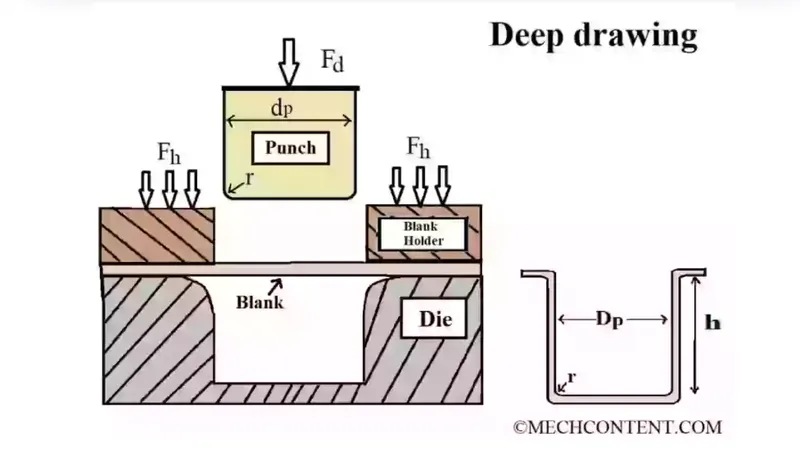
The Deep Drawing is shown above
The rigid tools consist of a punch, die, and binder. In deep drawing, the plate holder closes after the metal sheet blank has been inserted.
Next, the sheet is clamped between the die and the binder. This process slows down the flow of the sheet while it is being drawn and thereby prevents wrinkles from forming under the binder. The punch stretches the sheet over the die radius and forms it in the die. The amount of punch force necessary for forming is thereby continually increased up to the lower dead centre of the punch.
Whereas in pure deep drawing there is no reduction of sheet metal thickness, forming is achieved in stretch forming purely as a result of a decrease in sheet metal thickness. Stretch forming is extensively used for the forming of only slightly curved parts with a low depth of draw (e.g. roofs, doors).
When drawing complex car body parts in practice, there is usually a combination of stretch and deep drawing involved. The sheet metal must be stretched as well as possible without reaching the material's limits
Hemming
Hemming is a forming operation in which the edges of the sheet are folded or folded over another part to achieve a tight fit. Normally hemming operations are used to connect parts, to improve the appearance of a part, and to reinforce part edges.
In-car part production, hemming is used in assembly as a secondary operation after deep drawing, trimming, and flanging operations to join two sheet metal parts (outer and inner) together. Typical parts for this type of assembly are hoods, doors, trunk lids, and fenders.
The accuracy of the hemming operation is very important since it affects the appearance of the surface and surface quality. Material deformations, which occur during the hemming process, can lead to dimensional variations and other defects in parts. Typical hemming defects are splits or wrinkles in the flange, material overlaps in the corner areas, or material roll-in. This is why it is important to use simulation tools to, on the one hand, better understand the hemming process and, on the other hand, significantly reduce the number of “trial and error” loops during tryout and production.
There are various types of hemming operations:
- Conventional die hemming
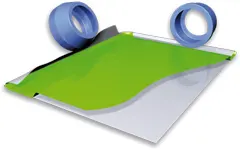
- Roll hemming
Conventional die hemming
Conventional die hemming is suitable for mass production. In die hemming, the flange is folded over the entire length with a hemming tool. Normally the actual hemming is a result of a farming operation in which the flange is formed with a hemming tool after the drawing and trimming operations have been completed. The formed flange is then hemmed in several process steps. These steps include, for example, the pre-hemming and final hemming depending on the respective opening angle of the flange. Production plants for conventional die hemming are very expensive, but the cycle times are very low.
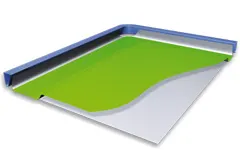
Roll hemming
Roll hemming is carried out incrementally with a hemming roller. An industrial robot guides the hemming roller and forms the flange. Roll hemming operation can also be divided into several pre-hemming and final hemming process steps. Roll hemming is very flexible to use and tool costs are significantly lower as compared to those of conventional die hemming. However, the cycle times are much higher since the hemming is realized using a hemming roller that follows a defined path.
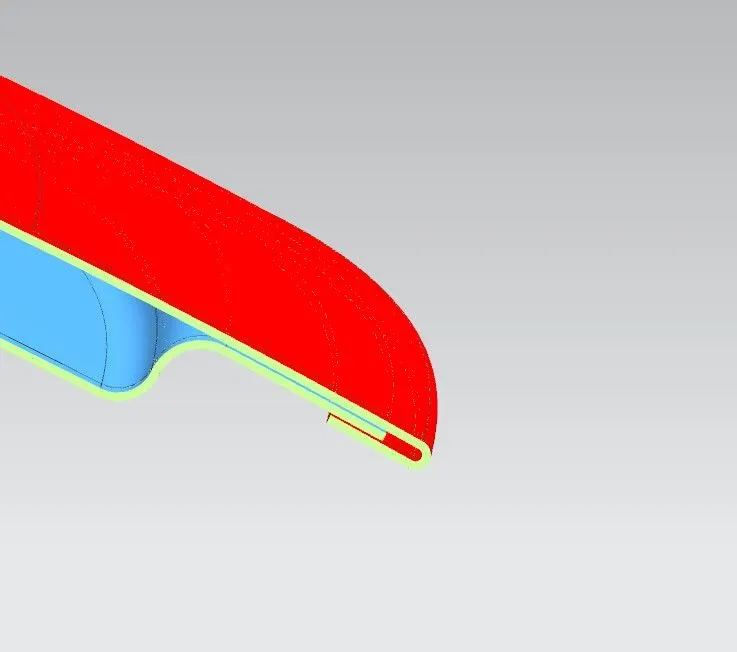
Hemming done on the outer panel
Hemming is preferred over Spot Welding given its superior aesthetic finishing.
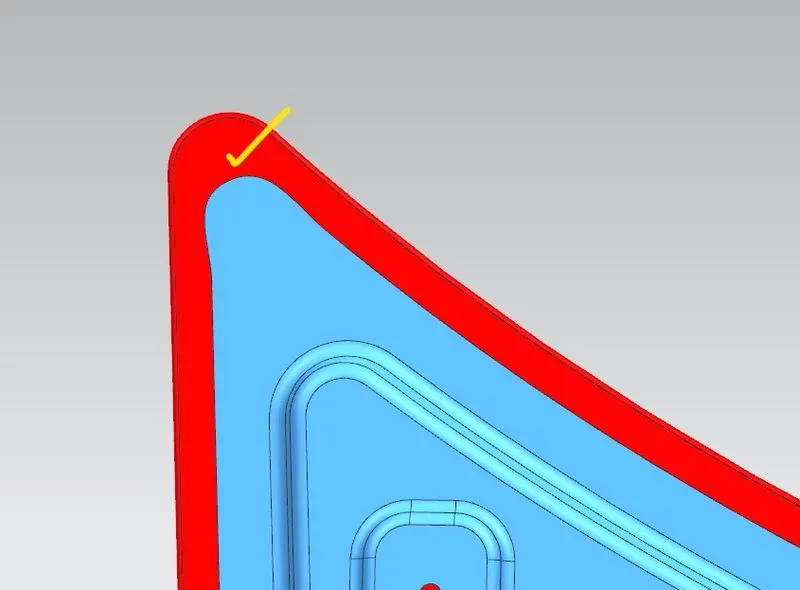
Relief is provided on the hood corners to avoid intolerance issues arising from the rolling process in the Hemming operation.
Hemming relief at corners
Pedestrian Safety – EuroNCAP Standards
The hood is designed per the Euro NCAP (European New Car Assessment Programme) standards. The Adult and Child impact zone is taken into consideration and calculated by plotting the regions from the model data. The model, in this case, the outer panel, is offset to generate the deformation space in the Engine compartment below the styling surface and thereby determine the interference.
Package components that penetrate the generated deformation are considered critical and need to be relocated or tuned to fill. This relocation or tuning leads to the decrease in the impact force exerted on the pedestrian from the compartment during a collision( since there are no critical components under the hood in this case). This is done to reduce the impact on the pedestrians head in particular.
Brackets that gets easily deformed during a collision are also installed on the Fender and Engine to reduce the impact on the pedestrian.
The share of Pedestrian Safety criteria for a 5-Star rating has increased significantly from 25% in 2009 to 60% in 2012. Implementing these considerations while designing the Hood will result in a good rating under EuroNCAP Standards under Head Injury Criteria (HIC) (HIC 15 less than 1000- better rating).
Conclusion
Thus the Hood comprising the inner and outer panels, hinges and striker was modelled according to the industry as well as EuroNCAP standards.