Project 1 _Creating an Architectural plan for the provided plot size and develop relevant basic structural drawings
AIM : 'TO CREATE ARCHITECTURAL PLAN FOR THE PROVIDED PLOT AND DEVELOPING BASIC STRUCTURAL DRAWINGS'.
Architectural Drawing
- Site Plan
- Ground Floor Plan
- First Floor Plan
- Elevation
- Section
Structural Drawing
- Column Dimension Plan
- Beam Dimension Plan
- Footing Dimension Plan
Commands Used in this challenge
- Line
- Xline
- Polyline
- Rectangle
- Circle
- Arc
- Trim
- Move
- Offset
- Hatch
- Layer
- MatchProp
- Multileader
- Fillet
- Copy
- Explode
Introduction:
The residential building to be drawn with plot dimensions 55’X60’.
The plinth dimensions are chosen as 35’X40’. The plot is east facing. The building is designed with following rooms
- Ground Floor Living Room.
- Study Room.
- Kitchen
- Parking
- Attached Bathroom
- Main -Master Bedroom
- Puja Room
- Staircase to first floor
- First Floor Living room
- Bedroom-2
- Guest Bedroom
- Balcony
- Staircase to roof
The dimensions of the components of house are as follows
| Walls | Columns and Beams | Doors | Windows | Staircase |
|
|
|
|
|
Procedure:
- Set the units to engineering and select ok
- Set limits as lower left corner (0,0) and upper right corner (500',500')
- Go to layer properties < create new layers < name the layers for reference < close.
- Architectural drawings:-
- Plan
- Elevation
- Section
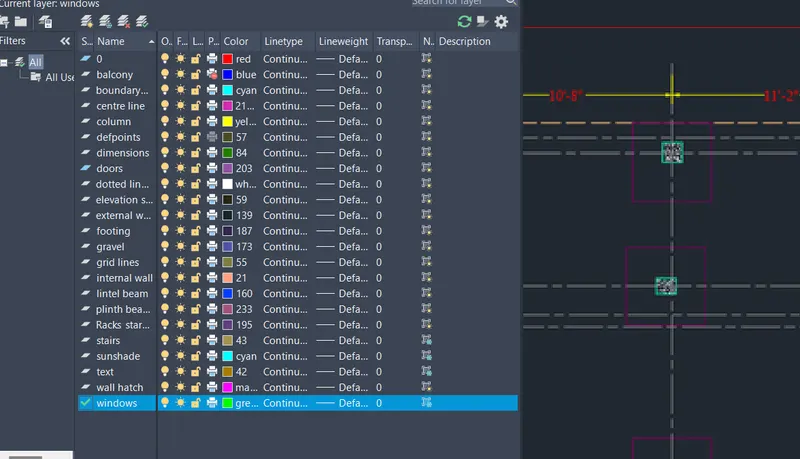
- Using the commands line and Dtext, create the directions.
- Then, Using the BLOCK command, make a single block and named it as directions.
ARCHITECTURAL DRAWINGS:-
PLAN:-
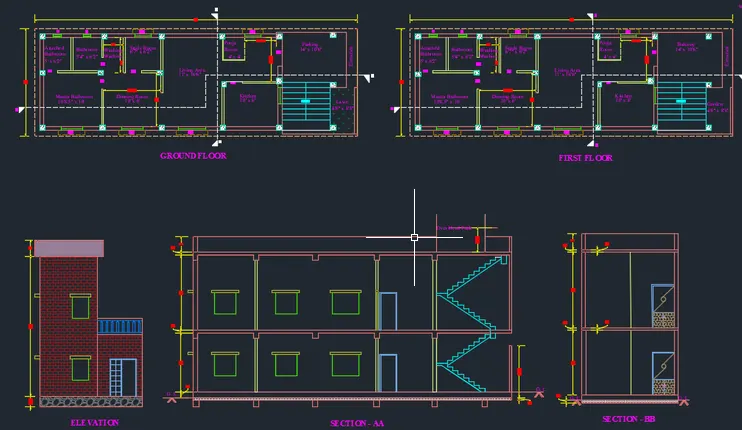
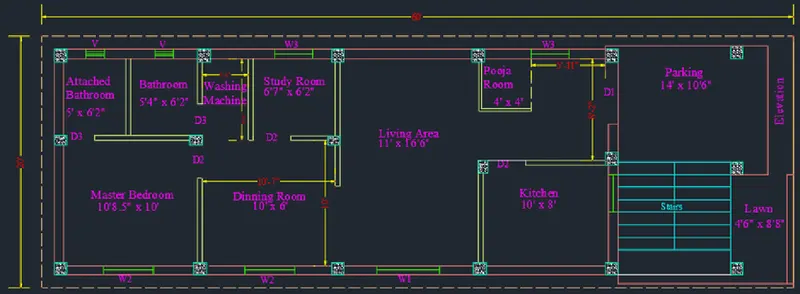
- Using the line Command, i drew the plot boundary of 60'x20'.
- The building's main entrance is facing the East direction.
- Using the commands line, offset, fillet and trim.
- Starting from the East, the car parking is planned at 14'x10'6", Lawn area for about 4'6"x8'8" and stairs for about 9'x9'.
- The building area is drawn leaving 1' offset distance in the North, West and South directions.
- After providing the offset distance, the floor dimensions comes about 45'x18' including walls,
- It is planned as per VAASTU. Even those directions are mentioned below.
-
Main Door Stairs Kitchen Puja Room Living Room Study Room Dining Room Master Bedroom Attached Bathroom Bathroom East South East South East North East FacingEast North East South East South West North West North West - The room dimensions are also assumed.
- The Door dimensions are shown above in tabular form.
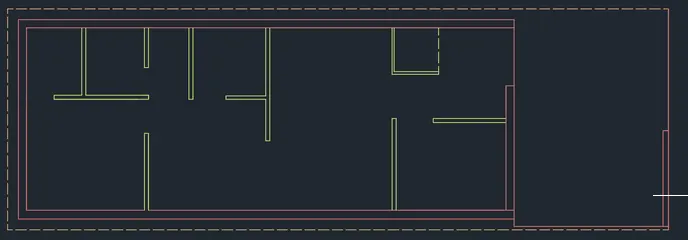
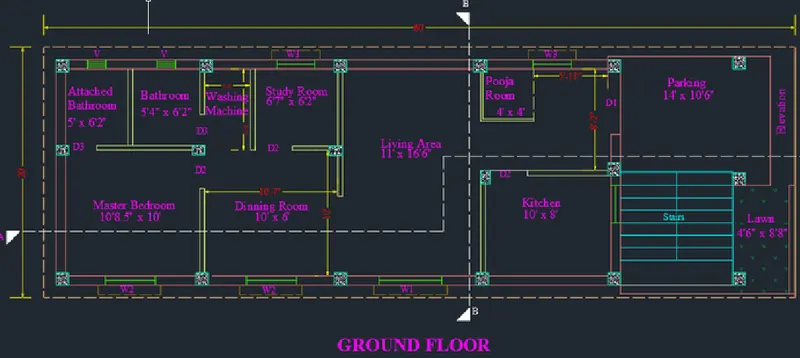
- Using the mentioned dimension doors are trimmed and placed and here is the figure attached below.
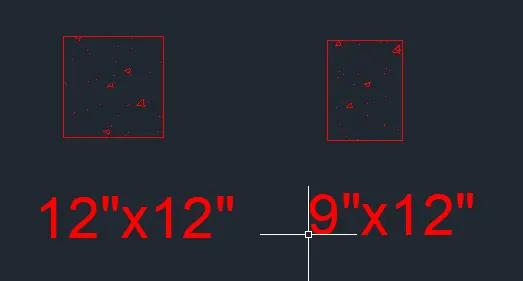
- Columns of sizes 12"x12" and 9"x12". Using the Hatch command, fill columns with AR-conc and adjusted the scale for better visibility and copy it.
- Using the DText command, the names for each rooms, spaces, doors, windows and the dimensions for all the rooms.
- Using the commands line, offset, fillet, trim and DText, the compound entrance is created with 6" thickness wall also the car parking and lawn area is surrounded by 6" thickness compound wall.
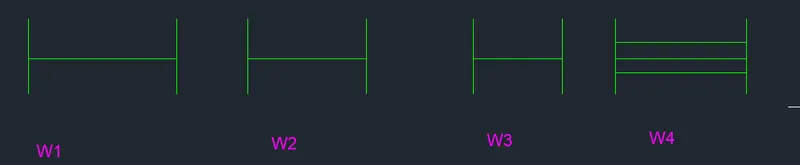
- Windows are draw as per the dimensioned mentioned above and those are plotted and placed in the plan as needed.
- Using Hatch command, fill LAWN and adjust the scale for better visibility.
- Using the linetype long-dash short-dash cut the plan into 2 sections, SECTION - AA and SECTION - BB.
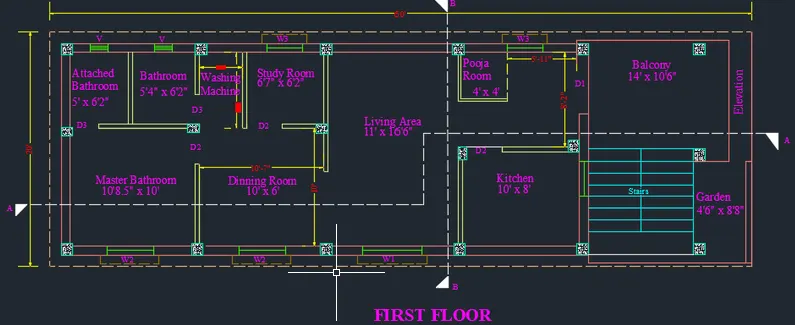
- And as in the ground floor plan is made the first floor only the change in parking is replaced as balcony as shown below.
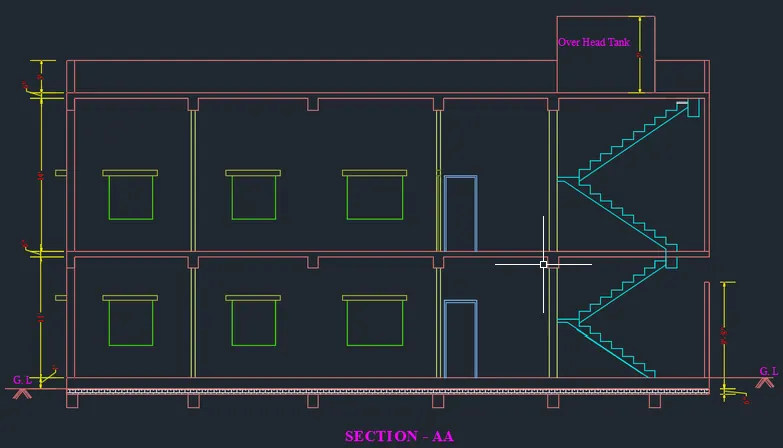
2. SECTION-AA:
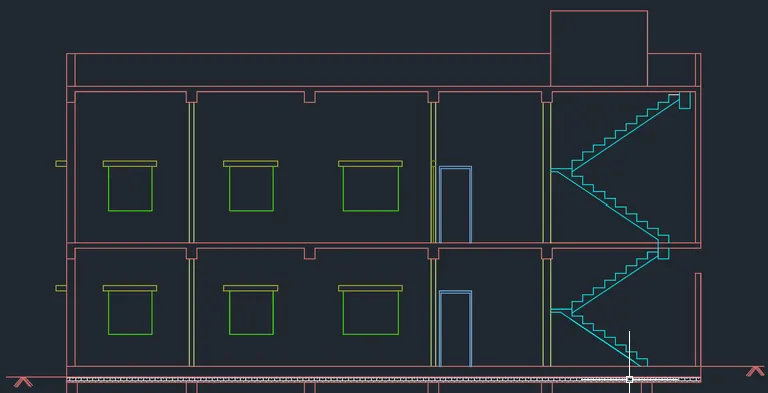
- Using the commands Line, polyline, offset, fillet and trim, I have created the sectional view for the Section -AA.
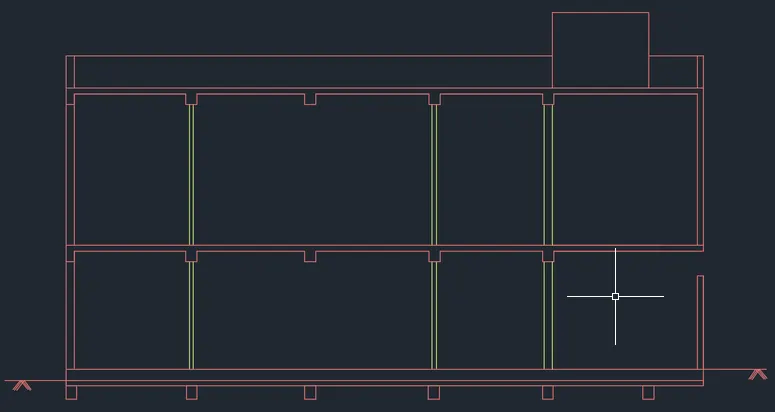
- Draw windows, kitchen space and stairs as shown in plan.
- Draw lintel beam over the windows, doors.
- Provided Parapet wall and over head as well.
- Using Hatch command, fill Plinth beam with brick and adjust the scale for better visibility.
- Using the commands Dim-lin, I have provide dimensions wherever required.
- And Using DText command, the name is given in the bottom and staircase dimensions are mentioned.
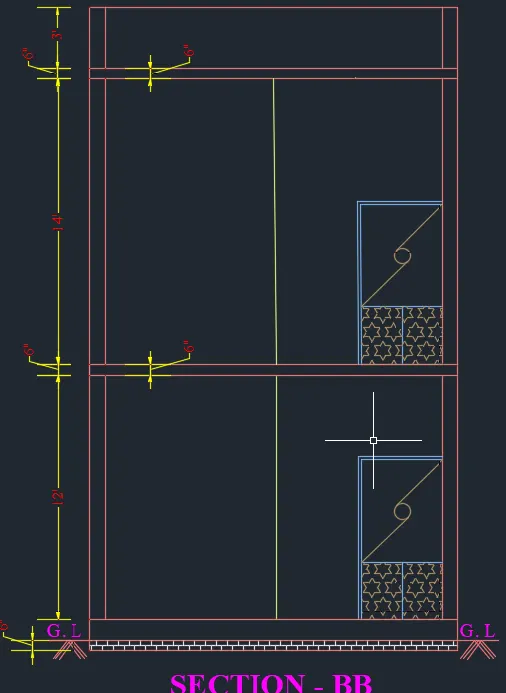
2. SECTION-BB:
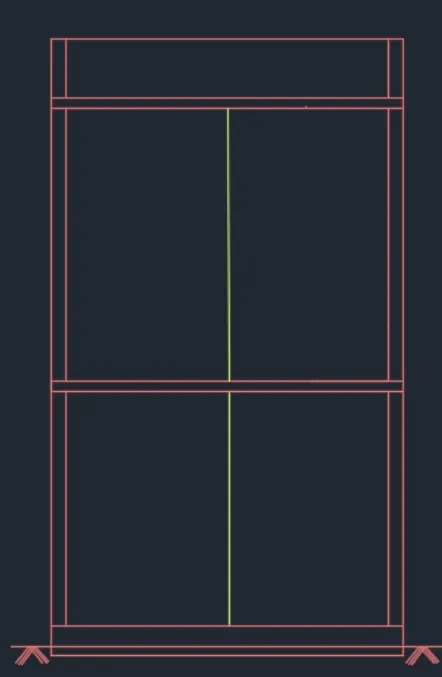
- Using the commands Line, polyline, offset, fillet, trim and hatch, create the sectional view for the Section -BB.
- Provide wardrobe as shown in the plan.
- Using Hatch command, fill WARDROBE with Star .
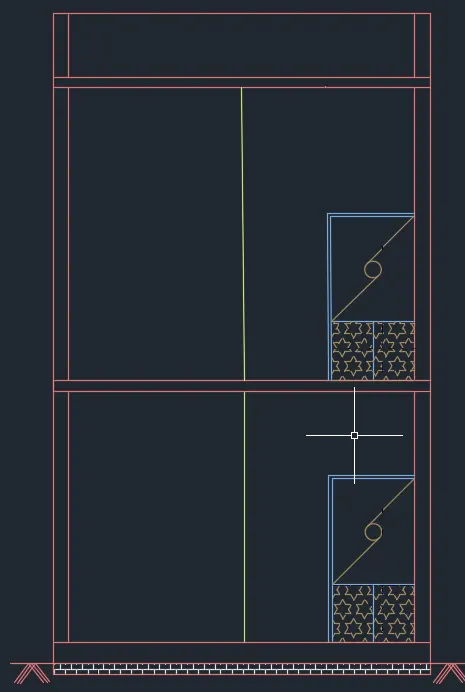
- Using DText command, the name is written in the bottom.
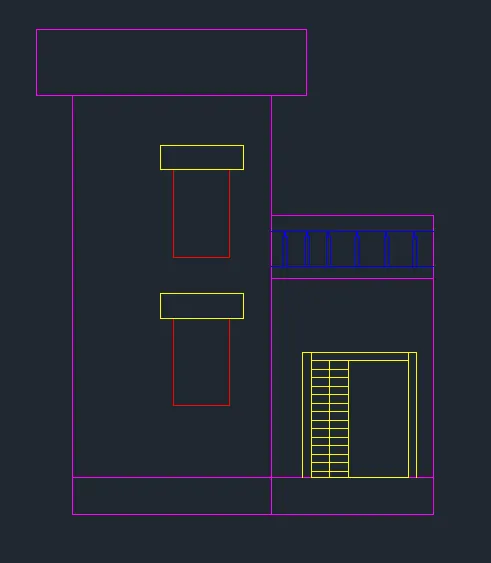
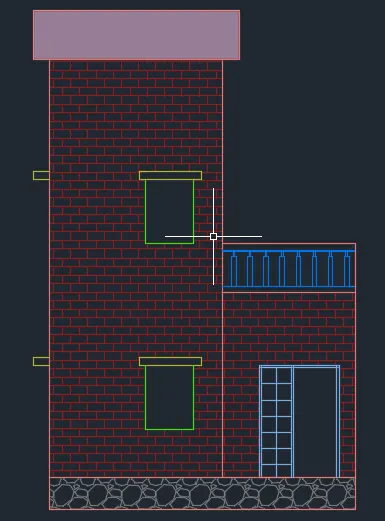
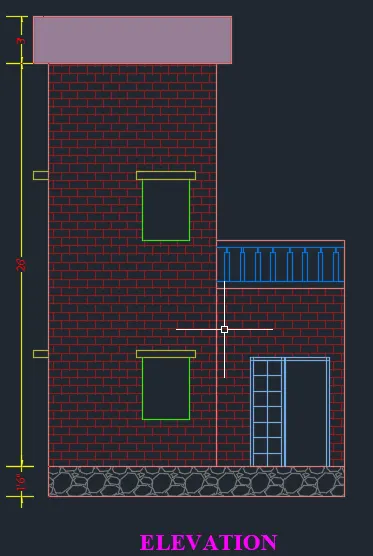
3. ELEVATION:-
- Using the commands Line, polyline, offset, fillet, trim and hatch, createdthe sectional view for the Elevation.
- Provide windows ,chajja and door as per plan.
- Provide lintel beam over the windows, doors.
- Provide Parapet wall.
 \
- Provide the dimensions wherever required.
RESULT:
II. STRUCTURAL DRAWINGS:-
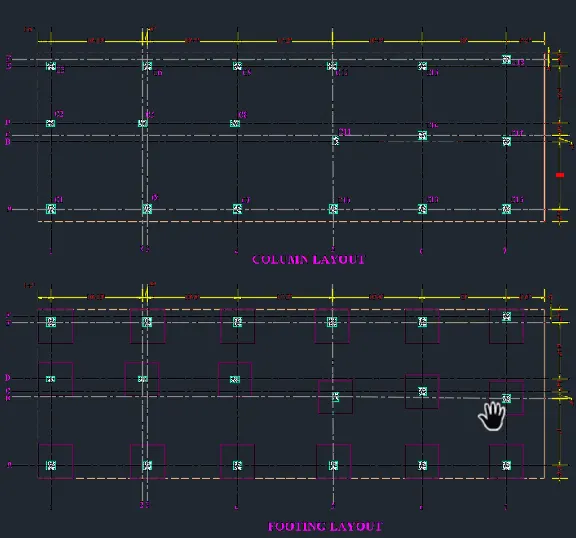
- Column Layout:-
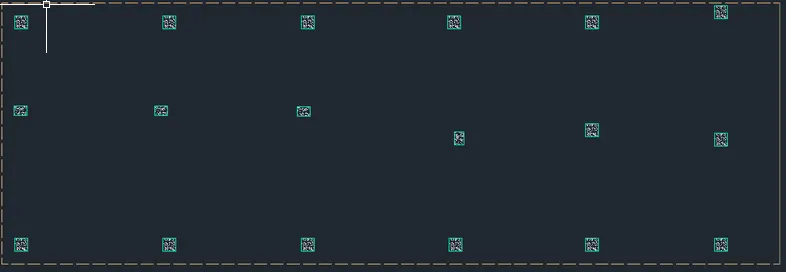
- Turn off all the layers except the column layer and boundary layer in the layer properties.
- Select the Copy tool in the command box.
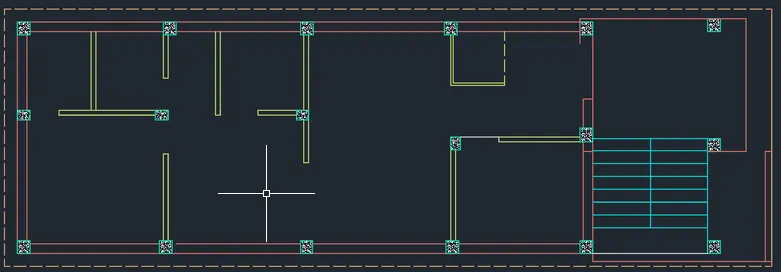
- Select all the columns from the building plan and copy them to a different location as shown below.
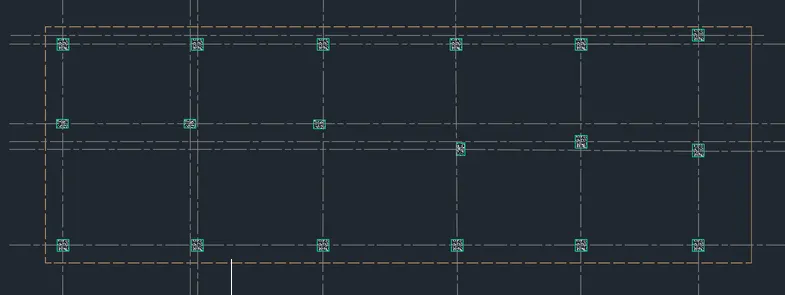
- Select the Construction line tool by typing XLine in the command box.
- Select the line type as ISO 02W100 and give scale as per required.
- Draw lines through the midpoint of the columns in the horizontal and vertical directions.Select the Trim tool by typing TR in the command box and Trim the unnecessary lines Trim the unnecessary lines.
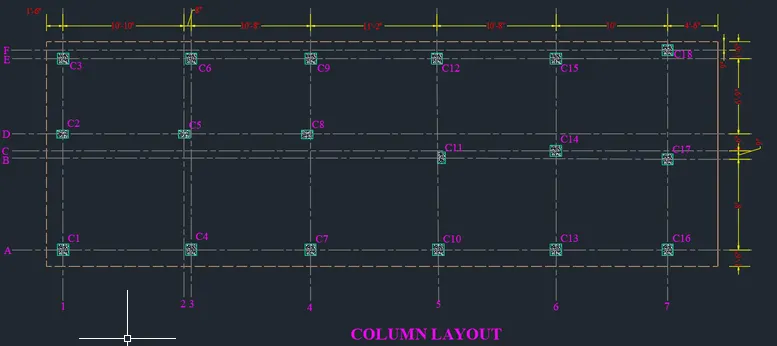
- Select the Dimension tool and select the first point and the second point of the object to measure and modify the dimensions as per the requirement..
- Under the text option, Change the text height to 10".
RESULT:
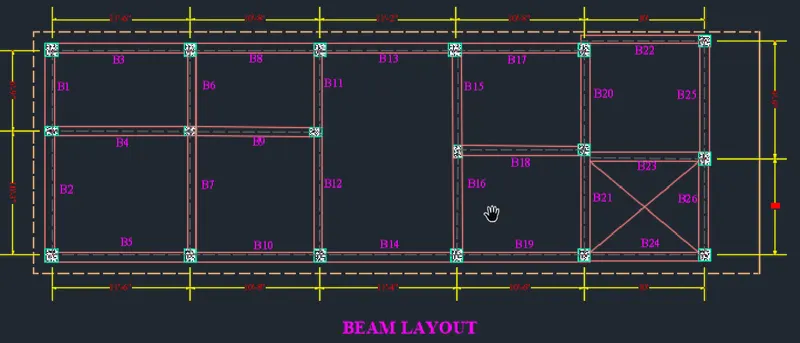
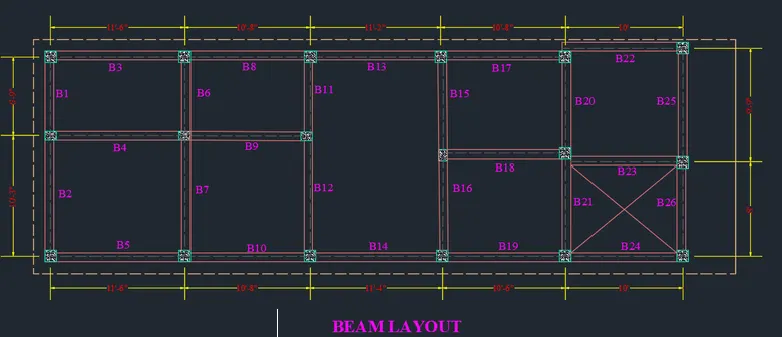
2. Beam Layout:-
- Turn off all the layers except the column layer and boundary layer in the layer properties.
- Select the Copy tool by typing CO in the command box.
- Select all the columns from the building plan and copy them to a different location as shown.
- Select the Construction line tool by typing XL in the command box.
- Select the line type as ISO 02W100.
- Draw lines through the midpoint of the columns in horizontal and vertical directions.
- Select the Trim tool by typing Trim in the command box and Trim the unnecessary lines.
- Select the Offset tool by typing O in the command box.
- Specify offset distance as 4.5" and create offsets for the beam of width 9".
- Select the Offset tool again by typing O in the command box.
- Specify Offset distance as 3" and create offsets for the beam of width 6".
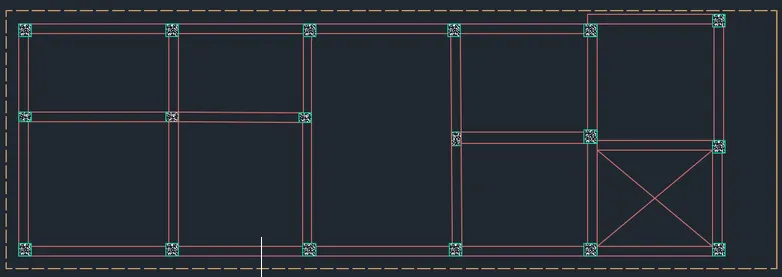
- Select the Trim tool by typing Trim in the command box and trim the unnecessary lines
- Assign the beamlines to the beam Layer.
- E2nter DS in the command box to open the dimension style manager dialog.
- Modify the dimensions as per the requirement.
- Change the color of the dimension and extension line as per the requirement.
- Under the text option, Change the text height to 10".
- Click ok, then click set current and close the dimension style manager dialog box.
- Give dimensions and text as per the drawing and requirement using the Mtext command and Dimension Command.
RESULT:
2. Footing Layout:-
- Turn off all the layers except the column layer and boundary layer in the layer properties.
- Select the Copy tool by typing CO in the command box.
- Select all the columns from the building plan and copy them to a different location as shown.
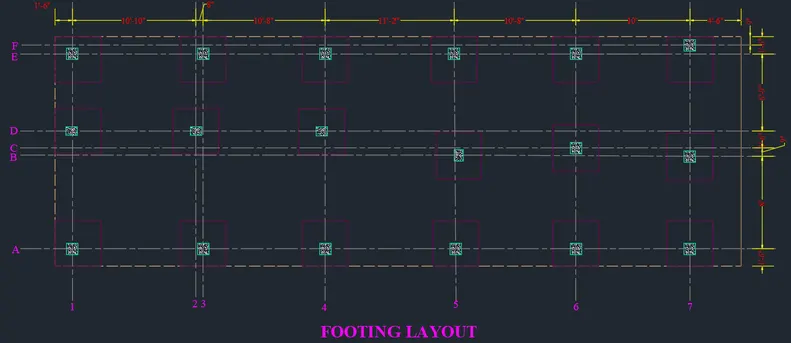
- Using the line command, the square footing of size 4'x4' is given for all the columns excluding for staircase column where footing of size 3'x3' is given.
- Using the CENTERLINE LineType, the grid lines are provided.
- Using the DIM-LIN and DIM-CONTINUE command, the dimensions between the grid lines are mentioned.
The calculations for the Column Schedule, Beam Schedule, And Footing size are provided below.
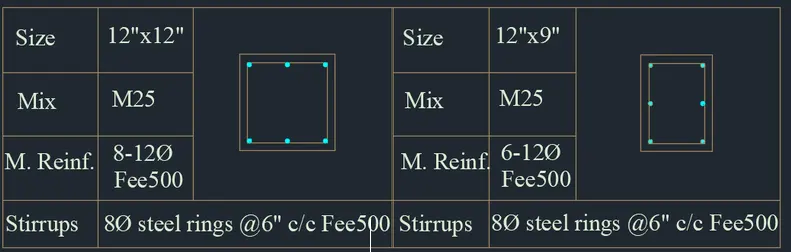
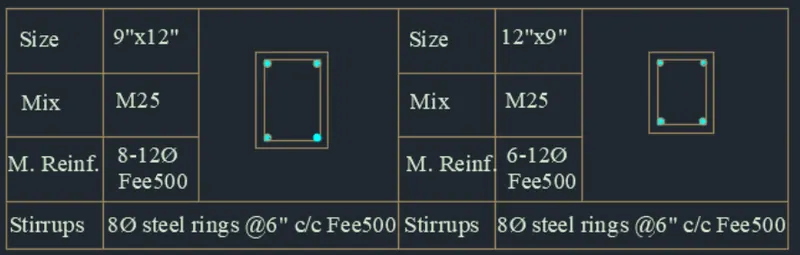
The Schedules are provided for the Size, Mix, Reinforcement and Stirrups.
- COLUMN SCHEDULE:-
- BEAM SCHEDULE:-
- FOOTING SIZE:
The footing Size is 4' x 4'.
The Final Result: