Project 1_Comparative study of different storey buildings for Seismic forces
Project 1_Comparative study of different storey buildings for Seismic forces
Aim : To modelling a 25 storey building on ETABS 2018 with structural properties including ground floor or plinth floor level at a height of 1.5 meters from the base and a story height of 3 meters.
Procedure:
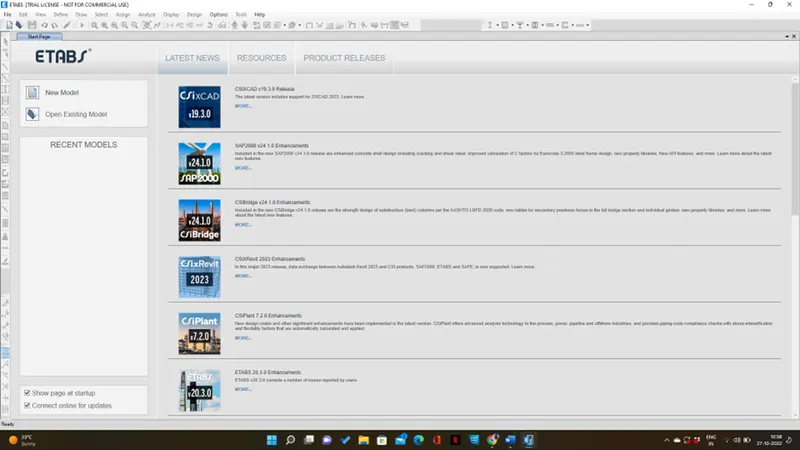
Step 1: Open ETABS software and click the menu and choose create a new model option
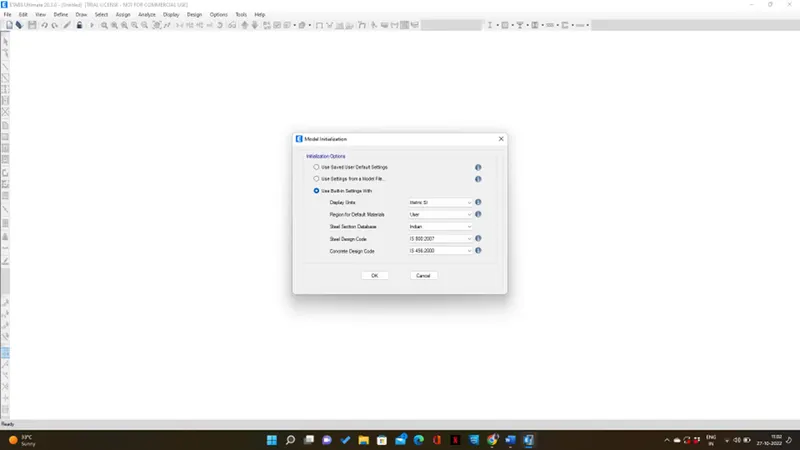
Step 2: A dialog box will appear and choose the Built-in -settings option and select the display units
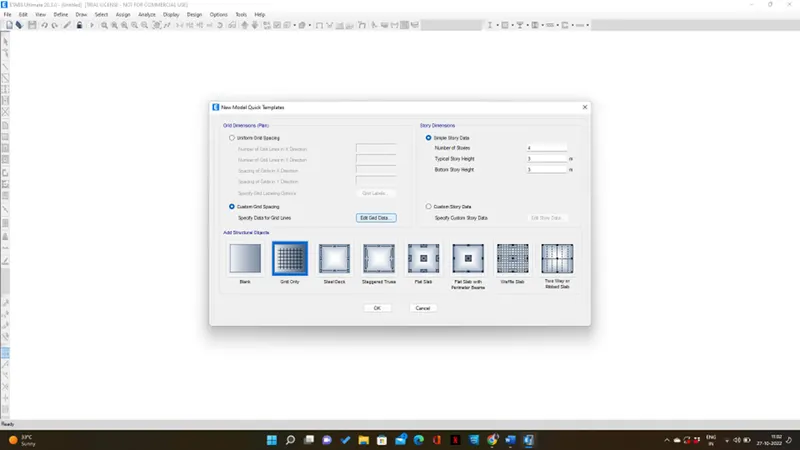
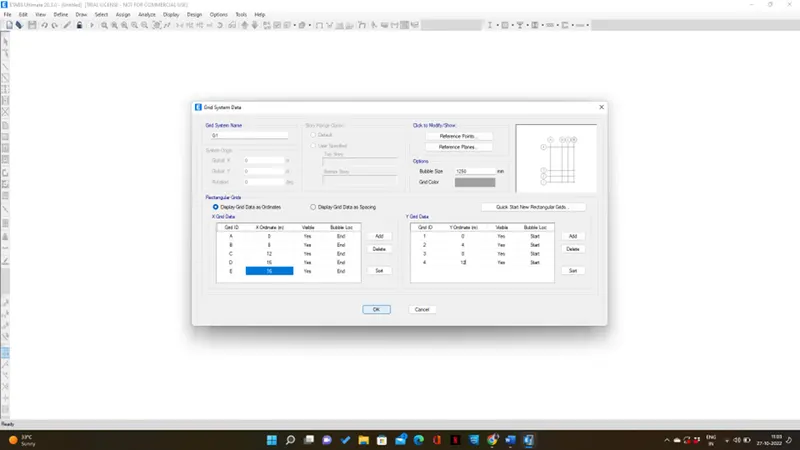
Step 3: New model quick template dialog box will appear to set up the grids.Set X grid data as 5 numbers at a distance of 4 m and Y grids as 4 numbers at a distance of 4 m and click ok
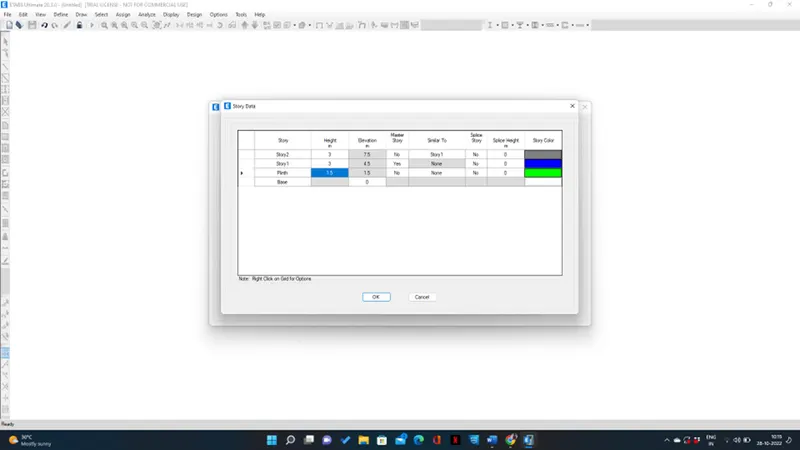
Step 4: In a story data dialog box ,need to input all the relevant details about the story which we want to model
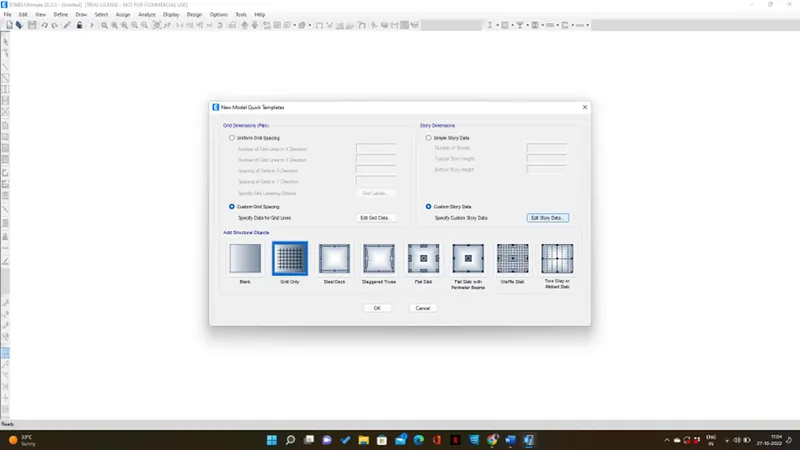
Step 5 : Click add story and add 2 stories and put 3m height for all story except plinth
Step 6 : Make 1st story as master story and choose all stories as similar to 1st story and click ok
Step 7: Go to define tab and select material ,a dialog box will appear .Select region and select all material type ,standard and grade as given in the question and click ok
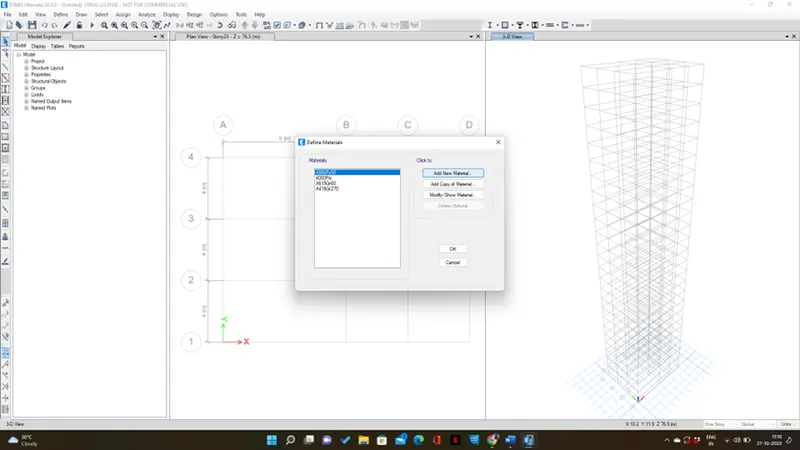
Step 8:Another dialog box will appear click add material property and edit the required data
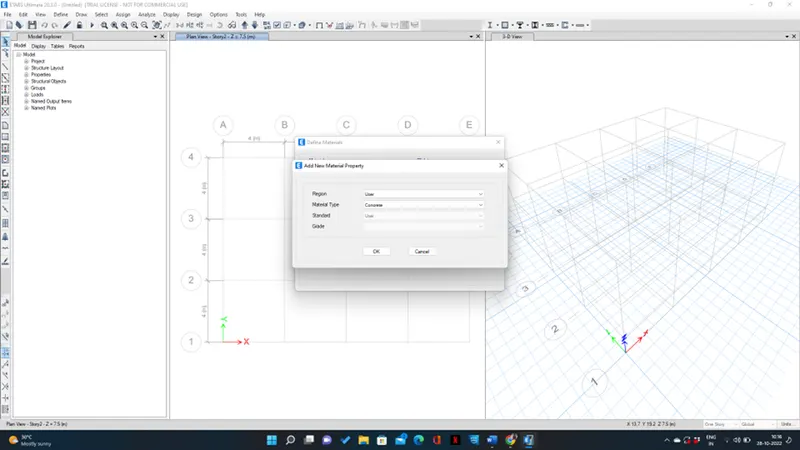
Step 9:Go to define and choose section properties and click frame section
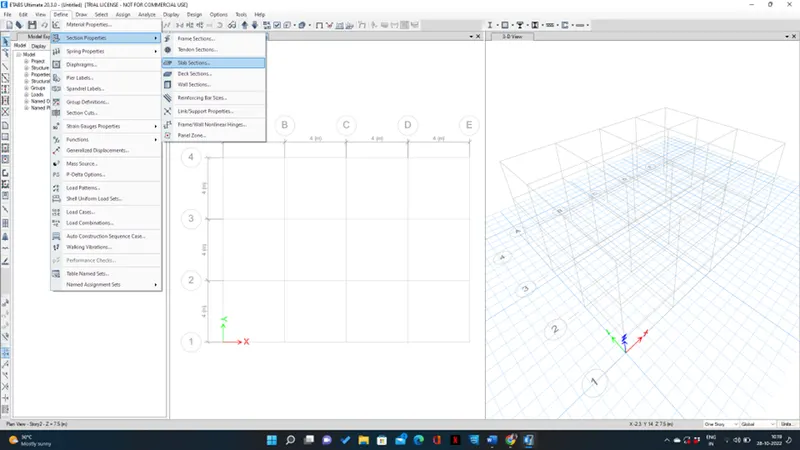
Step 10: Click to select add new property and rename the property name and select the material
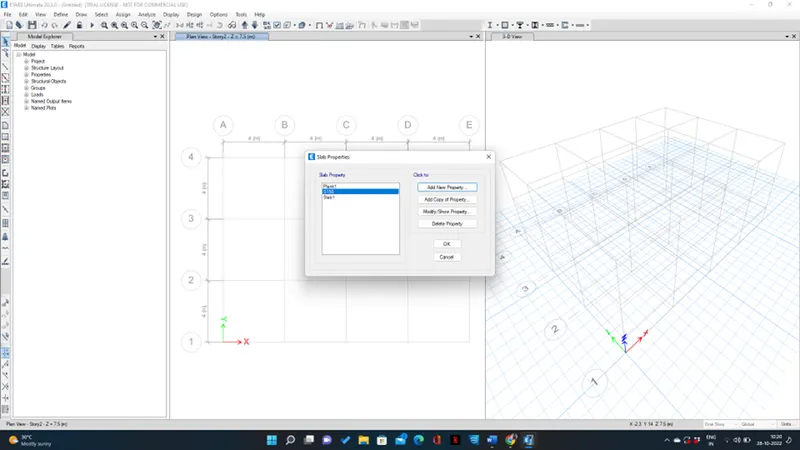
Step 11: Choose modelling type as membrane
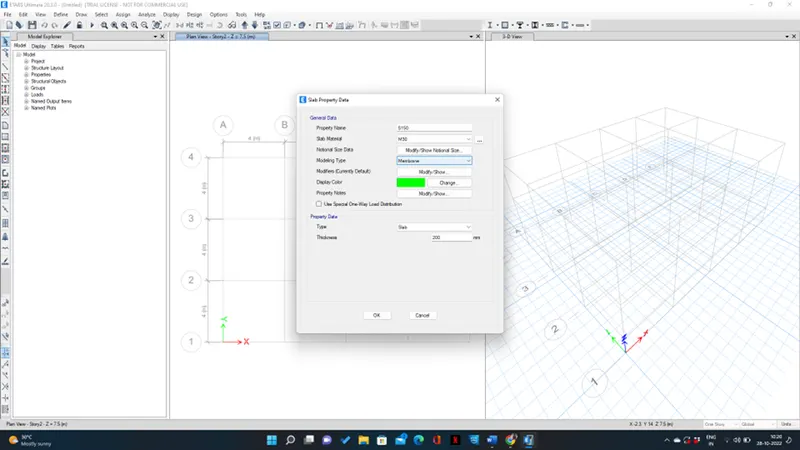
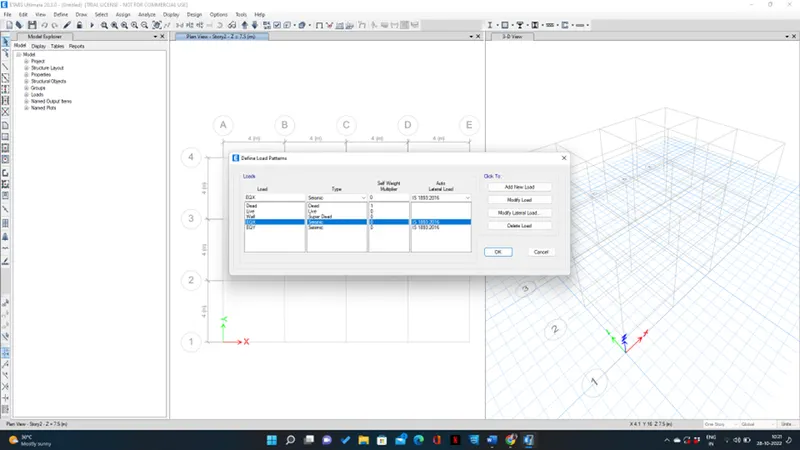
Step 12: Go to define tab and select load patterns and add new load as brick wall ,EQX with positive and negative eccentricity as per IS 1893:2016 similarly add EQY with positive and negative
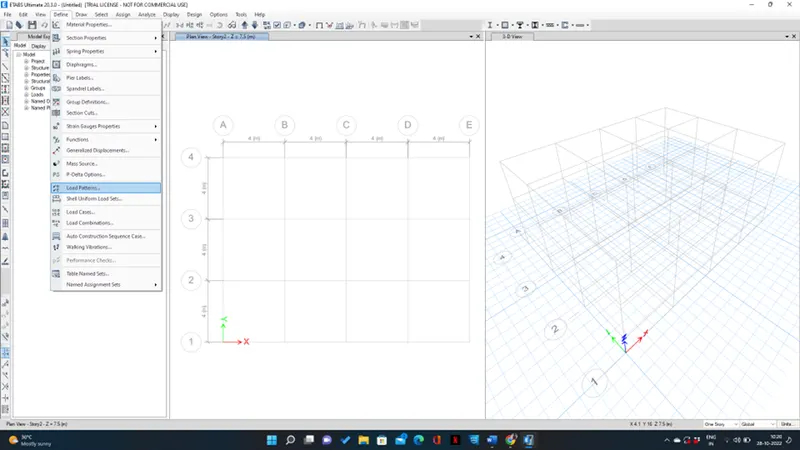
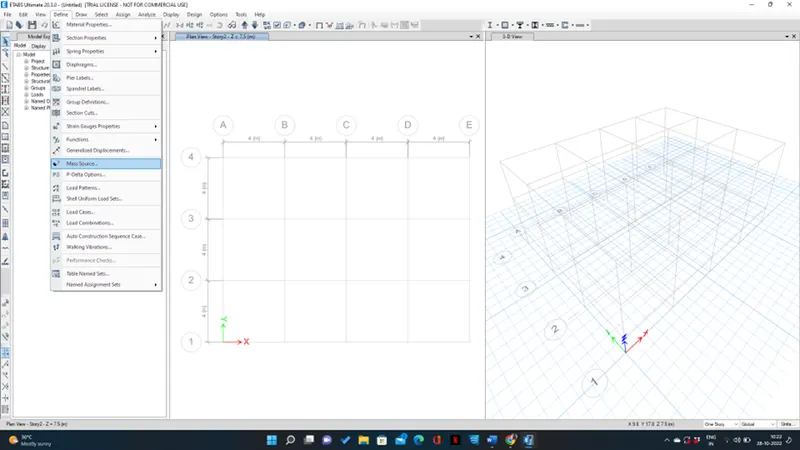
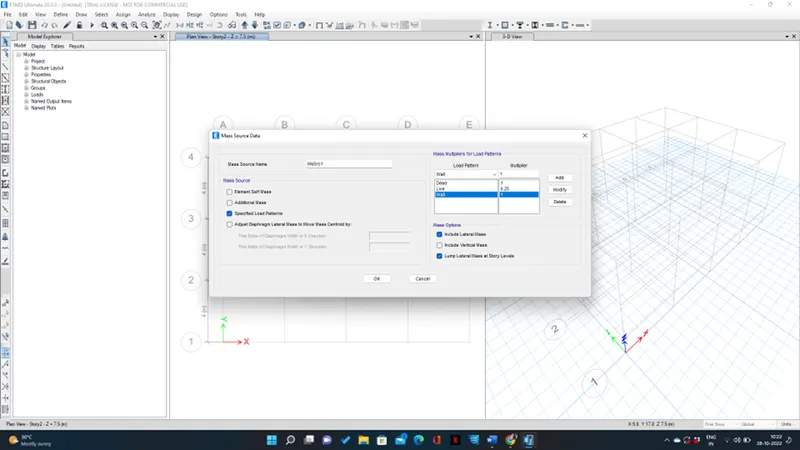
Step 13 : Go to define tab and select the mass source option and select specified load patterns and add the load patterns and click ok
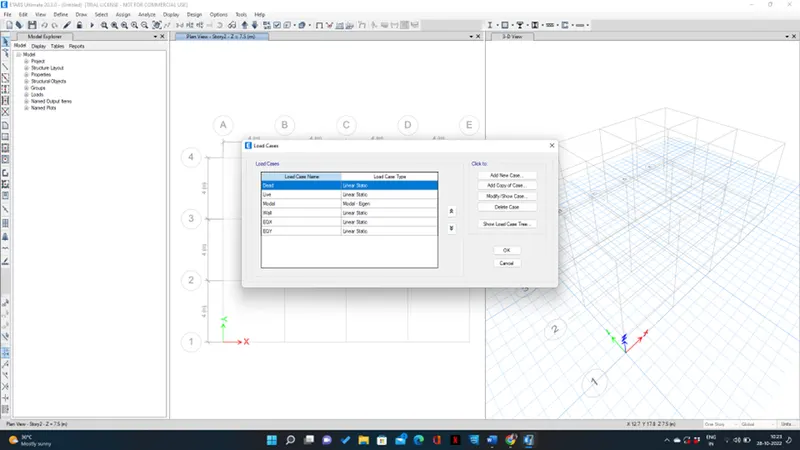
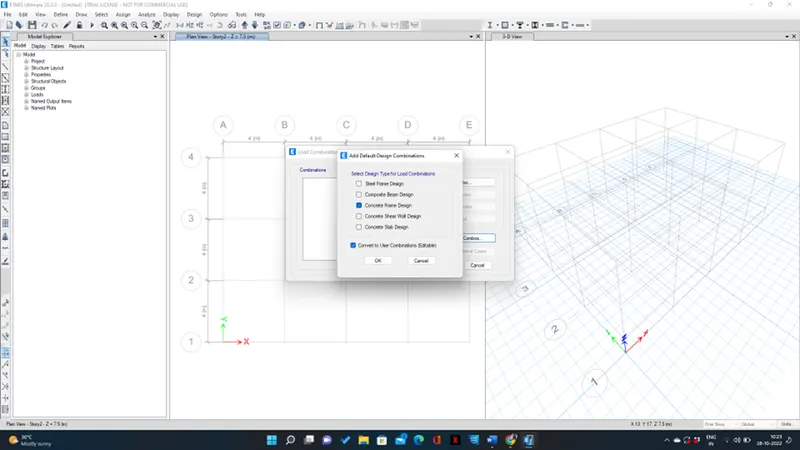
Step 14:Go to define tab and select load combinations and choose concrete frame design and click ok
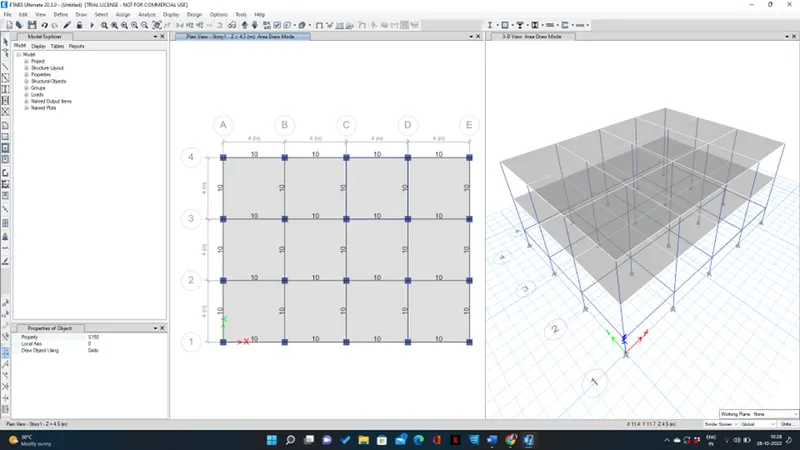
Step 15 : To draw column and beams click the quickdraw columns tool in the model tree after clicking the tool,the property tab will appear on that tab all the relevant detail about the particular objects will show
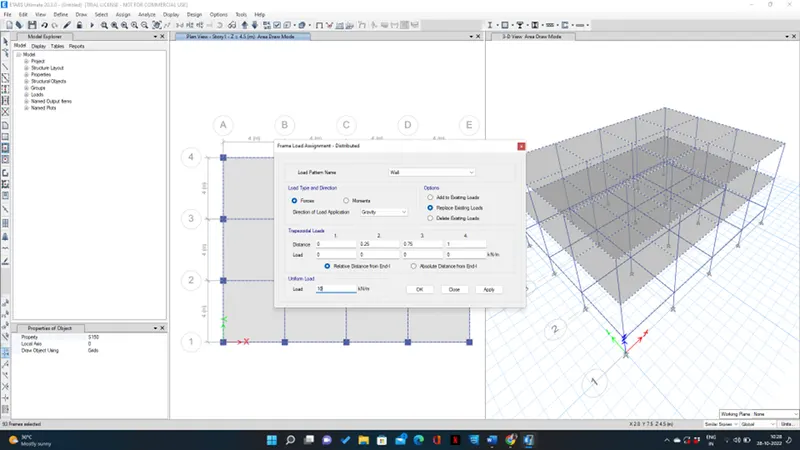
Step 16 :Go to select tab and select all columns and then go to assign tab and select frame load and assigned with 10Kn/m
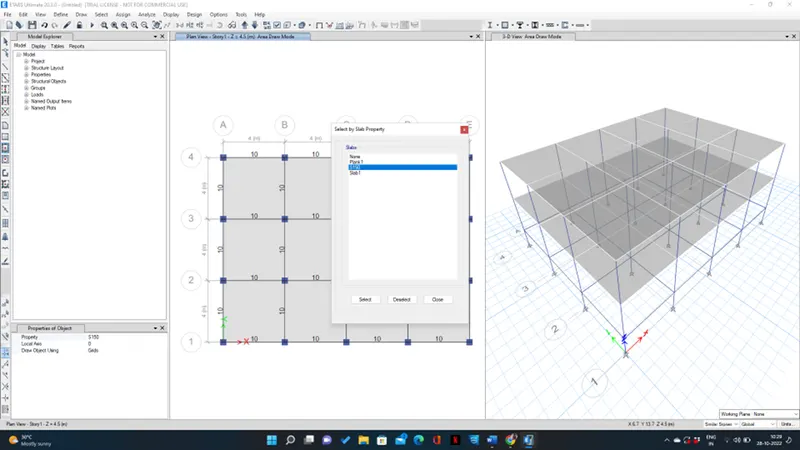
Step 17: Go to select tab and select all slab and then go to assign tab select the entire grids and click the assign tab and choose shell loads and select uniform
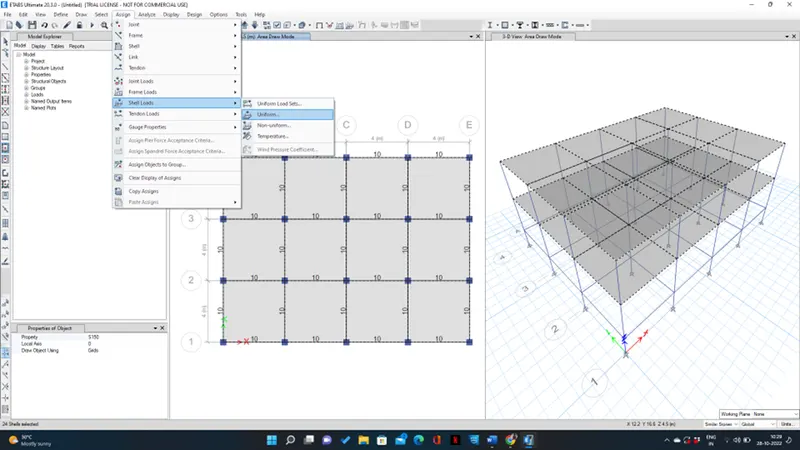
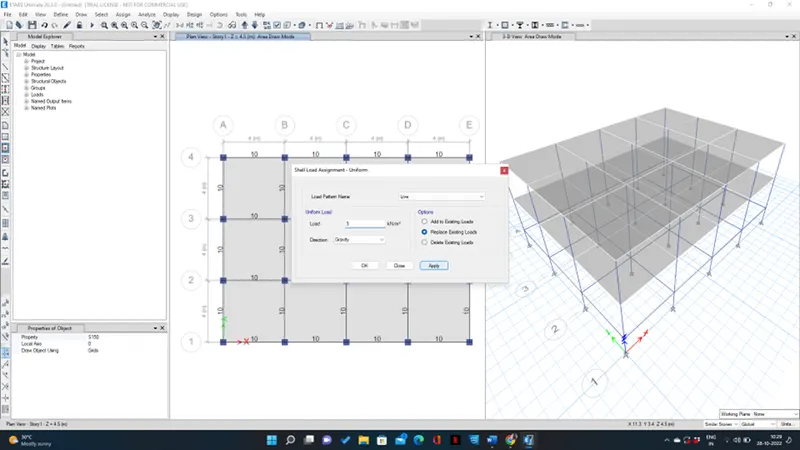
Step 18: Choose load pattern and input the load as 3kn/sqm and click ok
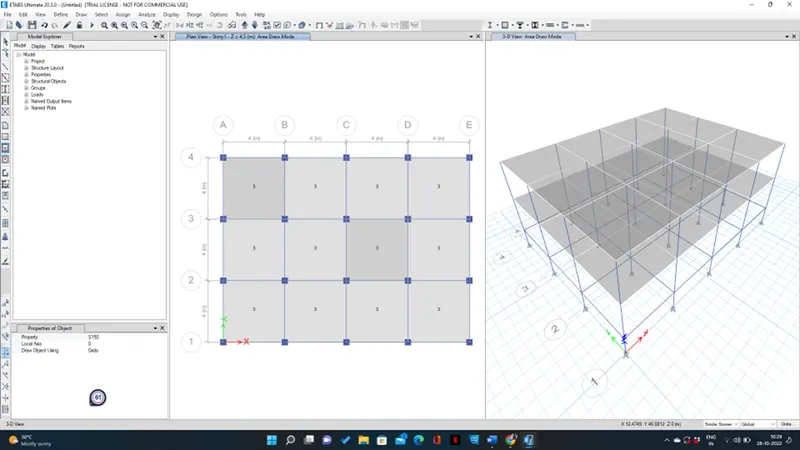
Step 19: Go to the assign tab and choose shell and select diaphragm
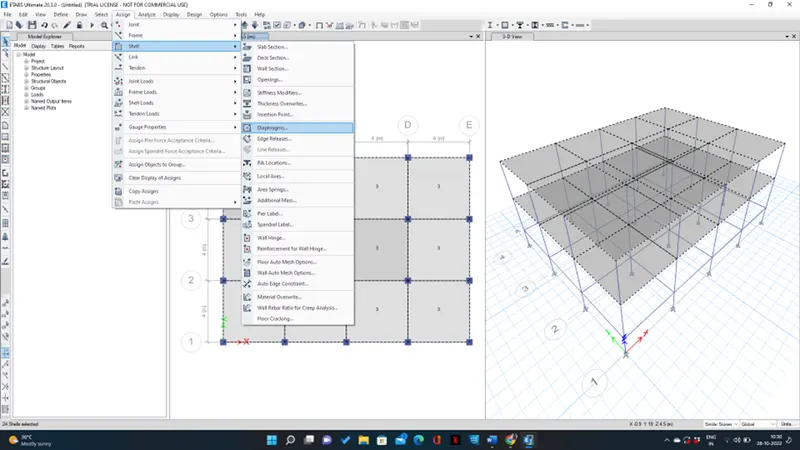
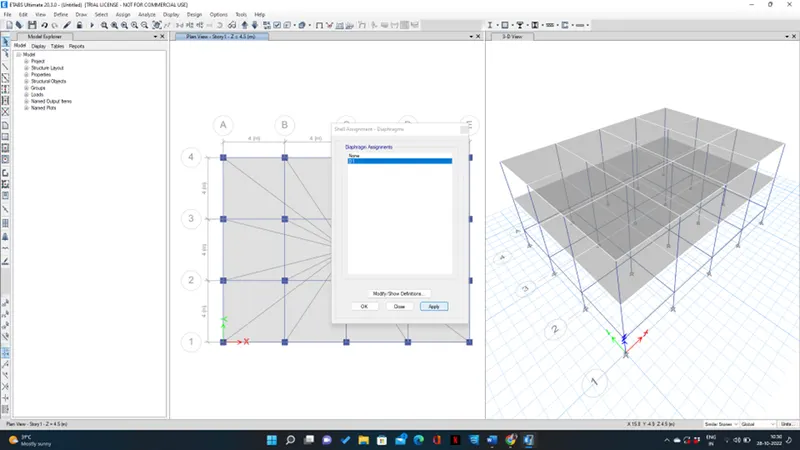
Step 20: Go to run analysis
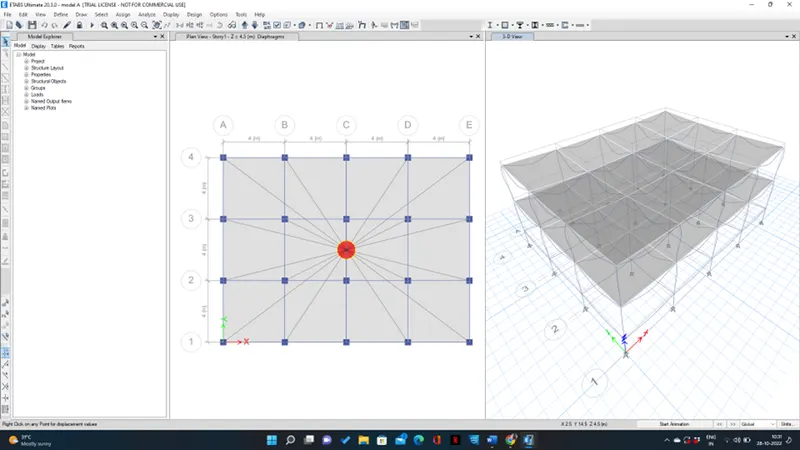
MODEL B
Step 1: Click the edit tab and edit story and add 5 story and make 1st story as master and all other as similar to 1st story and click ok
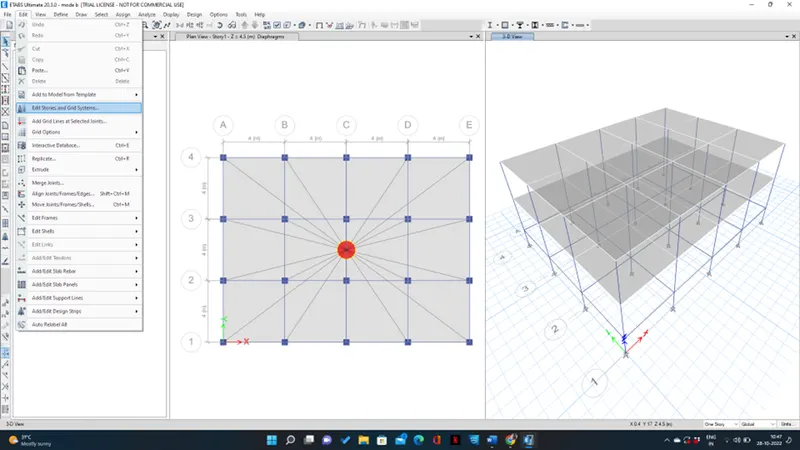
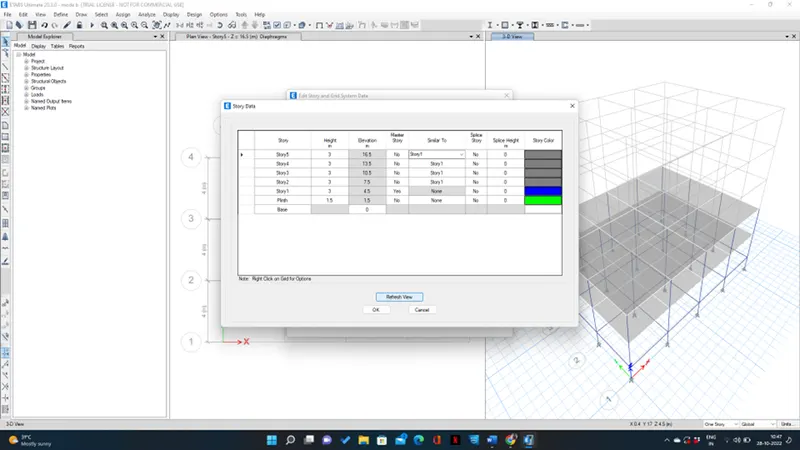
Step 2: Go to select tab and select the columns and go to assign tab and choose frame as 400x 400 dimension column and click ok
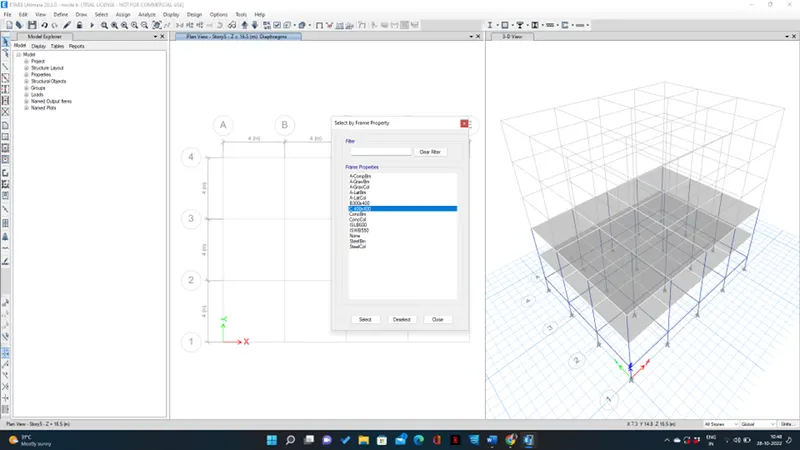
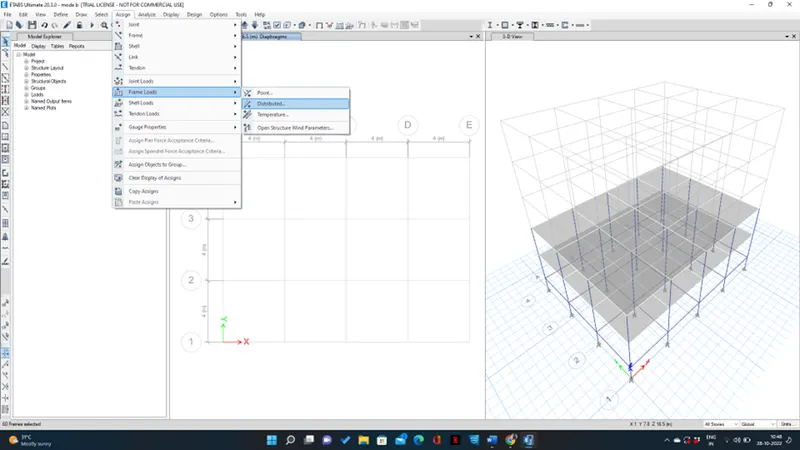
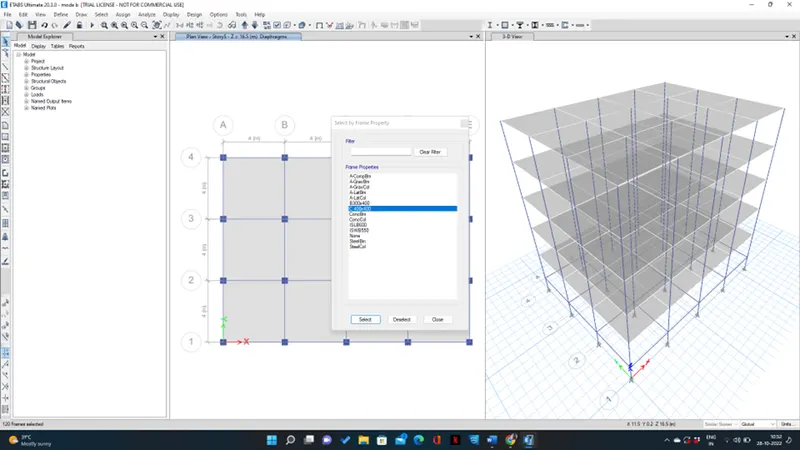
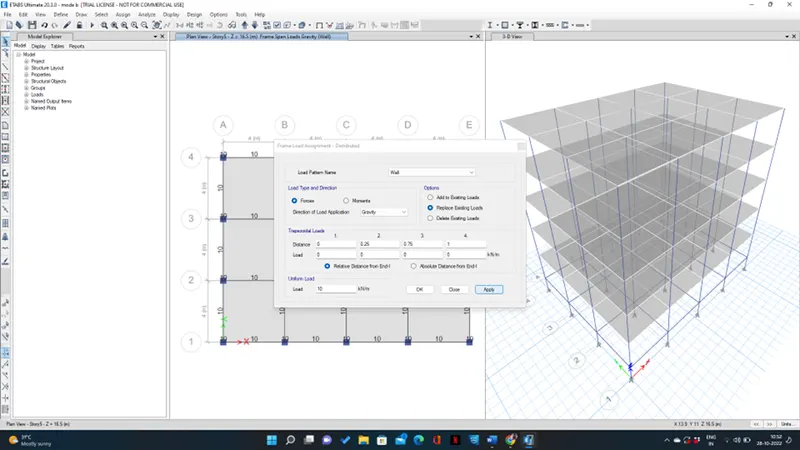
Step 3: Go to select tab and select the slab and go to assign tab and choose shell loads then uniform load
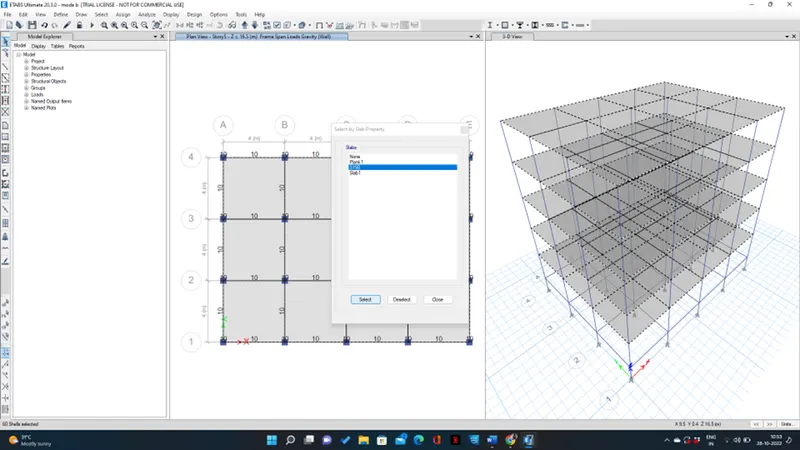
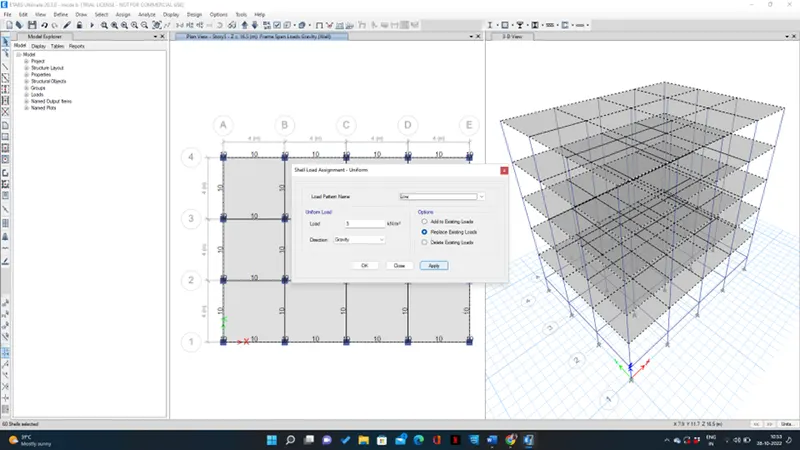
Step 4: Make live load and load pattern and input 3KN/sqm and brickwall load as 10kn/sqm and click ok
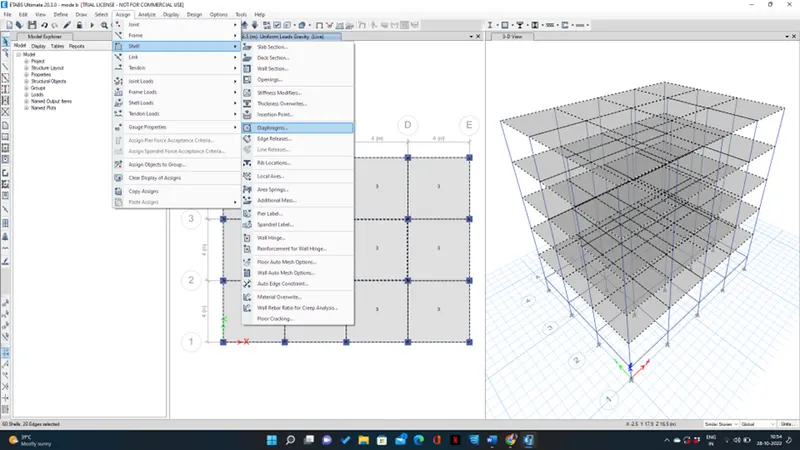
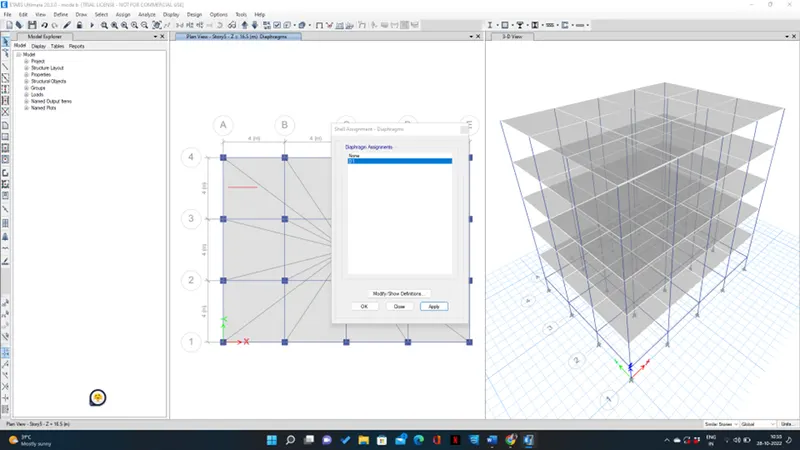
Step 5: Run analysis
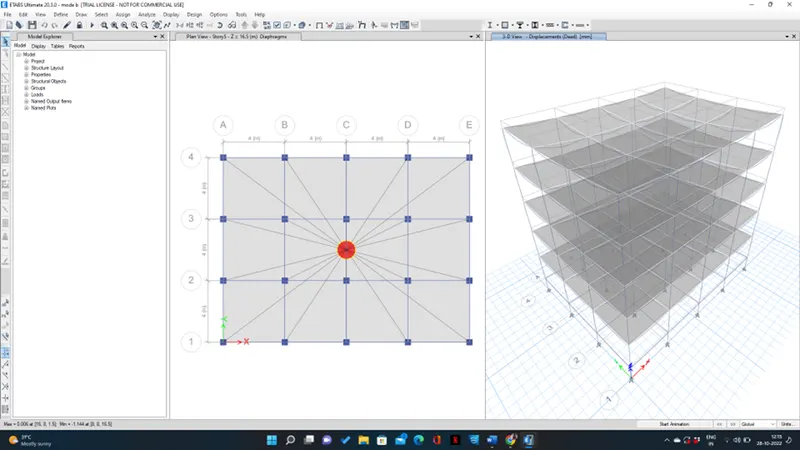
MODEL C
Step 1: Click the select tab and select the columns and choose assign and click frame as 550x300 and click ok
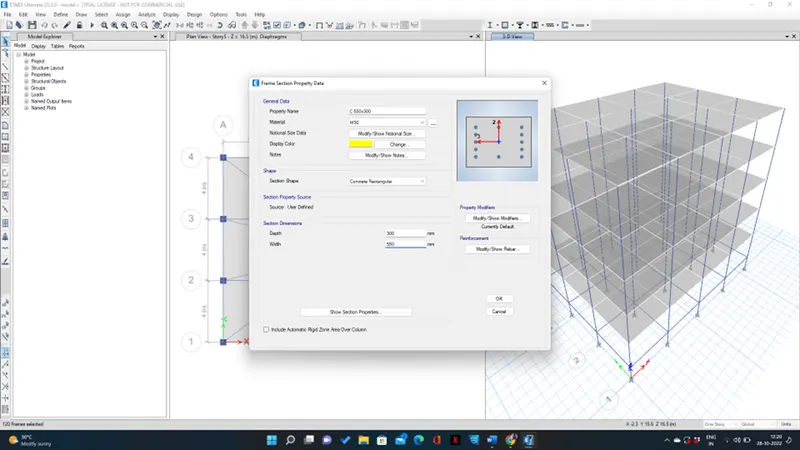
Step 2: Select the column object and go to assign tab and frame section then click local axes
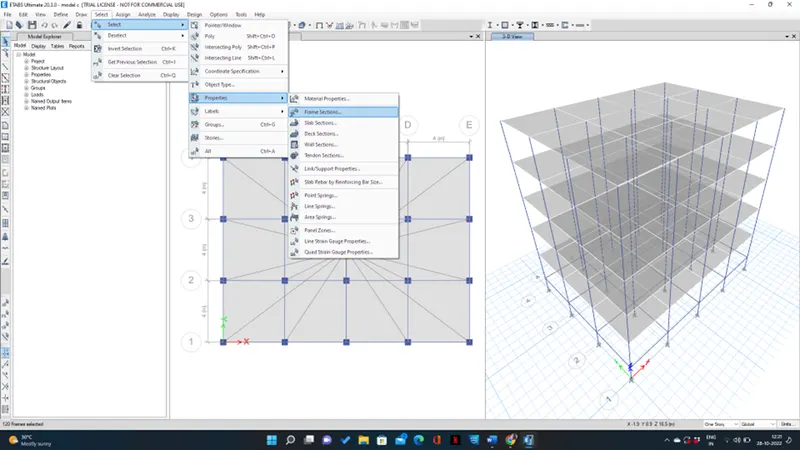
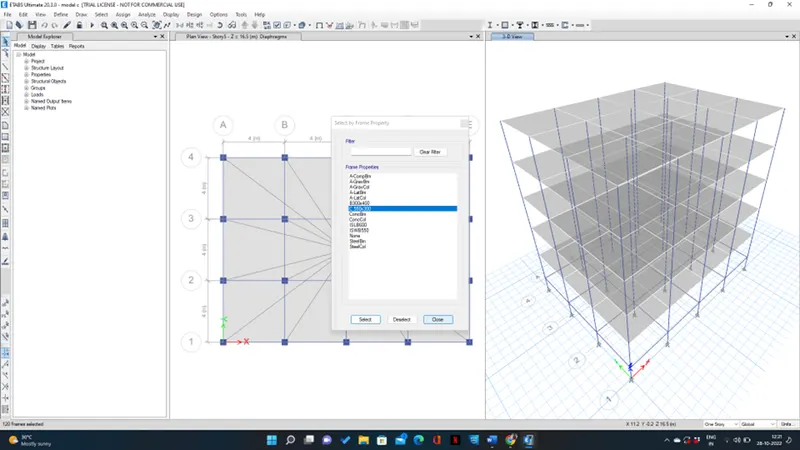
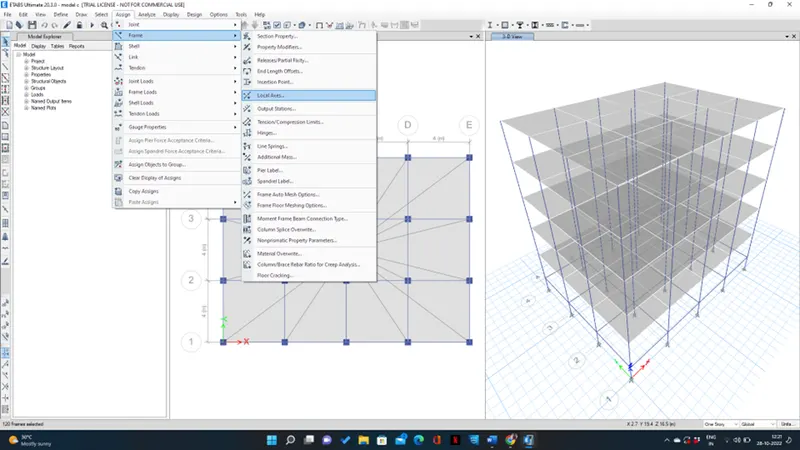
Step 3: Select rotation angle and enter the degree 90 and click ok
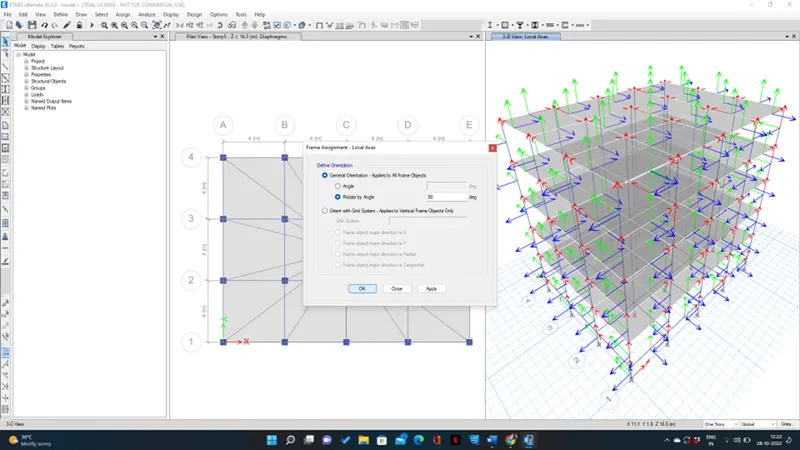
Step 4: Run analysis
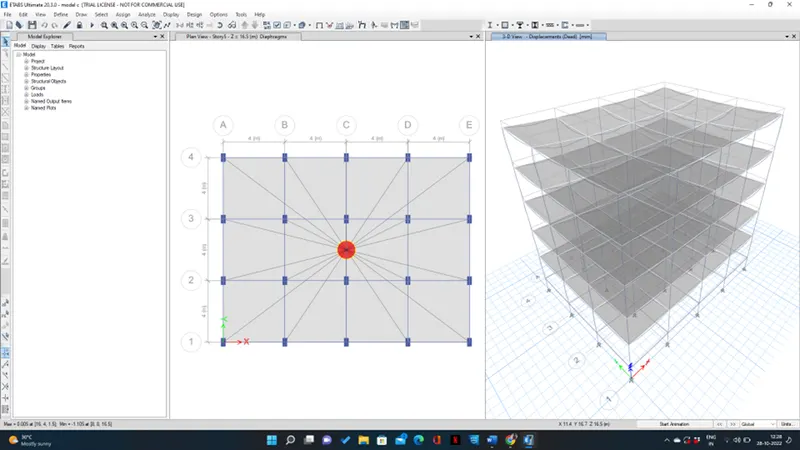
MODEL D
Step 1: Click the select tab and select the columns and choose assign and click frame as 550x300 and click ok
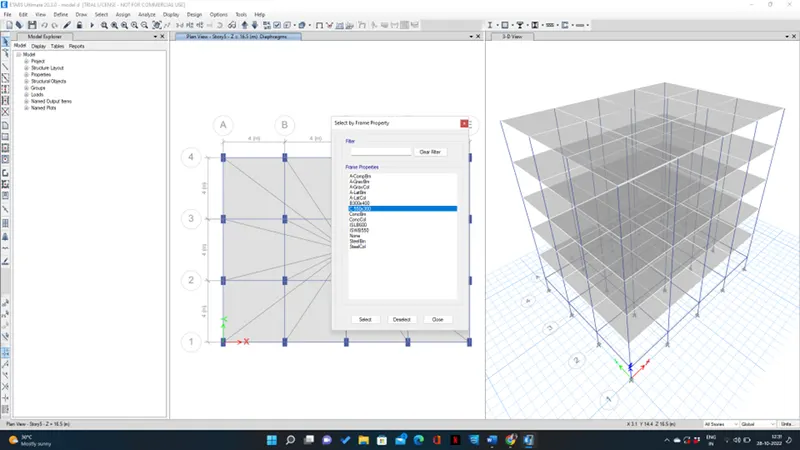
Step 2: Select the column object and go to assign tab and frame section then click local axes
Step 3: Select rotation angle and enter the degree 0 and click ok
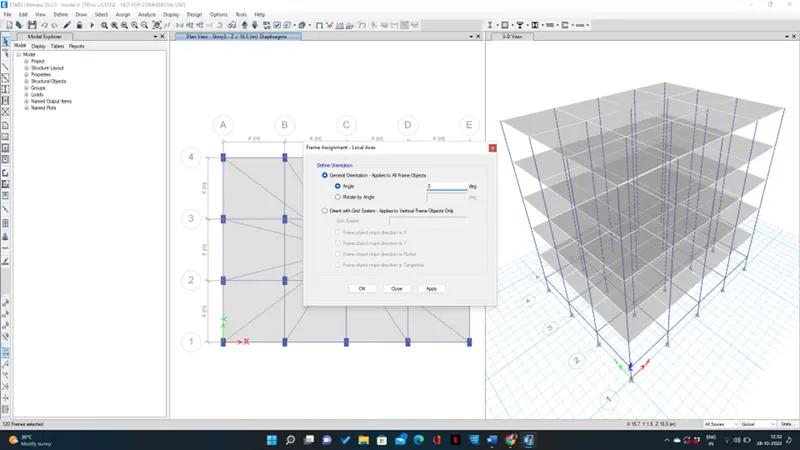
Step 4: Run analysis
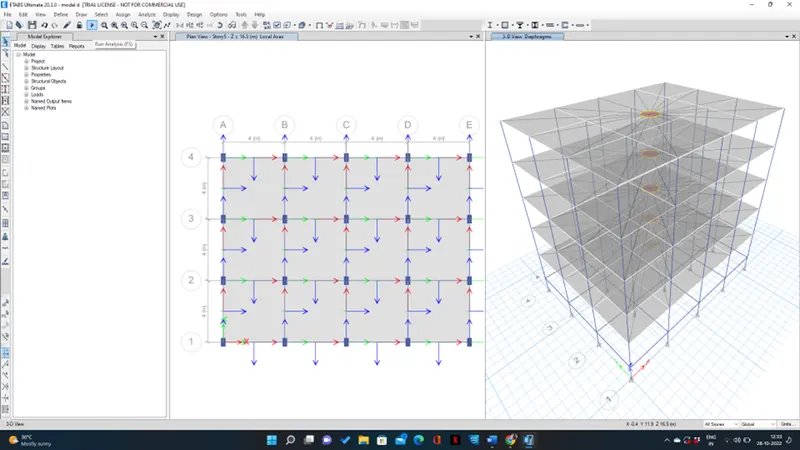
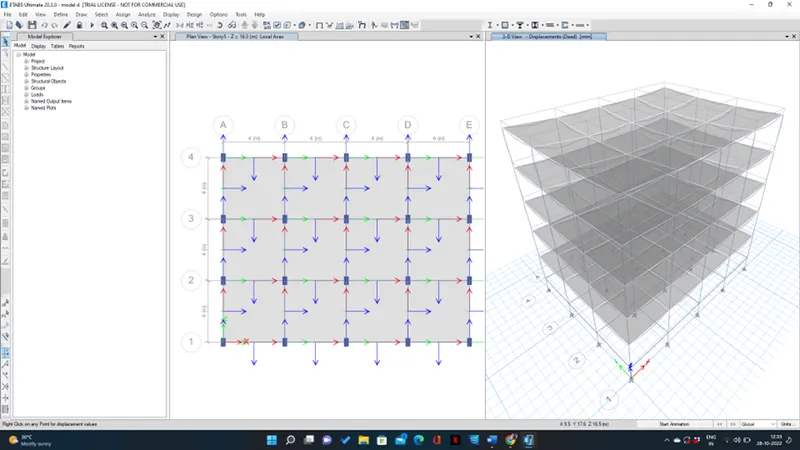
Model E
Step 1: Click the edit tab and edit story and add 10 story and make 1st story as master and all other as similar to 1st story and click ok
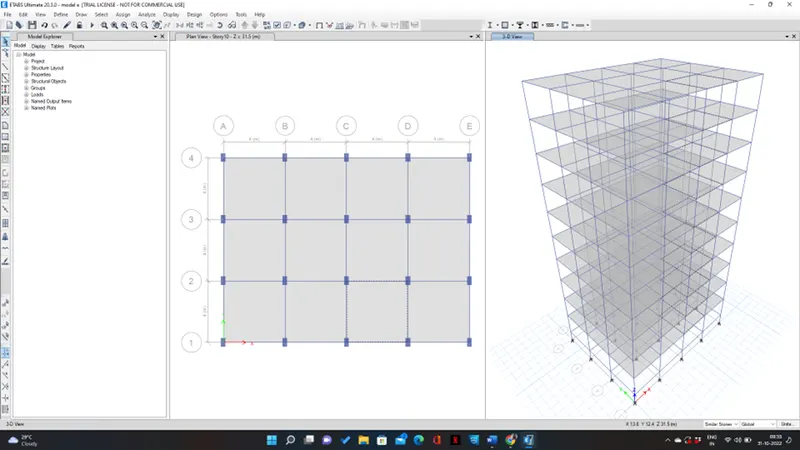
Step 2: Click the select tab and select the columns and choose assign and click frame as 600x600 and click ok ,then add new property and assign column with dimension 400x400
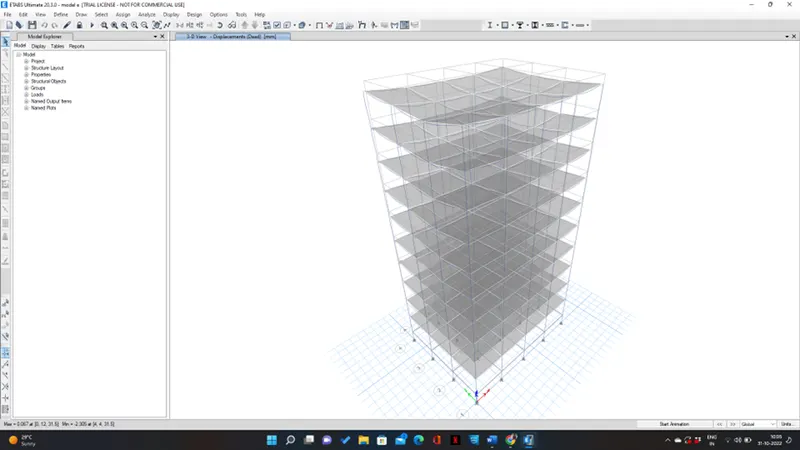
Step 3: unhide beams and floors and go to view tab and select set building view limit and set 6 to story 10
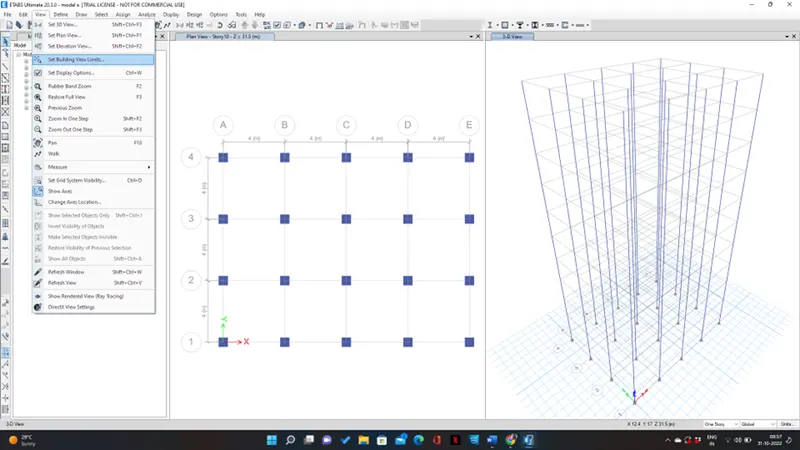
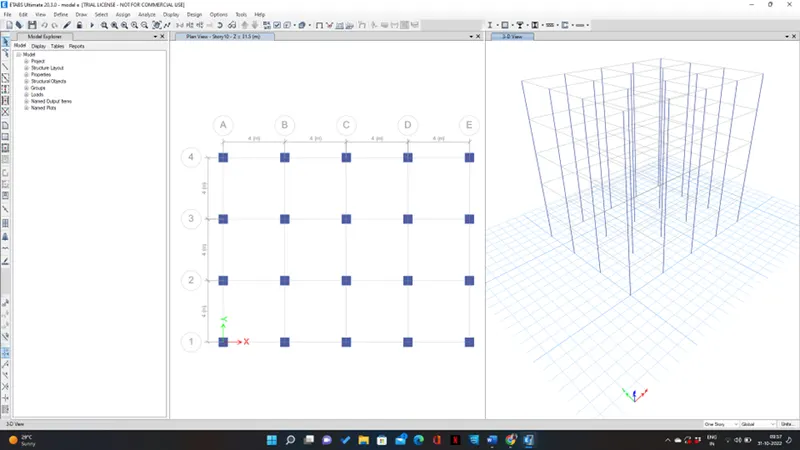
Step 4: Go to assign tab and frame and choose column 400x400 and click ok
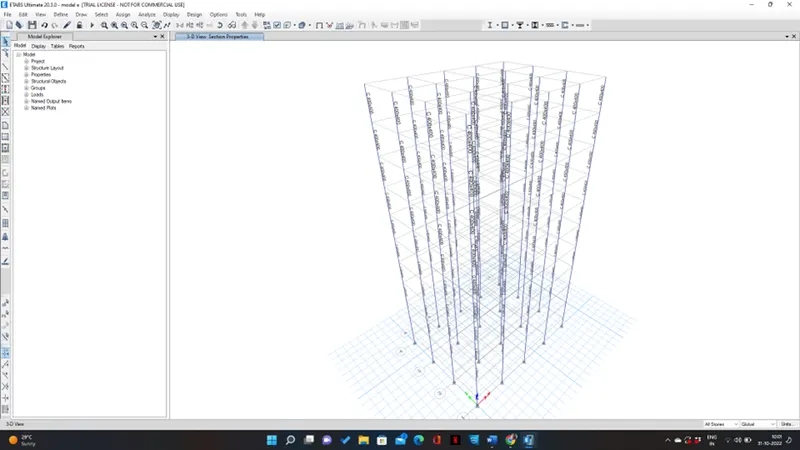
Step 5: Select the slab and go to assign and choose diaphgram
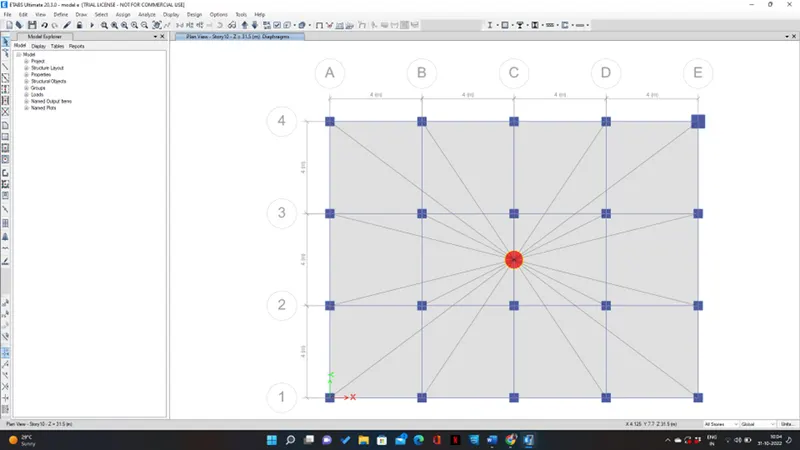
Step 6: Run analysis
Model F
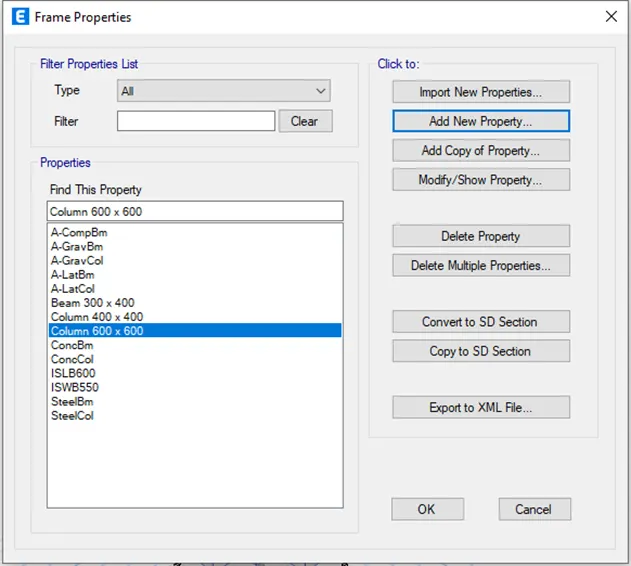
Step 1: Go to select tab and select the columns and assign tab and choose frame assignment as 600X 600 dimension column and click ok
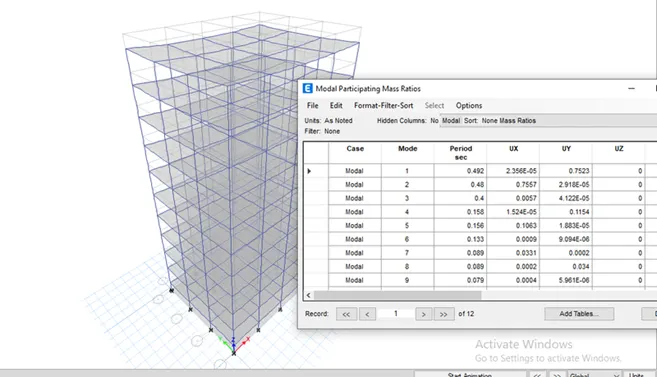
Step 2: Click display and choose show table option and select modal participating ration from structural output and click ok
Model G
Step 1: Click the edit tab and edit story and add 15story and make 1st story as master and all other as similar to 1st story and click ok
Step 2: Go to Define tab and select the column and edit the column sizes
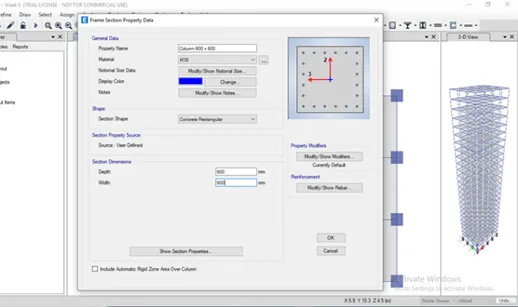
Step 3: Click the select tab and select the columns and choose assign and click frame as 600x600 and click ok ,then add new property and assign column with dimension 400x400
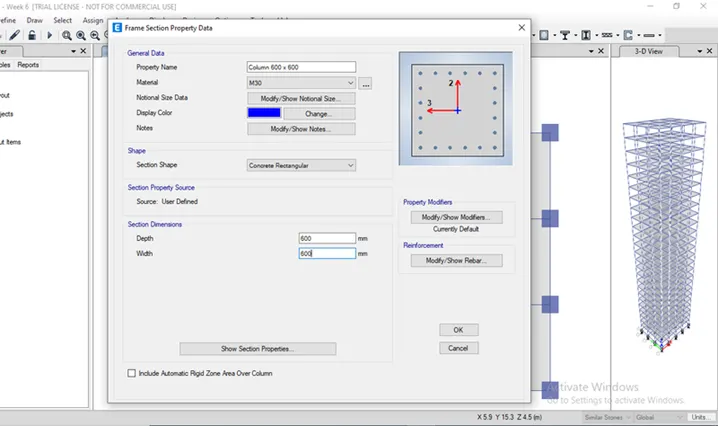
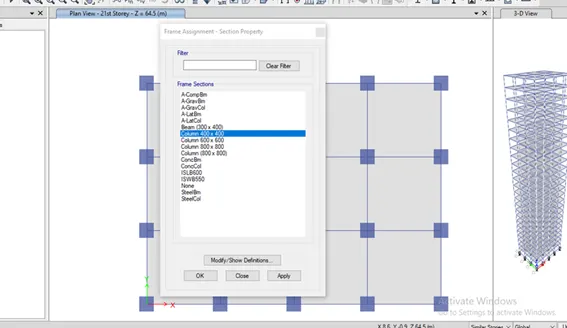
Step 4: Go to assign tab and frame and choose column of 21st story and choose assign tab and click frame assignment as 400x400 and click ok
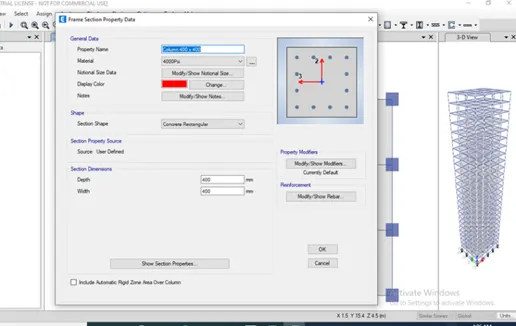
Step 5: Go to assign tab and choose column and choose assign tab and click frame assignment as 400x400 and click ok
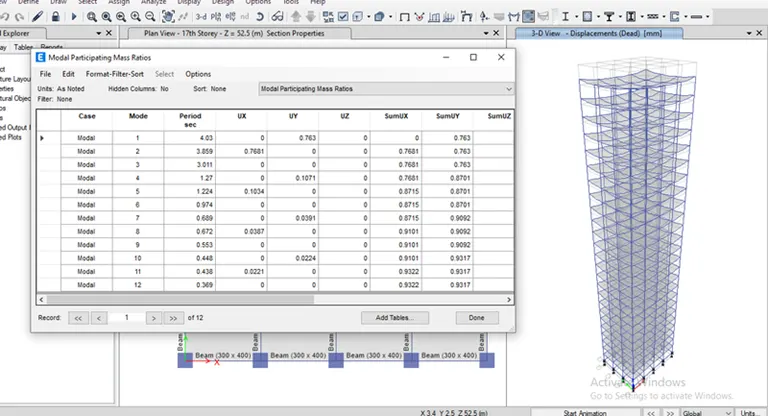
Step 6: After assigning each loads of each frame run the analysis and click display and choose the show table and select the modal participating ration from structural output and click ok
Model H
Step 1 : Go to define tab and choose section properties and add new property and choose rectangular and add new column with dimension of 800X 800 and click ok
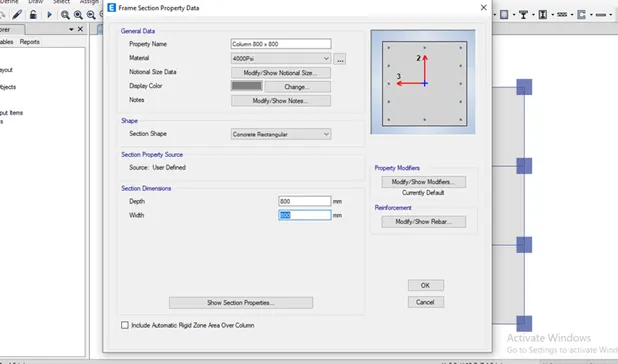
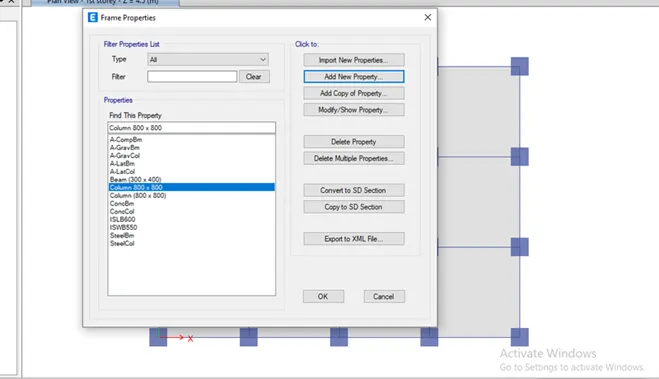
Step 2:Go to select tab and select the columns and click assign tan and choose frame assignment as 800X 800 dimension column and click ok
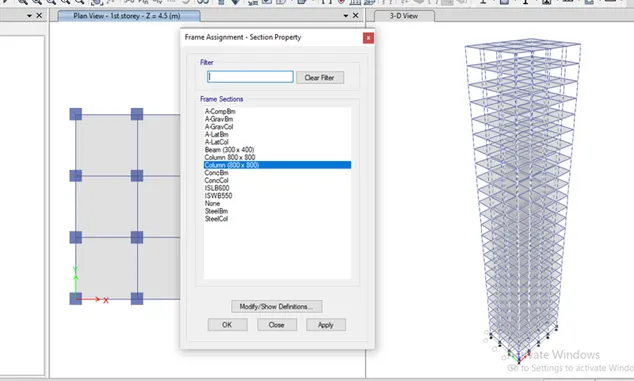
Step 3: After assigning each loads of each frame run the analysis and click display and choose the show table and select the modal participating ration from structural output and click ok
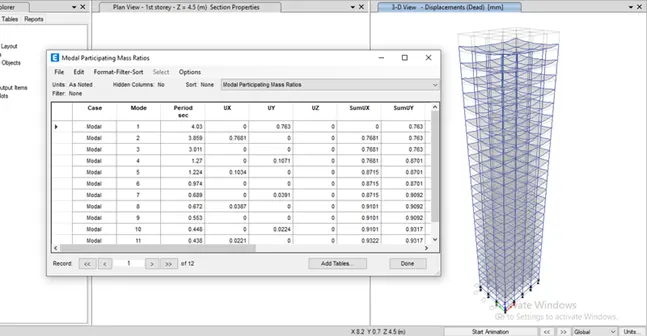
Model J
Step 1: Click the edit tab and edit story and add 25story and make 1st story as master and all other as similar to 1st story and click ok
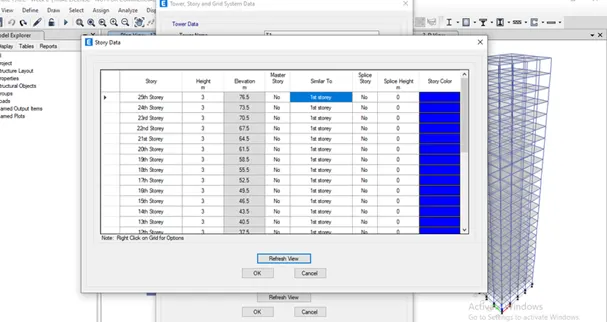
Step 2: Go to select tab and select the columns and assign tab and choose frame assignment as 800X 800 dimension column and click ok
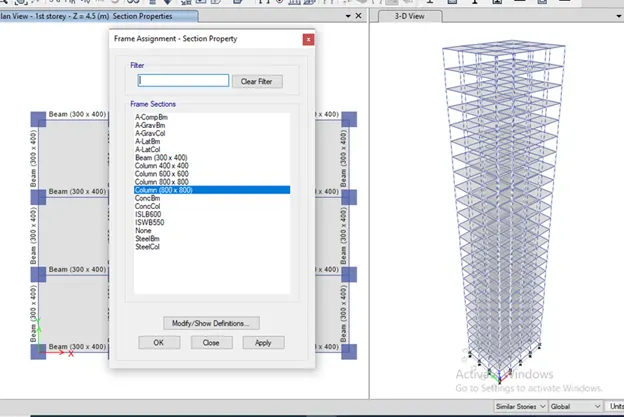
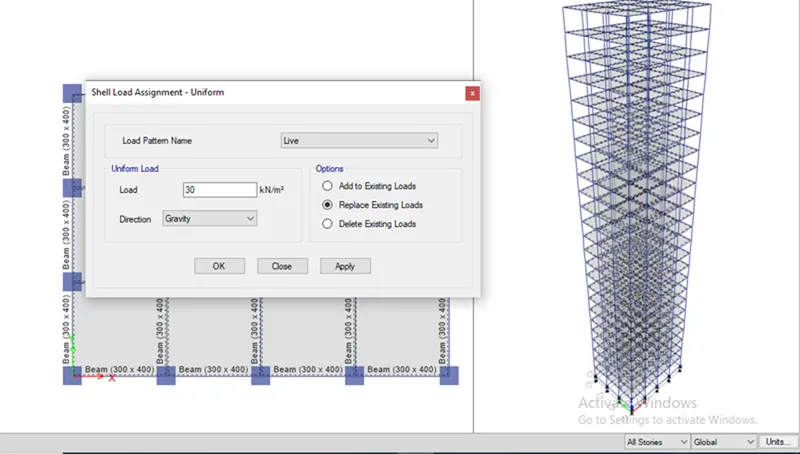
Step 3 :Go to select tab and assign the column dimension as 800X800 click the select tab and choose floors,choose shell loads then uniform load and make live load and load pattern input 30kn/sqm and click ok
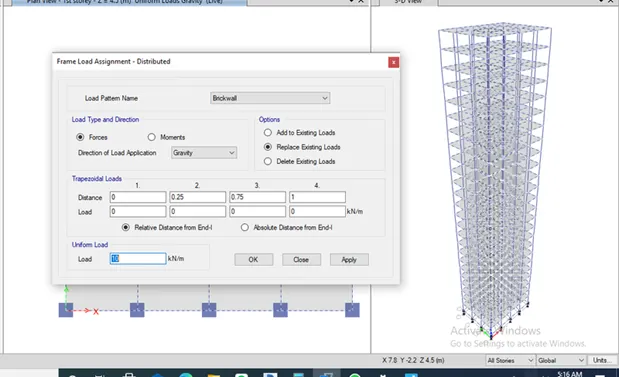
Step 4 : Go to select tab and choose beams and click the assign tab and choose frame loads and then distribute ,and make brick wall as input 10kn/sqm and click ok
Step 5: After assigning loads of each frame run the analysis
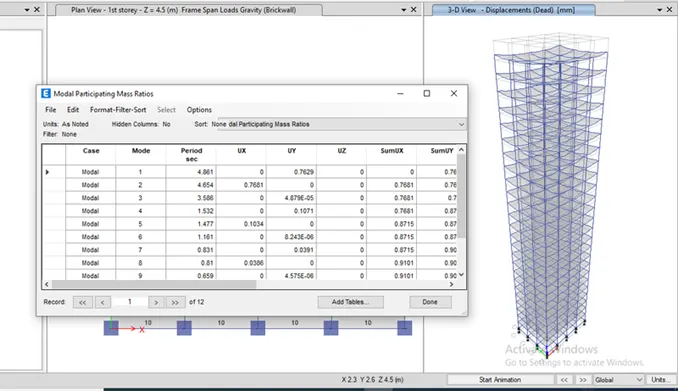
Model K
Step 1 :Go to select tab and assign the column dimension as 800X800 ,click the select tab and choose floors,choose shell loads then uniform load and make live load and load pattern input 60kn/sqm and click ok
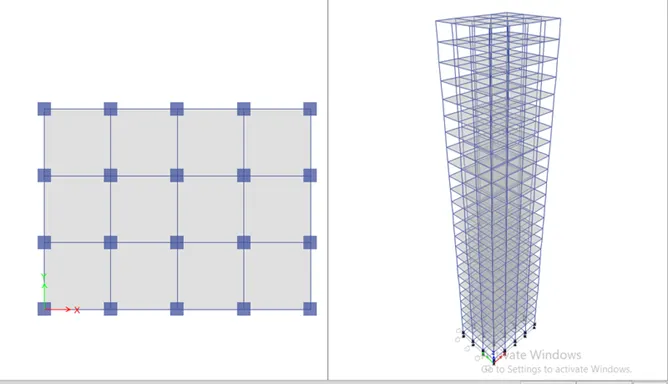
Step 2: After assigning each loads of each frame run the analysis and click display and choose the show table and select the modal participating ration from structural output and click ok
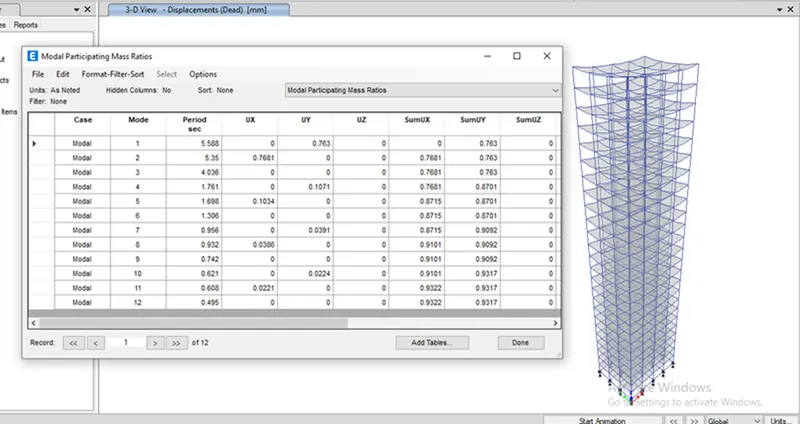
Comparison 1:
Aim : To compare fundamental natural periods of buildings H,J,K using ETABS
Conclusion :
- Building H,J,K are the same 25 story but the load increases gradually like 10% and 20% because of this building becomes more flexi due to an increase in weight
- Time period of H is 3.0,J is 3.411 and K is 4.036
Comparison 2:
Aim : To compare fundamental natural periods of buildings A,B,F using ETABS
Conclusion : Due to changing of building height the fundamental natural period varies gradually
- 89% at 0.39
- 83% at 0.911
F- 75% at 0.48
H- 78% at 3.811
Comparison 3:
Aim : To compare fundamental natural periods of buildings C,D using ETABS
Conclusion : Due to changing of orientation the fundamental natural period varies each building
- 91
- 04
B- 0.941
Comparison 4:
Aim : To compare fundamental natural periods of buildings E,G using ETABS
Conclusion: When comparing these building there is significant difference due to different column sizes.The fundamental period of building E is 0.36,F is 0.48,G is 3.85 and H is 3.01