Creating Levels, Grids, Layout and model elements for a residential unit using REVIT
Q1) It is a holistic process for creating and managing a big asset based on an intelligent model and enabled by a cloud platform.BIM integrates structured multidisciplinary data to produce their digital representation of an asset across its lifecycle from planning and designing to construction operations.BIM consists mainly 3d modeling concepts in addition to information database technology and interpolates software in a computer and environment, architecture, engineer, and contractor can be used to design and simulate its construction. So this technology helps the project team to generate a structured virtual model and all it into 3D and able to share all of its information to share each other. Building information modeling is a visual representation of the physical and functional characteristics of a facility from inception onwards. As such, it serves as a shared information repository collaboration throughout a facility’s life cycle.
Features :
- Easy access to information: In both physical representation and functional characteristics in the building process that provides very minute details of the project.
- Making the process more expressive: CADD process allows the user to work only in 3D but BIM provides work in 5D
- Comprehensive view of the project: BIM doesn’t provide not only a 3D structure but also a more comprehensive overview of the entire building.it provides all components of the process from geographic aspects to spatial relationships from light analysis to various provisions of topographical information
Benefits :
- Complete representation
- Instant updates
- Time constraint
- Resource tracking
Q2) Aim: To insert the category, family, type, and element in the Revit model
Category: It is one of the Revit element hierarchies. It controls the Revit element organization. Visibility, Graphical representation, and scheduling option of the family within the project.
Family: Group of 2D or 3D information that serves to represent a discrete building or documentation element in the project. it defines parametrical, graphical, and documentation required also.
Type: Specific representation in the family is defined by distinct parametrical, graphical, and documentation characters make from unit type in the family.
Element/Instances: Individual representation of a type in the project in the unit distinct parametrical, graphical, and documentation character which makes from the unit from other instances in the project.
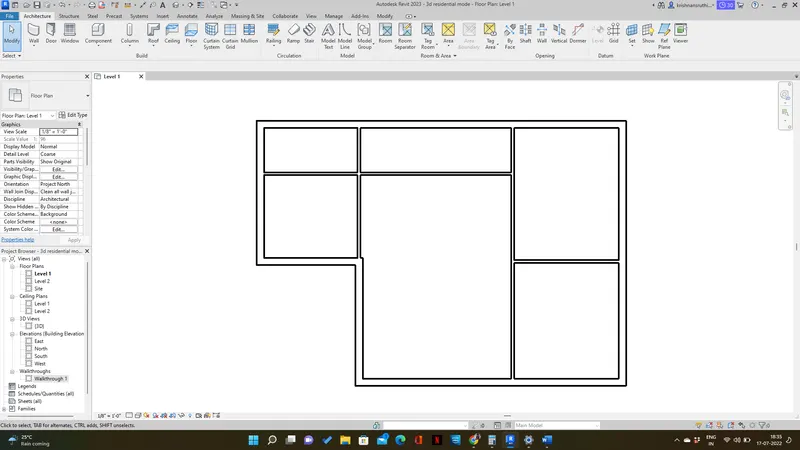
Step 1: Set up a REVIT model
Step 2: Select Insert from the menu bar and load the family
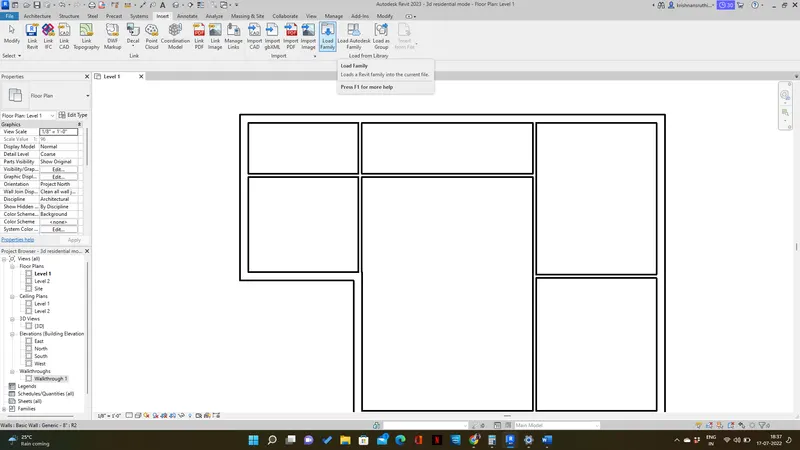
OR
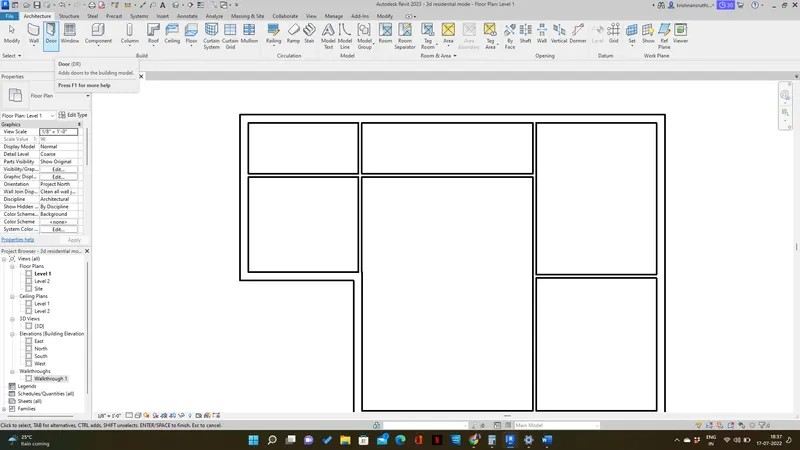
Step 2: Select the architecture tab and click the door
Step 3:A ribbon tab appears and select load family and select the US
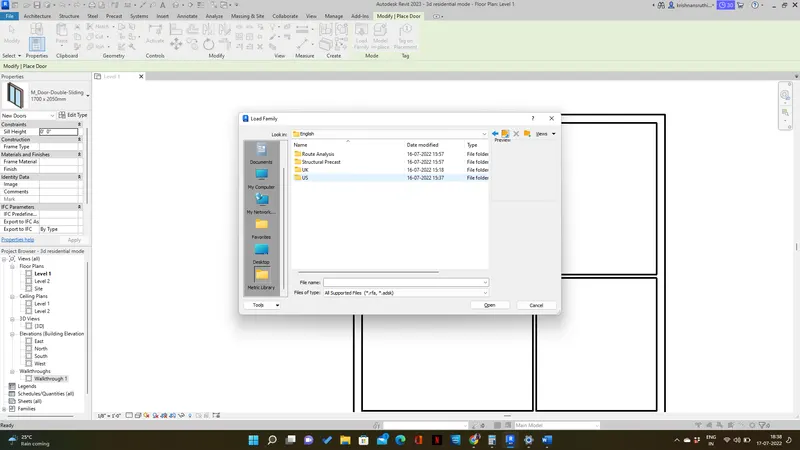
Step 4: Select the door from the category
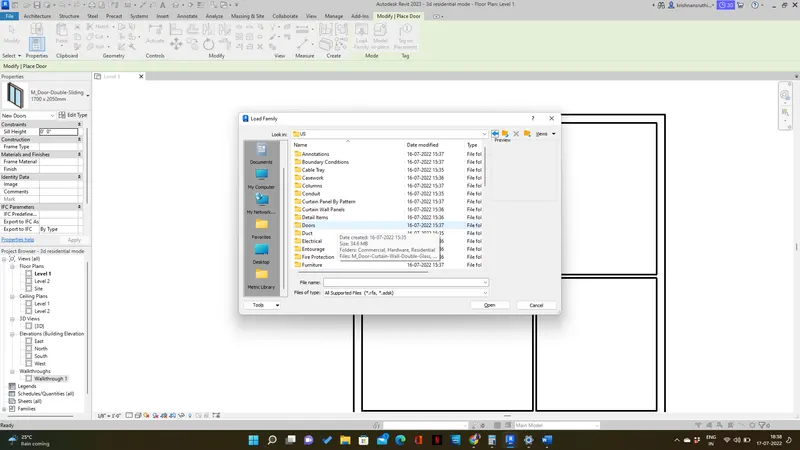
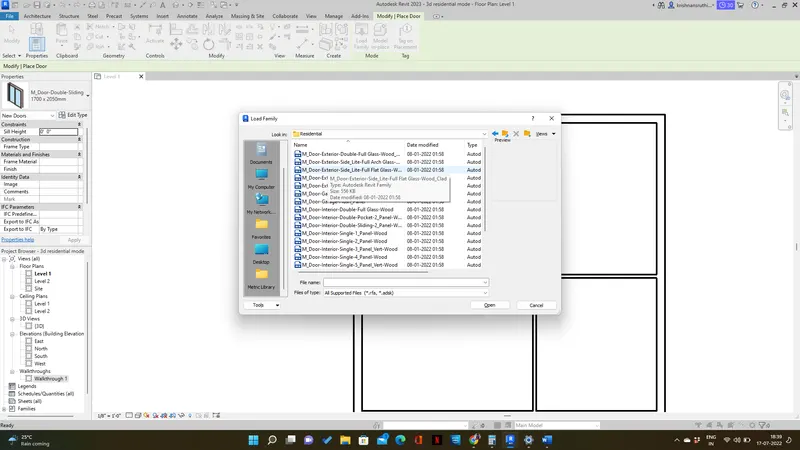
Step 5:Select family as Residential and pick any specification and click open
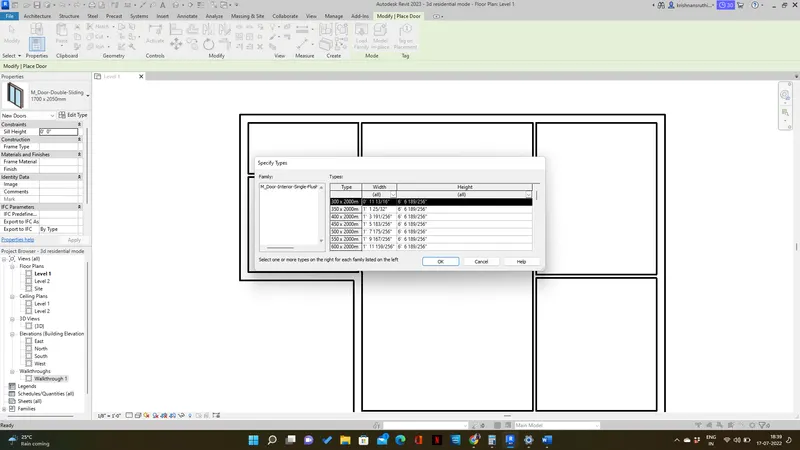
Step 6: Choose the size of the door and ok
Step 7: Place the door where we want a door
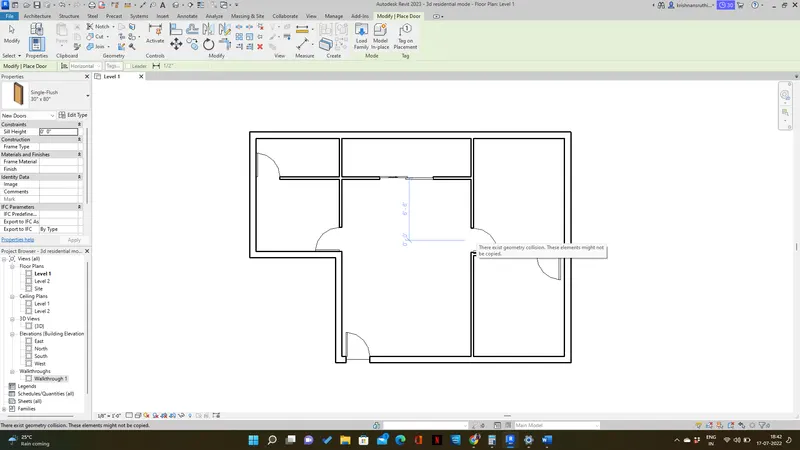
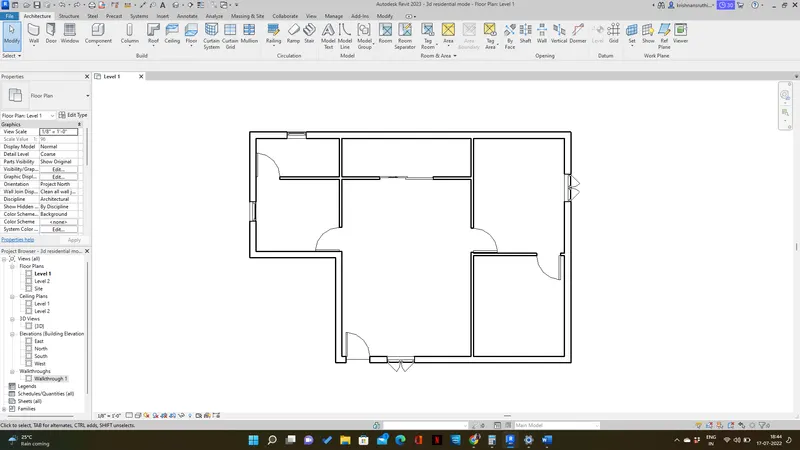
Result : Placed the doors,windows etc..using category,family,elements
Q3) Aim: To set up a project and save it with an appropriate name and enter its project information using the manage tab and set a maximum backup
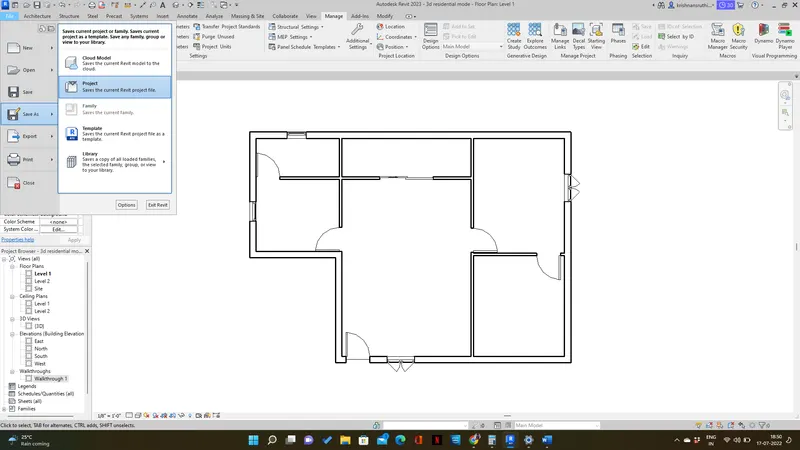
Step 1: Click the file and go to Save As and then project
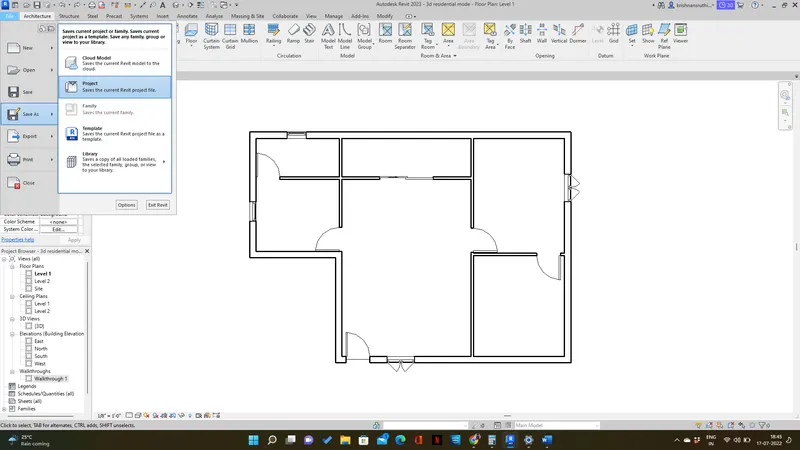
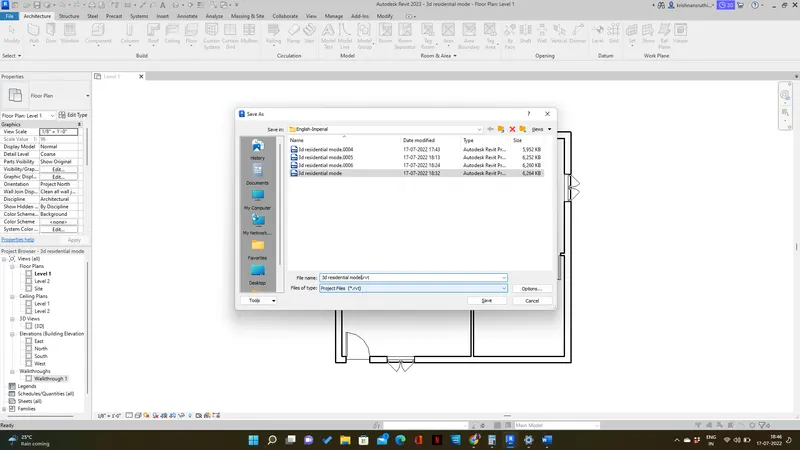
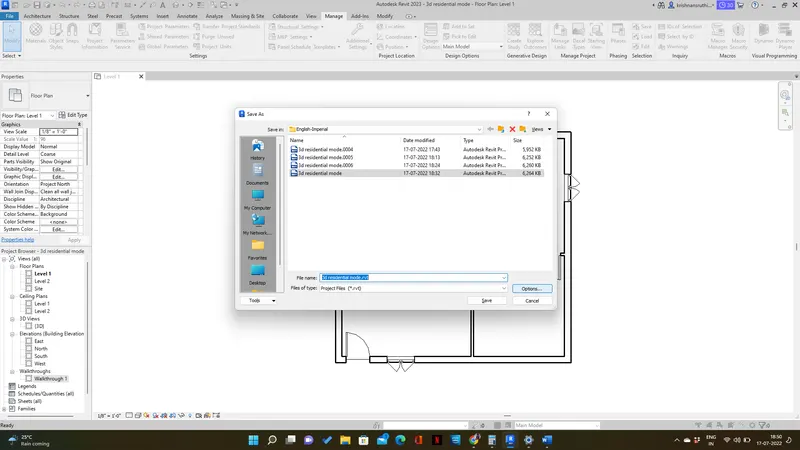
Step 2: Dialog box will appear and give the appropriate name click save
Step 3: Go to the Manage tab and select project information
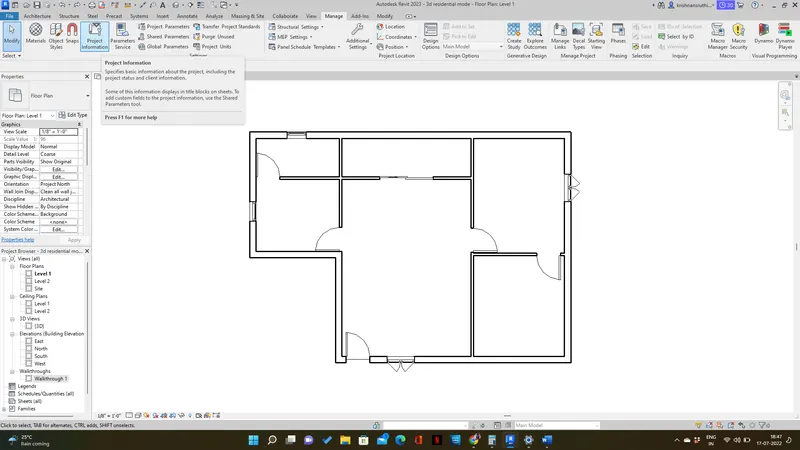
Step 4: Edit the details in the dialog box and click ok
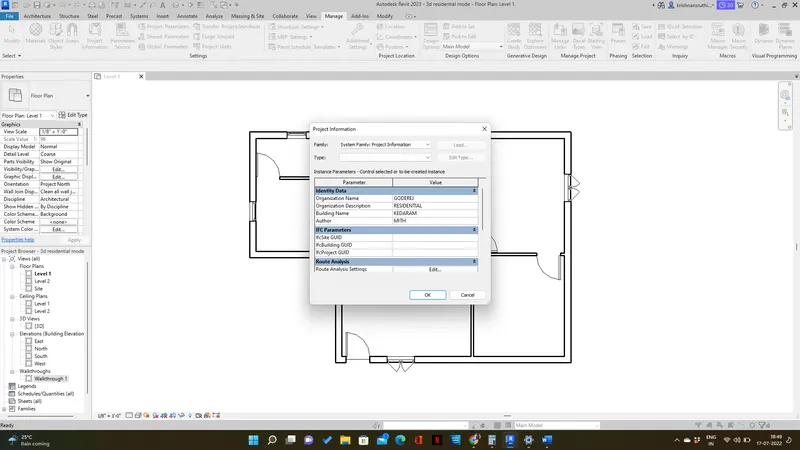
Step 5: Click the file and go to Save As
Step 6: A dialog box will appear select options
Step 7: Change the backup to 8
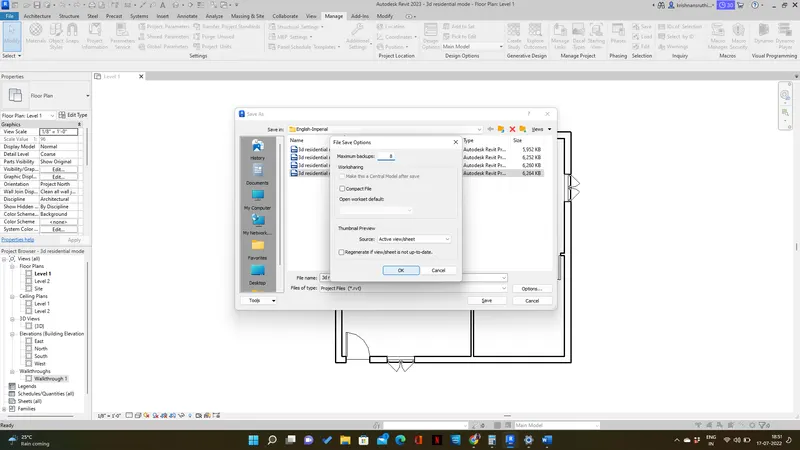
Result: Set up a project and save it with an appropriate name and enter its project information using the manage tab and set a backup
Q4)Aim: To create a level on the ground floor at 0' and the first floor at 10', the second floor at 20' and the roof at 30' and create grids transversely and longitudinal and give proper namings
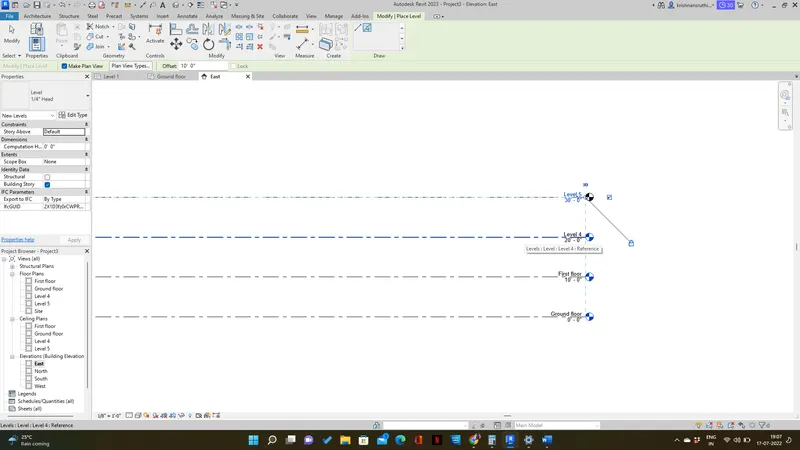
Step 1: In the project browser select elevation view,2 existing levels are there
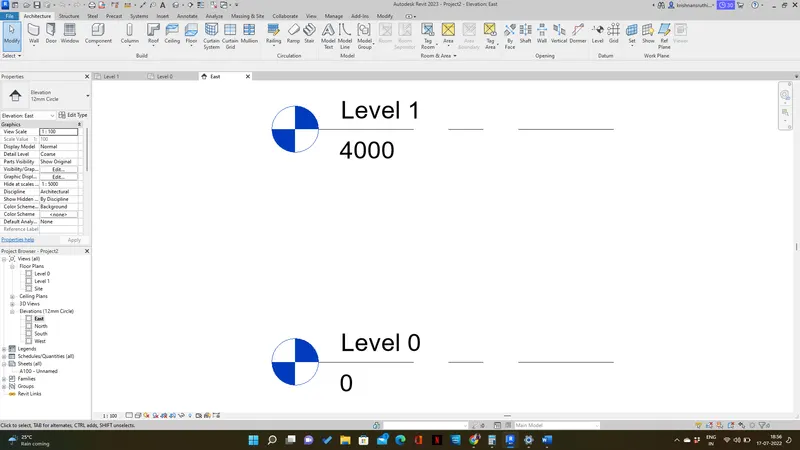
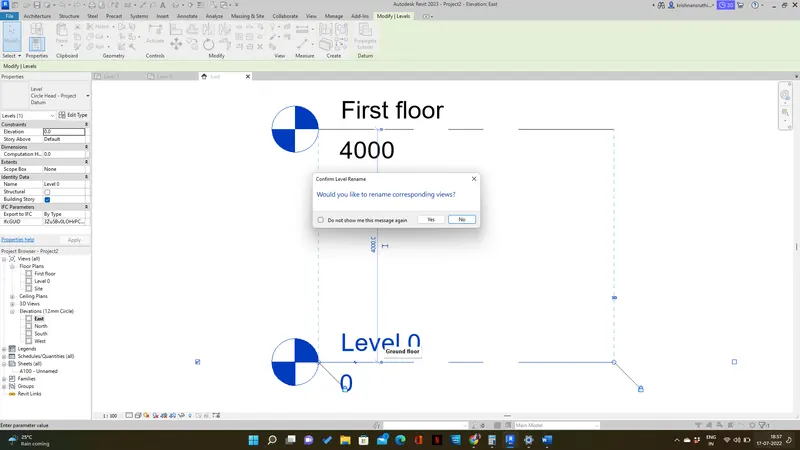
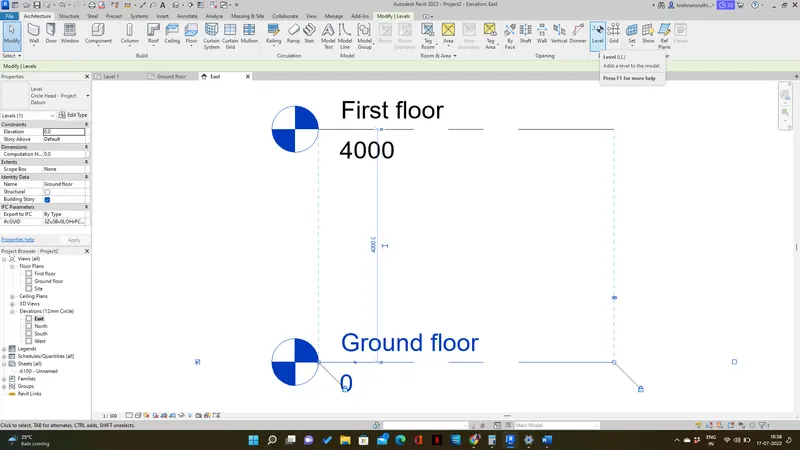
Step 2: Change the name by clicking the level names
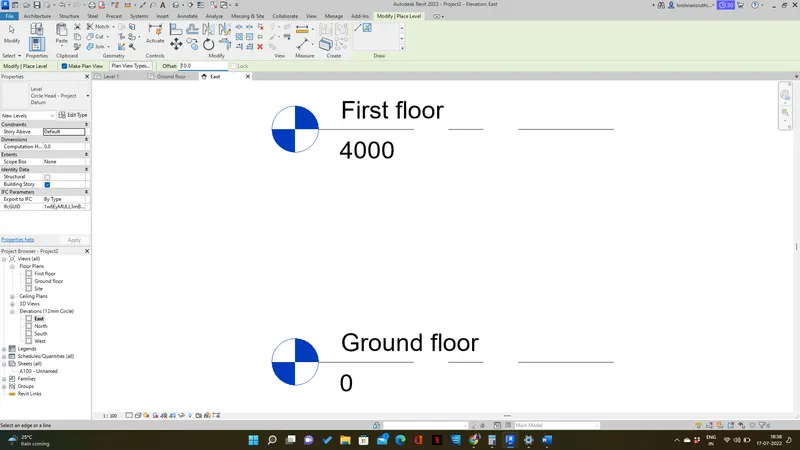
Step 3: Go to the architecture tab and select level
Step 4: Select pick line and provide offset as 10’
Step 5: Click at the existing level and then draw up to the roof with an offset 10’
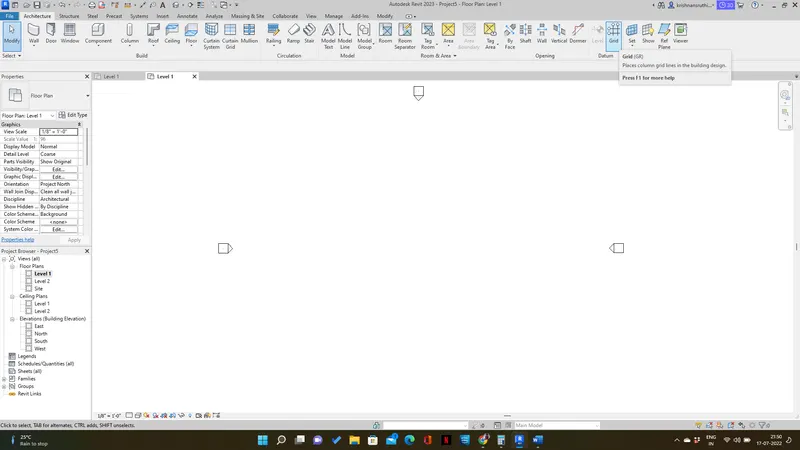
Step 6: Go to the architecture tab and select grid
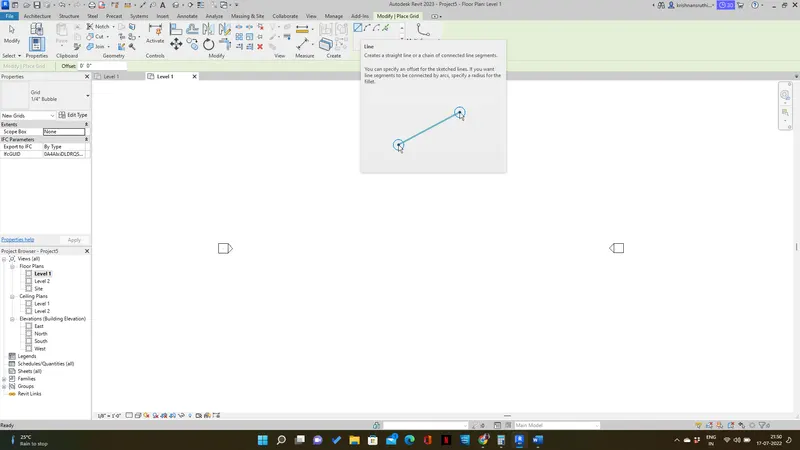
Step 7: Select line or pick line or arch
Step 8: Select the line option and draw
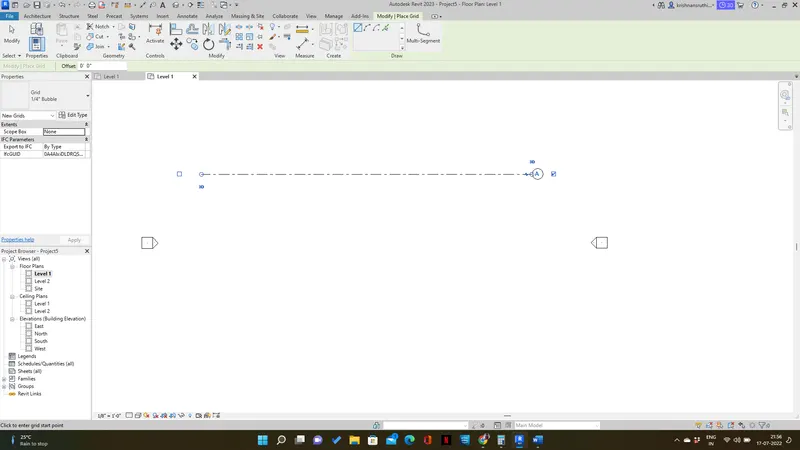
Step 9: Select the pick line option and edit offset at 10’
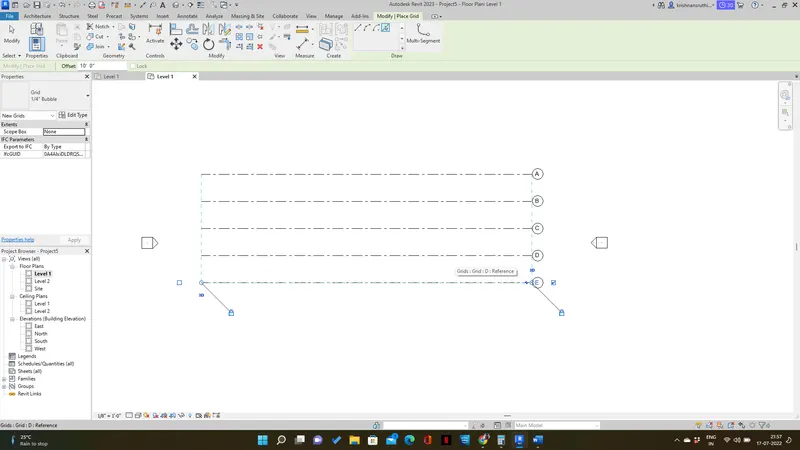
Step 10: Then draw A,B,C,D,E
Step 11: Go to the architecture tab and select grid
Step 12: Select line or pick line or arch
Step 13: Select the line option and draw
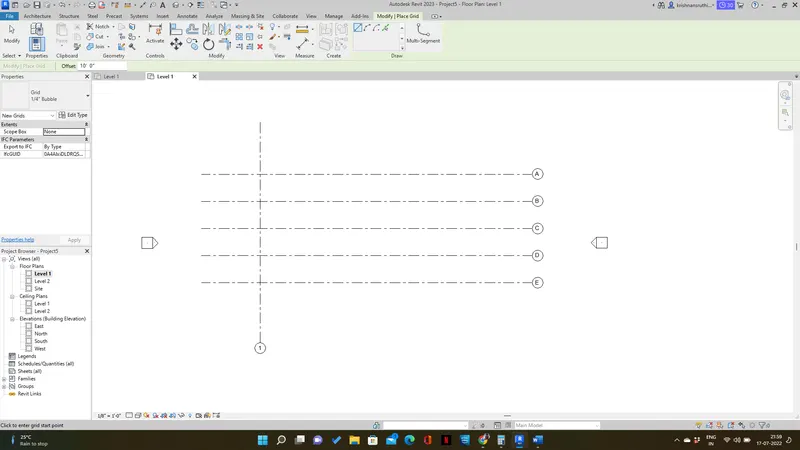
Step 14: Select the pick line option and edit offset at 20’
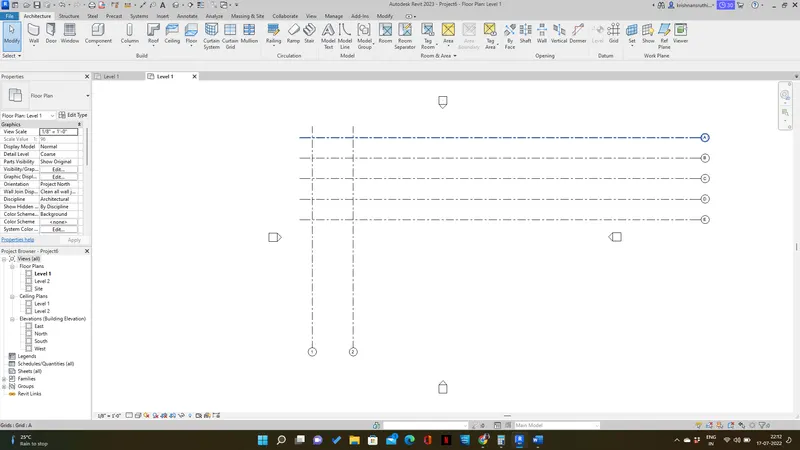
Step 15: Then draw 1 to 10
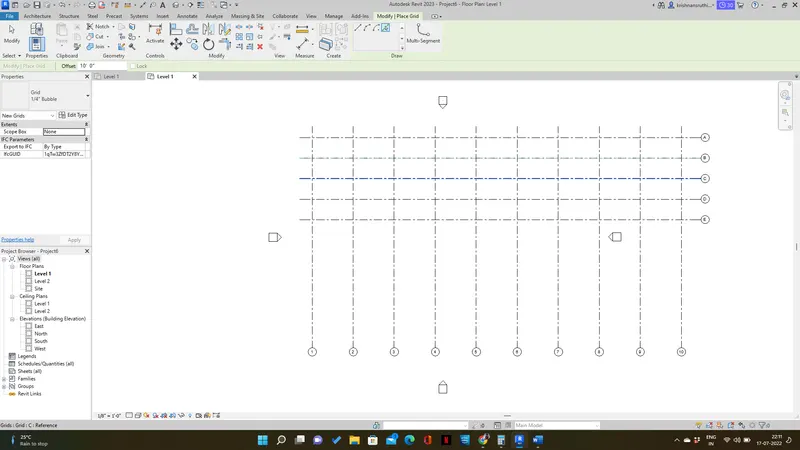
RESULT: Successfully created levels and grids
Q5)Aim: To create a conceptual residential layout
Procedure :
Step 1: Go to the architecture tab and select wall
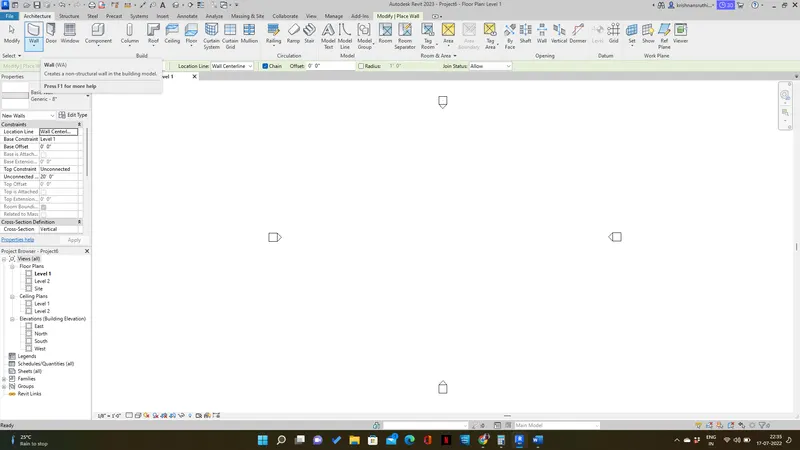
Step 2:select wall architecture
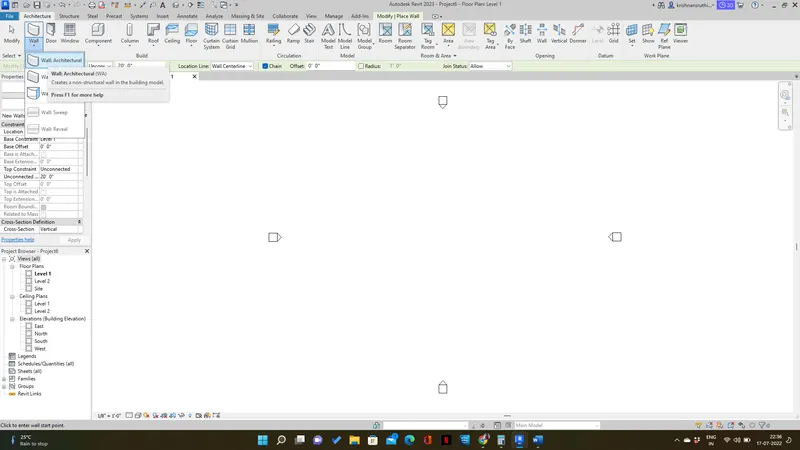
Step 3:Draw the desired wall layout
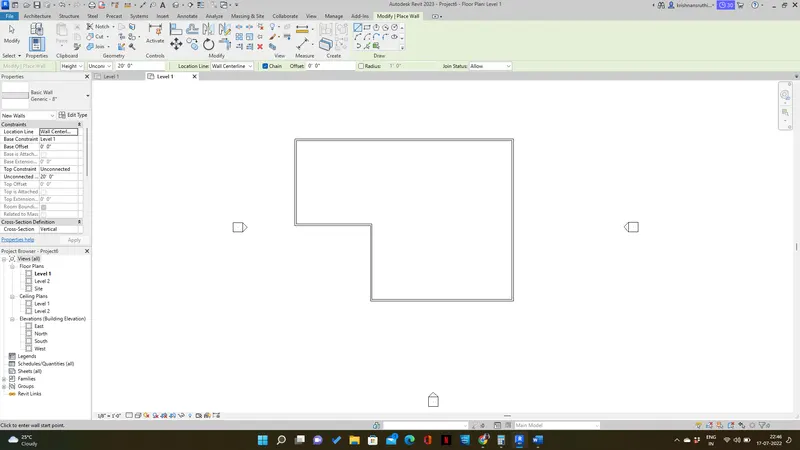
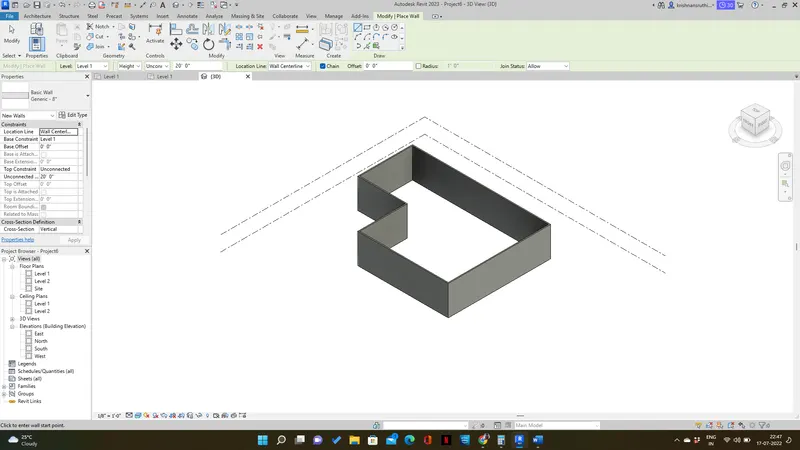
Result: Created residential unit layout
Q6) Aim: In the layout created draft the level of details you are planning to include-Dimensions of room, components you plan to add to the residential unit
Introduction: Dimensioning each object is a necessary thing for that in rivet there is an annotate toolbar.
Using the linear or aligned option in the toolbar we can annotate the layout
Procedure
Step1:add interior wall by using the property browser to change the wall specification
Step 2: Select annotate from the menu toolbar
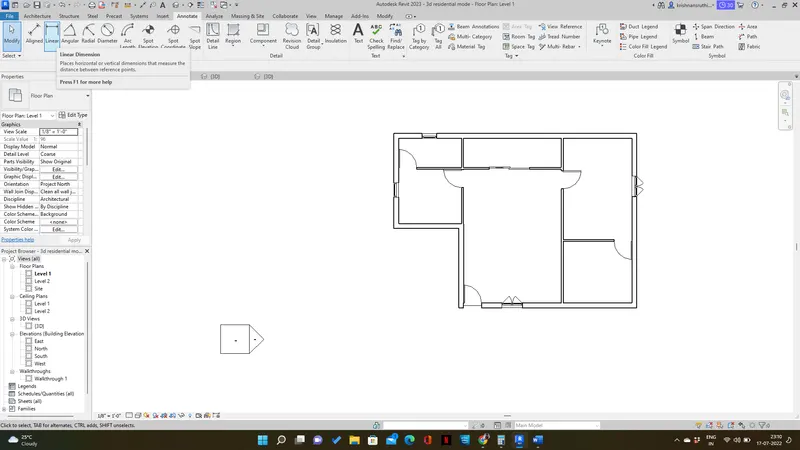
Step 2: Pick the corner of the wall and click enter.
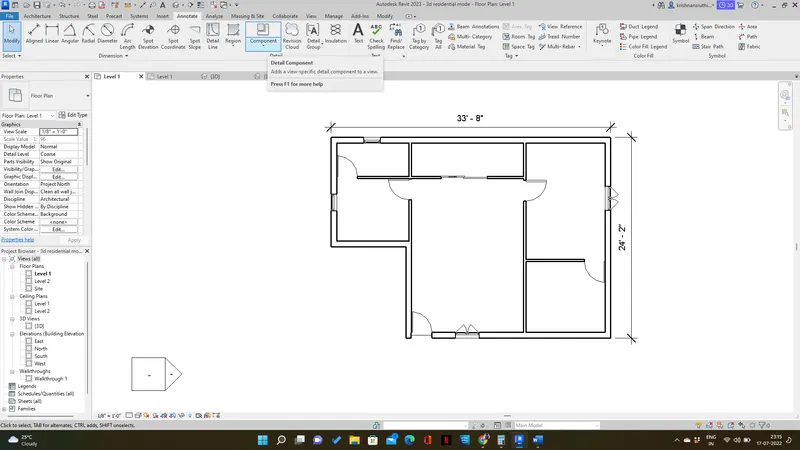
Result: Annotated each wall using the annotation tab
Q7)Aim: To insert the residential elements such as doors, windows, tables, chairs, couches, etc.
Procedure:
Step 1: Set up a REVIT model
Step 2: Select the architecture tab and click the door
Step 3:A ribbon tab appears and select load family and select the US
Step 4: Select the door from the category
Step 5:Select family as Residential and pick any specification and click open
Step 6: Choose the size of the door and ok
Step 7: Place the door where we want a door
Step 8:select furniture from the tab
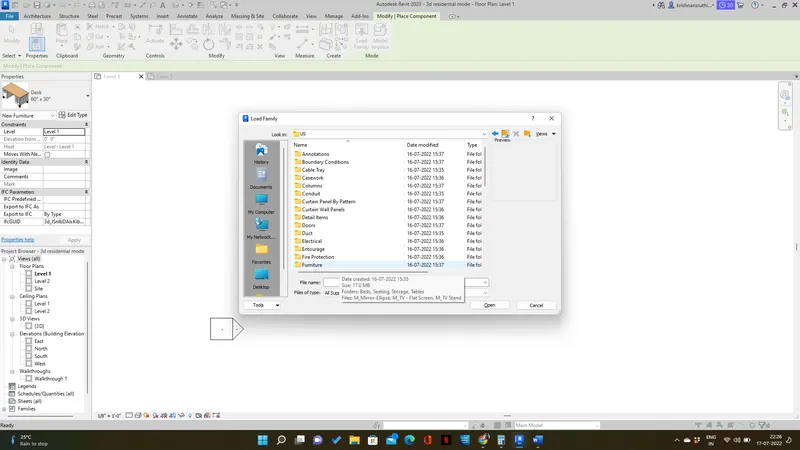
Step 9: select the bed /couch/table etc and place it where we want.
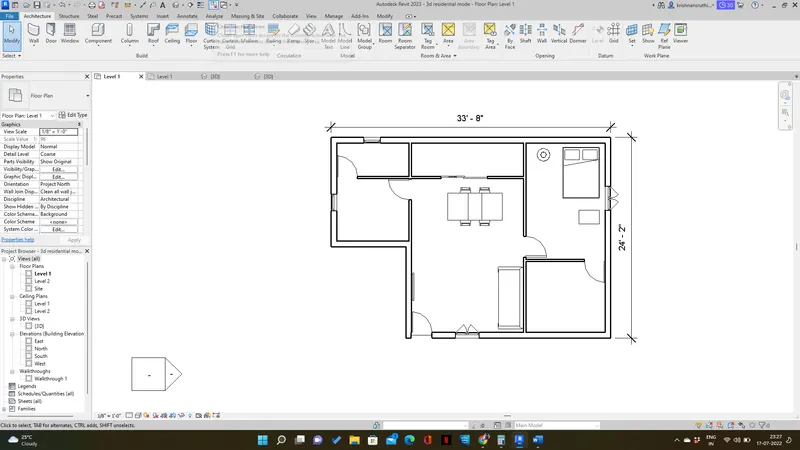
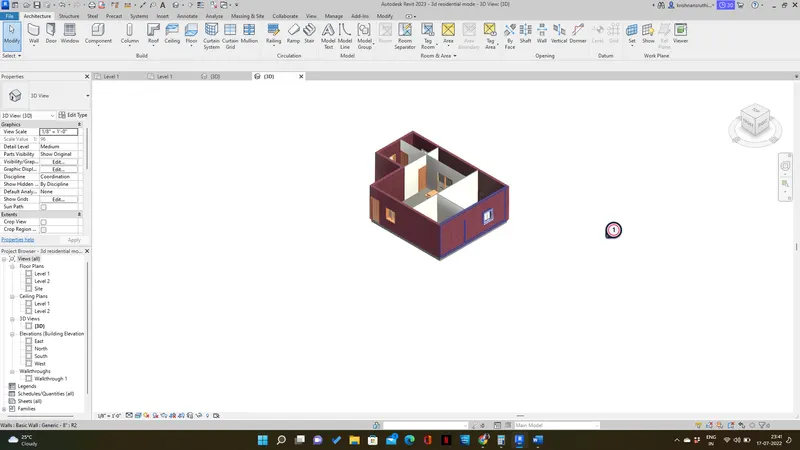
Result: The residential model elements inserted successfully