Project 1 - 2D meshing on the instrumental Panel
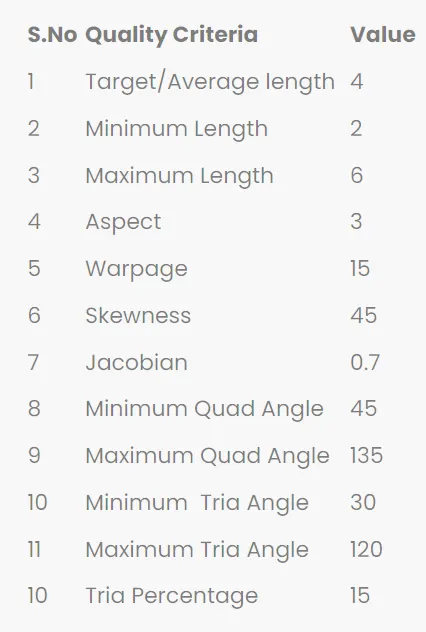
Aim: For the given component, check for the geometrical errors and mesh with the given element's Quality criteria. After meshing the component the thickness has to be assigned.
Quality criteria:
Principle :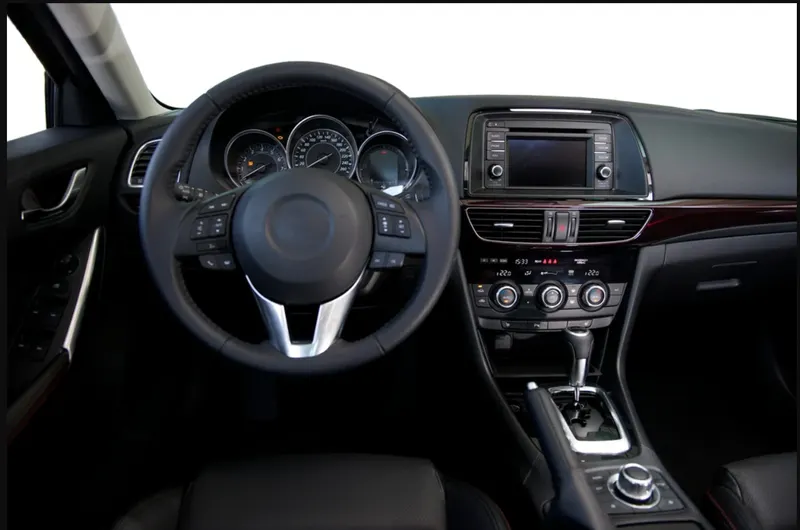
A car dashboard is a part of the car interior installed within the central console of a vehicle. The dashboard originally included an array of simple controls and instrumentation to show speed, fuel level, oil pressure, etc. Modern types may have gauges and controls as well as information, climate control, and entertainment systems.
Initially, manufacturers were using metal or wood as dashboards material. Modern dashboards generally are more stylish. Nowadays, Plastics are predominantly used as car dashboard material due to several advantages. Some are strength-to-weight ratio, mouldability, longevity, low cost, appearance, wear, and scratch resistance.
Some commonly used plastics are Polypropylene (PP), Poly Vinyl chloride (PVC), Thermoplastic Olefin (TPO), and Acrylonitrile-butadiene-styrene (ABS).
Well, the amount of information that you may get from your dash may vary from other people. This may be because of different manufacturers, models, and costs.
The type of display preferred varies from manufacturer to manufacturer. It may be Analog or Digital or a combination of both.
The Digital Display looks pretty impressive and is known for showing exact data (value), such as exact speed or exact engine rpm.
But, the benefit of Analog Display is that it shows relative changes better than Digital Display. For example, an Analog speedometer shows the rise and fall of the vehicle speed better than the Digital one. And while being in the driving seat you must have realized that you don’t need the exact reading at all. To determine the speed, you often have a quick look at the dashboard and see the needle’s current position.
So when the driver needs to look at something quick and exact data is not necessary, Analog is preferred.
Procedure:
Import the CAD Model into the ANSA software.
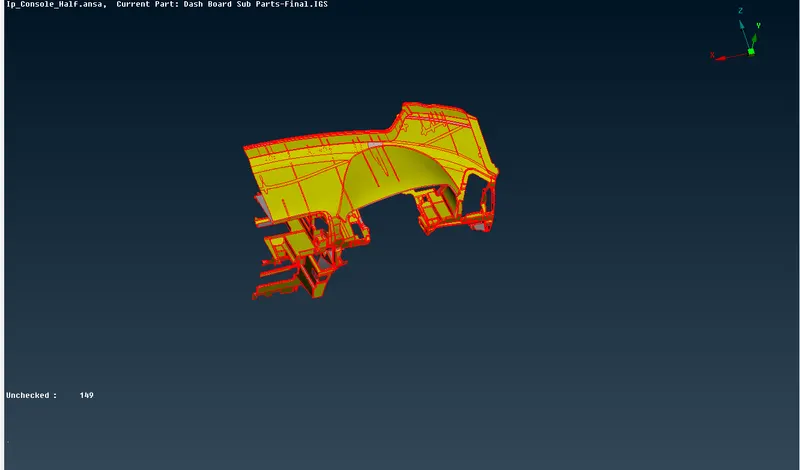
Since the Model is not connected as there are only red cones perform TOPO on the Model
After performing Topo the Model will be shown below
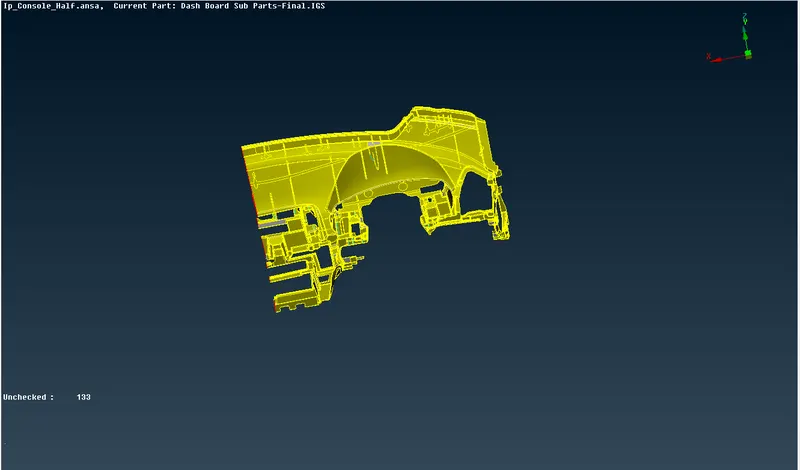
Once the top is done we have to check the Model for geometrical errors before Mid surfacing or casting can be done
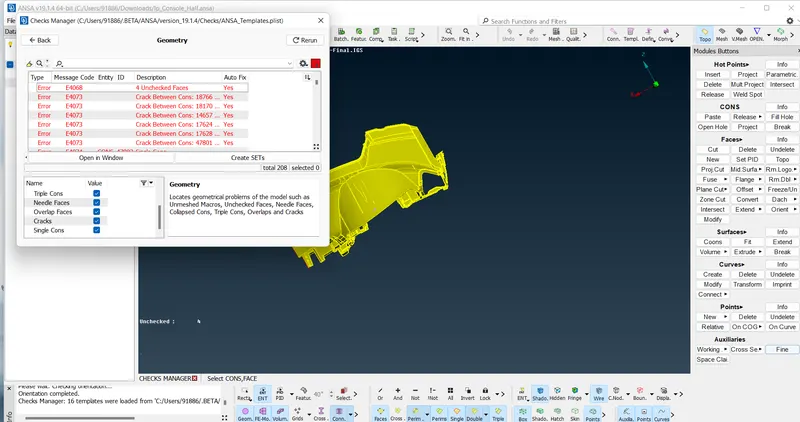
After running a geometrical check. There are some geometrical errors in the model. It has to be rectified before midsurfacing can be done. The errors can be rectified either by manual method or by using the Auto fix options
Some errors cannot be fixed by the auto-fix option it has to be rectified Manually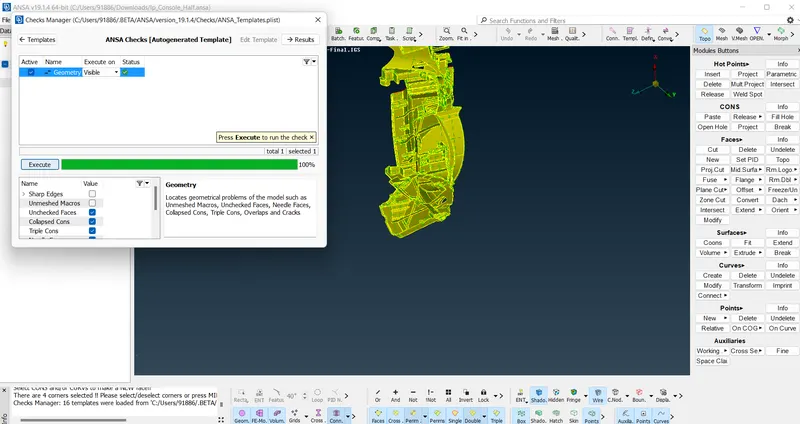
After Fixing the errors the check Manager should display as above
After the Model is free from geometrical errors. Meshing can be done
There are two ways in which this Model can mesh
1 By offsetting the surface manually and assigning the Pid for every surface which has been offset and the Meshing can be done
Note: Though this process takes a longer duration the mesh flow is better
2 By using the casting option, the software automatically takes the mid surface and assigns a PID for it and meshing is done
Note: The Meshing can be improved in the Model by using align manager
First, the casting method is used for this Model But since the model is complex the software kept crashing hence Manual offset method is used
The Thickness of the model has to be checked on the various surfaces before the offset of the plane can be done
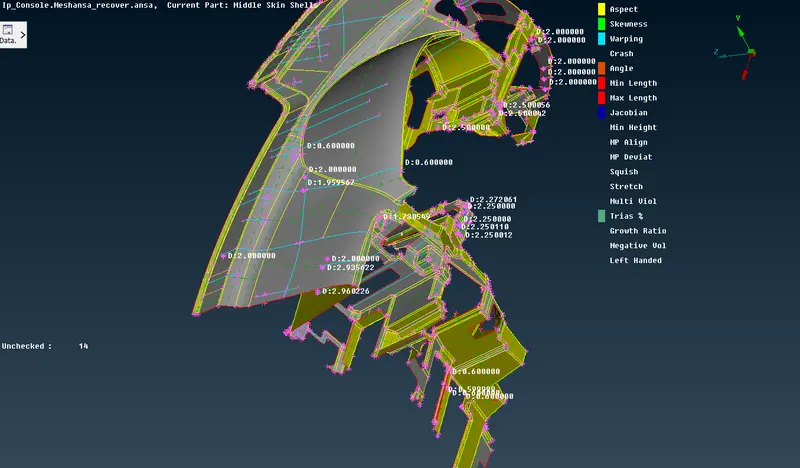
Since the model has various thicknesses the surface has to be offset individually
After taking the Mid surface. The model is shown below
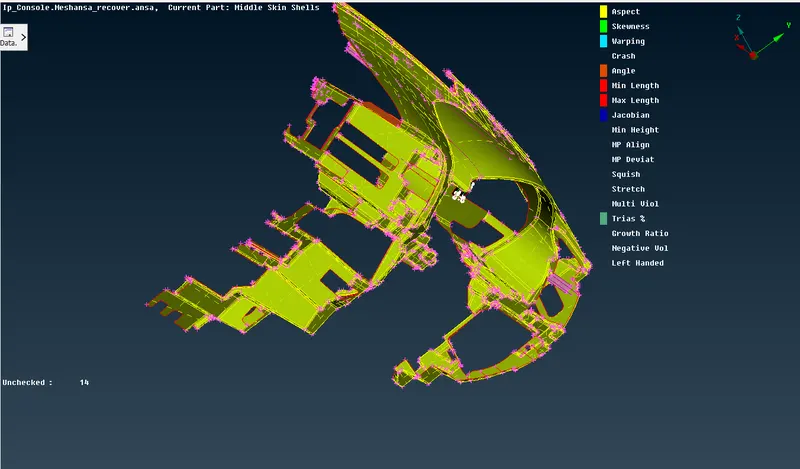
The Ribs has different thickness hence mid surface can be taken by using the offset option or by using the middle option
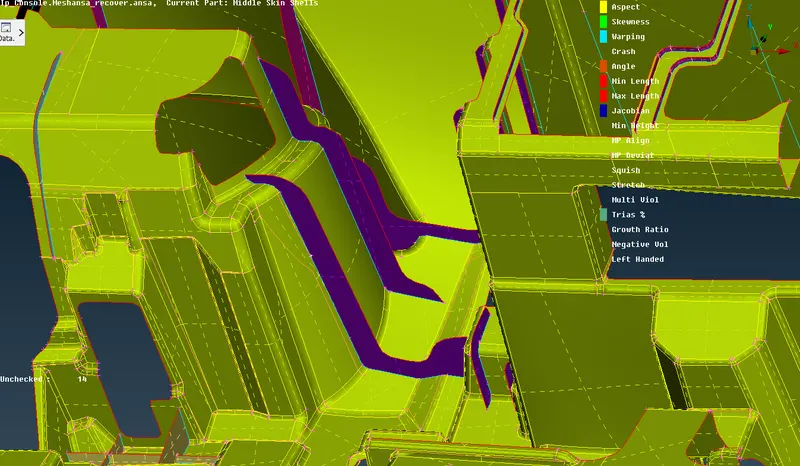
For the dog house present in the model we cannot take mid surface directly as it does not have any thickness
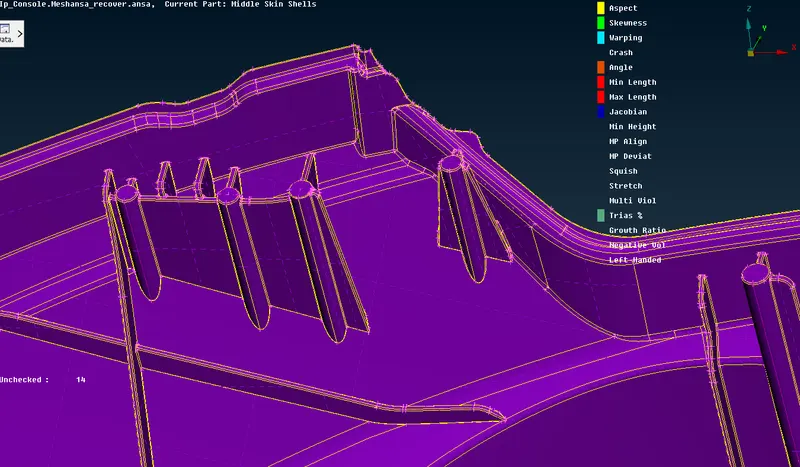
since it does not have any proper thickness we have approached a different method by creating intersecting plane (+ sign) and then extending it to the surface. The plane is created by using the Middle curve option and by creating the cons so the planes created should look like a + sign. The dog house presentation is shown below
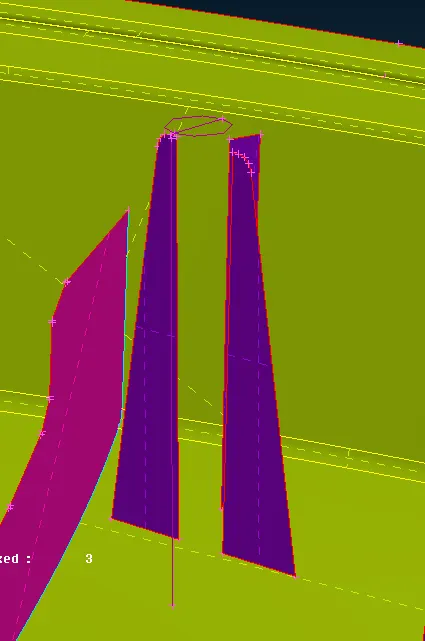
After creating the curves the plane is created using the NEW option and connected using the extend option Triple cons will be formed as there more than two surfaces are connected
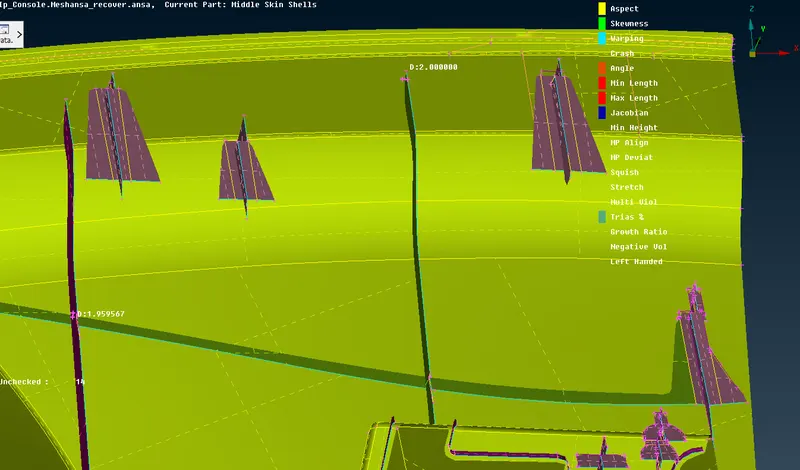
After the Midsurface is done Meshing can be started
The steps to be followed before meshing
- Import the model into ANSA
- Preform topo
- Check for geometrical errors
- Measure the thickness and use the appropriate Method to take the Midplane
- Assign the PID to the Midsurf (Note: Different PIDs has to be assigned for different thicknesses)
Before Meshing can be done Quality Criteria have to be given
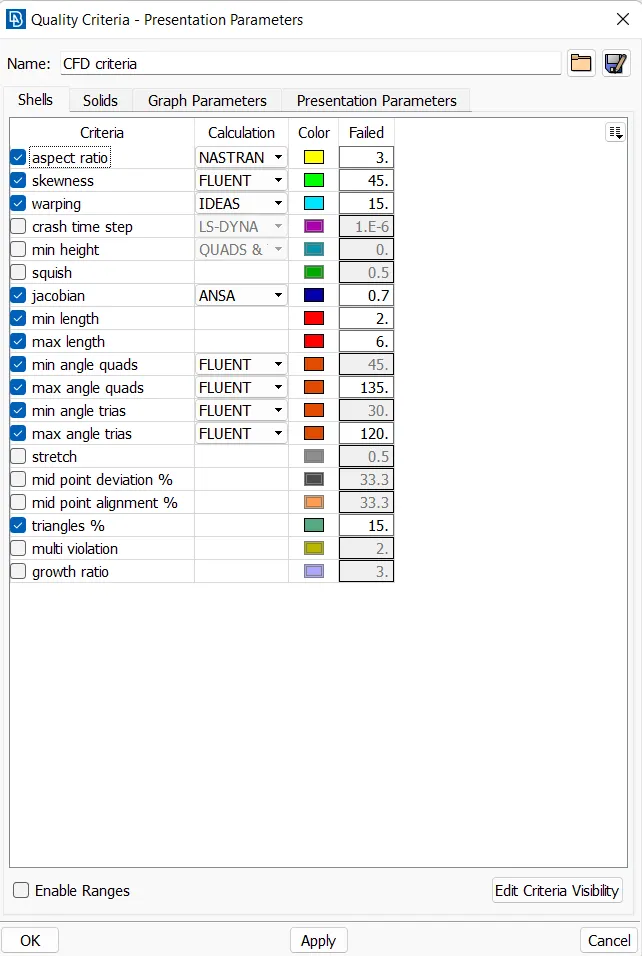
The Meshing of the Model is done using the best option or Spot Mesh Since the model has triple cons Manual mesh is preferred
Once the mesh is created. It can be improved using Reconstruct or Smooth option
The split or Swap option can be used to reduce the number of triple cons in the region
There will be off elements present in the region where triple cons will be present as it cannot be resolved
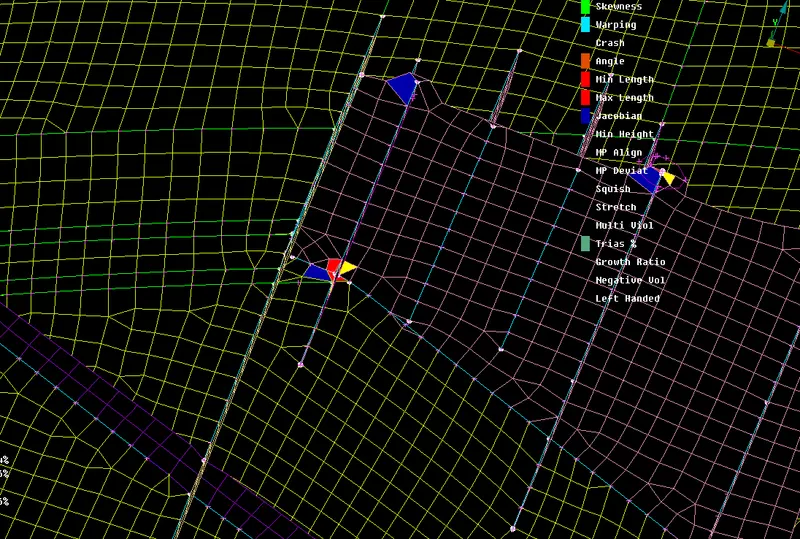
The Meshing of the smaller components can be done through the casting Method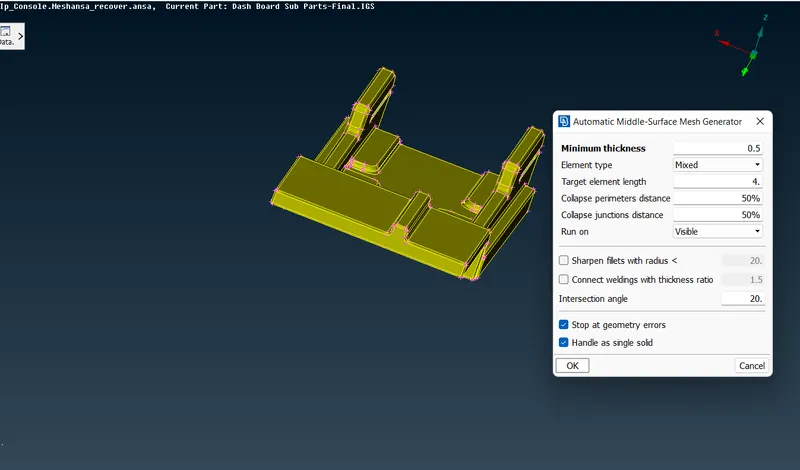
After Clicking the Casting option, a dialogue box will pop up. A minimum thickness of 0.5 and target length of 4 is given
After the casting, there will be elements failing the quality criteria which can be solved using reconstruct, spilt, and swap options. There will be elements that will be not created properly which can be solved using the Align manager
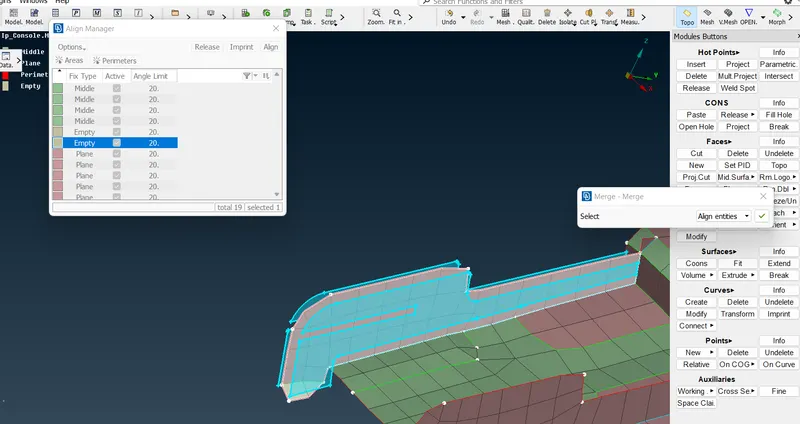
Final Mesh component
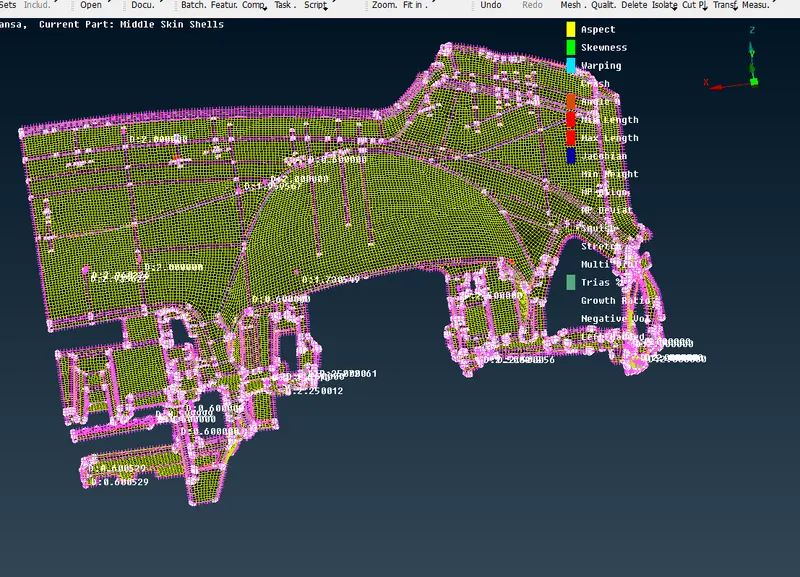
Conclusion:
The given Model is free from Geometrical errors and mid-surface is done by using different options
and able to attend a good mesh flow.
Learned Different types of mid-surface and meshing techniques which enables us to attain a proper mesh flow with less time.
Link : https://drive.google.com/file/d/1n2LuRUO752ahqMgma6Rv-OA1XZ8COUYM/view?usp=sharing