PREPROCESSING ON INSTRUMENTAL PANEL USING ANSA
AIM: To perform preprocessing on instrumental panel using ANSA Software.
OBJECTIVE:
- To perform geometry cleanup on given model.
- To perform middle surface extraction.
- To assign mesh parameters and quality criteria parameter.
- To perform shell meshing as per given quality criteria.
- Assigning thickness, in order to make shell as solid.
CAD MODEL:
First, we have to Import the required CAD file i.e. vehicle dashboard or instrumental panel in ANSA software by using GUI option. Once model is opened, it will look like in graphical window as shown in picture below:
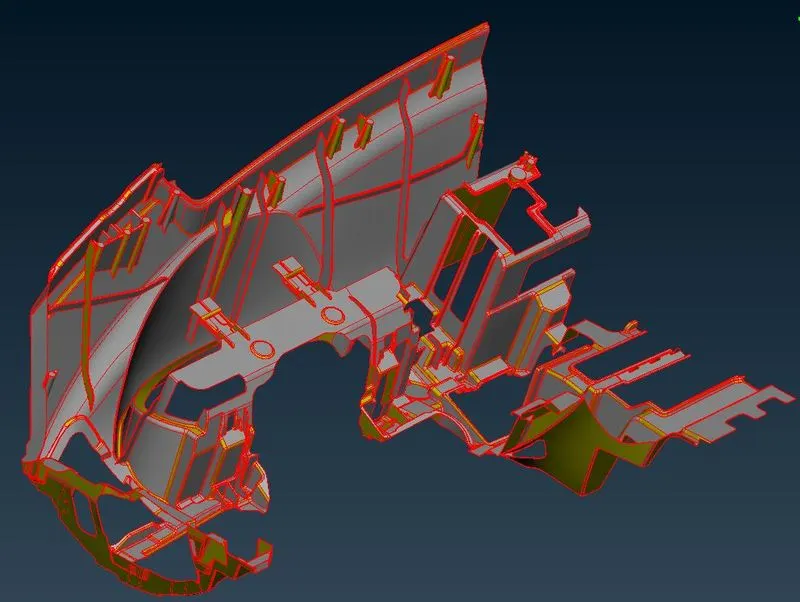
Figure 1: CAD model of Instrumental Panel
PROCEDURE:
1. Geometry cleanup on instrumental panel model
1.1 Topology Cleanup
Once CAD model is opened, we notice, there CONS connectivity are missing (as shown in red color). So to make these CONS connected, we will perform topology operation by following
i.e. TOPO----> Faces ----> Topo
Then we will select model in a single box selection. This function automatically creates topological conditions between selected adjacent CONS.
Once topology cleanup is finished, model will look like as shown in picture below.
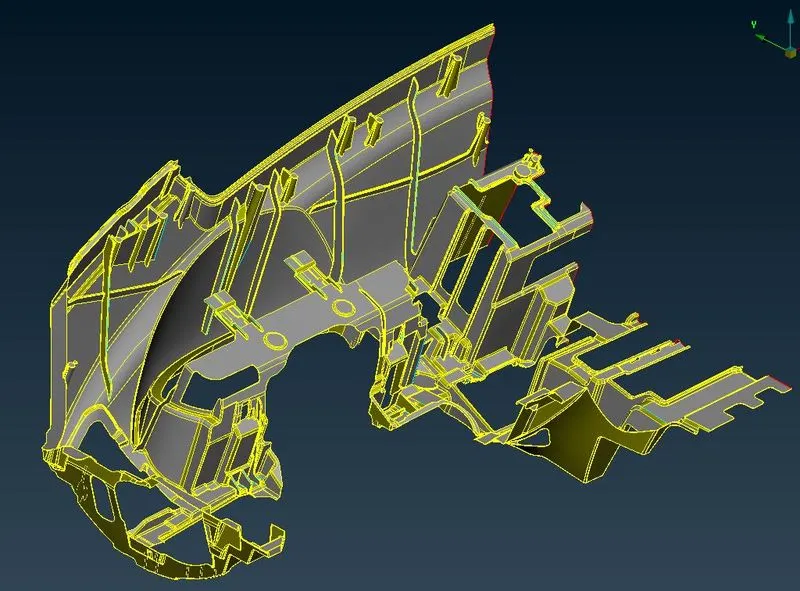
Figure 2: Topology cleanup
1.2 Geometry Checkup
Before proceeding to discretization of model, we have to make sure that geometry is free from errors.
Ansa is having default check template, where we have to filter our model for given errors. In this case, we have to select all checks except Sharp edges and unmeshed macros.
In order to rectify geometrical errors, following steps have to follow:
Left click on “Checks” in Tools option ----> Select “Geometry” in options ---->set “Visible” for Execute on (It helps to automatically selecting the visible component in graphical window ----> Now click on Execute.
This function locates geometrical problems of the model such as needle faces, collapsed cons, triple cons, overlaps and cracks. Error generates will depend on selected ANSA Checks option in template as shown in picture below.
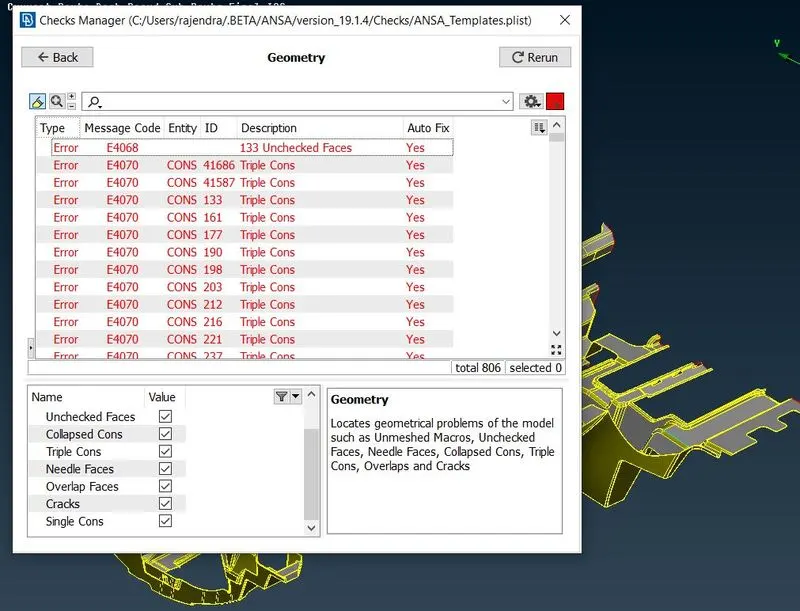
Figure 3: Geometry check
As we can see ANSA generates lot of errors. In order to check any error, right click on the error which need to be check and select show only. Then it automatically identifies particular error location in the component. In order to fix these shown error, we have two options. Either we can use manual or auto Fix option. We will use auto fix because we noticed in check tab i.e. yes for Auto Fix, that means ANSA can fix these shown errors automatically.
As we know, we can proceed to next stage only if there are no geometrical error left. So we will rerun the geometry checkup macro until geometry is free from errors as shown in picture below:
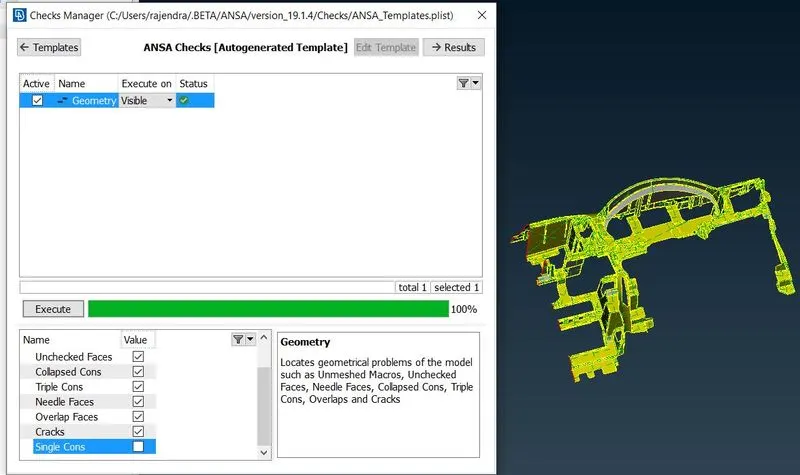
Figure 4: Geometry check
Now geometry is free from errors. So we can proceed to further steps.
2. MID surface extraction
Before going to middle surface extraction, we have to check orientation of faces for CAD model. In order to change orientation, we can use function TOPO---->Faces---->Orient. Where, yellow color shows negative and grey color shows positive direction.
This function sets a uniform orientation to all visible faces according to the orientation of majority of the faces. Here in picture we can see model is not properly oriented.
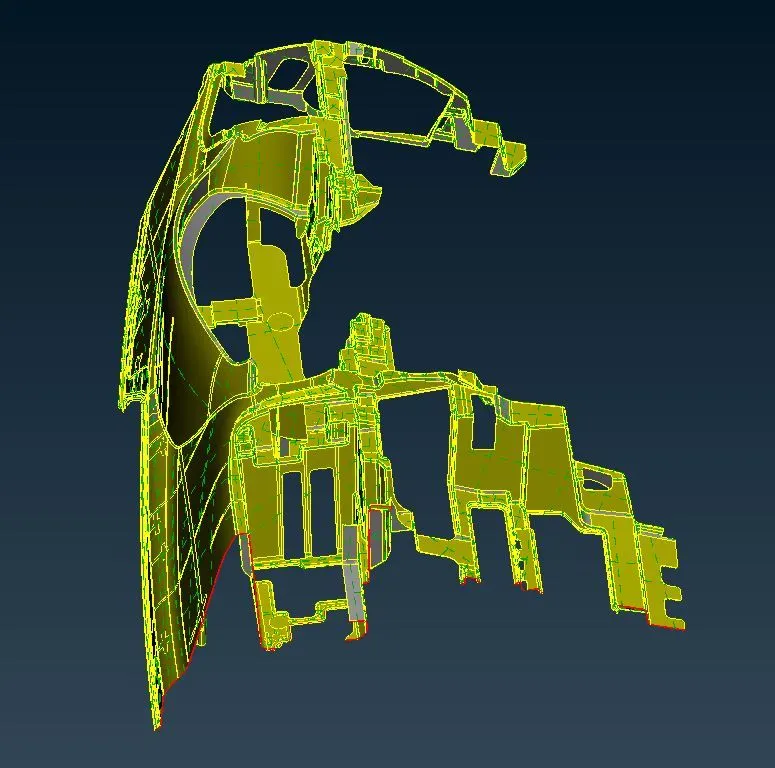
Figure 5: Mid surface extraction
Without properly orientation of faces, we won’t able to extract middle surface in single selection. So, to avoid such errors we will orient faces by following steps discussed earlier. After converting all faces to proper orientation, model will look like as shown in picture below.
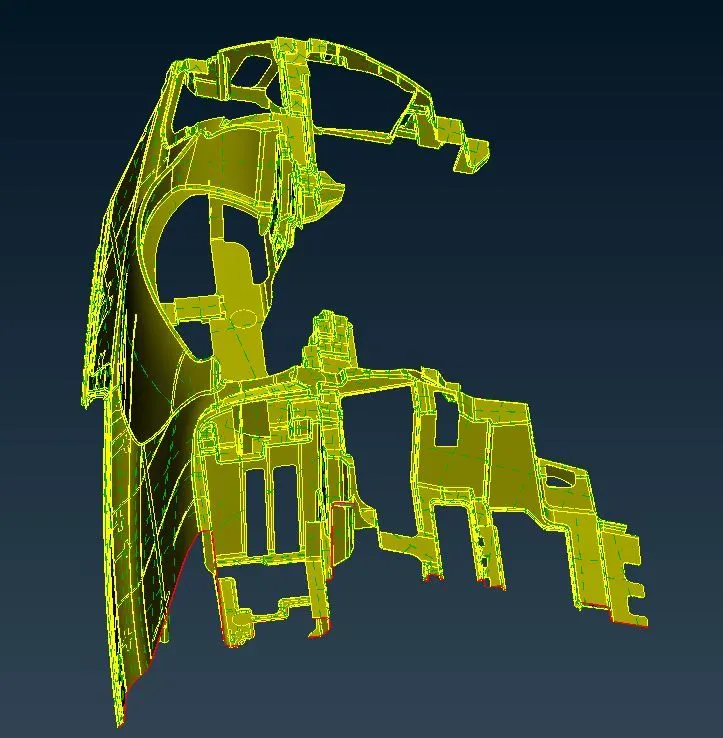
Figure 6: Mid surface extraction
As we can see, CAD model is having complex features with varying thickness. Then in this case, automatic mid surface extraction might get fail. So we will extract mid surface manually.
2.1 By using offset option:
We will use offset option to extract middle surface. Make sure we will measure part thickness before middle surface extraction. Offset option available under
TOPO---->Faces---->Offset
This function offset selected faces by a given distance in order to create new faces.
We will provide offset distance which is half of the parent component thickness as shown in picture below:
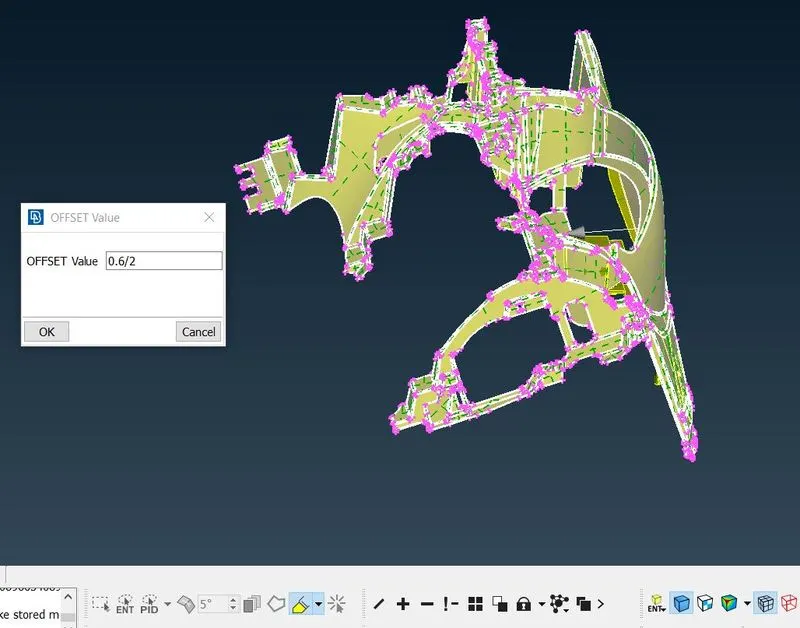
Figure 7: Mid surface extraction
After extracting middle surface it will look like as shown in picture below:
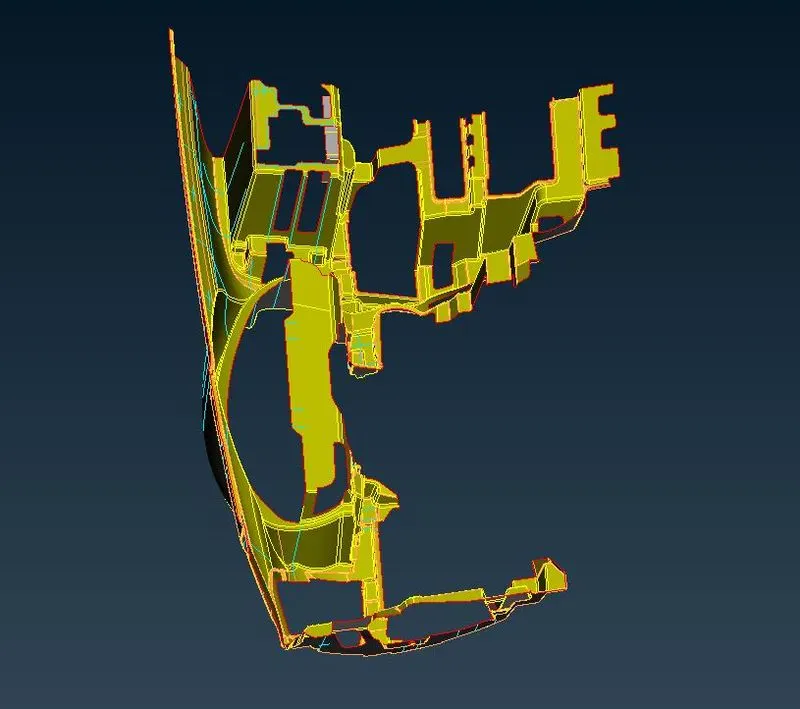
Figure 8: Mid surface extraction
2.2 By using middle surface
This function created mid surface between two selected faces. This function is available under:
TOPO---->Faces---->Mid.Surface
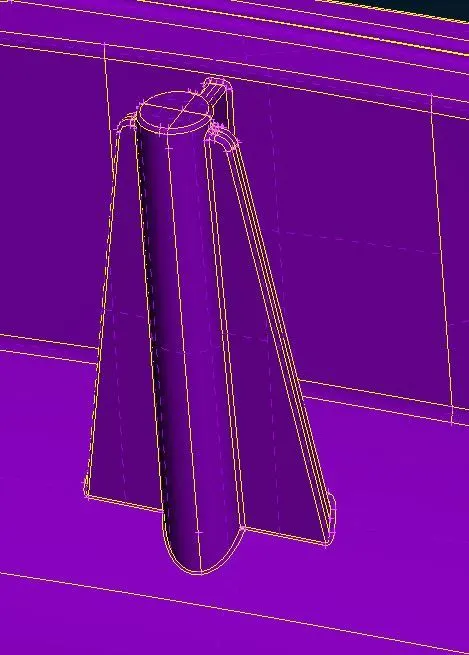
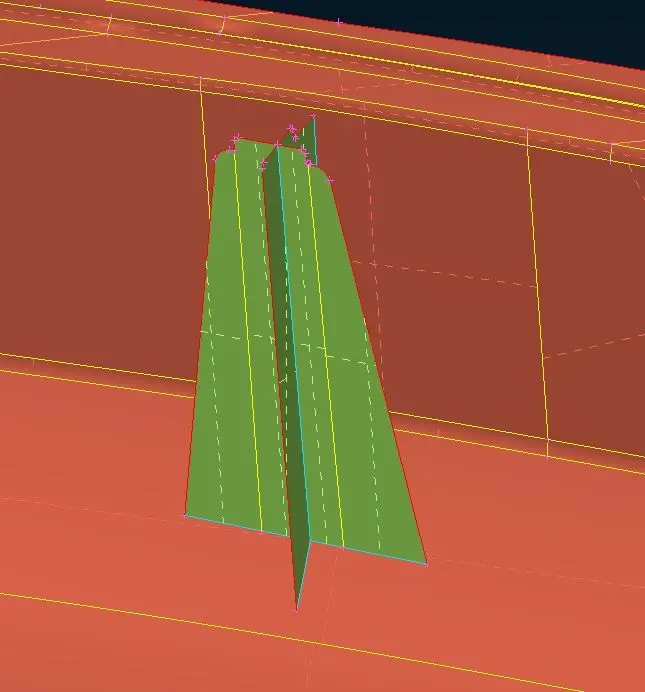
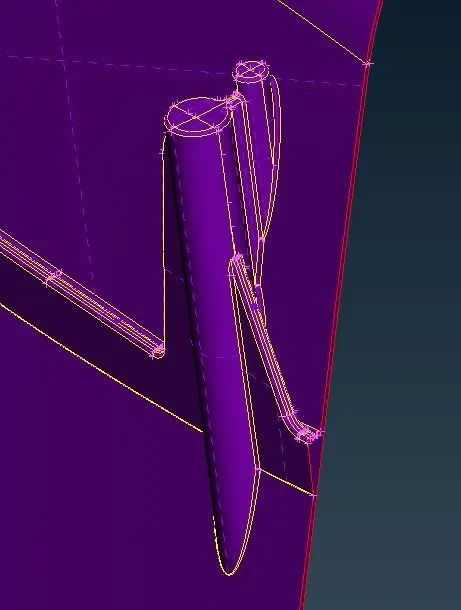
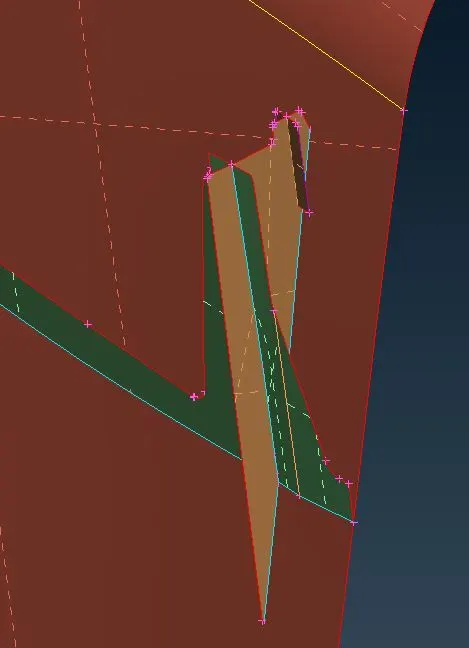
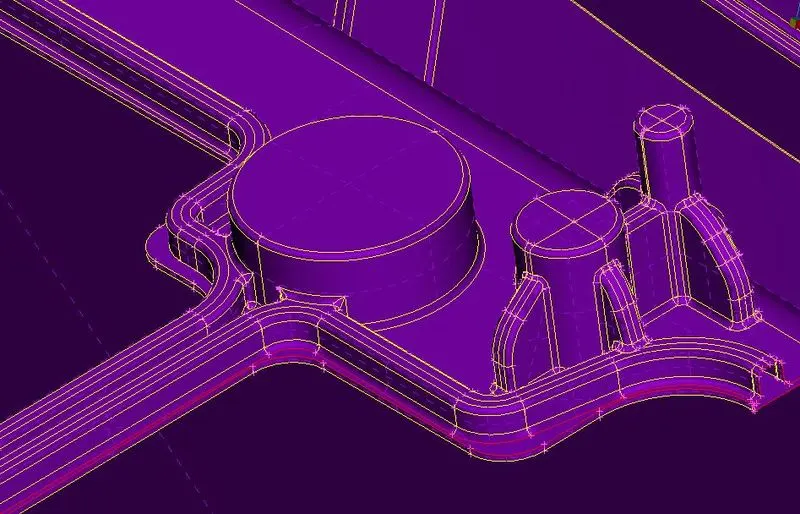
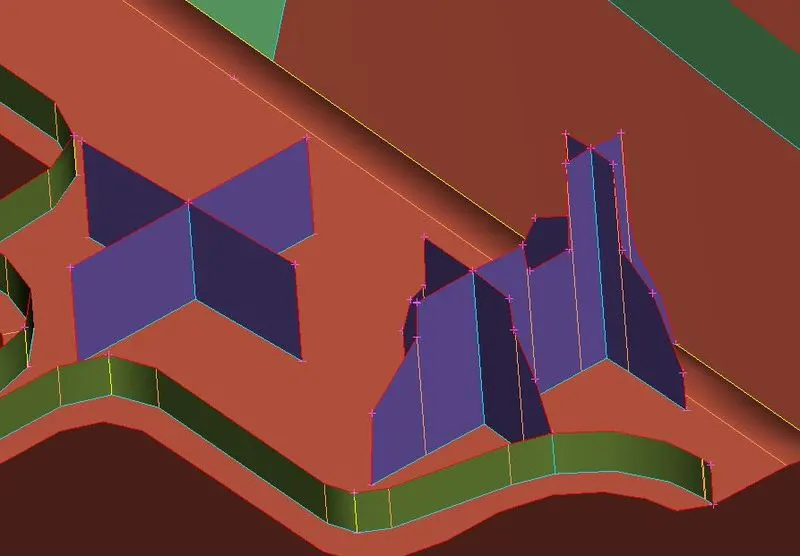
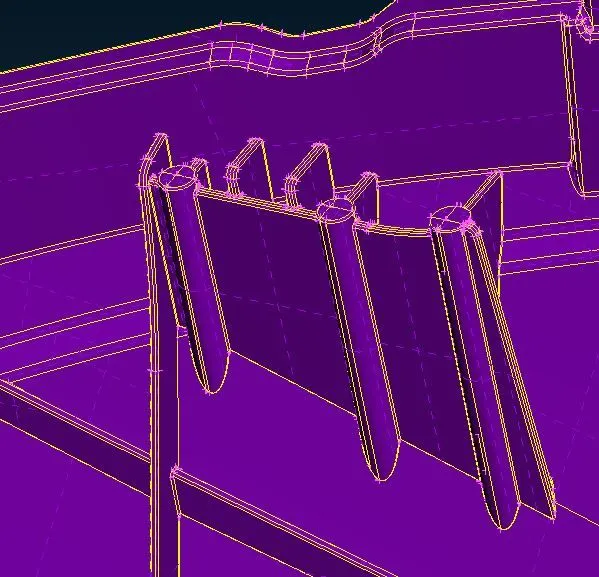
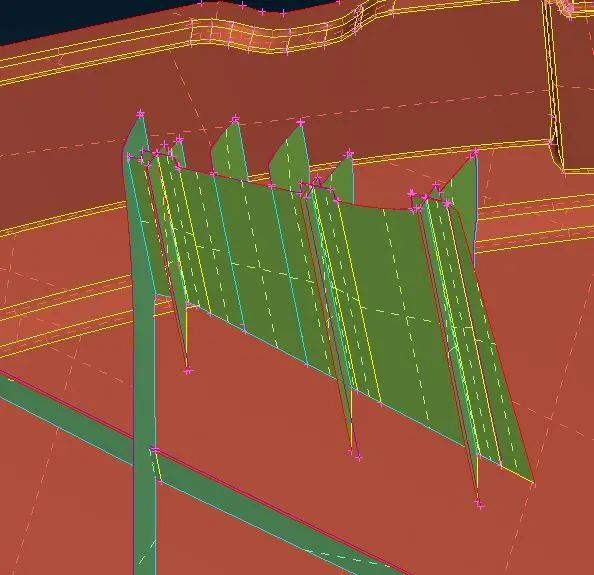
In instrumental panel we will capture Dog house using Mid.surface option. Once middle surface is captured. Then we will use extend option to get a proper height and width of the ribs. Below we can see features captured using mid surface before and after as shown in picture:
 |
 |
| BEFORE | AFTER |
Figure 9: Mid surface extraction
 |
 |
| BEFORE | AFTER |
Figure 10: Mid surface extraction
 |
 |
| BEFORE | AFTER |
Figure 11: Mid surface extraction
 |
 |
| BEFORE | AFTER |
Figure 12: Mid surface extraction
After done mid surface extraction, model will look like as shown in picture below.
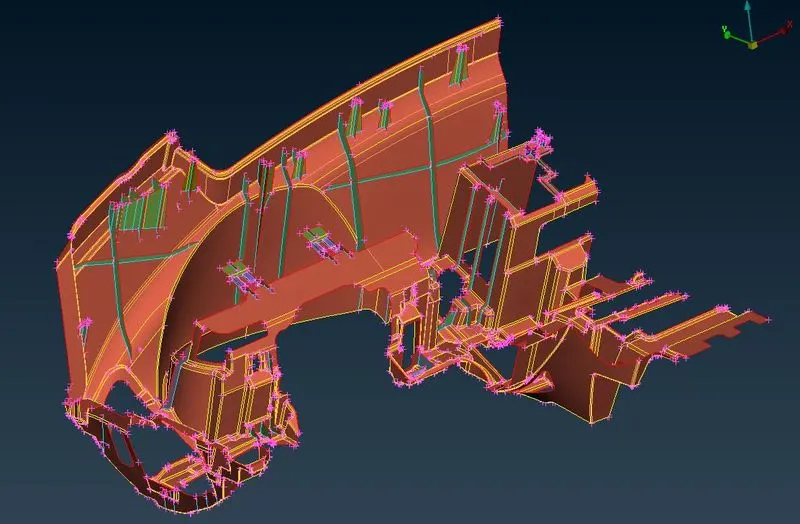
Figure 13: Mid surface extraction
3. Mesh Parameters and quality criteria
Before proceed to meshing, we have to assign different mesh parameters such as average Target length, minimum and maximum target length. And we have to keep element type is “Mixed”. According to these parameters our mesh model will get discretize.
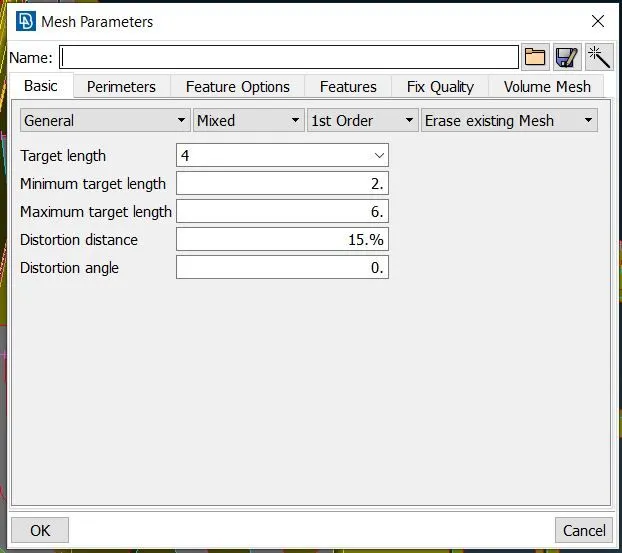
Figure 14: Mesh Parameters
After assigning mesh parameters we have to assign Quality criteria presentation parameters. Quality criteria helps to make understand whether our finite element model will fail or not.
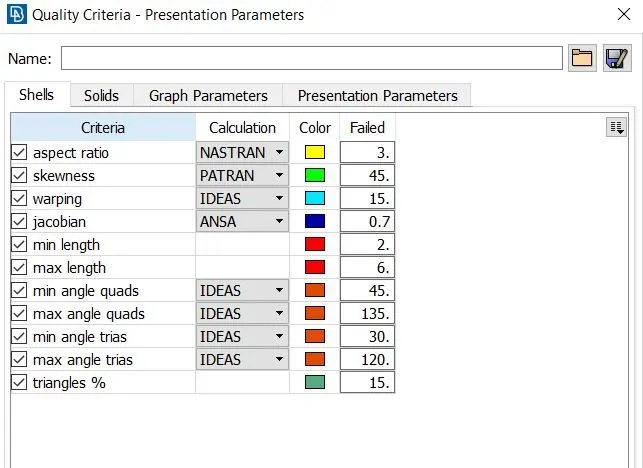
Figure 15: Quality criteria - Presentation Parameters
4. Discretization of component by manual method
A mesh is a network that is formed of cells and points. A meshing is the process of subdividing the structure from infinite number of points to the finite number of node and elements. This process is also known as discretization.
And we have to maintain the distance between two nodes equal to the average target length i.e. 4mm. This can be done by following certain steps i.e. MESH---->Perimeters---->Length for both Perimeters and Macros.
Before meshing we have to check topology cleanup requirement of components in model.
In ANSA, we have variety of options to perform meshing. Now, we will use “BEST” or “SPOT” option for meshing to generate FE elements on each and every surface of model.
During meshing we have to take care of quality criteria. Because on click of meshing option, it will generate improper meshing. So we have to improve meshing in order to satisfy the quality criteria.
We can use defeaturing to avoid element failing due to quality criteria. Once meshing is done on instrumental panel, model will look like as shown in picture below:
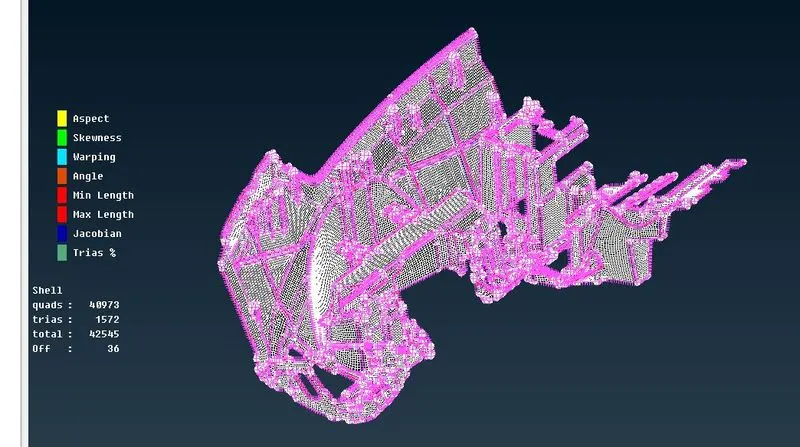
Figure 16: Discretization of component
In this case, after meshing few elements are failed due to of triple CONS. These are unavoidable.
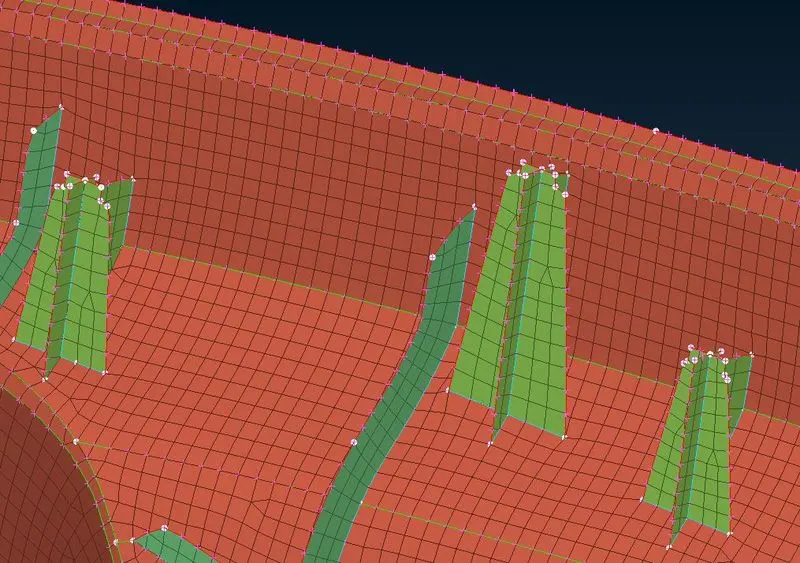
5. SHELL AS SOLID
In order to assign thickness, we have to make sure our thickness value should be in property identity. So to activate thickness at final stage, we have to check draw shell as solid under quality criteria presentation parameters. So we can see shell with thickness and without thickness. as shown in picture below.
 |
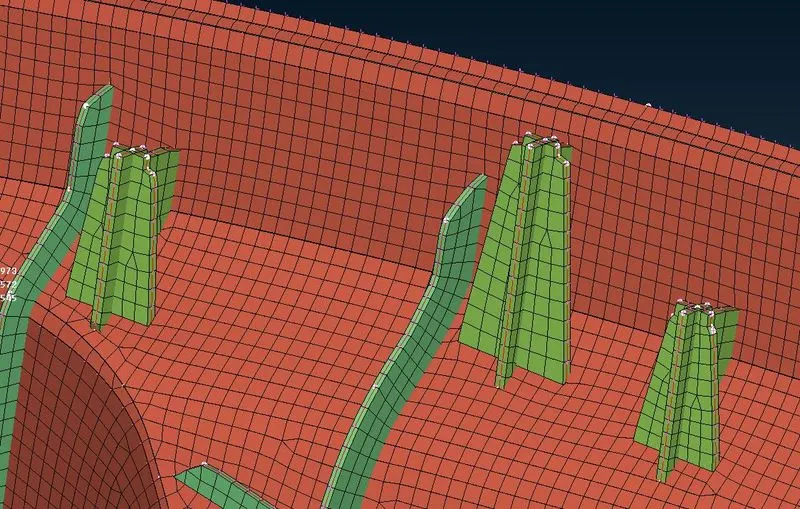 |
| Without Thickness | With Thickness |
Figure 17: Shell as solid
Learning Outcomes
- Able to fix topological error.
- Learned, how to do mid surface extraction by different method.
- Assigning PIDs for different surfaces.
- Assigning mesh and quality criteria parameters.
- Learned to achieve good mesh flow even in complex regions.
CONCLUSION
Preprocessing is done successfully on CAD model of instrumental panel such as topology cleanup, geometry check, middle surface extraction and good meshing flow which s followed by assigning thichness to make shell as solid.