Preparing Schedule & Cost Estimation for a building using REVIT
AIM : Using the shortcut keys in Revit discussed to complete the following tasks and list them below
a. Using 3D model create a section box
b. To create similar doors and windows in a floor plan layout
c. To reduce the thickness of lines visible in plan views
d. To apply override settings to a floor in the model section view
e. To increase the range of visibility in a plan view
f. To select the previously selected items
g. To add annotations to the model views
h. To bring the model elements in line
i. To rotate the model elements
j. To move an object to another location
k. To copy a model element
l. To mirror an element about an axis
m. To create an array of model elements
Apparatus : Revit Architecture model , Section box command , similar command, Thickness command , view range command , control <, command , Annotation command , Align command Copy command , mirror command , array command.
Procedure :
Step1:
- Create a new architecture file or open the Exesting file in the Architecture model open the model in 3d view and in propery tool bar click on the Box section view or short for the Box section view is ( BX)
- Uses of section view is to view the particular element in 3d view with out disturbing the all other element
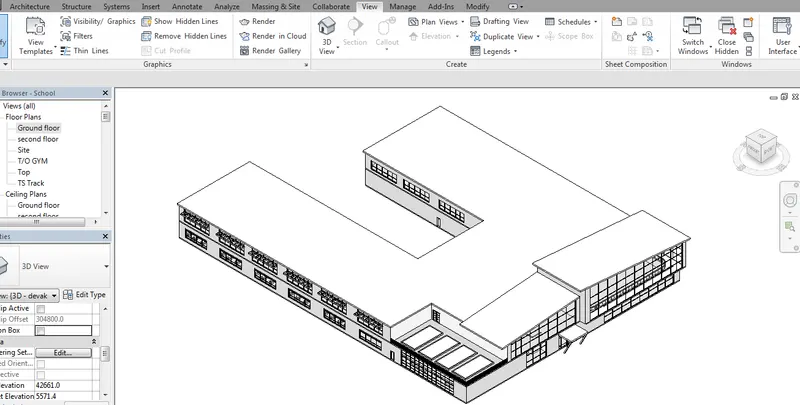
Full view
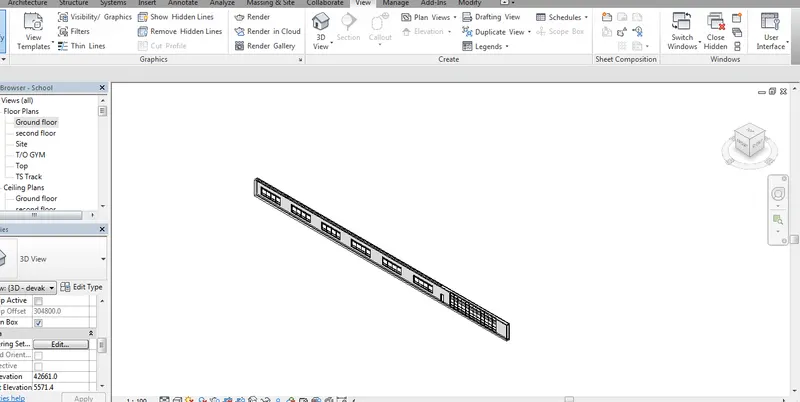
Box section view
Step 2:
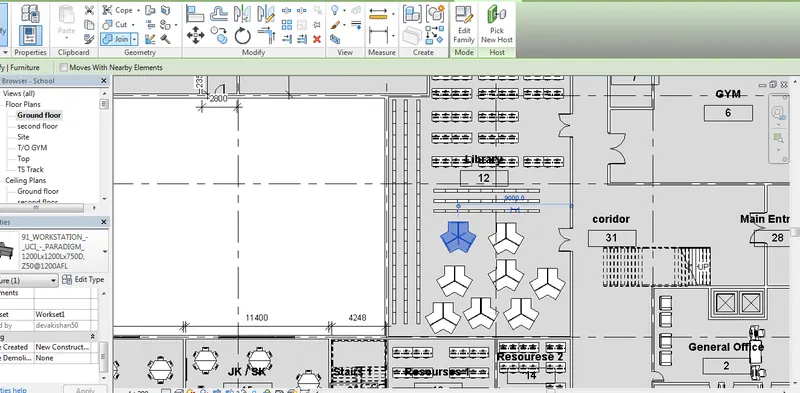
- Door and windows by using the similar command Click on the door and in modify command click on the similar command as to create a similar door with out uisng the command door or window command
- Uses of similar command the same dimension of the door or any element is created to reduce the time taken
Step 3 :
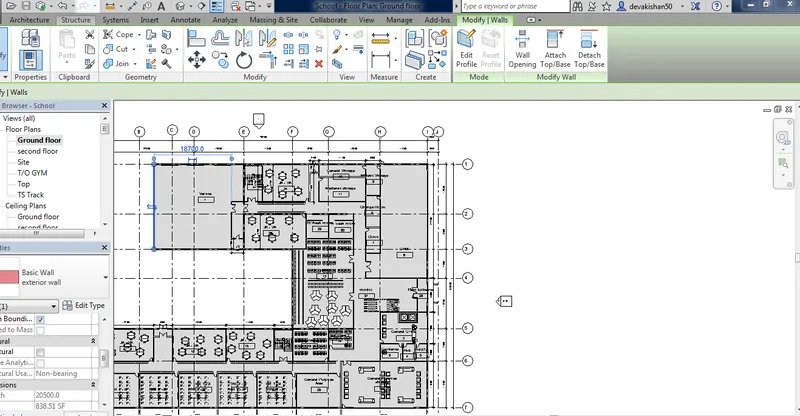
- open the floor plan in Archutecture model click on ribbon command and click on Thickness or short cut is TL
- use of thcikness line to visible the boundry of the plan in Thicker then the other lines
Step 4 :
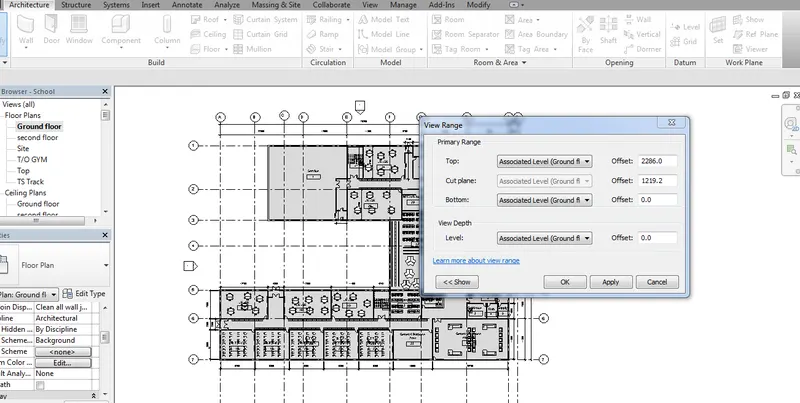
- View Range click on view command select the command view arange or short cut command is vr
- Use of view range command is to view the floor plan on the next level
Step 5 :
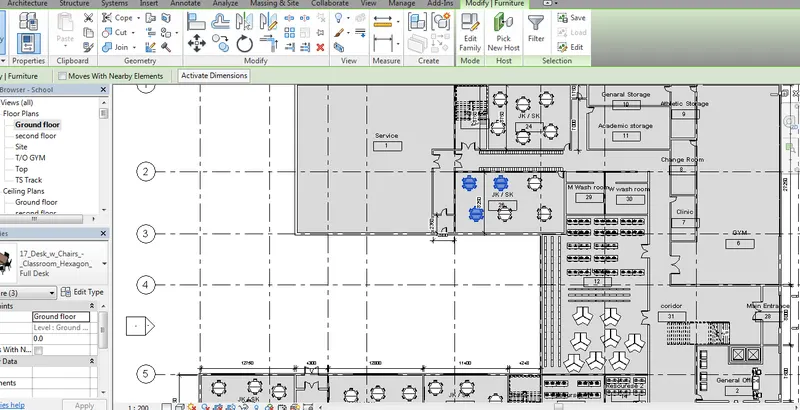
- Reselect command short cut command is control+< to select the previou selected command in the model
Step 6:
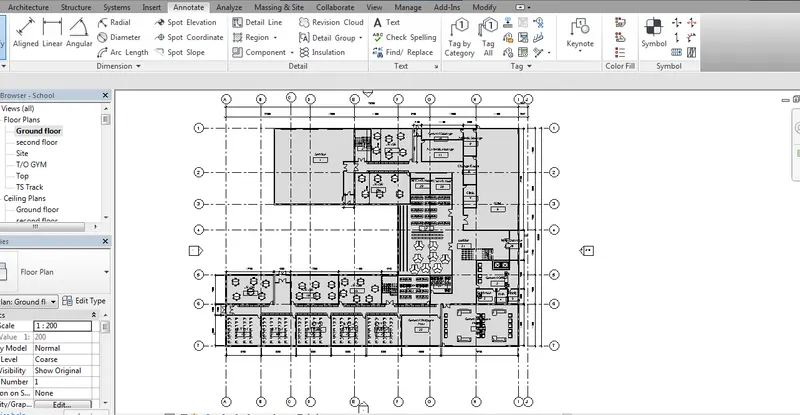
- Annotation command to specify the dimension deatail about the room or any other element short cut command is DI
step 7 :
Align command select the element and in modify command select the align command
use of align command is to align the element for example door to the wall line parrall to the wall line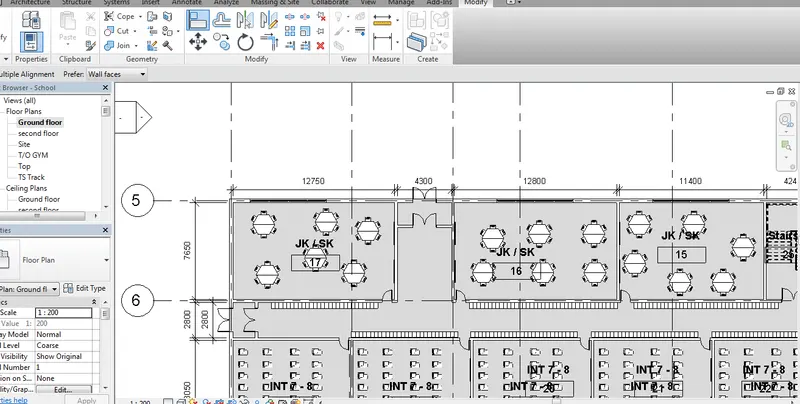
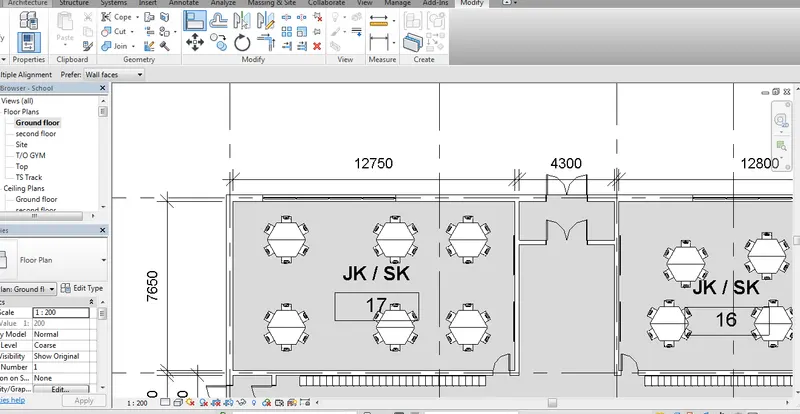
Step 8:
- Select the element and click on rotate command in modify tool bar and then rotate the door or other component in any 360 degree Short cut command is RO
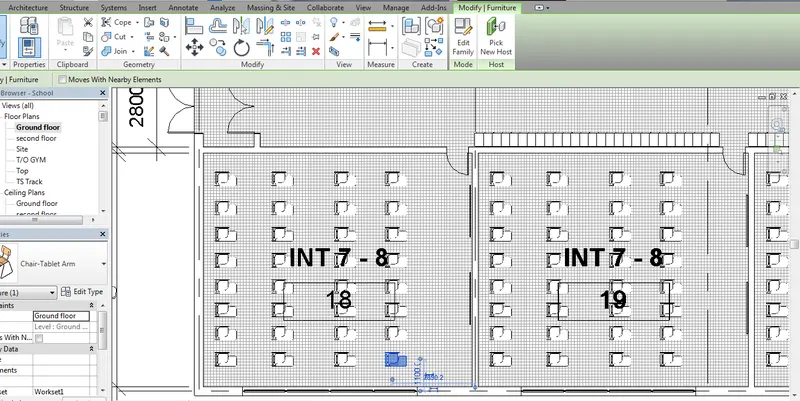
Step 9 :
- Select the element and click on Move command in modify tool bar and then move the door or other component in parrall or perpendicular direction Short cut command is MV
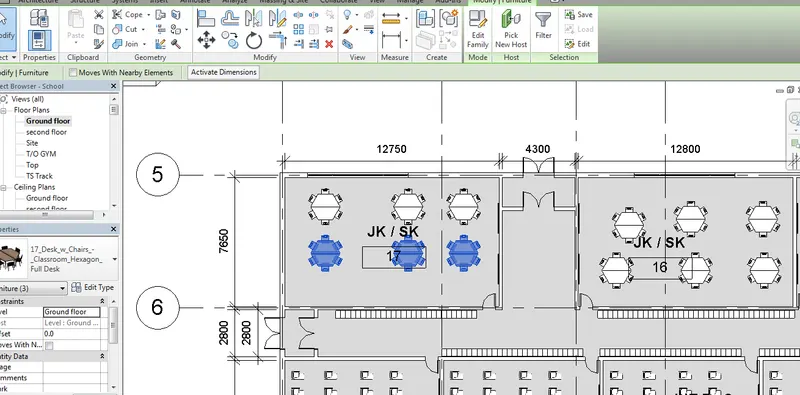
Step 10:
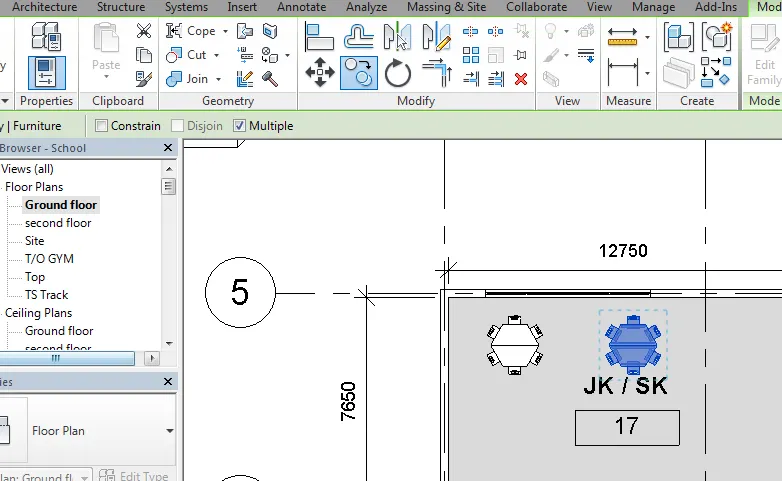
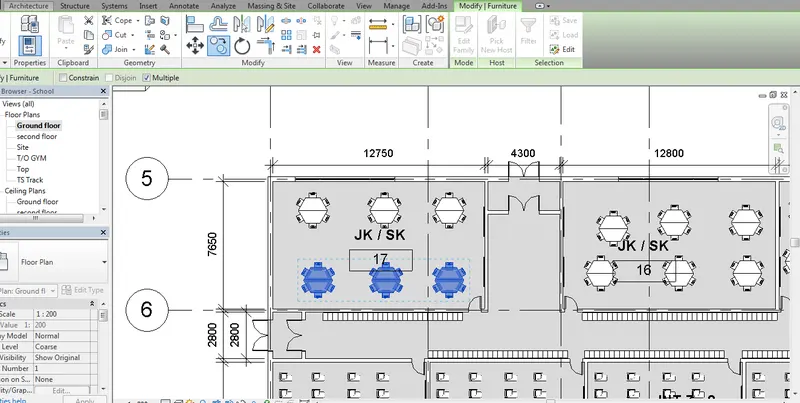
- Select the element and click on Copy command in modify tool bar and then copy the door or other component in parrall or perpendicular direction Short cut command is CO
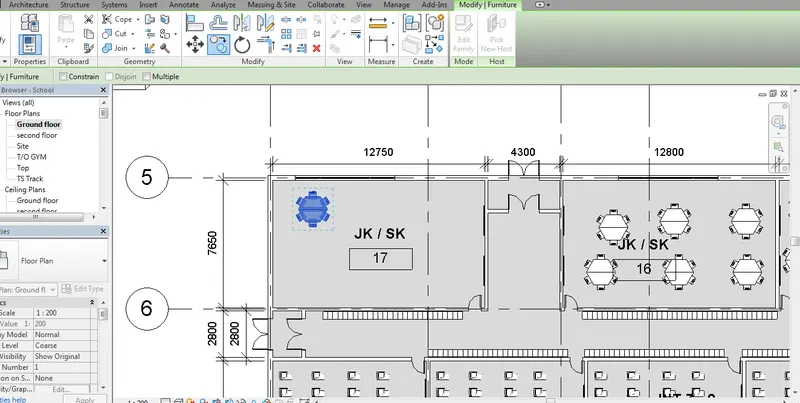
we can copy the object to mutiple time by click on multiple
Step 11 :
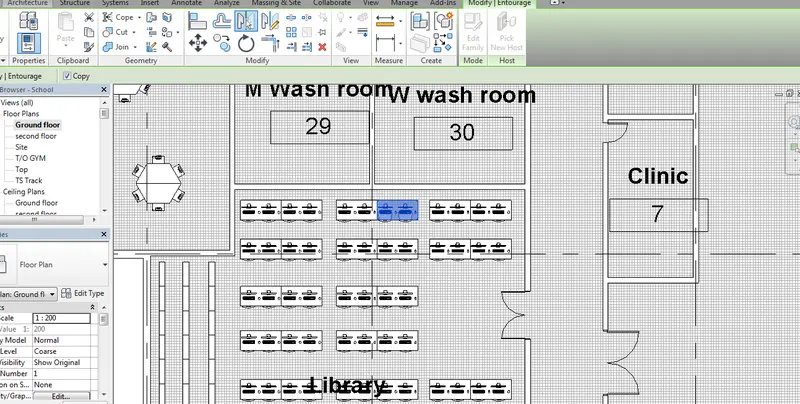
- Select the element and click on Mirror command in modify tool bar and then mirror the door or other component Short cut command is MM
Step 12 :
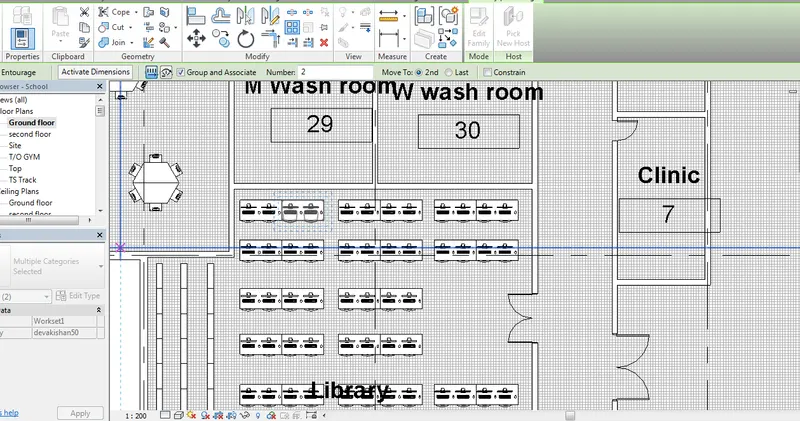
- Select the element and click onArray command in modify tool bar and then Array the door or other component to number of element Short cut command is AR
Aim : Using Revit and the projet done preparation of schedule quantity of
a. Walls
b. Doors
c. Windows
d. Material – Concrete/Wood
Apparatus : Architecture wall, Doors , Windows , Material , Modify schedule quantity , Door parameter , Level , type , width , height , count
Procedure :
Step1:
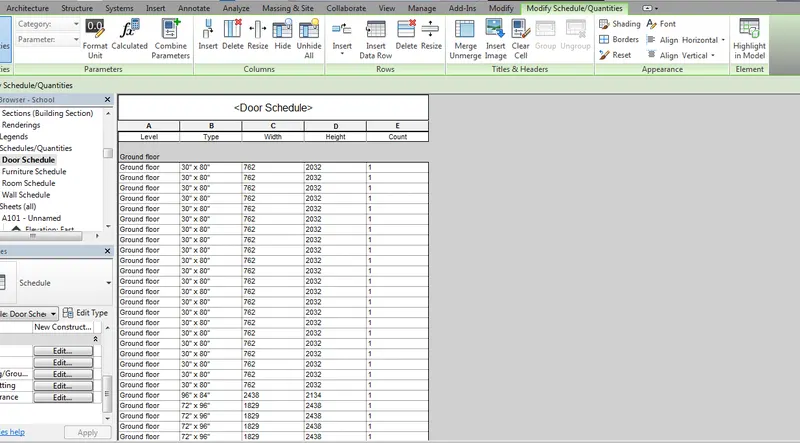
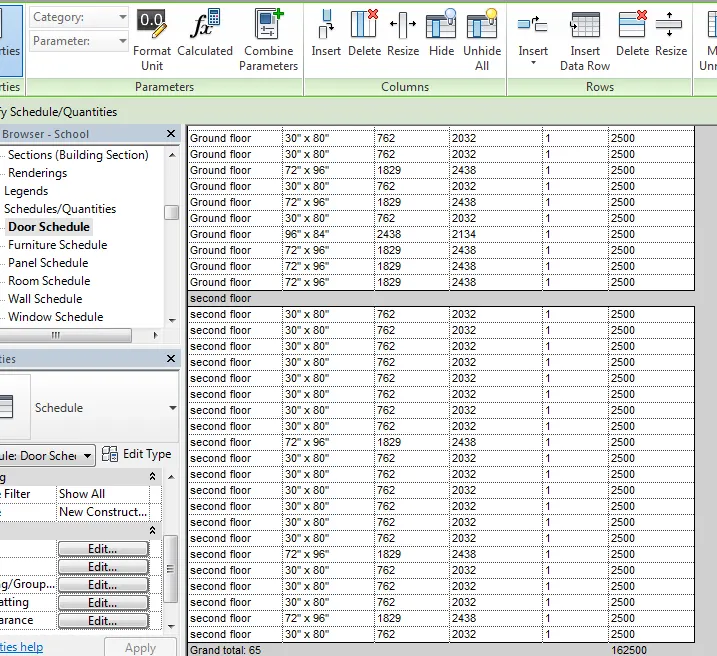
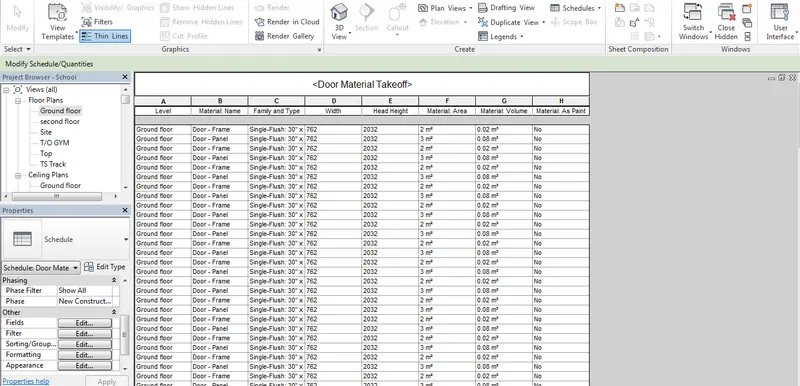
- After complication of all floor design in and placement of door and window click on view on Ribbon and modify schedule quantiy
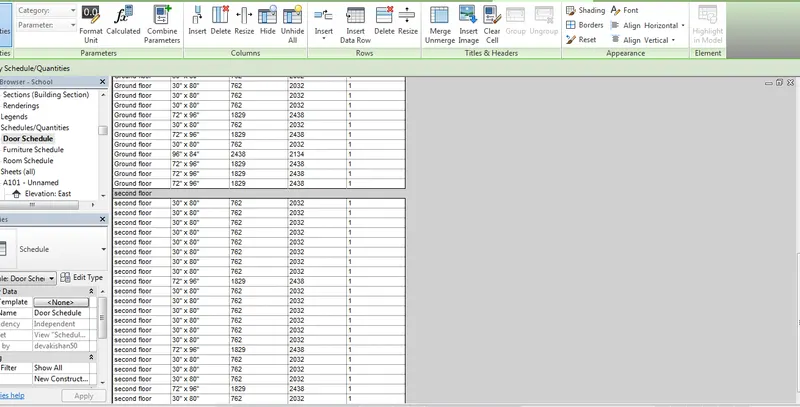
- Select the Category as door click ok and create of new schedule quantity and slect the filed in order as Level , Type , Width , height, count and press ok
- The qunatity are schedule in the form of shown below table
Step 2:
- After complication of all floor design in and placement of door and window click on view on Ribbon and modify schedule quantiy
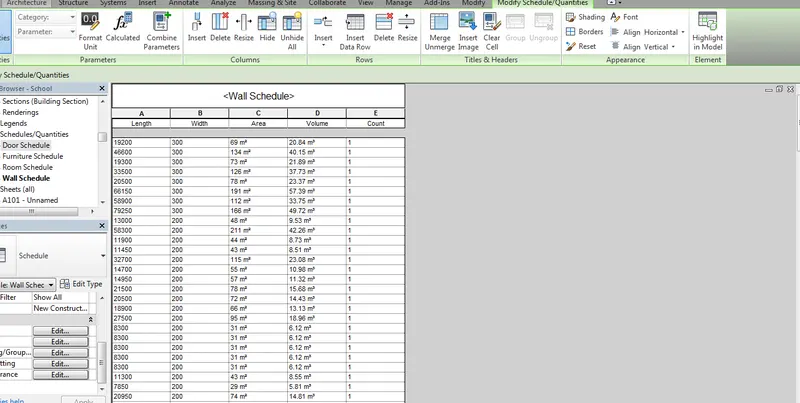
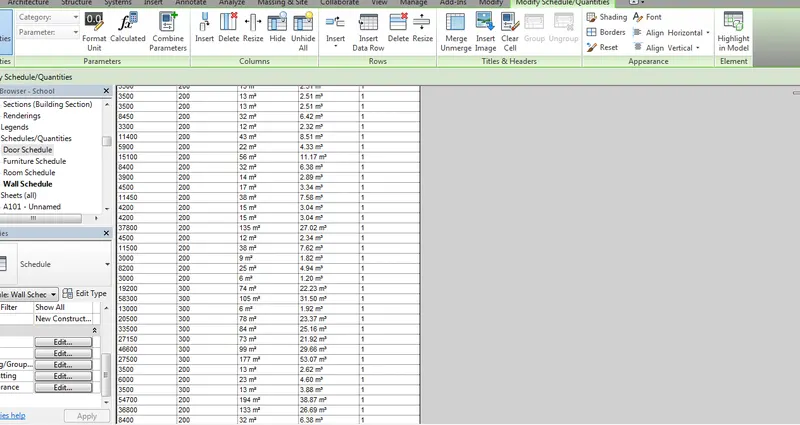
- Select the Category as wall click ok and create of new schedule quantity and slect the filed in order as Level , Type , Width , height, count and press ok
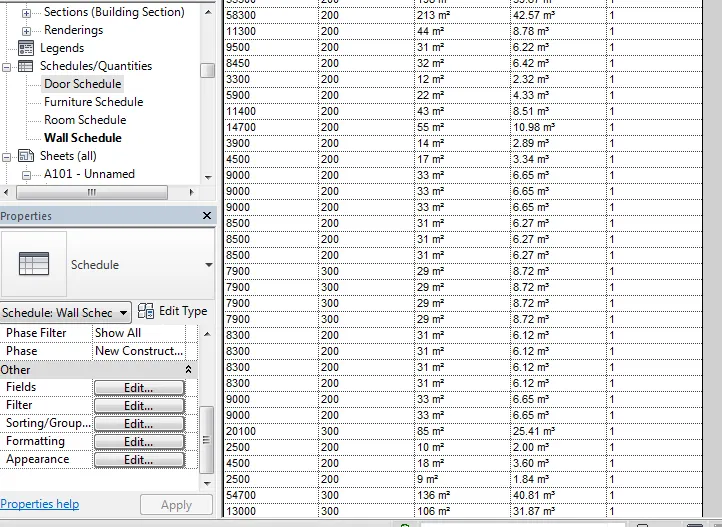
- The qunatity are schedule in the form of shown below table
- Need to edit any schedule click on edit in property and u can edit the field , filter , shorting , formating , apperance
Step 3 :
- After complication of all floor design in and placement of door and window click on view on Ribbon and modify schedule quantiy
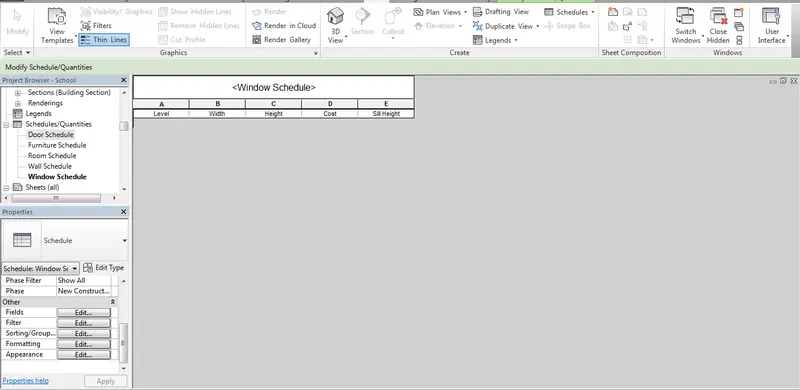
- Select the Category as wall click ok and create of new schedule quantity and slect the filed in order as Level , Type , Width , height, count and press ok
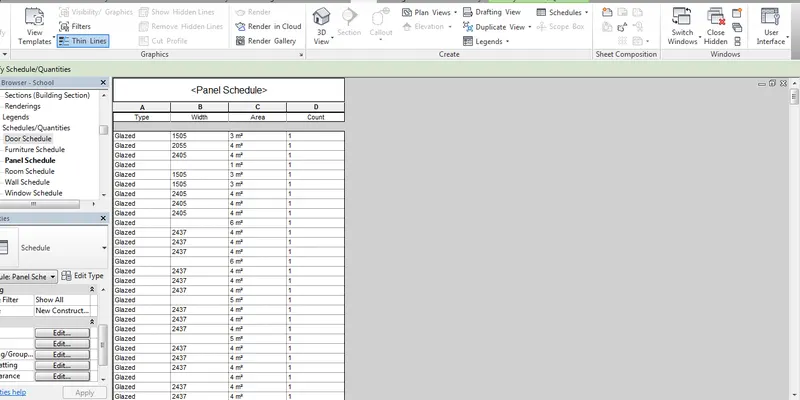
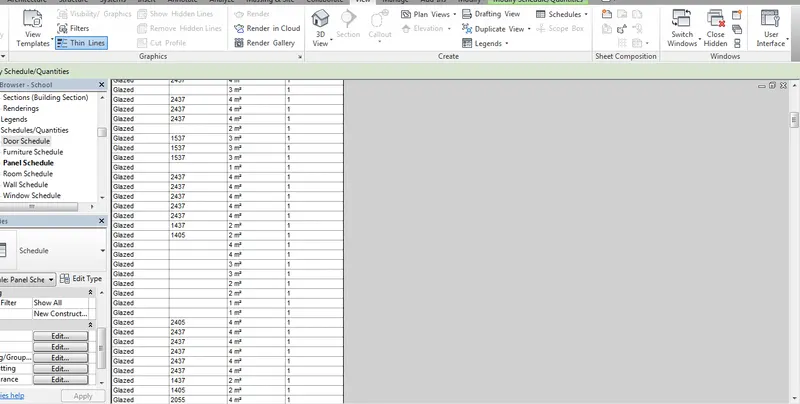
- The qunatity are schedule in the form of shown below table
- Need to edit any schedule click on edit in property and u can edit the field , filter , shorting , formating , apperance
- But in our present project there is no provision of window insted of window only curtain wall
Step 4:
- After complication of all floor design in and placement of door and window click on view on Ribbon and modify schedule quantiy
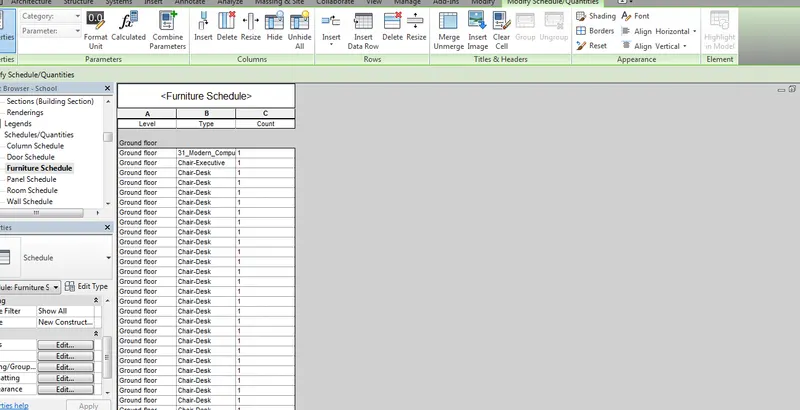
- Select the Category as wood or Furniture click ok and create of new schedule quantity and slect the filed in order as Level , Type , Width , height, count and press ok
- The qunatity are schedule in the form of shown below table
- Need to edit any schedule click on edit in property and u can edit the field , filter , shorting , formating , apperance
3
AIM : Using Revit Calculate area and volume of each room in the model with appropriate room tags applied to each room and Preparing a schedule report for area and volume of each room.
Apparatus : Architecture wall, Doors , Windows , Material , Modify schedule quantity , Door parameter , Level , type , width , height , count
Procedure :
Step1:
- After complication of all floor design in and placement of door and window click on view on Ribbon and modify schedule quantiy
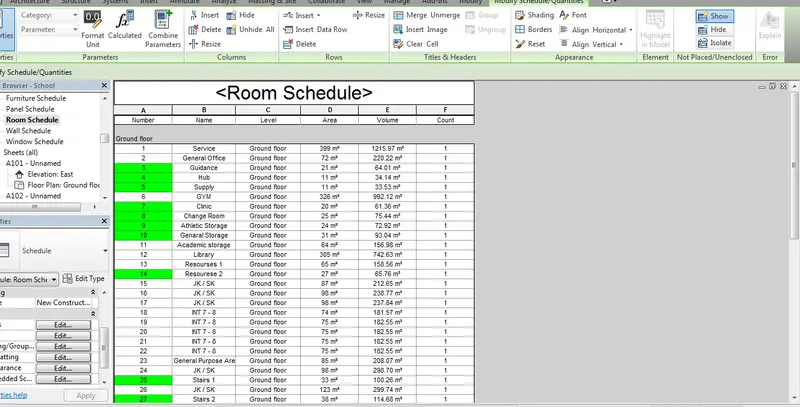
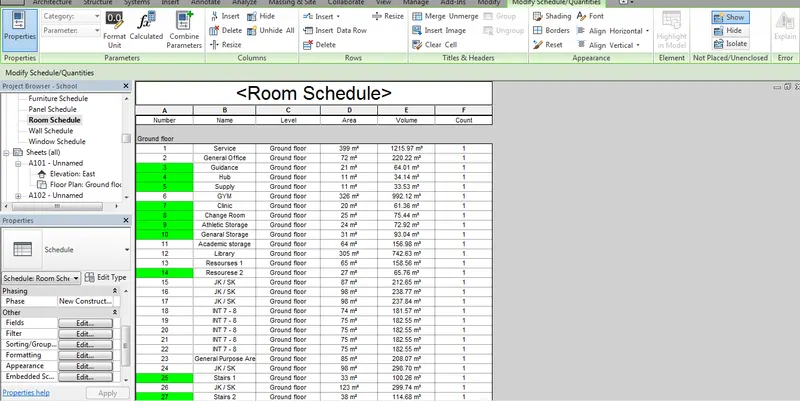
- Select the Category as room click ok and create of new schedule quantity and slect the filed in order as Level , Type , Width , height, count and press ok
- The qunatity are schedule in the form of shown below table
4
AIM :Using the same schedule using the unit cost rate for materials available in the internet, preparing total cost of materials used in the project
a. Total Cost of Materials
b. Individual Material Take off
Apparatus : Architecture wall, Doors , Windows , Material , Modify schedule quantity , Door parameter , Level , type , width , height , count , cost.
Procedure :
Step 1:
- After complication of all floor design in and placement of door and window click on view on Ribbon and modify schedule quantiy
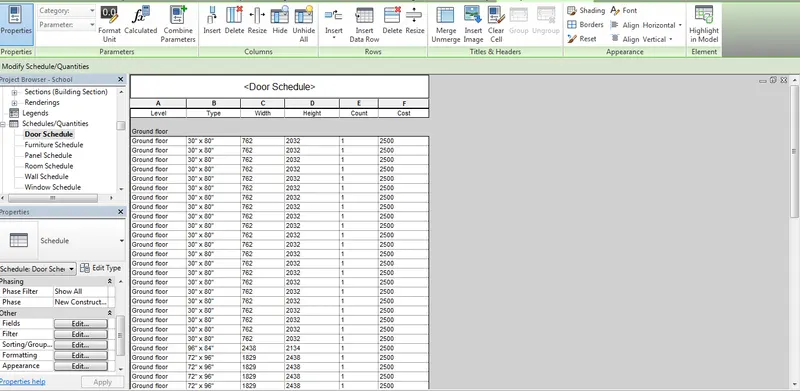
- Select the Category as room click ok and create of new schedule quantity and slect the filed in order as Level , Type , Width , height, count, cost and press ok
- The qunatity are schedule in the form of shown below table
- In the field edit the type of categorie you want to schedule
- The cost of the material has taken by assuming the door price
Step 2 :
- After complication of all floor design in and placement of door and window click on view on Ribbon and modify schedule quantiy
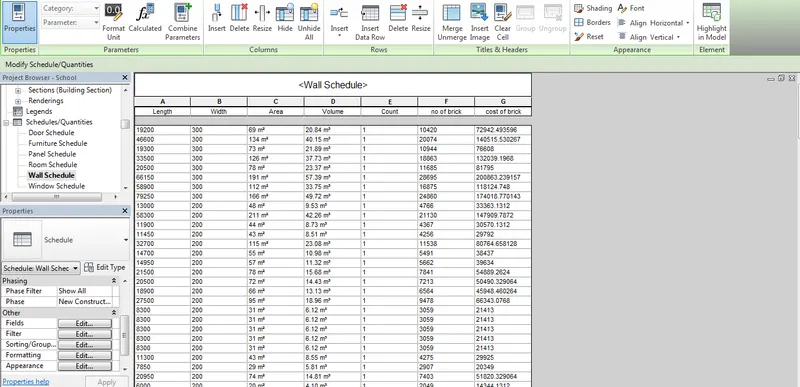
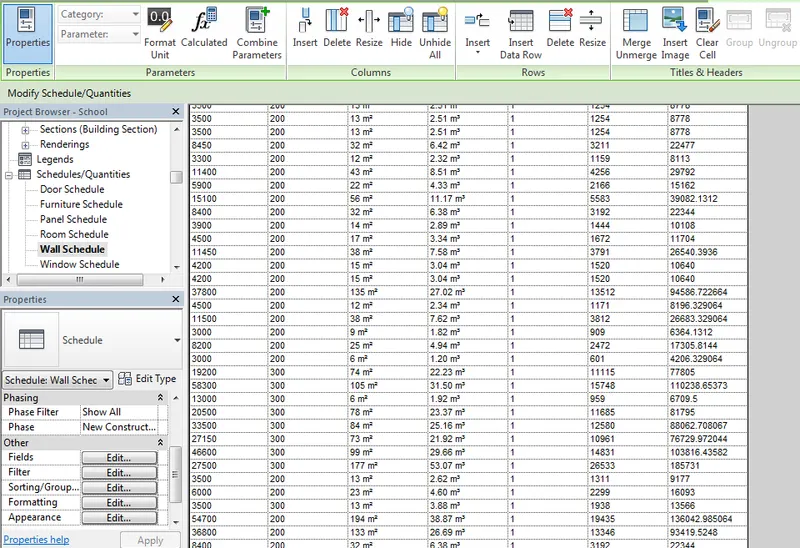
- Select the Category as room click ok and create of new schedule quantity and slect the filed in order as Level , Type , Width , height, count, cost and press ok
- The qunatity are schedule in the form of shown below table
- In the field edit the type of categorie you want to schedule
- The quantity of brick that are caluculated per m^3 dividing with volume of 1 brick let say it 0.002 = 500 no in 1 m^3
- The cost of the bricks as per one brick 7 RS multiply with no of brics per m^3
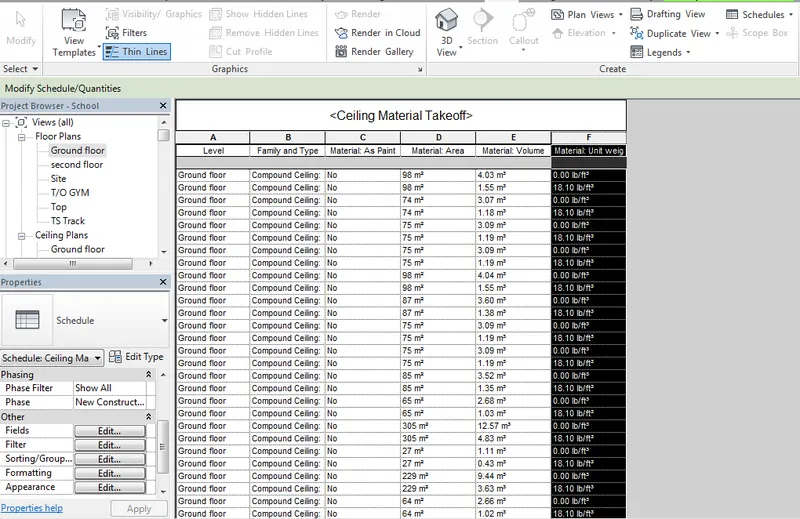
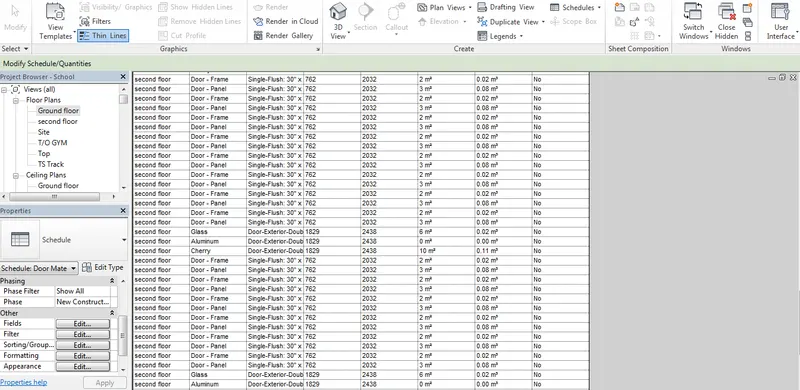
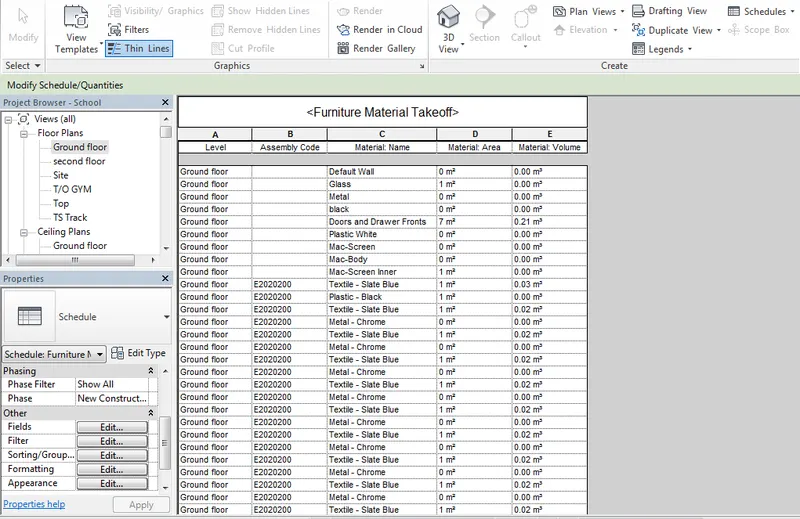
B: Individual material Takeoff
Step 3 :
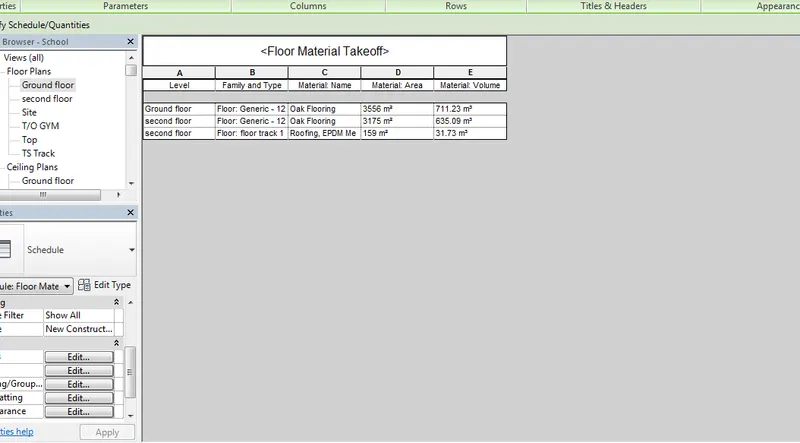
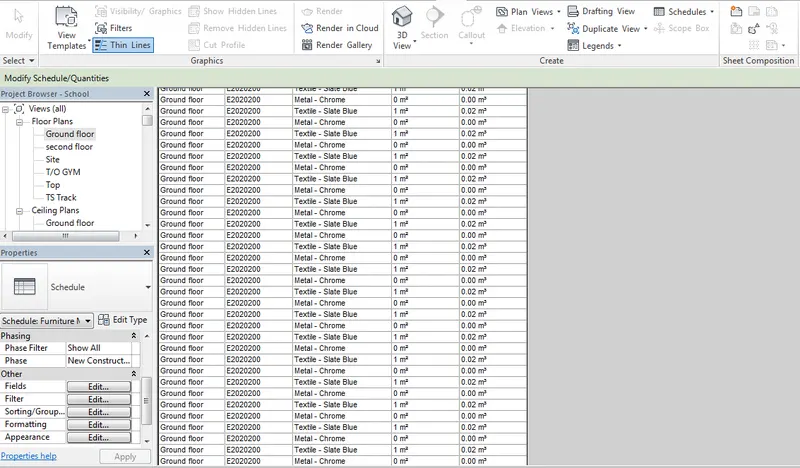
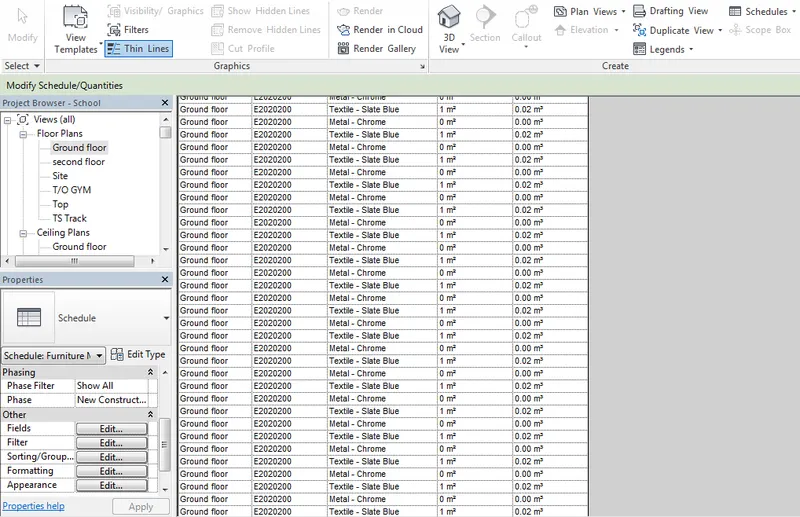
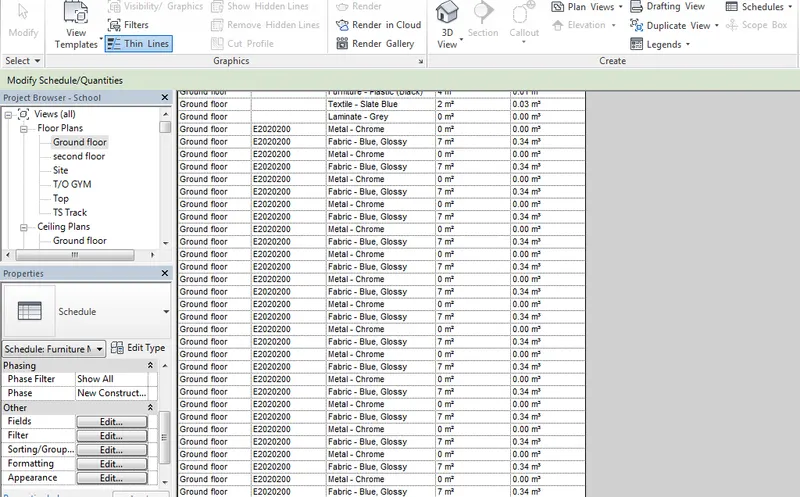
- After complication of all floor design in and placement of door and window click on view on Ribbon and modify schedule quantiy click on material take off
- Select the Category as room click ok and create of new schedule quantity and select the filed in order as Level , Type , Width , height, count, cost and press ok
- The qunatity are schedule in the form of shown below table
- In the field edit the type of categorie you want to schedule
5)
AIM: Using the concept of Visual Programming
a. How to decide framings for a structure using Dynamo
b. If there is no water coming from the pipes
c. If request for money from client has been declined for the project
Apparatus : Revit installed Dynamo Software , view command , Visual programming Dynamo ,
Procedure :
Step 1 : click on view tab in revit and visual Programming Dynamo , click ok and create new file of dynamo for creation of file in Dynamo u need to give the programming to the software
Step 2 : In search bar click Code block and rename it as X create another code block and name it as y and another as Z
Step 3: By Typing Range in Search bar , integer number, Point by coordinate , sum , product , math.sin all the gemetory sign in dynamo
6)
AIM : List the parameters associated with each model element
a. Wall
b. Floor
c. Door
d. Window
e. Table
f. Building
Apparatus : View , Schedule properties , Quantity , Field , field Schedule .
Procedure :
A : Click on view next to Schedule and then on schedule properties select to wall parameters
The parameter associated with wall element are
- Absorptance
- Area
- Assembly code
- Assembly descrition
- Base constraint
- Base offset
- Comments
- Cost
- Count
- Description
- Estimated Reinforcement Volume
- Family
- Family and type
- Fire Rating
- Function
- Manufacturer
- Mark
- Model
- Phase created
- Phase Demolished
- Roughness
- Structural Material
- Structural usage
- Thermal mass
- Thermal resistance
- Top constrient
- Top offset
- Type
- Type comment
- Type mark
- Unconnected Height
- URL
- Volume
- Width
The parameter associated with Floor element are
- Absorptance
- Area
- Assembly code
- Assembly descrition
- Base constraint
- Base offset
- Comments
- Cost
- Count
- Description
- Elevation at bottom
- Elevation at Bottom core
- Eevation at Bottom survey
- Elevation at top
- Elevation at Top core
- Eevation at Top survey
- Estimated Reinforcement Volume
- Family
- Family and type
- Fire Rating
- Function
- Heat transfer coefficient
- Height offset from level
- Ifcgudd
- Image
- Keynote
- level
- Manufracture
- mark
- model
- perimeter
- Phase created
- phase demolished
- Roughness
- slope
- Structural
- Structural Material
- Thermal mass
- Themal resistance
- Type
- Type comment
- Type Image
- URL
- Volume
The parameter associated with Door element are
- Assembly code
- Assembly description
- Assembly name
- Construction type
- Cost
- Count
- Description
- Family
- Family and type
- Finish
- Frame material
- Finish
- Fire rating
- frame material
- Frame type
- Fucntion
- Head Height
- Heat transfer
- height
- Image
- keynote
- level
- manufracture
- mark
- Model
- Omni class number
- omni class title
- Operation
- phase created
- Phase demolished
- Rough height
- Rough width
- Still Height
- Solar heat gain coefficient
- Thermal Resistance
- Thickness
- Type
- Type image
- Type mark
- URL
- Visual light transmittance
- Width
- Volume
he parameter associated with Window element are
- Assembly code
- Assembly description
- Assembly name
- Construction type
- Cost
- Count
- Description
- Family
- Family and type
- Finish
- Frame material
- Finish
- Fire rating
- frame material
- Frame type
- Fucntion
- Head Height
- Heat transfer
- height
- Image
- keynote
- level
- manufracture
- mark
- Model
- Omni class number
- omni class title
- Operation
- phase created
- Phase demolished
- Rough height
- Rough width
- Still Height
- Solar heat gain coefficient
- Thermal Resistance
- Thickness
- Type
- Type image
- Type mark
- URL
- Visual light transmittance
- Width
- Volume
The parameter associated with Window element are
- Assembly code
- Assembly description
- Assembly name
- Construction type
- Cost
- Count
- Description
- Family
- Family and type
- Finish
- Frame material
- Finish
- Fire rating
- frame material
- Frame type
- Fucntion
- Head Height
- Heat transfer
- height
- Image
- keynote
- level
- manufracture
- mark
- Model
- Omni class number
- omni class title
- Operation
- phase created
- Phase demolished
- Rough height
- Rough width
- Still Height
- Solar heat gain coefficient
- Thermal Resistance
- Thickness
- Type
- Type image
- Type mark
- URL
- Visual light transmittance
- Width
- Volume
The parameter associated with Table element are
- Assembly code
- Assembly description
- Assembly name
- Comments
- Cost
- Count
- Description
- Family
- Family and type
- IFCguid
- Image
- Keynote
- Level
- manufracture
- mark
- Model
- omniclass Number
- Omni Class Title
- Phase created
- Phase Demolished
- Type
- Type comments
- Type IfcGUID
- Type Image
- Type mark
- URL
The parameter associated with Grass Building element are
- Area
- Area Type
- Comments
- Count
- IfcGUid
- Image
- Level
- Perimeter
- name
- Number