Introduction to REVIT concepts
AIM
To create a new project (Structural / Architectural / Construction template ) and name the project appropriately
INTRODUCTION
Autodesk is a BIM(Building Information Modeling) software civil engineers, architects, mechanical,electrical,plumbing (MEP )engineers
PROCEDURE
Step 1:Open Revit software
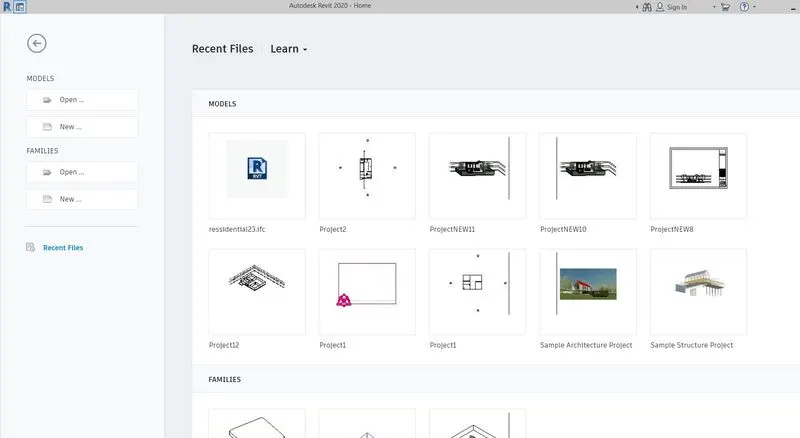
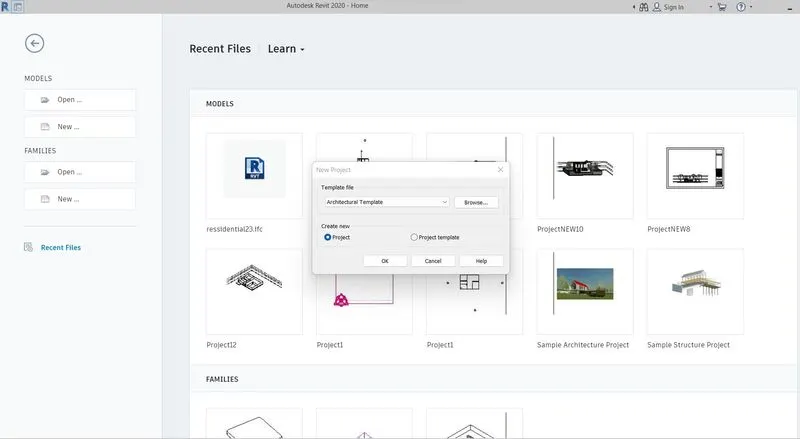
Step 2:Select new in the ‘models’ option
Select architectural template in ‘template file’ option
Then click ok
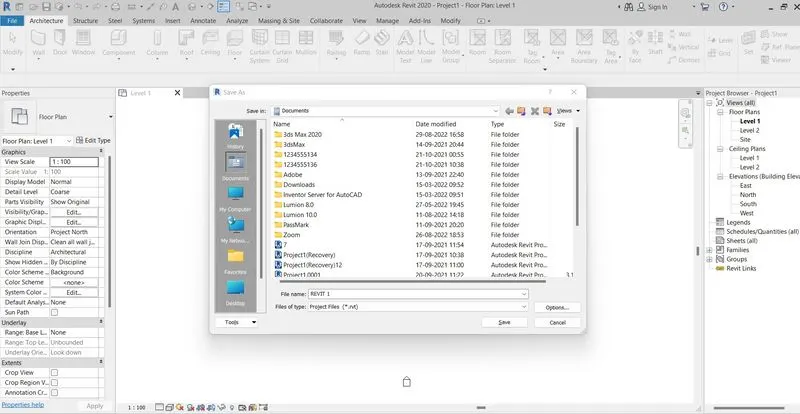
Step 3:From the file select ‘save as’ option
Select the location
Enter a name
Select save
Then enter
RESULT
Created new file and save it successfully
AIM
To save the new project file. Close and open using icons from file toolbar
INTRODUCTION
Autodesk is a BIM(Building Information Modeling) software civil engineers, architects, mechanical,electrical,plumbing (MEP )engineers
PROCEDURE
Step 1:Open Revit software
Step 2:Select new in the ‘models’ option
Select architectural template in ‘template file’ option
Then click ok
Step 3:From the file select ‘save as’ option
Select the location
Enter a name
Select save
Then enter
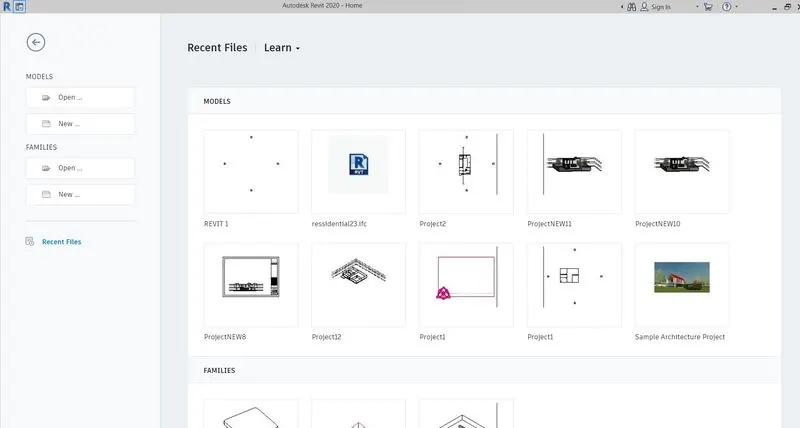
Step 4:Then in file menu select close
Step 5:From the window select the filewith name saved name
RESULT
save the new project file. Close and open using icons from file toolbar successfully
AIM
To familiarize with options to draw a wall. Create a rectangular layout of walls of about 40’-0” X 35’-0”
INTRODUCTION
Autodesk is a BIM(Building Information Modeling) software civil engineers, architects, mechanical,electrical,plumbing (MEP )engineers
PROCEDURE
Step 1:Open Revit software
Step 2:Select new in the ‘models’ option
Select architectural template in ‘template file’ option
Then click ok
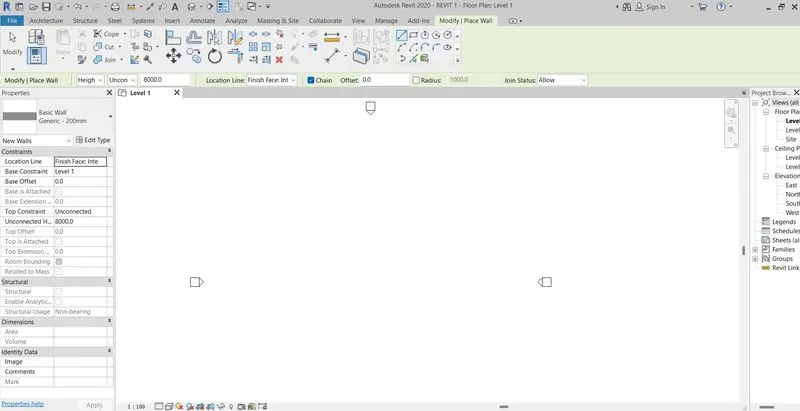
Step 3:Select wall from architecture
Click a base point
Enter the dimensions draw the wall
RESULT
Draw the wall successfully

AIM
To use the aligned option to add dimensions to the layout from annotate toolbar
INTRODUCTION
Autodesk is a BIM(Building Information Modeling) software civil engineers, architects, mechanical,electrical,plumbing (MEP )engineers
PROCEDURE
Step 1:Open Revit software
Step 2:Select new in the ‘models’ option
Select architectural template in ‘template file’ option
Then click ok
Step 3:Select wall from architecture
Click a base point
Enter the dimensions draw the wall
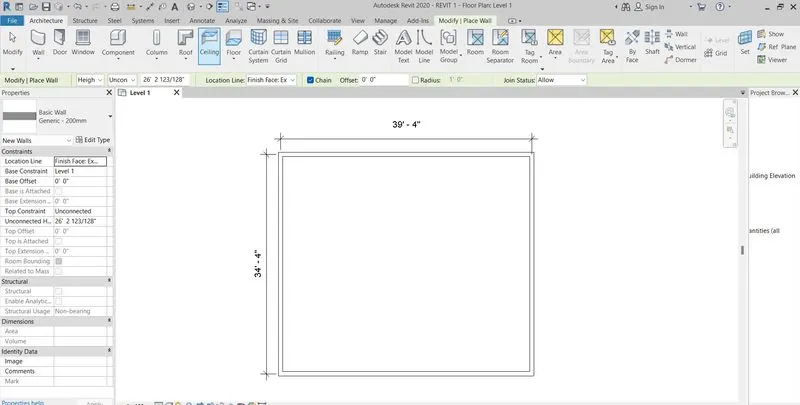
Step 4:From annotate select aligned dimension
Step 5:Select the wall center line
RESULT
AIM
To use the properties browser to switch to different wall types
INTRODUCTION
Autodesk is a BIM(Building Information Modeling) software civil engineers, architects, mechanical,electrical,plumbing (MEP )engineers
PROCEDURE
Step 1:Open Revit software
Step 2:Select new in the ‘models’ option
Select architectural template in ‘template file’ option
Then click ok
Step 3:Select wall from architecture
Click a base point
Enter the dimensions draw the wall
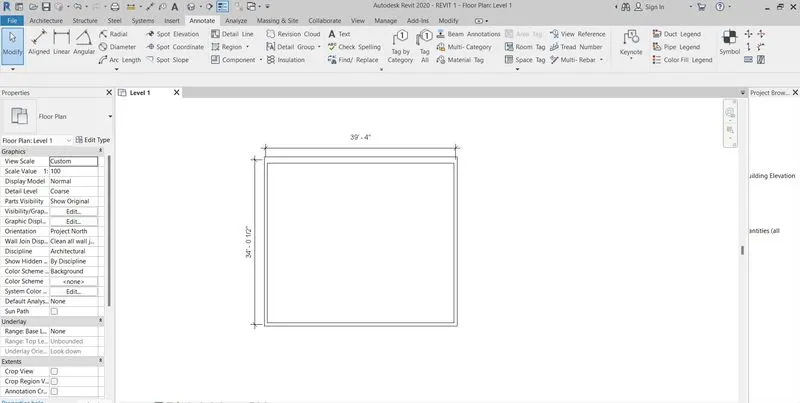
Step 4:Select the wall to change
From properties select the suitable wall type
RESULT
Wall type changed successfully
AIM
To create a 3D view from the view toolbar and save the view with the appropriate name
INTRODUCTION
Autodesk is a BIM(Building Information Modeling) software civil engineers, architects, mechanical,electrical,plumbing (MEP )engineers
PROCEDURE
Step 1:Open Revit software
Step 2:Select new in the ‘models’ option
Select architectural template in ‘template file’ option
Then click ok
Step 3:Select wall from architecture
Click a base point
Enter the dimensions draw the wall
Step 4:Select the ‘Defalt 3D view’ option
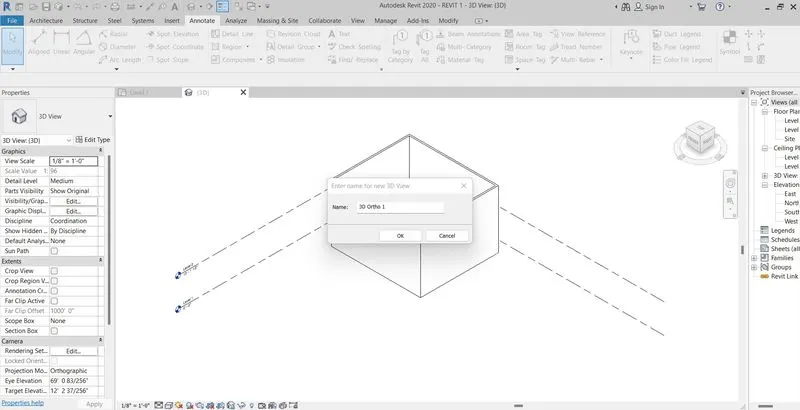
Step 5:Select the corner of view cube
Rigth click
Select ‘Save view’
Enter the name
Then ok
RESULT
Created a 3D view successfully
AIM
To navigate through the 3D model using the view cube. Orbit/pan through the model layout created
INTRODUCTION
Autodesk is a BIM(Building Information Modeling) software civil engineers, architects, mechanical,electrical,plumbing (MEP )engineers
PROCEDURE
Step 1:Open Revit software
Step 2:Select new in the ‘models’ option
Select architectural template in ‘template file’ option
Then click ok
Step 3:Select wall from architecture
Click a base point
Enter the dimensions draw the wall
Step 4:Select the ‘Defalt 3D view’ option
Step 5:Select ‘Full navigation wheel’
Orbit on Left side of navigation wheel
Pan on down side of navigation wheel
RESULT
Used Orbit/Pan in navitagion tool bar successfully
AIM
To use the visibility settings option below to switch model to shaded, realistic, hidden lines options
INTRODUCTION
Autodesk is a BIM(Building Information Modeling) software civil engineers, architects, mechanical,electrical,plumbing (MEP )engineers
PROCEDURE
Step 1:Open Revit software
Step 2:Select new in the ‘models’ option
Select architectural template in ‘template file’ option
Then click ok
Step 3:Select wall from architecture
Click a base point
Enter the dimensions draw the wall
Step 4:Select the ‘Defalt 3D view’ option
Step 5:Select the visual style on bottam panel
Select shaded
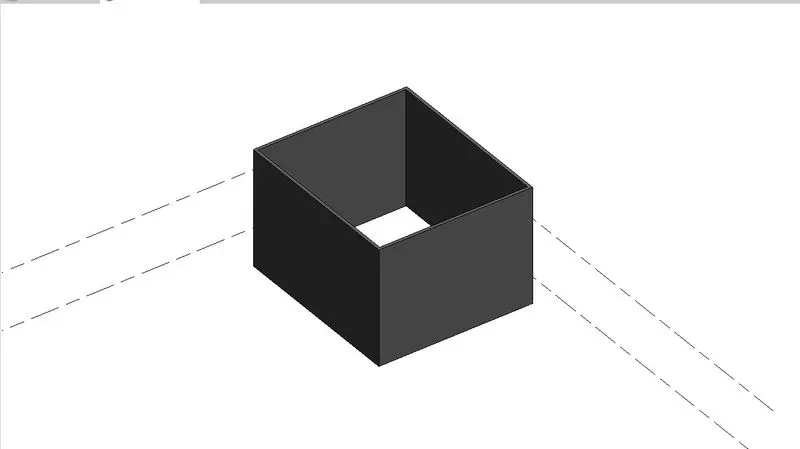
Step 6:Select the visual style on bottam panel
Select realistic
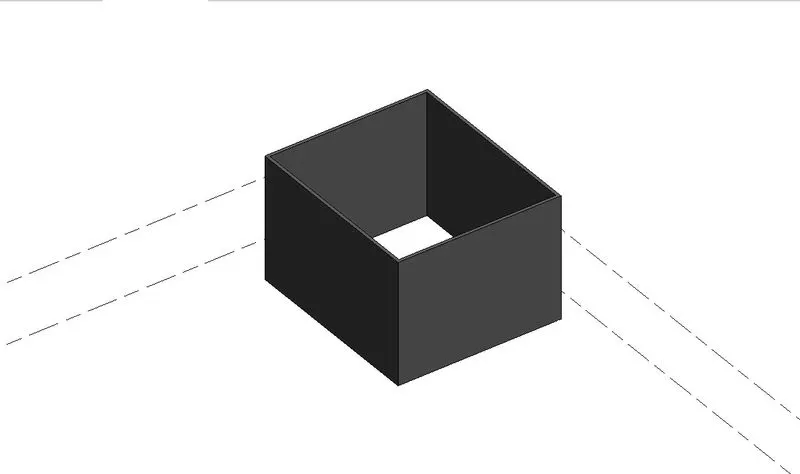
Step 7:Select the visual style on bottam panel
Select hidden line
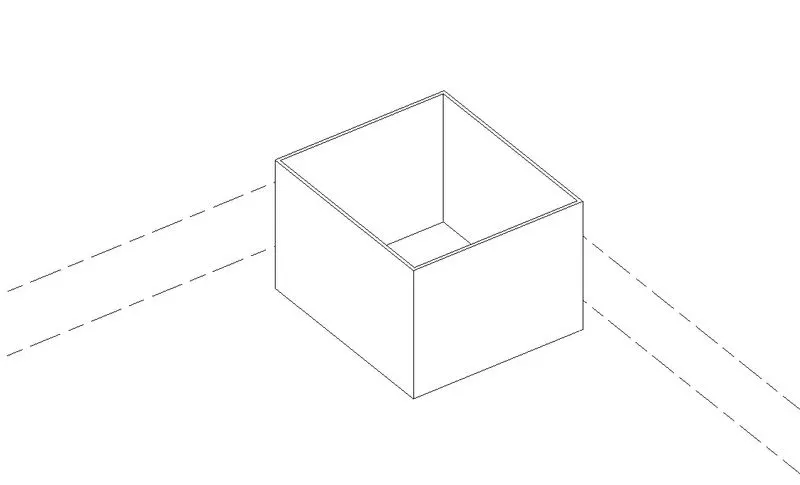
RESULT
Created different types of 3D view
AIM
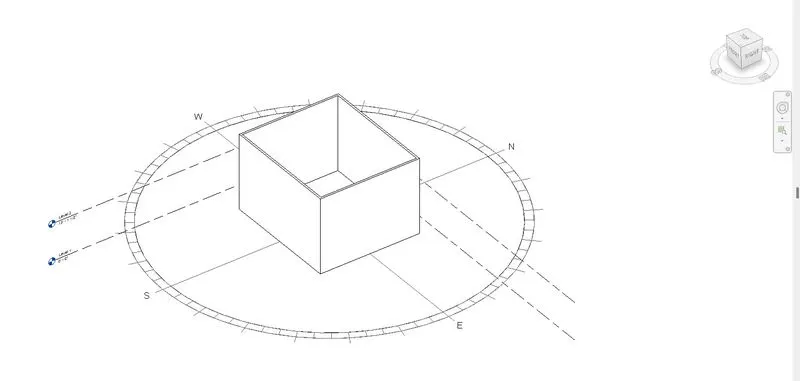
To turn the sun path on and off to view shadings in the layout created
INTRODUCTION
Autodesk is a BIM(Building Information Modeling) software civil engineers, architects, mechanical,electrical,plumbing (MEP )engineers
PROCEDURE
Step 1:Open Revit software
Step 2:Select new in the ‘models’ option
Select architectural template in ‘template file’ option
Then click ok
Step 3:Select wall from architecture
Click a base point
Enter the dimensions draw the wall
Step 4:Select the ‘Defalt 3D view’ option
Step 5:Click on sun psth button
Select on son path on
RESULT
AIM
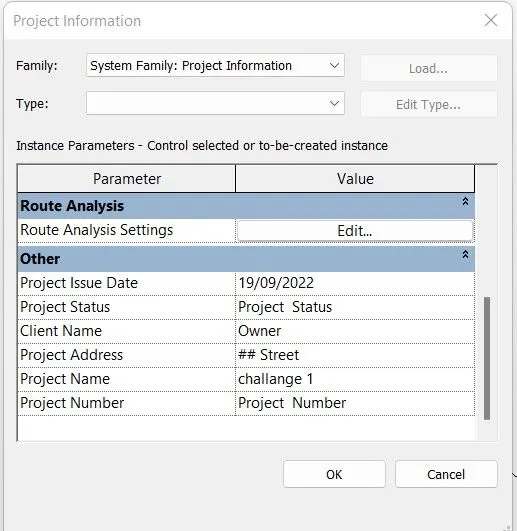
To use the Manage toolbar to enter project settings, project name, and project issue date (choose according to your convenience)
INTRODUCTION
Autodesk is a BIM(Building Information Modeling) software civil engineers, architects, mechanical,electrical,plumbing (MEP )engineers
PROCEDURE
Step 1:Open Revit software
Step 2:Select new in the ‘models’ option
Select architectural template in ‘template file’ option
Then click ok
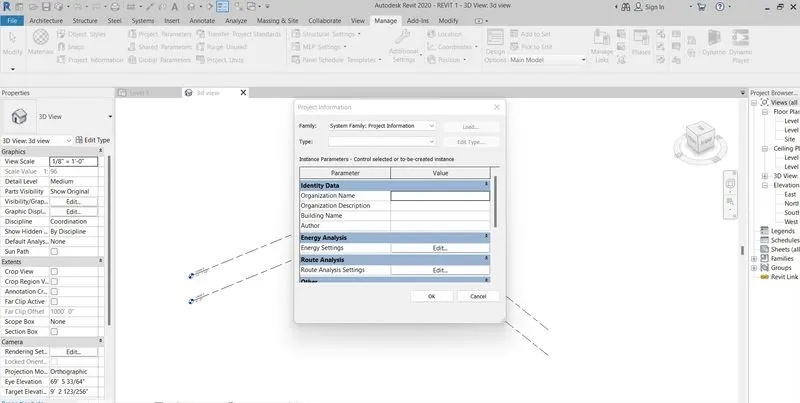
Step 3:Select manage toolbar
Select project information
Change the datas in the information accordingly
RESULT
AIM
To know about analyze toolbar,Links in revit,Collaborate tab in Revit
INTRODUCTION
Autodesk is a BIM(Building Information Modeling) software civil engineers, architects, mechanical,electrical,plumbing (MEP )engineers
PROCEDURE
What is the Analyze toolbar used in Revit? How it is beneficial for design and modeling

Analyze can be selected from toolbar
It can be used for the structural analysis of the building,it has various option for analyzing
Boundary condition
It defines the points, lines and area boundary conditions in an analytical mode
Load
It applies point,line and area load to a model
Load cases
It adds and edit load cases for the analytical model
Load combination
It adds and edit load combinations for the analytical model
What are the links that Revit supports to be linked to the model?

Link Revit: Link another Revit model to the current model
Links IFC:Links an IFC file to the current project to reference its information for additional design work
Link CAD:Links a CAD file to the current Revit project
When original linked file changes these changes are reflected in the file when you reload the project
Link Topography:Links existing topography to the current Revit model
DWF Markup:Links marked op DWF files into a Revit project so you can see the markups on the corresponding sheets
Point Cloud:Links a point Cloud file (*.rcp or*.rcs) into the current project
Coordination Model:Links aNWD oNWC file to provide context for the Revit model
Why do you need the Collaborate tab in Revit? How it supports modeling and its efficiency
Collaborate tab enables work sharing
Through work sharing team members can work on a model simultaneously
You can edit and sync a model in the cloud,through local area network (LAN) or wide area network(WAN)
Collaborate tab helps to
Work together:Multiple revit file can be linked together
Cloud sharing
Work sharing
Central model
Multiple persons can work together in model and cloud sharing helps to involve the persons in the work from different location
RESULT
Studied about analyze toolbar,Links in Revit,Collaborate in revit