Introduction to REVIT concepts
1) From the file menu, create a new project (Structural / Architectural / Construction template ) and name the project appropriately
Ans) AIM:- To create a new project file and Name the file.
Introduction:
Revit is a high end software used by many professionals. It is also a multi disciplinary software it is used by constructional, architectural, structural, mechanical, electrical engineers. The changes made in the project are changed in real time.
Procedure:
First we need to go to search button and enter revit.
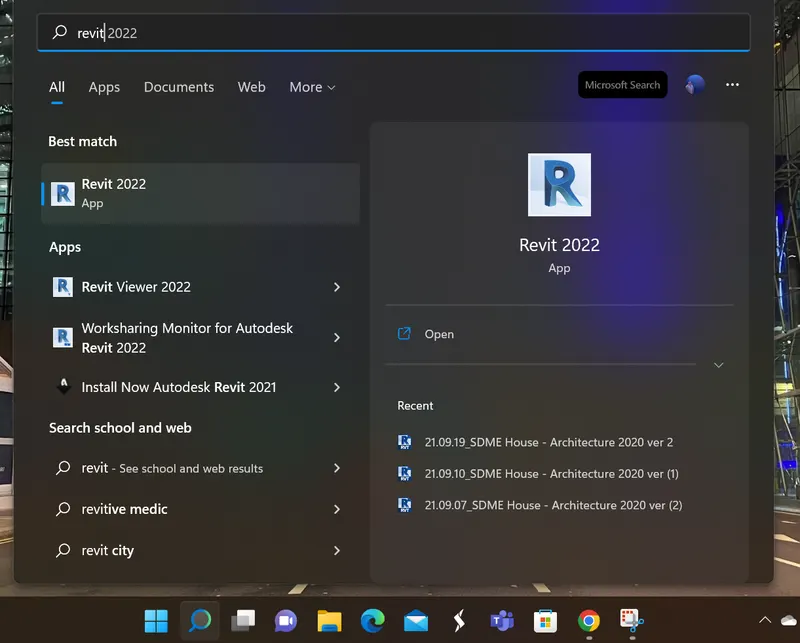
Then Double click on Revit 2002 icon to open the file.
Then a window will open like this.
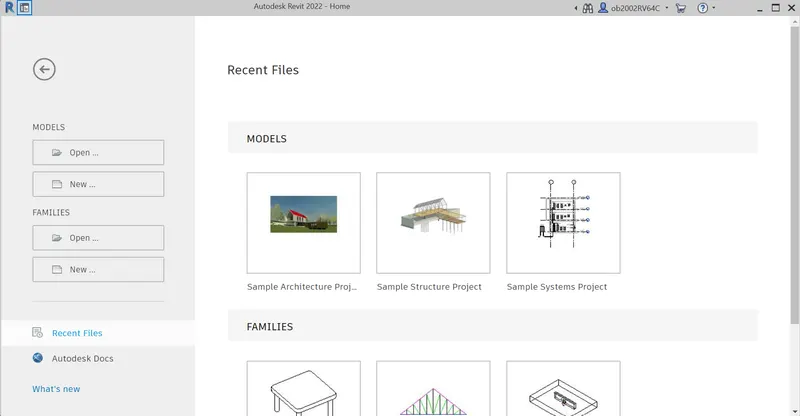
Then click on the New Button below the Models on the left hand side.
Then a smal window pop up like this.
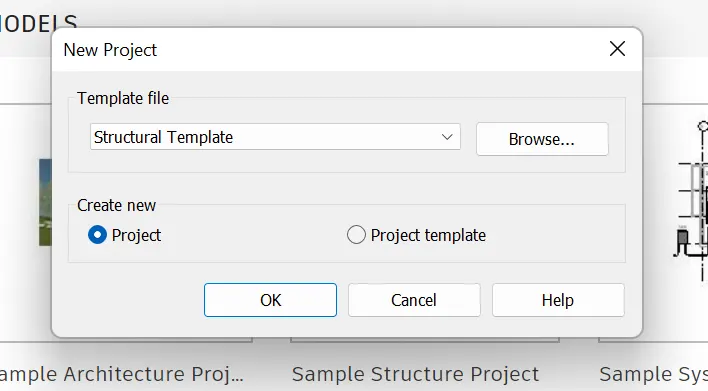
THen select the Template file and click on ok. here i am selecting construction Template.
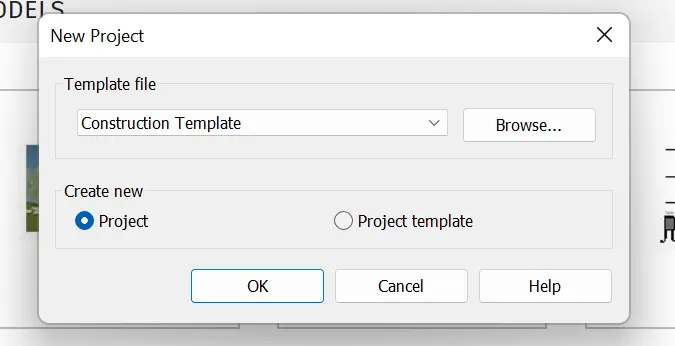
Once you clicked on ok it will load a file like this.
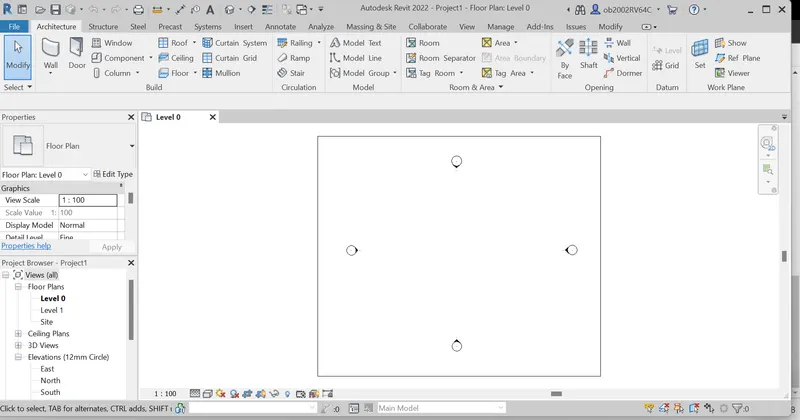
Then click on file option on top left to save file and create a name to file.
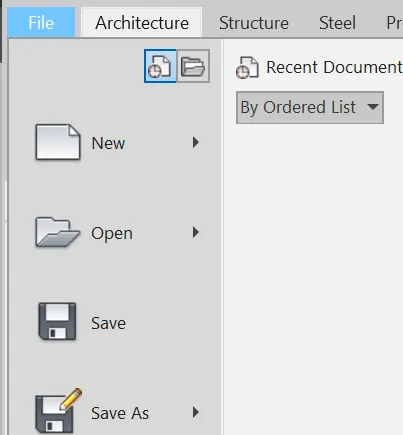
Now click on the save as button to give a name to project and save the project file.
change the name of the file and select the location where you want to upload the file.then click on the save button to change name of file and save a copy of the file.
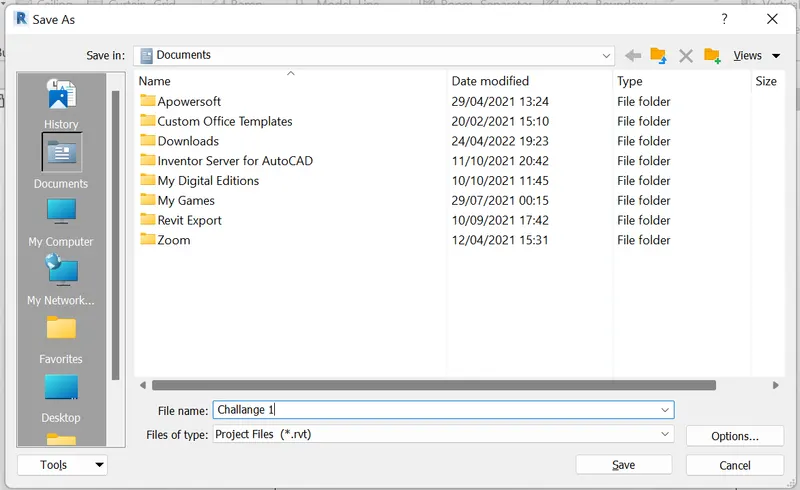
Result:
As an result we have now created a construction template and created it a name and saved a copy of the file in our folder. The name which is changed you can see it clearly on the center-top of the file we created.

2) Save the new project file. Close and open using icons from file toolbar.
Aim:- To save an project file and close and open the file using an icon from file tool bar.
Introduction:
Revit is a high end software used by many professionals. It is also a multi disciplinary software it is used by constructional, architectural, structural, mechanical, electrical engineers. The changes made in the project are changed in real time.
Procedure:-
First click on the file button on the top left as your opened file previosly.
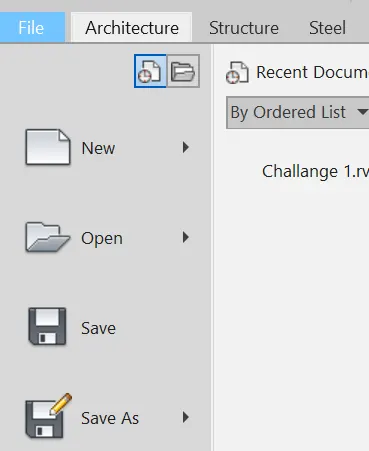
Then click on Save as button to save a file by giving name and loacation to the file. Then click on save button. as result your file will be saved.
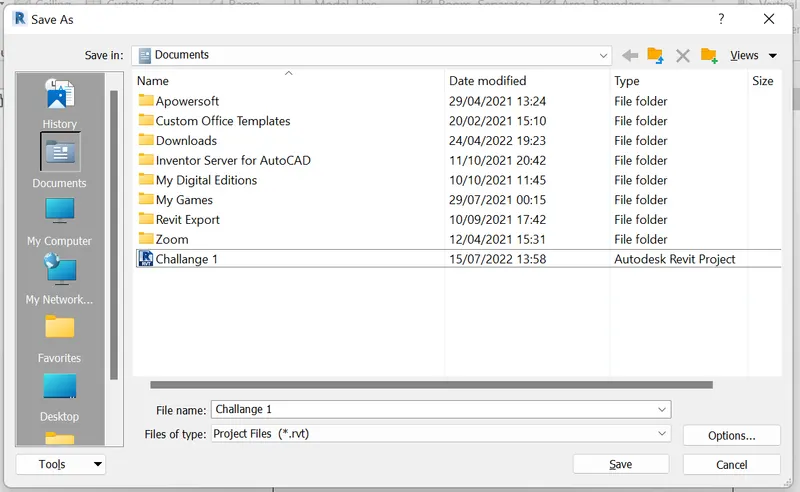
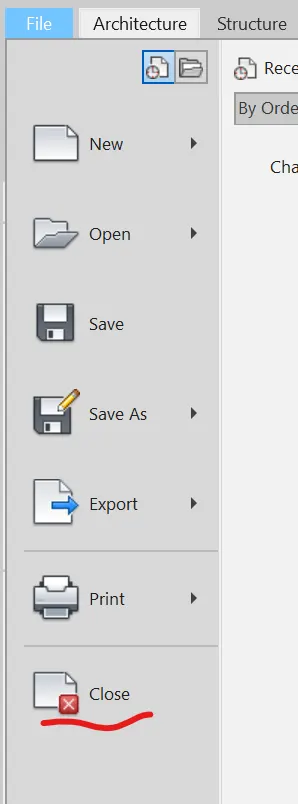
Then click on the File button on the top left once again and then click on the cloce button.
After closing the file your screen will look like this.
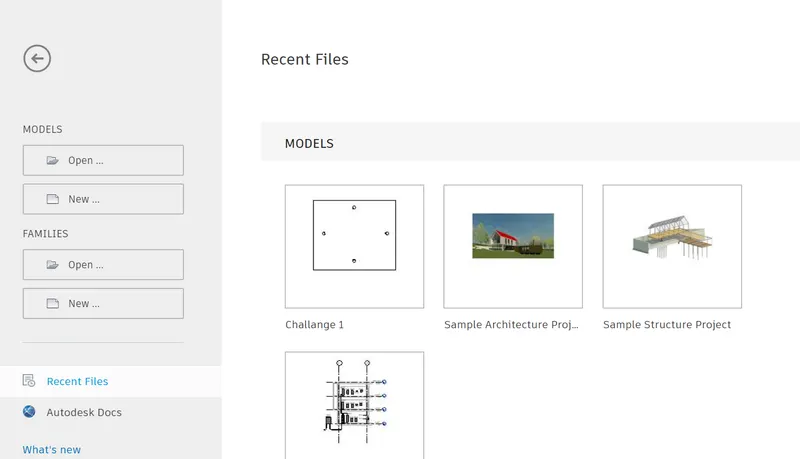
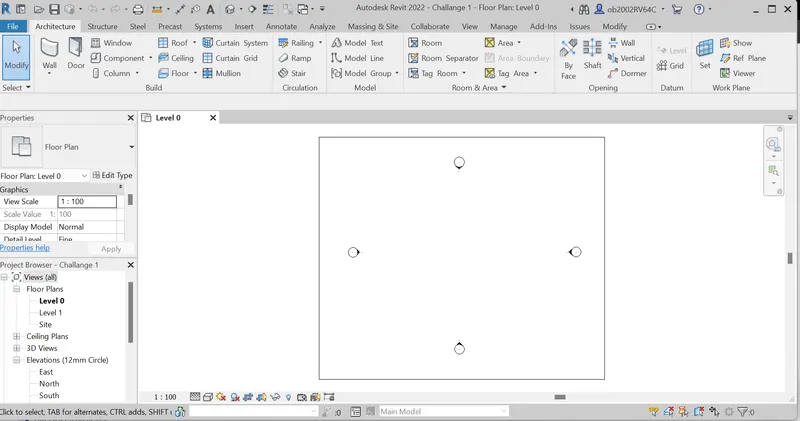
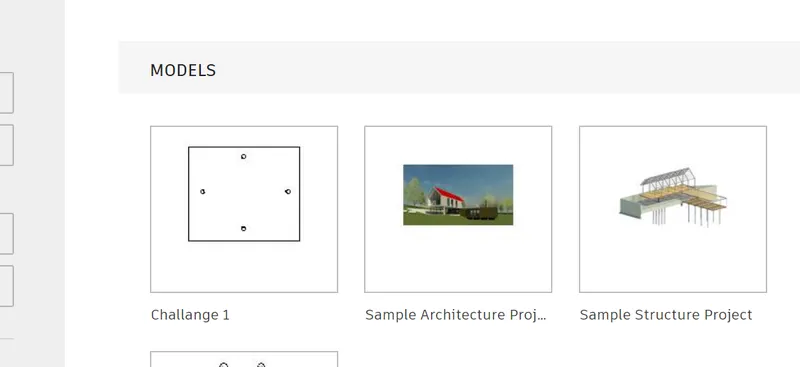
Now click on the Challange 1 Bellow the Models to open our file.
Then your file will open like this again.
Result:-
As a result we have now saved the file and closed and open the file to cleck wheater the file has been successfully saved.
3) From the architecture/ structure toolbar familiarize with options to draw a wall. Create a rectangular layout of walls of about 40’-0” X 35’-0”
Aim:- Using a architecture toolbar Creating rectangular wall about 40’-0” X 35’-0”.
Introduction:
Revit is a high end software used by many professionals. It is also a multi disciplinary software it is used by constructional, architectural, structural, mechanical, electrical engineers. The changes made in the project are changed in real time.
Procedure:-
First asusual we need to open the revit and open the file.
Then double click on the challange file below the module to open our file.
Once the file is open in the tool bar click on the architecture.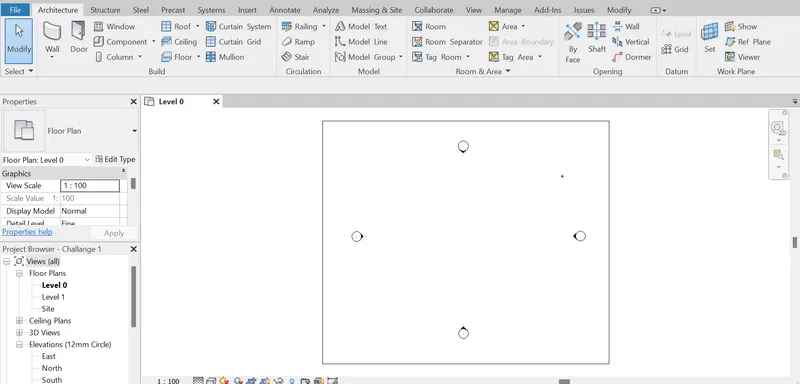
Below the architecture you can see the wall option then click on it. Then a new modify bar appear on the tool bar.
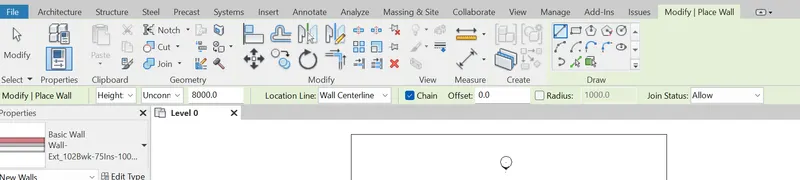
On the top right now click on the lin shape to create a wall as per our lengths.
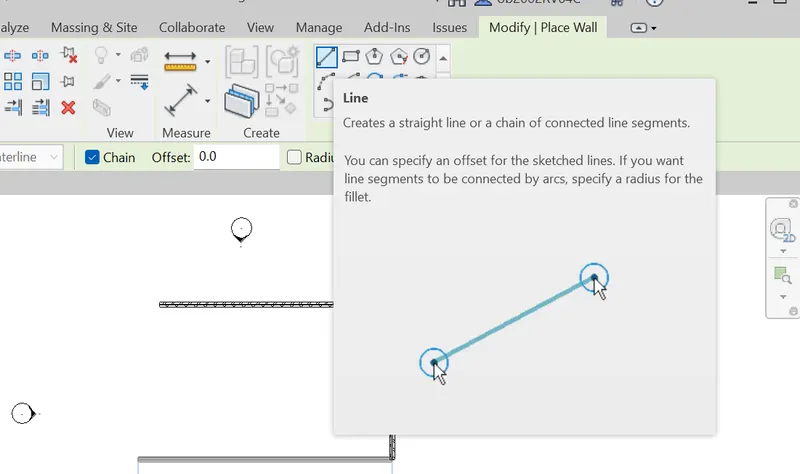
using given lengths enter them by using line command at top
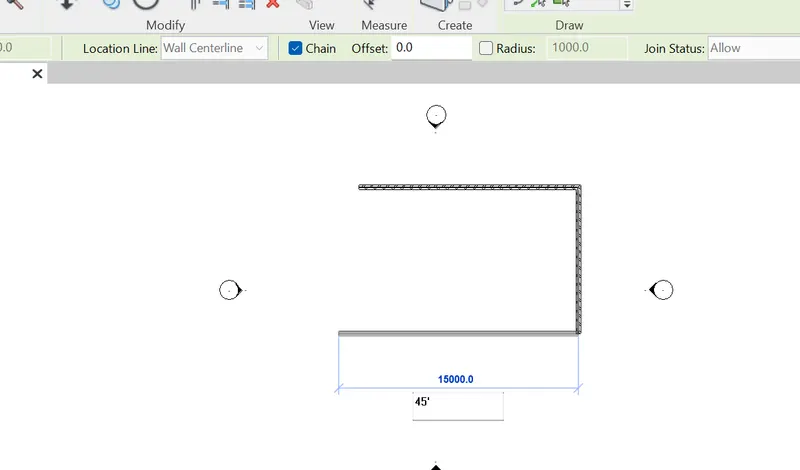
Result:-
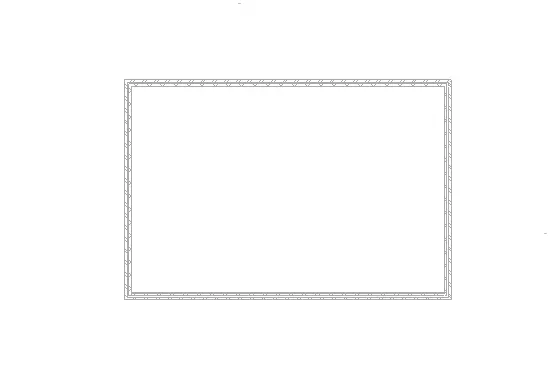
once entering the dimension in the while constrcuion of the wall it should be look like this. the end result of the project file should look like this now.
4) From the Annotate toolbar use the aligned option to add dimensions to the layout
Aim:- To add dimension to a layout by using aligned option from annotate toolbar.
Introduction:
Revit is a high end software used by many professionals. It is also a multi disciplinary software it is used by constructional, architectural, structural, mechanical, electrical engineers. The changes made in the project are changed in real time.
Procedure:-
First we need to open our previos drawing and then click on the annotate toolbar. then you will see the changes in the tool.

Then click on the linear option becouse we have a stright line we can use linear so that we can easily add the dimensions to the layout.
once you clicked on the linear screen will change like this again.

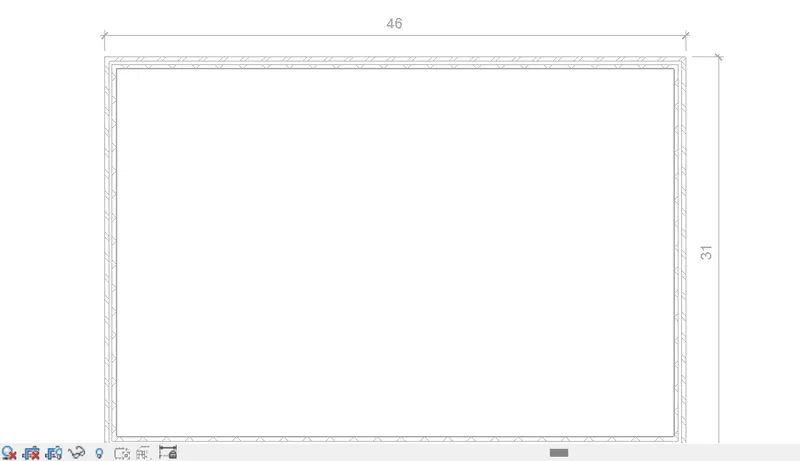
By using the linear option carefully pick the point end to end of the rectangle like this.
Result:-
As an end result we got the dimensions for the wall in the view now.
5) Use the properties browser to switch to different wall types
Aim:- To change the wall type by using the property browser.
Introduction:
Revit is a high end software used by many professionals. It is also a multi disciplinary software it is used by constructional, architectural, structural, mechanical, electrical engineers. The changes made in the project are changed in real time.
Procedure:-
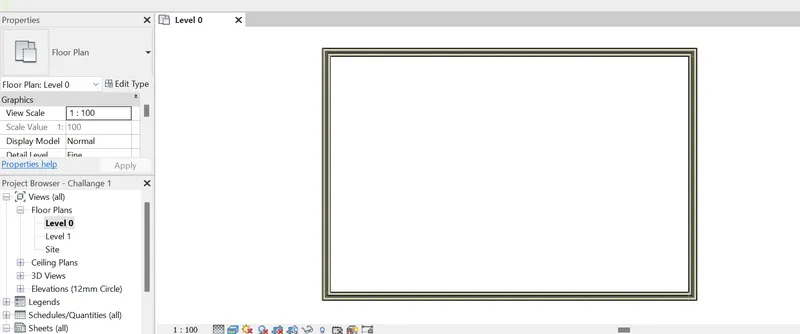
First select the wall which we made previosly any side. then wall become blue like this.
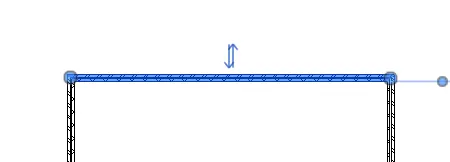
Now on the left hand side in property browser we can see the wall type and thickness . there we can see and select different type of wall as we wish.
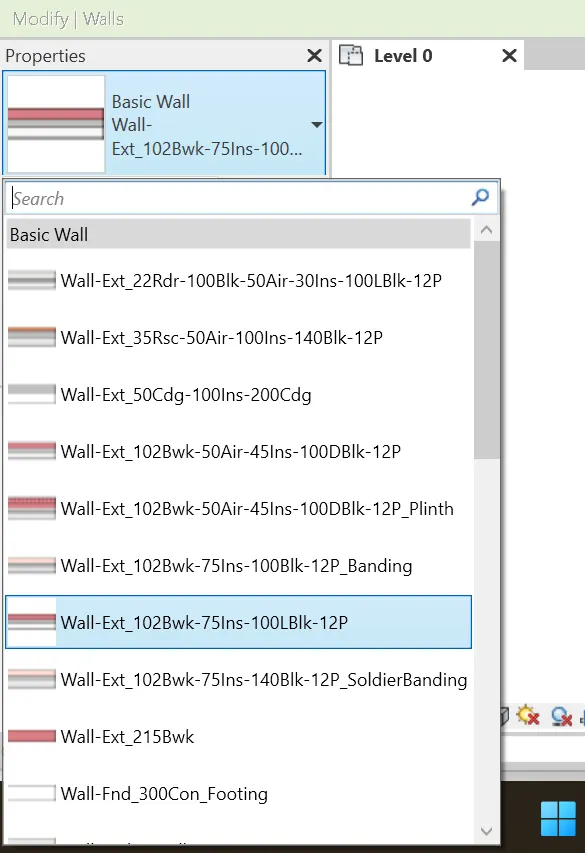
we can we after we change on the top . now there is a new wall type.
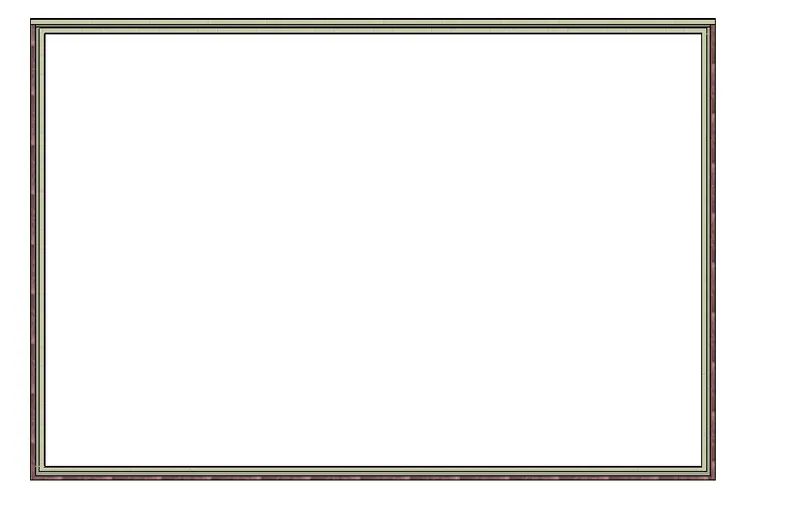
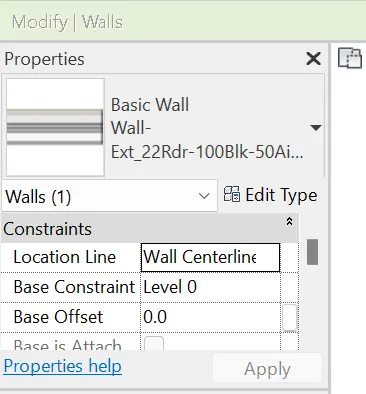
Result:-
As an end result we changed the wall type using the property browser in the left.
6) Create a 3D view from the view toolbar and save the view with the appropriate name
Aim:- creating a 3D view of the file and saving the file by giving the name to it.
Introduction:
Revit is a high end software used by many professionals. It is also a multi disciplinary software it is used by constructional, architectural, structural, mechanical, electrical engineers. The changes made in the project are changed in real time.
Procedure:-
First to change the 2D to 3D go to the view in the tool bar then we can see option.

we can see the 3D view option click on that and then click on default 3D view.
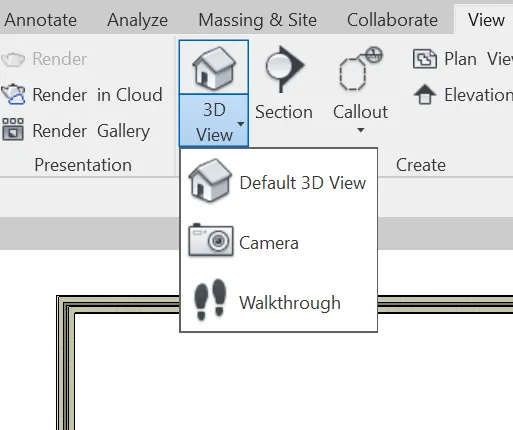
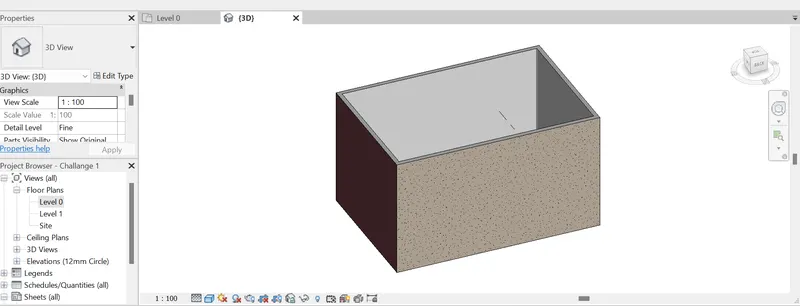
after clicking on the default 3D view you can see the change in the view.
To save this view we need to click on the corner of the globle top right of the drawing.
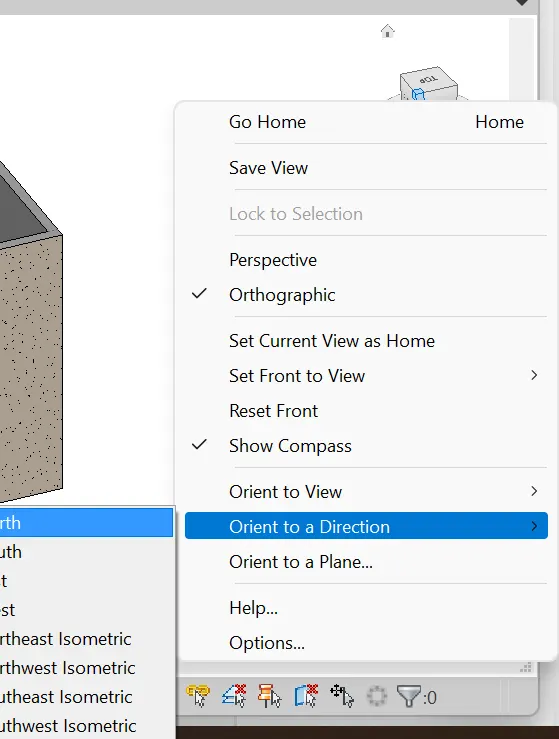
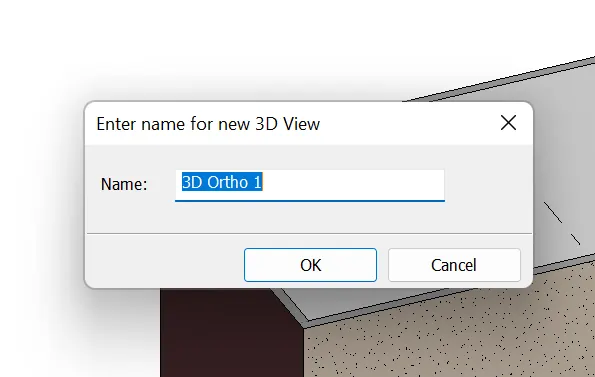
Then click on the save view option and give name to the view.
Result:-
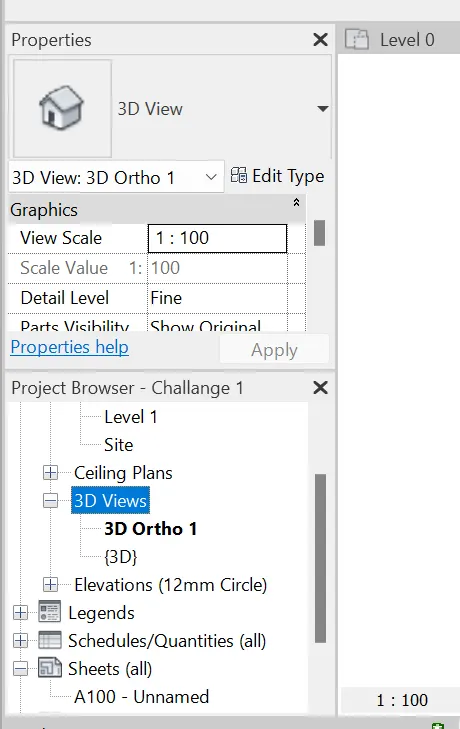
As a end result our 3D view has been named and saved successfully. we can see our saved view in properties.
7) Navigate through the 3D model using the view cube. Orbit/pan through the model layout created
Aim:- Navigate to the 3D model using the view cube by using orbit/pan thought layout created.
Introduction:
Revit is a high end software used by many professionals. It is also a multi disciplinary software it is used by constructional, architectural, structural, mechanical, electrical engineers. The changes made in the project are changed in real time.
Procedure:-
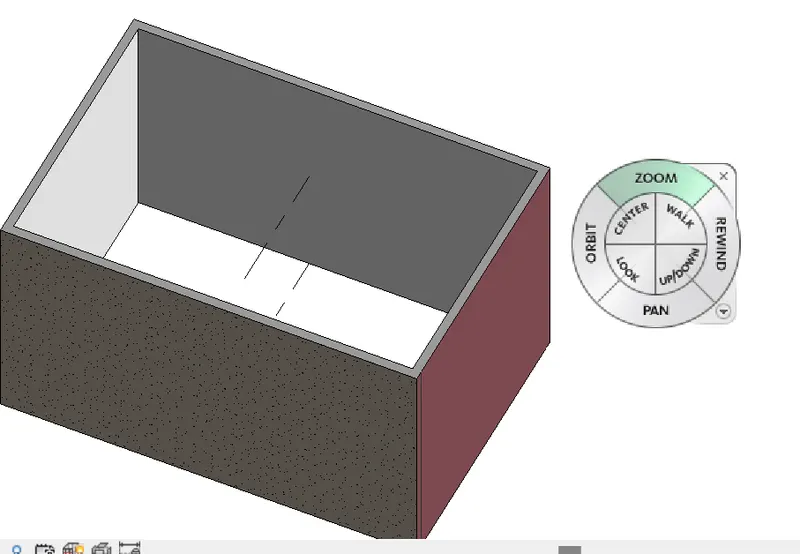
In this first step we are navigating through the 3D which we created. on the right hand sidee of the layout we can see the navigation bar. In that use the first icon which states the navigation tool.
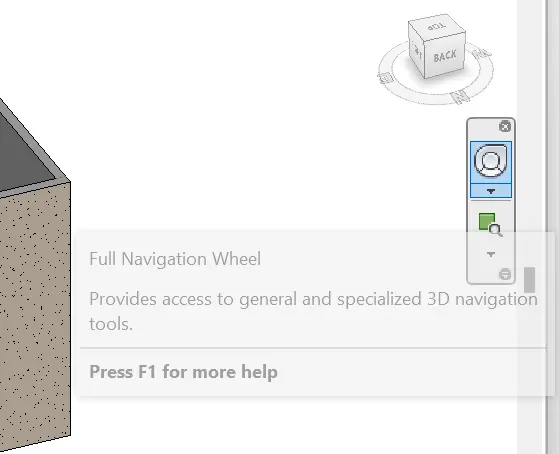
once we click on that we can see this icon appear on the screen.
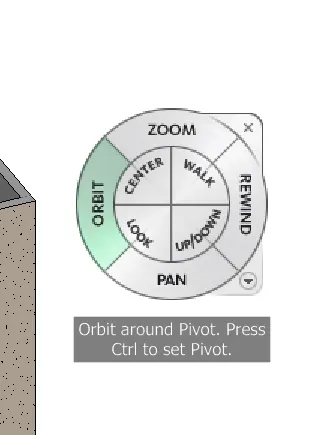
Then keep the curser on the orbit and select it so we can see the moment in the view while we rotate the curser. here i used orbit tool to see the ground level of the view.
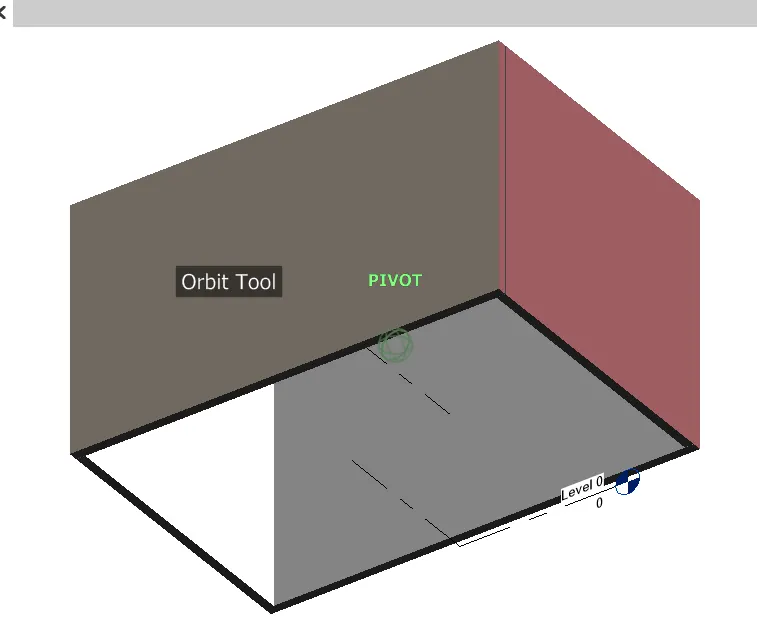
by using the pan too we can move the view to any corner of the layout.
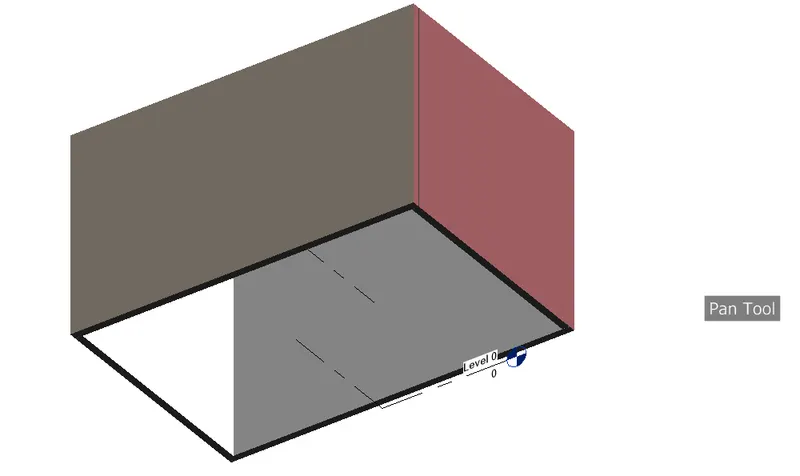
Result:-
As an end result we can use the navigation tool and use all the option as zoom to zoom the view,orbit to rotate the view as we wish to see, pan to move the view, revind to see what we have done previously.
8) Use the visibility settings option below to switch model to shaded, realistic, hidden lines options.
Aim:- To change the model visability style shades, realistic , hidden lines.
Introduction:
Revit is a high end software used by many professionals. It is also a multi disciplinary software it is used by constructional, architectural, structural, mechanical, electrical engineers. The changes made in the project are changed in real time.
Procedure:-
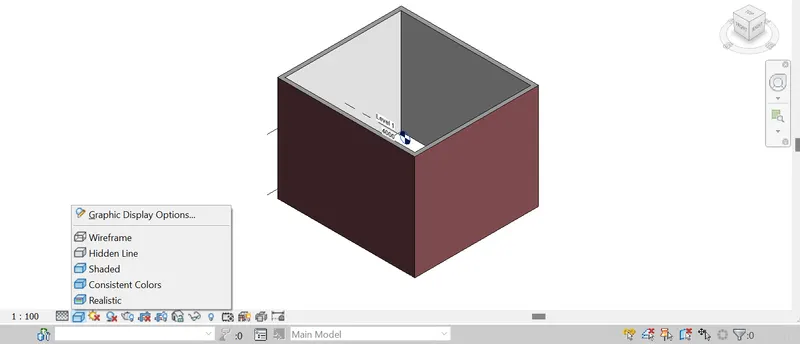
As we got our 3D model before below the we can see the icon in that we can see visual style icon.
where we select that and we can change the type of the view.
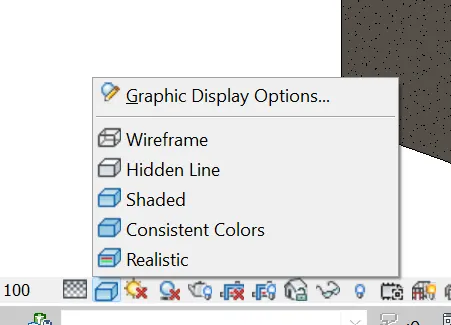
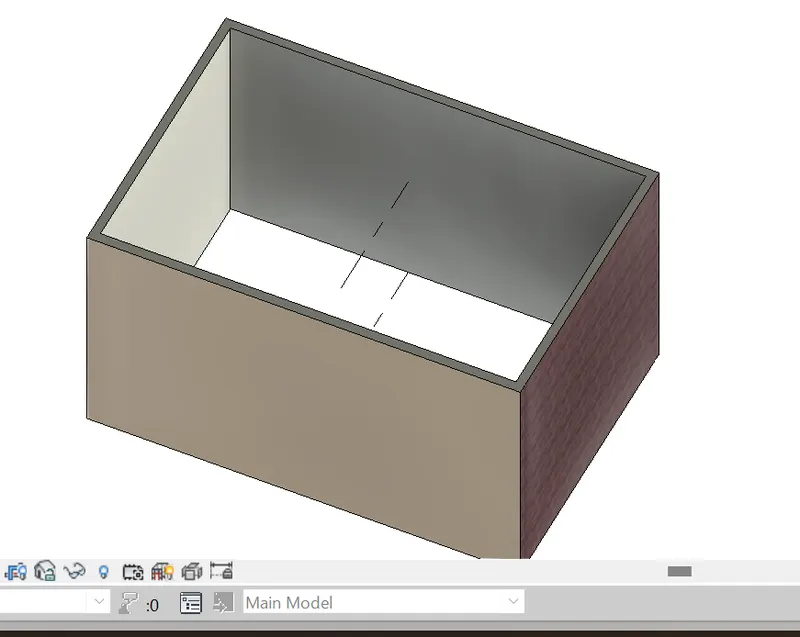
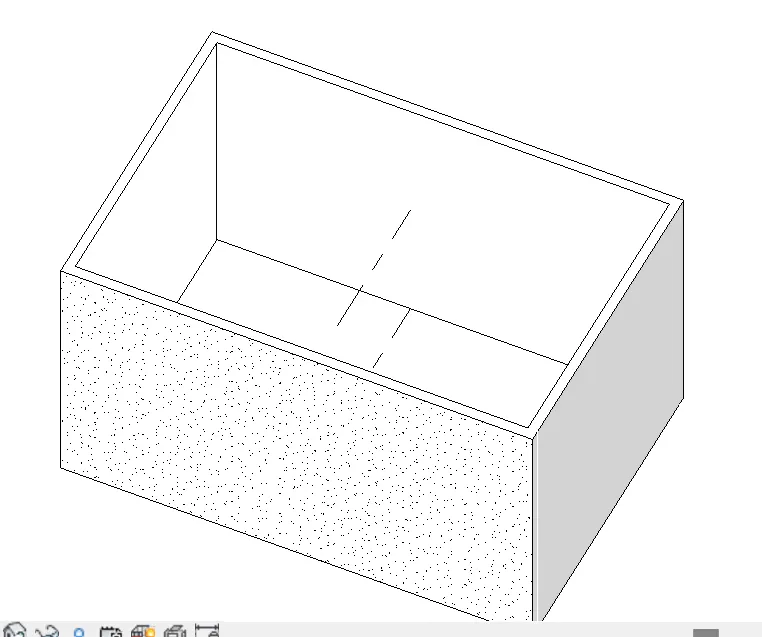
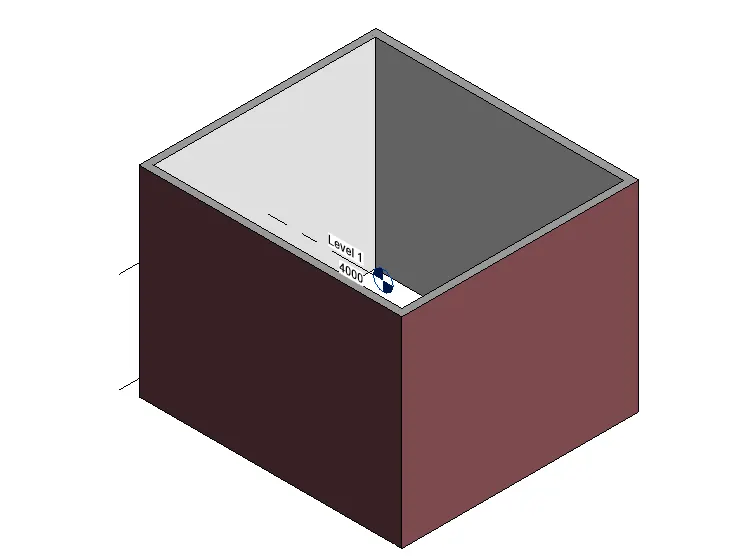
As we can see the option above we can select one by one in the view type here i selected first Realistic, Then Hidden, them shaded in an order.
1) realistic
2) Hidden
3) Shaded
Result:-
As an end result we can change the view type as which we wish to see as it is by clicking the view style icon in the bottom of the layout.
9) Turn the sun path on and off to view shadings in the layout created.
Aim:- To check the shadings in view by turning on the sunpath on and off.
Introduction:
Revit is a high end software used by many professionals. It is also a multi disciplinary software it is used by constructional, architectural, structural, mechanical, electrical engineers. The changes made in the project are changed in real time.
Procedure:-
To turn on the sun path we csn see the sun shaped icon beside the visability style icon. Below the ;ayout.
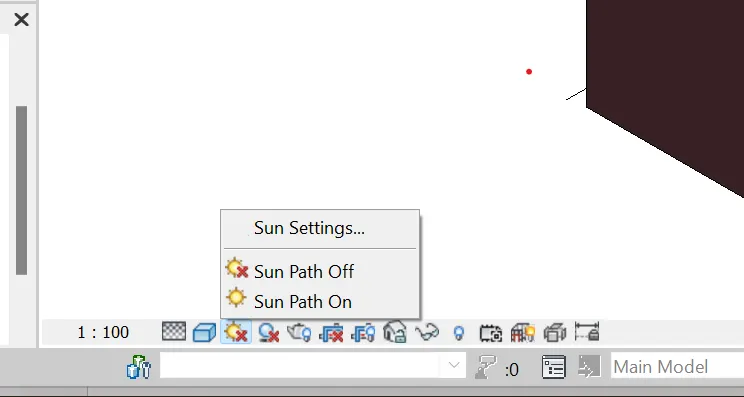
we can now turn the sun path on and off to see the change. tids is when we turn on the path we can see the direction and the sun view.
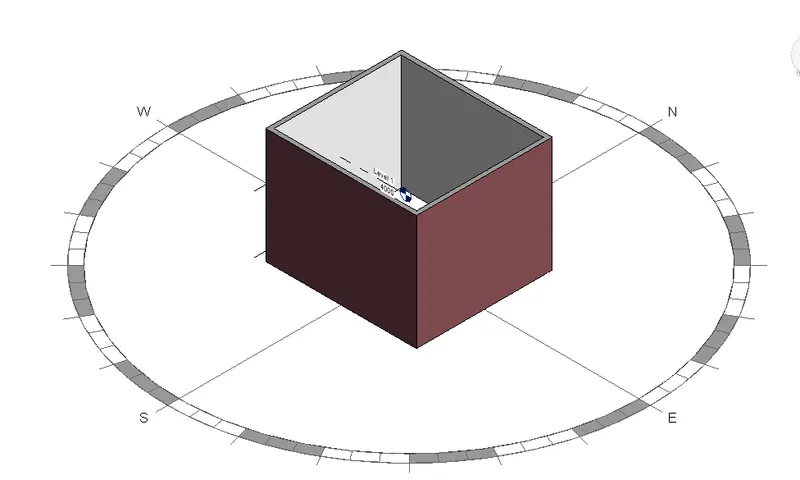
we can even change the location and the time to see the sun path by clicking the sun settings on the sunpath icon
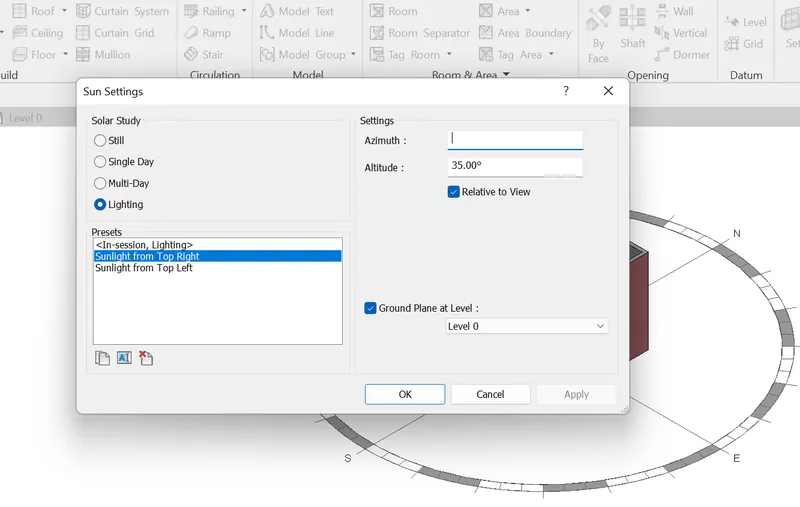
Result:-
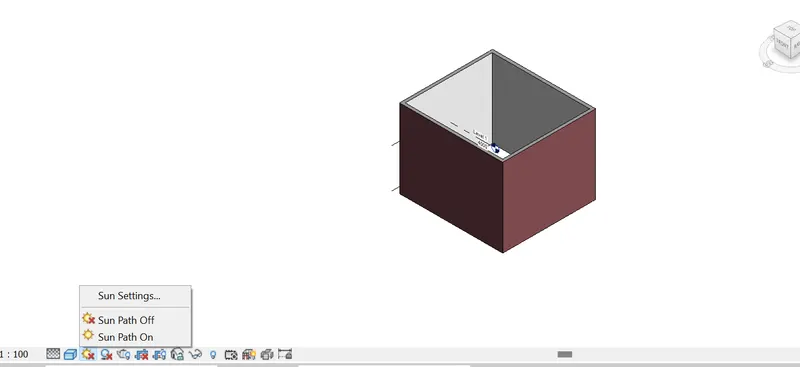
As an result we can see in which direction the sun is moving with respect to the time and the location of the project where it is located. it helps in see hiw much sun light could pass through the view at the pase of time.
10) Use the Manage toolbar to enter project settings, project name, and project issue date (choose according to your convenience).
Aim:- By using the manage toolbar change project settings, project name , and issued date.
Introduction:
Revit is a high end software used by many professionals. It is also a multi disciplinary software it is used by constructional, architectural, structural, mechanical, electrical engineers. The changes made in the project are changed in real time.
Procedure:-
To chage the project information we need to go to the manage tab and see the icon of project information.
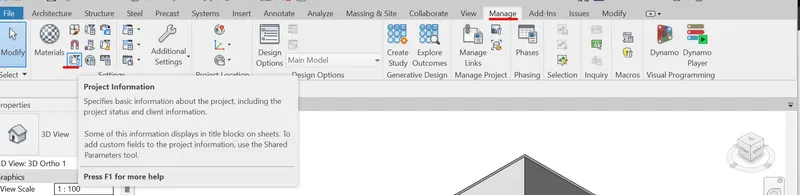
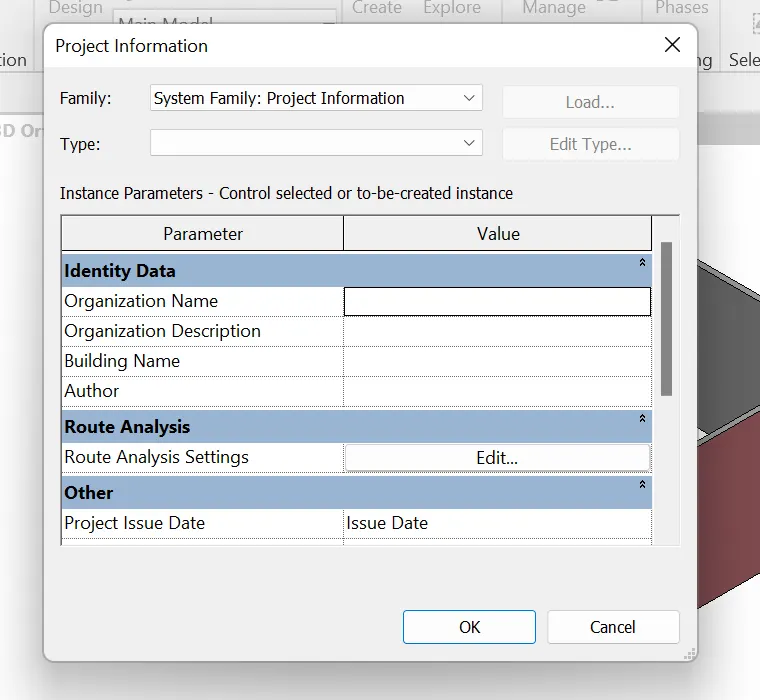
once we click on the project information now we can see the new tab where we can change the project name and issue date.
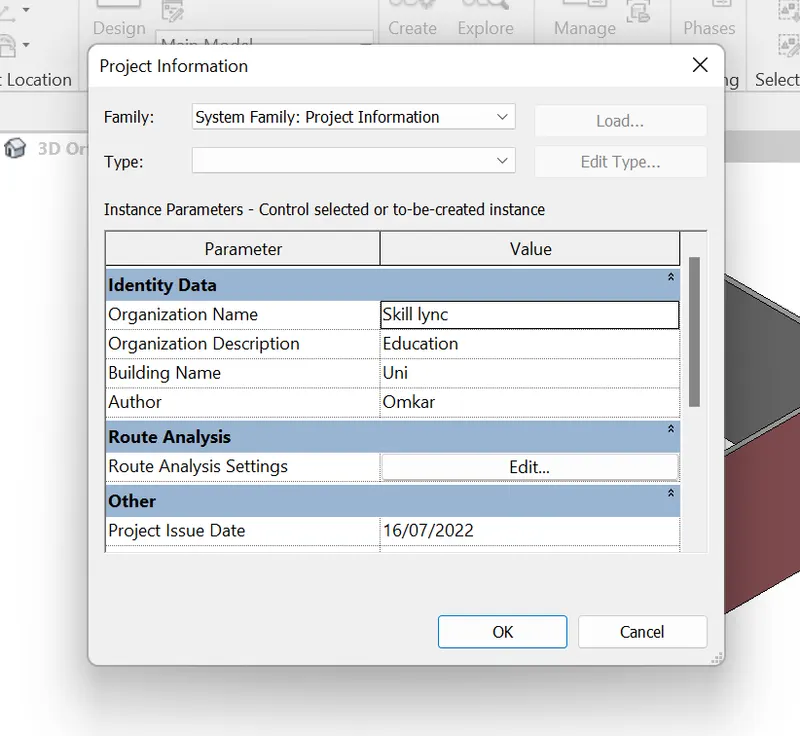
Now i changed the name and the issued then then click on ok.
Result:-
As an end result we can see the changes made in the project name date and chages to the project information.
11) What is the Analyze toolbar used in Revit? How it is beneficial for design and modeling.
Aim- To identify how analyze toolbar benificial for design and modelling.
Introduction:
Revit is a high end software used by many professionals. It is also a multi disciplinary software it is used by constructional, architectural, structural, mechanical, electrical engineers. The changes made in the project are changed in real time.
Procedure:-
Analyze toolbar is used for the structural analysis of the building. by using the different tools in the we can identify how it effect the structure.
In this bar we can see icons like boundries, loads,load combination, load cases, analatyical model tools, reports and schedule, energy optimization.
This all tool helps in identify the load conditions and how it effects. how the load is bearing are in the model. space chechings in the model helps in identify the space in the model.
we can use to combine the loads and check the load combinations how it effects.
As per the design we can identify the structural components and there effect and effeciency so that we can design as the the bearing and the efficency.
This tool helps in lot of time saving process and the modelling can be done easily.
12) What are the links that Revit supports to be linked to the model?
Aim:- Identify the links which support the revit model.
Introduction:
Revit is a high end software used by many professionals. It is also a multi disciplinary software it is used by constructional, architectural, structural, mechanical, electrical engineers. The changes made in the project are changed in real time
Analysis:-
In the revit we can link the suppoting model and model in revit with out any risk.
In the inser toolbar we can identify the what are the supporting.
The support file for the revit are CAD, topography, markup,point cloud files, IFC files.
Result:-
As an result we can attach the file to revit and work on the file from the revit its simple and easy to use. while it is userfriendly and helpful to the modellers.
13) Why do you need the Collaborate tab in Revit? How it supports modeling and its efficiency
Aim:-The needs of collaberate tab and how it supports modeling and efficiency.
Introduction:
Revit is a high end software used by many professionals. It is also a multi disciplinary software it is used by constructional, architectural, structural, mechanical, electrical engineers. The changes made in the project are changed in real time.
Procedure:-
Collabrate toolbar is used for group task to collabrate with groups.
1) Working togeather.
2) Cloud sharing.
3) Work sharing.
4) Central model.
This tool helps people to work togeather with a single project with out any distrubance and this changes takes palce any model is real time update.
They can share the project file and can upload to the cloud storage. In the work sharing while we share the work with the group it will create a central model which has all the elements and the properties in the project. so, that they can work togeather with the collaboration. there wont be any issues after the becouse the project has same point for every single person working on it so there won't be any issue.
In this way the Collaberate bar help in collabiration and working of the single project at a time from different location. with out any mistakes.