Introduction to REVIT concepts
1. From the file menu, create a new project (Structural / Architectural / Construction template ) and name the project appropriately.
Aim :-
- To create a new project And name it appropriately.
Procedure :-
- Open Revit 2021.
- Click New from Models.
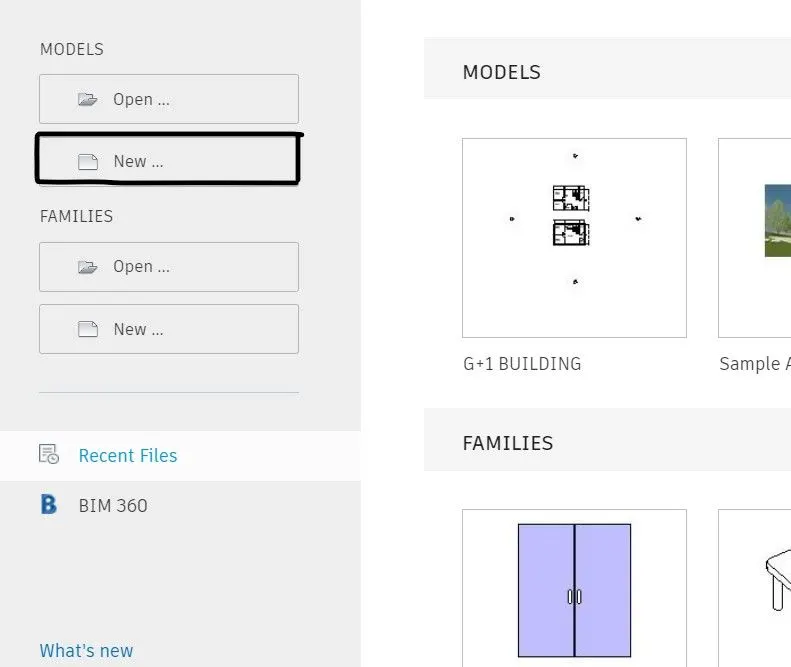
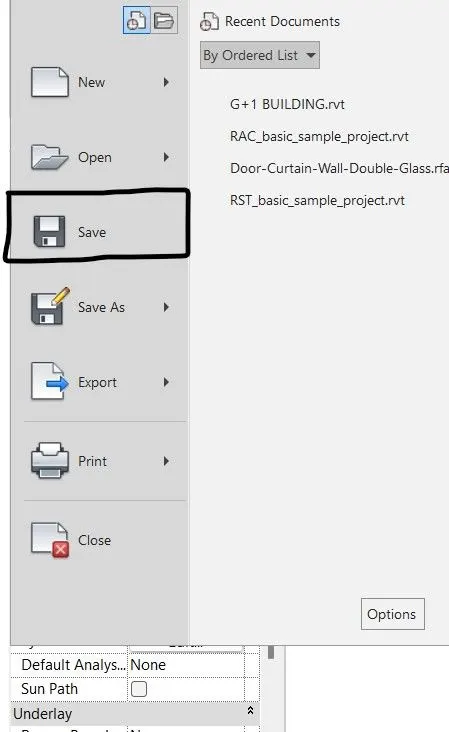
- Then new box will Pop-up named New Project.
- So choose the tempalate file Imperial-Architecture Template.
- Cretae New Project.
- Click Ok.
- New Project file is Created.
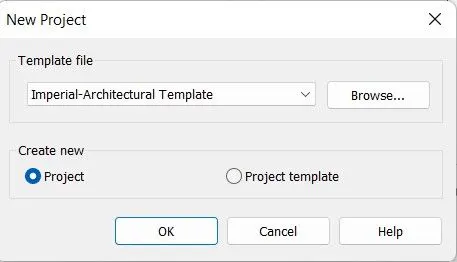
- Now save that file from FILE menu.
- Click Save.
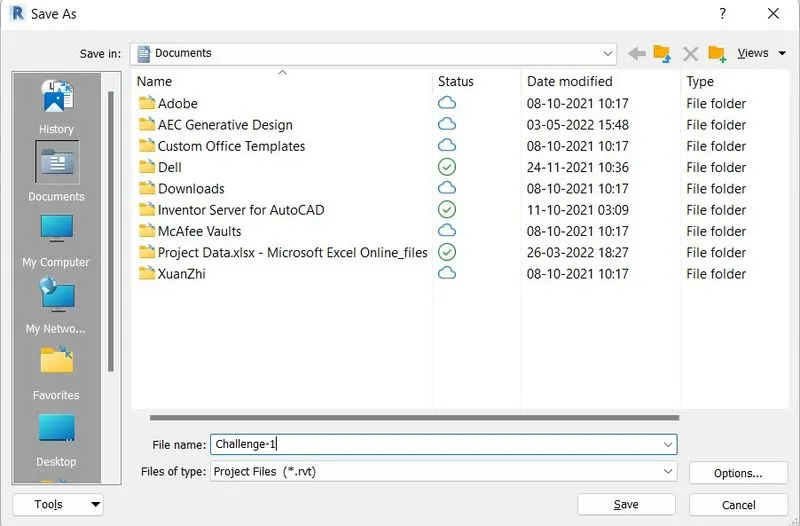
- Then new box will Pop-up named Save As.
- NAme the File.
Result :-
- New File is created named Challenge-1.
2. Save the new project file. Close and open using icons from file toolbar.
Aim :-
- To Save the new project file and Close and open using icons from file toolbar.
Procedure :-
- Save the file from FILE menu.
- Then new box will Pop-up named Save As.
- Name the File.
- Press Ok.
- Now From File Menu Choose Close.
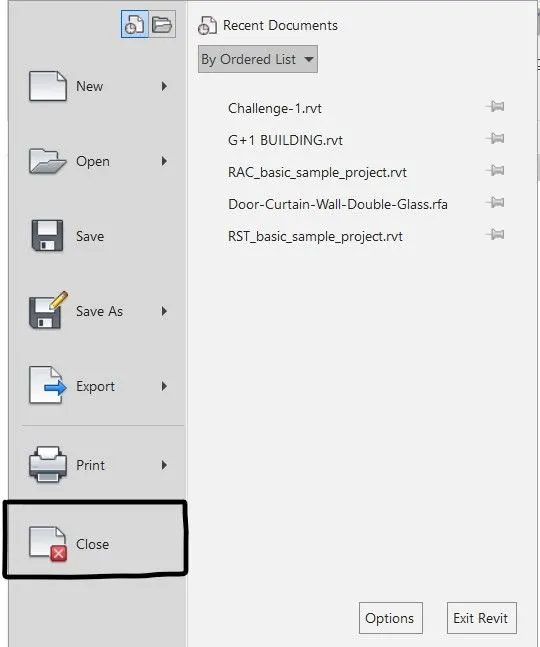
- Now Again click on Open.
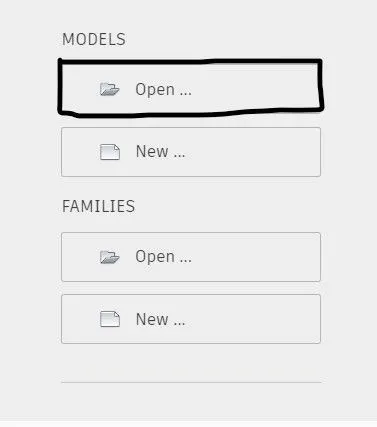
- New box will Pop-up named Open.
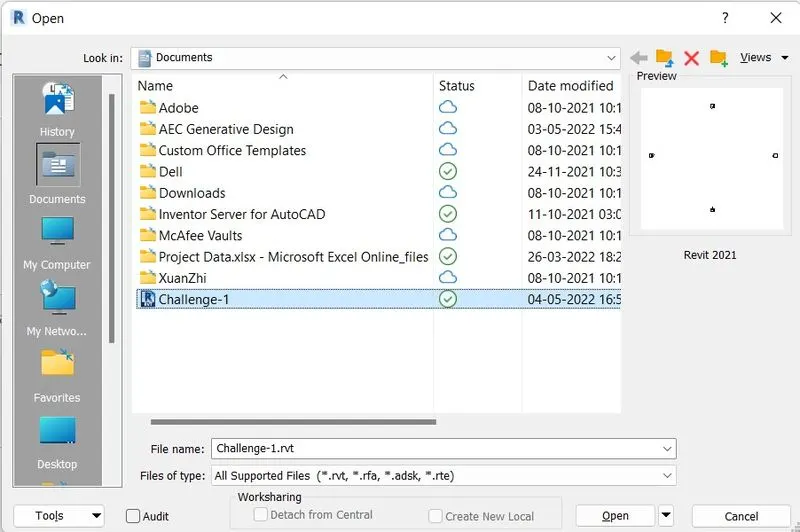
- Choose the file and click Open.
Result :-
- New File is saved named Challenge-1.
- Then closed the file and again poened it.
3. From the architecture/ structure toolbar familiarize with options to draw a wall. Create a rectangular layout of walls of about 40’-0” X 35’-0”.
Aim :-
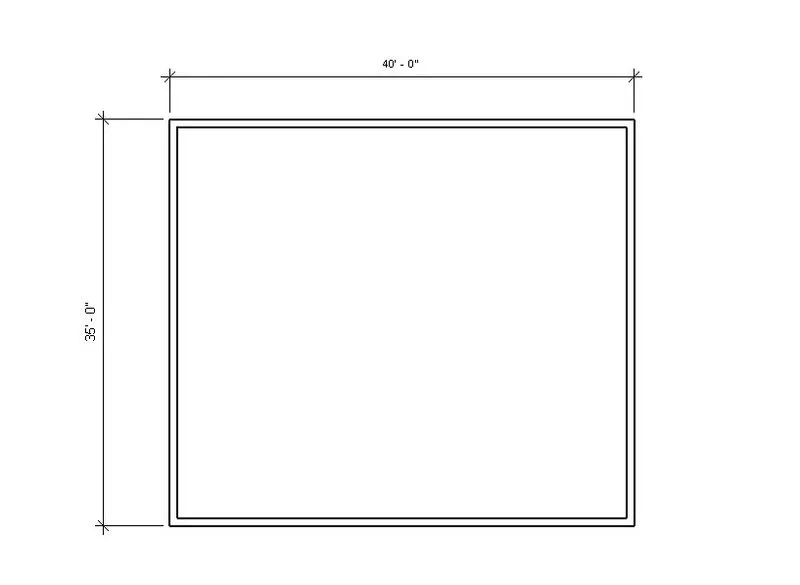
- To draw the rectangular layout of walls of 40' X 35'.
Procedure :-
- Select the Wall:Architecture from Architecture menu.
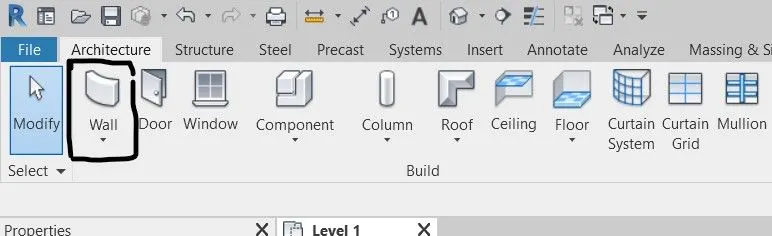
- Draw the Wall of size 40' horizontally and 35' verically.
- And draw the rectanular layout of wall.
Result :-
- Created a rectangular layout of walls of about 40’-0” X 35’-0”.
4. From the Annotate toolbar use the aligned option to add dimensions to the layout.
Aim :-
- To add dimensions to the layout in the wall.
Procedure :-
- Use the Annotate menu and select linear command.
- Selct both ends of wall and anootate it.
Result :-
- Dimensions are added in the drwaing.
5. Use the properties browser to switch to different wall types.
Aim :-
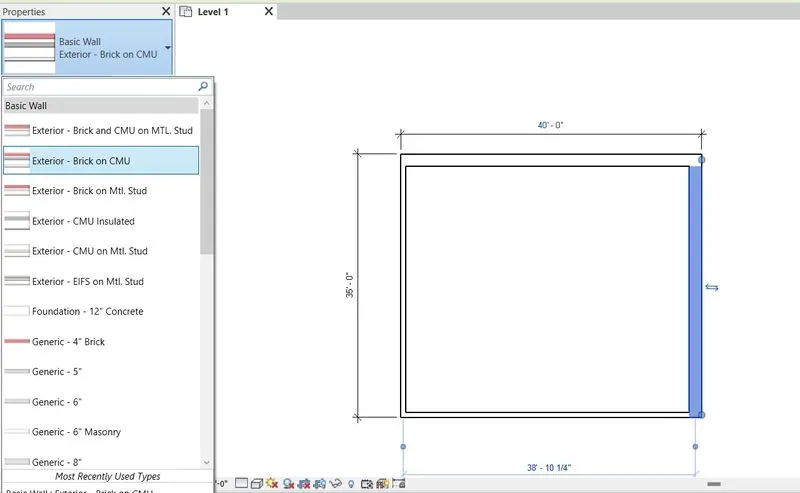
- To change the type of wall from properties.
Procedure :-
- Select the 2 faces of wall.
- Go to properties.
- Select the wall type Exterior - Brick On CMU.
- Click Ok.
Result :-
- Type of Wall is changed through properties.
6. Create a 3D view from the view toolbar and save the view with the appropriate name.
Aim :-
- To Create a 3D view from the view toolbar and save the view with the appropriate name.
Procedure :-
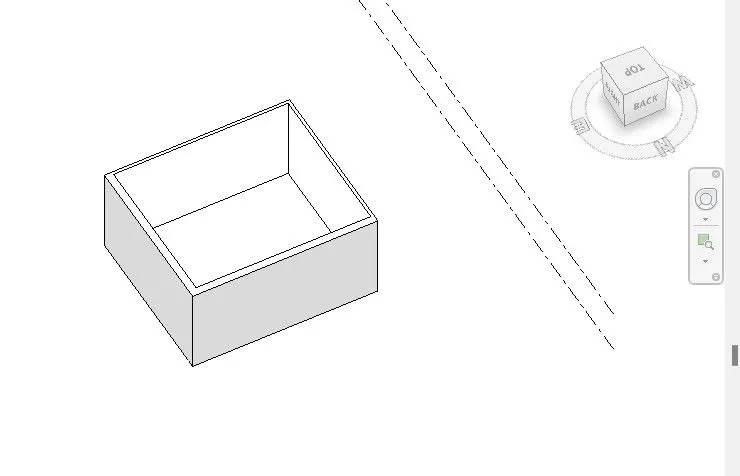
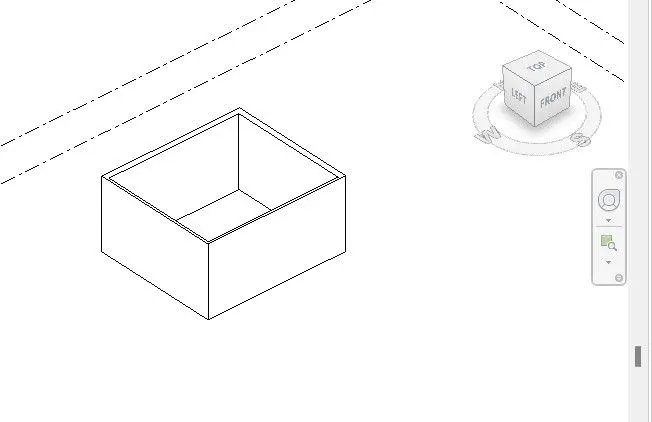
- Select the View cube that is on the top right side.
- Select the different views from viewcube.
Result :-
- The different views are taken from view toolbar.
7. Navigate through the 3D model using the view cube. Orbit/pan through the model layout created.
Aim :-
- To navigate Orbit/pan through the model layout created.
Procedure :-
- Go to view Menu.
- Select User Interface.
- Select NAvigation Bar.
- Select the Orbit/ Pan whatever you want to select.
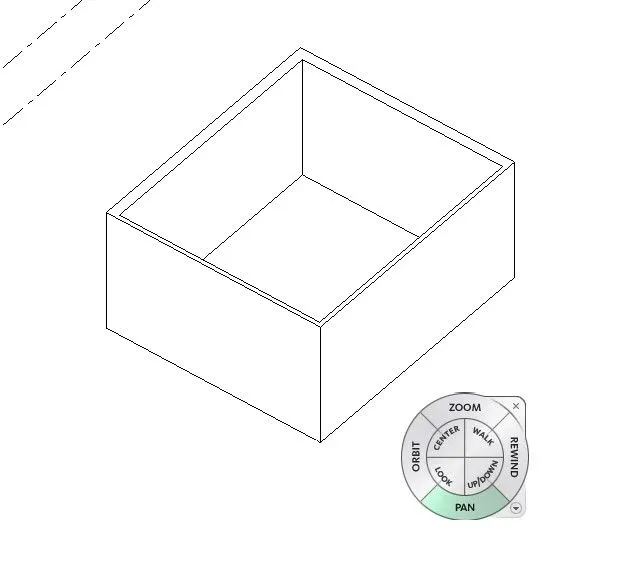
Result :-
- Navigation bar is opened and navigated Orbit/pan through the model layout created.
8. Use the visibility settings option below to switch model to shaded, realistic, hidden lines options.
Aim :-
- To switch model to shaded, realistic, hidden lines options.
Procedure :-
- Select the option of box like option below the option bar.
- Choose Shaded and Realistic.
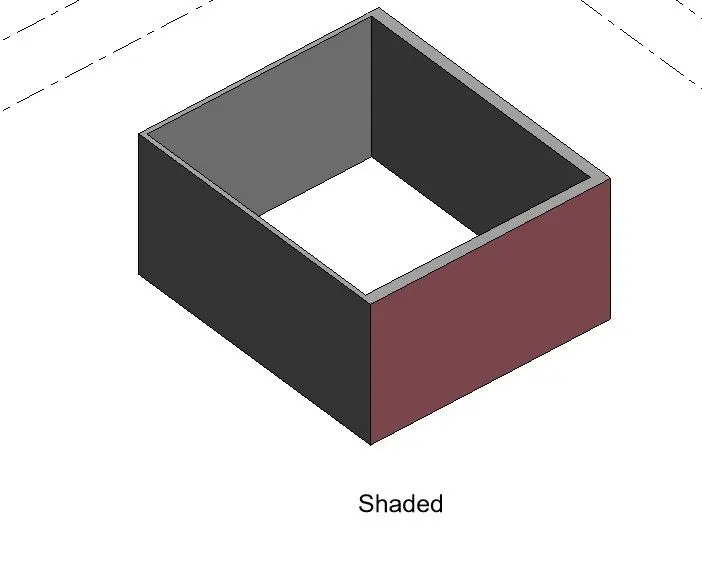
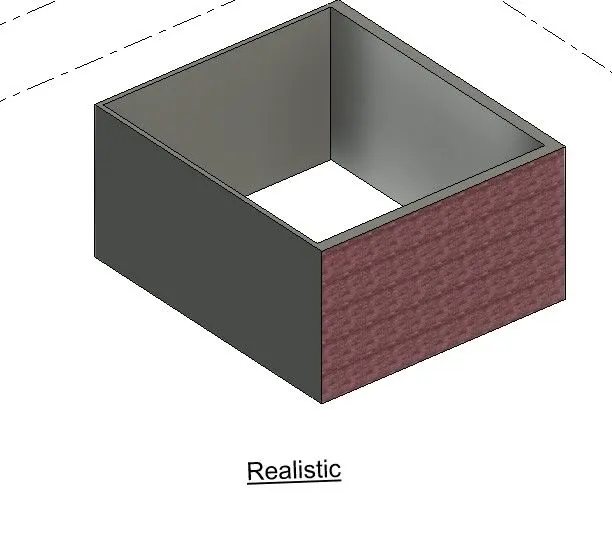
Result :-
- Model is switched to shaded and Realistic views.
9. Turn the sun path on and off to view shadings in the layout created.
Aim :-
- To Turn the sun path on and off to view shadings in the layout created.
Procedure :-
- Go to option bar in the bottom side.
- Go to Sun Path.
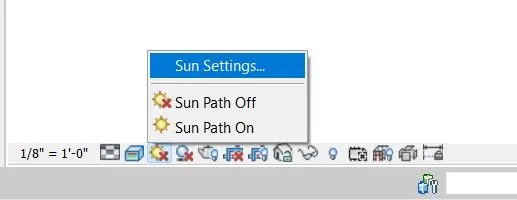
- Select Sun Path On.
- Go to Sun Setting.
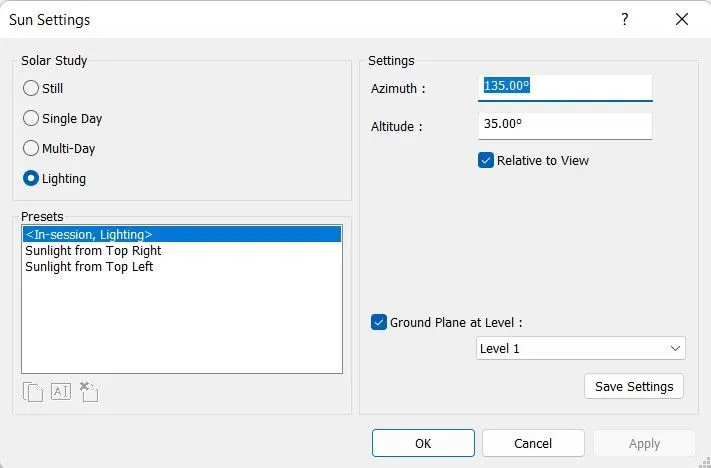
- Set the settings wisely and click Ok.
Result :-
- Sun path is created to view shadings in the layout created.
10. Use the Manage toolbar to enter project settings, project name, and project issue date (choose according to your convenience).
Aim :-
- To Use the Manage toolbar to enter project settings, project name, and project issue date.
Procedure :-
- Go to Manage Menu.
- Choose Project information.

- New pop-up bow will open named Project information.
- Fill necessary data.
- Click Ok.
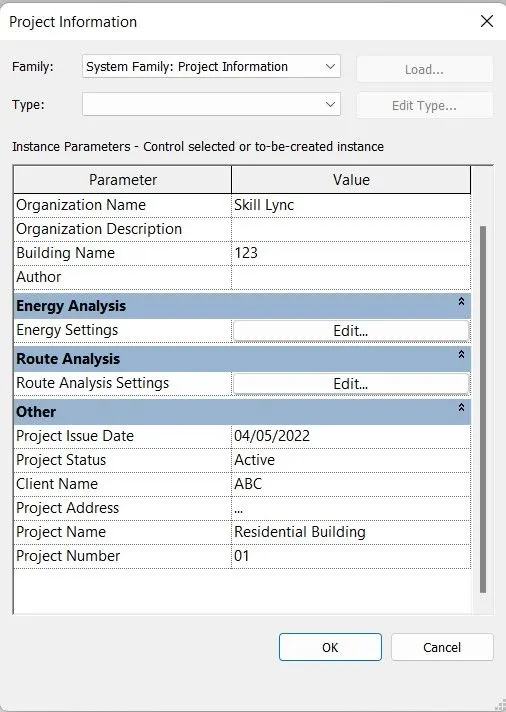
Result :-
- Filled the project Information in the data file.
11. What is the Analyze toolbar used in Revit? How it is beneficial for design and modeling.
Aim:-
- To analyse analyze tool in Revit.
Introduction :-

- There are different sections in the analyze toolbar.
- The analyze toolbar is used to analyze the whole structure of the building.
- When one creates a structure there are many different kinds of forces, loads, and designs that are taken into consideration.
- A small failure can lead to the failure of the whole building.
- This analyze tab of the Revit software helps in analyzing if the structure is proper or not.
- Checks all the loads and gives the results for better designs as well and also gives the reasons why is the design not correct!
- There are different sections in the analyze toolbar like:
- Analytical Model : Apply structural loads to your analytical model to assess possible deformations and stress in your design.
- Analytical Model tool : Tools for aUse boundary conditions to communicate engineering assumptions about support conditions to analysis software packages.nalytical consistency provide warnings in the early stages of design about the stability of the structure. This gives engineers greater insight into their designs prior to submitting them for complete analysis.
- Spaces and Zones.
- Reports and Schedules
- Check System
- Color Fill
- Energy Optimization : Energy Optimization for Revit is a fast, reliable, and scalable tool for better building energy performance. Energy Optimization for Revit provides clear guidance and direction towards better building energy performance for the entire design team, from concept to detail and design to the operation of new and existing buildings.
- Route Analysis : Use route analysis to calculate distance and time of travel from one point to another point in the model.
- People Tool Flowkit
- Structural Analysis : View, adjust, and manage the analytical model that Revit develops automatically while you develop the physical building model.
12. What are the links that Revit supports to be linked to the model?
Aim :-
- To analyse the links that Revit supports to be linked to the model.
Introduction :-
- Linking models are primarily intended for linking separate buildings, such as those that compose a campus.
- You can link architectural models, structural models, and MEP models.
- For example, the following site plan shows 4 building models linked to one model.
- When you link a model into a project, Revit opens the linked model and keeps it in memory.
- The more links a project contains, the longer it can take to open.
- Linked models are listed in the Revit Links branch of the Project Browser.
- You can convert linked Revit models to groups, and you can convert groups to linked Revit models. You can also mirror linked Revit models.
- There are different sections in the Insert toolbar.
- Link Revit
- Link IFC
- Link Cad
- Link Topography
- Manage Links
13. Why do you need the Collaborate tab in Revit? How it supports modeling and its efficiency.
Aim :-
- To analyse Collaborate tab in Revit.
Introduction :-
- Revit is not just software that is used for architectural or structural purposes, but also electrical, and mechanical purposes as well.
- When an architectural drawing is made, the drawing is also shared with other professionals so that the works regarding different respective fields are also carried on simultaneously.
- Thus all the fields work together to give the final draft together as a team. This is where the collaborate tool is most used.
- We do not have to wait for one model to be completed to start the model of next discipline.