Introduction to REVIT concepts
ANS 1)
Aim: From the file menu, create a new project (Structural / Architectural / Construction template ) and name the project appropriately.
Procedure:
- Open the REVIT software by double clicking on it.
- On the left side, in the models section NEW option is available click on it.
- Similiarly at the top left corner there is File menu click on it and select the new file.
- Select architectural or structural or construction template press ok.
- Again go to the file menu and select the Save option.
- Give the name to the project as "Challenge 1" and click on the save option.
ANS 2)
Aim: Save the new project file. Close and open using icons from file toolbar.
Procedure:
- Go to the file menu and select the Save option.
- Give the name to the project as "Challenge 1" and click on the save option.
- Again go to the file menu and select the Close option in the bottom.
- File is closed and the home page of REVIT is opened.
- In the model , there is OPEN option available click on it and select he challenge 1 file to open.
- Or in the home page we can see recent files and in models we can find our Challenge 1 file.
- Click on it and it will be opened.
ANS 3)
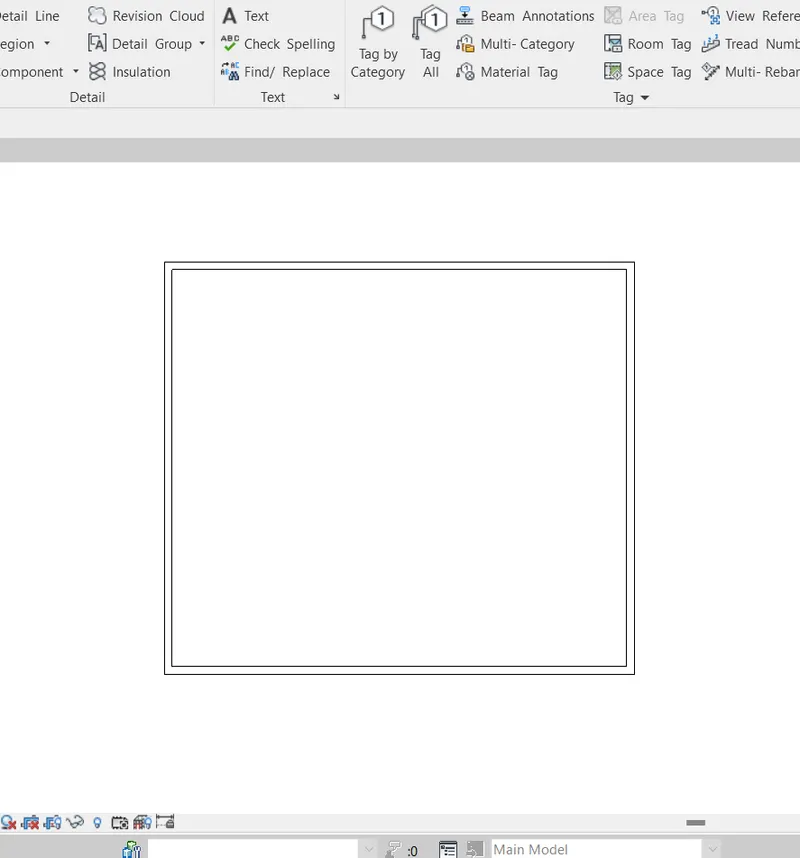
Aim: From the architecture/ structure toolbar familiarize with options to draw a wall. Create a rectangular layout of walls of about 40’-0” X 35’-0”.
Procedure:
- We already saved the file in the structural template.
- Now in the Structure toolbar select the wall option and selection the line.
- Draw the first line of length 40' in horizontal direction.
- Draw the other line having length 35' in vertical direction.
- Similiarly draw other two lines.
- Hence a rectangular layout of walls of 40'X35' is created.
ANS 4)
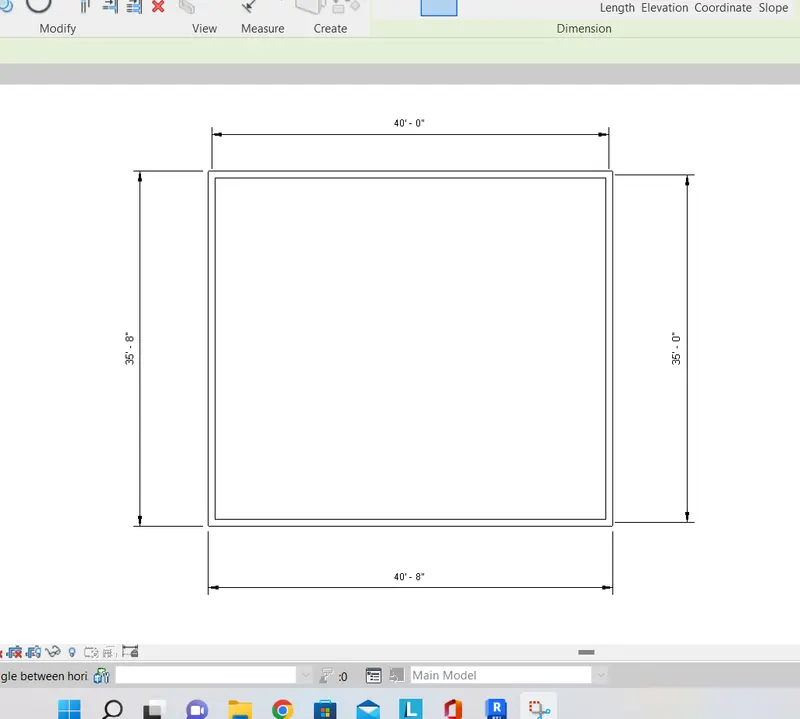
Aim: From the Annotate toolbar use the aligned option to add dimensions to the layout.
Procedure:
- We already have a rectangular layout of walls of 40'X35'.
- In the annotate tools bar select the aligned option.
- Specift the first point and the end point of the line to give the dimensions.
- Simliarly give the dimensions to all the lines.
ANS 5)
Aim: To Use the properties browser to switch to different wall types.
Procedure:
- We already have a rectangular layout of walls of 40'X35'.
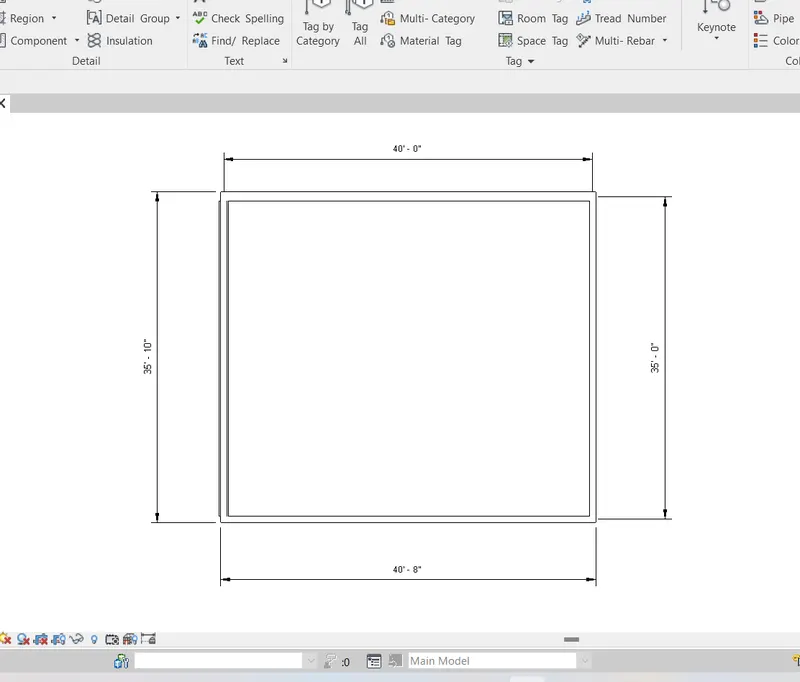
- Select one of the wall and in the properties browser it shows the wall type as "Generic 8"
- Now in the property browser select clicck on the wall type it start showing different wall types.
- Now select the wall type other than Generic 8".
- Lets select the Generic 12" wall type for one wall.
- And for other wall select Generic 12" masonary wall type.
ANS 6)
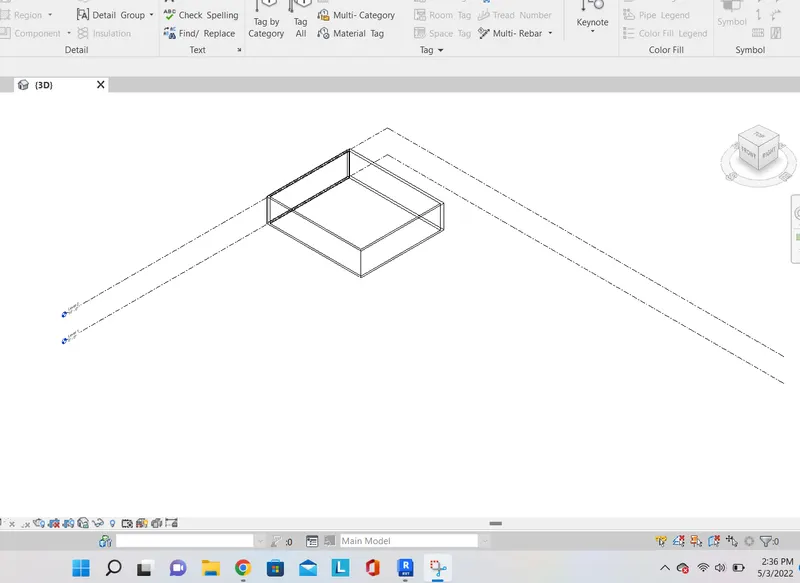
Aim: To Create a 3D view from the view toolbar and save the view with the appropriate name.
Procedure:
- We already have a rectangular layout of walls of 40'X35'.
- In the top bar there is a option for 3D view.
- Select the 3D default view and it will covert into 3D view.
- Now to save the 3D view, right click on the view cube and select save view.
- Give the name to the view as view 1 and click on ok.
- Hence the view is saved.
ANS 7)
Aim: Navigate through the 3D model using the view cube. Orbit/pan through the model layout created.
Procedure:
- We already have a rectangular layout of walls of 40'X35'.
- To navigate through view cube just click on the view cube and rotate is as per the requirement .
- In the navigation bar just select the navigation wheel and there are otpions for orbit or pan to navigate through the 3D model.
- There are some other tools for the navigation are also there in the navigation bar.
ANS 8)
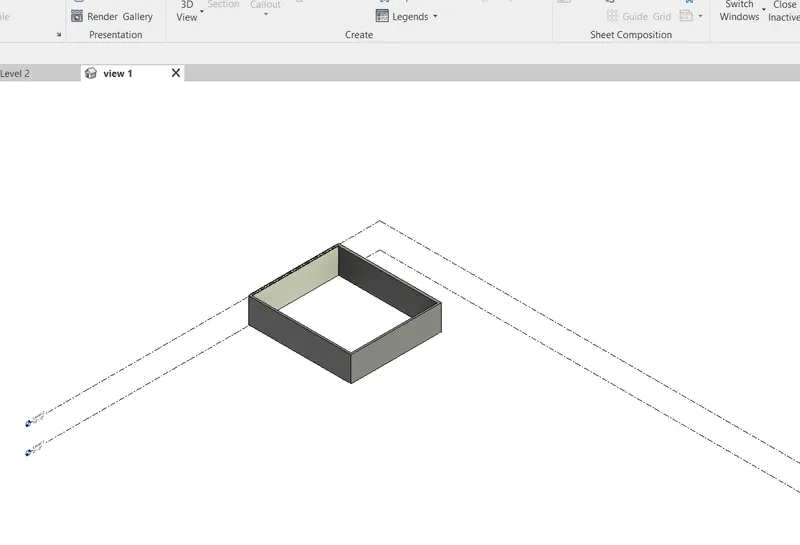
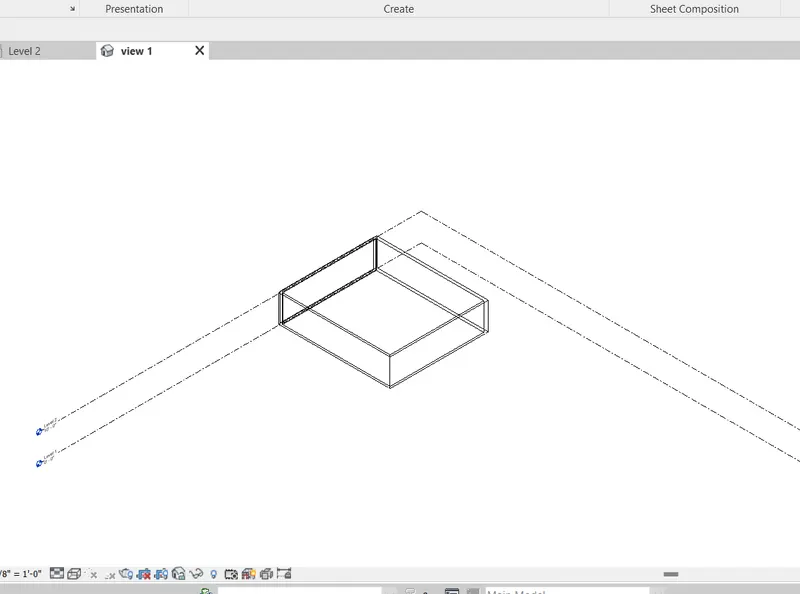
Aim: Use the visibility settings option below to switch model to shaded, realistic, hidden lines options.
Procedure:
- We already have a rectangular layout of walls of 40'X35'.
- In the bottom toolbar of the REVIT there is option called Visual style.
- Click on the Visual style and there are other options for shaded, realistic, hidden lines etc.
- Click on the option required and the model will be visible like our requirements.
ANS 9)
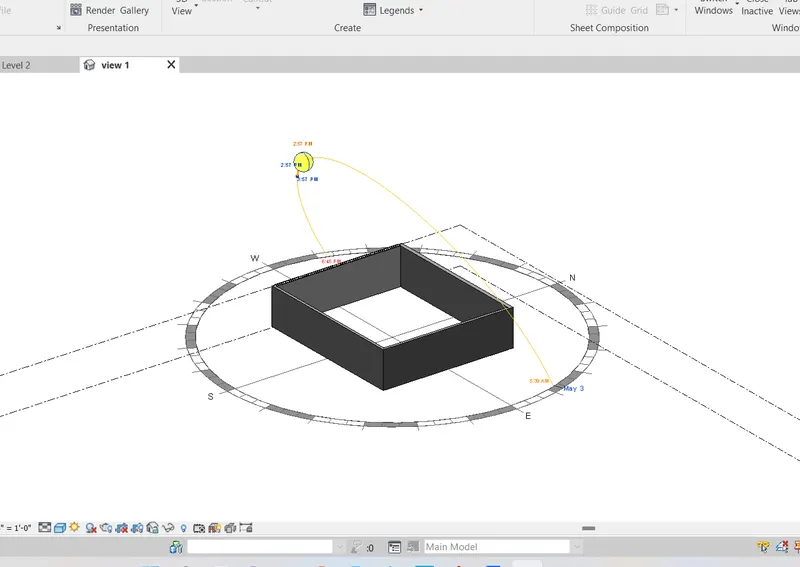
Aim: Turn the sun path on and off to view shadings in the layout created.
Procedure:
- We already have a rectangular layout of walls of 40'X35'.
- In the bottom toolbar of the REVIT there is option called Sun Path.
- Click on the Sun Path and there are other options for Sun Path on and off and other settings.
- Click on the ON and OFF option of the sun path .
- Sun path is visible in our model.
ANS 10)
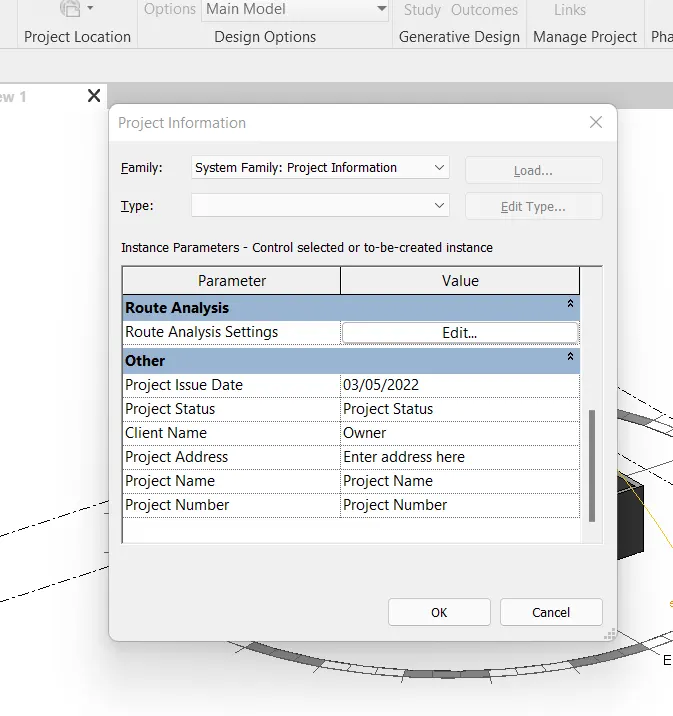
Aim: Use the Manage toolbar to enter project settings, project name, and project issue date.
Procedure:
- In the toolbar there is manage option, click on it.
- There is a tab called project information click on it.
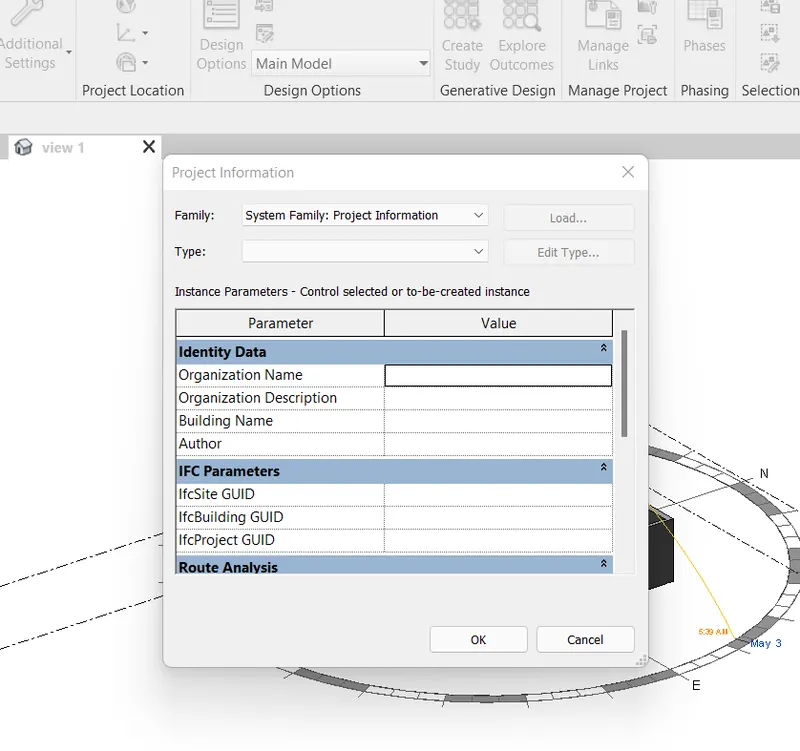
Enter the project settings, change the project name or date and press ok.
Hence the changes are getting saved.
ANS 11)
Aim: Discuss about Analyze toolbar and there uses in the REVIT.
Analyze tab is used for the structural analysis of the model or project. Analyze is a dedicated toolbar for the structural analysis and there are many tools inside this for the analysis. Some of them are :
- Structure analytical model
1) Boundary conditions
2) Loads: In loads there are different types of loads like point load uniform loads etc.
3) Load cases
4) Load Combinatons.
ANS 12)
Aim: The links that Revit supports to be linked to the model.
There are the some types of the links that are supported by the REVIT
- Link REVIT
- Link IFC
- Link CAD
- Link Topography
- DWG Markup
- Decal
- Point cloud
ANS 13)
Aim: Need of the Collaborate tab in Revit and how it supports modeling and its efficiency.
Collaborate: This tab is used for the work sharing, by using LAN or WAN many people work on the same project or same model.
- Work Together: Multiple revit models can link together.
- Cloud Sharing: People can work together if they are at different places.
- Work Sharing:
- Central Model: Any changes in the central moodel can be seen by the all who are working on that particular project.