Introduction to REVIT concepts
1. Aim – to create a new project and name the project.
Procedure –
- Open the revit software.
- Go to file option and select new option.
- Select architectural template and project option and press ok.
- Go to file option and select save as option and name the project appropriately and save it.
Result –
A new project is created with architectural template and the project is saved.
2. Aim – to open a saved project in Revit.
Procedure –
- Go to file option and close the saved project.
- You can open the saved project from recent files or open option and browse for the project.
Result –
The saved project is closed and then opened again.
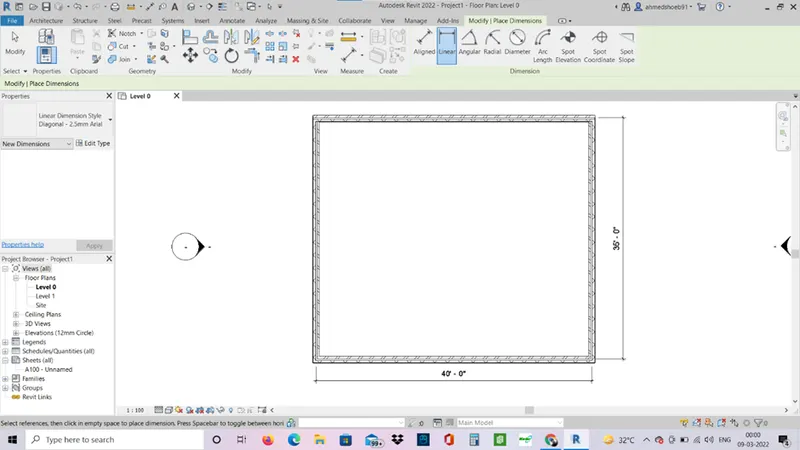
3. Aim – draw a rectangular wall of dimension 40’ x 35’ in Revit.
Procedure –
- Open the architectural template and open a new project.
- In the toolbar select walls command, select either architectural or structural wall.
- Draw a line of 40’ in horizontal direction and at the end of the wall draw a vertical line of 35’.
- Draw a rectangular wall of 40’ x 35’.
Result –
4. Aim – to annotate the dimension of the walls in revit software.
Procedure –
- The rectangular walls of 40’ x 35’ is drawn.
- Go to annotate tab and select dimension and linear option.
- Click on end to end of the wall and a dimensions are made.
Result –
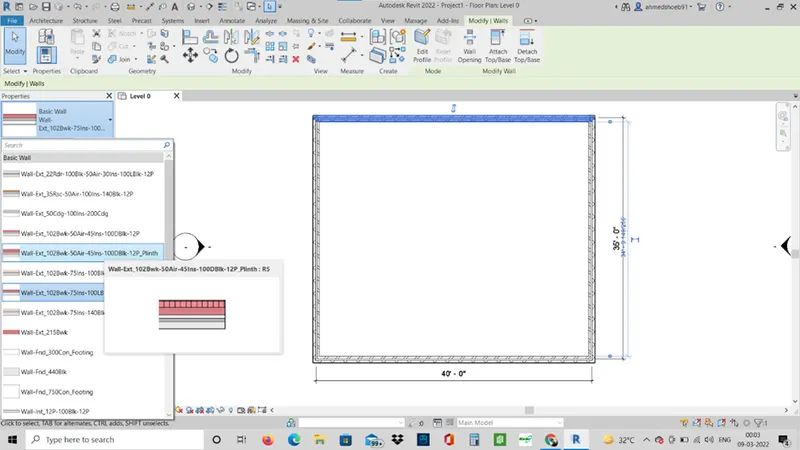
5. Aim – to change the different types of walls from properties browser.
Procedure –
- Select the wall to which is to be changed.
- Using property browser, you can change the different walls.
- Select different wall to change different types.
Result –
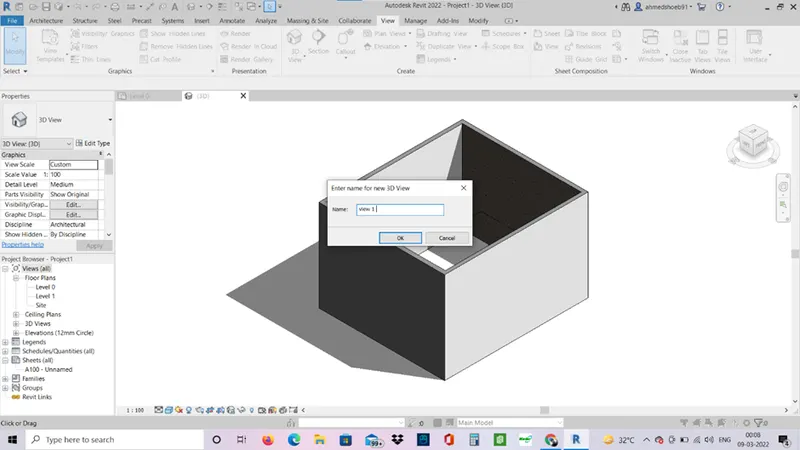
6. Aim – to create a 3d view and save the view with appropriate name.
Procedure –
- Go to view in view toolbar.
- Select the 3d default option a 3d view of the walls is created.
- In the view cube click right click on mouse, and select save view.
- Name the saved view.
Result –
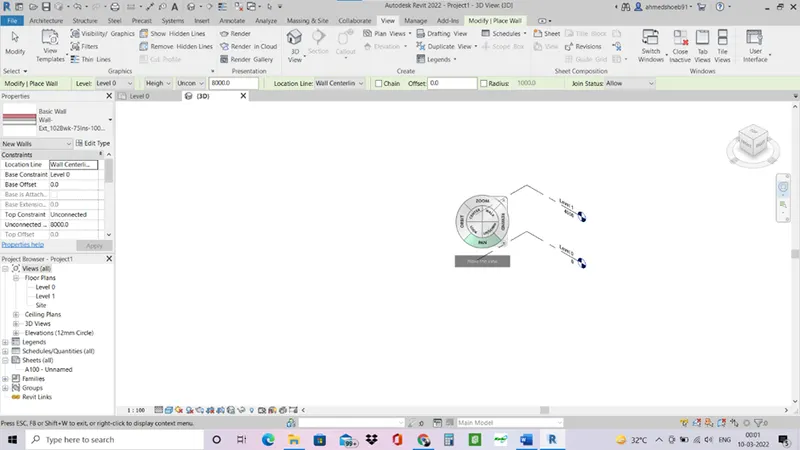
7. Aim – to navigate through the 3D model using the view cube. Orbit/pan through the model layout created.
Procedure –
- Click on the view cube and navigate the model through view cube.
- Select the orbit wheel and select orbit or pan command to change the orientations as required.
Result –
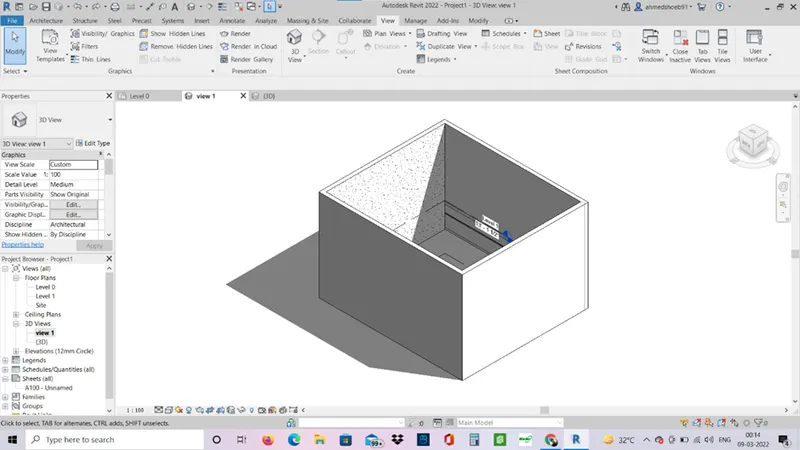
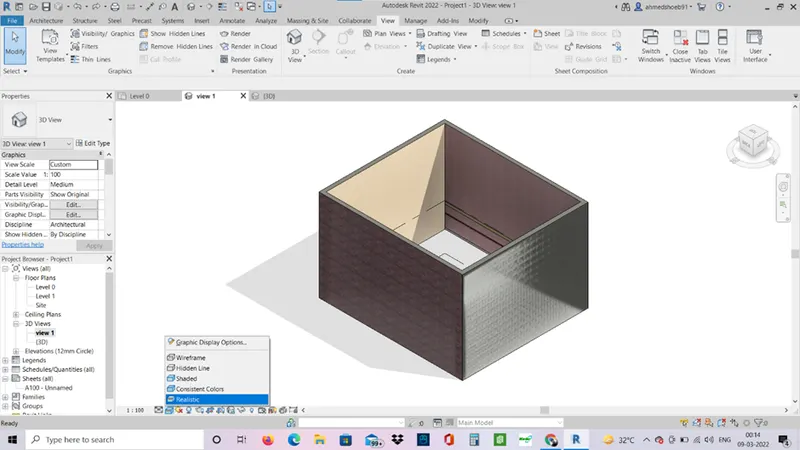
8. Aim – to use the visibility settings option below to switch model to shaded, realistic, hidden lines options.
Procedure –
- Select the 3d model
- Go to the visibility section below and select the required visibility option required. For example hidden, wireframe, shaded etc.
Result –
Hidden line
Realistic
9.
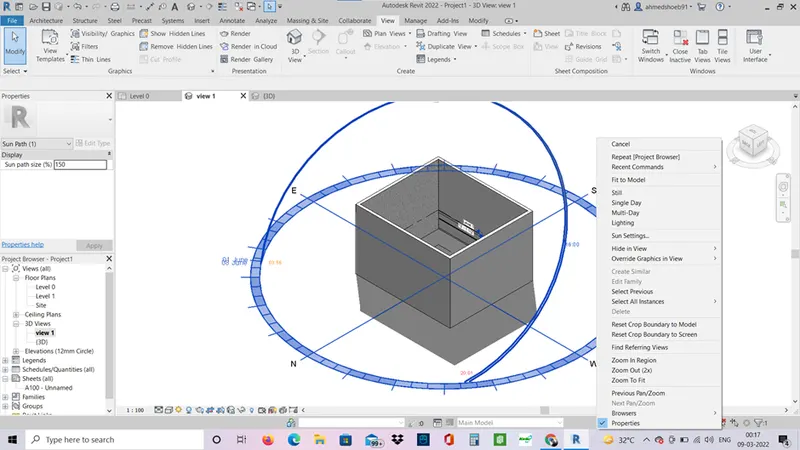
Aim - to turn the sun path on and off to view shadings in the layout created.
Procedure –
- Beside the visibility option there is also option for sun path on or sun path off.
- Select whichever required.
- If sun path is on settings can be changed to require desired light effect such as time of day, location of the model etc.
Result –
10.
Aim -to use the Manage toolbar to enter project settings, project name, and project issue date.
Procedure –
- In the model go to manage in the toolbar.
- Select project information, a dialog box will be opened.
- Make the changes and fill the boxes in the dialog boxes.
- Press ok and the project settings, project name and project issue date is changed.
Result –
Using Manage toolbar to enter project settings, project name, and project issue date is entered.
- Analyze tool is used in revit for the structural analysis of the building. Analyze tool consist of boundary conditions which helps defining the boundary condition such as point, line and area boundary condition on the model, loads helps applying different loads such as point, line and area load to the model. It also include load cases and load combination for different types of loads.
- Revit supports different types of links such as IFC, CAD drawings, DWF markups, point clouds, topography, pdf and images.
- Collaborate tool is used in Revit to make simultaneous worksharing of the project easy. It can be connected through LAN or WAN. A master project can be set and requests for editing can be done. All the users can have their own copy of the model and make changes to the model and then publish it so others can see and required changes are made. For example a project consist of structural drawings, MEP drawing , plumbing works drawings etc, the project is shared with them and they design it accordingly so there are no clashes in the project.