Hood design-Week 2
Aim:
To design a hood with assembly with the given skin data and parts in NX CAD with the help of design parameters and concepts.
Hood:
The hood or bonnet is the hinged cover over the engine of motor vehicles. Hoods can open to allow access to the engine compartment, or trunk (boot)on rear-engine and some mid-engine vehicles) for maintenance and repair.
Styles and Materials:
On front-engined cars, the hood may be hinged at either the front or the rear edge, or in earlier models it may be split into two sections, one each side, each hinged along the centre line. A further variant combines the bonnet and wheelarches into one section and allows the entire front bodywork to tilt forwards around a pivot near the front of the vehicle.
Hoods are typically made out of the same material as the rest of the body work. This may include steel, aluminum, fiberglass or carbon fiber. However, some aftermarket companies produce replacements for steel hoods in fiberglass or carbon fiber to make the vehicle lighter.
Release/ safety and security mechanisms:
The hood release system is common on most vehicles and usually consists of an interior hood latch handle, hood release cable and hood latch assembly. The hood latch handle is usually located below the steering wheel, beside the driver's seat or set into the door frame. On race cars or cars with aftermarket hoods (that do not use the factory latch system) the hood may be held down by hood pins. Some aftermarket hoods that have a latch system are still equipped with hood pins to hold the hood buttoned down if the latch fails.
Features:
A hood may contain a hood ornament, hood scoop, and/or wiper jets. A portion of the hood may be raised in a power bulge, to fit a large engine or air filters.
Pedestrian Safety:
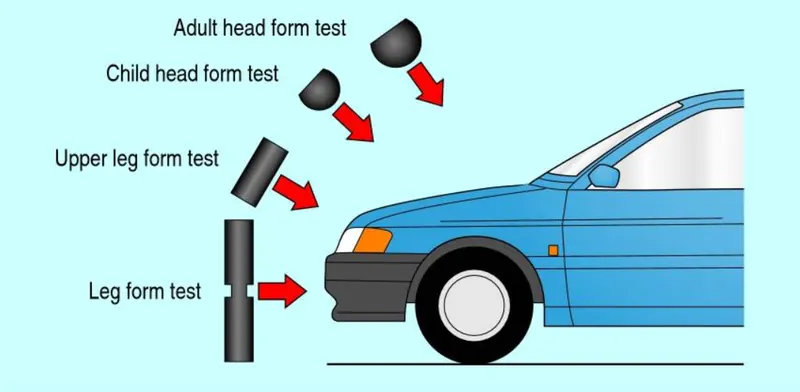
In Japan and Europe, regulations have come into effect that place a limit on the severity of pedestrian head injury when struck by a motor vehicle. This is leading to more advanced hood designs, as evidenced by multicone hood inner panel designs. Other changes are being made to use the hood as an active structure and push its surface several centimeters away from the hard motor components during a pedestrian crash. This may be achieved by mechanical (spring force) or pyrotechnic devices.
Types of Hoods:
 |
 |
|
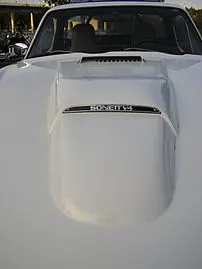
Some hoods may need a bulge to fit over the engine and air filters, or enhance the aesthetic appearance of the hood |
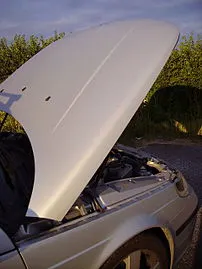
A flipfront hood |
 |
|
|
A rear-hinged clamshell hood |
|
Design Parameters:
Sheet thickness information:
- Outer panel thickness = 0.75mm (from outer skin towards inner panel)
- Inner panel thickness = 0.75mm (from inner panel towards outer panel)
Hem region information:
- Hem Glue clearance = 0.2mm (both sides)
- Hem Flange = 15mm (inwards from leading edge of the skin)
Skin Data:
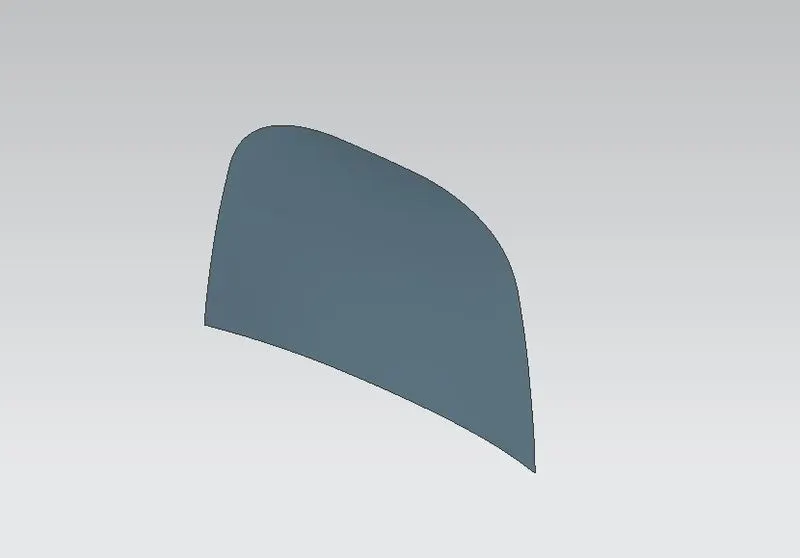
The Skin data of the exterior look of the outer panel is given by the aesthetic looks team. And with the given outer skin data, the master Section is prepared. The skin data determines how the car looks from the exterior and gives an elegant and premium aesthetic looks and also adds aerodynamic properties for the vehicles’ performance.
Master Section:
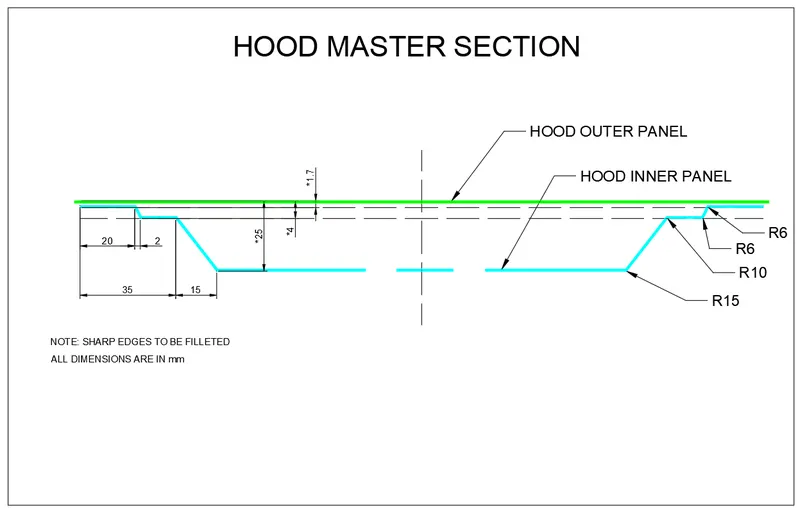
Master Section is nothing but the shape of the inner panel that needs to be designed with the given outer panel's skin data. The Master section's shape is formed with the long years of trial-and-error experiments and generative iterations in compliance with new safety norms and assessments.
Components:
1. Hood Outer Panel
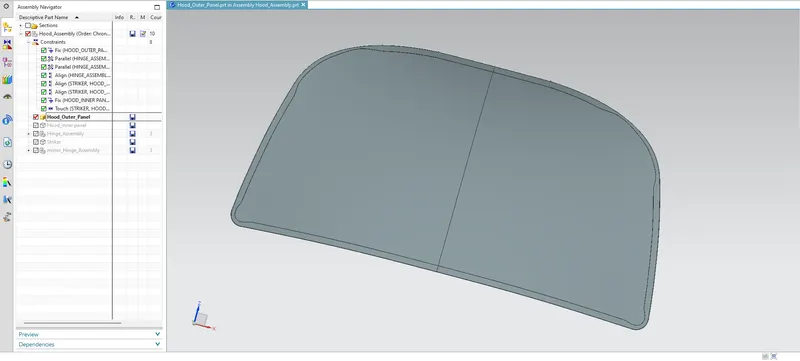
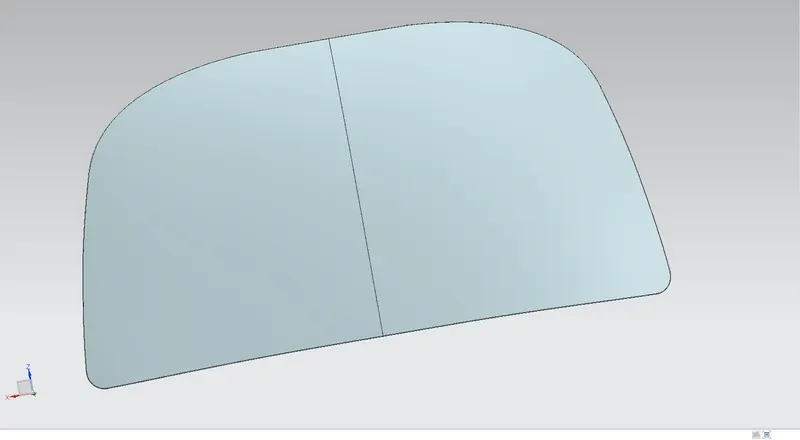
The outer panel is the outermost component of the hood which gives the aesthetic looks of the cars’ body and encloses the engine and battery compartment. The outer panel should be also in compliance with pedestrian safety and should have less impact on pedestrians during mishaps.
2. Hood Inner Panel
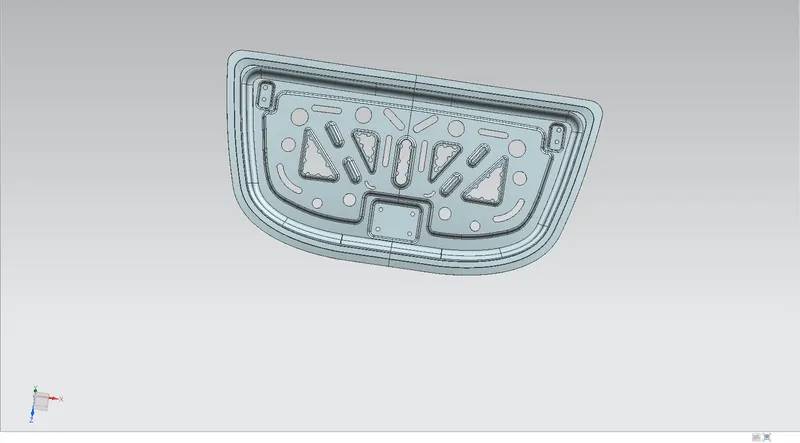
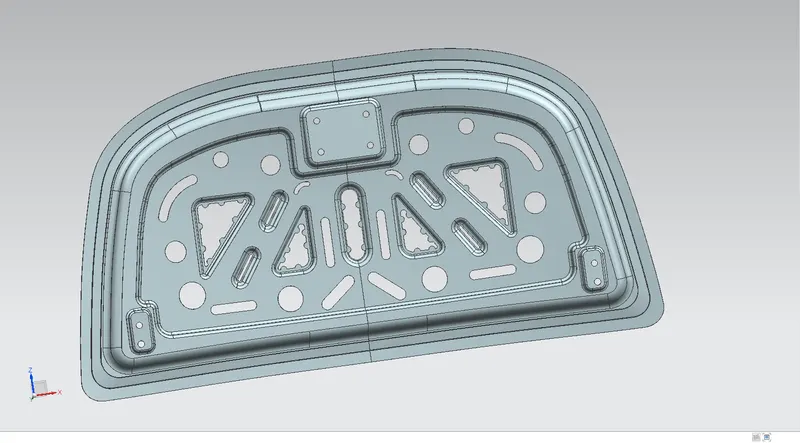
Inner panel of the hood consists of the components that are responsible for the frontal impact and pedestrian impact compliance and the features to mount the hinges and striker for the latch locking mechanism in the engine compartment’s side.
3. Hinge Assembly
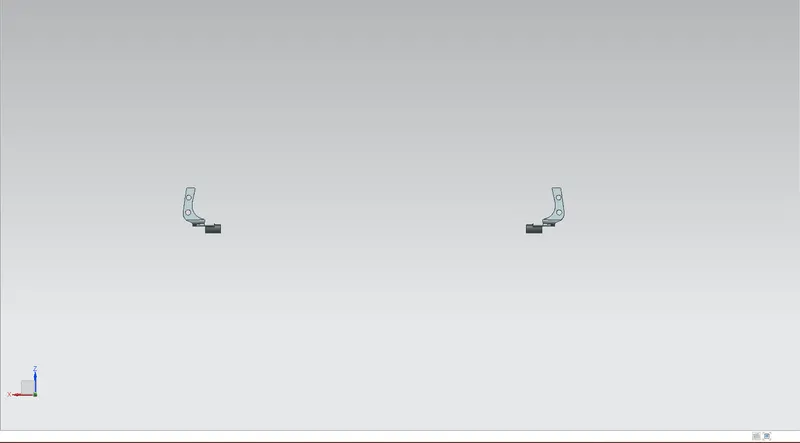
Hinges are rotational components that are responsible for the opening and closing of the hood from the engine compartment and helps to access the engine, battery and other important parts of the car for maintenance and repair. There two hinges on each side of the hood and also mounts to the engine compartment.
4. Striker
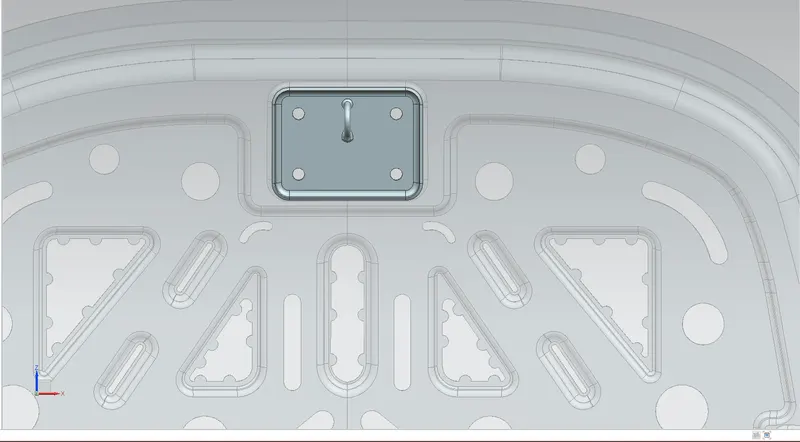
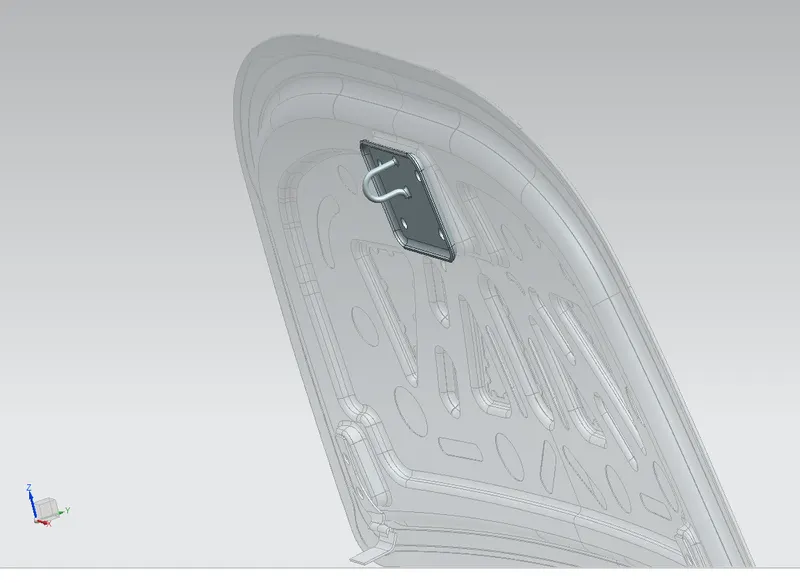
Striker is the component that is responsible to lock the hood in place with the help of the latch mechanism which is mounted in the engine compartment.
Design Considerations - Safety Compliance of Hood:
- The hood should be designed such as it gets deformed during a mishap or hit to lower the risk of pedestrian injury.
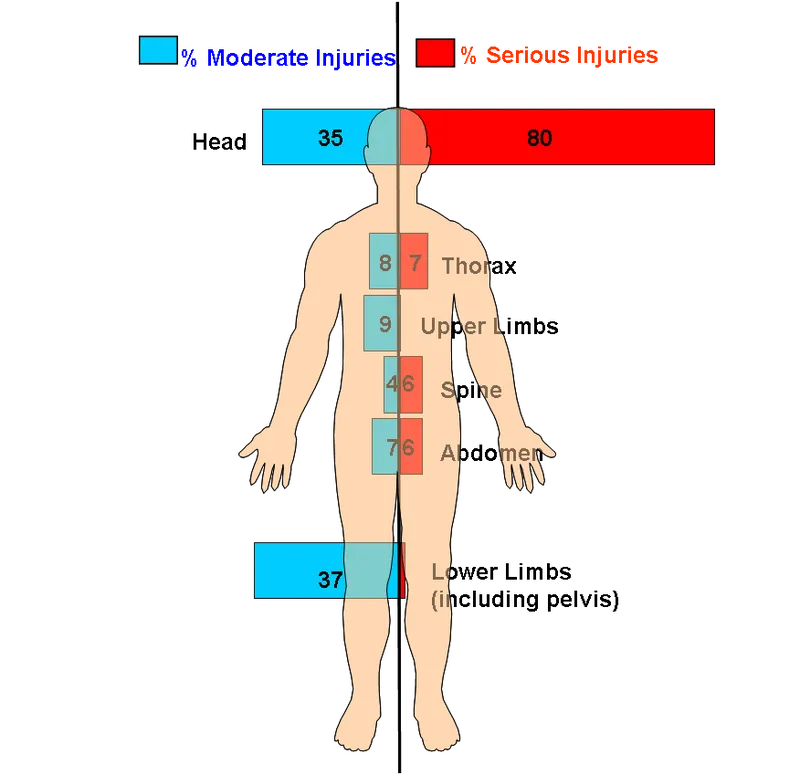
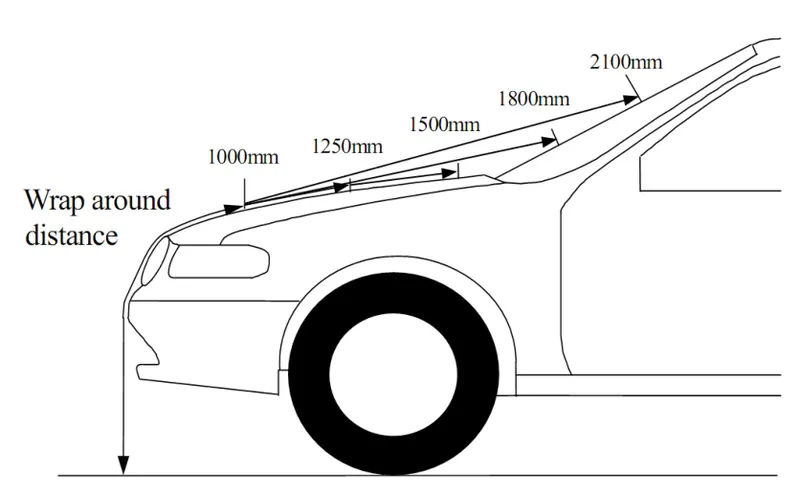
- The pedestrian safety compliance is determined by Wrap Around Distance (WAD).
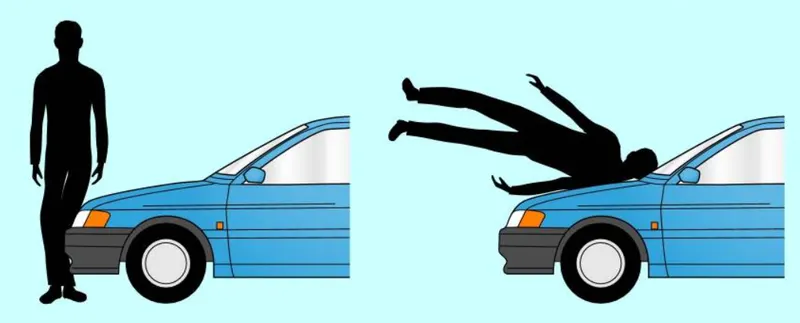
When a Car Cashes on a pedestrian, the whole human body wrap around the front shape of the car and the head impacts on the hood or the windscreen. The distance on which the head impacts on the car from the ground is called as the Wrap Around Distance (WAD).
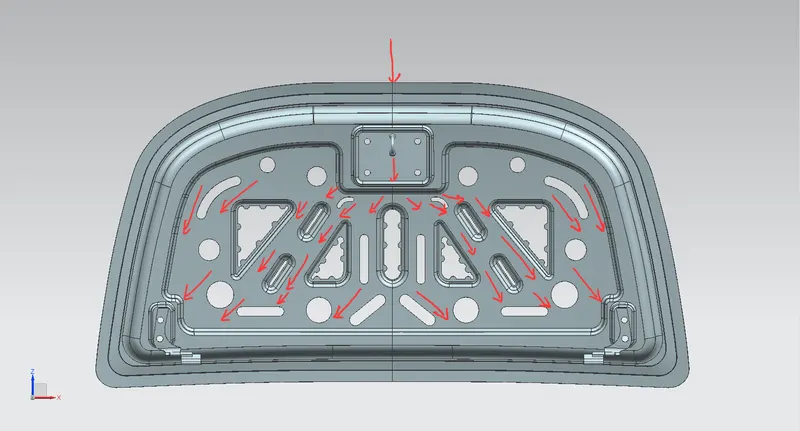
- The hood should be designed in a way that it should dissipate and direct the impact forces towards the outside of the cars’ body/shell to lower the harm caused to the occupants inside the cabin.
Software Used:
Siemens NX (CAD) Unigraphics 12
Tools used:
- 2-D Sketcher Tools
- Associative Copy
- Mirror Geometry
- Analysis Tools
- Local Radius
- Simple Distance
- Surface Tools
- Trim Sheet
- Extend Sheet
- Trim and Extend
- Through Curves
- Emboss
- Offset Surface
- Law Extension
- Face Blend
- Edge Blend
- Sew
- Thicken
- 3-D Sketcher Tools
- Offset Curve in face
- Curve in Surface
- Project Curve
- Bridge Curve
- Assembly Features
- Move Component
- Mirror Assembly
- Assembly Constraints
Preparation of Master Section:
With the given skin data and the master section details, now it is time to start the surface modelling to prepare the surface of the master section. As we see the master section detail sketch it understandable that the surfaces of the section are an exact copy of the given outer panel’s skin. So, we use the skin as the reference surface and proceed with trimming the skin surface about the mid-plane to reduce the designing time and the difficulties since the skin is symmetric about its mid-plane.
Embossing and Cut-outs:
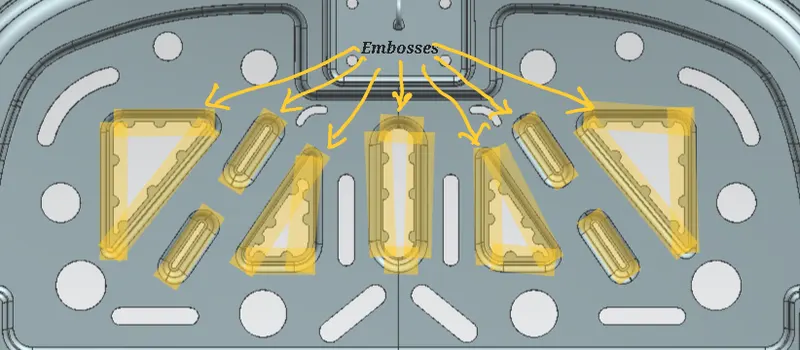
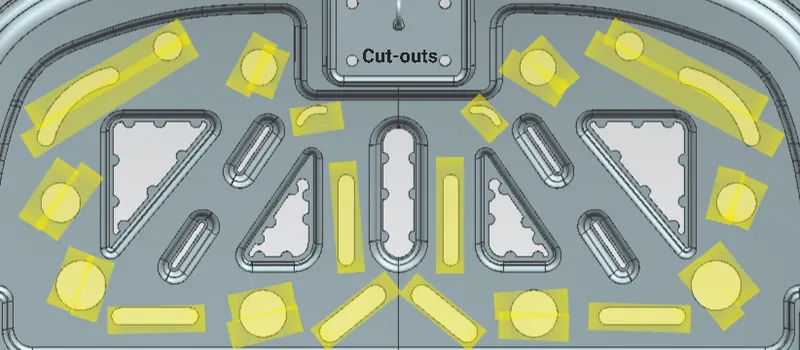
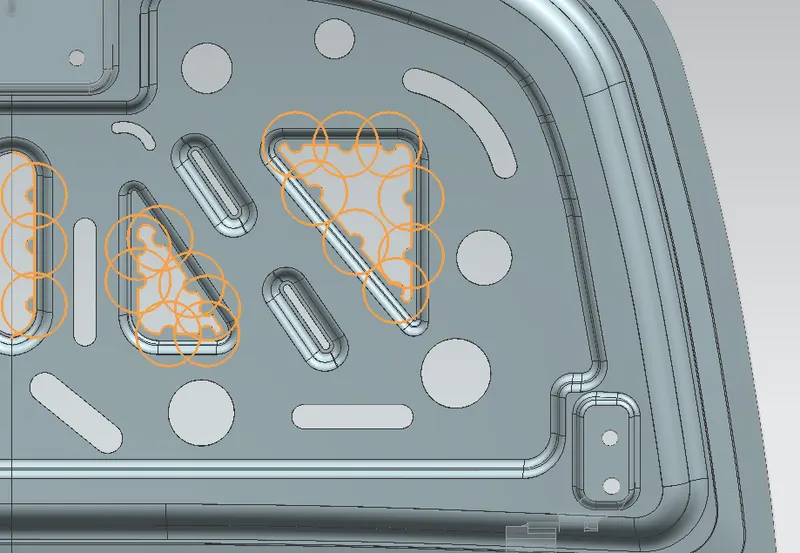
Once the inner panel’s master section is designed and takes shape, it is time to give some embosses and cut-outs. The embosses are given to increase the structural stability and also provides spaces or the components that sits inside the engine and battery compartment. The cut-outs are provided to reduce the vehicles’ weight and decreases the internal stresses and strains which reduces the strength and makes the panel deformable in the event of a crash or mishap. The mostly used shapes of embosses and cut-outs are V and Y which are useful to distribute and direct the impact forces towards the hinged points and to the outside body of the vehicle and protect the occupants inside the cabin.
Hinge and Striker Assembly:
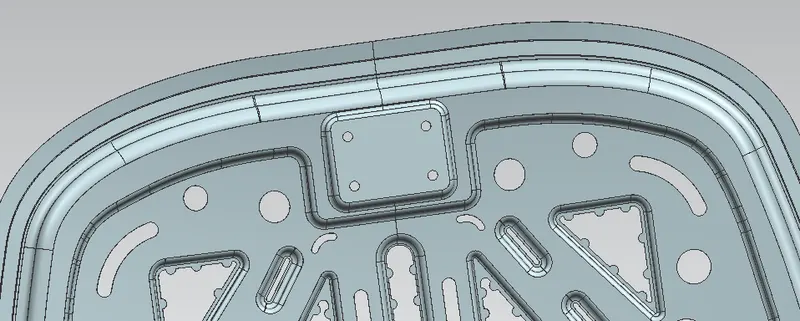
The next is to assemble the hinge and striker in designated places in the hood. When these hinge and striker models are closely examined, we understand that their surfaces are flat. And in the inner panel we see that the surface has a curvature and this makes it difficult to mount the hinges and striker to the hood. Therefore, a flat surface is needed in-order to mount and this can be achieved with the help of creating embossed sections in a flat plane that is parallel aligned to the hood’s cross section. At first the hinge is moved near to the inner panel in the assembly workspace and is adjusted accordingly with the inner panel so that the mounting space can be visualised clearly. Then in the inner panel a datum plane is created in the sketcher workbench that is parallel to the XZ plane of the Datum Co-ordinate System and is offset towards the inner panel and is copied and aligned at an angle that is parallel to the inclination of the inner panel. That plane is used to create the section for embossing.
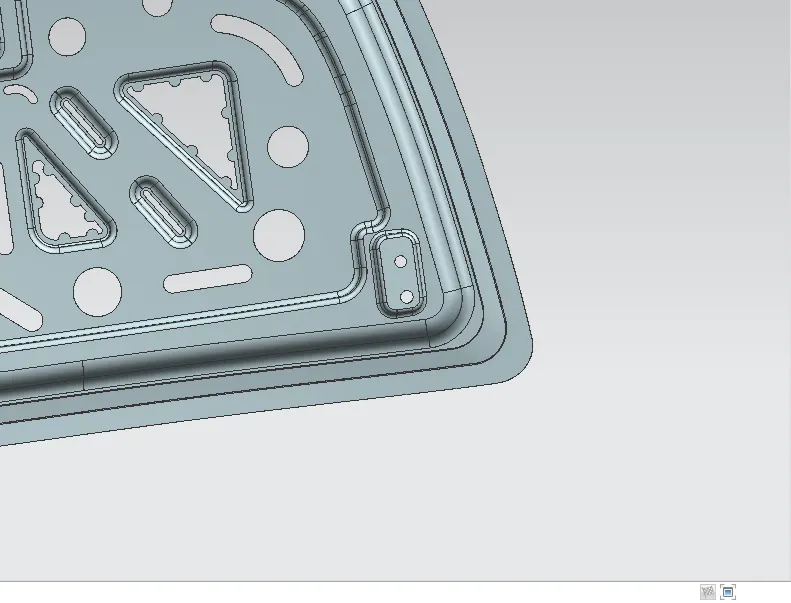
After creating the hinge emboss the hinge is assembled in the emboss by adding assembly constraints such as parallel, touch/align properties. When the hinge is in placed the hinge is mirrored about the YZ plane with the help of mirror assembly feature since the hinge is itself an assembly of two components the engine compartment side and hood side.
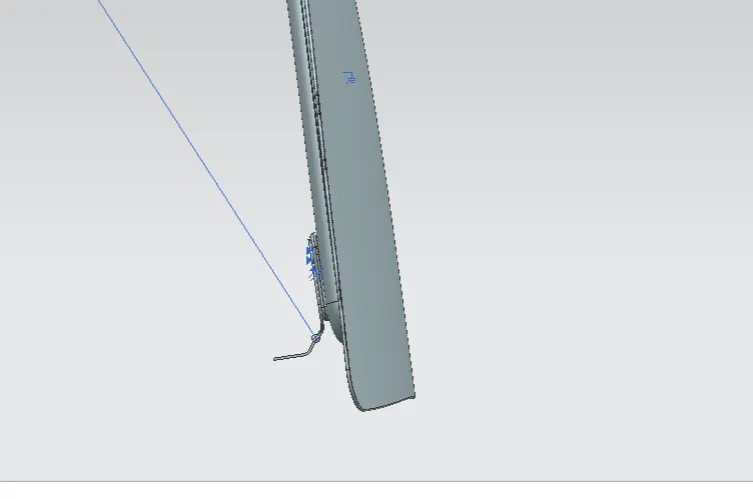
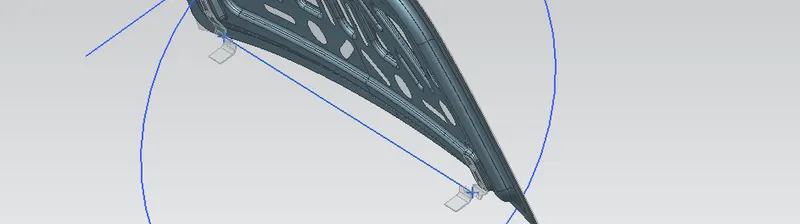
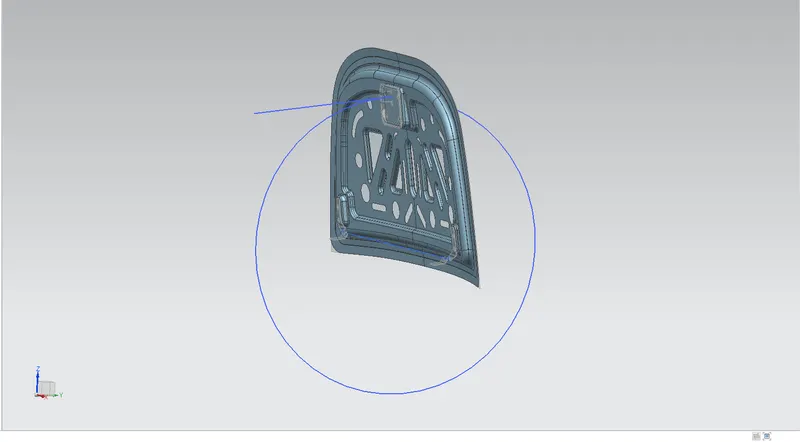
Then it is time to place the striker in place. To place the striker in place it is necessary to trace the movement of the hood and striker with respect to the hinge axis. This trajectory trace is achieved by creating a centerline that passes along the axis of the hinges and creating a trajectory circle and a line that is in tangent to the circle in the inner panel’s side and a line that passes in the middle of the striker pin which goes inside the latch lock that is in the engine compartment. Then the striker moved in place nearer to the inner panel and is assembled with respect to the line of the striker pin and the tangent line of the trajectory circle of the hood by adding assembly constraints such as touch/align, parallel properties. After aligning the striker pin to the created trajectory circle, the mounting face of the striker is used as reference for the section creation of the striker emboss.
Analysis
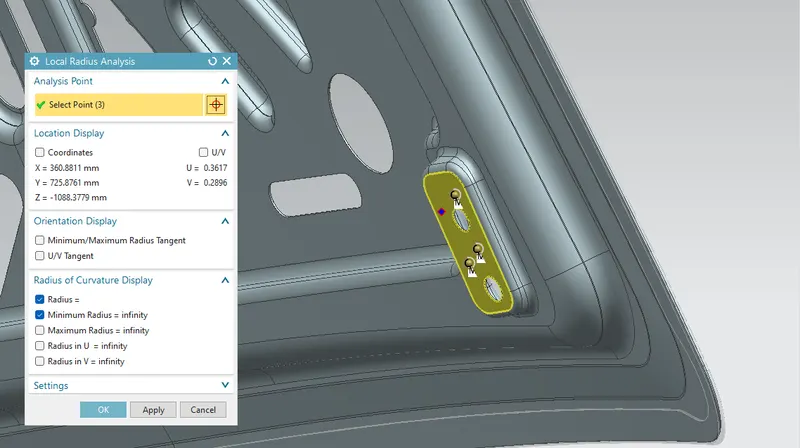
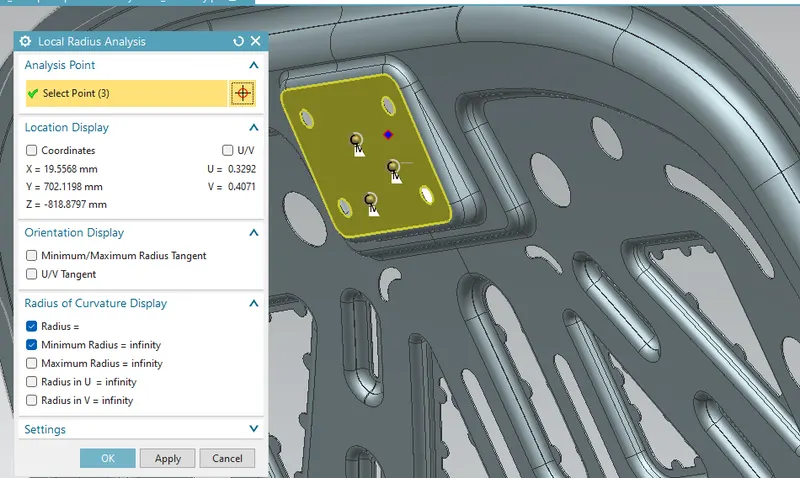
After creating these embosses to check the correctness the faces are checked for the flatness using the analysis tool called local radius and if the tool shows the radius as infinity, then the surface is flat or otherwise not. For the both hinge and striker embosses the radius is shown as infinity, so our embossed surfaces are flat as needed.
Sheet Metal Operations:
- Blanking
- Punching and piercing
- Drawing
- Hemming
Mastic Data:
Since the hood is going be the first thing that a customer notice in any car to get impressed by its aesthetic, elegant and premium look, it is not possible to join the outer panel and inner panel by welding as seen in general as it affects the appearance of the car and degrade its premium looks and the customer will get start to disliking the car and this will affect the sales of the vehicle and incurs loss to the manufacturer/OEM.
But the inner panel and the outer panel needs to be joined to make it a single entity. Since the panels are of sheet metal so they can be easily bent to form hems to join them in the edges, but in the center region it is not possible to do hems. So, a adhesive called mastic sealant is used to glue them in place and in also arrests any kind of vibrations and reduces the NVH ISSUES.
Hemming:
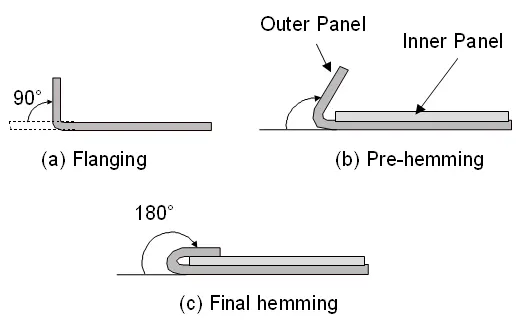
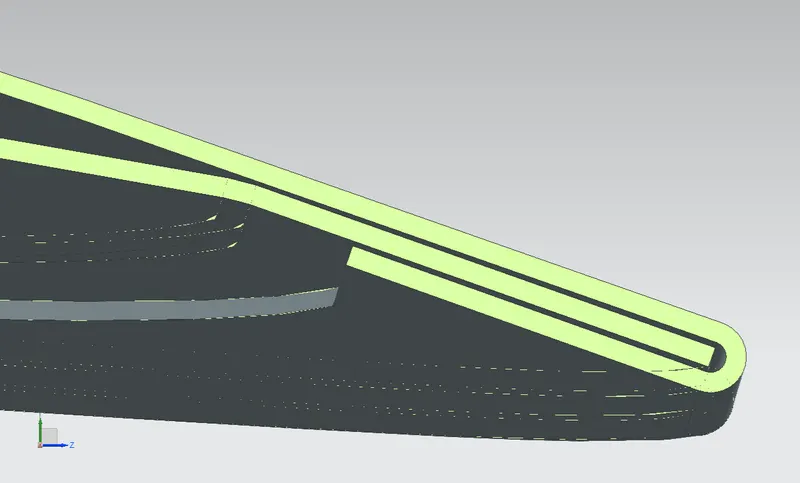
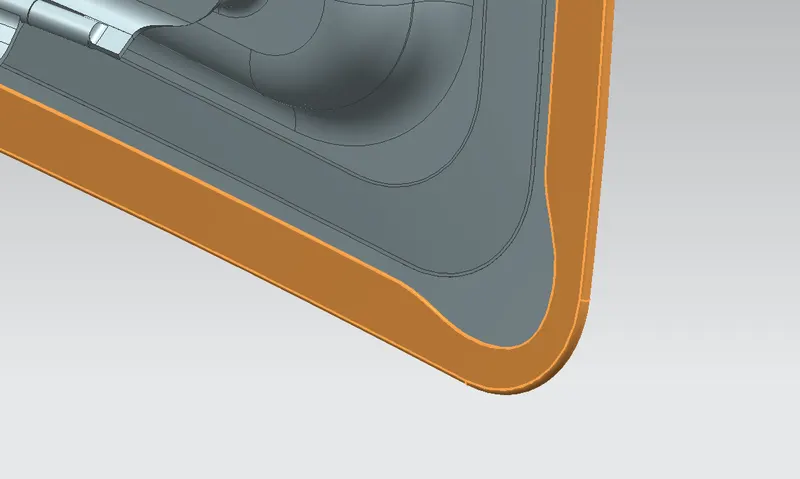
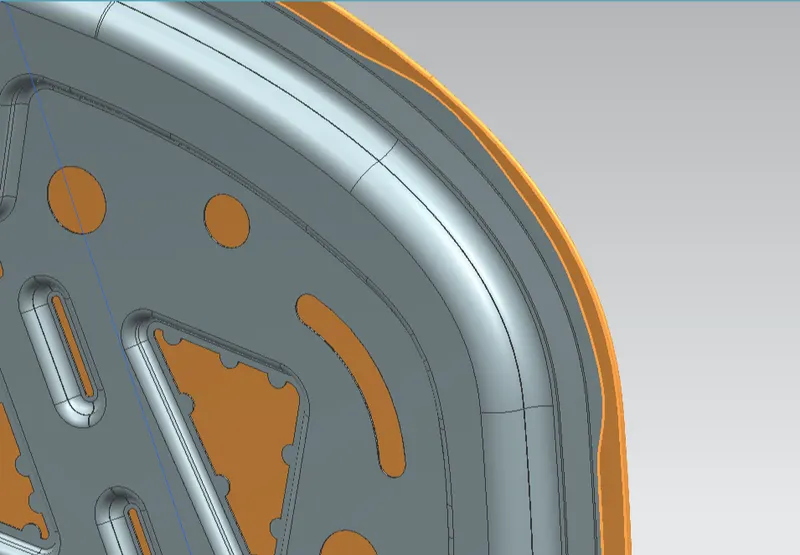
It is one of the sheet metal operations where two sheets are joined by bending one sheet in a way so that it wraps the other sheet. Usually hemming is done by rolling a ball that guides through the edges of the sheet multiple times depending upon the tightness that is needed and it is glued after the wrapping to arrest the vibrations and noise. So, a clearance of 0.2mm is given to the glue/adhesive on both the faces. The edges of the hem at the corners are relieved to reduce the internal stresses caused by the hemming.
Deep Drawing and Drafts:
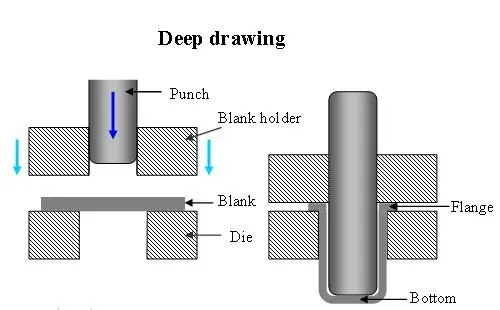
Since sheet metals are deep drawn for the section and embosses and to achieve a good manufacturability of the sheet metal making process, draft angles are given. These draft angles will provide easy to remove the sheet from the die/tool after drawing process.
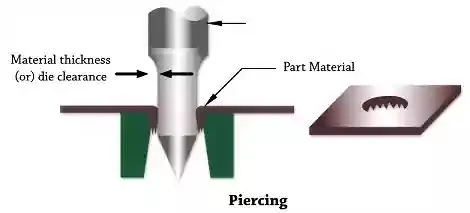
Punching and Piercing:
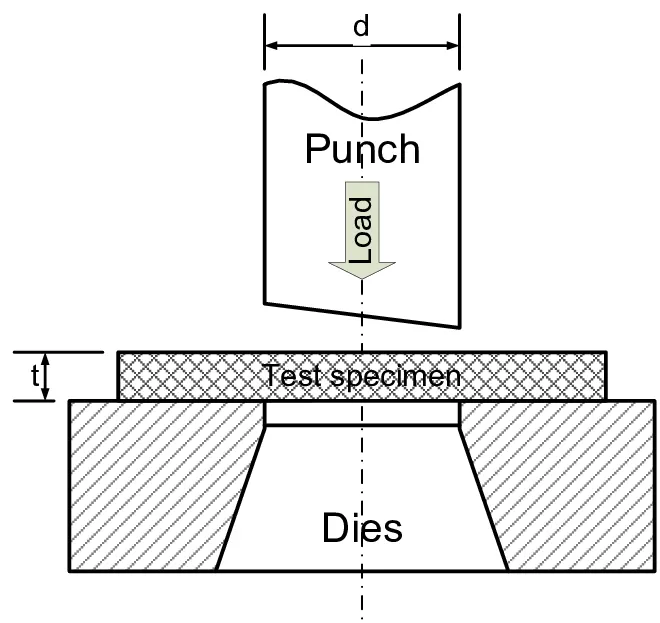
The cut-outs in the sheet metal are made by punching and piercing operations that is carried out after drawing.
Conclusion:
Hence a hood is designed with the given skin data and design parameters.
PS-: same Files are compressed as ZIP and RAR for safety reasons and is uploaded. STEP files are within the Compressed archives.