Hood design-Week 2
A detailed report about the Hood Design which includes a detailed explanation about hood and its components, Latch Trajectory, Mastic Data, Emboss Definitions, Manufacturing process like Deep-Drawing and Hemming, and all the parameters followed in the design.
HOOD INTRODUCTION:
HOOD also referred to as a bonnet is a cover of engine compartment it is very critical part because of consisting frontal crash, pedestrian safety and scatter energy outside of the car rather than send force impact inside the car body during the collusion. Levers are provided in the car two type to access the HOOD opening they are primary lever and secondary lever.
Primary lever available in some cars below the driver seat to open hood little around 10MM to 15MM and secondary lever present inside the HOOD to open completely by stricker mechanism with help of primary lever. When HOOD opening angle is less there is high chance of human get hit on Stricker , so based on regional standard calculation human average height in INDIA around 5.5 feet and Europe about 6 feet as per requirement to concern company will design to fix necessary opening angle.
Important consideration in Hood design:
- Head zone criteria
- NVH
- Hood balancer
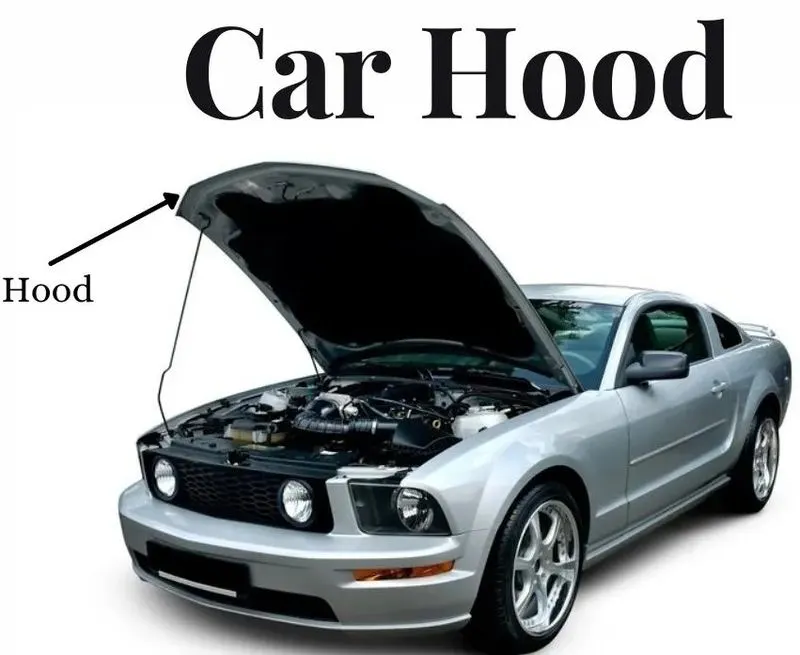
HOOD STAY:
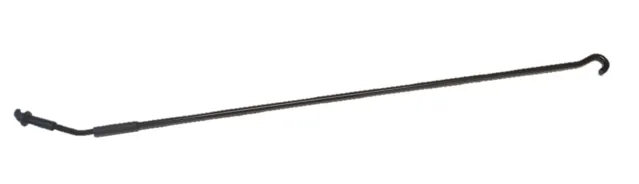
SUPPORT ROD: In curve bend shape to increase rigidity avoid wobbling with sufficient clearance around the parts provided between the engine compartment and bonnet or in Vice-versa position. Supporting rod consist of opening angle, mount and dis mount of the rod fixing location. (Bend not less than 35 MM more bend causes reduce in opening angle and rod bends due to hood weight)
Supporting rod should be arrange opposite side of battery in the engine compartment otherwise causes difficult during battery replacement.
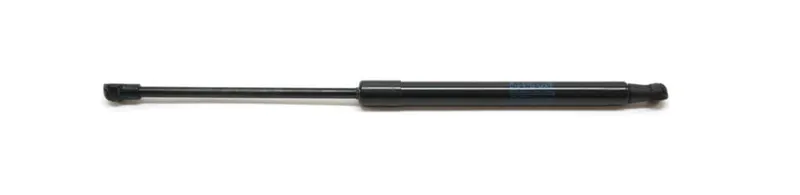
GAS STAY: Use to open the hood with little effort and hold it in open condition, But by adding gas stay will increase weight 500-800gms.
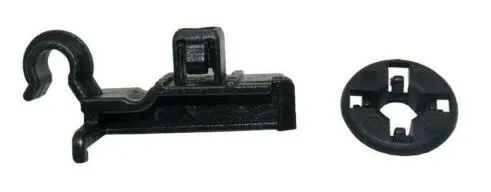
GROMMET: In engine compartment and hood grommet used to keep the support rod or gas stay in rest condition.
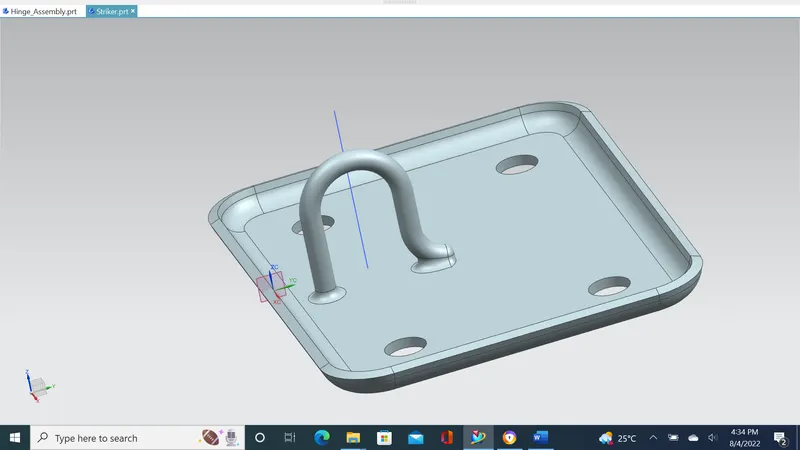
Stricker:
Latch is a striker, which is placed over the hood & get attached to the hole provided in engine compartment this is used for locking purpose of hood with engine compartment.
Hinges:
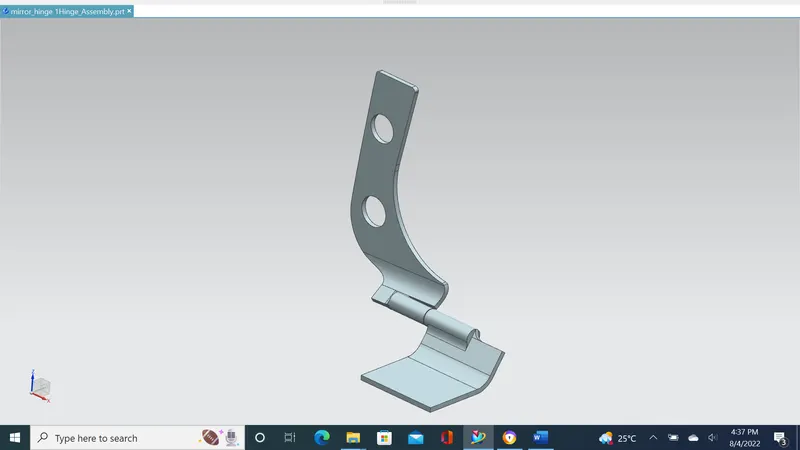
Hinge is used for controlling element for opening & closing of the hood, It connects the hood & engine compartment of car. The hood's hinges serve one other purpose besides holding the hood-safety.
Latch Trajectory:
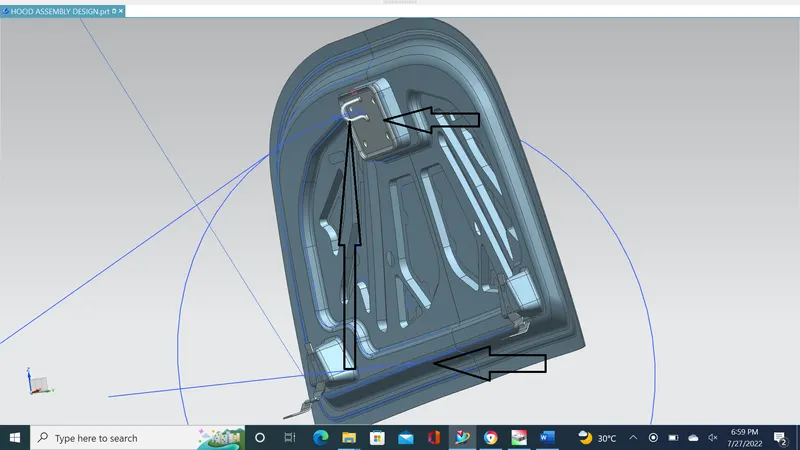
The latch trajectory is the path which the striker will follow when the hood is open/closed while pivoting on the hinge axis. The latch trajectory is taken as a circle with the hinge axis as the center of the circle. The striker is placed 90 degree such that it is tangent to the circle. Hinge axis should be perpendicular, Latch trajectory helps to define proper closing angle of both stricker and hinges provided in hood.
Mastic Data: Mastic stiffness area filled with mastic seal between the outer and inner panel around 5MM and every mastic seal able to increase strength of 80MM diameter, the reason for providing mastic at inner panel to maintain the aesthetic look of outer panel. Small rubber or hard paste applied in between both inner and outer panel after fed into the furnace the paste gets harder to join the both panel and also improves NVH.
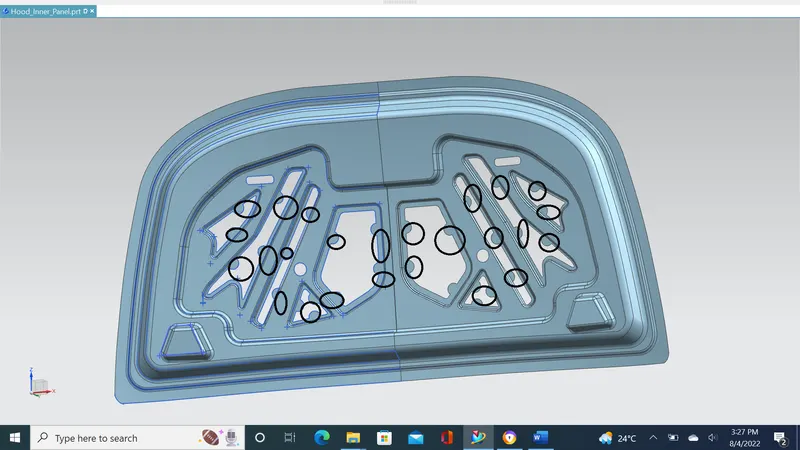
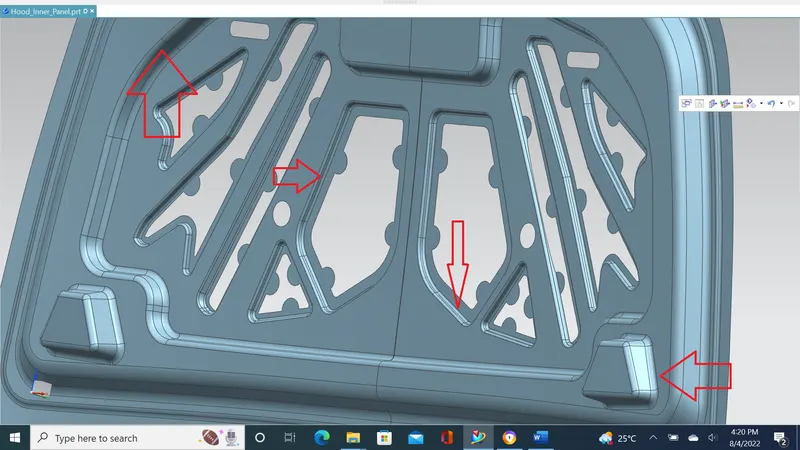
Emboss Definitions: As we design engineer need to dissipate force during any accidents by having emboss in hood panel, An emboss is a metal forming process in which a high pressure is applied on a die to make a imprint on the working surface. In this process the metal thickness remains the same while embossing of stamping to distribute the forces produced during the impact with pedestrian or crashing by any external vehicle can harm driver and passenger. Emboss plays very important role in safety aspect both IN and OUT.
Deep-Drawing:
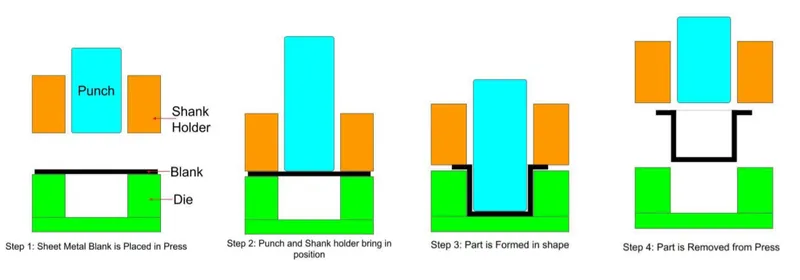
Deep drawing is a sheet metal forming process in which a sheet metal blank is radially drawn into a forming die by the mechanical action of a punch. It is thus a shape transformation process with material retention. The process is considered "deep" drawing when the depth of the drawn part exceeds its diameter.
Hemming:
Hemming is a sheet metal forming process in which sheets are joined by bending it usually to 180°. Automotive body panels and automotive parts such as deck-lids, trunk-lids, doors, hoods and tailgates are formed by hemming process.
Roll hemming:-
Roll hemming is carried out incrementally with a hemming roller. An industrial robot guides the hemming roller and forms the flange. Roll hemming operation can also be divided into several pre-hemming and final hemming process steps. Roll hemming is very flexible to use and tool costs are significantly lower as compared to those of conventional die hemming. However, the cycle times are much higher since the hemming is realized using a hemming roller which follows a defined path.
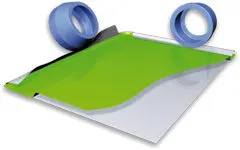
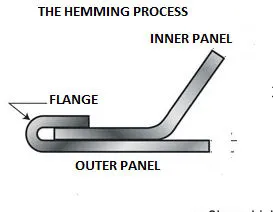
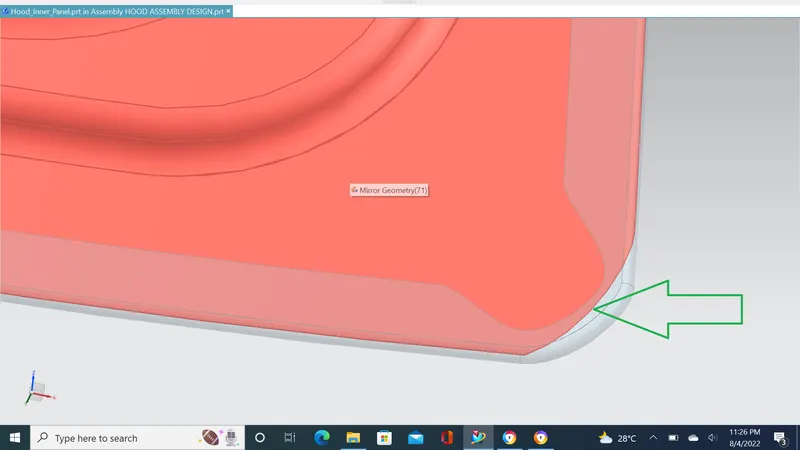
NOTE: Trimmed edge of hemming surface using curve on face command to decrease stress concentration at the corners during the hemming process.
DESIGNING ASPECT HOOD ASSEMBLY: Constrain (To avid flip and mis-matches in assembly)
1. IMPORT OUTER PANEL THEN FIX CONSTRAIN (0,0)
2.COPY INNER PANEL AS OUTER PANEL
3. AGAIN IMPORT INNER PANEL THEN FIX CONSTRAIN (0,0)
4. STARTING WORK AT INNER PANEL:
- Active inner panel-Assembly navigation-Part Assembly.
- Trim sheet because of working in half side of inner panel.
- As per master section 0.75x2= 1.5 + 0.2 = 1.7 MM.
- Command used for SURFACE-Off set surface.
- Command used for CURVE-Off set curve in face.
- Command used for SURFACE-trim sheet used to remove un wanted surface.
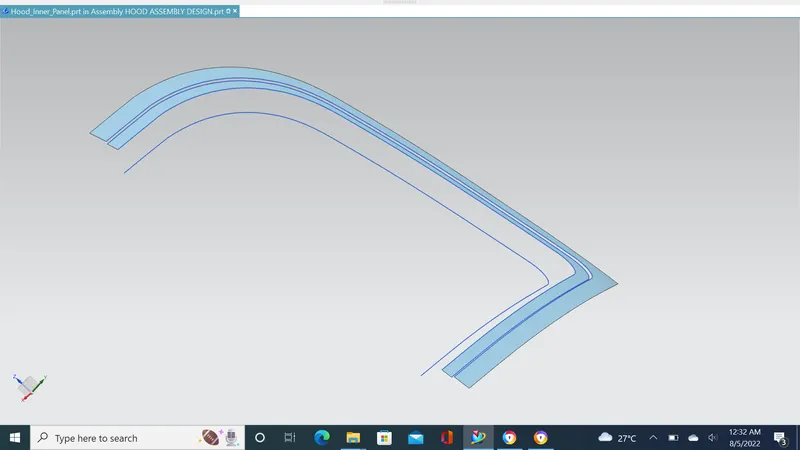
- Repeat the process until require strip attains.
- Use bridge curve command between the strip.
- Command through curve mesh used for fill the surface between the curves.
- Face blend used on edges or edge blend in corners for smooth curve surface (Applying Edge blend part must be sew before)
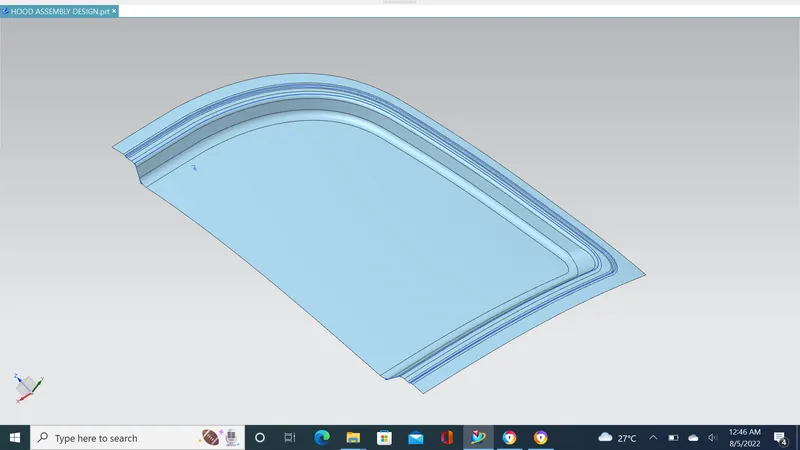
- Sketch on plane.
- CURVE-Project curve.
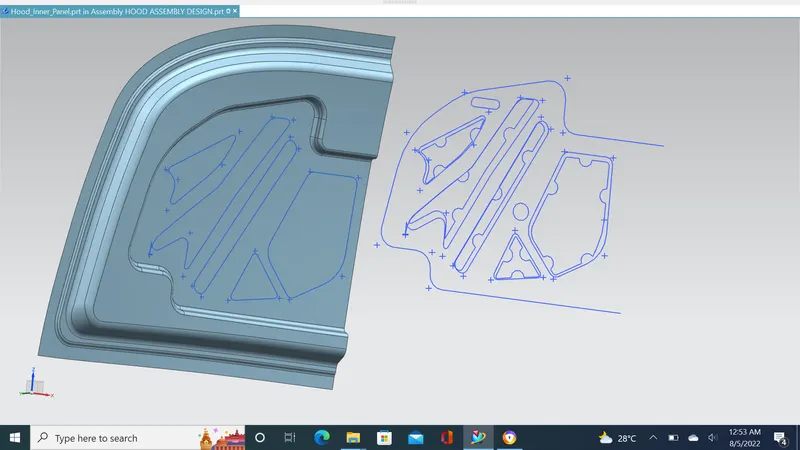
- Emboss command.
- LAW of extension with trim and extend for stricker placement.
- Draft angle greater than 7MM.
- FACE BLEND.
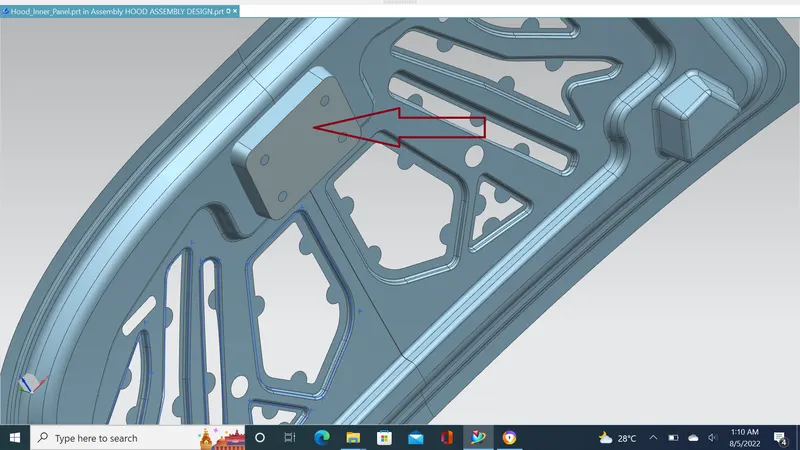
5. IMPORT STRICKER THEN FIX CONSTRAIN (0,0)
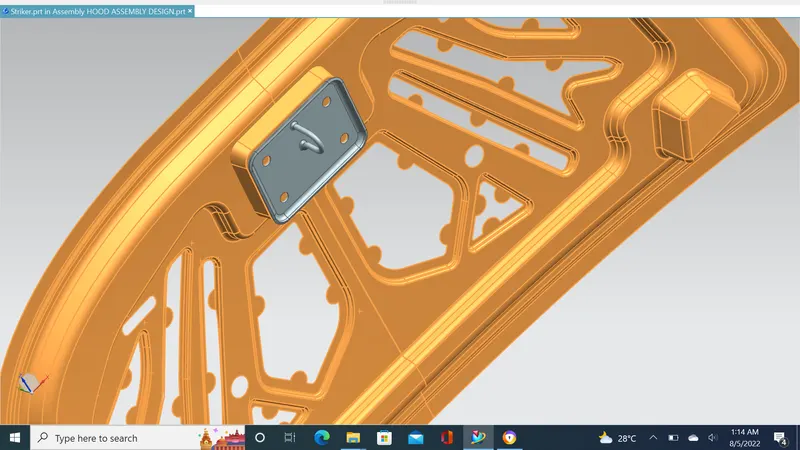
6. IMPORT HINGES THEN FIX CONSTRAIN (0,0)
- EMBOSS FOR STRICKER
- TOUCH CONSTRAIN
- PARALLEL CONSTRAIN
- MIRROR ASSEMBLY
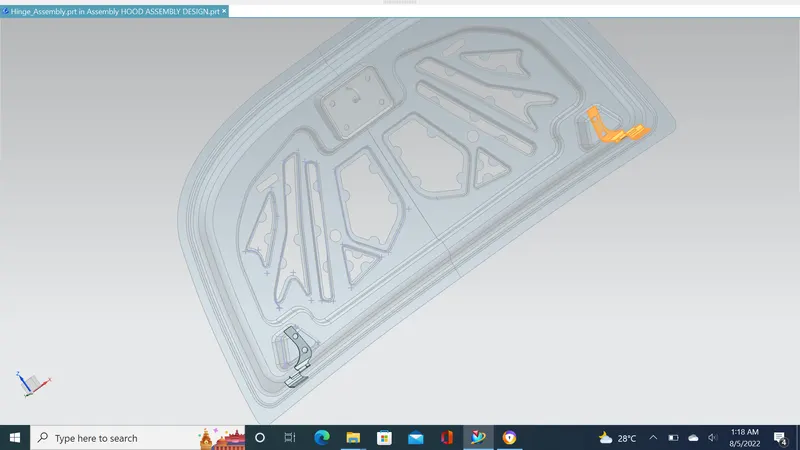
7. HEMMING ON OUTER PANEL.
- Calculation 3(0.75)+2x0.2=2.65
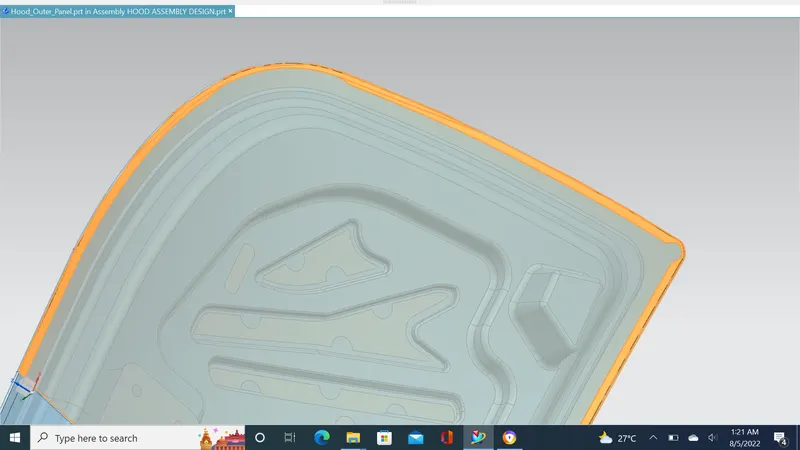
8. FINAL HOOD ASSEMBLY:
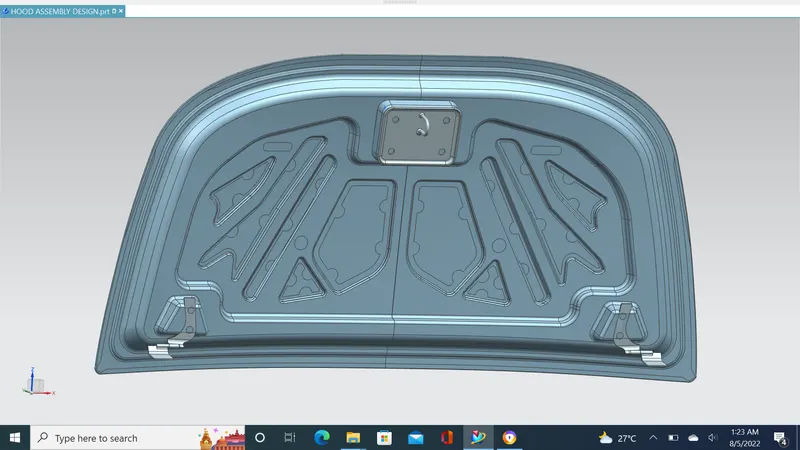
CONCLUSION:-
Important changes have been made to the Euro NCAP ratings resulting in the introduction of the overall rating scheme.
Individual documents are released for the four main areas of assessment:
• Assessment Protocol – Adult Occupant Protection.
• Assessment Protocol – Child Occupant Protection.
• Assessment Protocol – Pedestrian Protection.
• Assessment Protocol – Safety Assist.
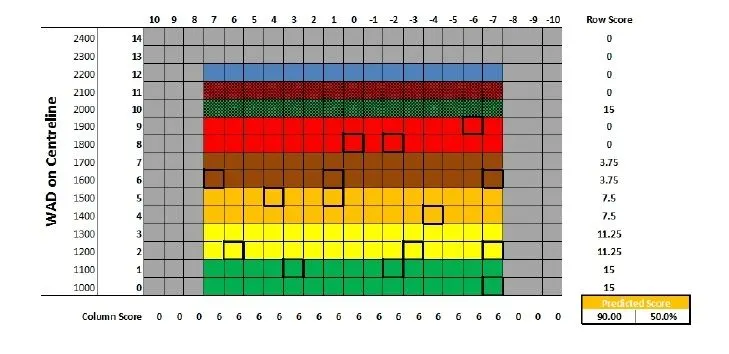
The prediction consists of the following:
15 Default Green x 1.00 = 15.00
30 Green x 1.00 = 30.00
30 Yellow x 0.75 = 22.50
30 Orange x 0.50 = 15.00
30 Brown x 0.25 = 7.50
30 Red x 0.00 = 0.00
15 Default Red x 0.00 = 0.00
15 Blue
195 grid points 90.00 points
Note: Decrease number of red zone & Increase in number of green zone for safety aspect.
- Successfully completed HOOD Assembly Challenge based on given master section by following all given safety parameter with help of NX CAD software.
- Kindly download hood assembly Zip file attachment further extract for your evaluation and thanks for your concern guidelines.