Hood design-Week 2
Title: Design and development of hood design
Aim:
The aim of the project is to design the hood inner panel w.r.t to hood outer panel class A surface and create the latch emboss w.r.t to hinge emboss face, both emboss face should be parallel. Hemming dimensions should be maintained w.r.t to hood inner panel after thicken. Latch trajectory should be maintained w.r.t to hinge assembly and latch reinforcement.
Introduction:
Hood or bonnet is main component in front of the car and it covers the engine portion. The shape of the hood is designed to minimized the air effect, weight and pedestrian safety. Most of the car accident pedestrian effected more threat due to stiff hood. So to avoid more threat the hood design is fabricated from sheet metal by giving more clearance and the clearance between the hood and stiff is maintained minimum 10cm to avoid more threat to death.
Conventional car bonnets are mostly is made of steels and aluminium. In bonnet mainly consists of two major parts, an inner bonnet and outer bonnet. The inner bonnet is critical for providing with structural strength and outer bonnet is for providing a homogenous style and to maintain aerodynamics of the vehicle body. The outer bonnet is not important for strength as inner bonnet but it is the function for pedestrian safety. When designing a bonnet fulfill all requirements in form of safety aspects and crash behavior etc.
Bonnet system consists of a bonnet, striker, hinges and latch. The bonnet system should allow for inspection of the engine and service such as fluid fill. It should fulfil the demands in ergonomics concerning opening and closing forces and opening geometry with the latch system and opening system.
The inner bonnet and outer bonnet joined together by hemming. Front reinforcement (lock striker reinforcement) and hinge reinforcement are clinched to the inner bonnet for joining these spot welding is used.
Latch reinforcement trajectory:
Latch reinforcement is nothing but giving the strength to the inner hood panel while closing the hood, the hook hits to the vehicle body striker point. To avoid the damages to hood inner panel the extra metal (latch reinforcement) is added.
Emboss:
Embossing is a metal forming stamping process for producing raised or sunken designs or relief in sheet metal. This process can be done by using the male and female roller dies or a strip of metal between the rolls of the desired pattern.
Design Methodology / Approach
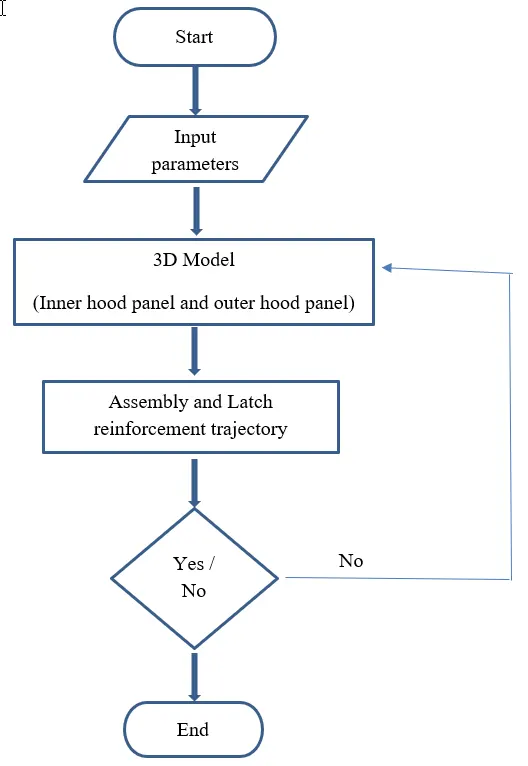
Figure 1: Design Methodology
Description (Need to explain tools / Features used while designing)
Input parameters:
Hood Thickness Information
- Outer Panel Thickness = 0.75mm
- Inner Panel Thickness = 0.75mm
- Reinforcement Thickness = 1.5mm
Master sketch:
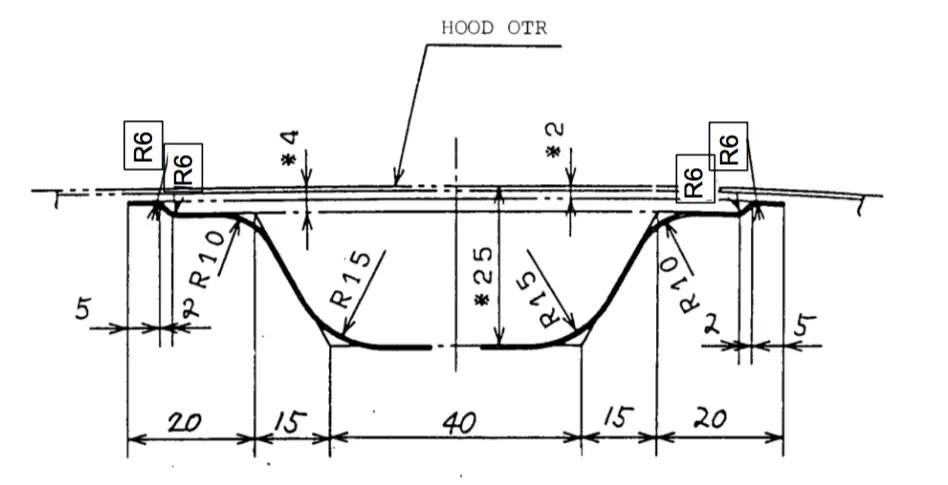
Figure 2: Input parameters for inner hood panel
The dimensions 5 mm and 25 mm is changed to 20 mm and 35 mm respectively.
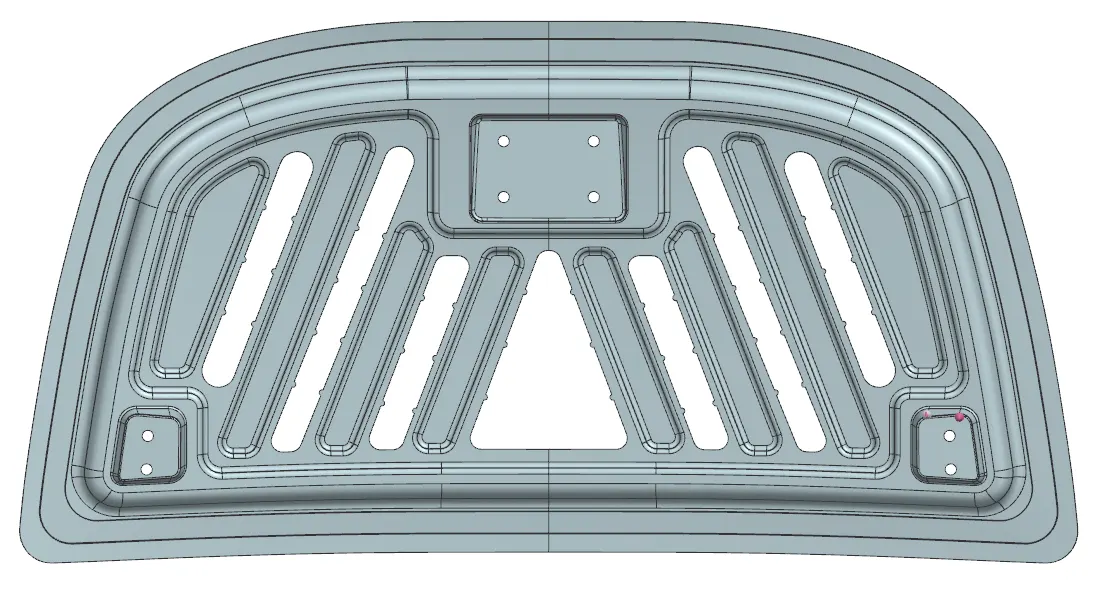
Figure 3: Inner hood panel
From Outer hood panel class A surface and (figure 2) input parameters the inner hood panel is developed.
Mastic sealant:
Mastic points are given on the inner hood panel to support the outer panel hood and the inner hood panel by filling the gap with mastic sealant.
The mastic sealants cover a dia of 80mm, it is a rubber paste becomes hard on the heating.
The purpose of the sealants is to avoid or reduce the noise vibration hardness.
(Note: the mastic points shown in Figure 3)
Hemming Process:
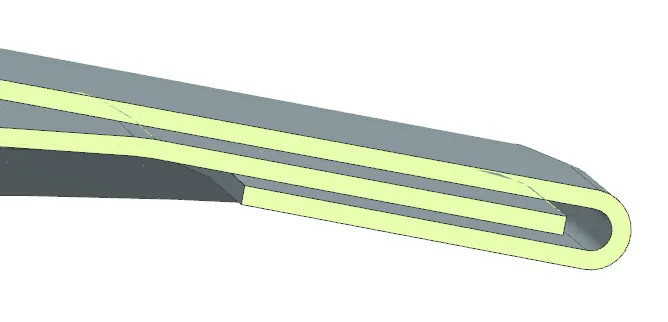
Figure 4: Hemming
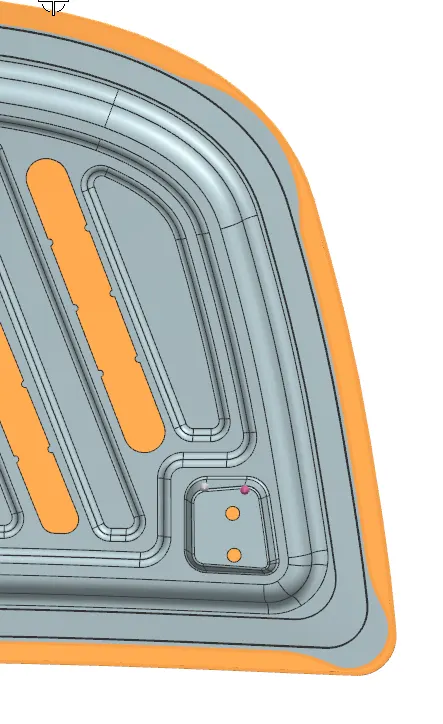
Figure 5: Relief at edges
Hemming is the process to join the two sheet metals without using a rivets and welding process. Hemming process the rollers are rolled at edges and the corners of the edge relief is given according to design considerations.
The relief is given 3 mm at corners, the clearance between the inner hood and outer panel is 0.2mm (while creating a hem), i.e. 0.75+0.2+0.75+0.2+0.75 = 2.65mm.
Latch reinforcement trajectory:
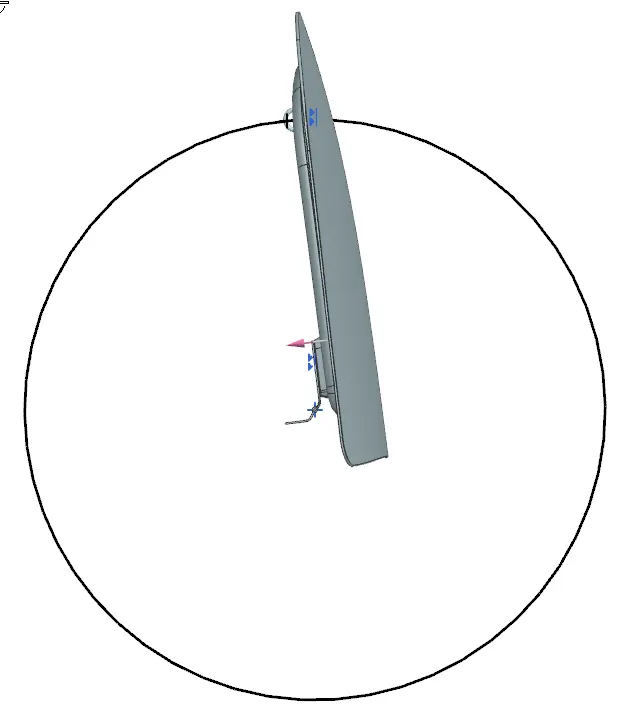
Figure 6: Side view of Latch Reinforcement trajectory
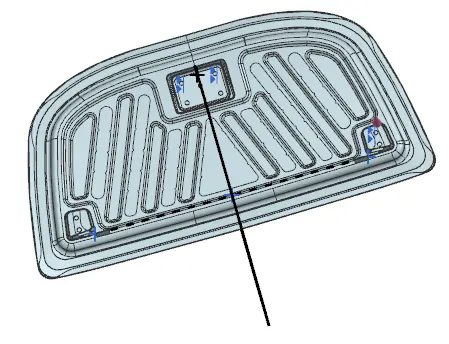
Figure 7: Front view of Latch Reinforcement trajectory
Latch reinforcement trajectory purpose is to maintain perpendicular and 90 degrees while closing the striker point positioned at vehicle body point.
Latch reinforcement trajectory is maintained perpendicular between hinge axis and latch striker point if it is not perpendicular again changes done in 3D model. After changing again has to check latch reinforcement trajectory until it comes to perpendicular between the latch striker point and hinge axis.
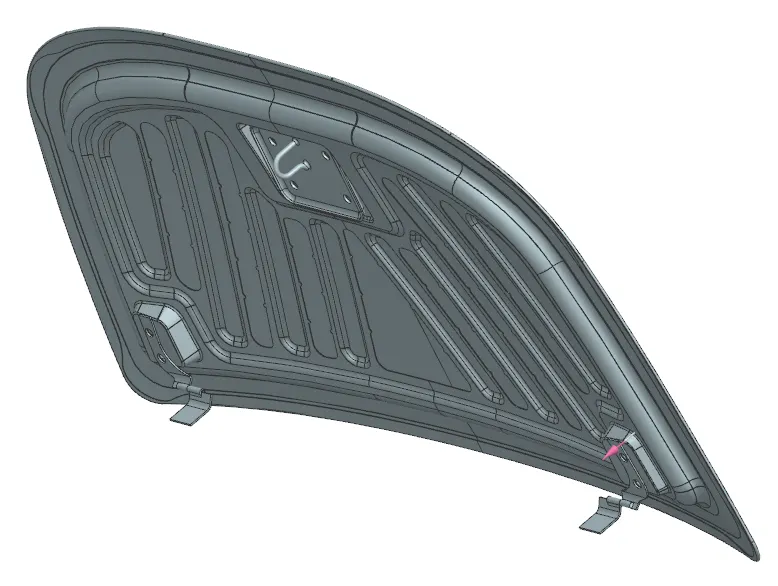
Figure 8: Isometric View
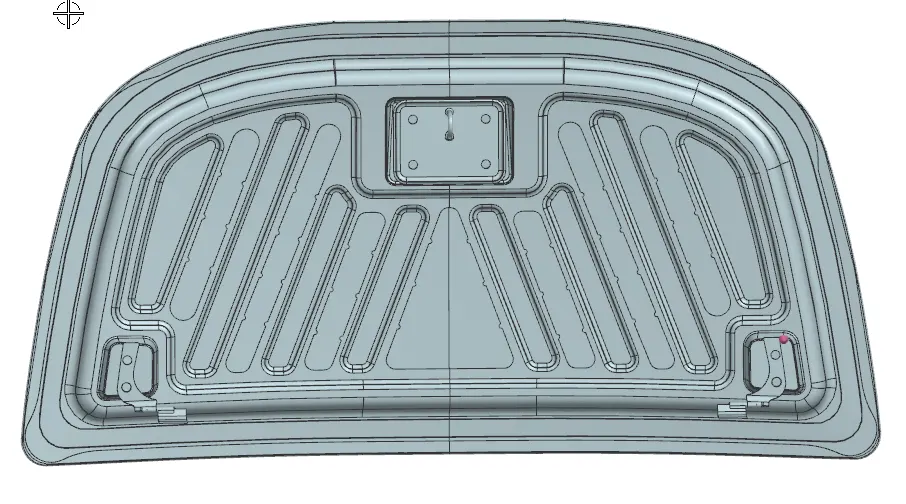
Figure 9: Front view
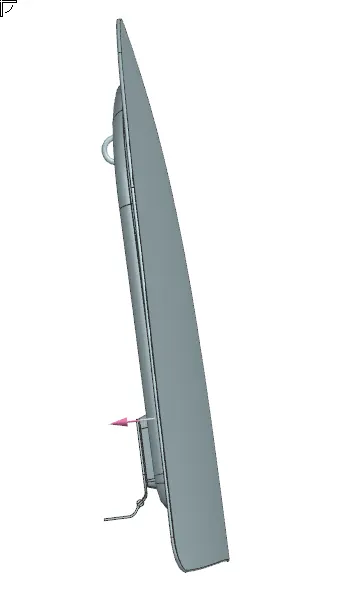
Figure 10: Side view
Conclusion:
The hood assembly is design with the help of Outer hood panel class A surface and the latch reinforcement trajectory is maintained perpendicular to the hinge axis and hook.
https://drive.google.com/drive/folders/1XqWjmrPoTL1Uw3d6ZIrgmMHSO4U0hg7d