Hood design-Week 2
Objective:
We will design the hood inner panel using NX CAD in this project, which will help us become familiar with the NX CAD features and tools as well as the design parameters and technical abilities required to create the hood.
Introduction:
Here, we'll learn about and create the concept of a front-mounted engine hood in accordance with industry requirements. The hood, often known as the bonnet, is a hinged cover that covers the engine and gives access to the engine compartment or trunk for maintenance and repair.
On cars with front-mounted engines, the hood may be hinged at either the front or rear edge, or it may be split into two portions, one on each side, each hinged along the centre line, as on previous versions. Another variation merges the bonnet and wheel arches into a single piece, allowing the entire front bodywork to tilt forward around a pivot near the vehicle's front.
Support Rod/Prop rod: When you need to work on your car's engine bay, a hood rod is meant to keep your hood propped open. It must be securely fastened when in use to provide a secure grip on the hood. Meanwhile, while it is not in use, it must be kept stationary and not move. The part responsible for the function is the hood rod clip. When not in use, this clip clamps onto the rod to keep it firmly in place. It prevents the rod from sliding about and producing problems beneath the hood.
Gas Stay: This is used to open the hood of an automobile with just a little lift force. All it takes is a modest amount of effort, and the rest is handled by gas pressure. It's usually found in high-end cars with a hood that's heavier than usual.
Sheet Metal Operations:
Blanking and piercing are shearing procedures that use a punch and die to create pieces from coil or sheet stock. Blanking creates the component's external features, whereas piercing creates the component's inside holes or forms. The web is leftover material that is developed after many components have been manufactured. Also considered junk is the "slug" created by piercing internal features. "Piercing" and "punching" are phrases that can be used interchangeably.
Deep Drawing: Deep drawing is a sheet metal forming technique in which a sheet metal blank is mechanically pulled radially into a forming die. As a result, it's a material-retention shape modification process. When the depth of the drawn part exceeds its diameter, the procedure is called deep drawing.
Embossing: Sheet metal embossing is a stamping technique that creates raised or sunken images in sheet metal. This technique can be done using matched male and female roller dies, or by sliding a sheet of metal or a strip of metal between the desired pattern's rolls.
Hemming: Hemming is a shaping procedure that involves folding or folding (yet another part) the sheet's edges to obtain a snug fit. Hemming procedures are commonly used to join parts, improve the look of a part, and reinforce part edges. Hemming is a method of joining inner and exterior closure panels in the automotive industry (hoods, doors, tailgates, etc.). The process of bending/folding the outer panel's flange over the inner panel.
The correctness of the operation has a major impact on the appearance of the car's outer surfaces, and is thus a crucial factor in the finished vehicle's overall quality.
Mastic Points: These are the points at which the hood's inner and outer panels are linked or can be glued together with mastic glue. If a method such as bolting, riveting, or welding is utilised to secure the outer panel, it will lose all of its aesthetic value. As a result, mastic sealants, which are elastic substances that act like rubber, are utilised. It's sandwiched between the two panels. It starts out as a paste, but following a hot furnace treatment, it hardens and gives the panels their strength. One area usually has an affect of 80 mm in diameter.
Hood design considerations:
The frontal BIW enclosure component of an automobile is regarded to be the hood. Bonnets are used to reduce air resistance as it flows around the vehicle. Apart from that, bonnets are made to satisfy a variety of different needs. In the event of an accident, they play an important role in safeguarding the passengers within the automobile as well as pedestrians. It also serves as the engine's cover.
The European New Automotive Evaluation Programme (Euro NCAP) is a European car safety performance assessment programme that has created test requirements and grading systems for evaluating pedestrian injuries in front-end collisions. A set of tests utilising hits aimed to bio-mimic a collision at a speed of 40 km/h is one example. They describe a circumstance in which a pedestrian is positioned laterally and is hit by an automobile on one of his legs first. The leg, upper leg, and, most crucially, the head are all tested, as head trauma is the most prevalent cause of death. As a result, the high impact region for adults and children is exposed to less thickness to minimise severe head injuries. Also, no reinforcement should be provided in that location because the hood will absorb the head impact energy after a collision, causing the hood to collapse and protect the head from serious injury. Another key consideration for hood design is occupant safety in the event of a frontal accident. The hood should be designed in such a way that upon a collision, the force will go upward via the embosses and be directed towards the car's body. As a result, the people inside are safe.
Theory:
A car's hood or bonnet is regarded as the frontal BIW enclosure component. Bonnets are used to reduce air resistance as it flows around the vehicle. The bonnet's design is crucial since it impacts the car's aerodynamic flow. Apart from that, bonnets are made to satisfy a variety of different needs. They play an important role in safeguarding passengers within the vehicle as well as pedestrians in the case of an accident. It also serves as the engine's cover.The hood or the Bonnet consists of the following parts.
- Hood outer panel
- Hood inner panel
- Latch and Striker re-enforcement
- Hinge re-enforcement
- Gas stays re-enforcement
Requirements:
- Outer Panel Thickness - 0.75mm
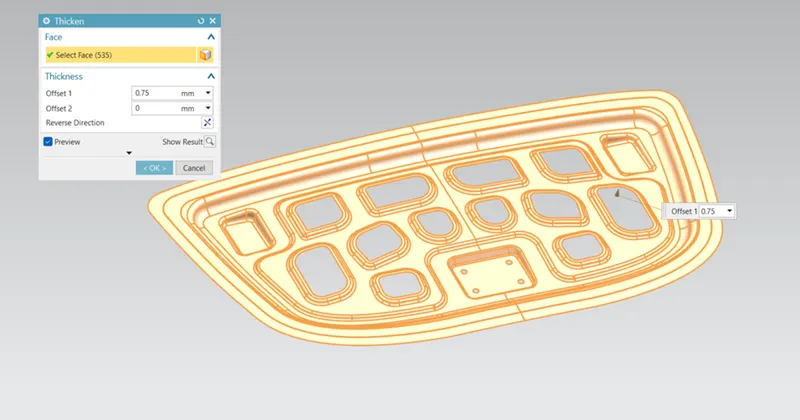
- Inner Panel Thickness - 0.75mm
- Reinforcement Thickness = 1.5mm
- Minimum fillet radius = 3mm Thickness (example: When thickness of inner panel is 0.75mm we need to maintain minimum fillet radius 3.0.75-3.75mm)
- No sharp comers inside the component
- No curvatures lesser than 5mm
- Small embosses should not exceed the maximum depth of 6mm (staying on the safe side)
- Mounting areas and welding areas need to be flat
- Provide appropriate comer relief on the area of curvature
Features/tools used for modelling:
- Sketch
- Offset surface
- Offset curve in face
- Trim sheet
- Through curves
- Law extension
- Trim and extend
- Extend sheet
- Face blend
- Edge blend
- Emboss
- Mirror geometry
- Sew
- Thicken
Procedure:
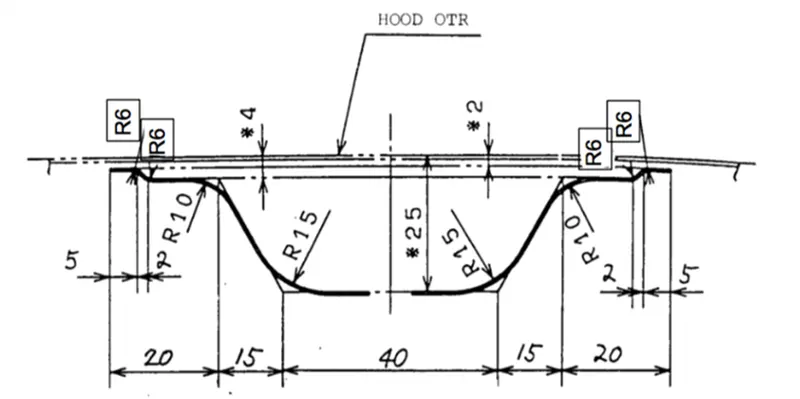
MASTERSECTION: Master sections are the guides for design requirements which decide the component packaging after technical (Styling Concept or Class-A) surfaces.
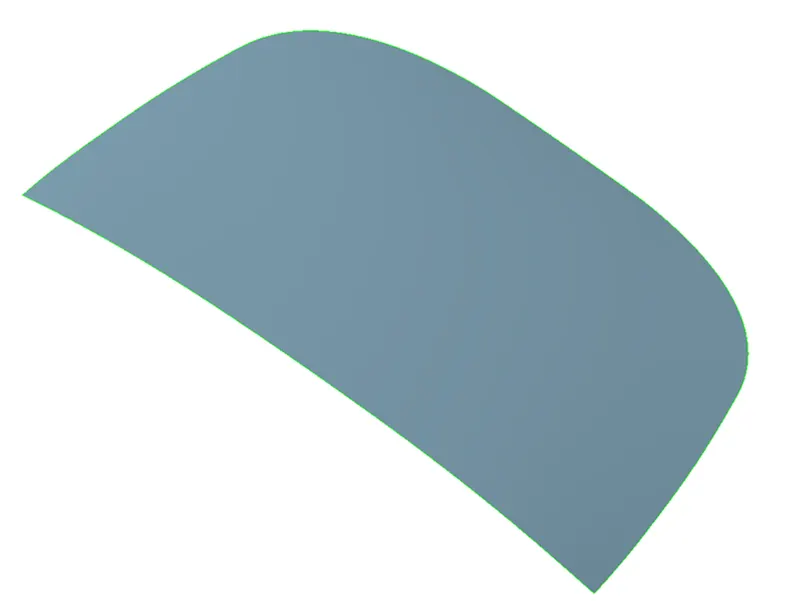
CLASS A SURFACE: A class A surface is any of a group of high-efficiency, high-quality freeform surfaces used in vehicle design. Although strictly speaking, it is nothing more than stating that the surfaces have curvature and tangency alignment - many people understand class A surfaces to have G2 (or even G3) curvature continuity to one another in order to achieve perfect aesthetical reflection quality (see free form surface modelling). Computer-aided industrial design programmes are used to create Class A surface. In the industry, Class A surface modellers are referred to as "digital sculptors." The A-Surface, the physical surface that the end user can feel, touch, see, and so on, is how industrial designers establish their design aesthetic.
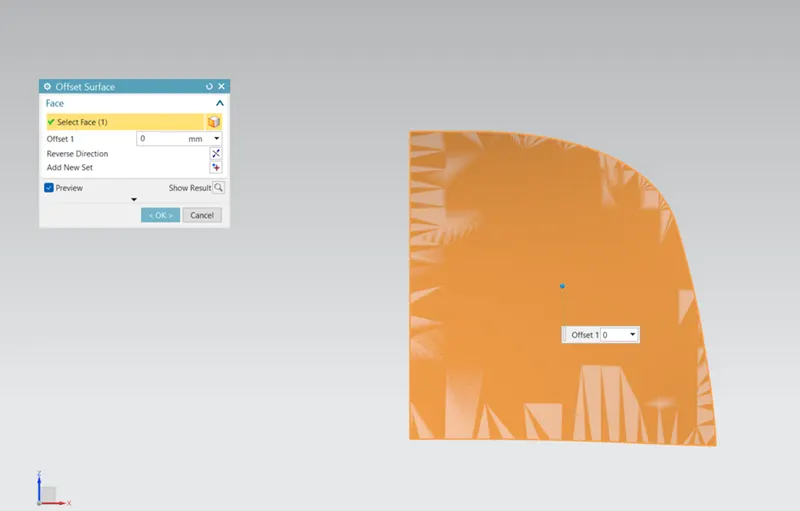
Offset surface: creates a body by offsetting a set of faces.
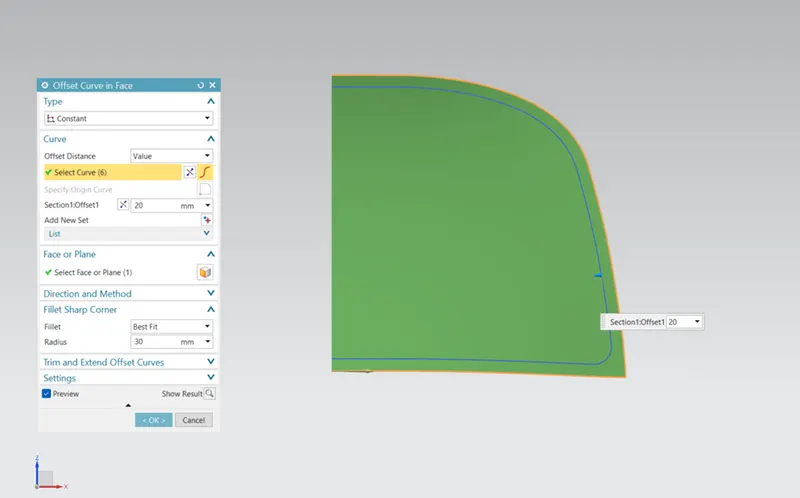
Offset curve in face: offsets curves along the faces on which they lie.
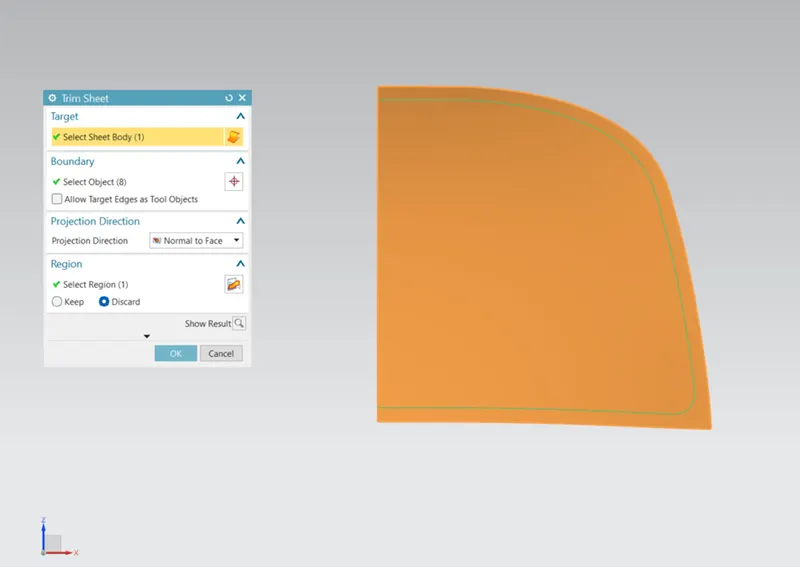
Trim sheet: trims off a portion of the sheet body.
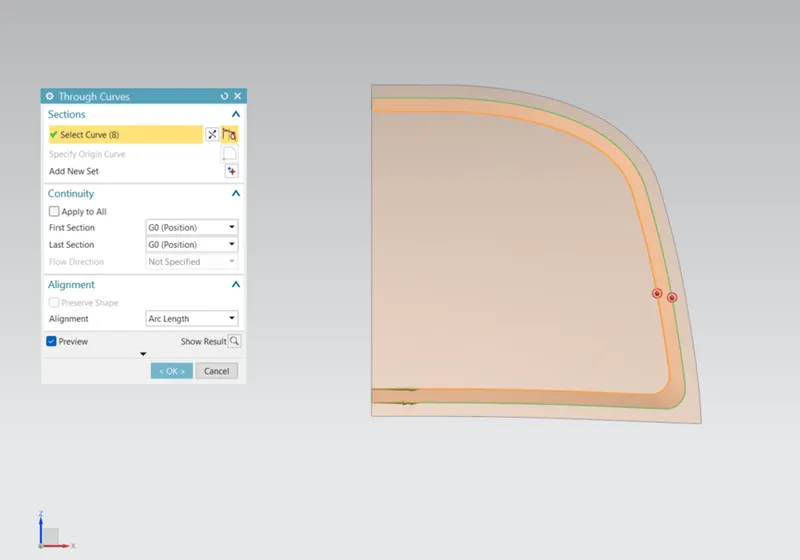
Through curves: creates a body through multiple section where the shape to pass through each section.
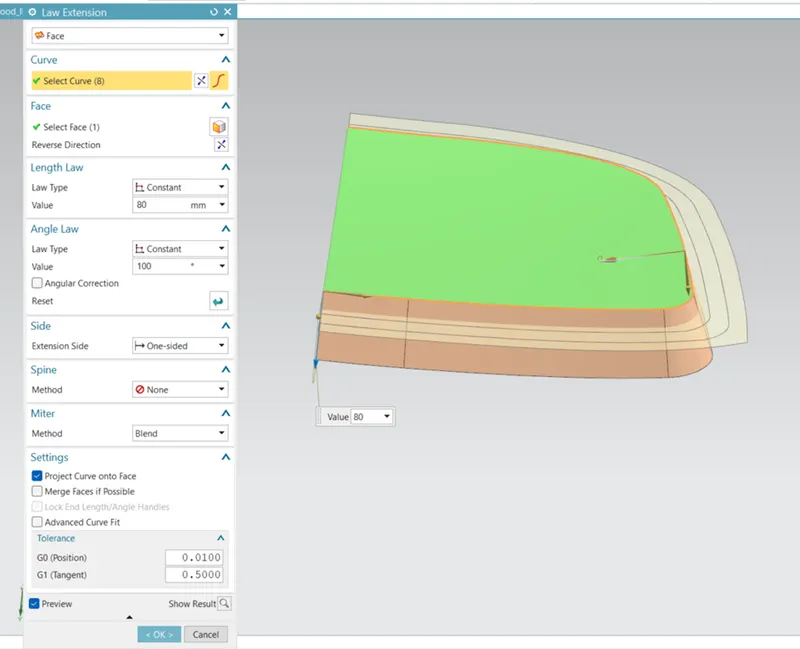
Law extension: creates a law-controlled extension from base sheet.
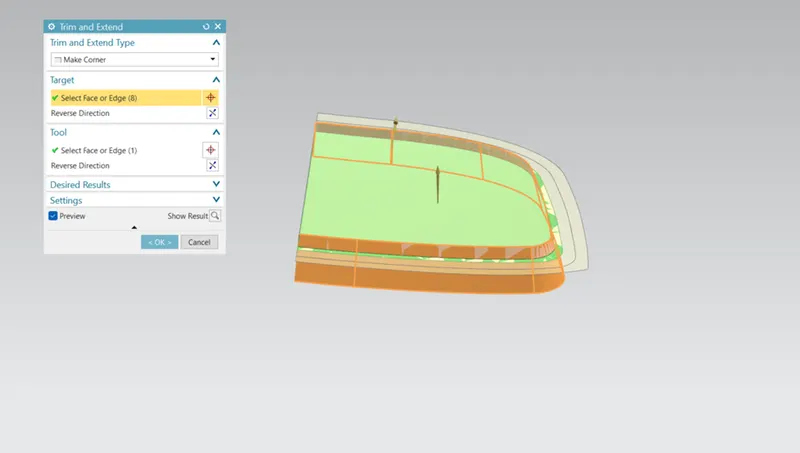
Trim and extend: trims or extends a set of edges or faces to intersection with another set of edges or faces.
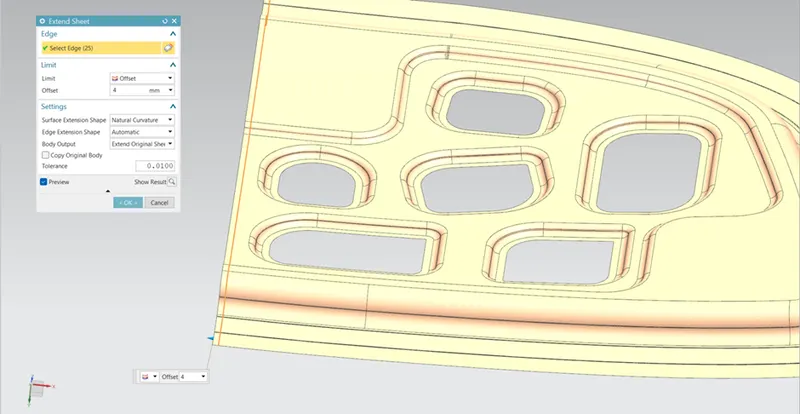
Extend sheet: extend a sheet body by a distance or to the intersection with another body.
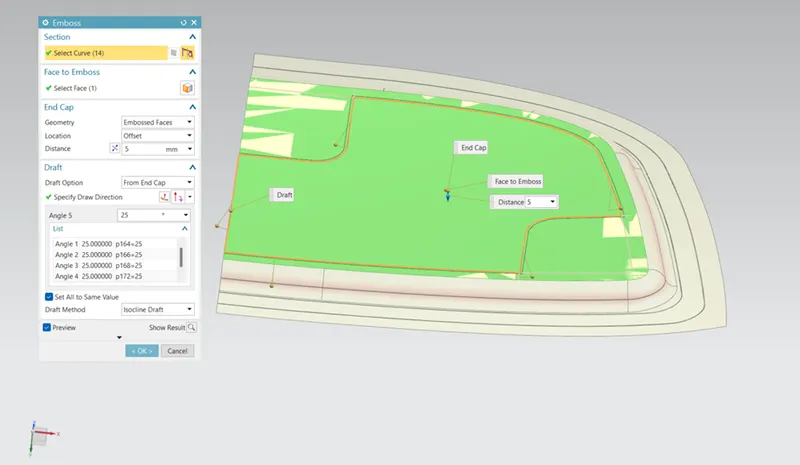
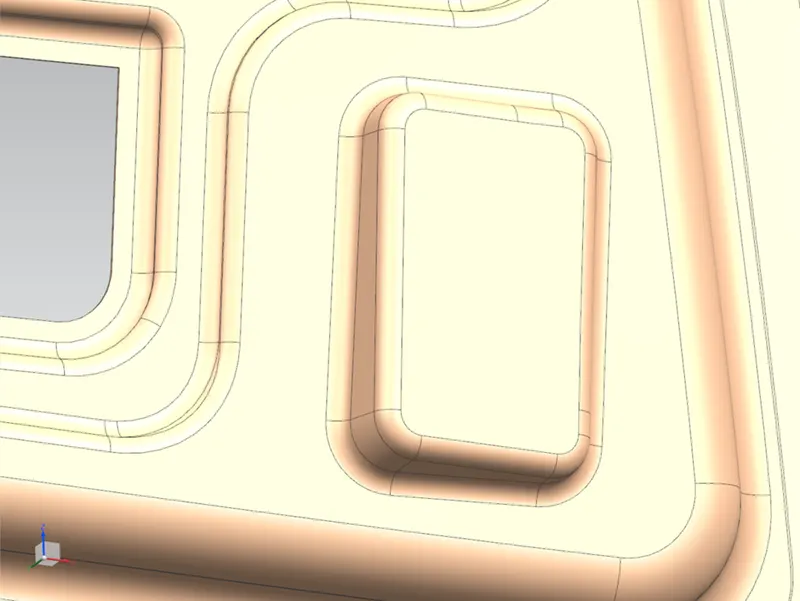
Emboss: Sheet metal embossing is a stamping technique that creates raised or sunken images in sheet metal. This technique can be done using matched male and female roller dies, or by sliding a sheet of metal or a strip of metal between the desired pattern's rolls. It's frequently used in conjunction with stamping to generate a gleaming, three-dimensional impression.
Depending on the sort of embossing required, metal sheet embossing is generally achieved using a combination of heat and pressure on the sheet metal. The metal thickness is modified in its composition in theory using any of these processes.
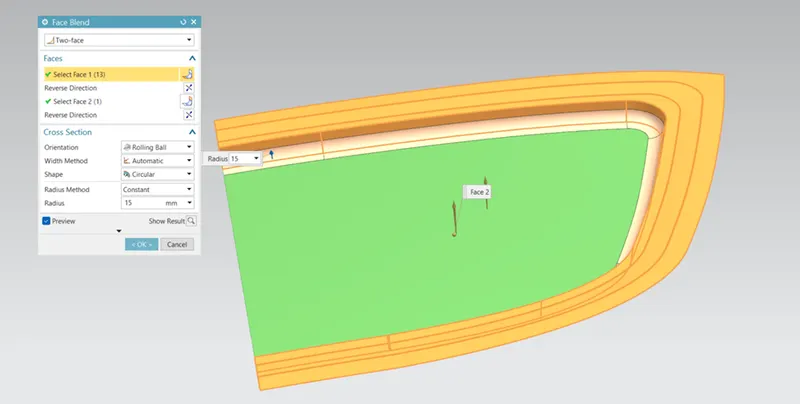
Face blend: add tangent blend faces between the selected sets of faces. The bend shape can be circular, conic or law controlled.
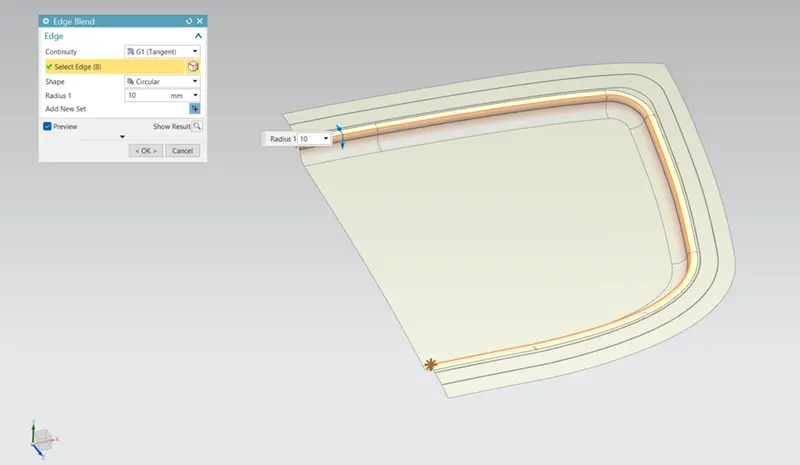
Edge blend: round sharp edges between faces. The radius can be constant or variable.
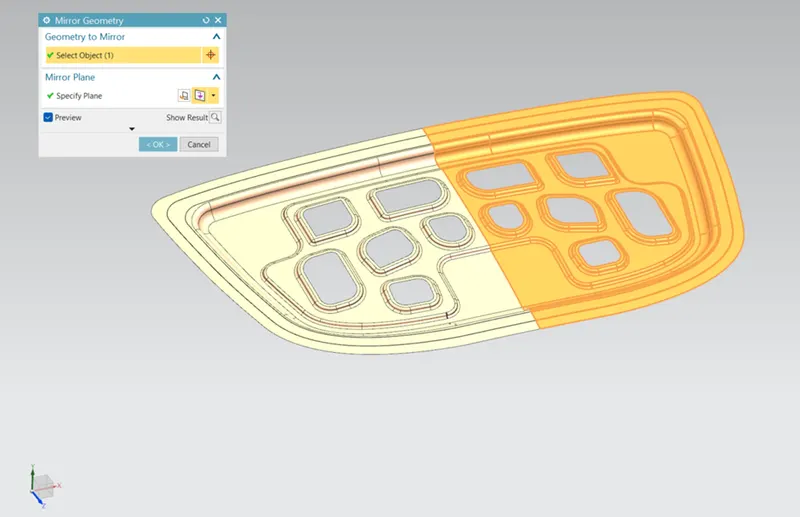
Mirror geometry: copies geometries and mirror them across the planes.
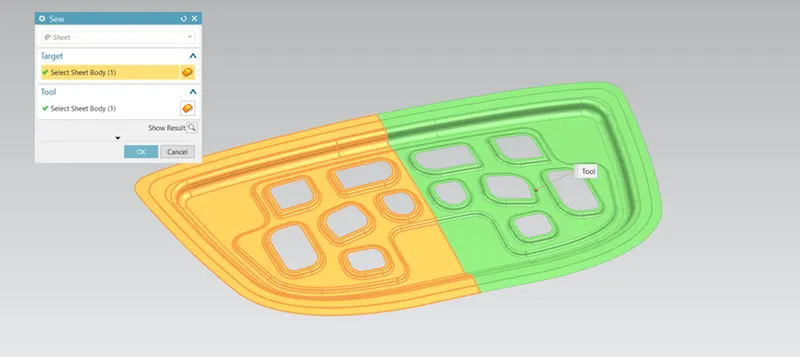
Sew: combine sheet body by sewing the common edges together, or combine the solid bodies by sewing common faces.
Thicken: creates a solid body by adding thickness to a set of faces.
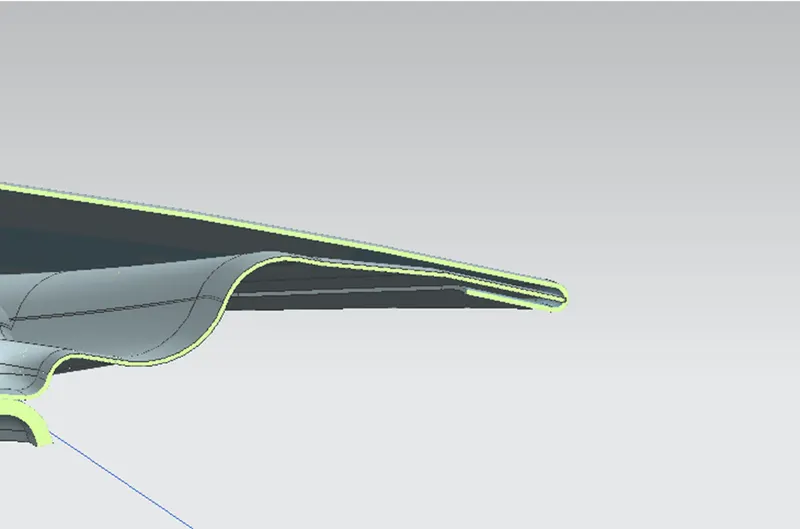
Hemming in sheet metal:
Hemming is a sheet metal forming method that involves bending sheets to an angle of 180 degrees. The hemming technique is used to create automotive body panels and parts such as deck lids, trunk lids, doors, hoods, and tailgates.
Hems are frequently used to reinforce an edge, conceal burrs and rough edges, and improve the aesthetic.
Assembly:
- Insert all the parts and add them with the proper geometric assemble constraints.
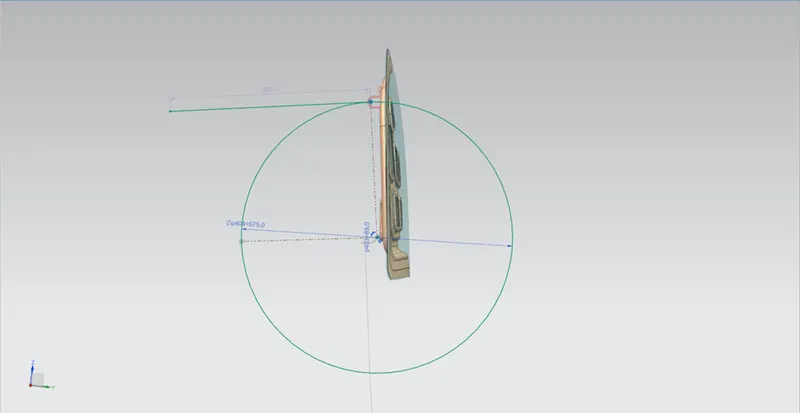
- Create a latch trajectory so that the hood can closes and opens in the particular axis.
- To create an axis, select the points on the two hinges respectively and join the points by line option.
- Then with respect to the axis create a datum plane on the centre of the axis and draw a circle which represents the latch axis.
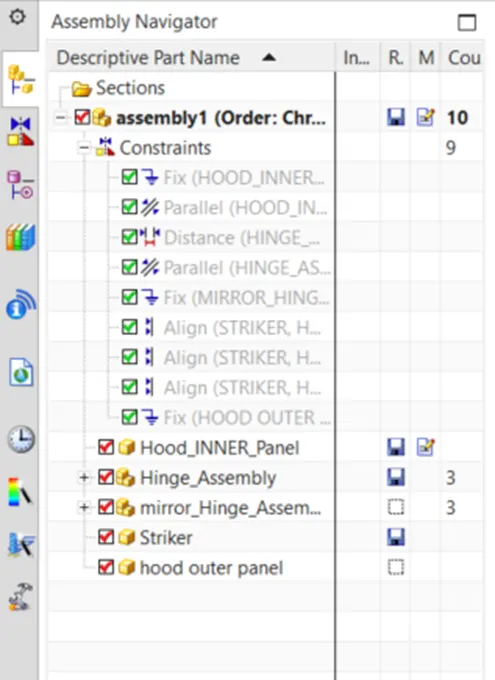
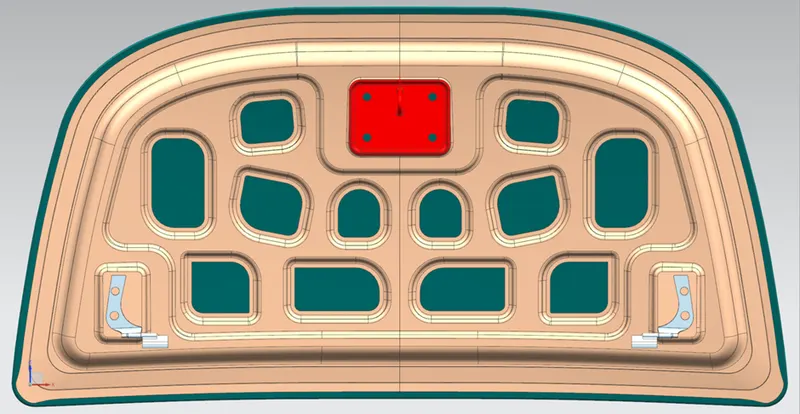
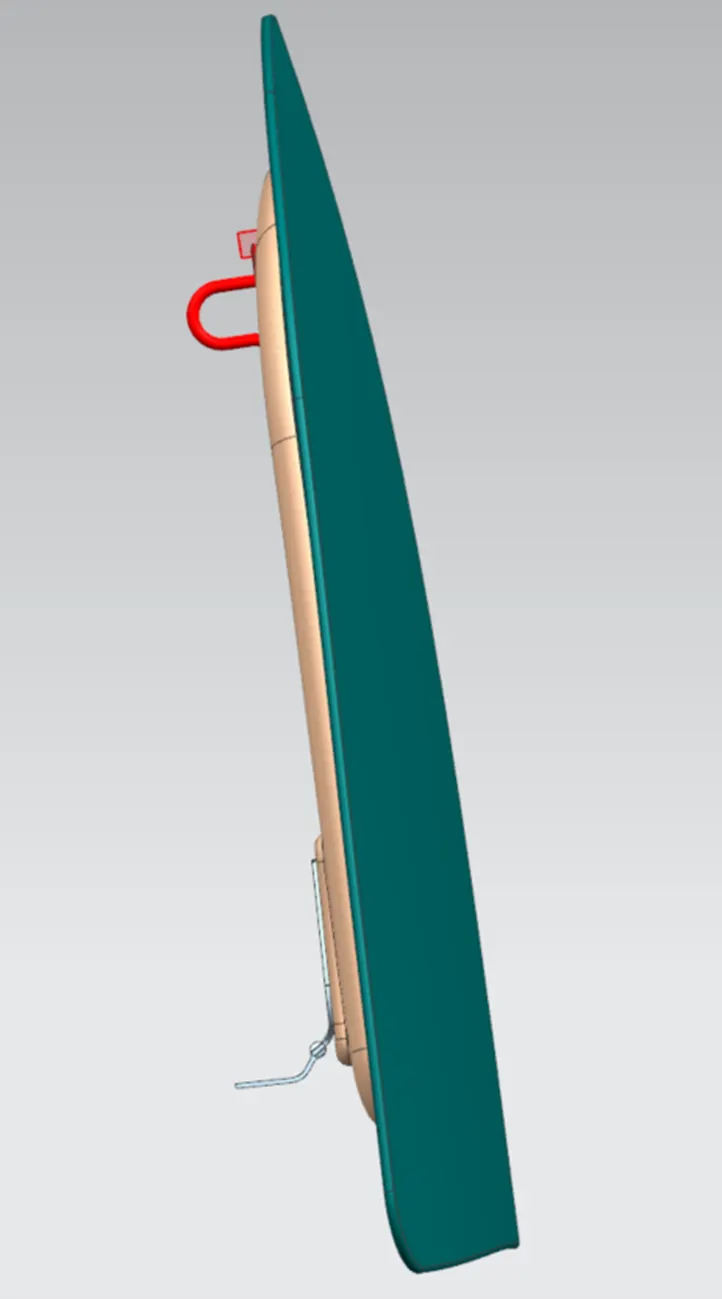
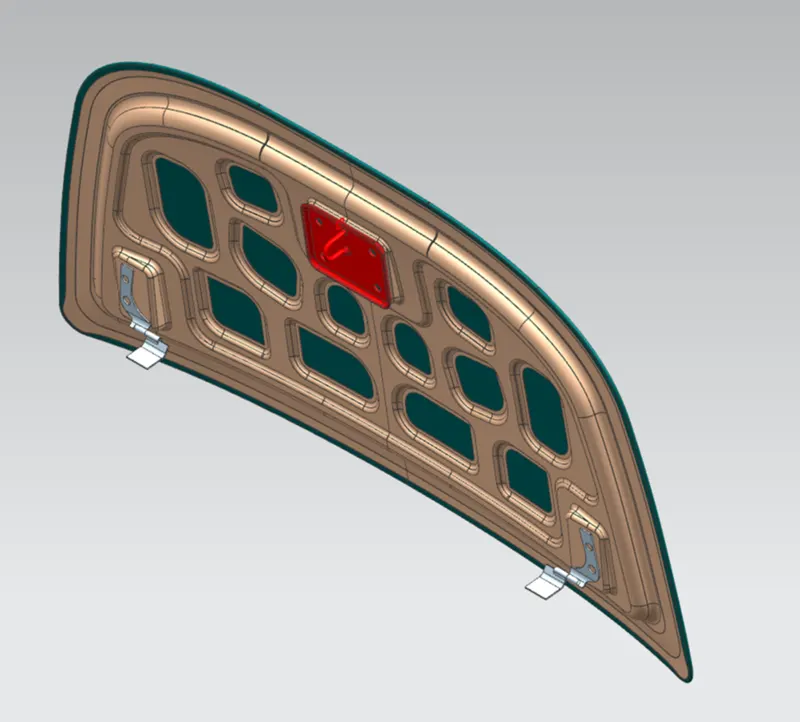
Latch trajectory: The hood opening and closing axes are sketched on the striker part of the calculation. The latch should be on an appropriate axis for opening and shutting the hood so that it fixes and locks into the latch lock; we utilise the latch trajectory to create the axis.
Reinforcement: When we give emboss we add some reinforcement which will compensate the lose strength. We added the stiff pad to it so that it gets the strength and also it has the mastic points.
Conclusion :
Thus, The automotive hood design has been designed and assembled using NX CAD.