Hood design-Week 2
DESIGN OF HOOD IN SIEMENS NX 12
OBJECTIVE
To create car hood assembly in siemens NX 12 CAD software which consists of outer panel, inner panel, hinge assembly, striker with some important engineering constrain for real life manufacturing concept.
INTRODUCTION
The car hood in the front portion is very important component where it acts as a shield to protect engine and various components under it. The design of hood for car is not that easy as it appears from the outside. There are various engineering and safety aspects behind the hood where it needs to satisfy the safety procedures to get approved in the market as well as to get good overview from the users.
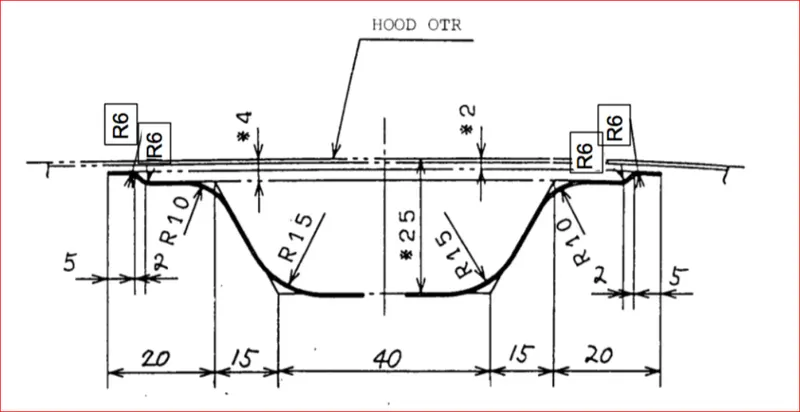
The dimensions of the inner panel, outer panel and its thickness is important in designing the hood. These dimensions will be decided according to the necessity of the design. This is known as master section, and it must be understood properly in order to proceed further the design. Here the master section of the hood given below.
DESIGN APPROACH
The hood or bonnet of the car is designed applying various surface features and engineering concepts which fulfils the design. First, the skin data for the hood is provided by the styling team to hood design team for further design. Then it will be assembled to complete design by adding hinge, striker in a perfect manner. There are various features involved in designing the hood follows
- offset surface
- offset curve in surface
- trim sheet
- through curves
- sketch
- edge blend
- law extension
- projected curve
- emboss
- bridge curve
- face blend
- edge blend
- mirror geometry
- sew
- trim and extend
- thicken
INNER PANEL DESIGN
The skin of the panel or the outer panel design and its data is already provided by the stylish team to ensure the possibility of designing the inner panel with given data. The design can be achieved by mentioned above features.
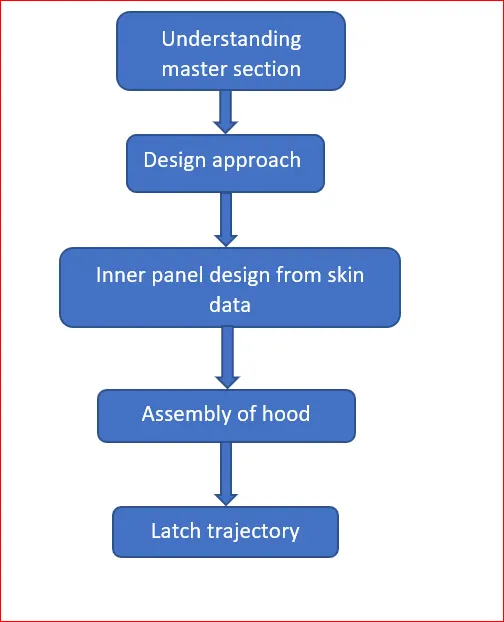
Understanding the master section, initially the outer panel must be fixed and designing work has to be done in assembly by importing hinge, latch and striker.
The outer panel is added to the feature group created in the name of parent file again the surface is offset for no dimension and added to feature group named working file whereas all the designing work has to be done in the working file.
After offsetting the surface from the working file for given dimensions, the outer portion has to trimmed as per calculations given in the master section.
Using the through curve option the two edges of working surface and offset surface has to be joined for the further design of inner panel.
After creating the surface by joining the two edges of the surface curve, the edges of the adjacent faces must blend together by using face blend for two faces of the body surface. Edge blend to be applied for edges meeting two faces.
After creating the surface for the inner surfaces, the embosses are created in the faces of inner panel to strengthen the hood physically.
There are lot of factors to be considered while designing the hood of the car. Pedestrian safety, crash impact are the two important factors need to be satisfied while designing the car.
So many portions were trimmed to pass the pedestrian safety. Also, the quality should not be compromised by reducing the weight of the inner hood panel.
Embosses are created by two common methods in designing the hood. Law extending the curves on the surface and trimming the surface portion after offsetting it and directly creating the emboss using the sketched curves over the surfaces by adjusting the length and angle of the emboss.
After sketching the geometry, it will be projected on the surface to by using projected curve option. Bridge curve option is used to join two curves on the corner faces while offsetting them separately to fillet the corners.
After completing the design, the mirror geometry feature is used to mirror the one side oof the inner panel to create copy one of them.
Sew option is used to join all the into the single body and repairs the gaps tolerances. So that the surface bodies are thickened for given dimensions.
After sewing, the surfaces now can be thickened for required dimension. Thicken feature is used to thicken the surface body. If there is any gaps in between the panels, it will cause trouble in thickening process.
ASSEMBLY CONSTRAINTS
after designing the inner panel, the hinge, latch and striker were placed in the inner panel assembly navigator. First the outer panel is fixed to the inner panel and the hinge component is moved by using move component feature in the assembly. So that the hinge can be placed perfectly to the emboss of inner panel. Touch constrain is used here to fix the hinge and the panel.
Striker is placed using latch trajectory method will discussed later on detail
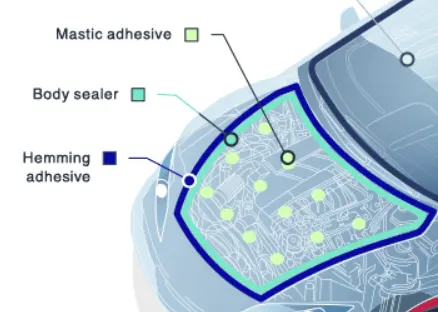
MASTIC DATA
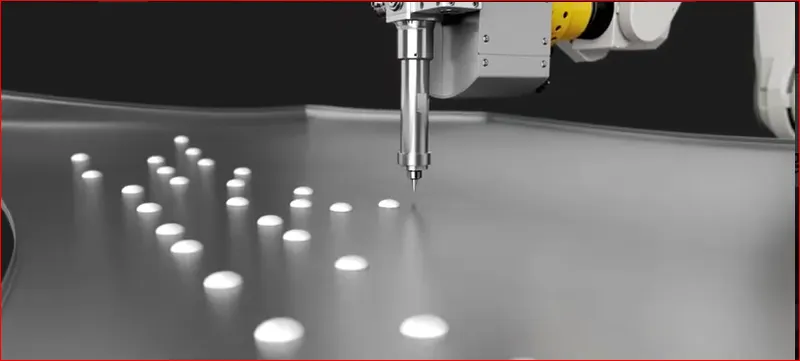
Mastic data is the kind of sealant applied in between two panels (Inner and outer panel) to ensure the stiff or the grip for two panels to avoid any kind of vibrations while driving the vehicle. Also it may reduce the noise between the panels.
It is a rubber or glue-like substance which provides strong grip to the panels.
DEEP DRAWING PROCESS
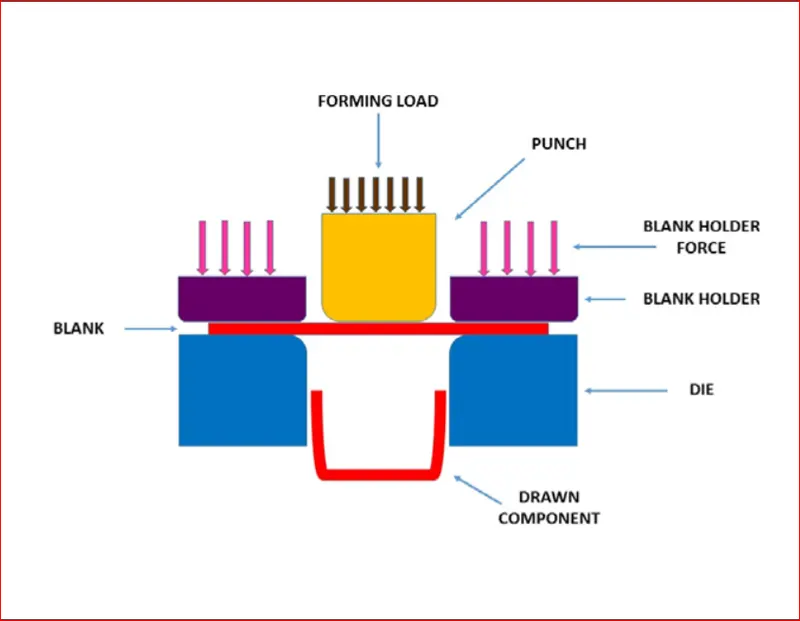
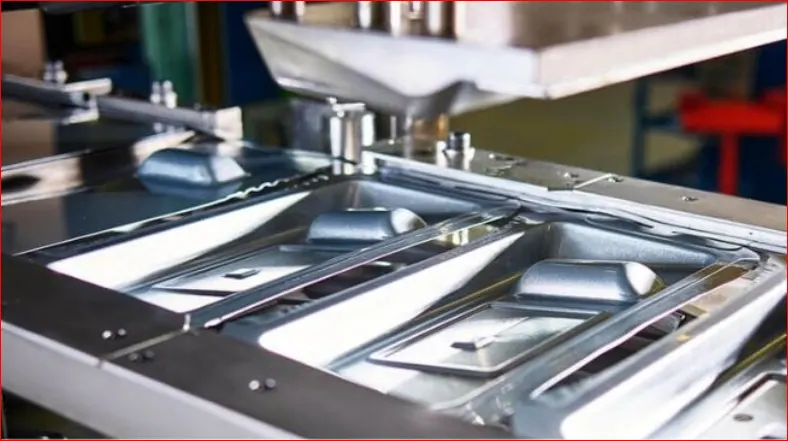
Deep drawing process is one of the important one in any sheet metal formation or sheet metal industries. This process is almost done by stamping or punching by giving the load to sheet metal for the desired shape. It is only the feasible, easy, and fastest way of creating the emboss on the sheet metal.
The deep drawing process is carried in all the sheet metal industries to achieve their stamping style according to their product dimension.
The above image represents the deep drawing process consists of drawn component (sheet metal) load applied at top to create stamping with required dimension. Drawn component is placed between two die material.
HEMMING
Hemming is the process of bending the sheet metal component over other in other to fix them together firmly. In car hood, the process is carried over to give perfect surface finishing of the hood and looking of the car. Spot welding can be done here alternatively to fix the two components, but its too costly and takes time longer than the hemming. More than that, spot welding won’t give the class A surface look for the hood. To give the class A surface finish, the hemming is the perfect and suitable method in it.
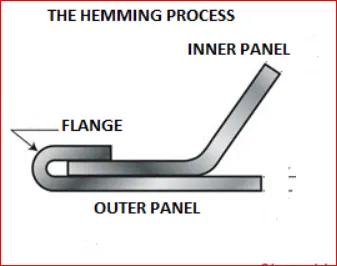
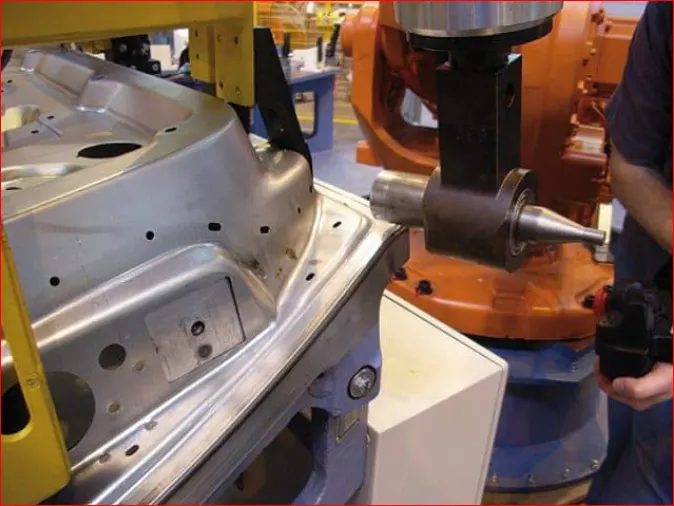
The robots of rollers roll over in between the flange and bend the one sheet metal over other. Corner relief is one of the important factors in hemming process. It is the process of giving some relief to the corner bends to avoid the wear and tear while unbending them in future.
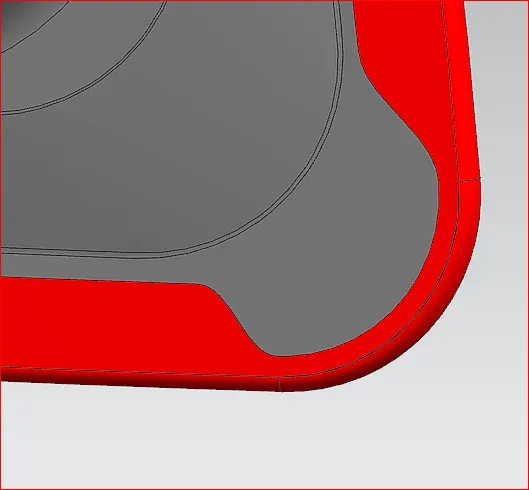
So, the corner reliefs are always useful for fine bending of the sheet metal or hemming.
The given thickness for the corner reliefs and the hemming dimensions are given below
DIMENSIONS
Inner panel and outer panel thickness – 0.75
Reinforcement thickness – 1.25
Additional reinforcement thickness is given to the emboss which holds hinge and striker in the inner panel to withstand the stress produced by the hinge and striker.
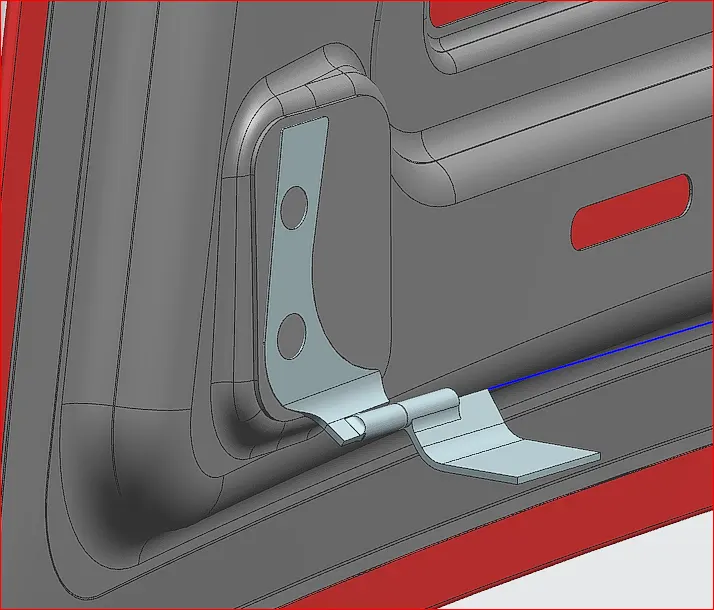
LATCH TRAJECTORY
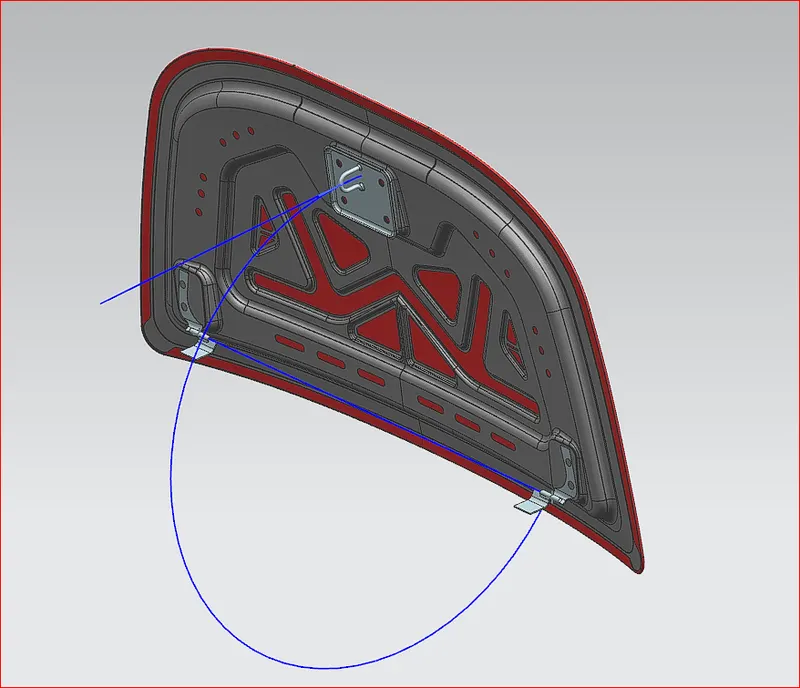
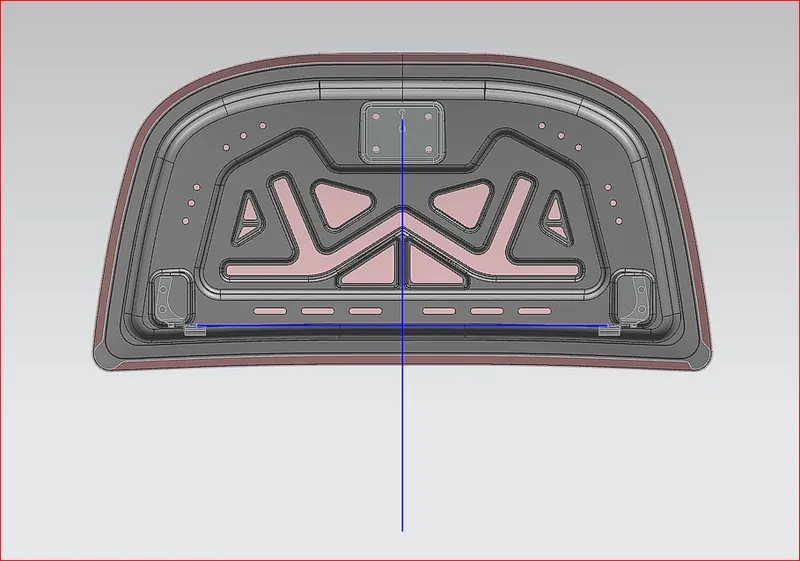
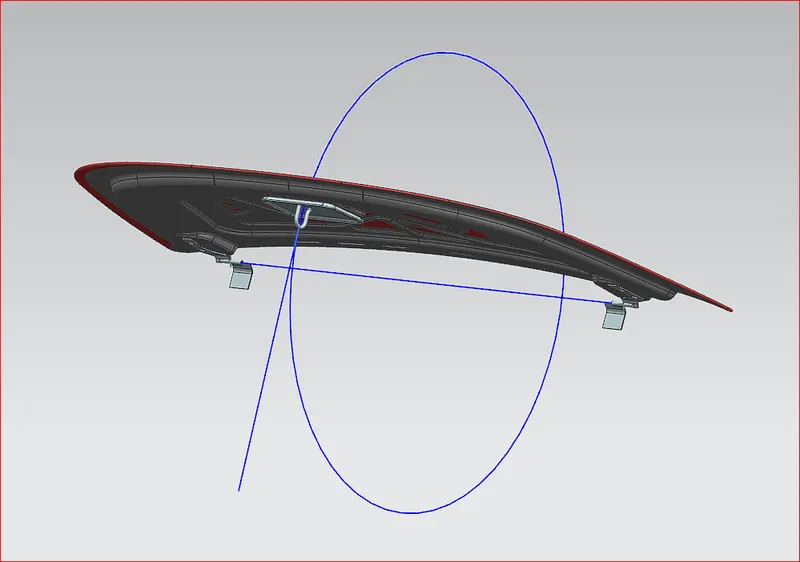
Latch and striker are placed in the inner panel by applying some engineering concepts and constraints between the inner panel and striker.
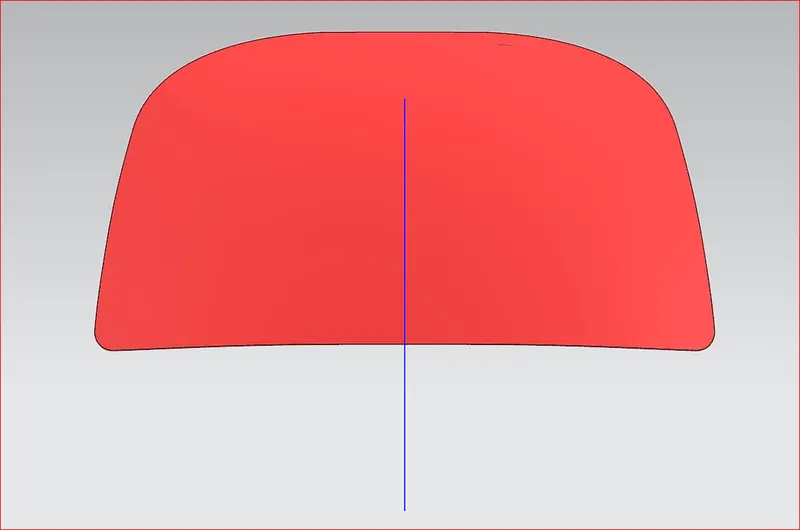
Circle is drawn from the middle bottom of the inner panel to some dimensions and two lines were drawn from the same origin up to the circle despite of any correlations. The rough angle dimension is given between two lines. When the line moves when the angle given, the design is exact and perfect to place the striker.
Same way, the datum plane is created in the midpoint of the striker and the line is drawn over the plane for some length.
The touch constrained is applied for the line in the striker and tangent line over the circle. The striker automatically comes at the position where it needs to be placed.
CONCLUSION
The design and assembly of car hood is completed in manufacturing standards like emboss creation, space for mastic sealant, deep drawing, hemming, corner relief and latch trajectory in siemens NX 12.0.1.