Hood design-Week 2
HOOD DESING USING NX CAD
INTRODUCTION:
Hood is a opening body panel for the front engine vehicle. Also its purpose to cover the engine and it consist of two panels one is the inner and another one is the outer panel in which the inner panel gives the strength and the outer panel act as metal cover of the hood.
OBJECTIVE:
In this project we are going to design the hood inner panel by using NX CAD and which helps to get familiar with the NX CAD features and tools and also we will learn what are the design parameters and the engineering skills required to make the hood.
METHODOLOGY:
We will get the outer skin data from the styling team and then we will design the inner panel according to that after the designing we send it to the CAE engineer then they will run the analysis on the design we gave if there is any changes to be then it is our responsibility to get it done and do the necessary changes.
DESCRIPTION:
The requirements to design the hood inner panel
- NVH(Noise Vibration Hardness)
- Latch and Striker point
- Support rod/Gas stay
- Hinge axis
- Reinforcements
- Pedestrian ratings
- NCAP rating
- Deformable brackets
For designing the hood we have given some data
Master sketch it’s a predefined sketch from which we can start to design the hood inner panel.
And the inner panels is been produce or manufacture by means of deep drawing.
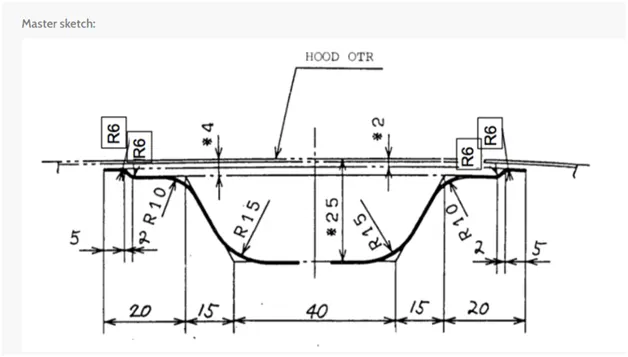
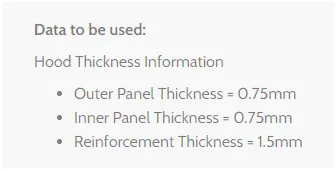
There are some data given to us that as to be followed
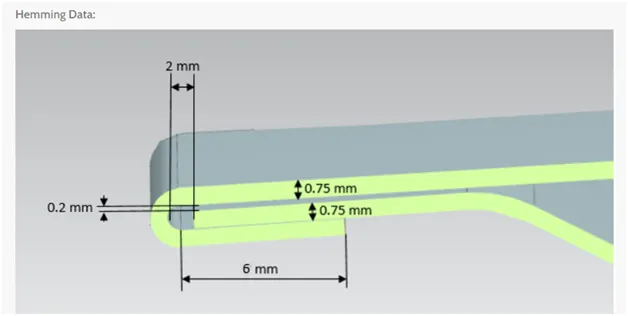
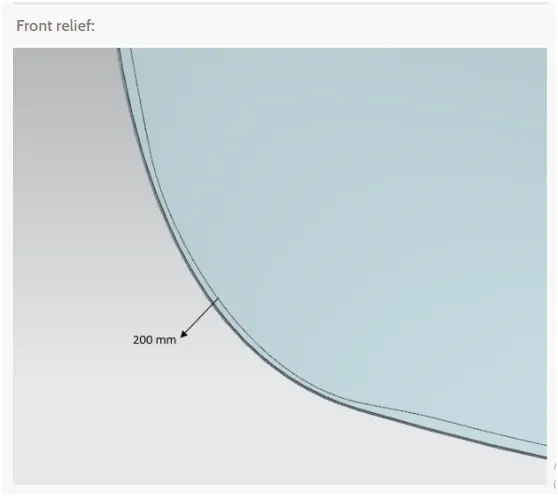
And also the given the hemming and relief data
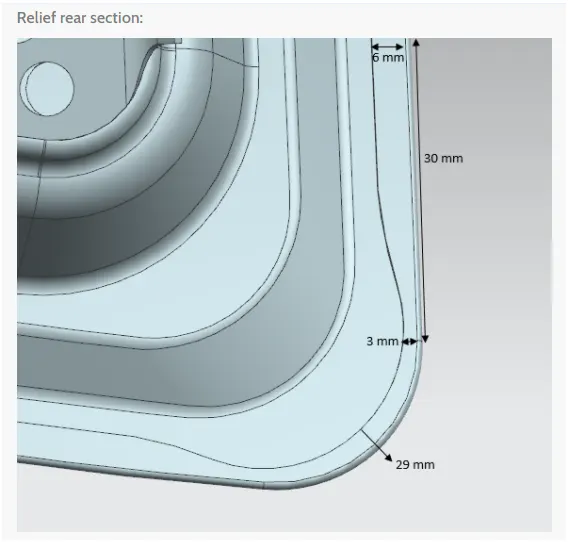
The steps and the rules we have to consider while designing the inner hood panel
EMBOSS:
A carve, mould, or stamp a design on the surface so that it stands out
We give emboss to provide stiffness to the panel
Also we have to design the emboss in such a way so that it dissipates the force in the outward direction.
In accident when the front impact load take place at that time the hood get the load so when hood is under impact the function of the emboss is to crumble in upward direction and also to change the direction outward so that minimal impact reaches to the passenger compartment.
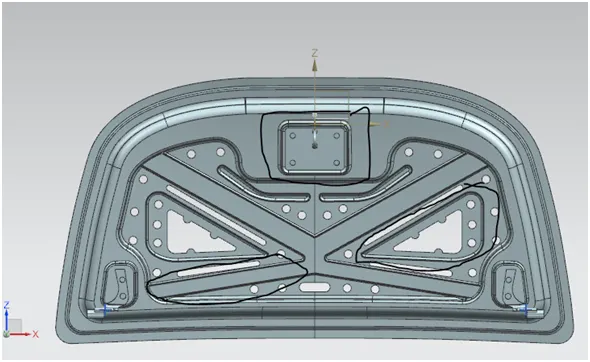
In the above you can see emboss we have created to increase the stiffness of the inner hood panel.
Mastic seals
it is used to glue the inner and outer panel of the hood since we cannot spot weld it which will destroy the styling surface which will not be a aesthetic looking panels.
The mastic seals is used which can spread in area of 80 mm diameter.
The sealant gets hardened as it went through the furnace.
It also improves the NVH.
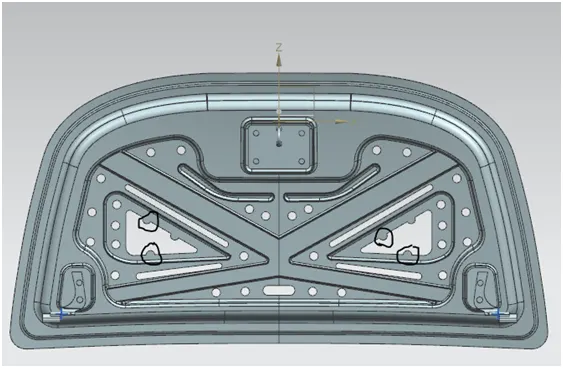
In the above picture you can see the mastic sealant space we have given.
Latch and Striker positioning
In latch and striker we try to position it by making a trajectory circle for it by using the hinge axis line so we position our striker and latch according to that so the trajectory decides at what angle the hood is going to open and at position the striker and latch is going to attach.
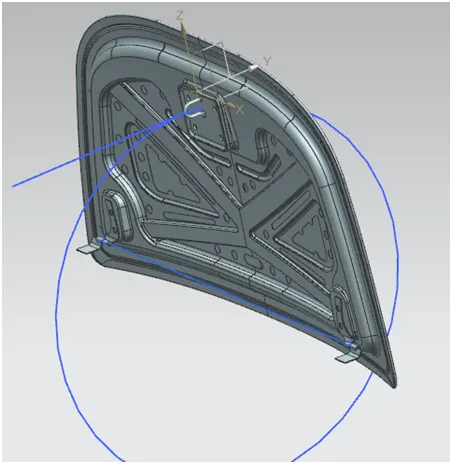
As you can see in the above image the trajectory circle for the latch and striker which is been drawn through the hinge line and we have also made a line from the striker tangentially to circle so that when we try to adjust the circle shape the latch and striker position updates with respect to the trajectory circle.
Reinforcement
When we give emboss we add some reinforcement which will compensate the lose strength.
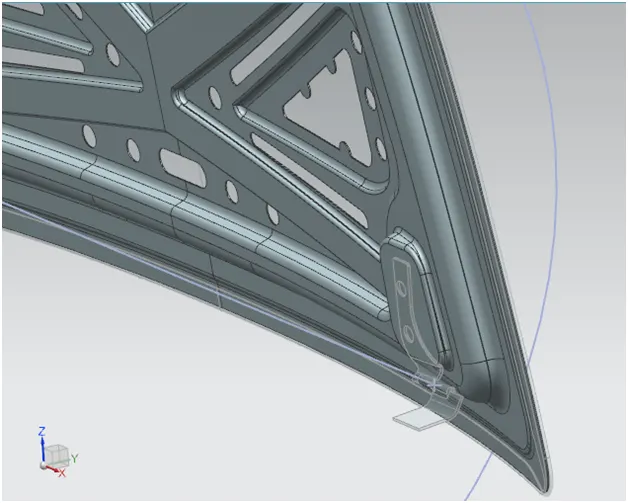
We added the stiff pad to it so that it gets the strength and also it has the mastic points.
Hemming
Hemming is basically we fold the panel inside of it only so that we can have fold sheet shape
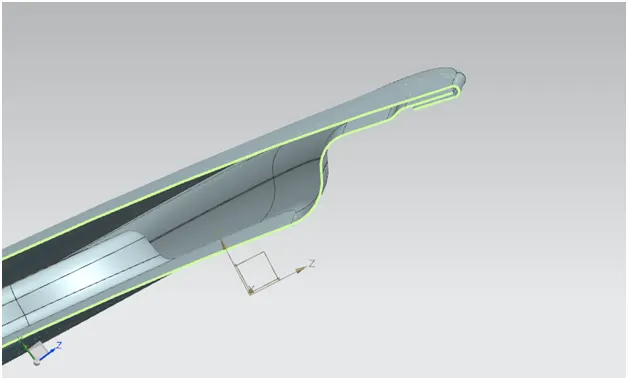
As you can see the image the hemming joins the outer and inner panel without any need of spot welding.
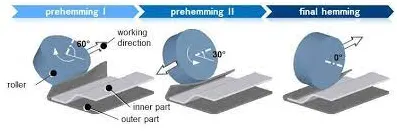
And we have rollers to roll the panels like this
Roller hemming
In roller hemming process, a robot guides a small roller across the flange to fold a sheet onto itself or onto another sheet. The process is oriented to low volume automotive applications, providing a distinct advantage in manufacturing closures and subassemblies with developed flanges.
WAD (Wrap Around Distance)
It is the factor we have to consider in our mind while designing the hood
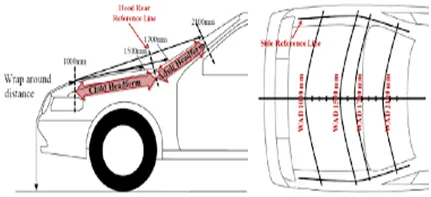
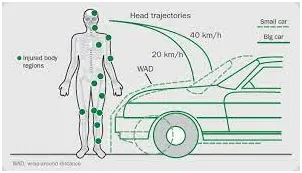
So wrap around distance is basically covering the pedestrian body length which is measure from the ground to the hood surface.
for child it is around 1000-1700 mm WAD
for adult it is 1700-2100 mm WAD
as per the global NCAP rule it must satisfy.
Features/tools used for modeling
- Sketch
- Offset surface
- Offset curve in face
- Trim sheet
- Through curves
- Law extension
- Trim and extend
- Extend sheet
- Face blend
- Edge blend
- Mirror geometry
- Sew
- Thicken
Sketch: we will sketch the object first on which we are going to use the features and tool.
Offset surface: creates a body by offsetting a set of faces.
Offset curve in face: offsets curves along the faces on which they lie.
Trim sheet: trims off a portion of the sheet body.
Through curves: creates a body through multiple section where the shape to pass through each section.
Law extension: creates a law controlled extension from base sheet.
Trim and extend: trims or extends a set of edges or faces to intersection with another set of edges or faces.
Extend sheet: extend a sheet body by a distance or to the intersection with another body.
Face blend: add tangent blend faces between the selected sets of faces. The bend shape can be circular, conic or law controlled.
Edge blend: round sharp edges between faces. The radius can be constant or variable.
Mirror geometry: copies geometries and mirror them across the planes.
Sew: combine sheet body by sewing the common edges together, or combine the solid bodies by sewing common faces.
Thicken: creates a solid body by adding thickness to a set of faces.
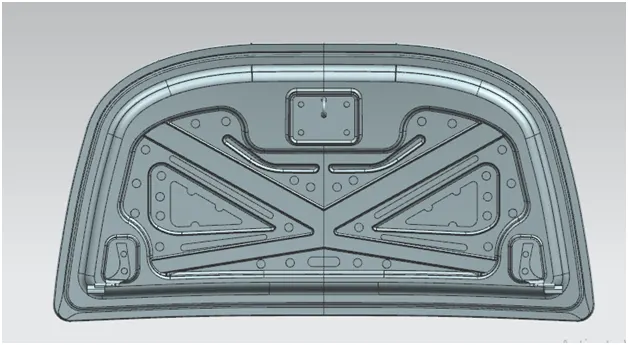
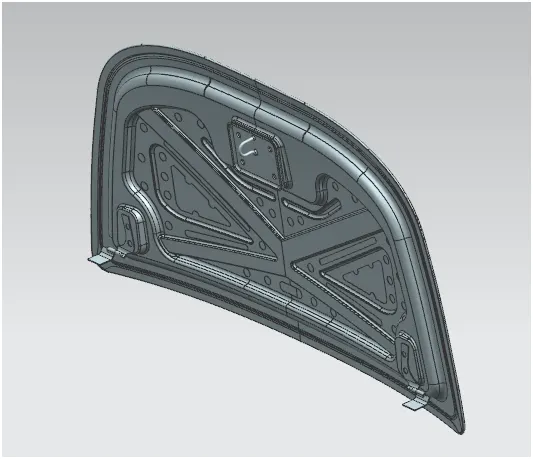
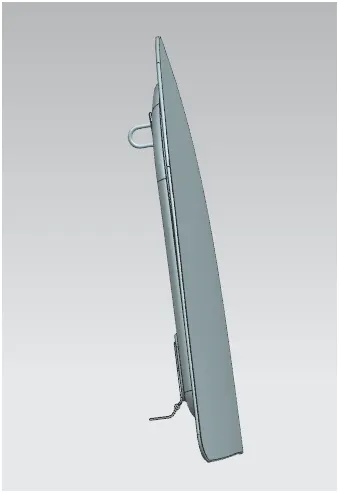
We also added some constraints for placing the parts properly in the assembly.
CONCLUSION:
We successfully made the inner hood panel as per given data also following the NCAP rules and also able to assemble the latch, striker, hinge, hood inner panel and outer hood panel with their reinforcements. Also we learn engineering principles and design parameters for the hood and also we learn the manufacturing process of it. We also learn the tools and features which is been used to design the hood.