Hood design-Week 2
Hood Design Using Nx-Cad
Objective:
The main aim of the project is to design the hood of a car using surface provided and taking into account of direction the force of impact to the corners or hinge assembly. Also, other design is created by keep in mind the following aspects, safety to pedestrians’ position of hinges and striker, opening angle of the hood.
Introduction:
Hood or Bonnet id the part of the car which covers engine part (in some cases like rear engine vehicles, it acts as the cover of the boot space or trunk). Hoods also play a major role in the aerodynamics of the car, thereby reducing the drag and increasing the down force of the car. Hood also helps to direct impact of the any head-on collisions away from the passenger cabin there-by reducing the damages to the passengers. These Hoods are designed in such a way that less damages are caused to the pedestrians during accident.
Hood:
The hood or bonnet is the hinged cover over the engine of cars. Hoods can open to allow access to the engine compartment on rear-engine for maintenance and repair. It is hinged thin sheet which covers and protects the main parts of car like engine. Its main function is to direct access to the engine, battery and other crucial parts of the cars for repair and maintenance and to protect these parts from direct sunlight and dust. It consists of Support rods or gas stays to hold the hood while it is opened. A hood may contain a hood ornament, hood scoop, power bulge and wiper jets etc.
Body in White:
It is the stage in automobile manufacturing in which a car body's frame has been joined together, that is before painting and before the motor, chassis sub-assemblies have been integrated into the structure. It helps to ensure that the welding process meets the pre-defined standards of high-quality. They provide the necessary support and stability to avoid distortions in the welding process, which can often lead to expensive iterations.
Parts of Hood:
- Outer panel
- Inner panel
- Striker
- Hinge Assembly
Function of the Hood:
- It helps to design car aerodynamically stable.
- Sometimes it is required to supply pure air so filter is provided on the bonnet to supply filtered inlet air.
- Hoods are provided with different vent designs for cooling purpose of an engine and carburettor at high speed.
- Scoops on hood having another function of supply of air for supercharger in case of supercharged engines.
- The function of hood is to handle this type of heavy engines with supercharger outside
- And lastly it also gives good looks
Design considerations of automotive Hood:
Safety:
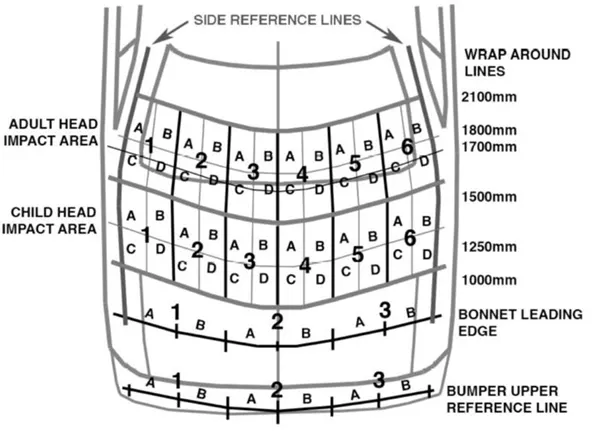
The primary safety requirement to be considered while designing the hood is the pedestrian safety from frontal collision. Euro NCAP, a European vehicle and road safety organisation has developed test specification and rating system for assessing pedestrian impact during impacts with the front of vehicles. Such tests include a series of tests using impactors designed to mimic a collision at a speed of 40 kmph.
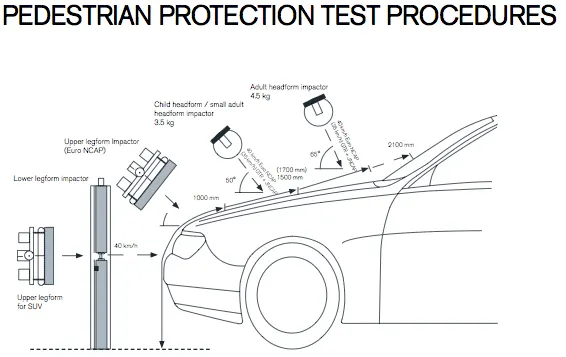
Thus, to avoid severe injuries to the head, the high impact area for adults and children are subjected to lesser thickness. Also, no reinforcement is provided in that area as during the head collision, the hood will absorb the head impact and collapse this protecting the pedestrian from severe head injury.
Another important criterion for the hood design is the protection of the occupants inside the car during the front collision. The design of the hood should be in a such a way that the during the collision, the force should travel in a direction away from the its trajectory and dissipating impact energy in the process and thus no/minimum impact force to the occupants of the car.
Other considerations for hood design:
Aesthetics:
Design of hood adds to the looks of the car. Hoods completes the flow to a car’s design. Thus, it is important for the hood designers to work on aesthetic details of the hood.
Functionality:
Hood is essentially a type of door that covers the powertrain and other vehicle propulsion system components such as drive belts, battery, fluid levels and lamp units in the frontal region of an automobile. As these components needed to be accessed often, so it is critical for the designer to work on hood’s weight, ease of use and hood mounting system.
Subcomponents of hood:
Outer panel:
The outer panel is the external cover the wraps over the inner panel. This component is styled to enhance the overall visual appeal of the car.
Inner panel:
The inner panel serves as a structure for the vehicle to dissipate and channel shock waves at the event of a crash. Hence this part is designed with utmost precision to confirm to road and pedestrian safety norms.
Striker reinforcement:
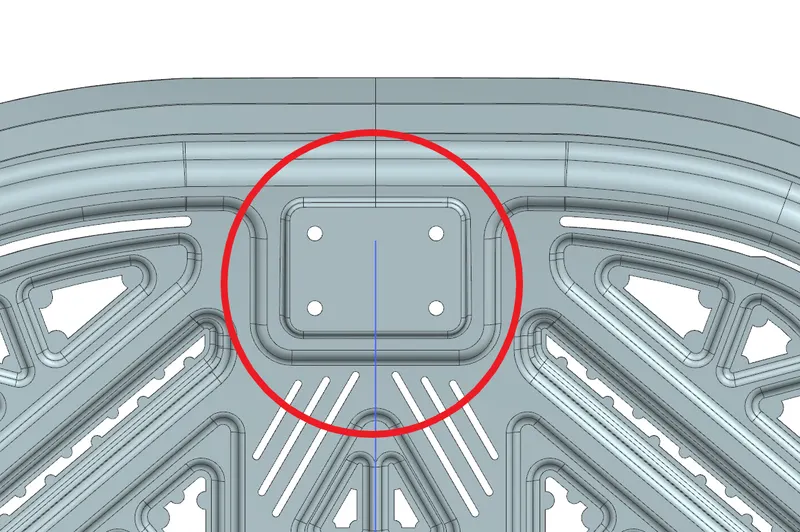
The striker is mounted onto to the car’s hood and latch is installed in the engine compartment. A striker reinforcement is designed onto the hood’s inner panel for enabling latching of hood to the engine compartment.
Hood stay reinforcement:
A hood stay is an apparatus for an engine room of a car which can safely keep an engine hood in an open state. The support rod used is slightly bent intentionally, so that it adds strength & rigidity to the rod which can hold the hood. The positioning and type of hood stay differs from manufacturer to manufacturer.
Hinge reinforcement:
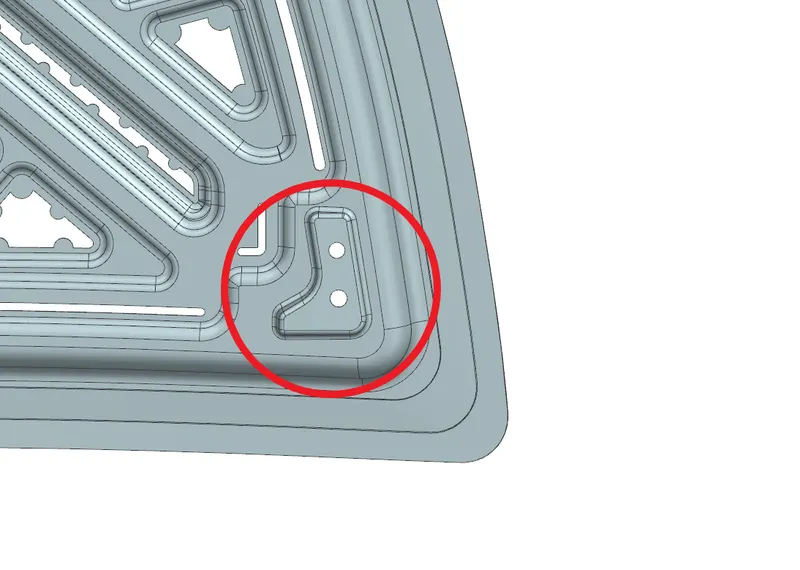
The trajectory for opening and closing is maintained by proper positioning of hinges. Hinges are placed at the ends of the hood and are installed onto the reinforcements embossed in the inner hood.
Design procedure:
Given data:
1. Master sketch:
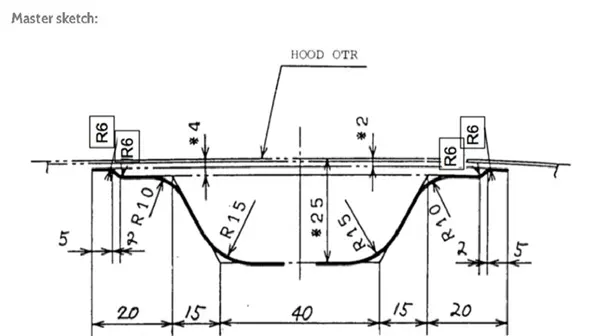
2. Hood Thickness Information:
- Outer Panel Thickness=0.75mm
- Inner Panel Thickness=0.75mm
- Reinforcement Thickness = 1.5mm
3. Hemming data:
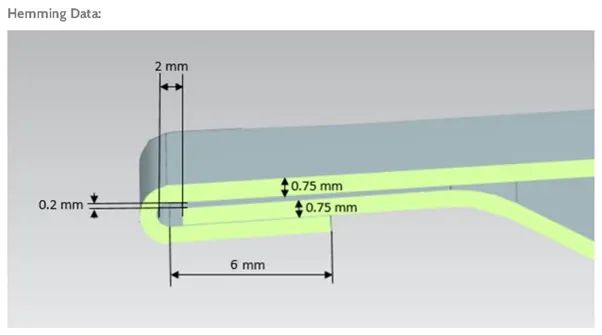
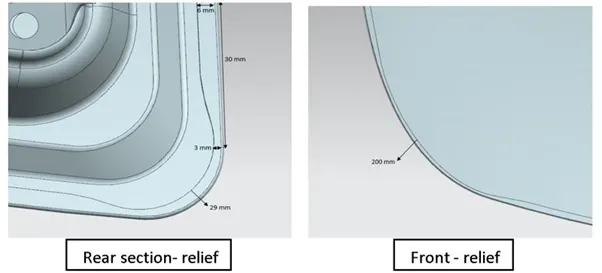
4. Corner reliefs data:
Design Methodology:
Designing of Inner Panel:
Master Section:
- The master section is created based on the requirements received from the marketability team and the manufacturing requirements.
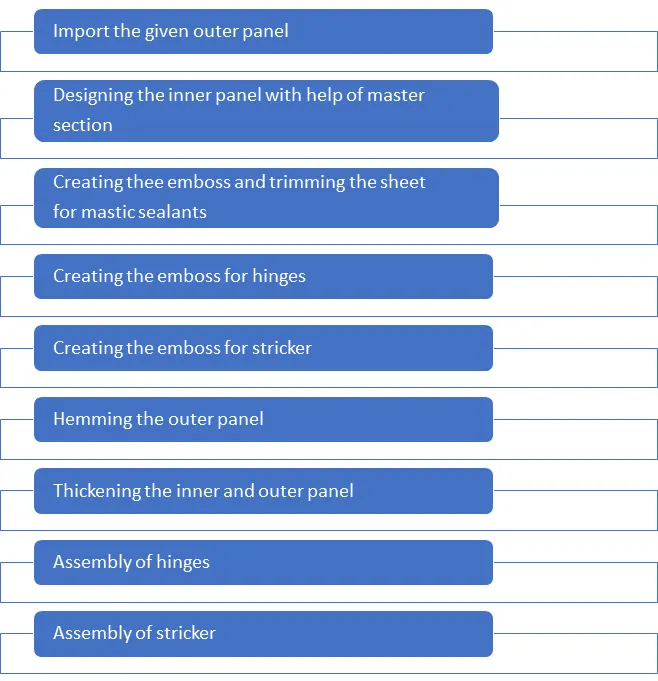
- Extract the body from the given dump solidly body and start creating inner panel using that extracted one.
- Create a part fie in assembly named after “Inner Panel”. Trim the half portion of it as we are going to mirror it at the end.
- Create an offset surfaces as per sketch from linked body.
- Use offset curve on face to create curves in faces using edges and trim off the unwanted portion.
- Use Through Curves command by selecting appropriate surface which usually creates a body through multiple sections where the shapes changes through each section.
- Create one more surface using offset surface and connect it with previous surface using law extension. Trim off the over extend portion using trim and extend.
- Blend the faces of the of the sheets using face blend by giving appropriate dimensions.
- Now create a Sketch by selecting a plane Parallel to the panel surface and project the curves on the panel using Projected Curve.
- Create a Emboss to modify the body with faces made by projecting a section along a vector by selecting embossed face as end face and projected curve as curve. Use edge blend to blend them.
- Create more embosses as per requirement by projecting drawn sketches on panel.
- Use trim sheet to create voids or holes on sheet as per requirement.
- Hinge Emboss:Use wave Geometry linker to extract the hinge face and use it as reference to create sketch for its positioning.
- Latch Emboss:This emboss is created once the trajectory of hood opening and closing finalized.
- Thicken the part at the end to make it solid body.
MASTIC DATA DESIGN:
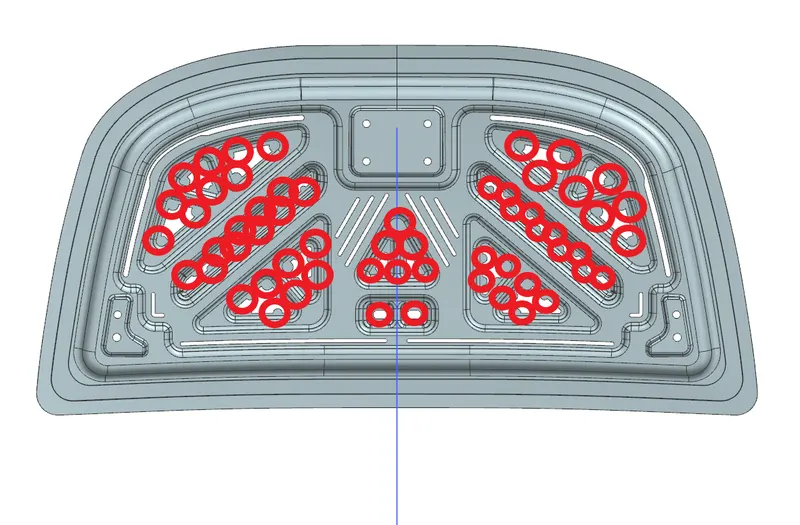
- The main purpose of the outer panel is for aesthetic looks. Thus, we cannot use bolts or welding, this has to be done with the help of hemming and mastic sealants.
- Mastic sealants are elastic compounds that behaves like the rubber. It is placed between the outer and inner panels. Initially it is in paste form t=but after the hot furnace bath, it will get hardened thus joining the outer panel and inner panel, Mastic sealants has the tendency to increase the strength of the panel and has the tendency to increase the strength of the panel and has the influence of 80mm diameter.
- Usually in designing these are created in inner panel using sketches and projecting them on panel. Later trimming of the sheet and blending it.
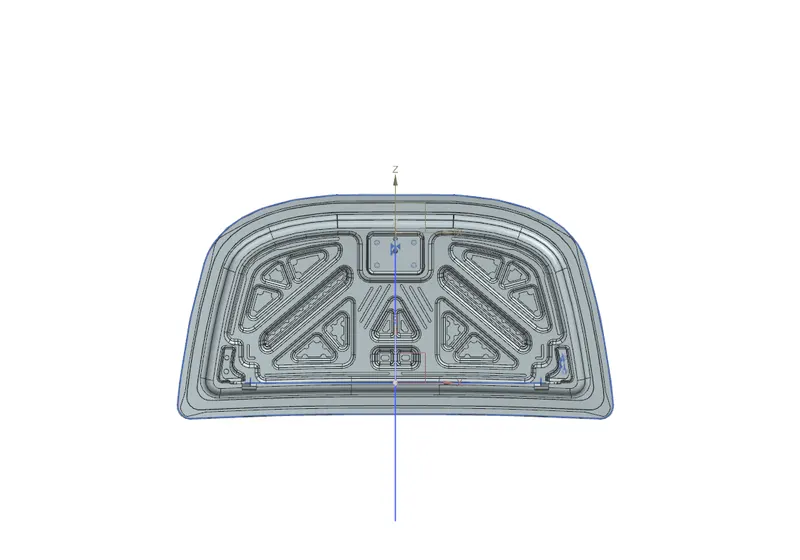
LATCH AND HINGE REINFORCEMENT:
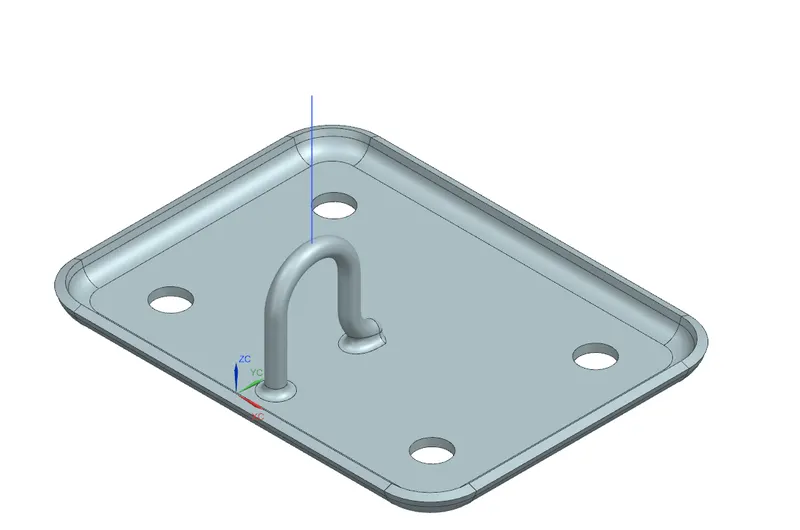
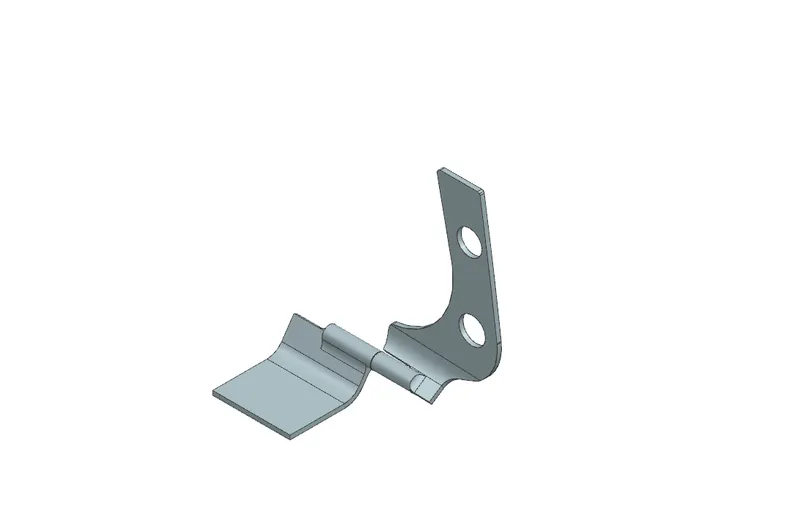
To further more reduce the impact to the occupants inside the car, additional latch and hinge reinforcements are provided to the hood. When latch and striker are place, there is a drop in strength at that position thus reinforcements are provided to compensate that loss. Also, stiffener pads are placed to reduce NVH (Noise Vibration Hardness). Hinge and latch reinforcements thickness are kept at 1.2mm but it may vary.
HINGE AND STRIKET POSITIONING:
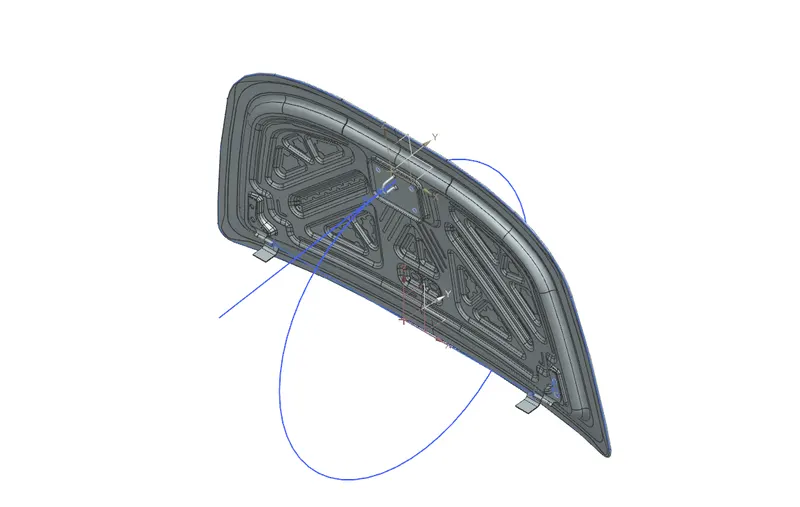
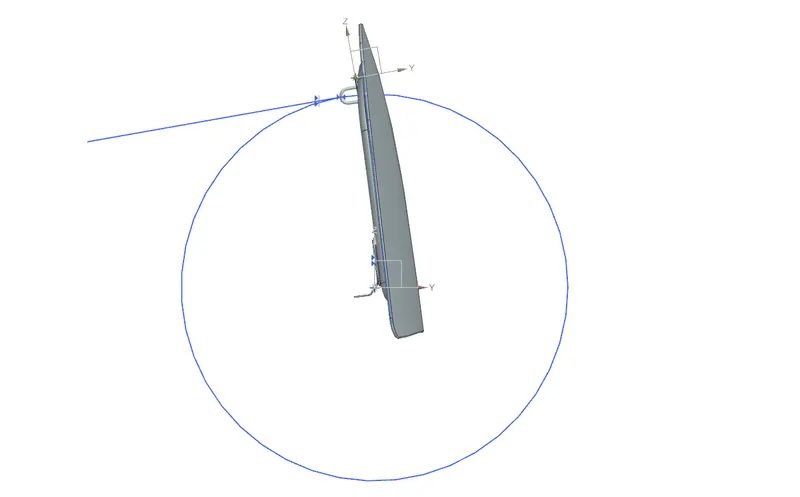
- For proper opening and closing of hood, the striker should be perpendicular to the trajectory of the hood. For this, the hinge is assembled at its position.
- Once it is placed, the hinge axis is drawn by connecting sketch points created on hinge edges.
- Create a datum plane using midpoint of hinge axis.
- Now sketch a circle into such a way that helps in positioning latch.
- Now position the latch using above drawn circle which has to be perpendicular to the hood trajectory.
- Once positioned create a Emboss on inner panel by extracting the face of the latch.
DESIGNING OF OUTER PANEL:
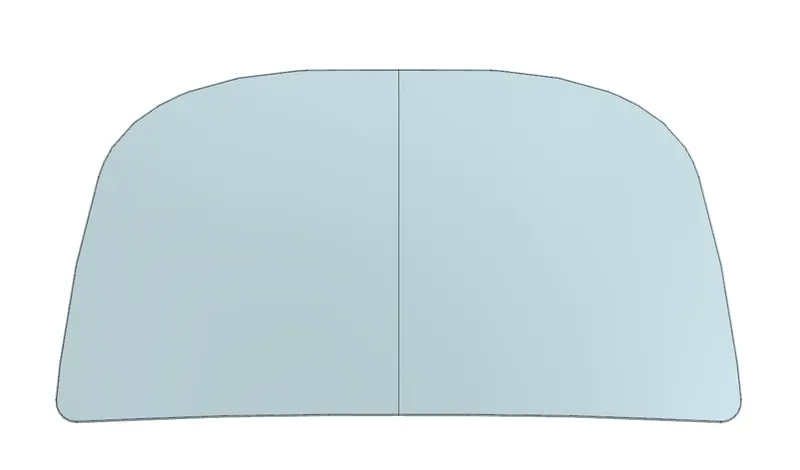
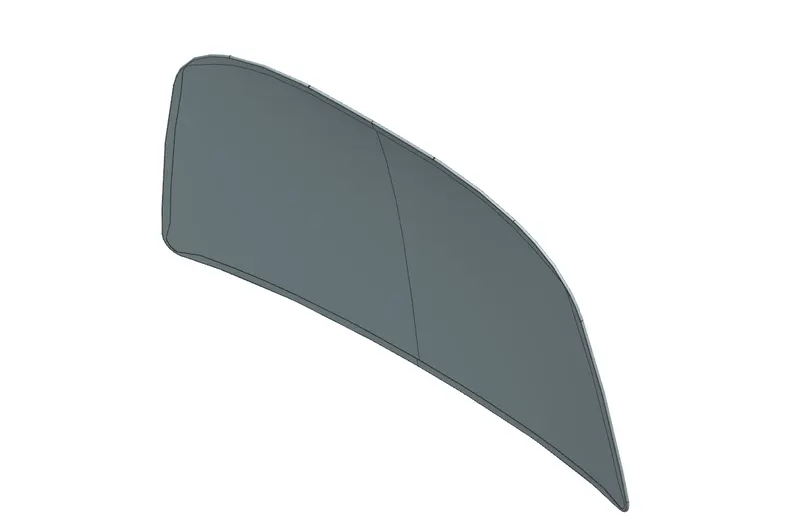
Hemming:
- Use offset curve on face to create curve alone the faces by selecting above offset surface.
- Extend the sheet by selecting the above offset curve.
- Create one more surface at an offset of calculating thickness and gap between flanges on opposite direction to above surface.
- Offset the above created law extension as per requirement using offset face.
- Now trim the extra surfaces which are not required.
- Use face blend and select the top, rear and middle face to create hemming.
Relief Data:
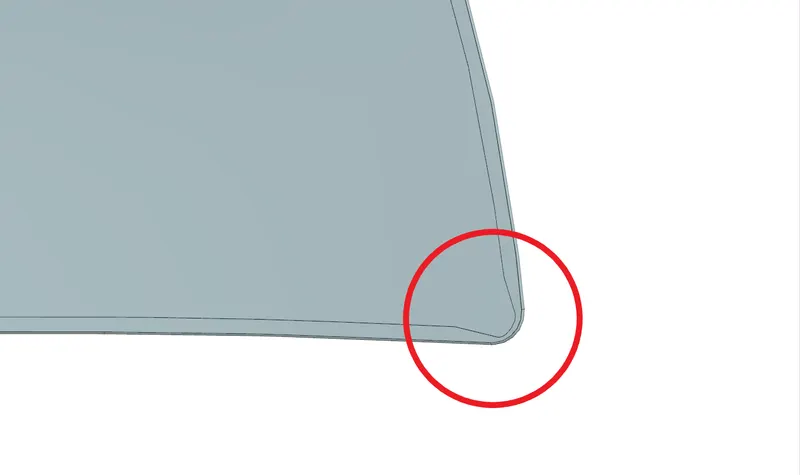
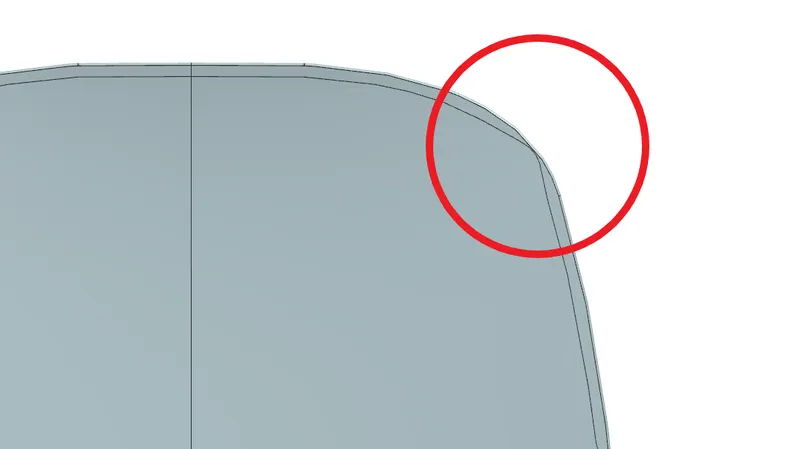
- Relief is provided onto the part or component in order to remove any stresses developed in a particular area i.e., sharp corners that take place during hemming process are carried out. Thus, corners are rounded or chamfered.
- Create a sketch and project it on panel using project curve trim the extra portion using trim sheet by selecting projected sketch as boundary.
Views of Model:
Front View:
Side View:
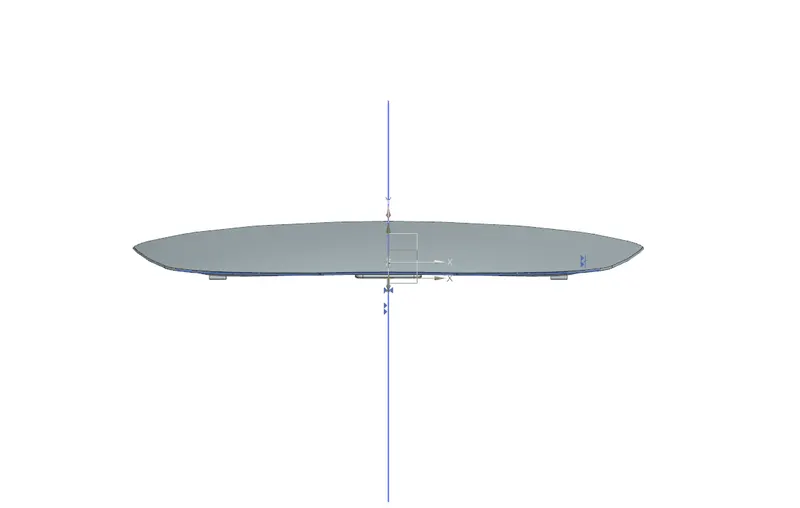
Top View:
Isometric View:
CONCULSION:
In this challenge Hood or Bonnet is designed successfully in a top-down approach and a creating the Inner panel using given Master Sketch and assemble the Latch and striker and hinge assemble with reinforcement.