Hood design-Week 2
AIM
To design Hood Outer Panel, Inner Panel and the necessary reinforcements by following the Master Section.
THEORY
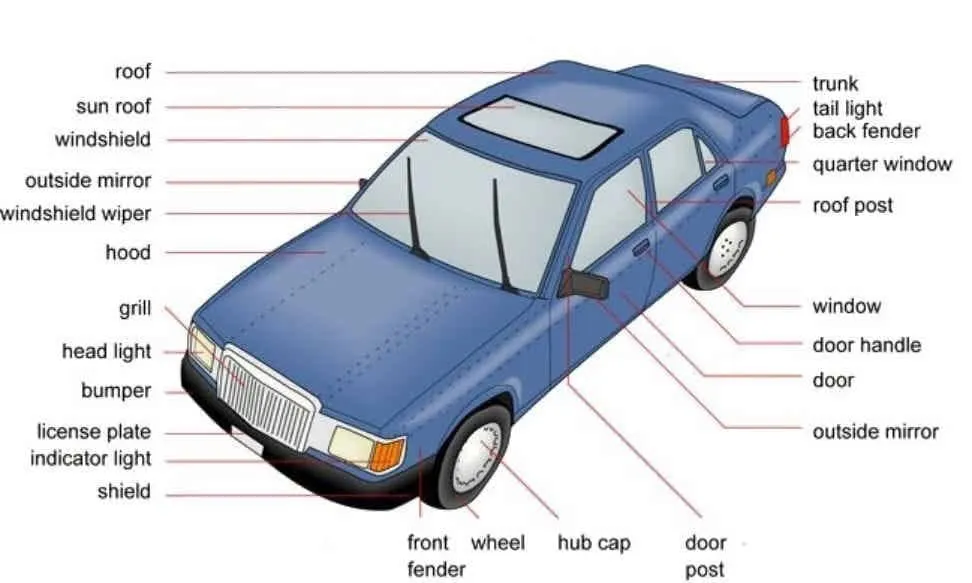
HOOD

A car hood, also known as a bonnet in some regions, is an essential component of an automobile's exterior design and structural makeup. This horizontal, hinged panel covers the engine compartment, providing access to the engine and other critical components beneath it. Its primary purpose is to protect the engine and other vital systems from environmental elements such as rain, dirt, and debris.
Typically made from lightweight materials like steel, aluminum, or composite materials, the hood is designed to be both aerodynamic and aesthetically pleasing. It integrates seamlessly with the car's overall design, contributing to its visual appeal. Most hoods incorporate a latch mechanism at the front to secure it shut during operation, and a secondary safety latch for added security.
Beyond its protective and aesthetic functions, the hood plays a role in managing airflow to the engine and maintaining proper engine temperature. Some hoods also feature vents or scoops that aid in heat dissipation and enhance engine performance.
HOOD DESIGN CONSIDERATION:
Hood design considerations play a crucial role in ensuring the safety of both passengers and pedestrians in the event of a collision or accident. Here are some safety-related factors in hood design:
1. Pedestrian Safety:
- Crash Compatibility: Hood design should be compatible with pedestrian safety regulations, which aim to minimize injuries to pedestrians during a collision. The front end of the hood should be designed to absorb and distribute impact energy in a way that reduces injury risk.
- Energy-Absorbing Materials: Some hoods incorporate energy-absorbing materials, like foam or soft structures underneath the hood's exterior surface. These materials can help reduce the force of impact on a pedestrian during a collision.
- Hood Height: Lowering the front edge of the hood can reduce the severity of impact on a pedestrian's body, especially on the head and upper body regions.
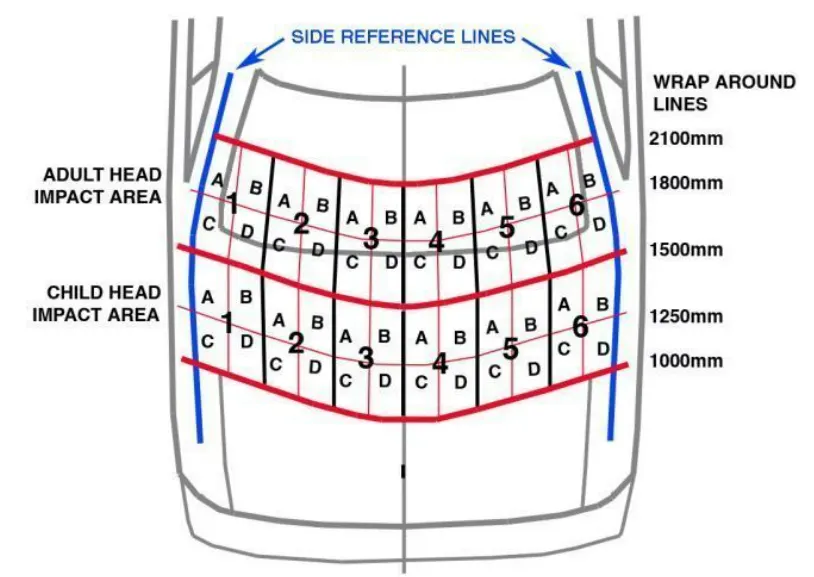
The European New Car Assessment Programme (Euro NCAP) is a European car safety performance assessment program that has developed test specifications and rating systems for assessing pedestrian injuries during impacts with the front of vehicles. Such tests include a series of impacts designed to mimic collisions at a speed of 40 km/h. These tests focus on situations where a pedestrian is positioned laterally to the car and the car first strikes one of the pedestrian's legs. The tests assess the leg, upper leg, and, most importantly, the head, as head trauma is the most common cause of pedestrian casualties.
To mitigate severe head injuries, the high-impact area for both adults and children is designed with reduced thickness. This area should not have reinforcement, as it's crucial for the hood to absorb the energy from head impacts, leading to the hood's collapse and, consequently, protection against severe head injuries.
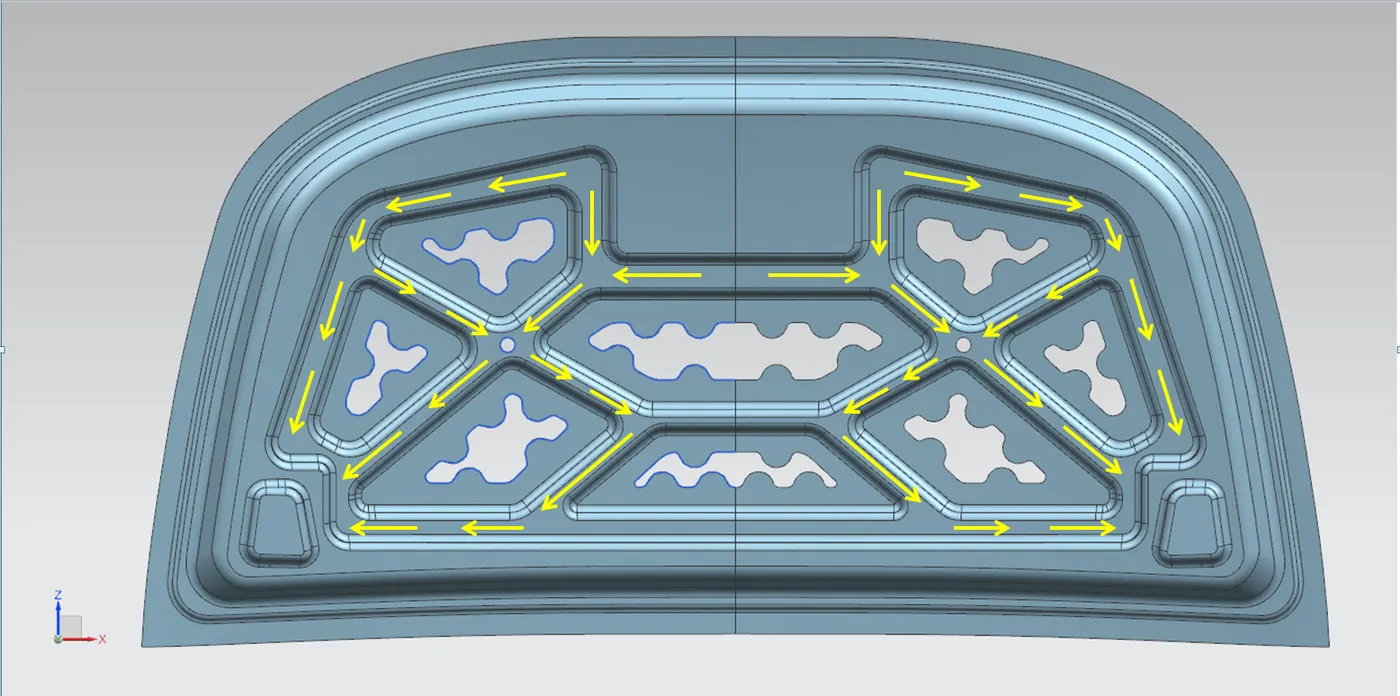
Another essential criterion in hood design is to safeguard the occupants inside the car during a frontal collision. The hood design should guide impact forces upward through embossed structures, directing them towards the car's body, thus ensuring the protection of the vehicle's occupants.
Active Hood Lift System
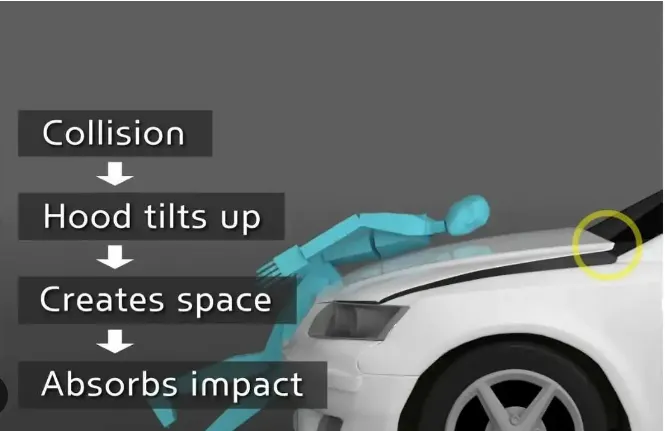
Active hood lift system has been developed to get more spaces for decreasing the head injury during pedestrian impact. This system is composed of detecting sensor, ECU where the algorithm is embedded and the pyro-type actuators which raise the hood. By this system, the rear part of the hood is raised up to approximately 120mm. The test results of system operation are introduced for each three typical impact cases. In this test the system could detect the lower legform impactor from the other rigid pole and only in case of lower legform the actuator is deployed within the required operating time, 30ms. To investigate the effects of this system on decreasing head injury, the authors have carried out the European New Car Assessment program (EURONCAP) child headform impact test in which the actuators are fully deployed and the rear part of the hood is initially lifted up to 115mm. Through this tests the authors could identify that the head injury could be reduced significantly at all target points
2. Passenger Safety:
Crashworthiness: The hood should be designed to protect passengers in the vehicle in the event of a collision. This involves ensuring that the hood structure remains intact and doesn't intrude into the passenger compartment during a crash.
Hood Latch and Secondary Latch: A well-designed hood latch mechanism secures the hood during normal operation, preventing it from opening unexpectedly. The inclusion of a secondary latch provides an additional level of safety in case the primary latch fails.
Reinforcements: The hood structure may include reinforcements, such as impact-absorbing materials or cross-members, to help absorb and distribute collision forces and minimize intrusion into the passenger compartment.
Visibility:
Good visibility is essential for both the driver and pedestrians. Hood design should not obstruct the driver's view of the road, and it should provide sufficient visibility to the front of the vehicle.
Materials and Design:
Choosing materials that balance weight and strength is important. Lightweight materials can reduce the severity of injuries to pedestrians in the event of a collision.
Components of Hood
The main components of a car hood typically include:
1. Outer Panel:
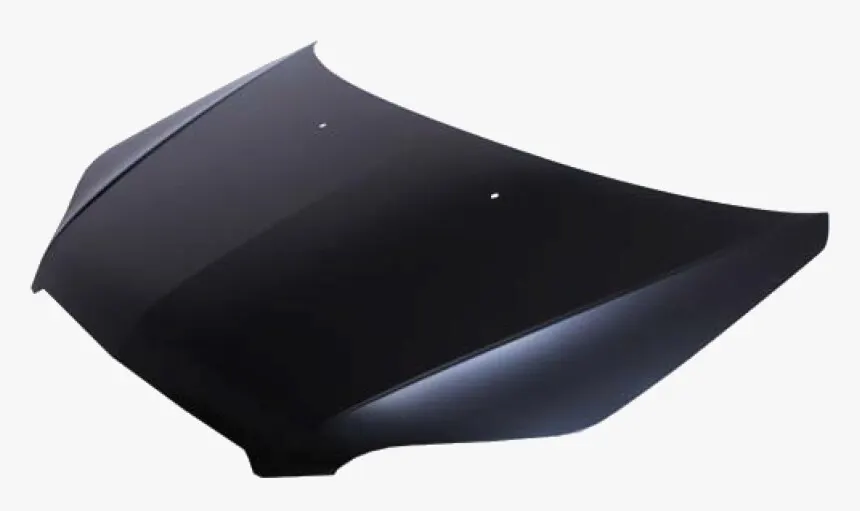
The outer panel is the visible, external surface of the hood. It is often made from materials like steel, aluminum, or composite materials. This panel is designed to be aerodynamic and contributes to the vehicle's overall appearance.
2. Inner Panel:
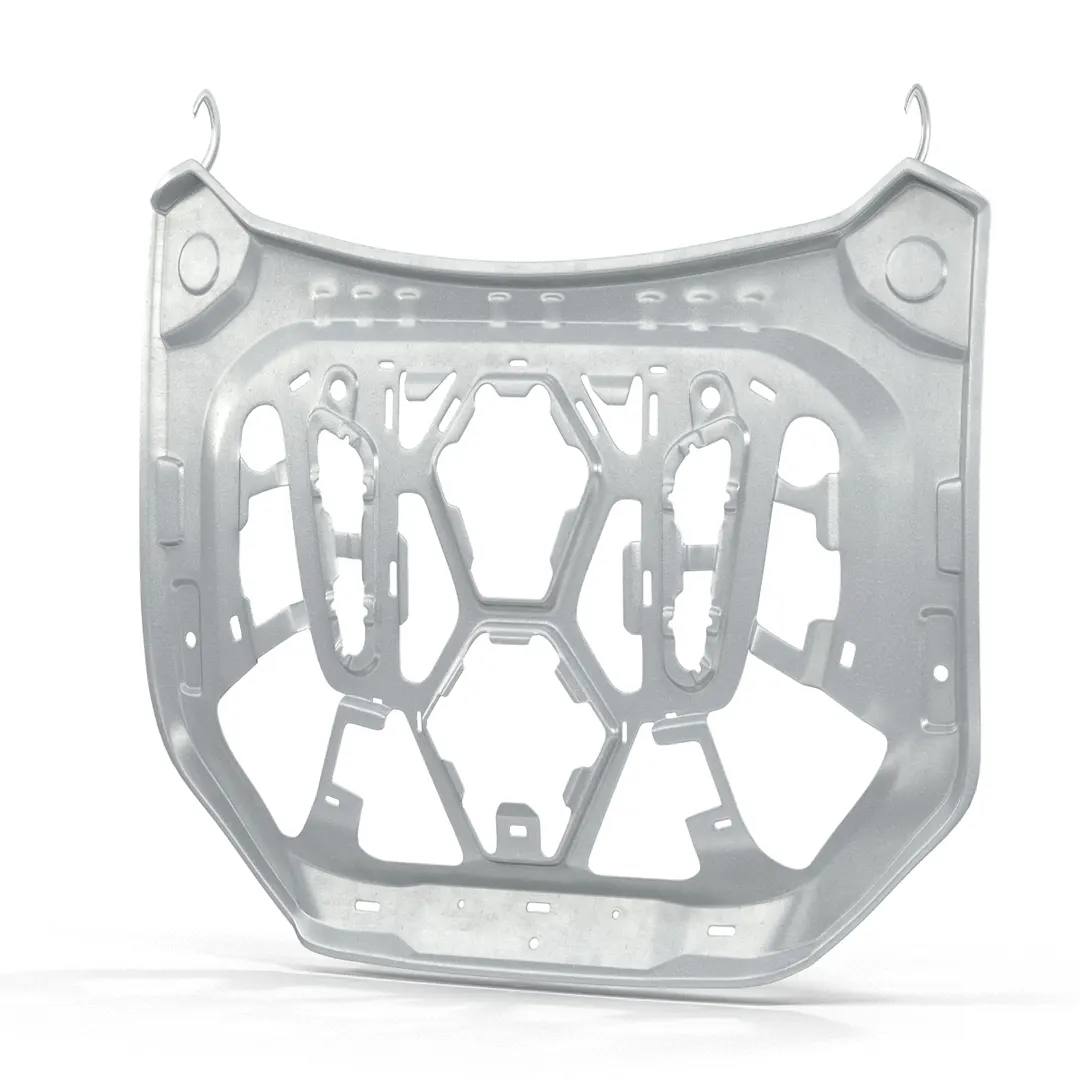
The inner panel is the underside of the hood and is typically made of the same materials as the outer panel. It adds structural support to the hood.
3.Reinforcements:
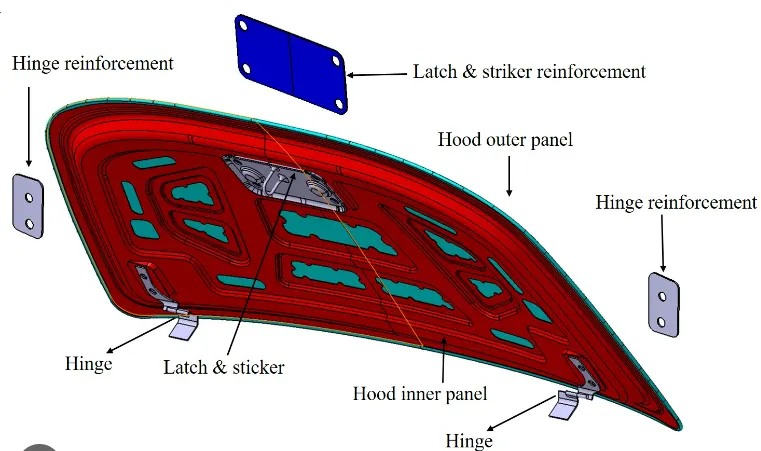
These are structures, often made from steel or other high-strength materials, that are integrated into the hood's design to provide additional strength and rigidity. They help absorb and distribute impact energy in the event of a collision.
4. Hinges:
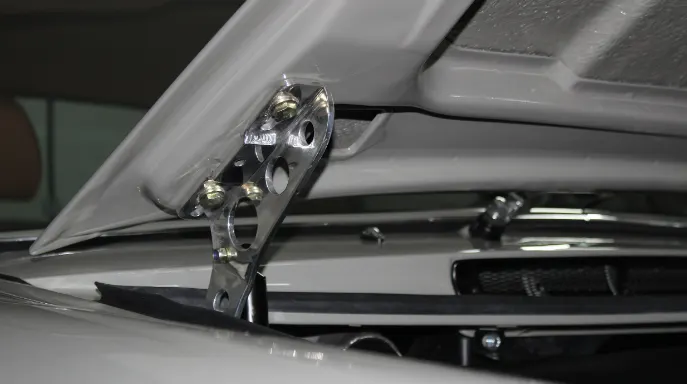
Hinges are mechanisms that attach the hood to the vehicle's body and allow it to pivot open and closed. Hinges should be robust and reliable to support the hood's weight and withstand continuous use.
5. Hood Latch:
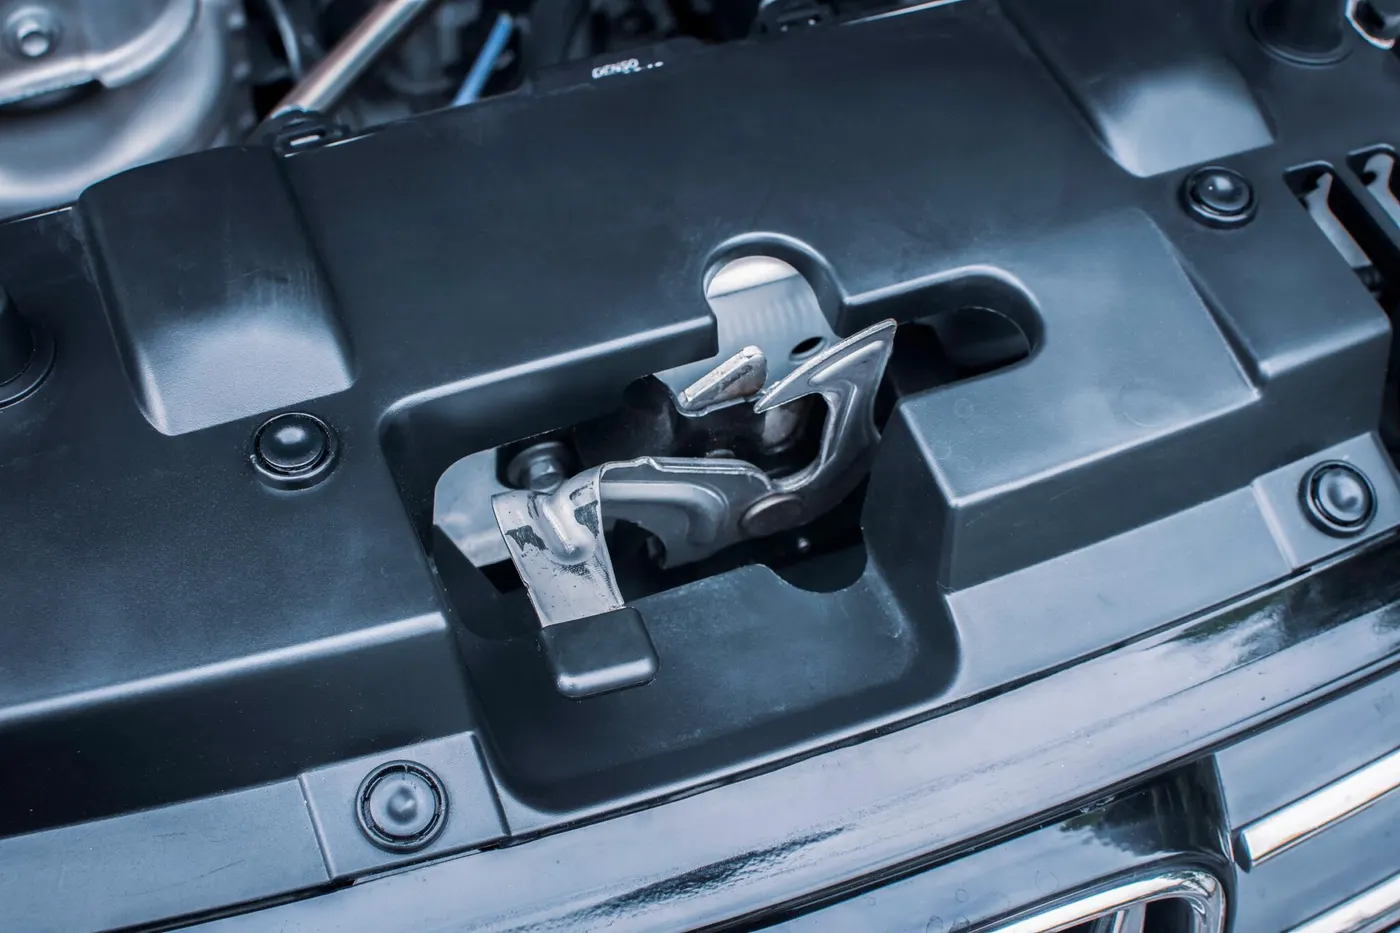
The hood latch is a mechanism at the front of the vehicle that secures the hood in the closed position. It prevents the hood from opening unexpectedly during driving.
6. Secondary Safety Latch:
A secondary latch is often included to provide an extra level of safety. It acts as a fail-safe mechanism in case the primary latch fails.
7. Striker:
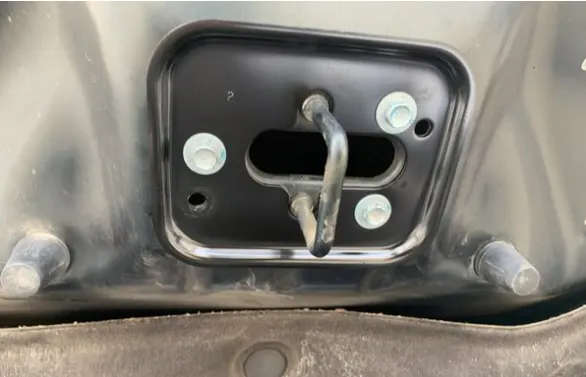
The striker, also known as the hood striker or latch striker, is a metal or hardened steel component fixed to the body of the vehicle. When the hood is closed, the latch mechanism on the hood engages with the striker, securing the hood in a closed position. The striker essentially "catches" the latch, preventing the hood from unintentionally opening while the vehicle is in motion.
8. Insulation:
Many hoods are equipped with insulation to reduce engine noise and prevent heat from radiating into the passenger compartment.
9. Hood Release Mechanism:
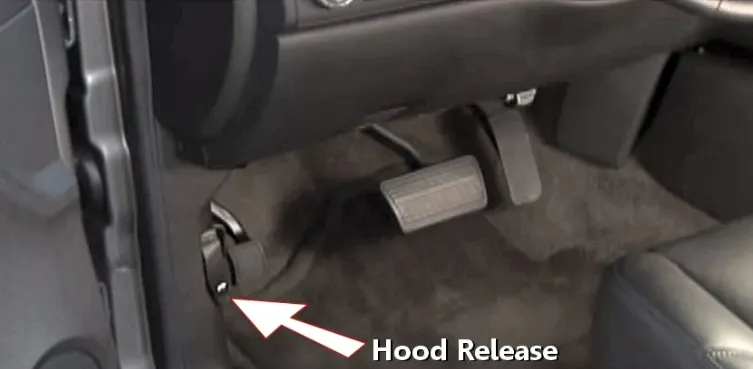
Inside the vehicle's interior, there is typically a hood release lever or button that allows the driver or operator to release the hood latch, enabling them to open the hood.
10. Air Vents or Scoops:
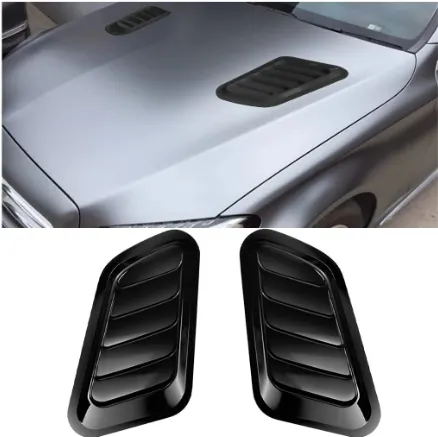
Some hoods have integrated vents or scoops to aid in heat dissipation from the engine compartment. These help maintain proper engine temperature.
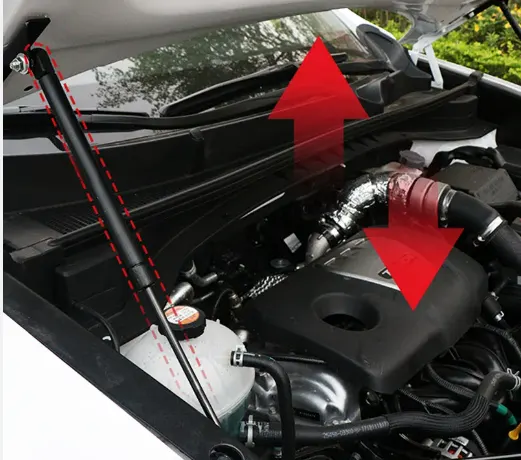
11. Hood Stay:
Hood stays, also known as hood supports or hood struts, are components used to hold the car's hood in an open position while accessing the engine compartment. There are a few common types of hood stays:
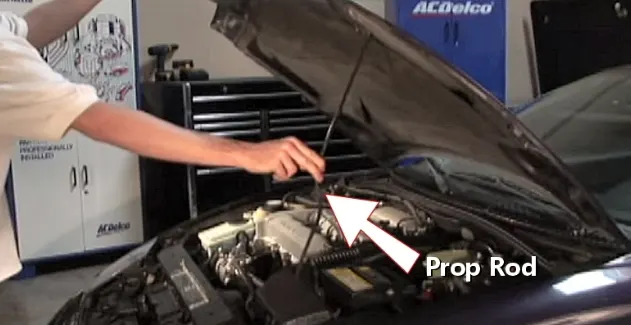
- Rigid Hood Rods: These are the traditional and most basic type of hood stay. A rigid metal rod or bar is attached to one end of the hood and secured to the body or frame of the vehicle at the other end. The rod can be propped into a designated hole in the hood for support when the hood is open. The rod can then be removed and stored when the hood is closed.
Mastic Sealing
Mastic refers to a type of sound deadening or insulation material that is applied to the underside of the hood. This mastic material is designed to serve several purposes:
- Sound Deadening: Mastic helps reduce noise from the engine, road, and outside environment that can be transmitted into the vehicle's cabin. It acts as a dampening material, absorbing sound and vibrations.
- Vibration Damping: It helps dampen and reduce the vibrations that can be generated by the engine and transmitted through the hood. This contributes to a quieter and smoother ride.
- Thermal Insulation: Mastic can provide some thermal insulation, helping to reduce heat transfer from the engine compartment to the hood's exterior surface. This can contribute to improved passenger comfort and protect the vehicle's exterior paint.
Mastic materials are typically made from butyl rubber, asphalt-based compounds, or similar sound-absorbing materials. They are applied to the underside of the hood in specific areas to target noise and vibration sources.
- Gas Struts: Gas struts, also known as gas springs or gas shocks, are a more modern and commonly used type of hood stay. They consist of a cylinder filled with gas and a piston. Gas struts are mounted on either side of the engine compartment and are connected to the hood and the body or frame of the vehicle. They use the pressure of the gas to assist in lifting and supporting the weight of the hood when it's open. Gas struts are convenient and help keep the hood open without the need for manual support.
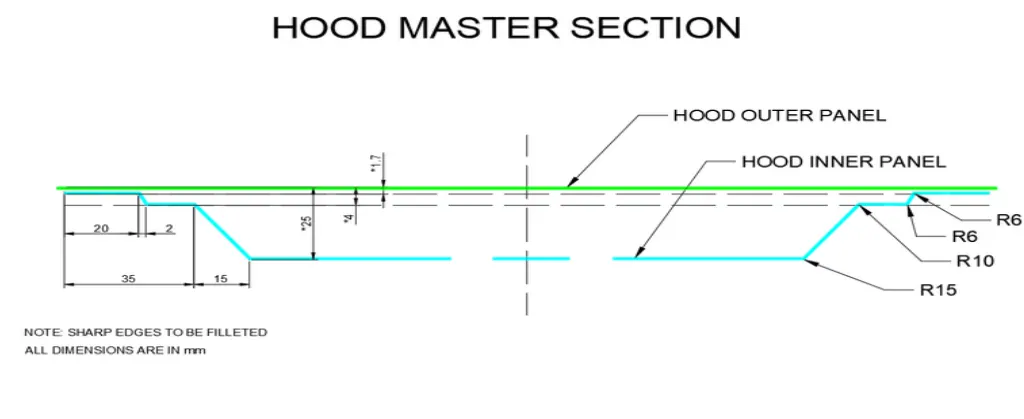
Master Section
Master sections are the guides for design requirements which decide the component packaging after technical (Styling, Concept or Class-A) surfaces.
Class A surface
A Class A surface,refers to a meticulously crafted 3D surface that adheres to exceptionally high standards of visual and tactile perfection. It exhibits flawless curvature continuity, precise control over tangency and curvature, and an absence of defects, resulting in surfaces that are both aesthetically pleasing and free from imperfections. These surfaces are commonly utilized in industries such as automotive, industrial design, and aerospace, where the visual and tactile quality of a product is paramount. The reflection quality of Class A surfaces is consistently excellent, and they often display a high degree of symmetry, making them essential in crafting premium and high-quality products. Achieving Class A surface quality requires advanced CAD modeling techniques, mathematical precision, and specialized software tools, ultimately yielding products with superior aesthetics and surface quality that meet the most exacting standards.
Manufacturing Processes - Hood Design
1. Embossing
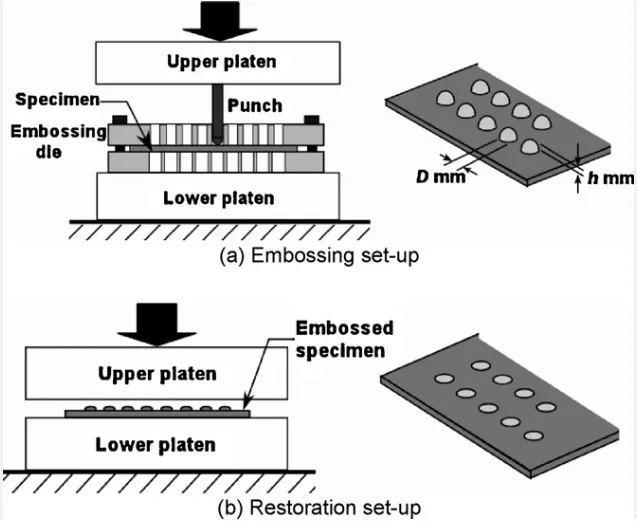
Embossing is a manufacturing process used to create raised or recessed patterns on the surface of materials, such as metal sheets in the context of car hood manufacturing. The process begins with the design of the desired pattern, which is then translated into precise dies, consisting of a male punch and a female cavity. These dies are used in a hydraulic press to apply pressure to a sheet of high-quality metal placed between them, effectively imprinting the pattern onto the metal's surface. After embossing, the metal may be cooled to prevent deformation. Depending on the intended result, finishing steps like painting or polishing may follow. Embossing is employed in car hood production for various purposes, such as adding aesthetic elements, incorporating brand logos, enhancing structural strength, or improving heat dissipation within the engine compartment. It's a meticulous process that demands precision and attention to detail to achieve the desired pattern with consistency and quality.
2. Deep Drawing
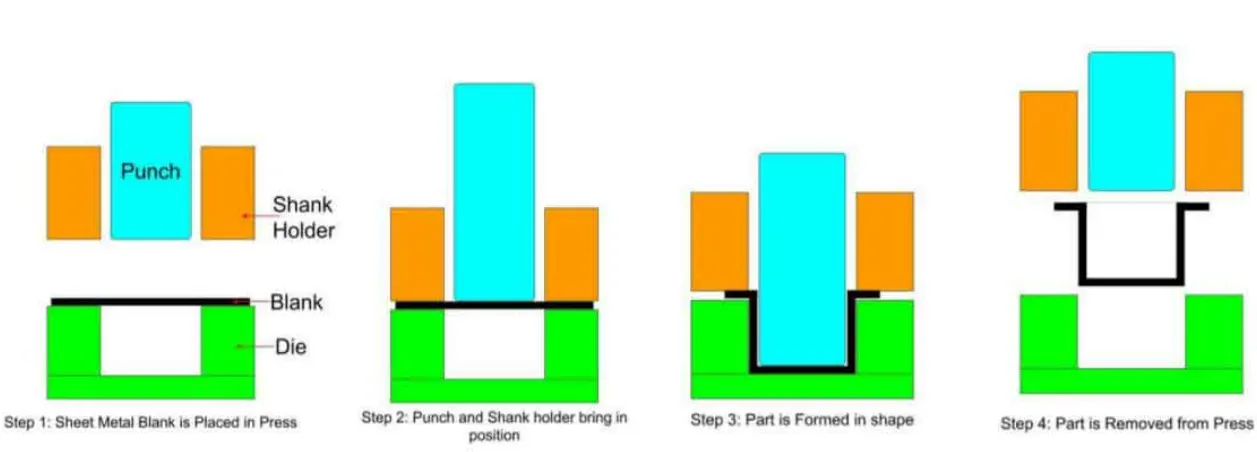 Deep drawing is a metalworking process widely used in various industries like automotive and appliance manufacturing, which involves transforming flat sheet metal into intricate three-dimensional shapes, typically cylindrical or box-like, with significant depth.
This process begins with the creation of a flat sheet metal blank, often made of materials like steel or aluminum.
The blank is then placed over a die, which matches the desired shape, and a punch forces the metal into the die cavity, stretching and conforming it to the shape's depth.
A blank holder secures the edges of the blank to prevent wrinkles or thinning.
Multiple drawing operations may be necessary for complex shapes, involving a series of progressively smaller dies and punches.
After the deep drawing process, excess material is trimmed away, and the finished part may undergo additional processes like deburring, surface treatment, and quality inspections. Deep drawing is valued for its efficiency in producing complex, seamless, and structurally sound metal components while maintaining dimensional accuracy.
3. Hemming Process
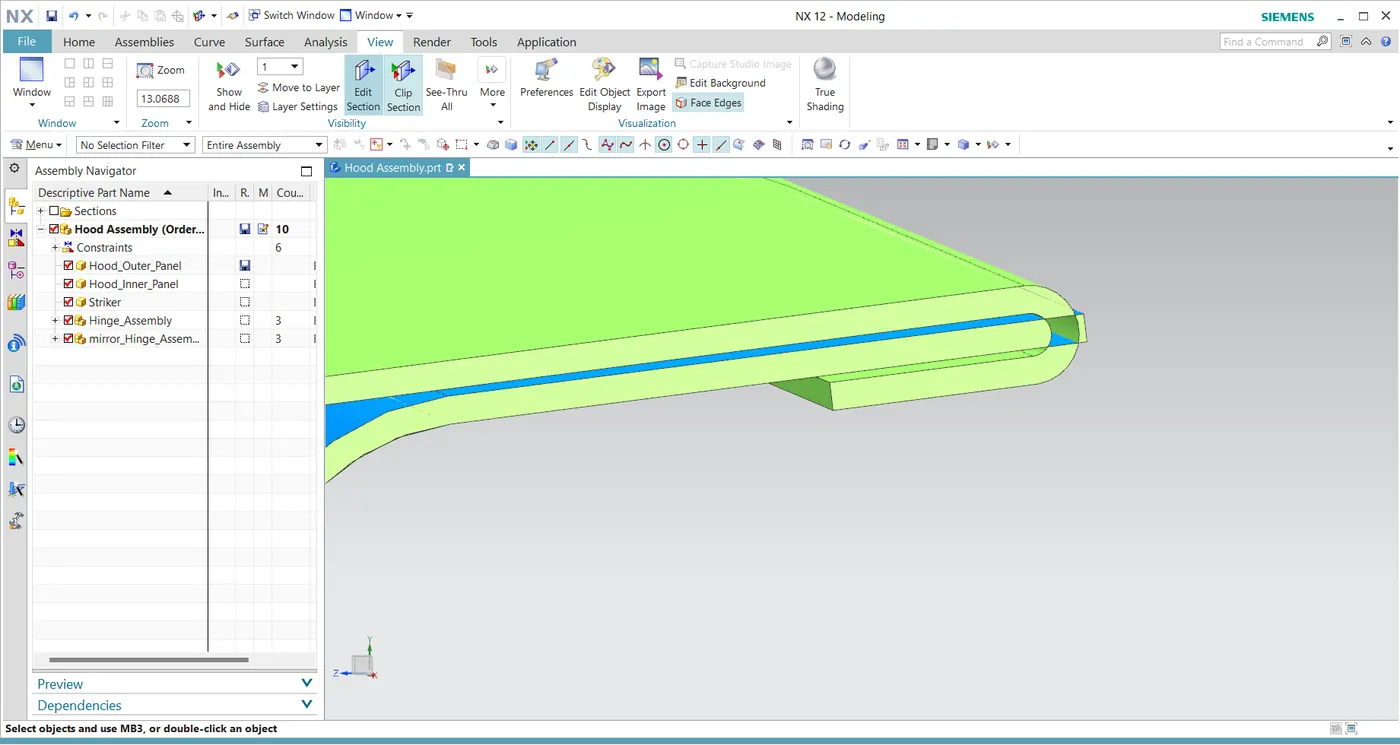
The hemming process is a metal forming technique used primarily in the automotive industry to join and reinforce sheet metal panels while concealing raw edges. This process enhances both structural integrity and aesthetics, creating clean seams for car body components like doors, hoods, and trunk lids.
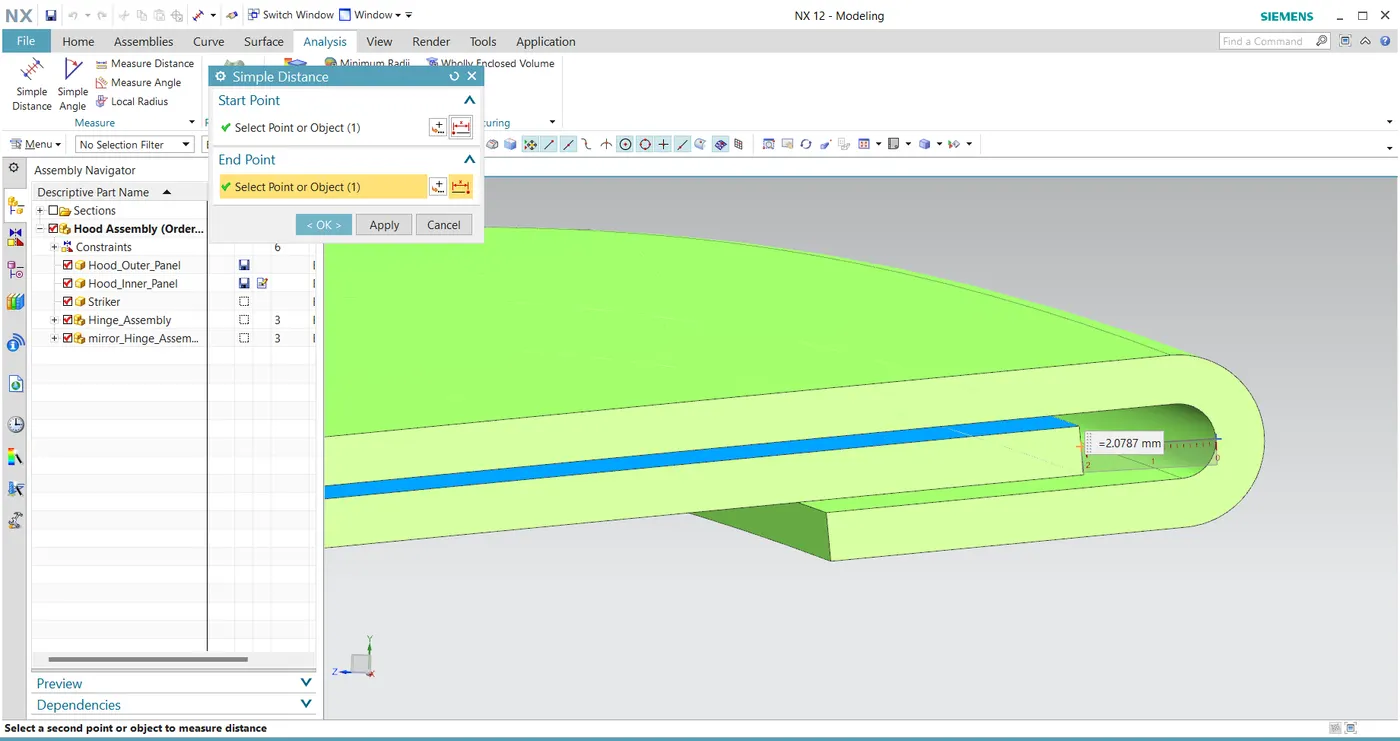
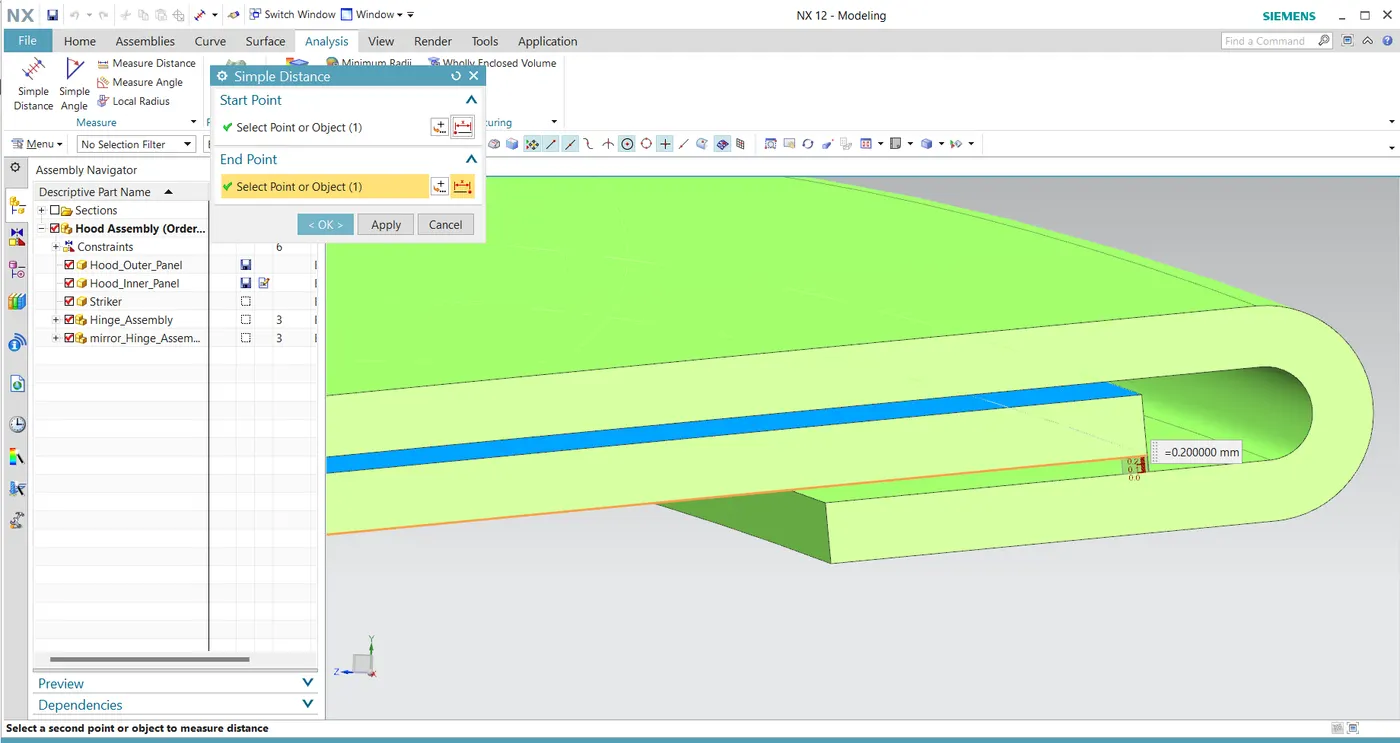
Before hemming, two sheet metal panels are prepared. One panel, known as the flange, is typically the outer panel with the visible surface, while the other, known as the base, is the inner panel. The flange is usually slightly longer than the base to accommodate the fold.The flange is then positioned over the edge of the base, and both panels are securely clamped together. This clamping can be done manually, but in industrial applications, it is often performed with the aid of specialized machinery.
The forming step involves folding the flange over the base, typically at a 180-degree angle. The fold can be created using a variety of methods, including die-based hemming or roll hemming.
To ensure a secure and weatherproof seal, adhesive, or sealant materials may be applied between the two panels before hemming. This helps to prevent water or contaminants from entering the seam.
PROCEDURE
Design Methadology
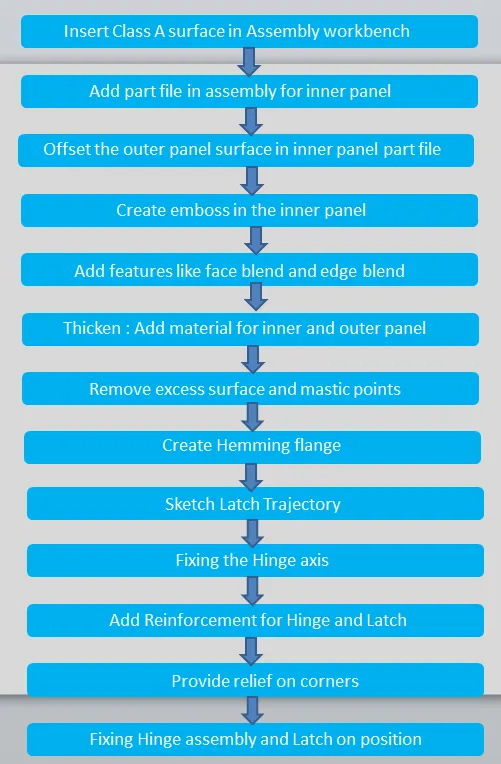
Step 1 : Create an assembly file for the entire hood assembly and insert hood outer panel to the assembly using 'Add Part'

Step 2 : Activate the Assembly, then add a new part file using 'Create New' command for creating the inner panel from the Class A of outer panel.

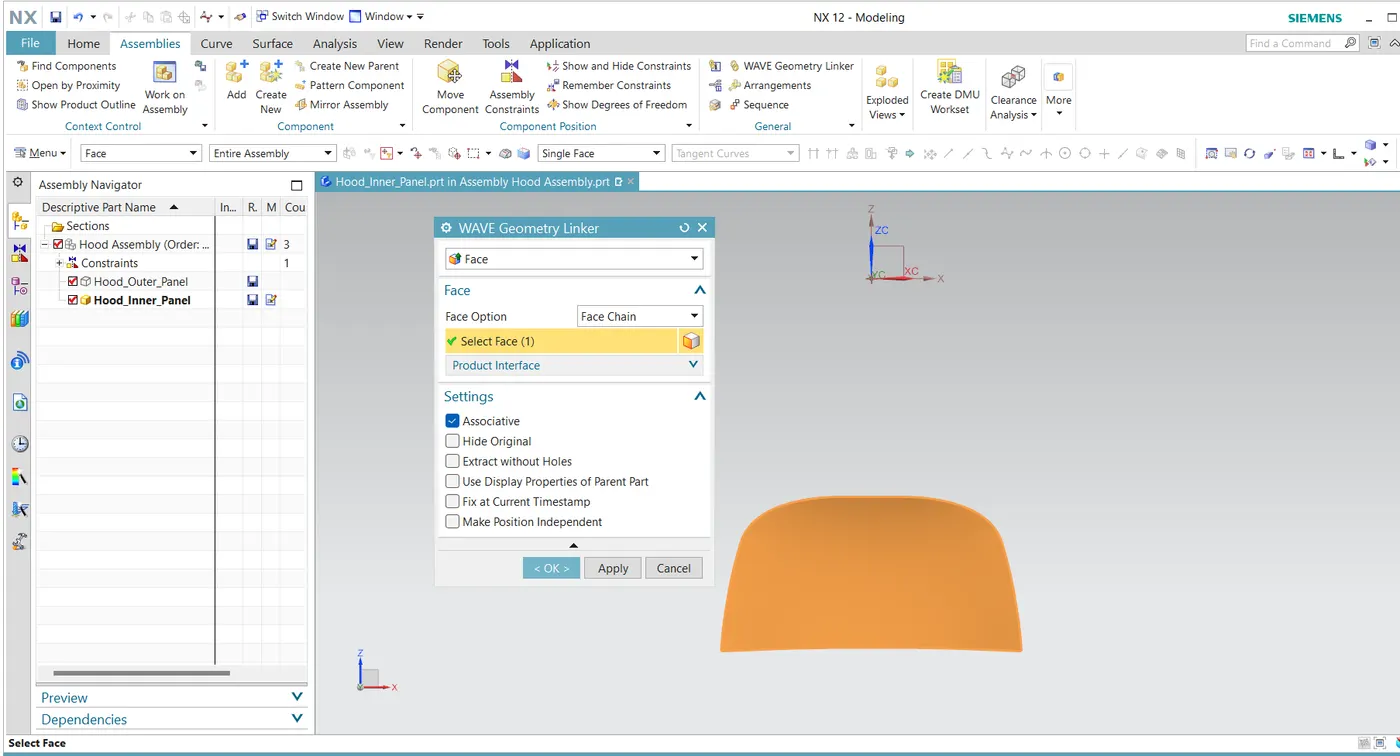
Step 3 : Extract the face of the hood outer panel into the inner panel using 'Wave Geometry Linker'
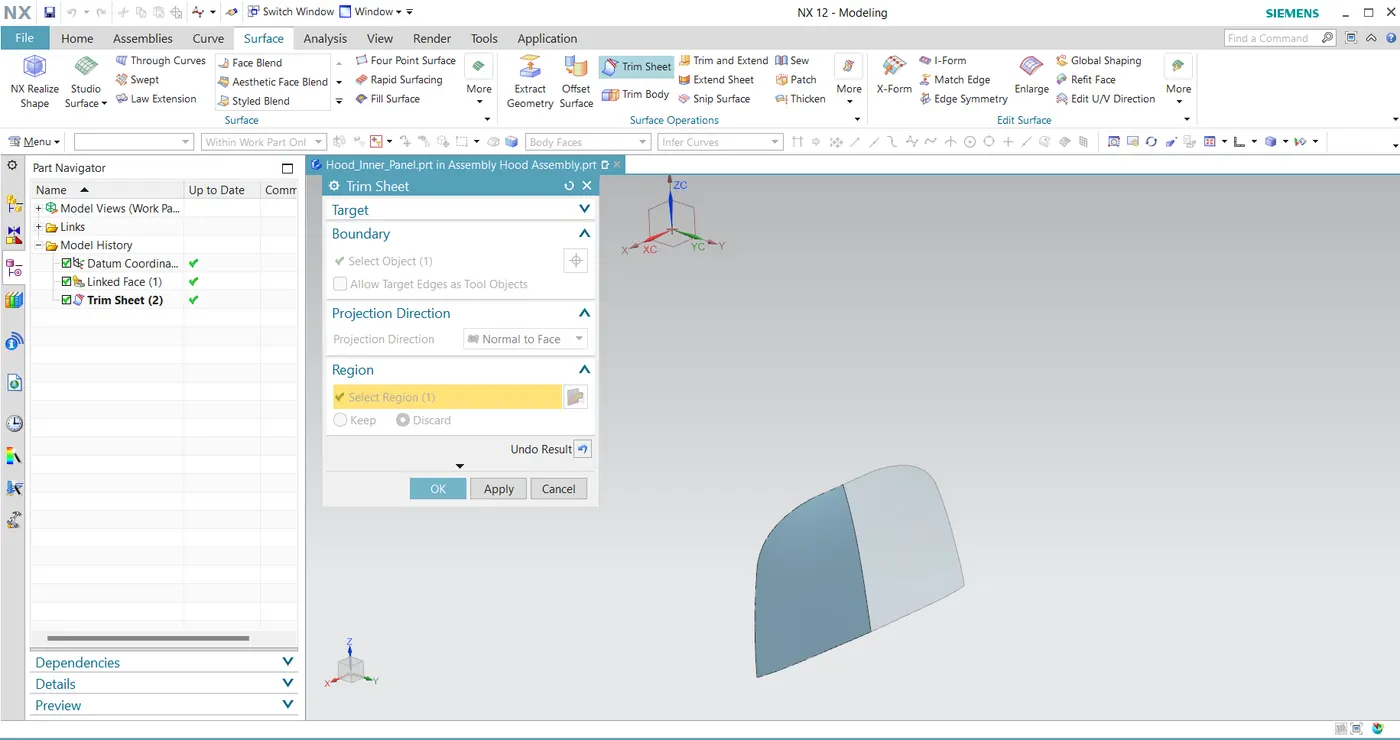
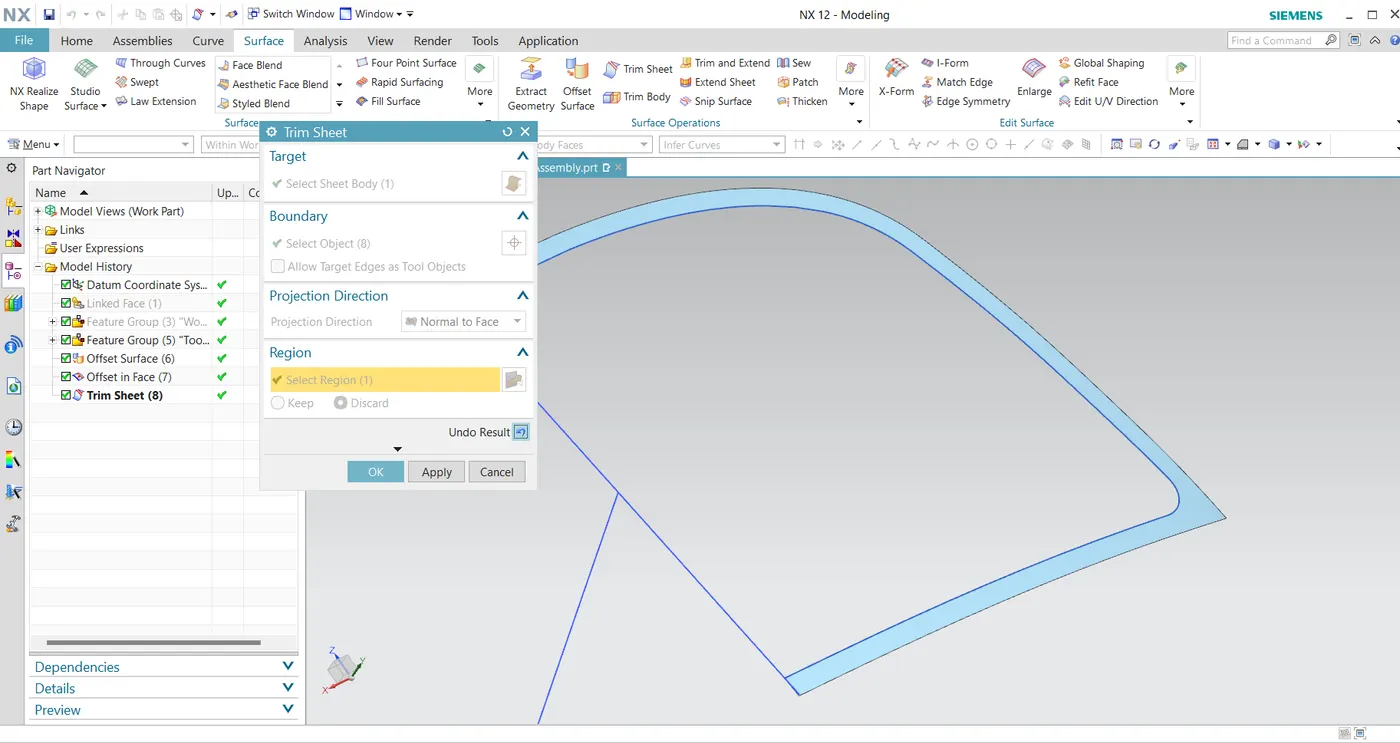
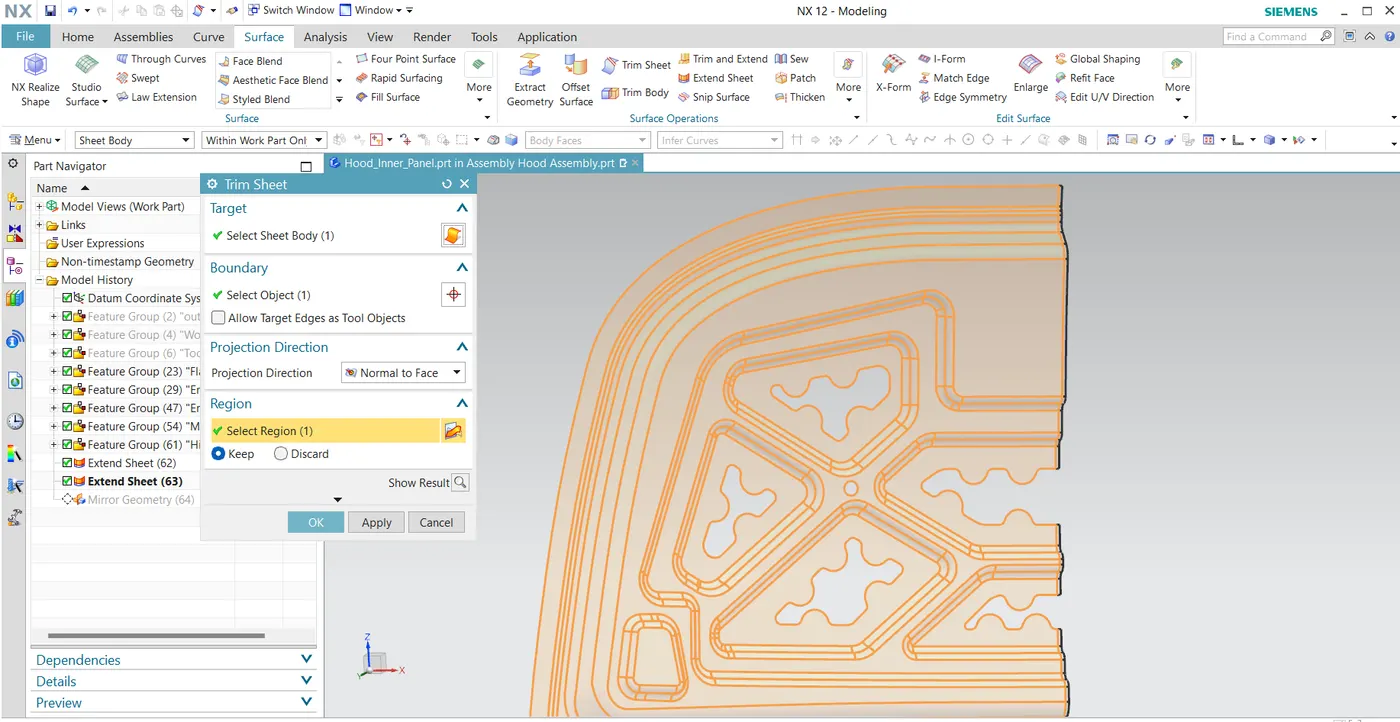
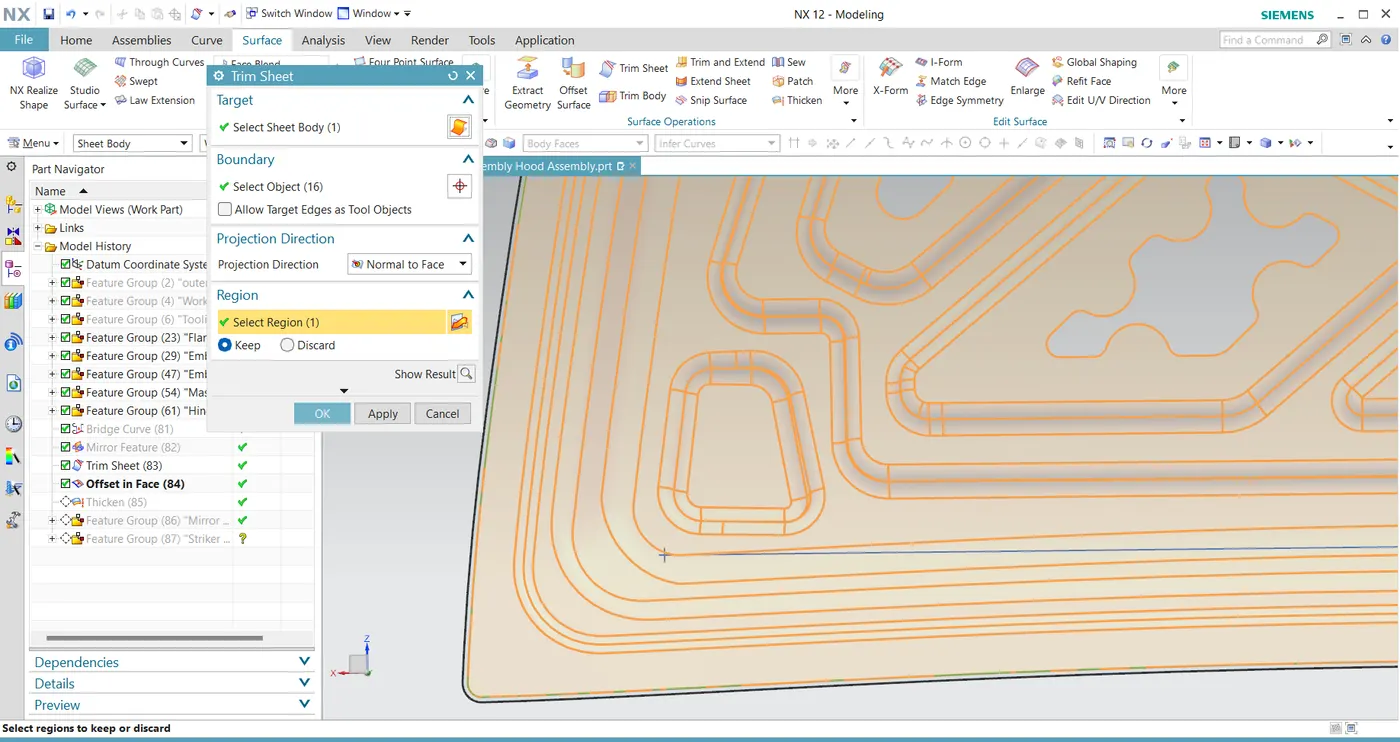
Step 4 : Trim the hood inner panel using Trim sheet for creating the inner panel based on master section and then mirroring to make the complete hood.
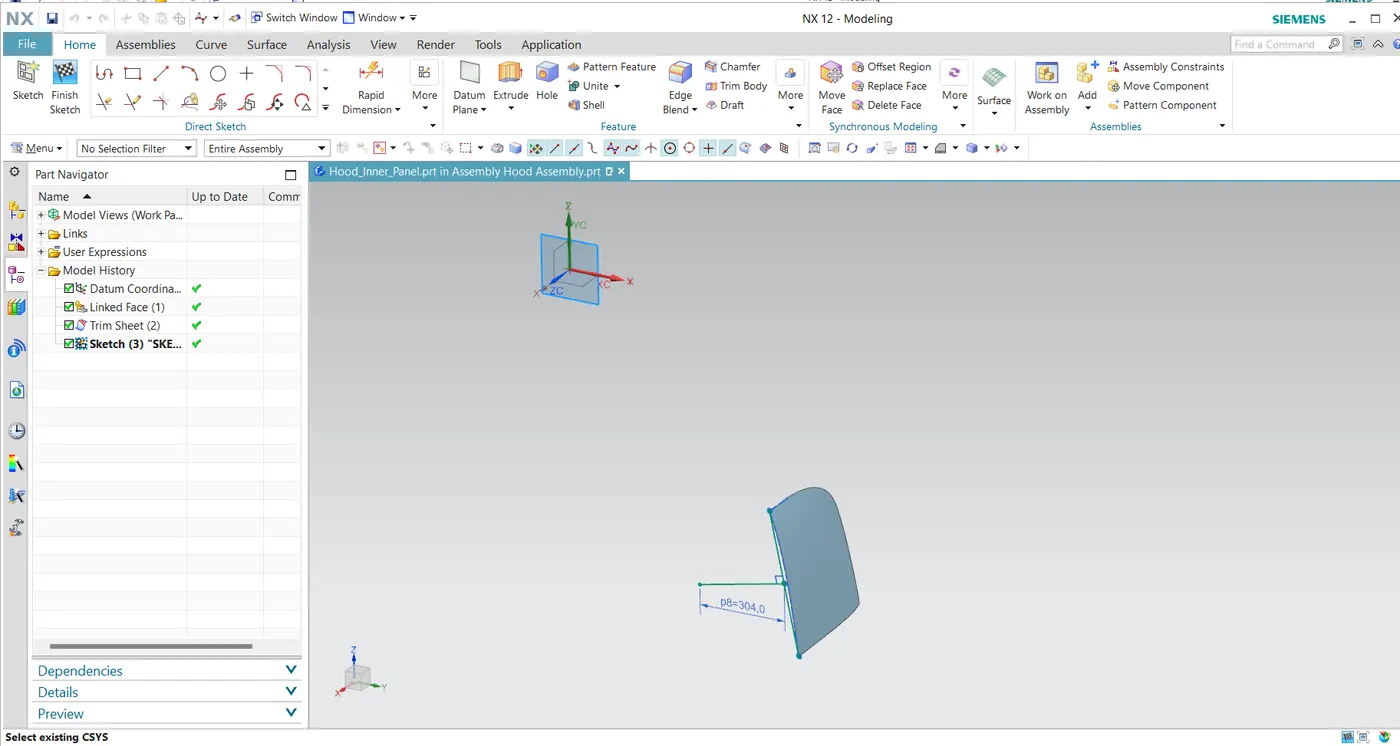
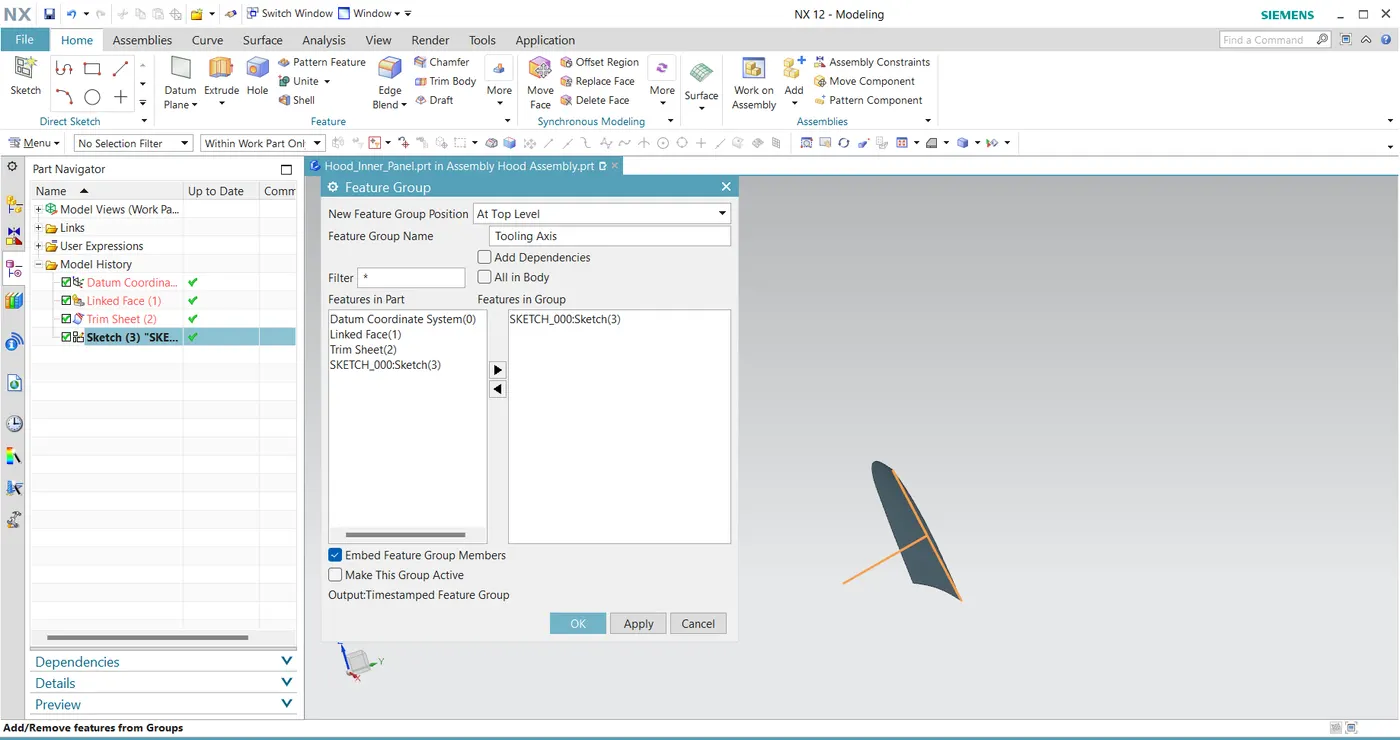
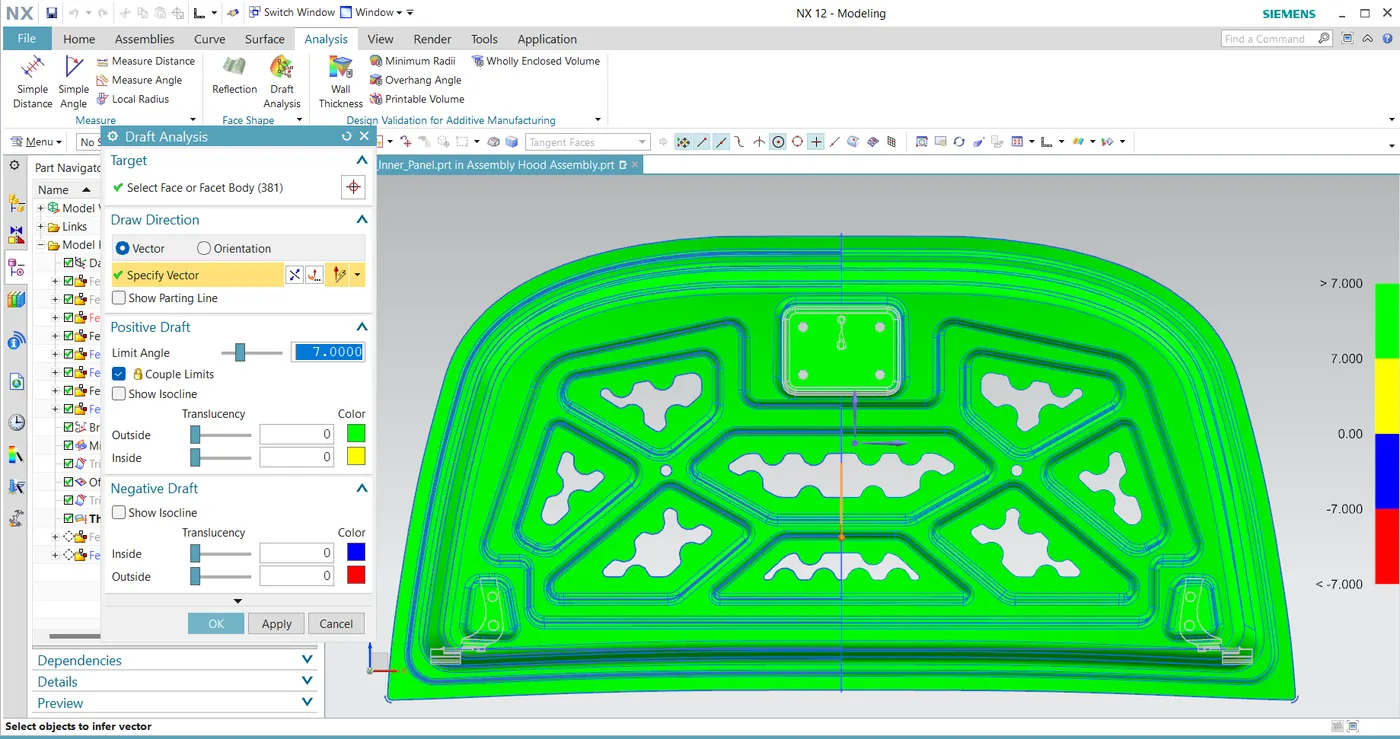
Step 5 : Create the tooling direction with a minimum draft angle of 7 degree and then make it to a feature Group
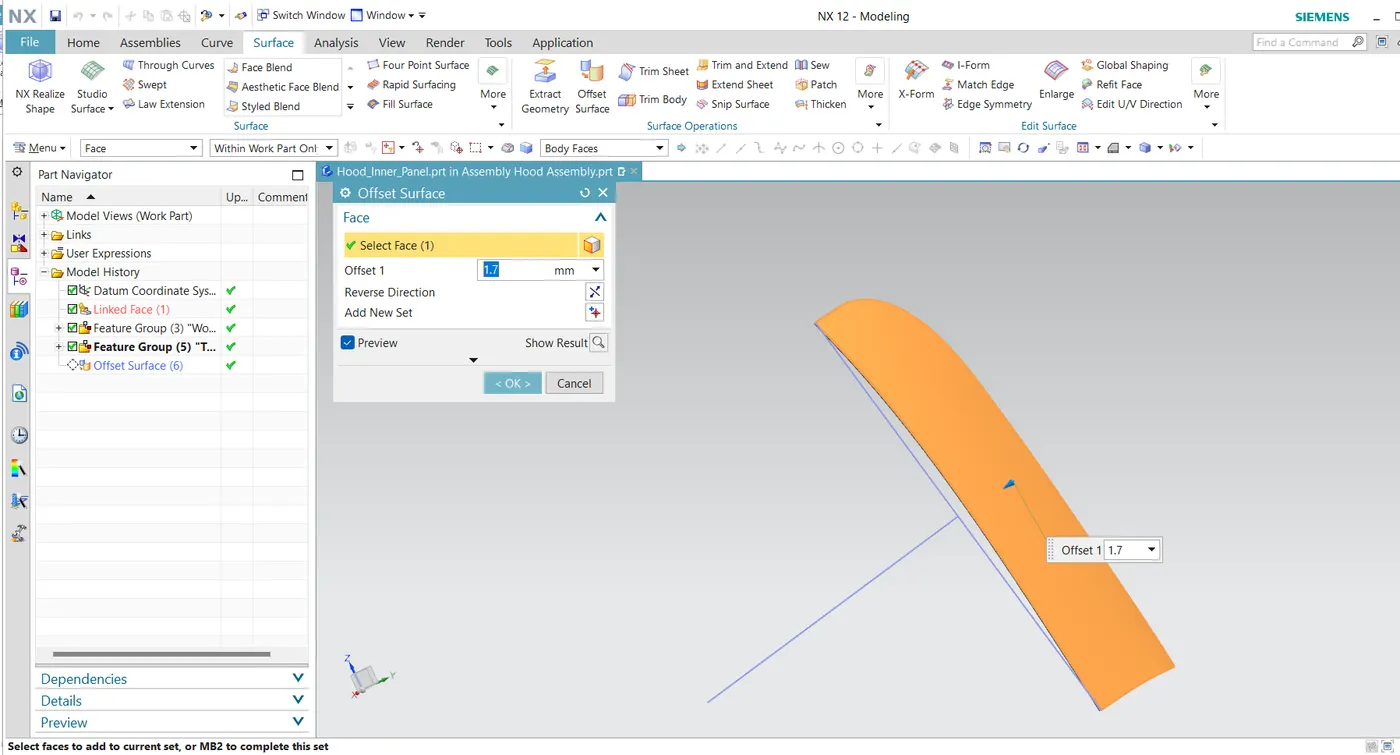
Step 6 : Offset the surface for 1.7 mm using Offset surface commad as per the master section provided.
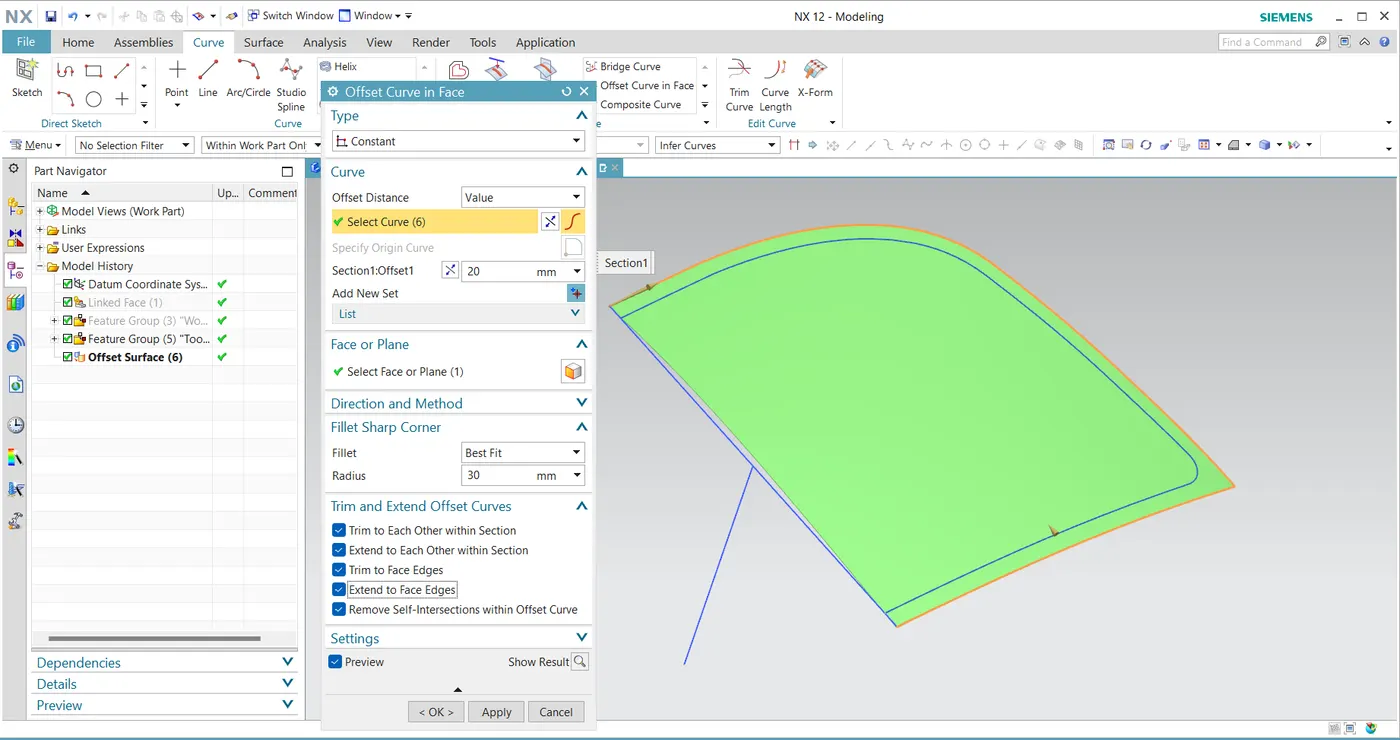
Step 7 : Using the 'Offset surface','Offset curve in face', 'Trim sheet' and 'Through Curve' commands make the inner panel as per the master section
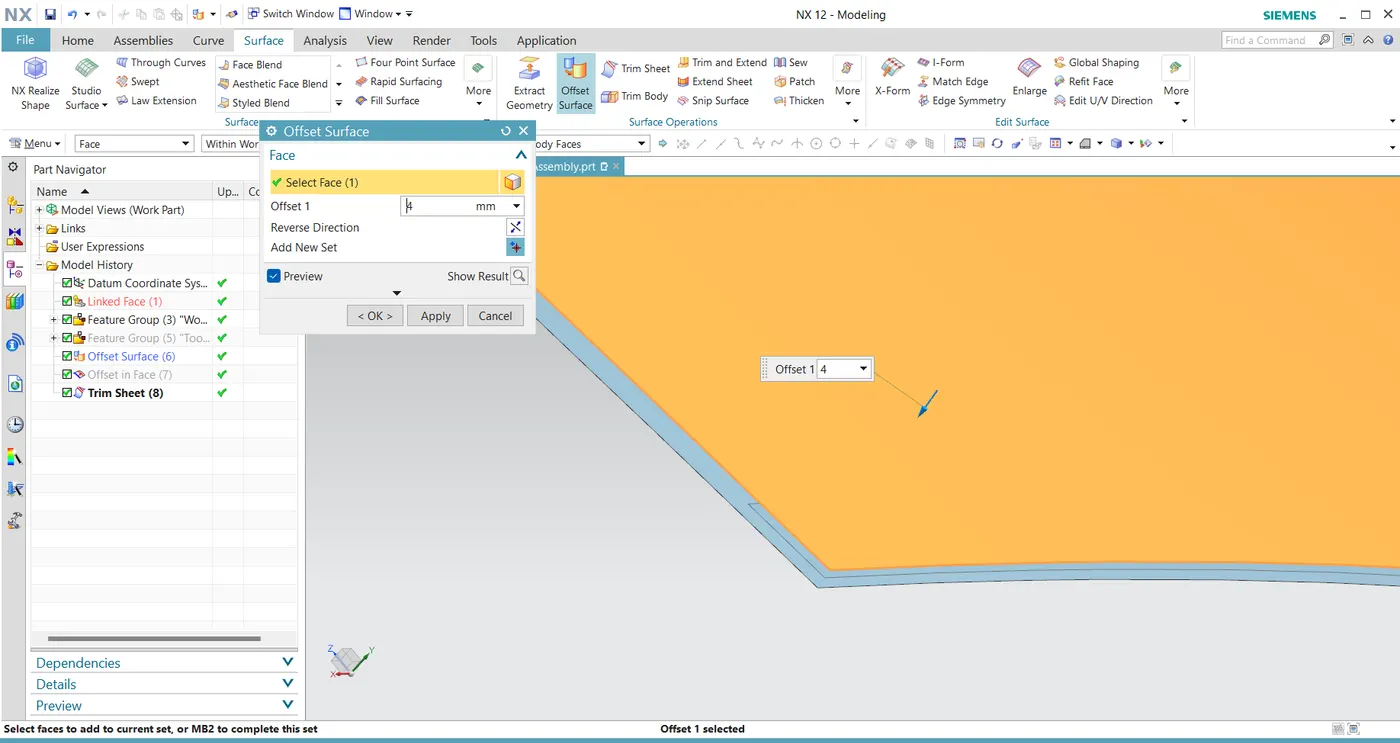
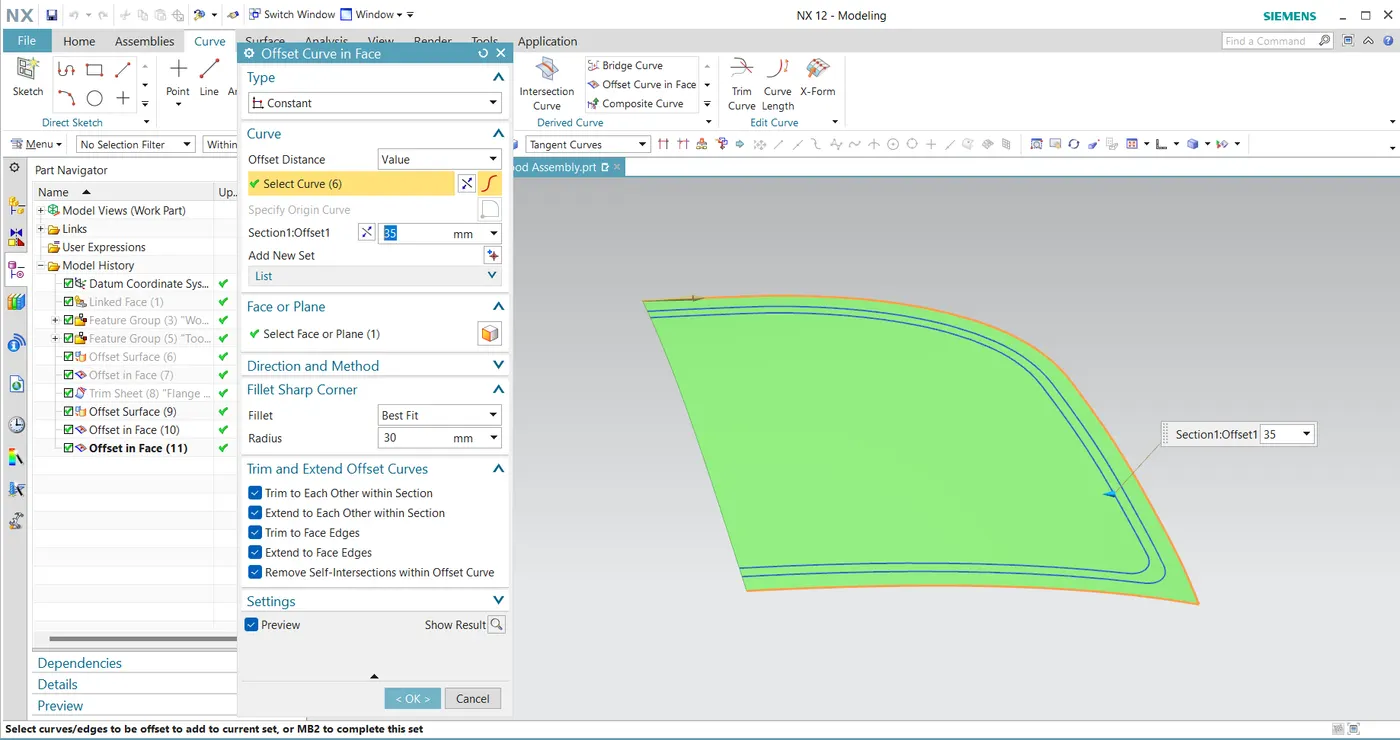
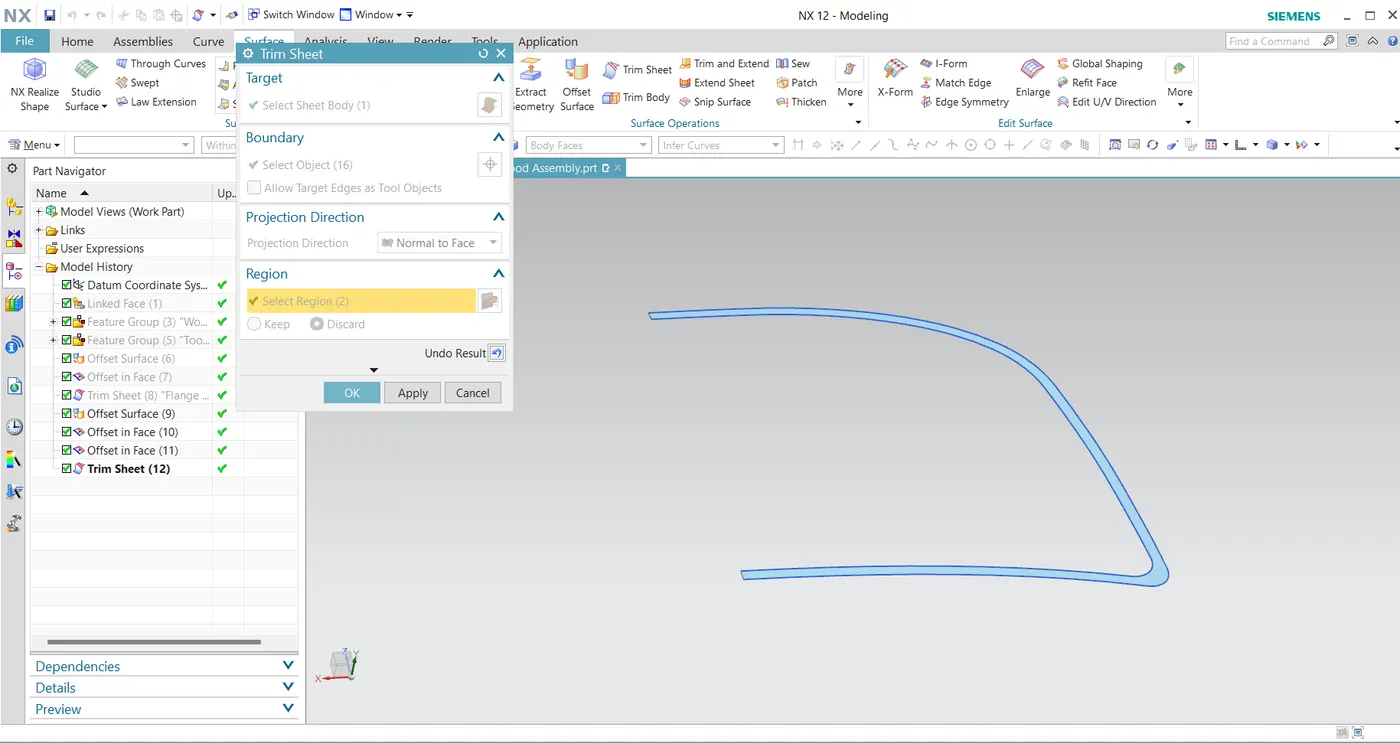
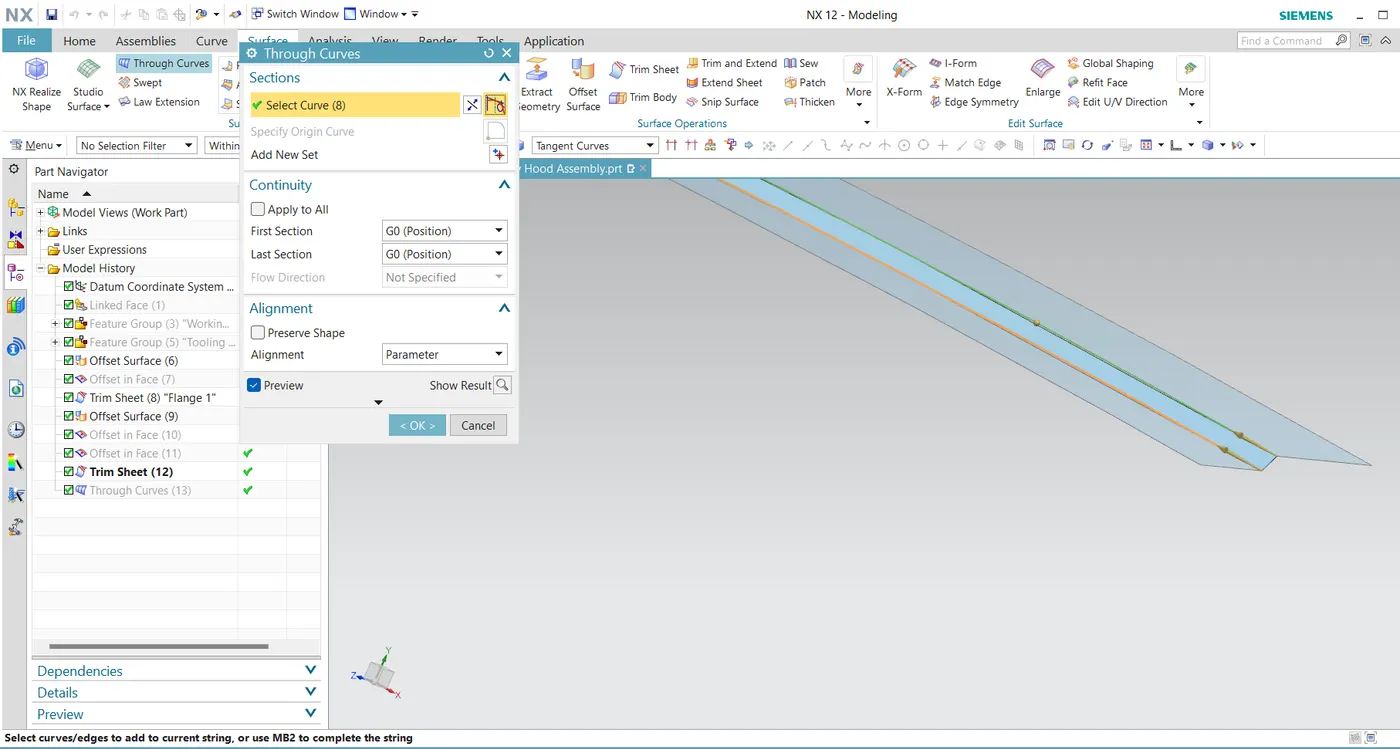
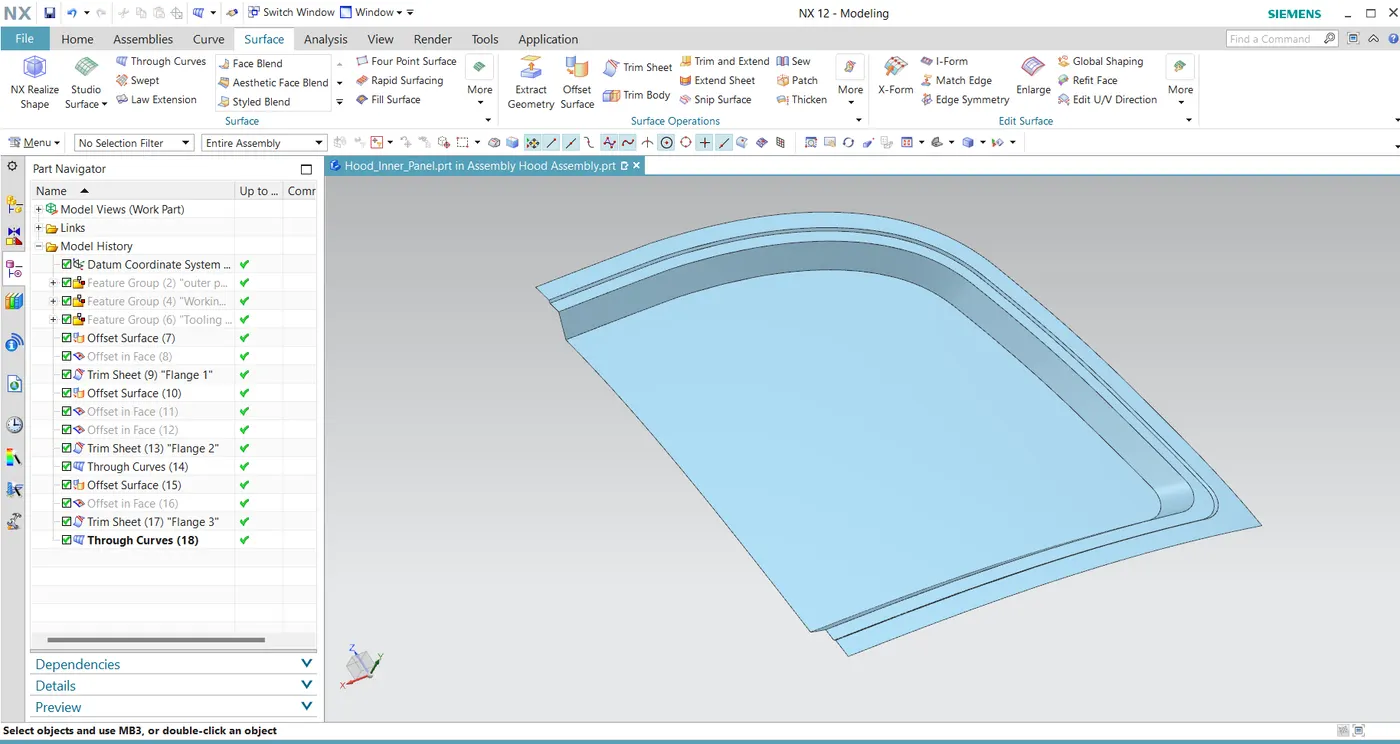
Remove the sharp edges using 'Face blend' Command
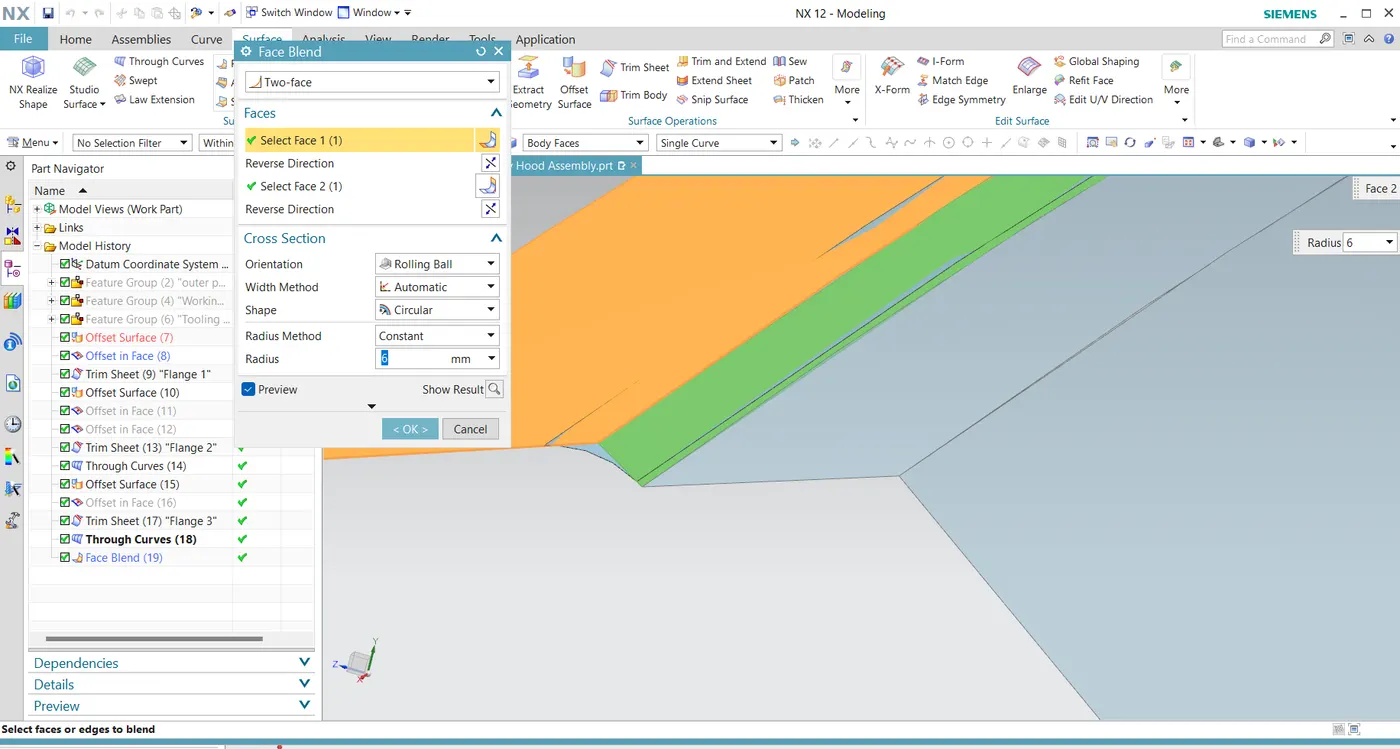
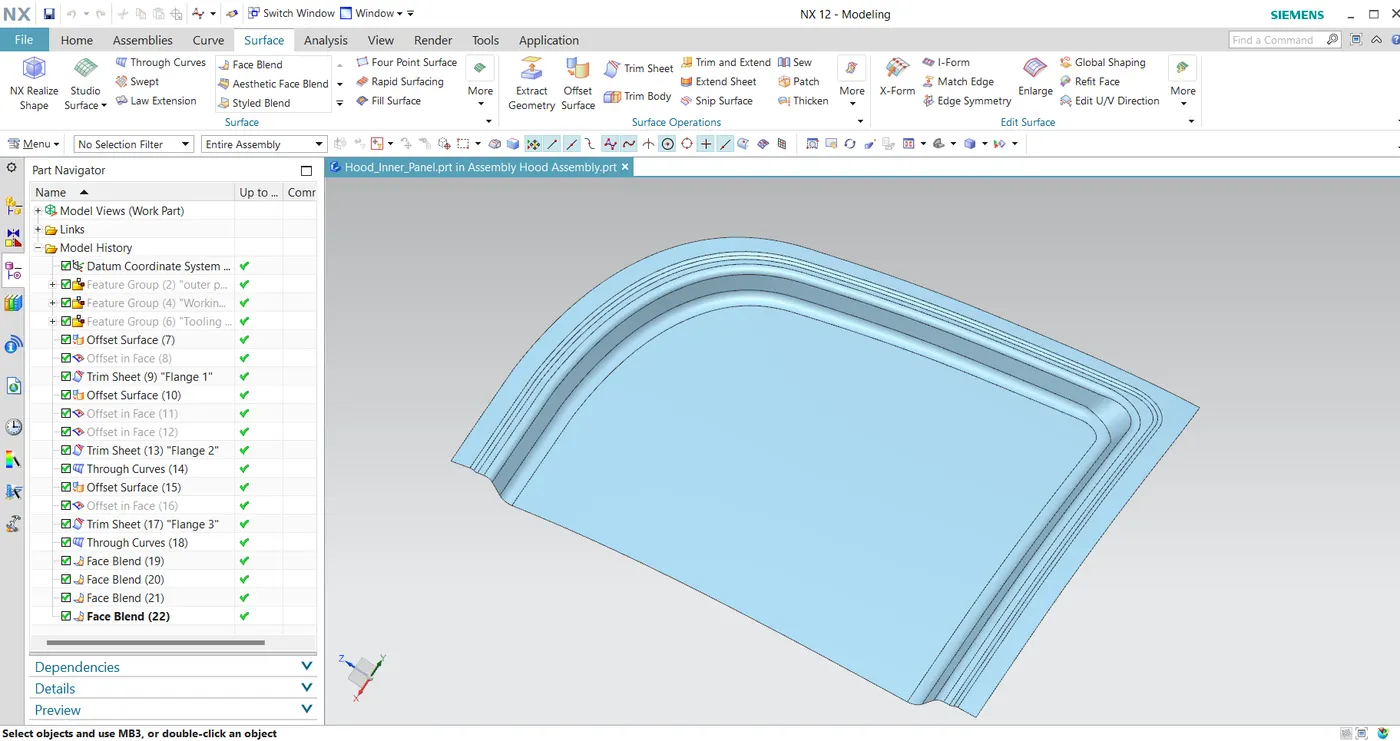
Step 8 : Import the hinges and striker for measuring the dimensions and then, create the Embosses.
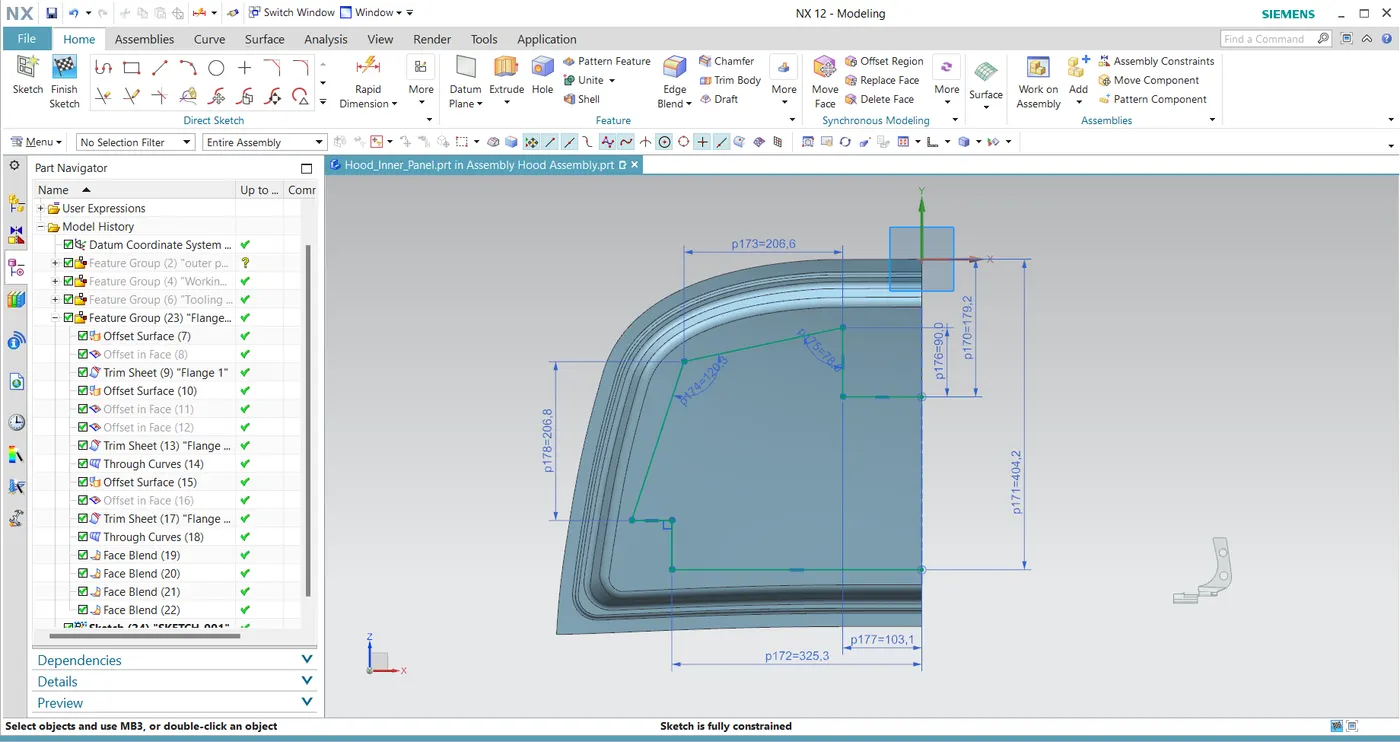
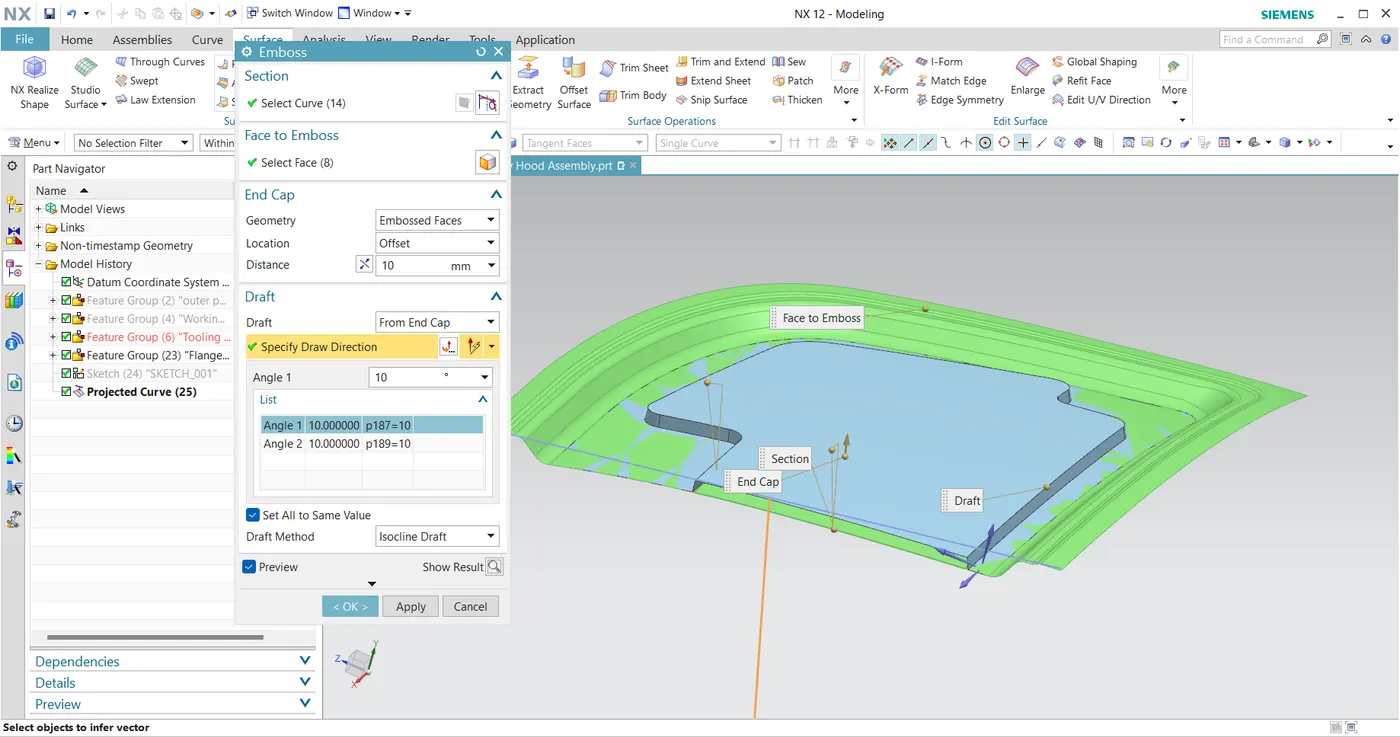
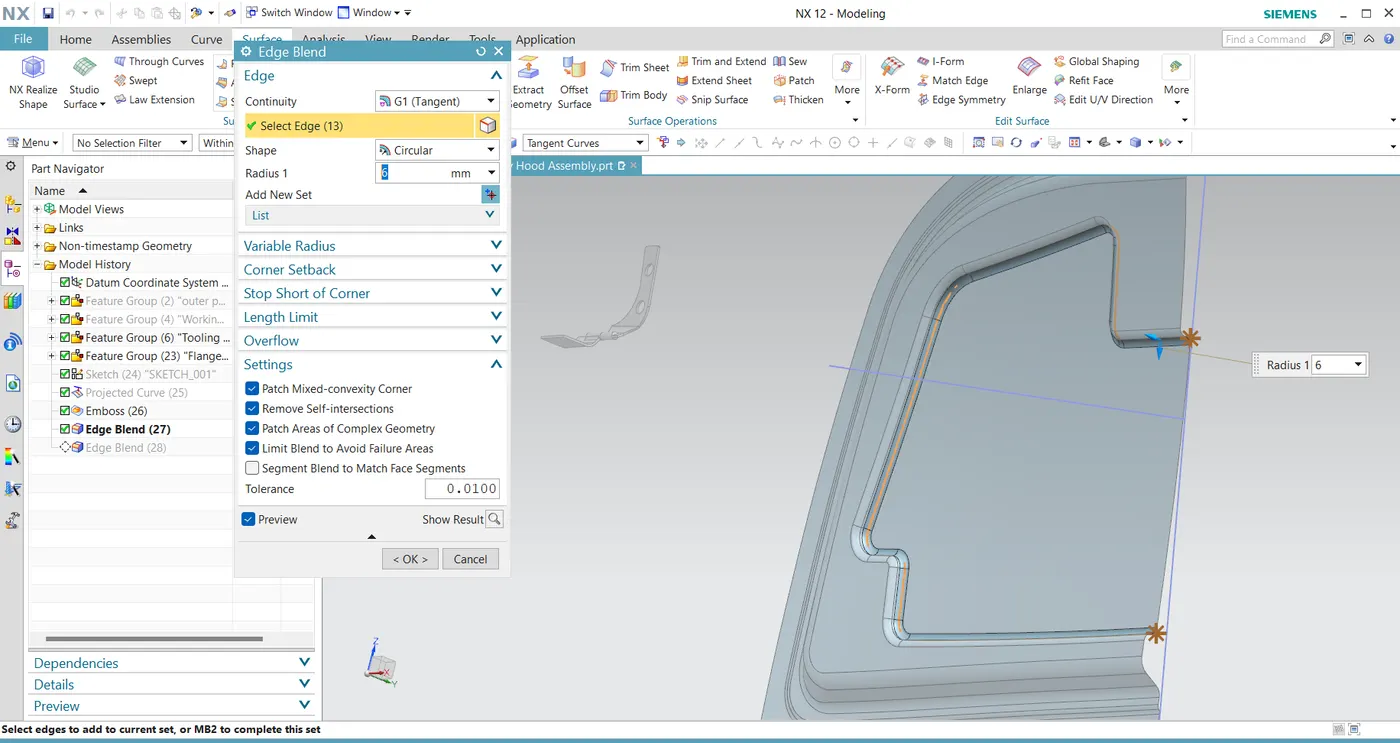
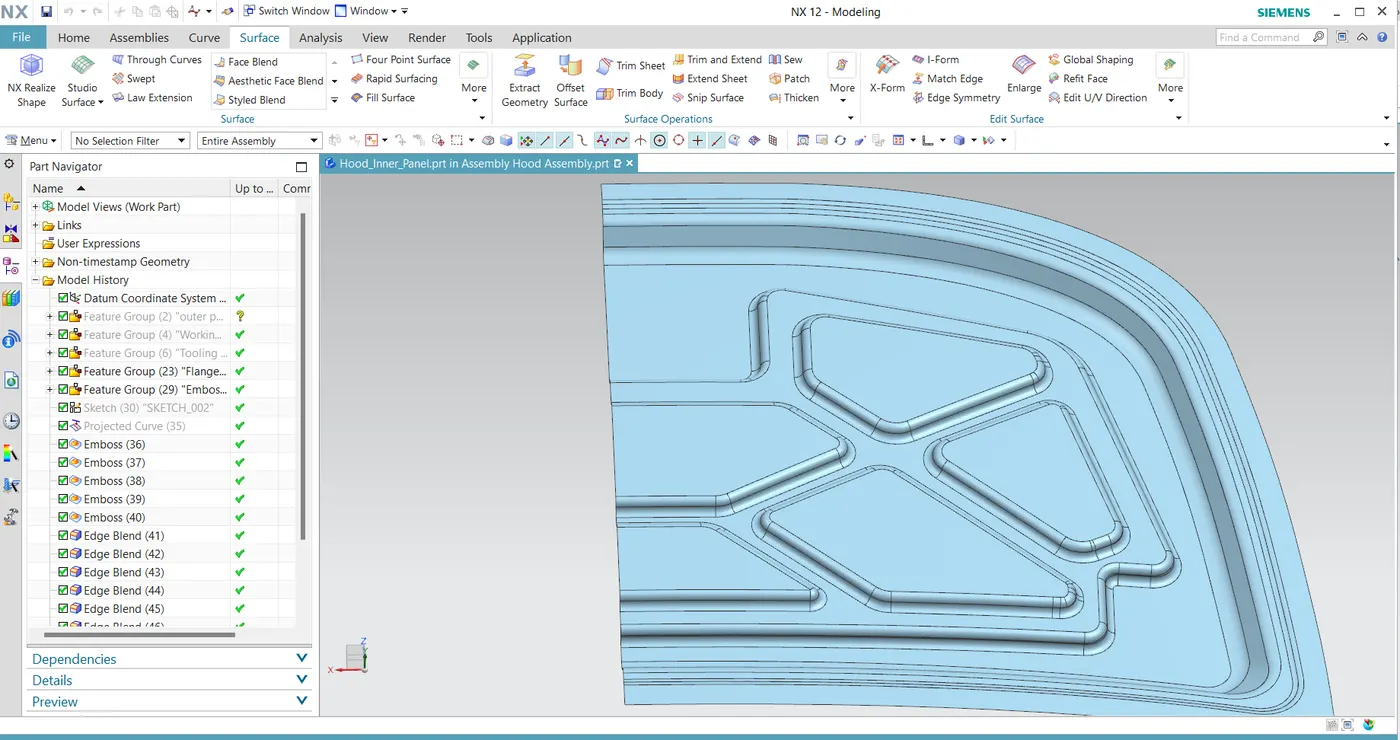
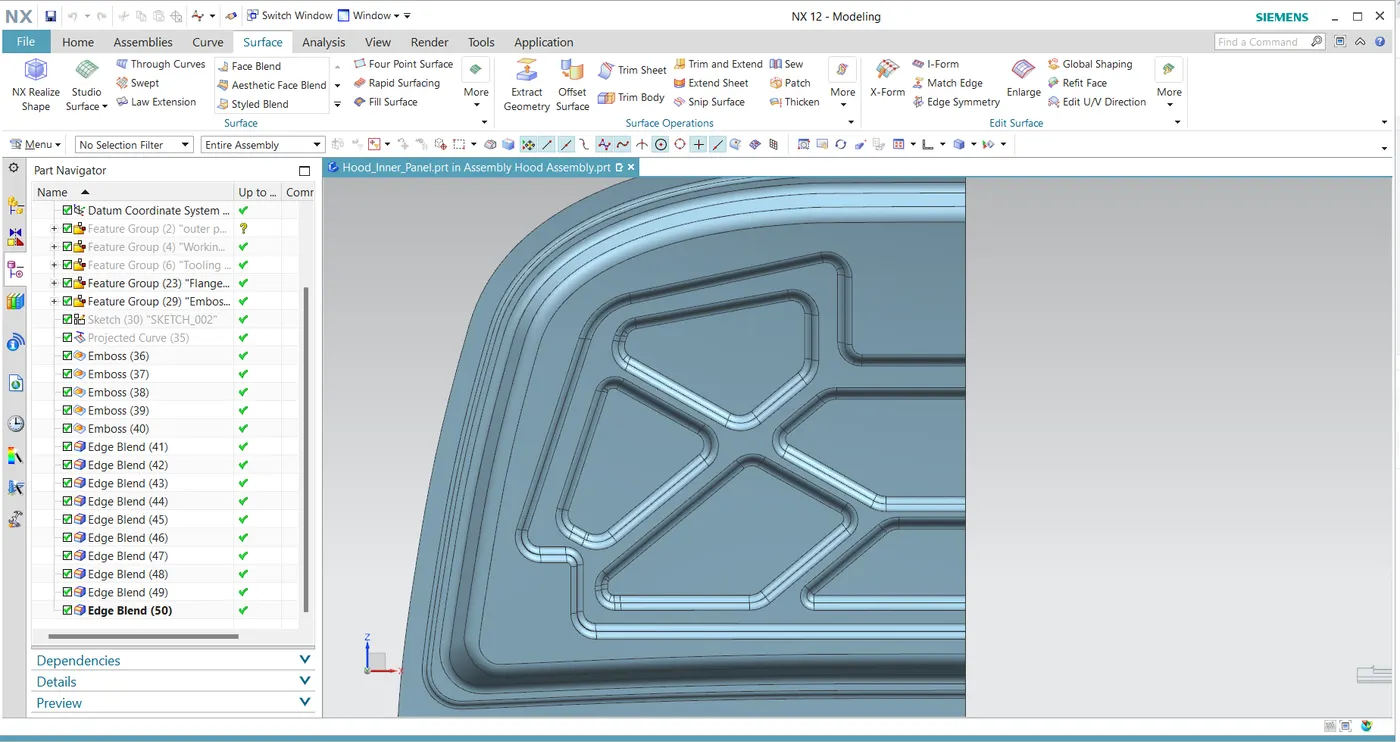
Step 9 : Create the cut outs and the mastic points
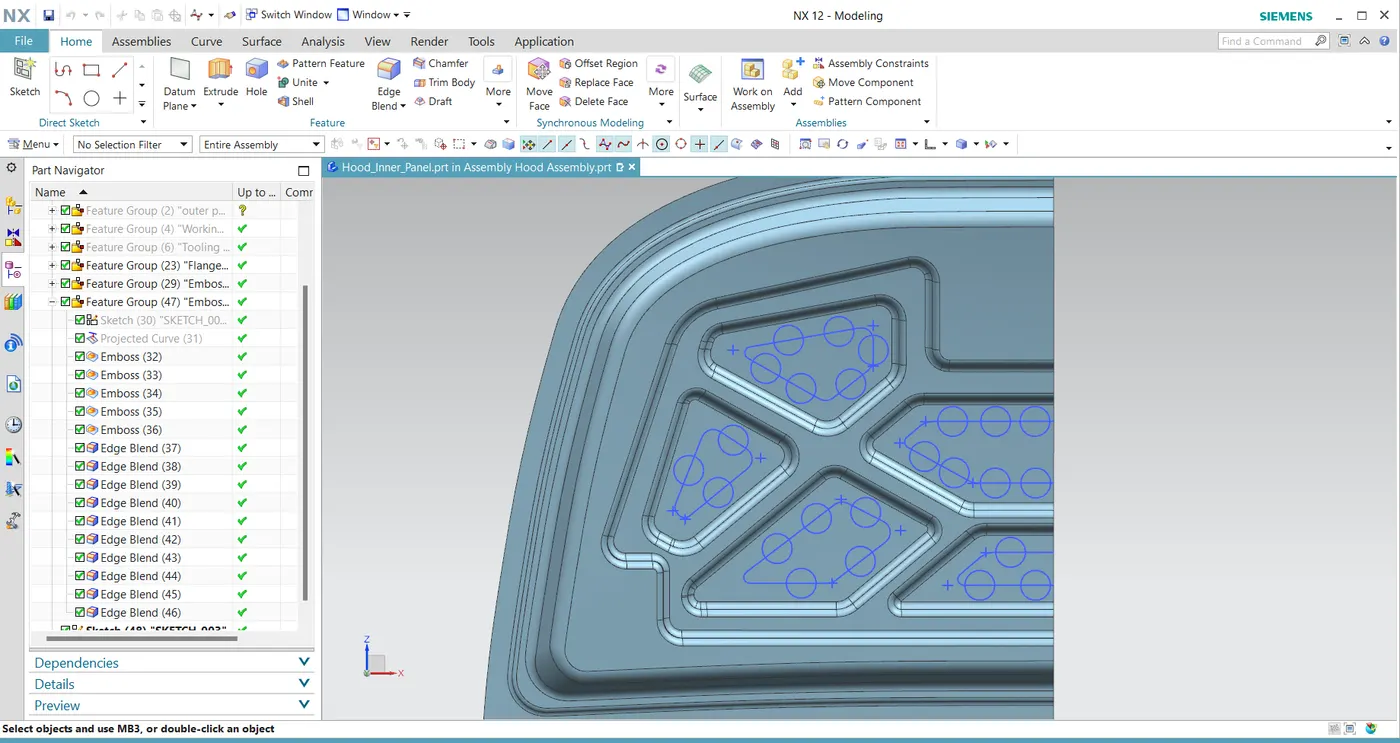
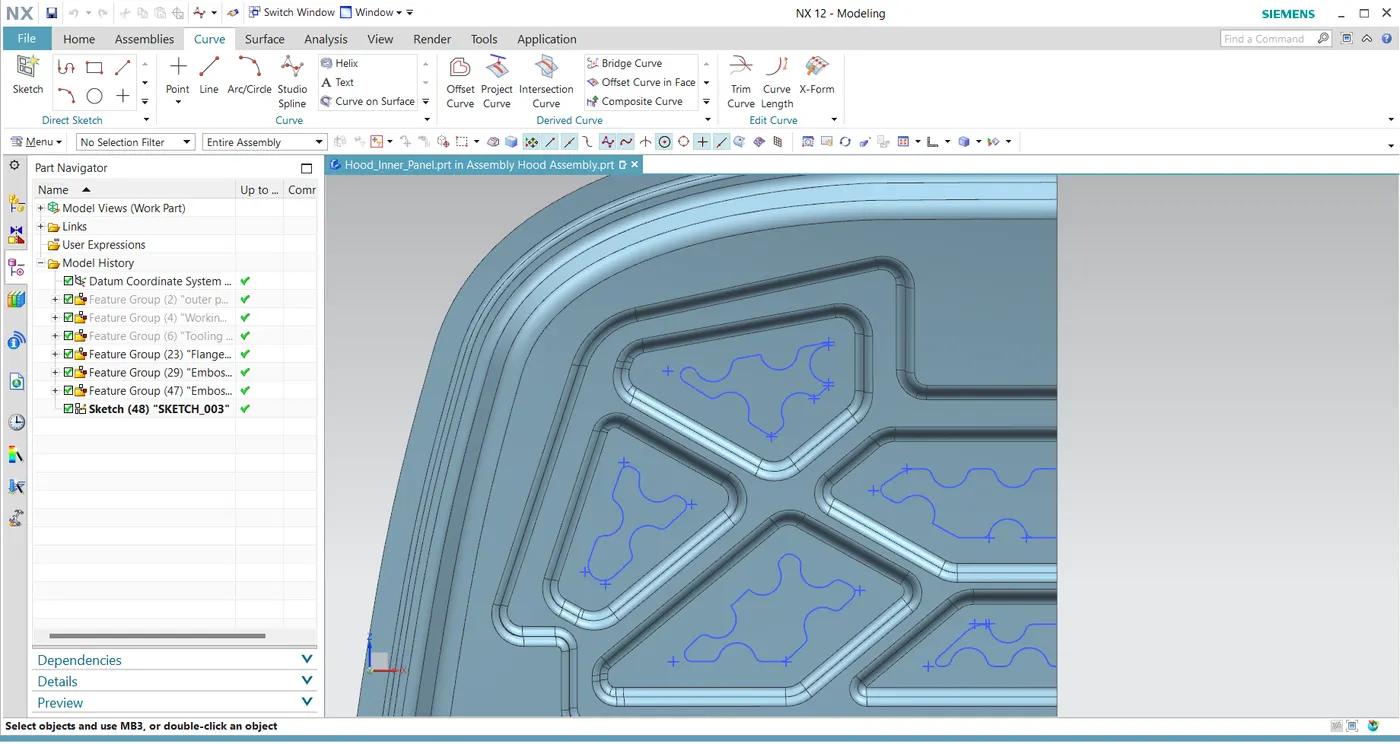
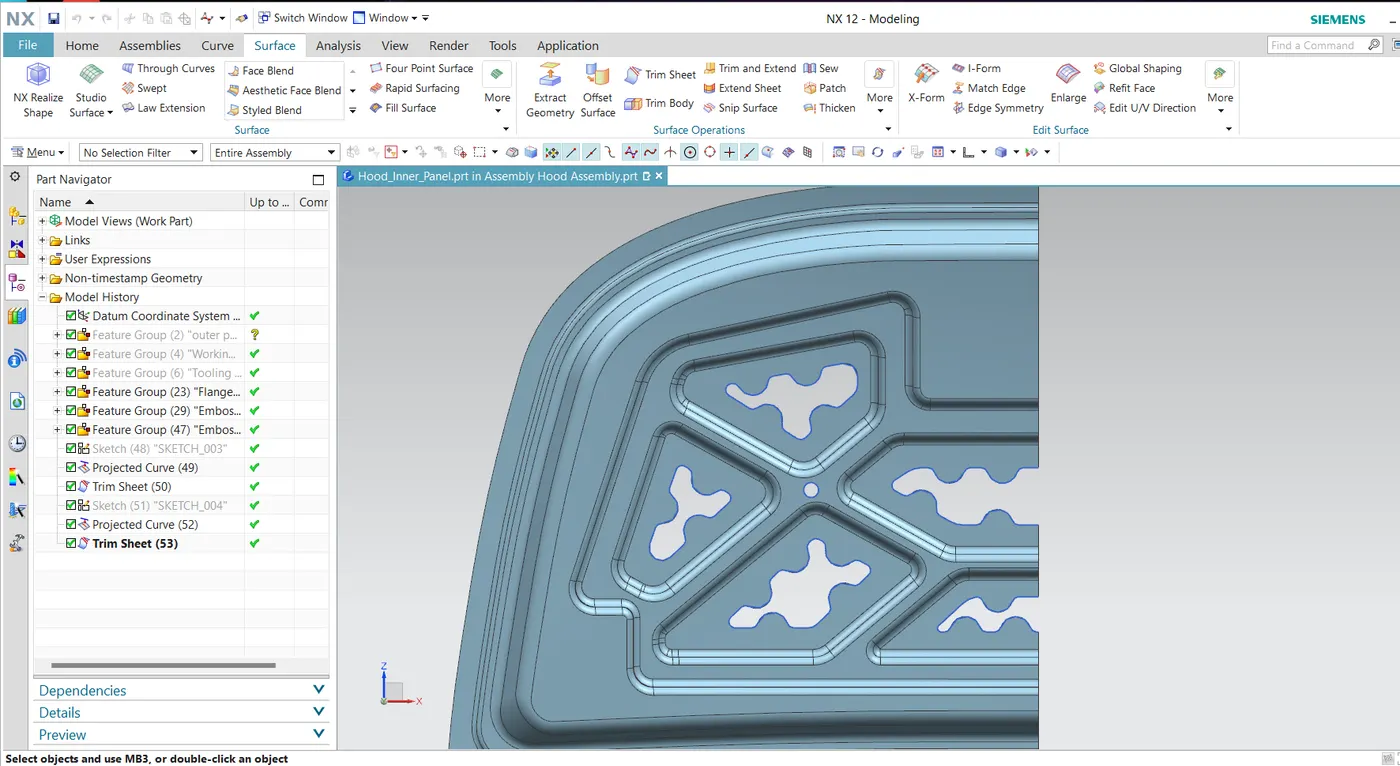
Step 10 : Create the hinge mound
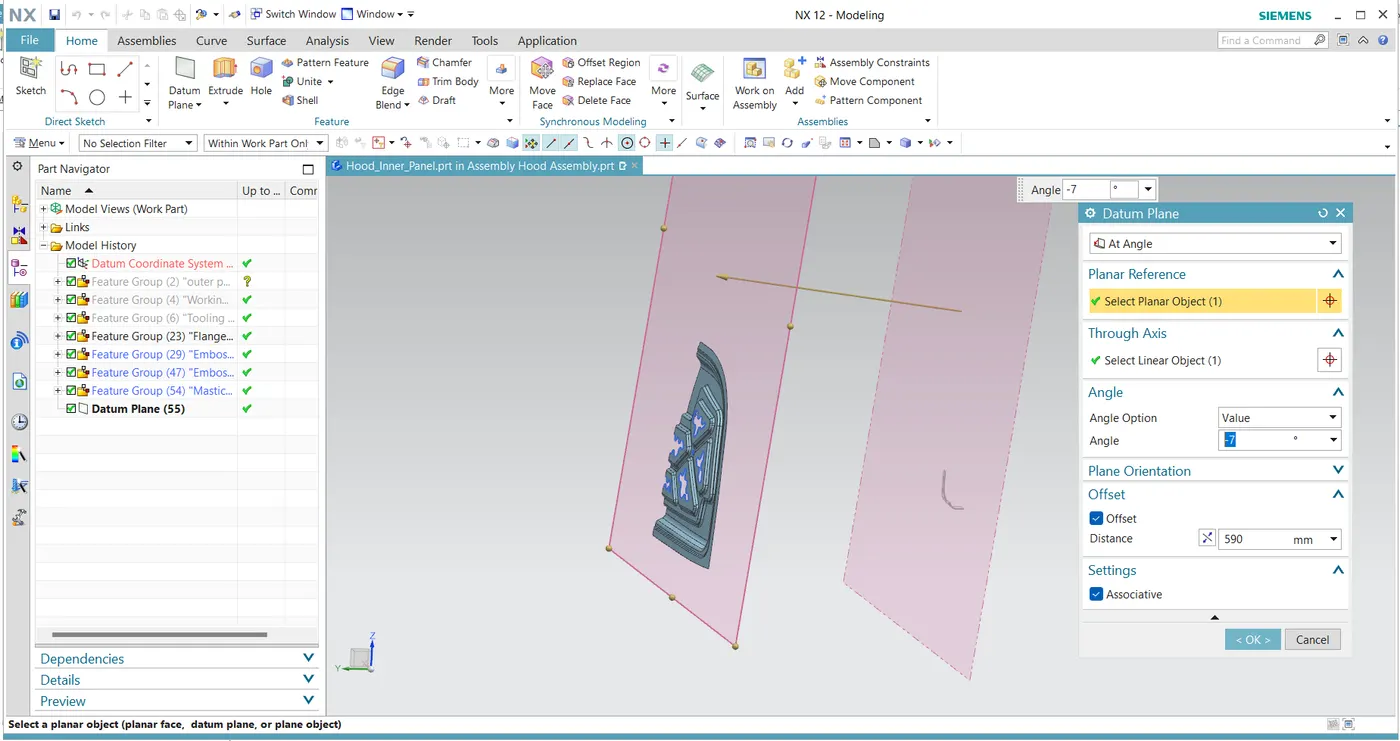
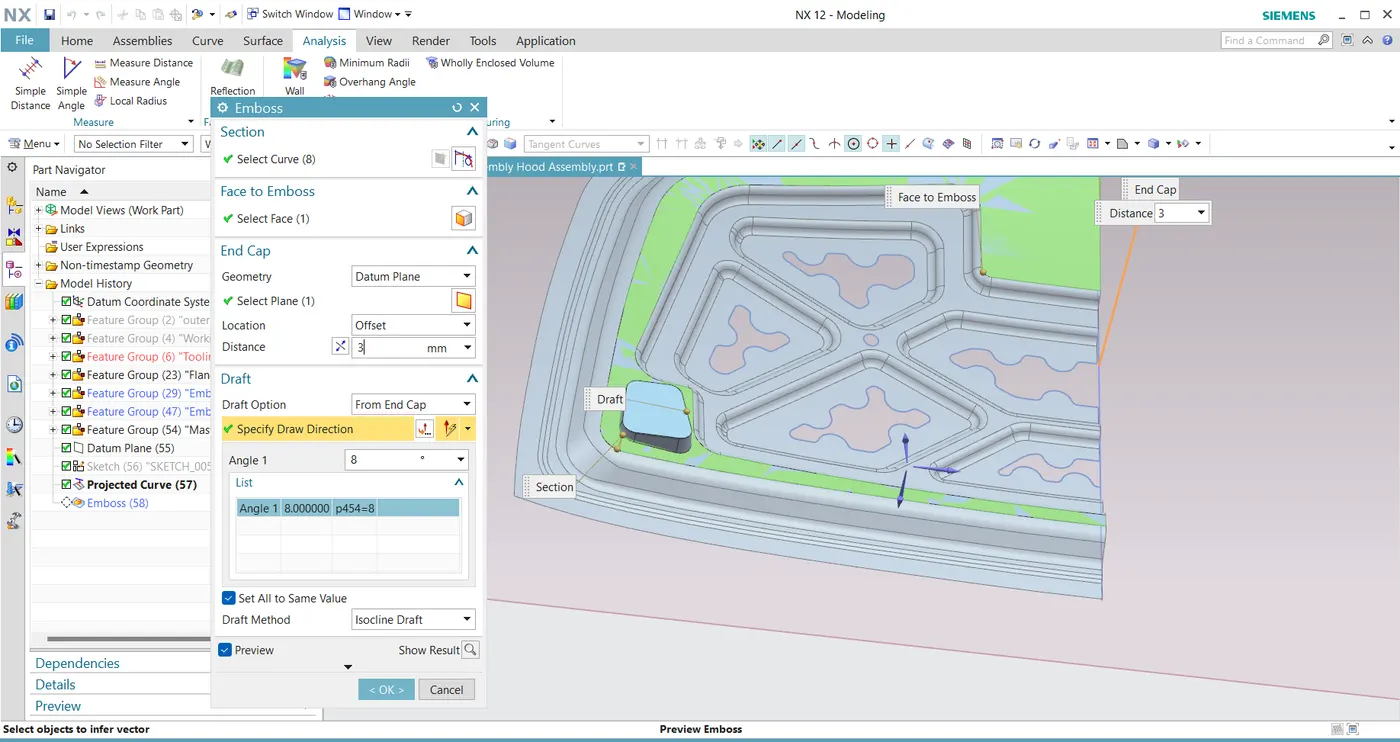
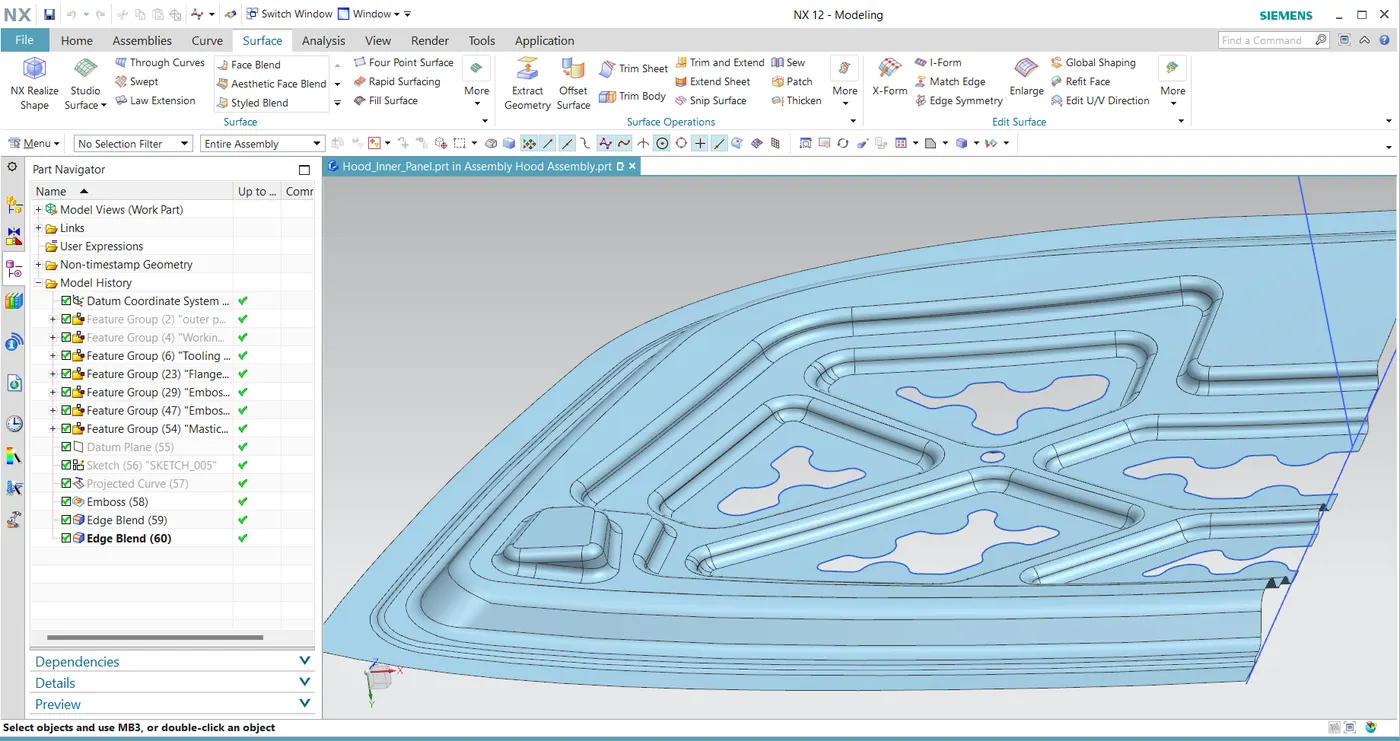
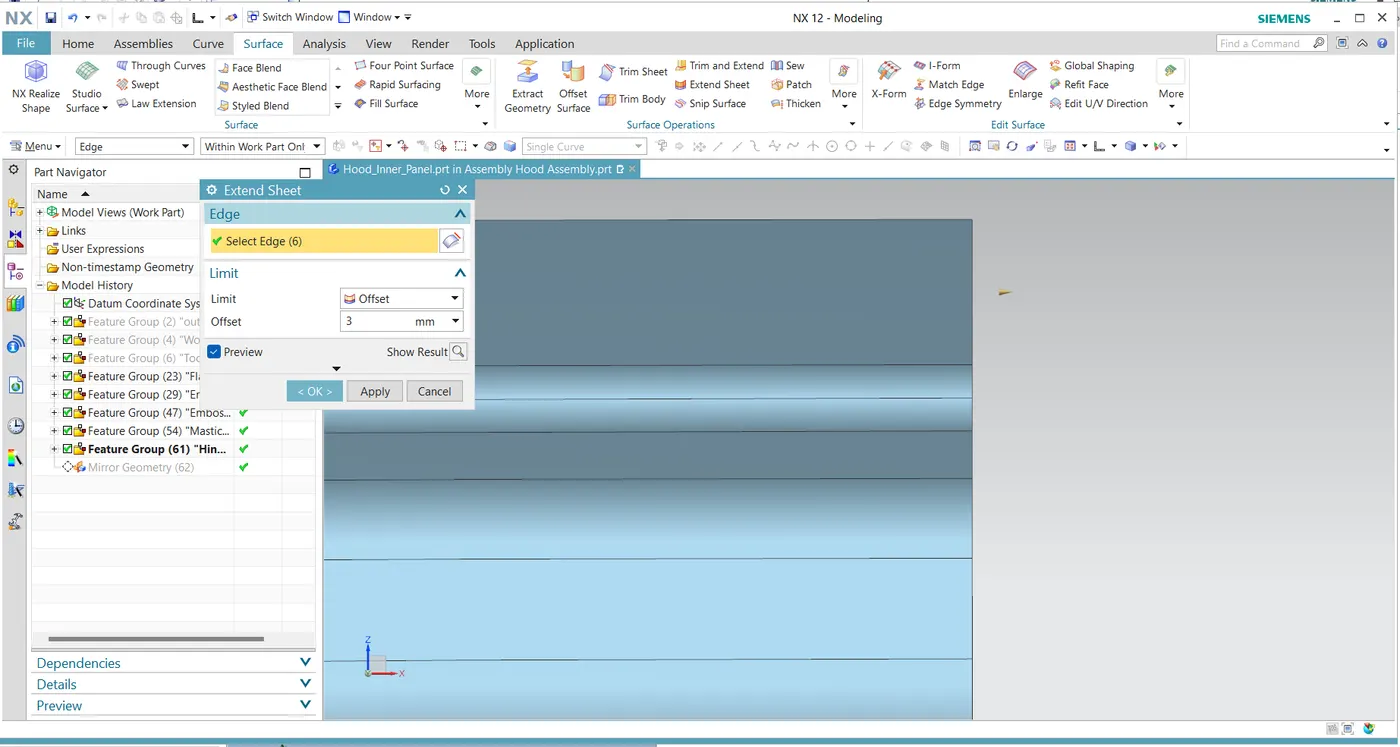
Step 11 : Mirror the part to make the complete hood.
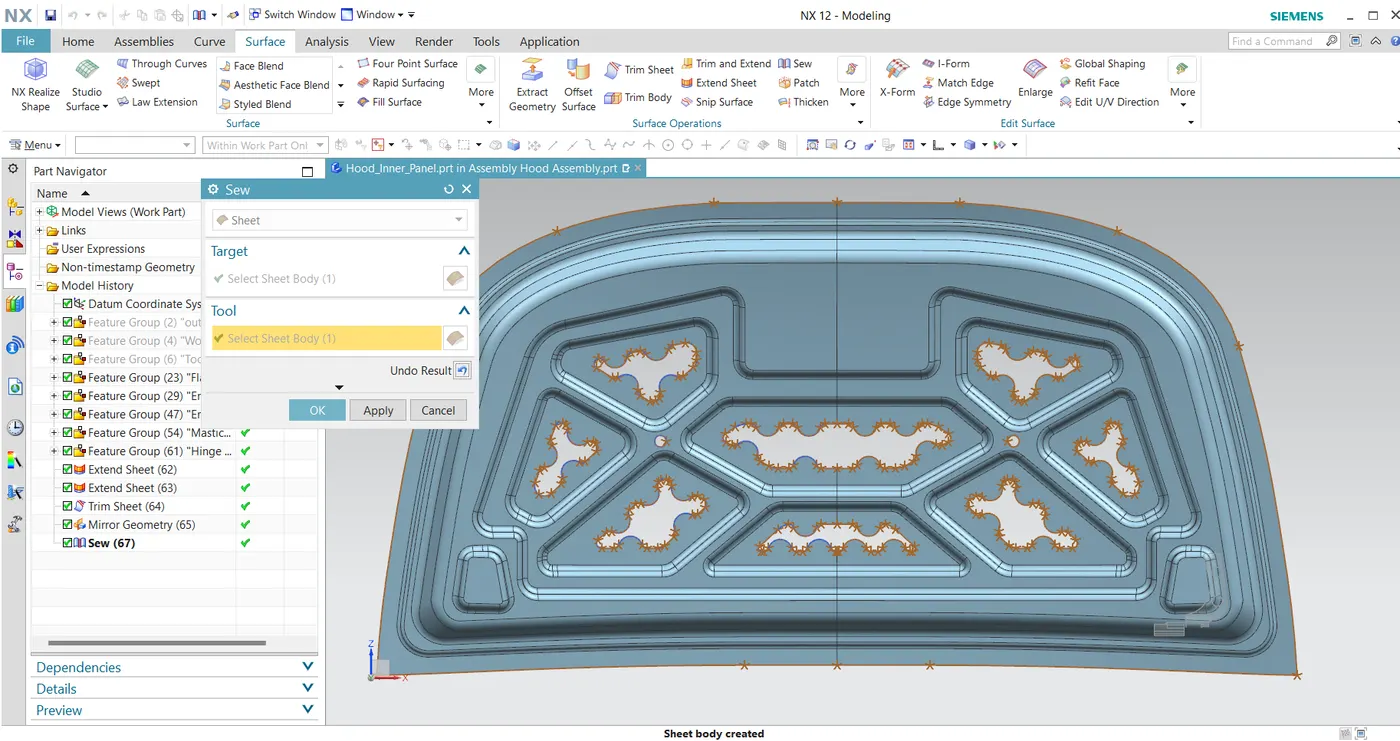
Crash force distribution
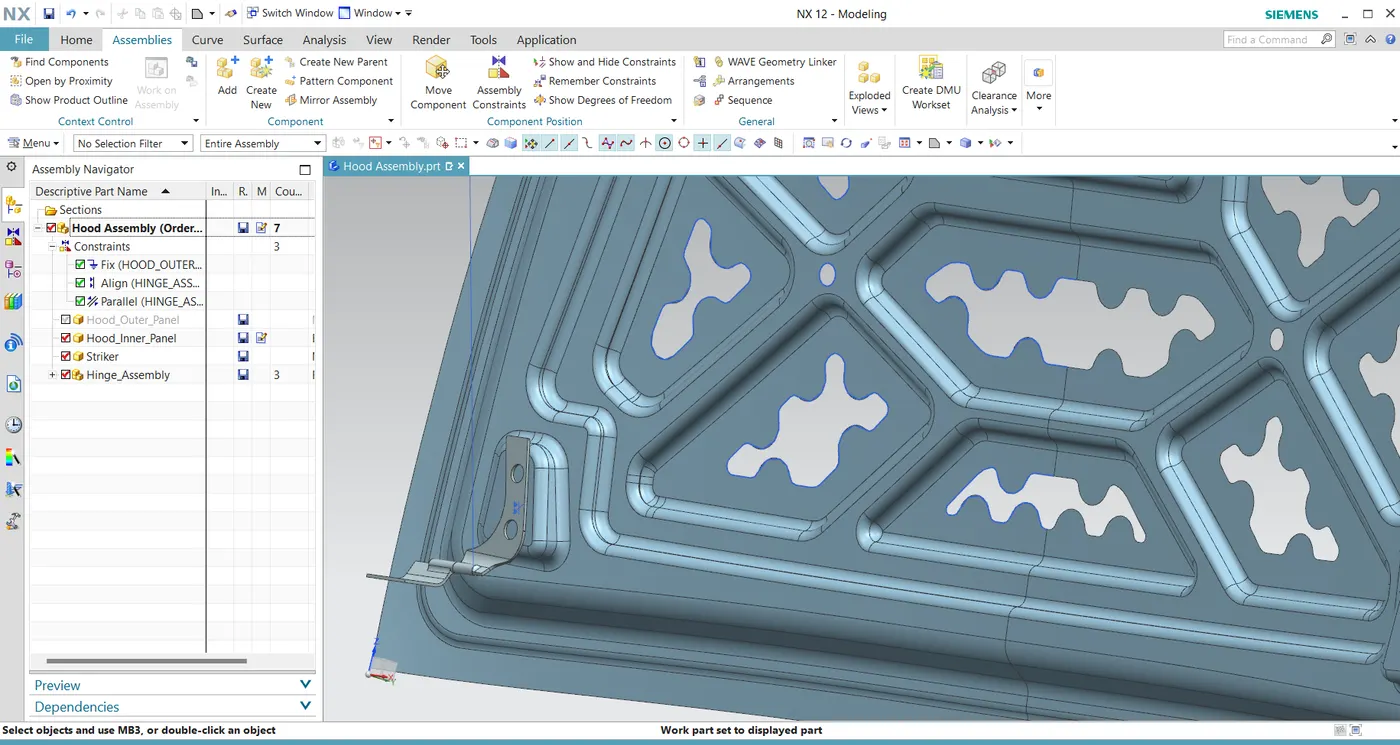
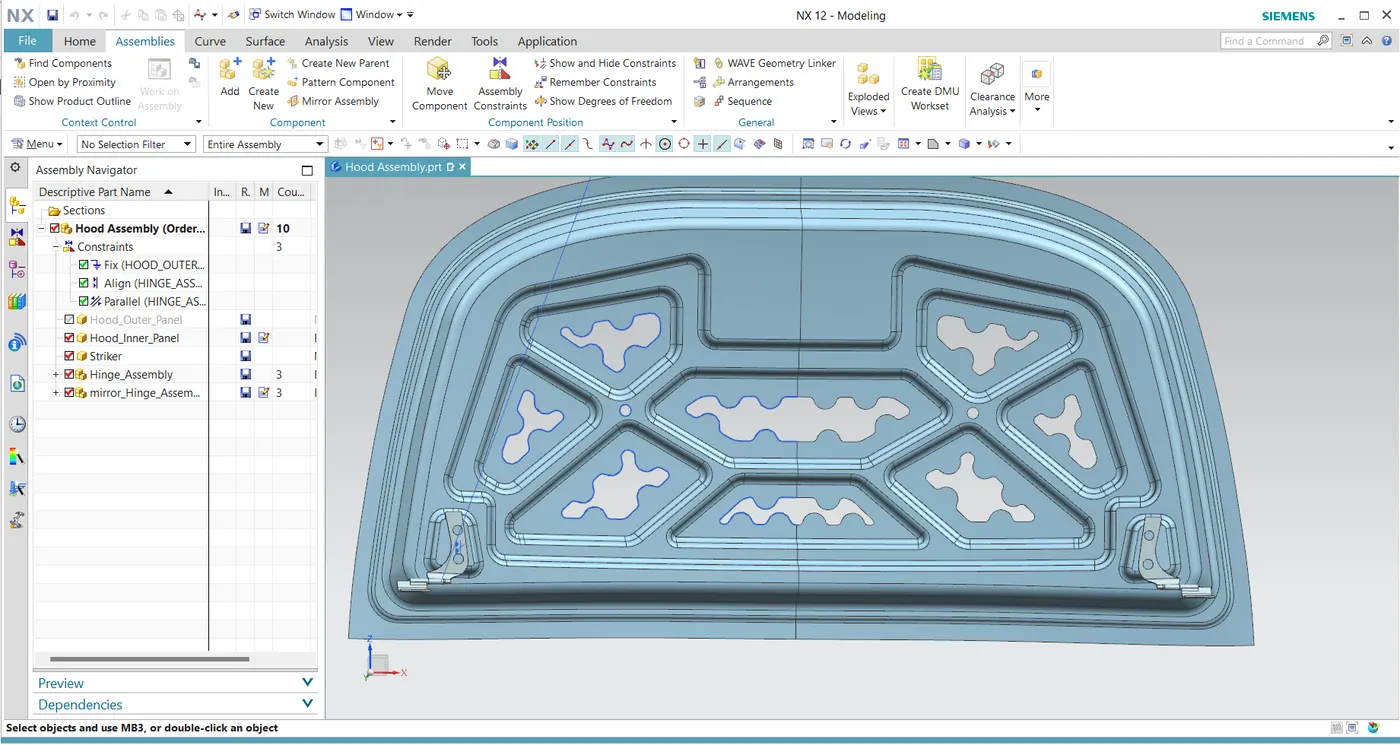
Step 12 : Give constrains to hinge assembly
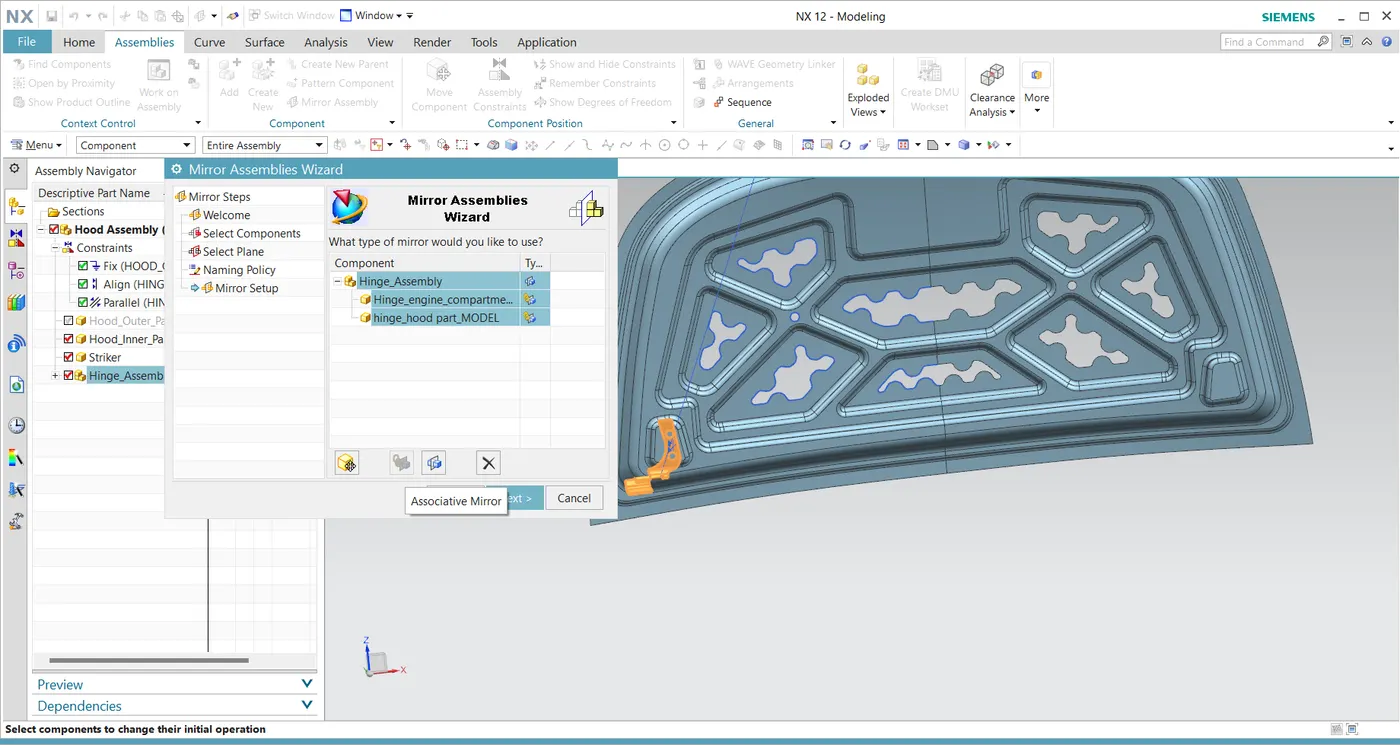
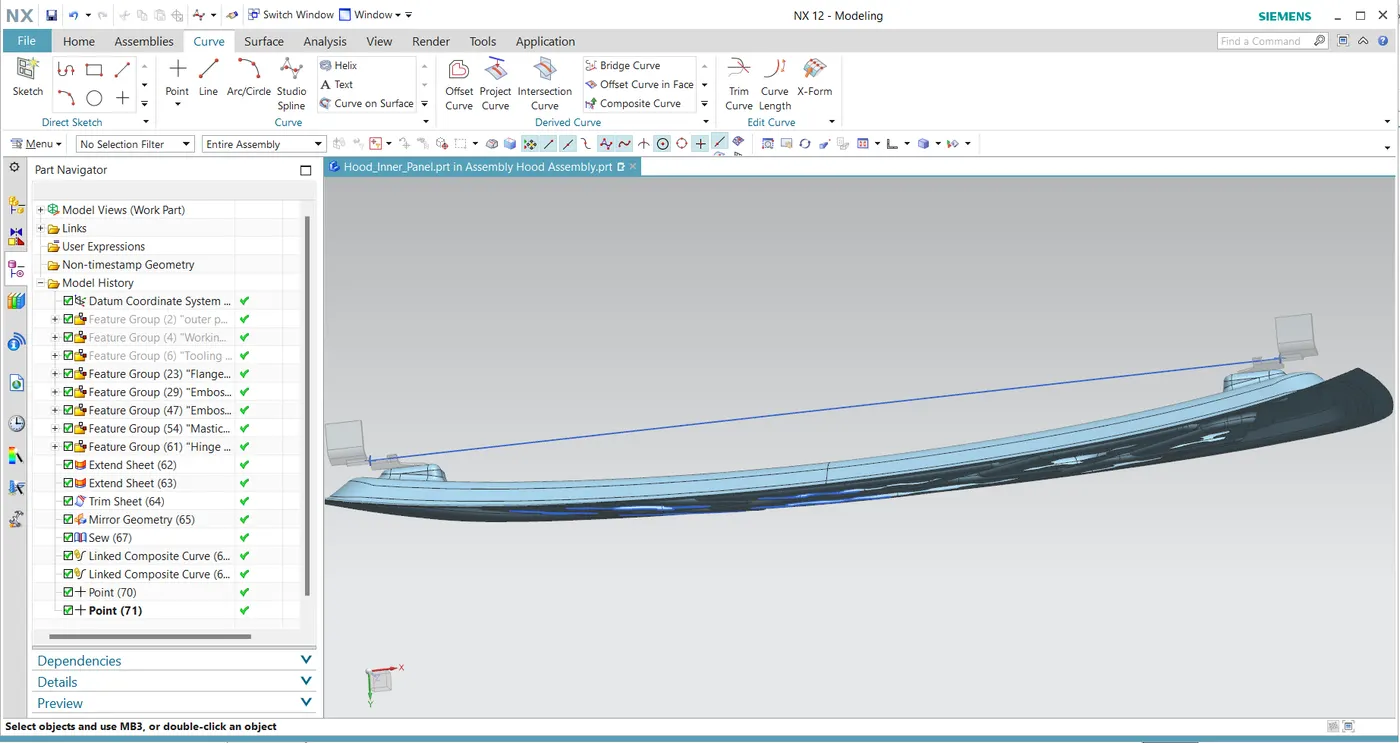
Step 13 : Create hinge axis
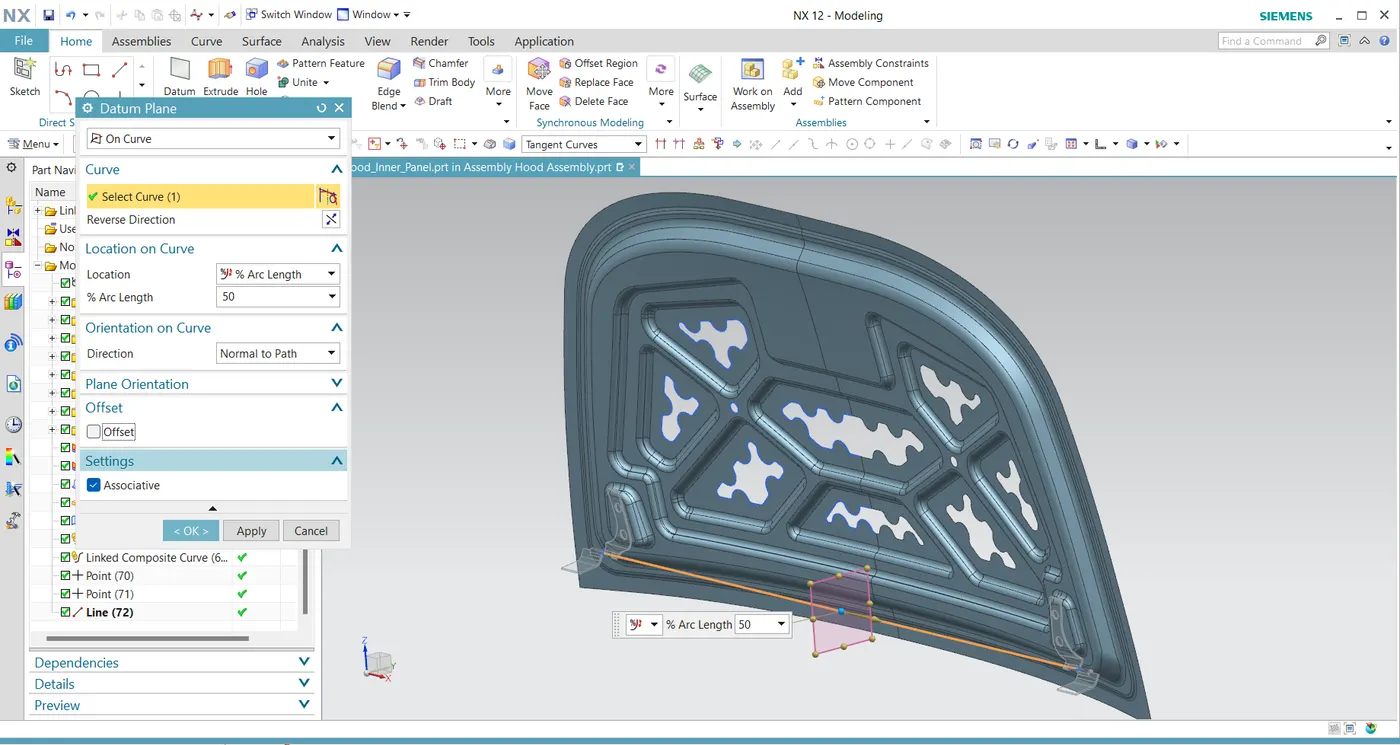
Step 14 : Create the Trajectory of hood and give constrain to the striker.
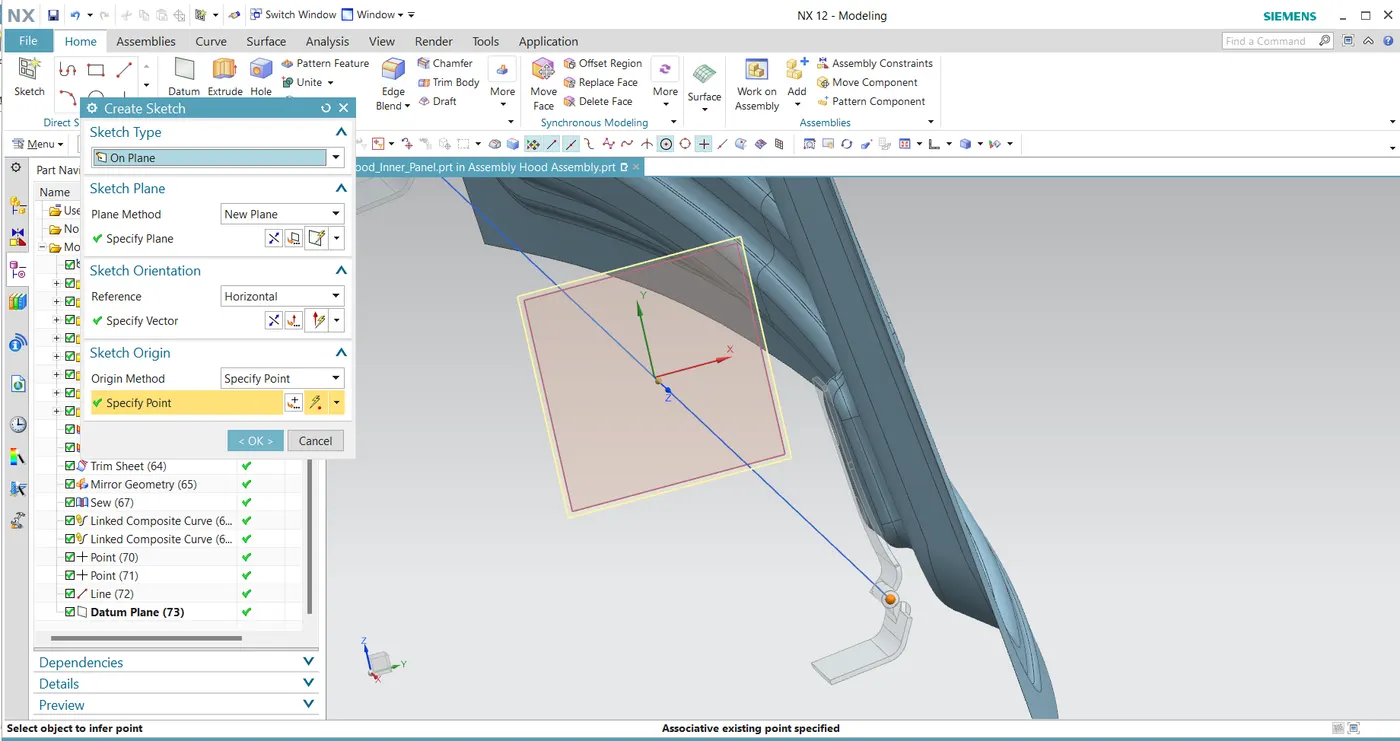
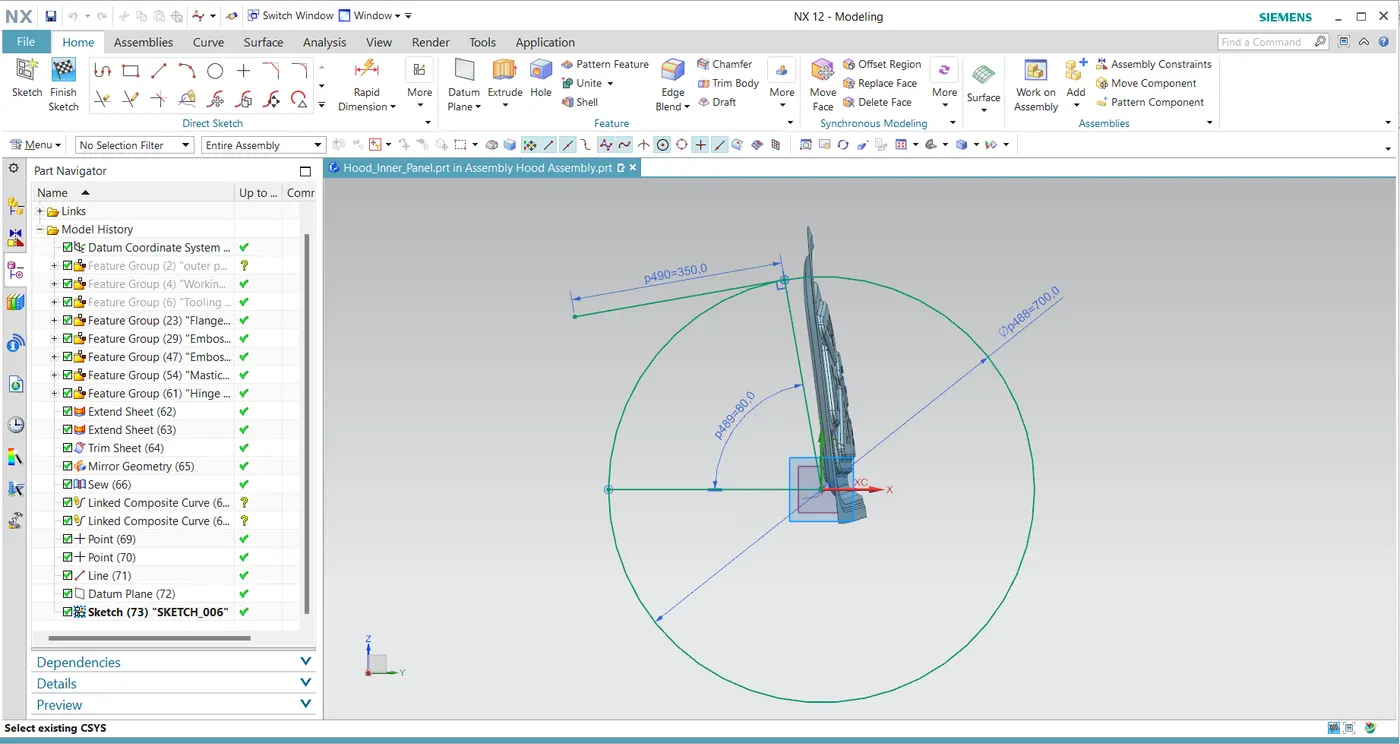
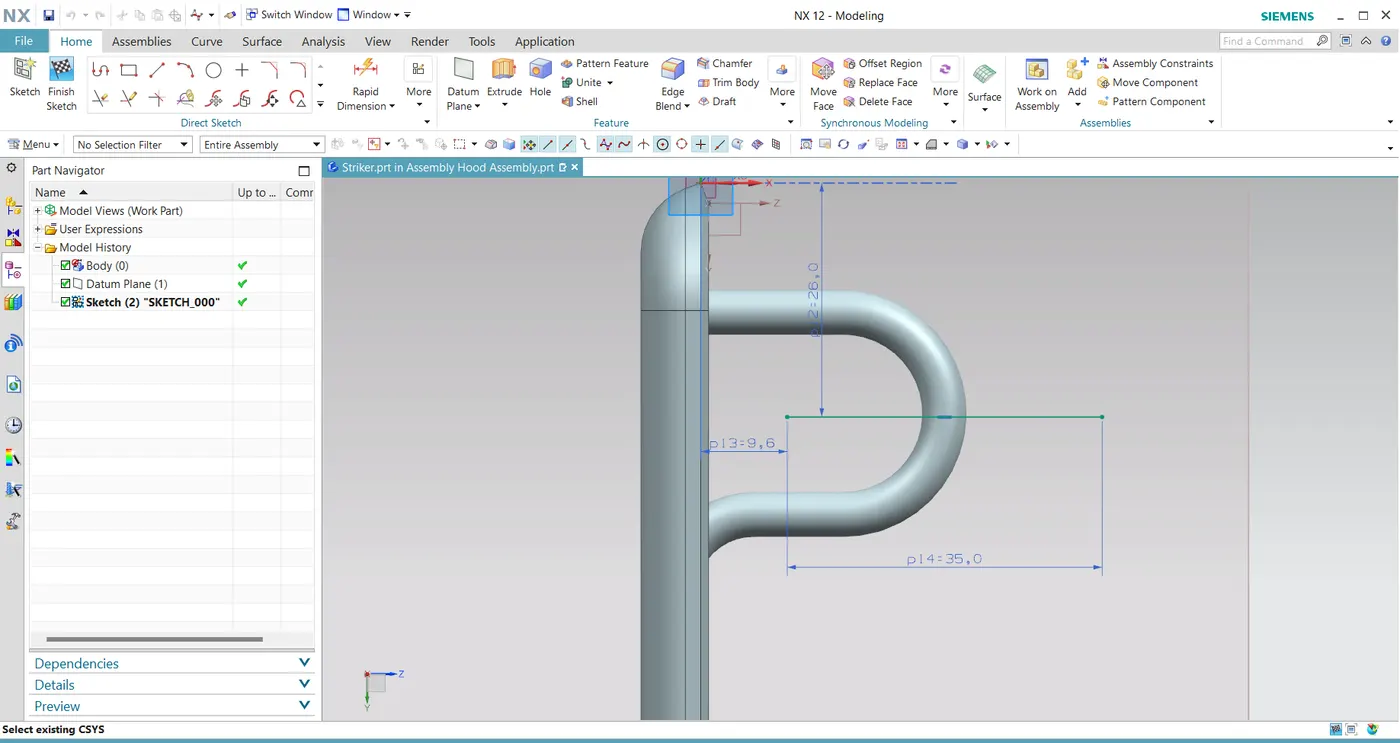
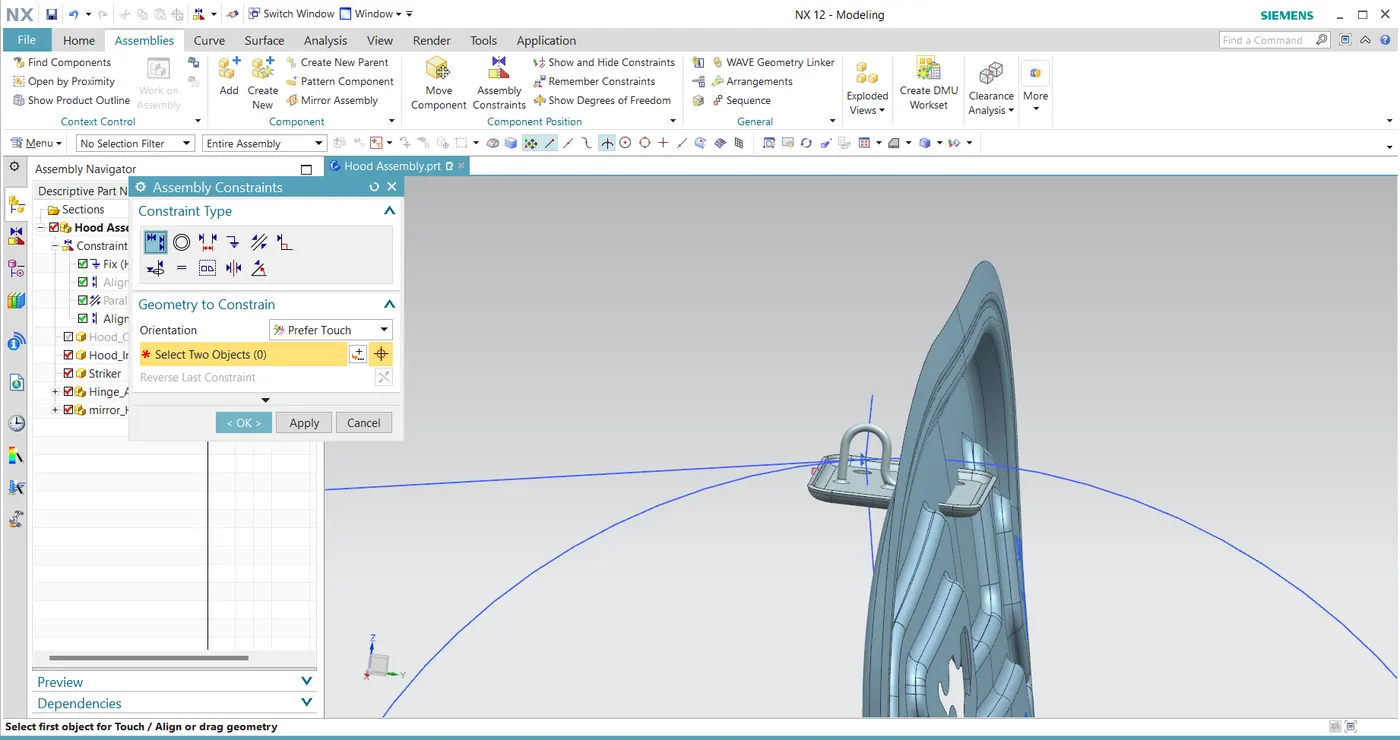
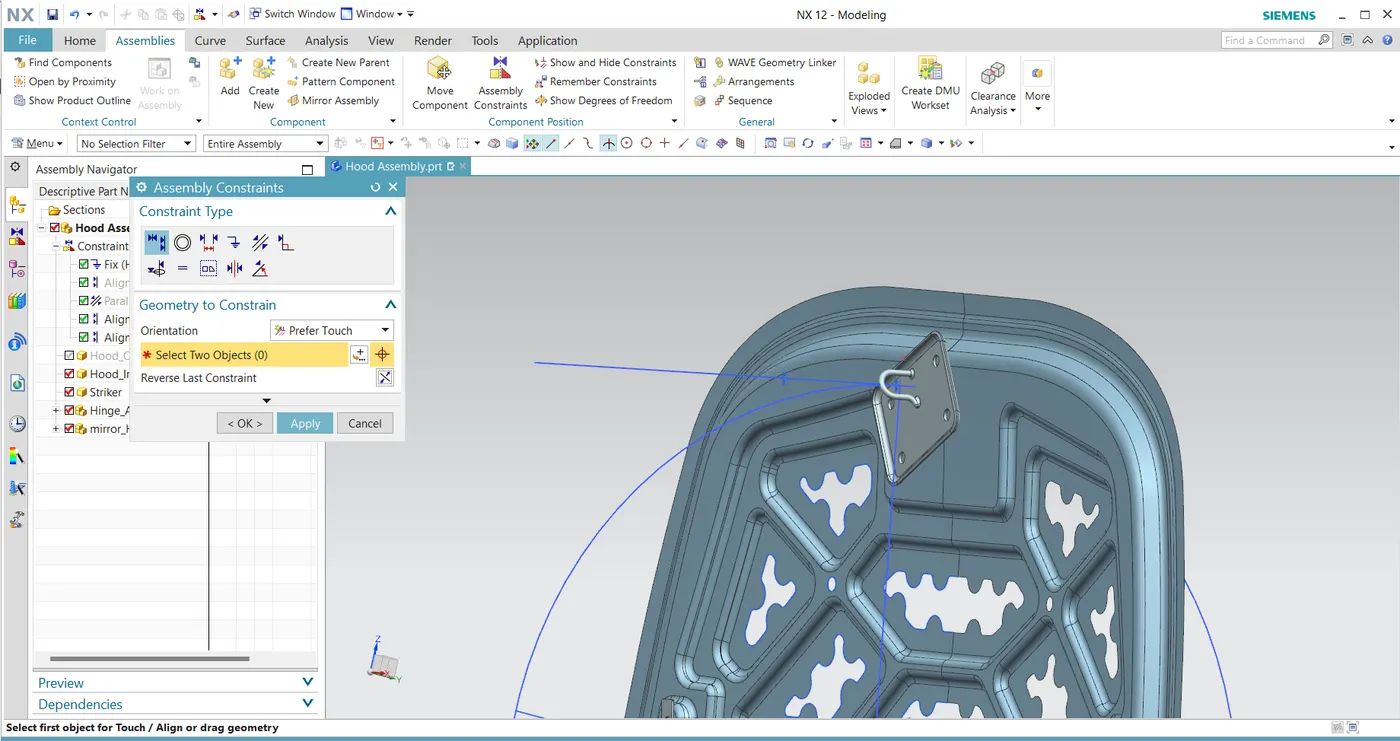
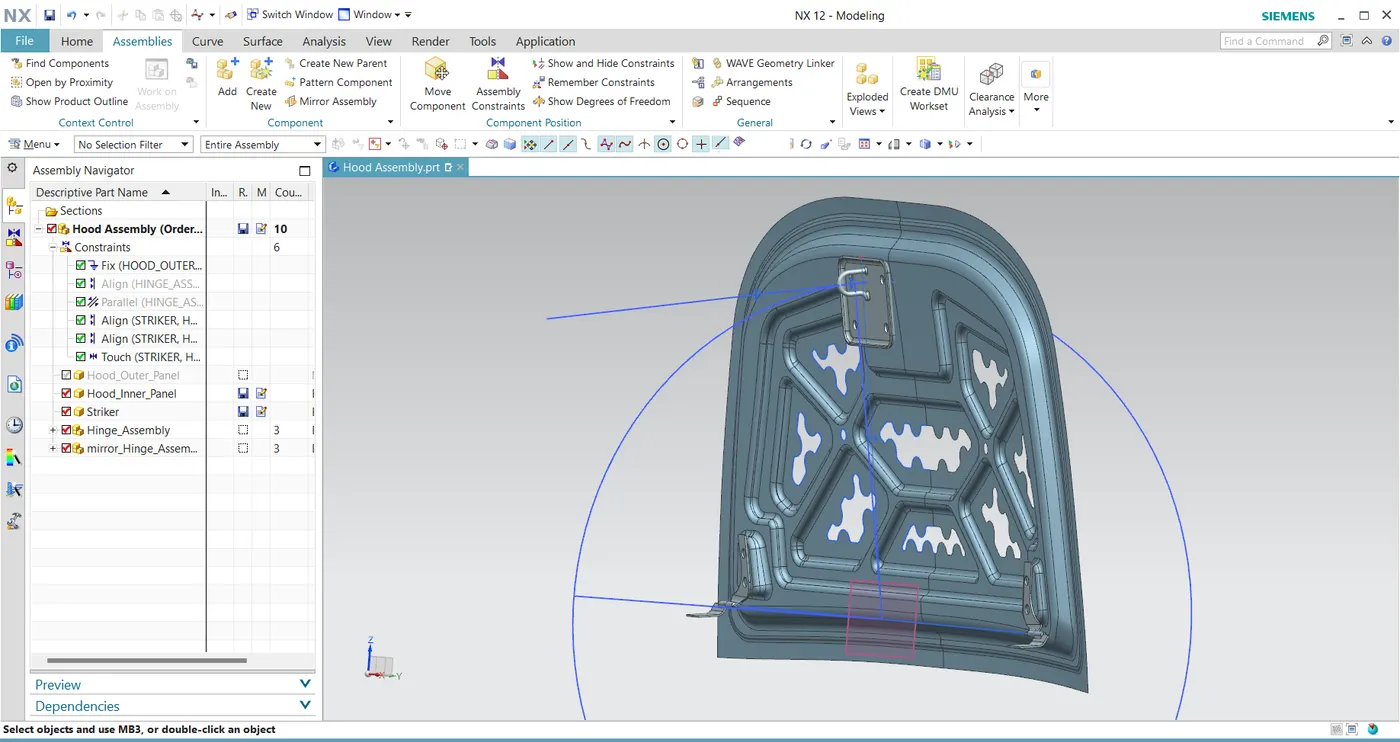
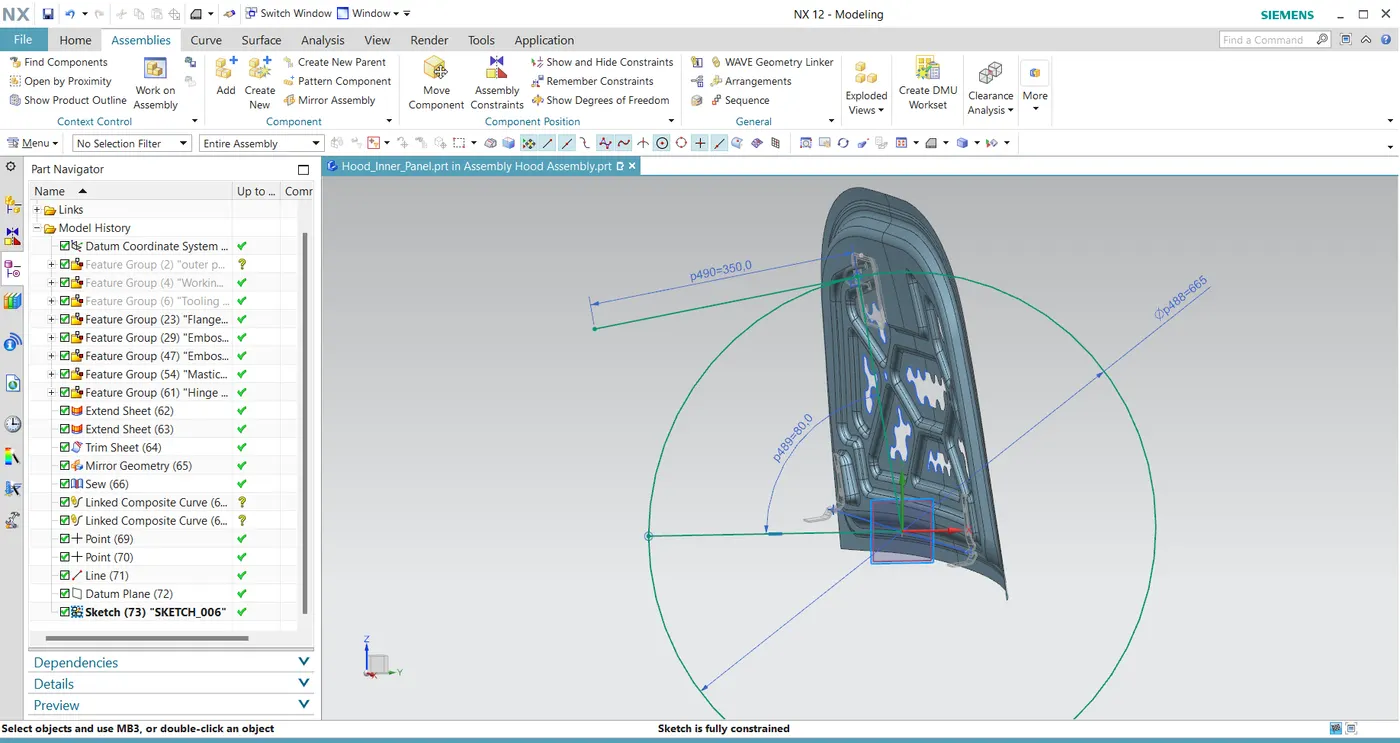
Step 15 : Create the striker mount
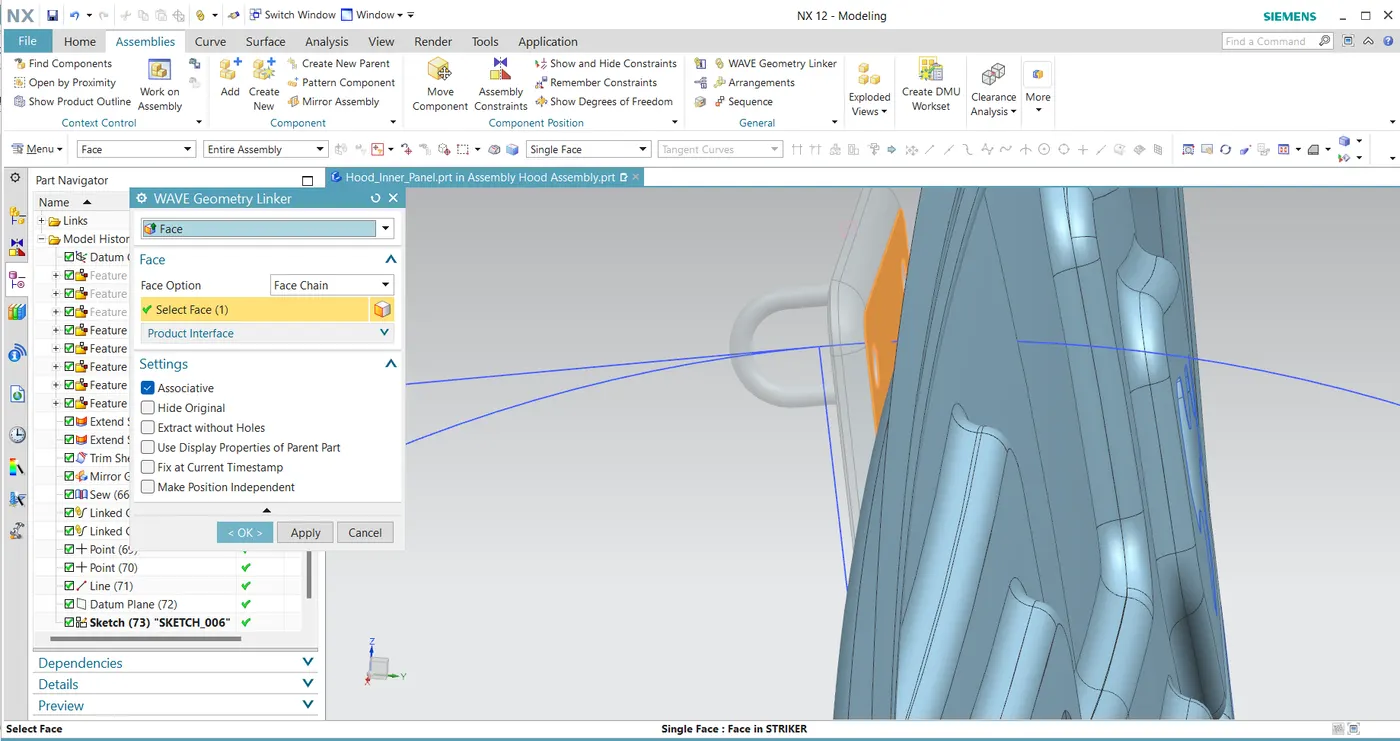
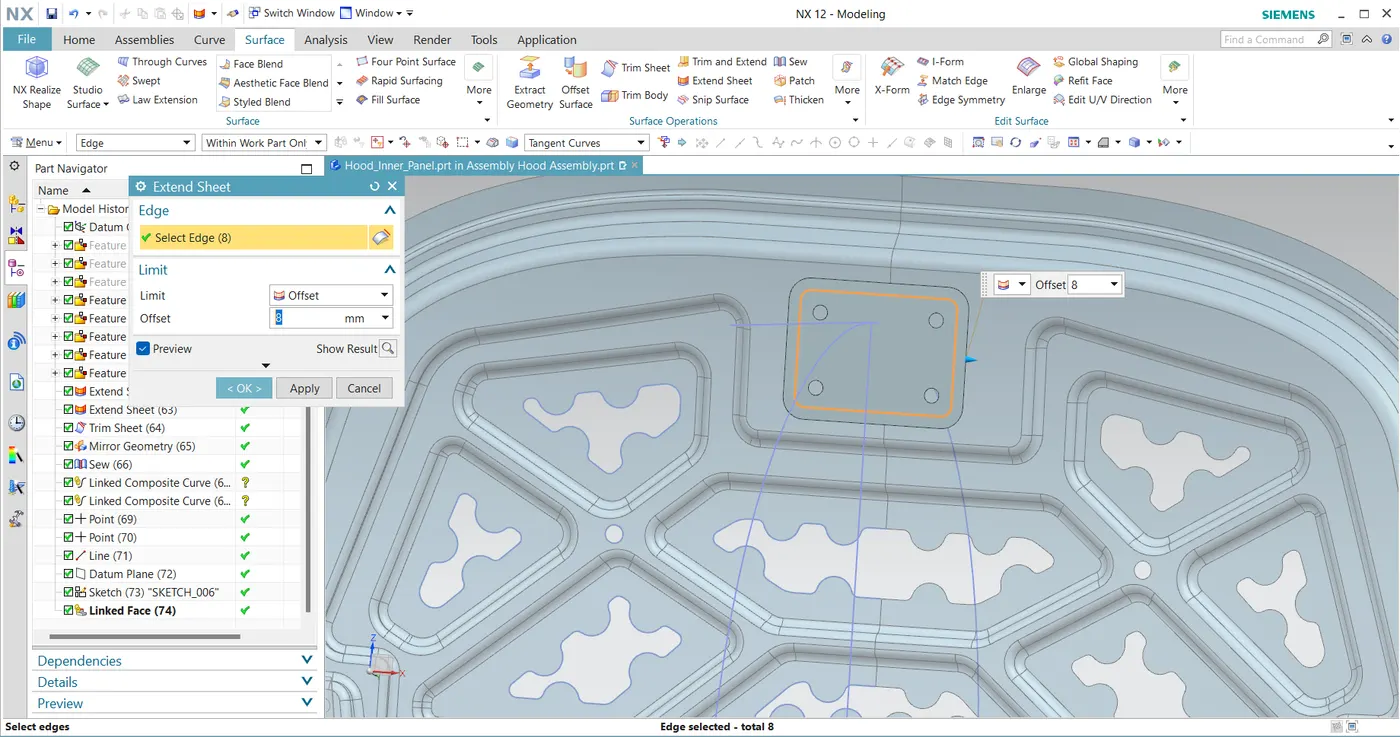
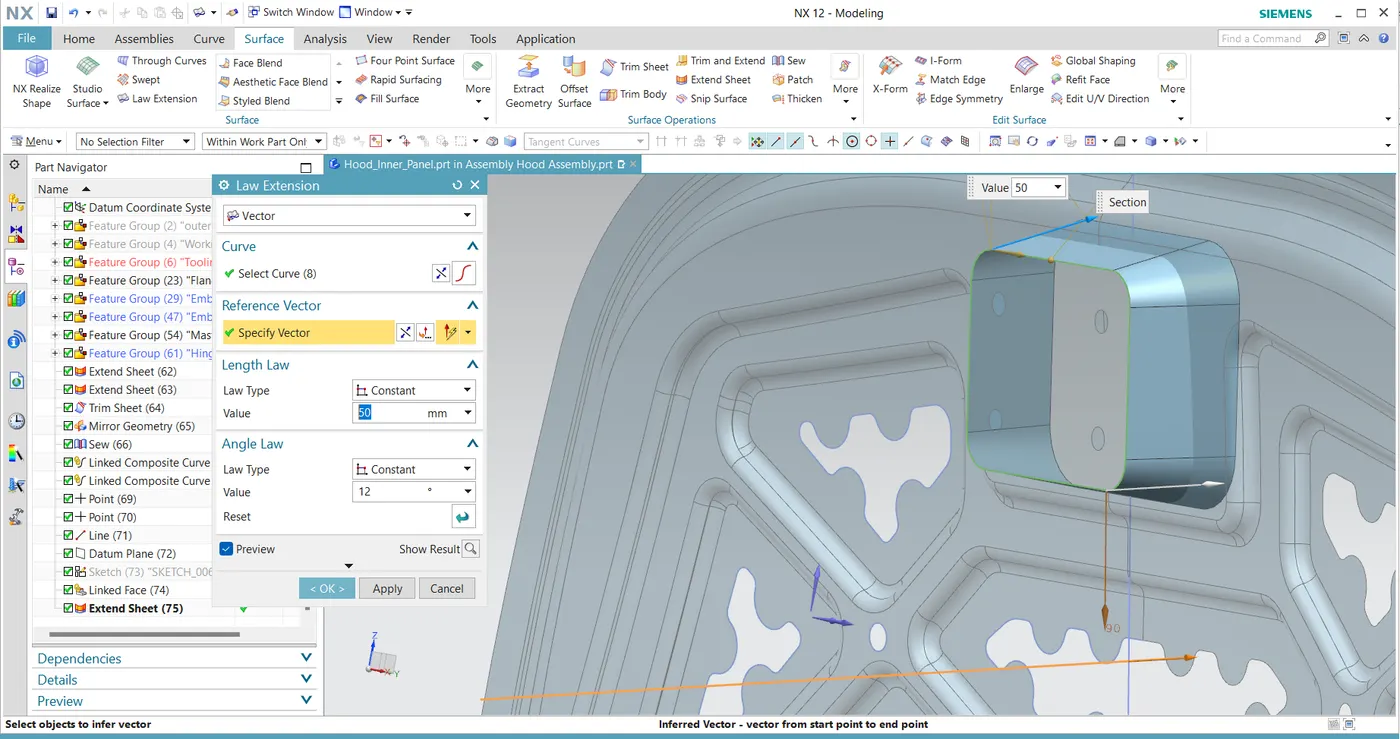
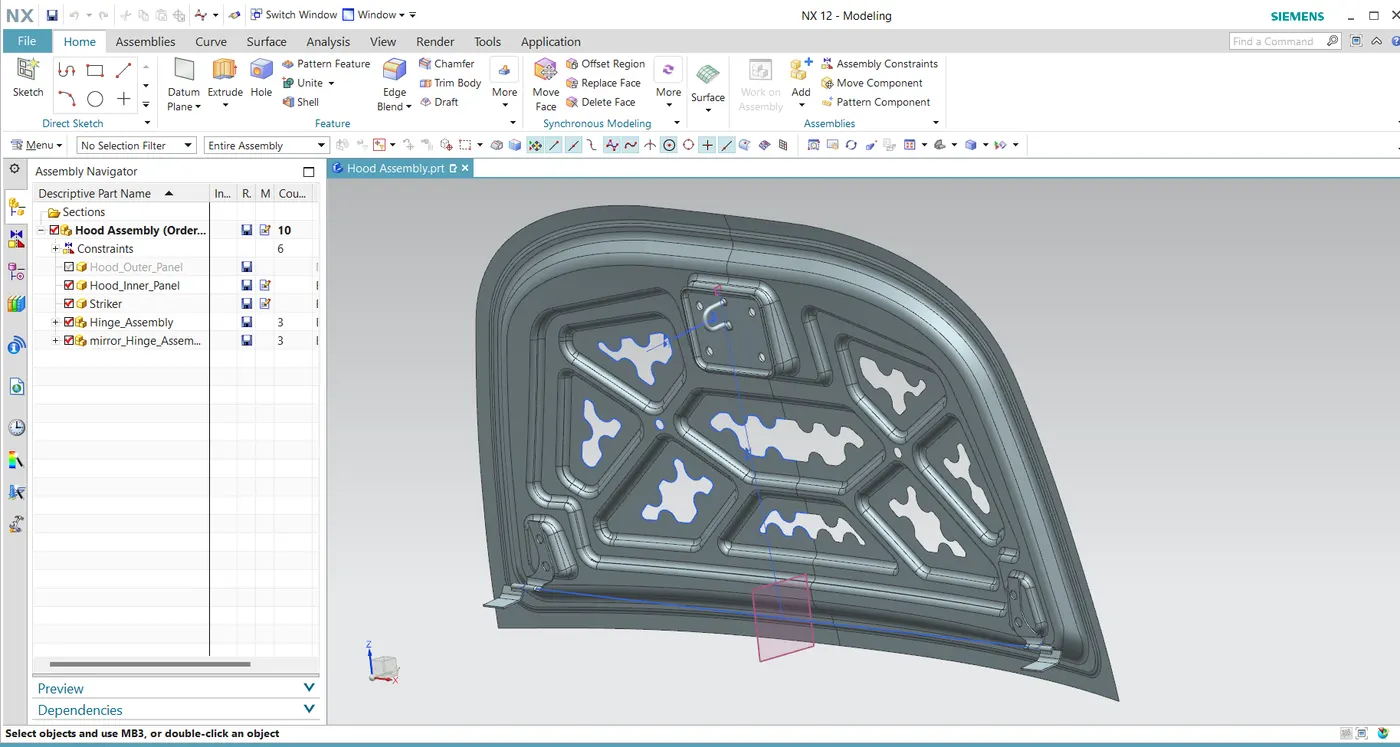
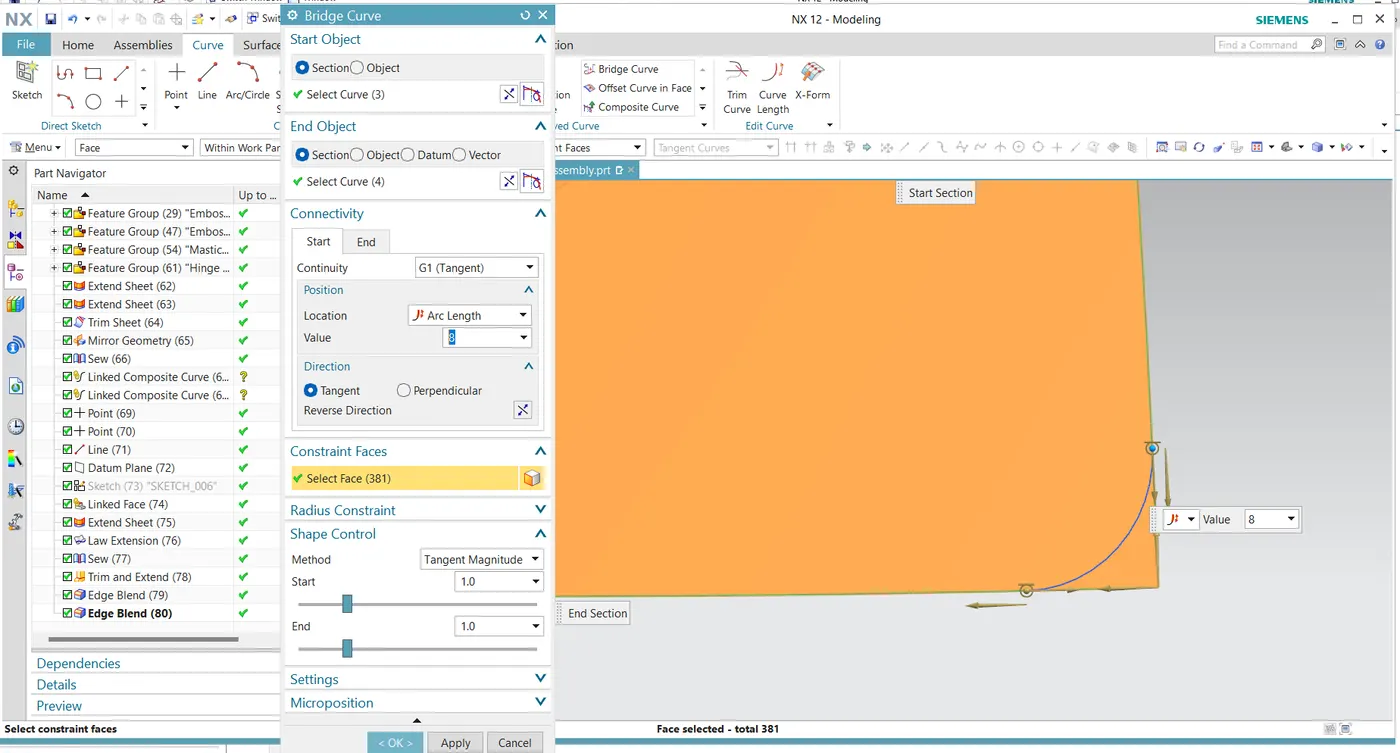
Step 16 : Trim the sharp edge to make it proper for hemming process.
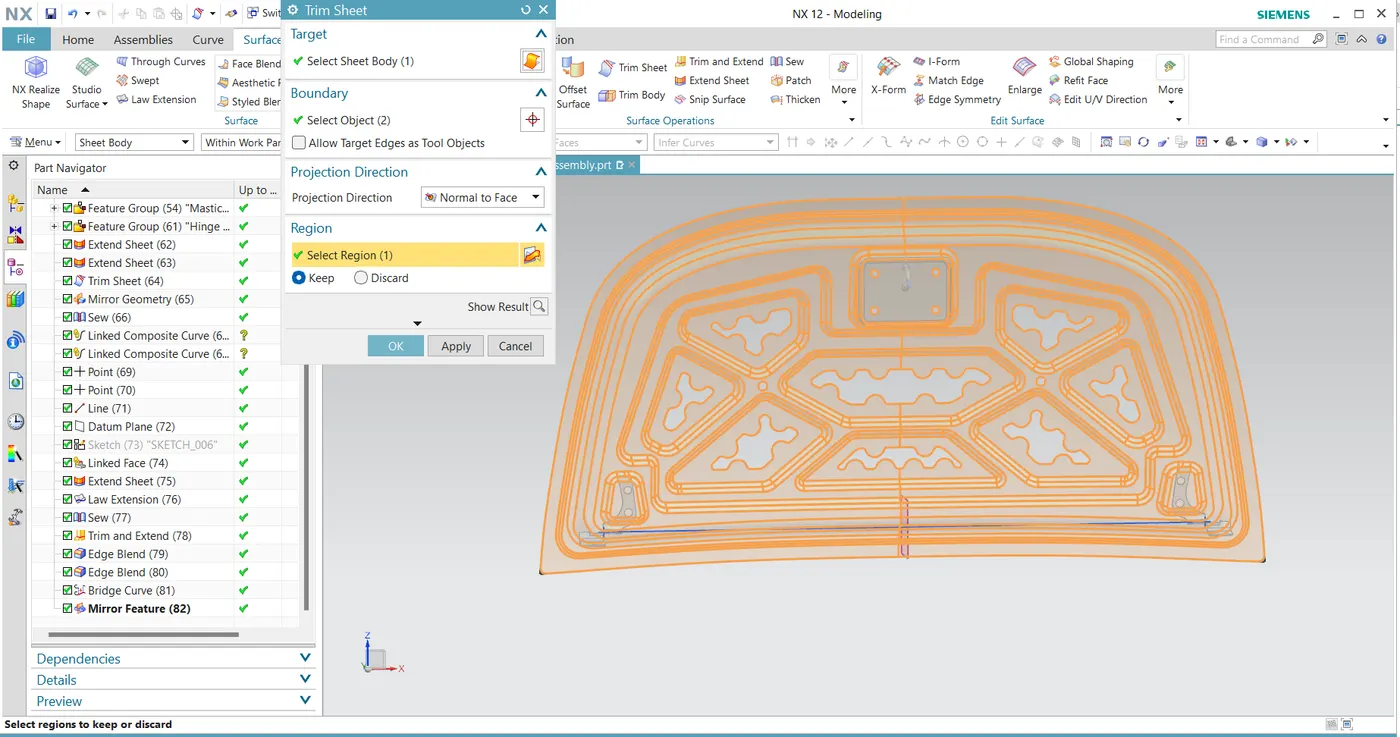
Step 17 : Thicken the Hood inner pannel
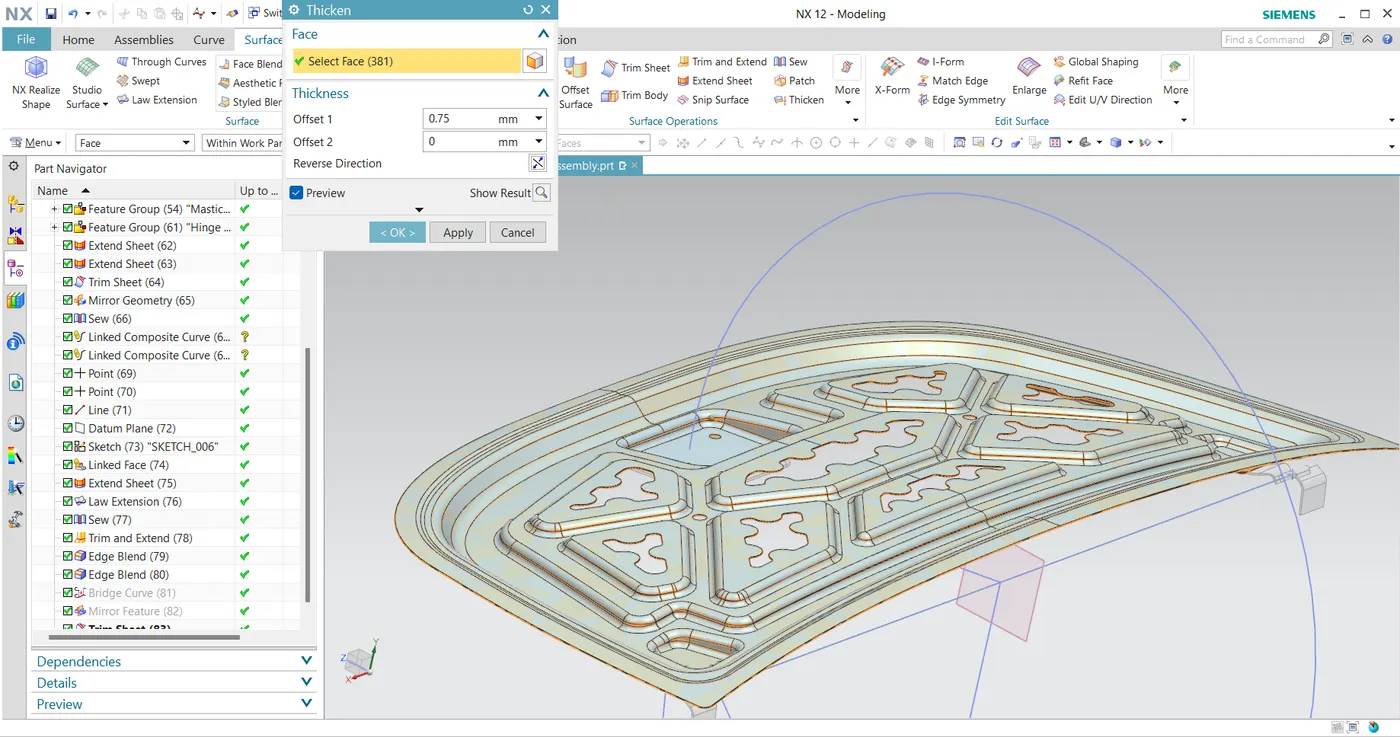
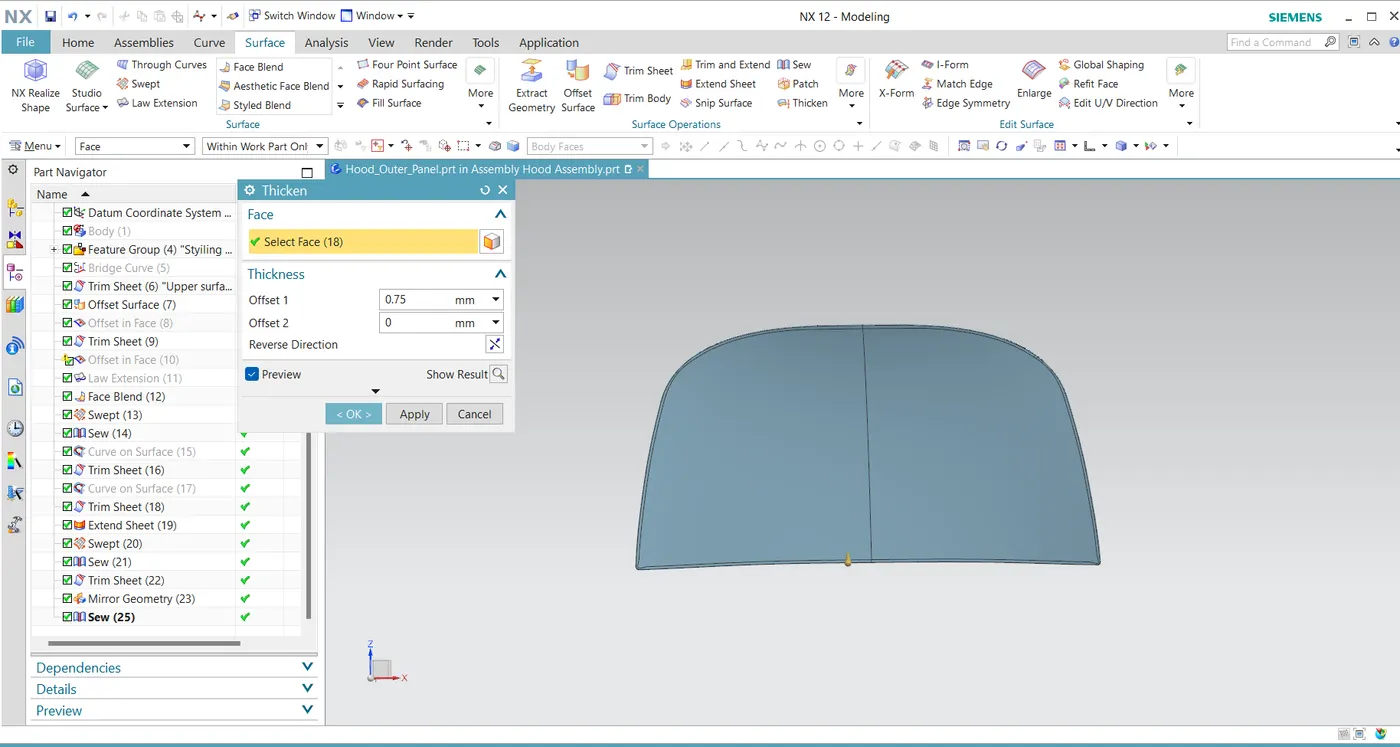
Step 18 : Create the hem relief for the hood outer pannel and then mirror it then finally thicken the outer pannel
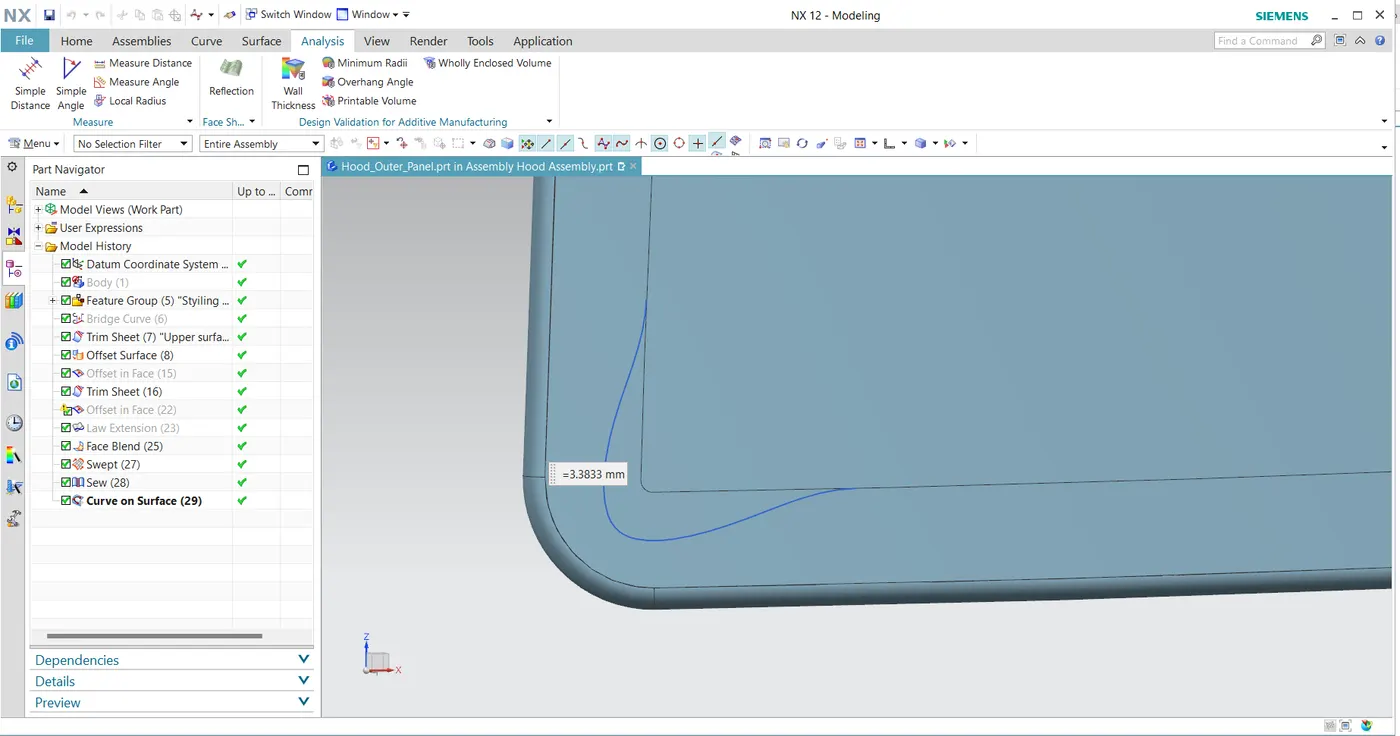
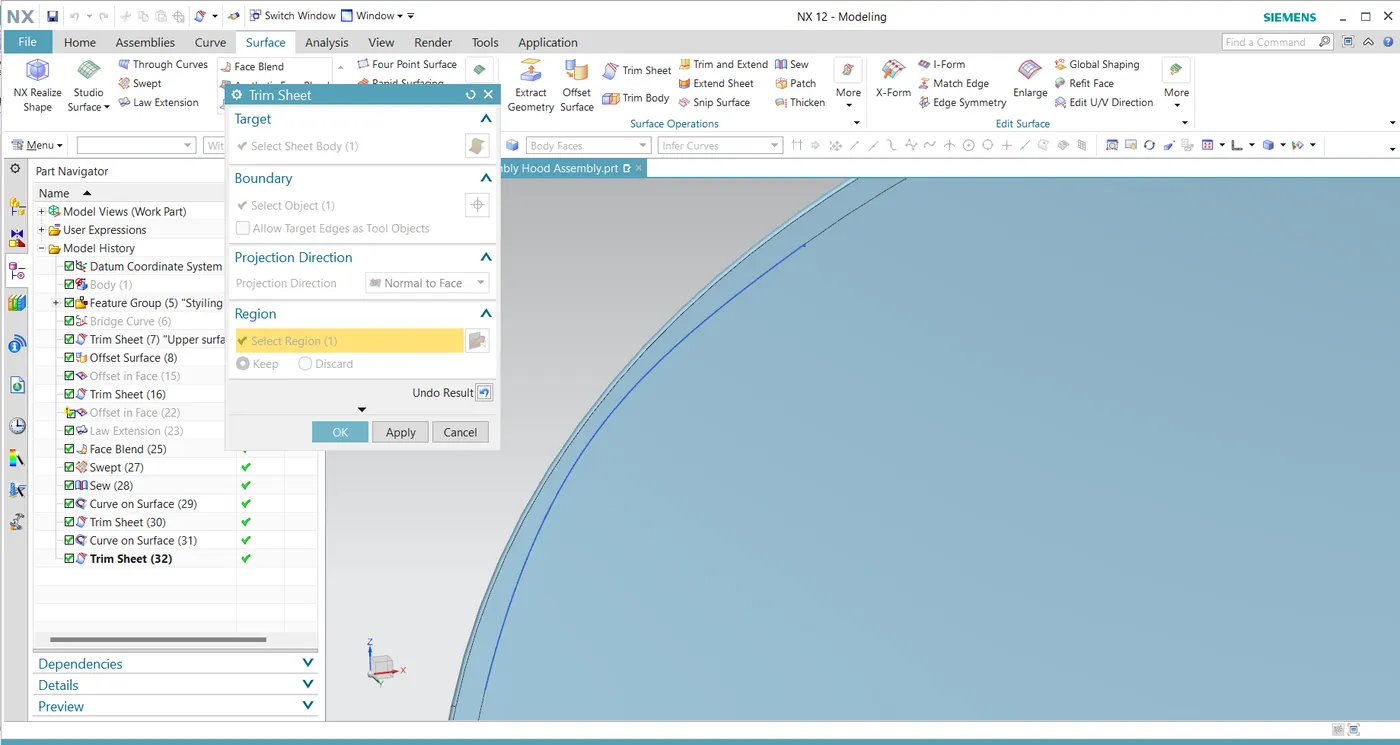
Step 19 : Check for the section view and trim off the extra portions form the hood inner pannel providing required clearence.
Final View
Bottom View
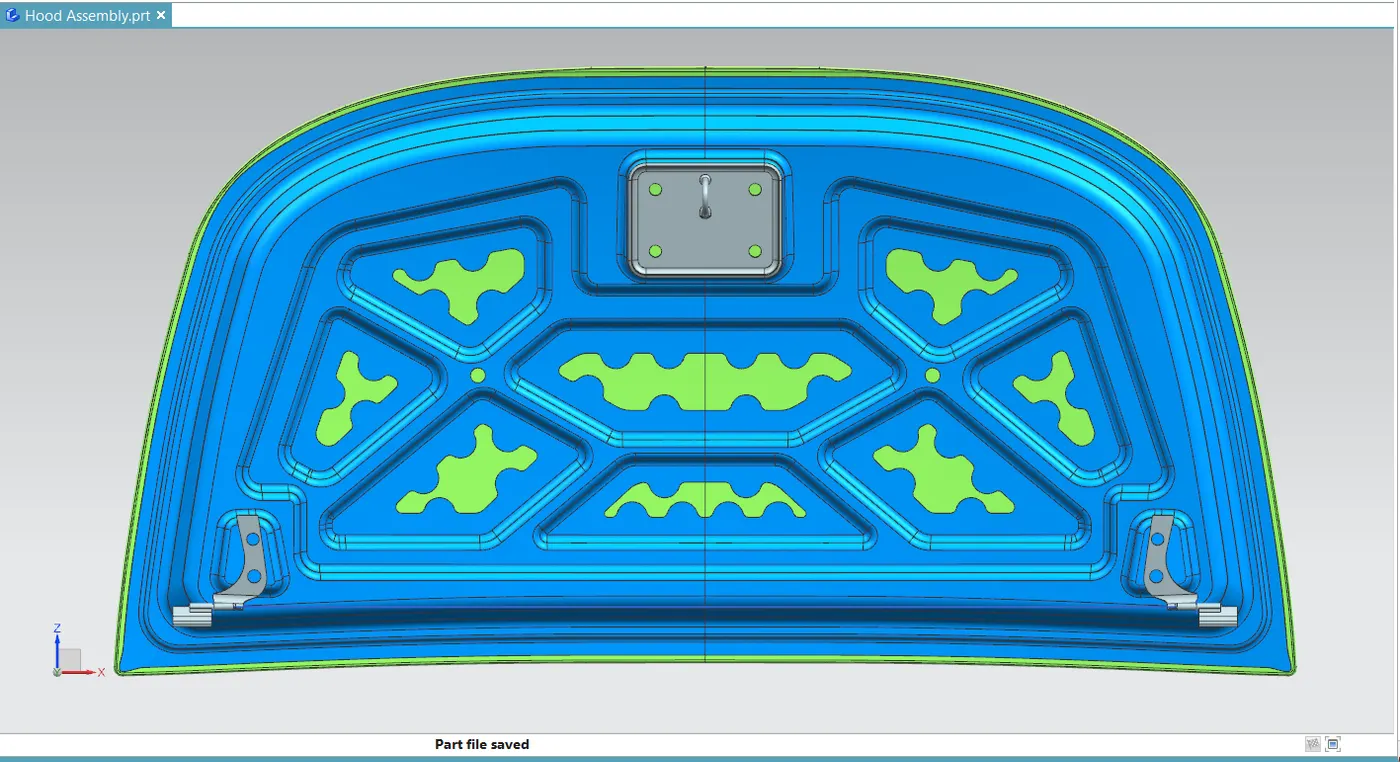
Top View
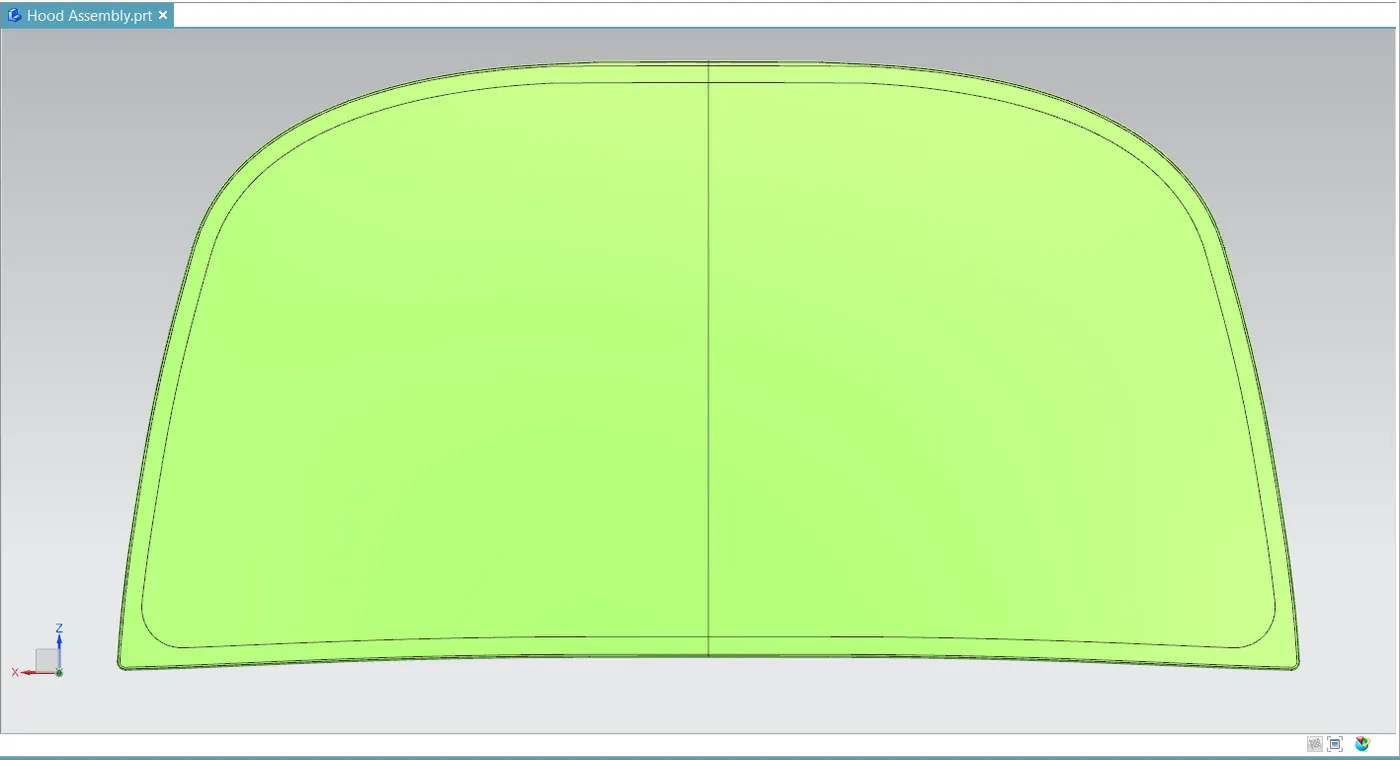
Side View
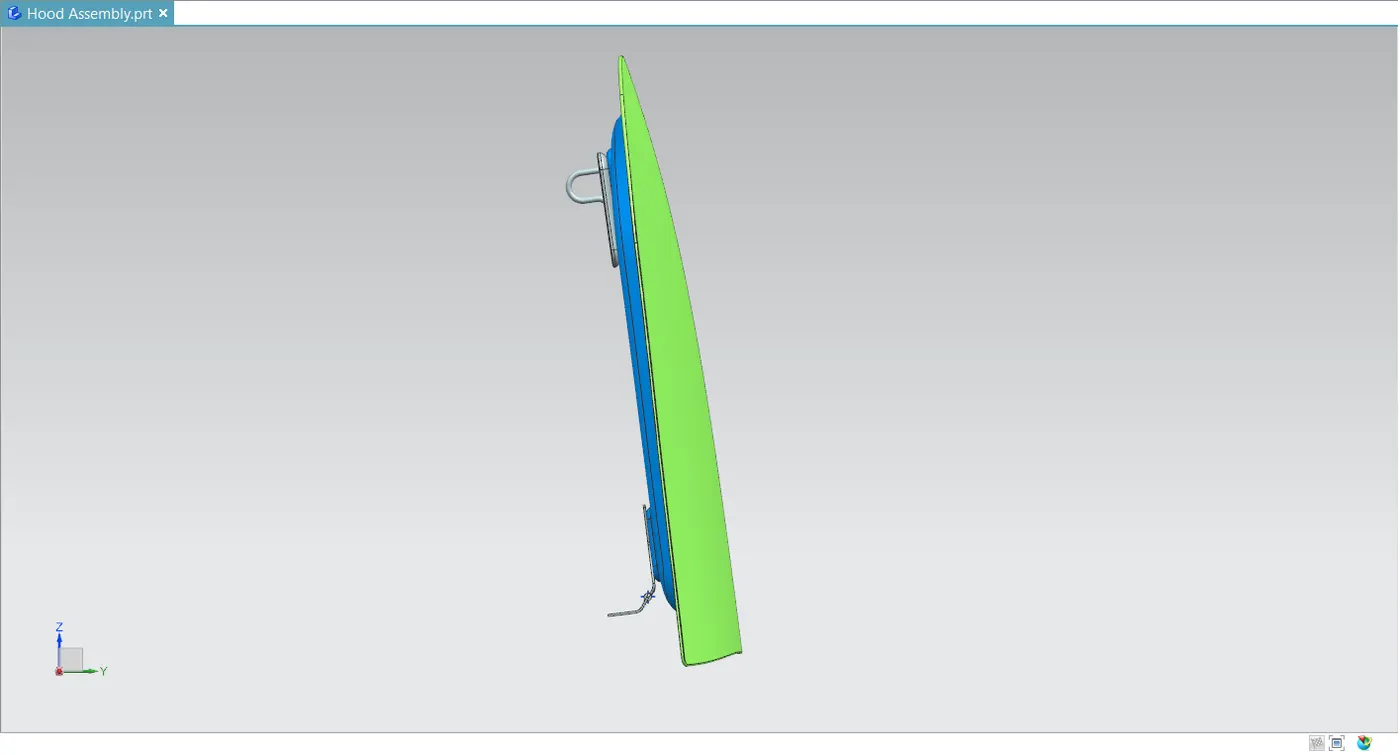
Isometric View
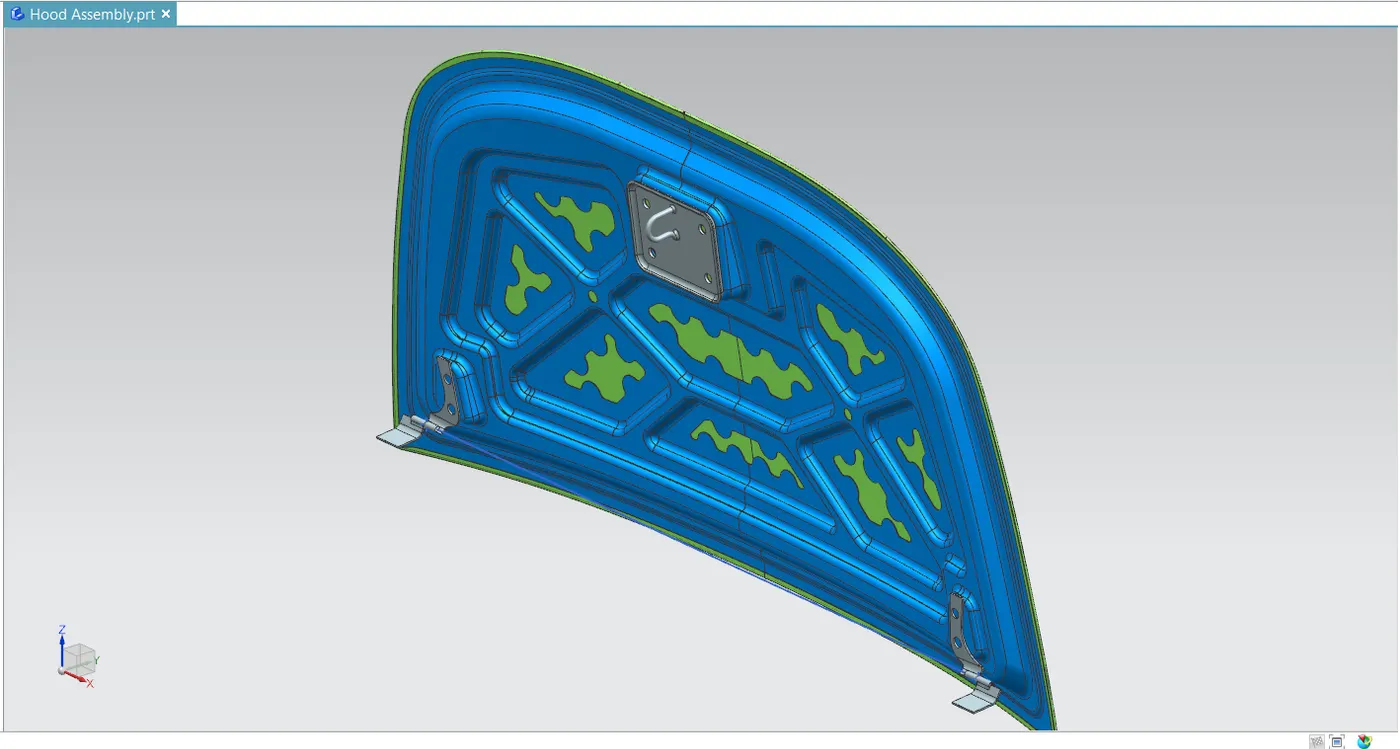
Draft analysis
RESULT
- Designed the hood inner panel and outer pannel and necessery reinforcements by following the master section.
- Also conducted the draft analysis.