Week 2- 2R Robotic Arm Challenge
Aim
To create a program in Matlab to simulate the forward kinematics of a 2R Robotic Arm.
Program Code :
% Animate_kinamatics of 2R robotic arm
close all
clear all
clc
% inputs
l1 = 1;
l2 = 0.5;
x = 0;
y = 0;
theta1 = linspace(0,90,10);
theta2 = linspace(0,90,10);
ct = 1;
% loop for automatic changing of value of theta1 & theta2
for i = 1:length(theta1)
    THETA1 = theta1(i);
    for j = 1:length(theta2)
        THETA2 = theta2(j);

        x1 = l1*cosd(THETA1);
        y1 = l1*sind(THETA1);

        x2 = x1+l2*cosd(THETA2);
        y2 = y1+l2*sind(THETA2);

        %plotting line
        plot([x x1],[y y1],[x1 x2],[y1 y2],'linewidth',3)
        axis([0 2 0 2])
        xlabel('movement in x axis');
        ylabel('movement in y axis');
        title('2R robotic arm animation')
        grid on;
        pause(0.03)
        M(ct) = getframe(gcf);
        ct = ct+1;
    end
end
% creating and saving the animation
movie(M)
videofile = VideoWriter('Animate_kinamatics','Uncompressed AVI');
open(videofile)
writeVideo(videofile,M)
close(videofile)
Program Explaination
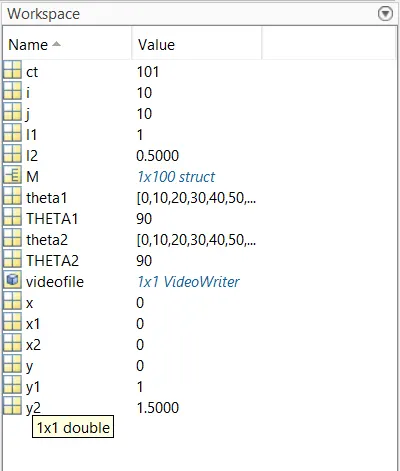
First of all the memory and storages are cleared using the close all,clear all and clc functions.
The initilization of variables l1(length of link 1),l2(length of link 2),starting points x = 0 & y = 0, ct (for counting number of excuation) are done.
During the movement of the arm, the link 1 & link 2 will make an angle theta1 & theta2 w.r.t horizontal respectively.For each value of theta1 there can be different values for theta2.
In this program the different values of theta1 & theta2 is obtained using the command linspace() command.The linspace() command will generate 10 values divided equally starting from 0 to 90.
Next to generate an animation the value of theta1 & theta2 should be changed automatically, for that for loop and nested for loop is used.
The for loop for theta1 begins from 1 and ends at its 10th value, the length(theta1) function will give the length of the theta1 which is 10.
Once the program enters the loop the first value of theta1 is extracted and assigned to variable THETA1.
Next the program enters in to nested for loop where the value of theta2 is extracted.The program will run for the value of j = 1 to 10 times. for each value of theta1 we will get 10 values of theta2.
The value of theta2 is assigned to THETA2 each time.
In the next part of program the coordinate values are obtained for link 1 & 2 which is also controlled by the for loop.
Now after getting the coordinates we need to plot ,for that plot() function is used.
In the plot function the starting point of link 1 & ending point of link 1, starting point of link 2 and ending point of link 2 is provided, along with the width of the line of plot using the linewidth command.
The axis values of x axis & y axis is defined from 0 to 2 using the axis() command.
xlabel() & ylabel() command is used to name the x axis and y axis. The title() command is used to give the title for the plot and the grid on command will show the grid.
Inorder to view each plot which actually consist of 10x10= 100 figures for each value of theta1 & theta2 pause() command is used.In this program each value plot will be on screen for 0.03 sec.
To capture the figures or in other words the plot frame getframe(gcf) command is used. This command will capture the current frame and will store into M(ct) where the 'ct' will keep on incrementing each time the loop excutes, for incrementing value of 'ct' - 'ct+1' iteration statement is used.
Once the position for all values of theta1 & theta2 is obtained also the corresponding frames obtained is captured next step is to create animation.
For creating animation we have to play the recorded frame for that we use function movie().
For creating animation first we need to make a file to store (here....videofile).By using the function VideoWriter() the video is written in to the file named 'videofile'.The name of file and the type of video need to be generated is provided inside the VideoWriter() function.
Result
The 2R robotic arm movement stimulation is obtained as video of .avi format.
Video link: https://youtu.be/lPhdvfzahz4
- The plot was shown but not the animation video was showing
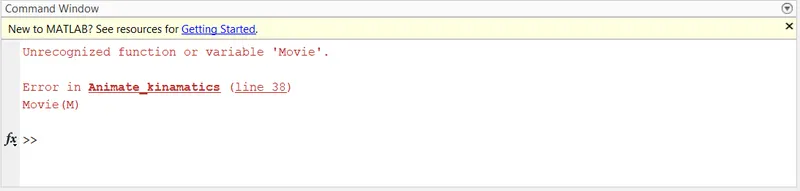
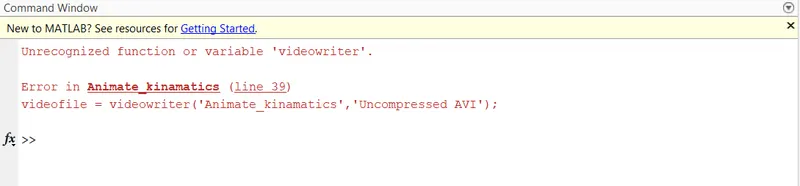
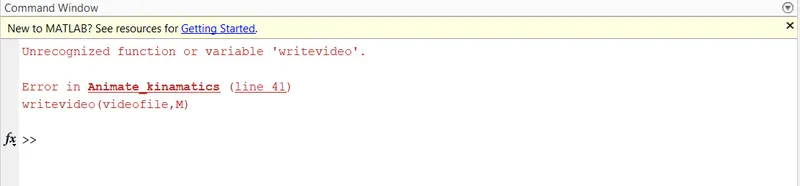
- Error 1 was cleared by changing the 'M' of Movie function to lowercase movie().The the animation was visible.
- Error 2 was cleared by changing 'videowriter()' function to 'VideoWriter()'.Still the animation video was't get saved.
- Error 3 was cleared by changing 'writevideo'() function to writeVideo().