Hood design-Week 2
Challenge: Design Hood Outer Panel, Inner Panel, and the necessary reinforcements by following the Master Section mentioned with the Design parameters explained in the videos.
Ans:-
Hood/Bonnet
The hinged metallic cover which rests over the engine bay & protects the engine & its components from the environment is called a Hood/Bonnet. The Hood also works as an access cover to repair & maintain the engine & its parts.
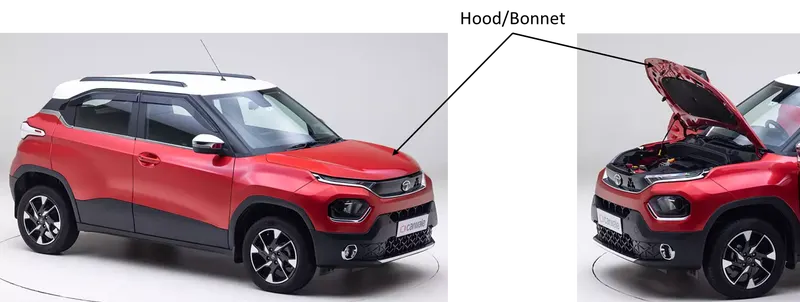
Fig 1:- Car Hood
Some hood models contain an ornament on top, a hood scoop, wiper jets, power bulges, or even a power bulge with wipers.
Generally, the hood is made of the same material which is used in the body construction of an automobile vehicle. Steel, aluminum, and carbon fiber/fiberglass are well-known materials used to make the hood.
Importance of Hood
- In simple words, the hood of the car is responsible for the safety of the car.
- All engine parts and radiators of the car are protected by the hood or bonnet.
- Car hoods are also used in sports cars as an aerodynamic mechanism by reducing the Air effect.
- Car hoods provide relatively easy access to the engines in case any maintenance is required.
- Having a hood on your car also reduces engine noise, which helps you drive more quietly.
- Keeping the paint under the hood longer can also help keep it in good condition.
- Getting out of the car before the hood catches fire can give motorists time to escape that is why a proper and strong hood is necessary.
Hood Components
1. Outer Panel
Generally, outer panels are the aesthetic component of the car. Based on the concept sketch Styling Class-A team creates the outer panel of the hood. The inner panel will be attached to the outer panel to increase its stability & strength.
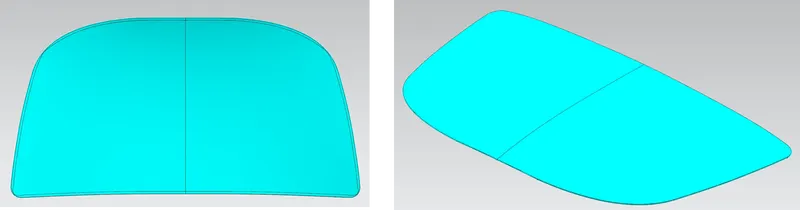
Fig 2:- Car Outer Hood Panel
2. Inner Panel.
Inner panels are strengthening elements of the car hood assembly. The inner panel is created using the master sections provided. In this case, master sections represent the shape & size of the features of the inner panel. Hinging & latching provisions will be provided in the inner panel.
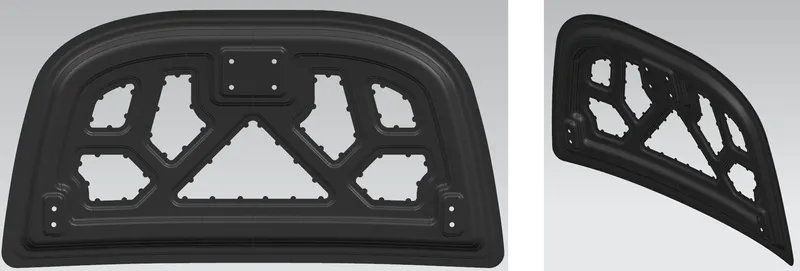
Fig 3:- Car Inner Hood Panel
3. Hinges
The hinges are used to open & close the hood assembly along its trajectory. Hinge assembly consists of two parts one is connected to the hood inner panel and the second is connected to the vehicle body.
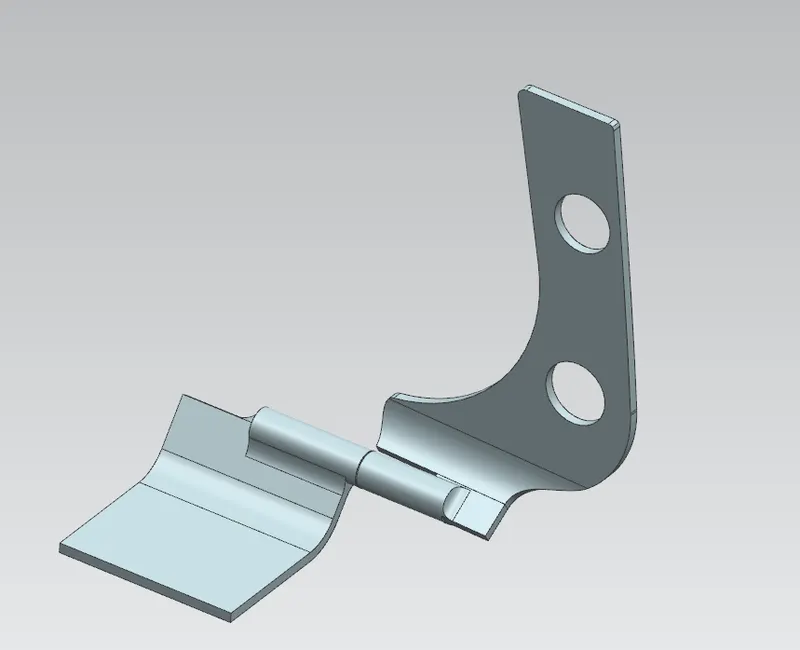
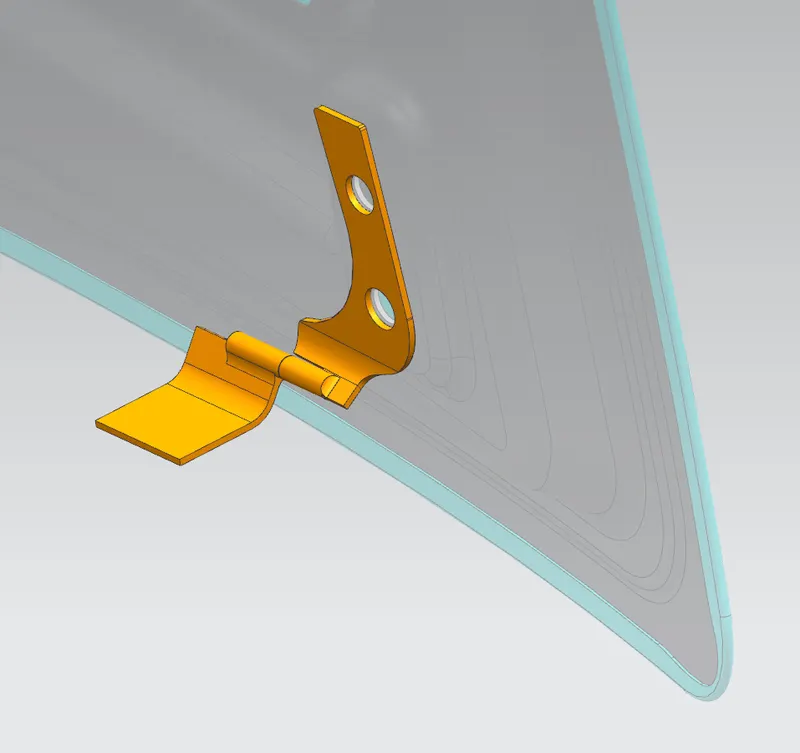
Fig 4:- Hinges
5. Striker
Striker is the part that is used to latch the hood assembly with the latching mechanism provided in the car body. Generally, latching is provided to the hood to prevent unwanted openings during driving. Striker is attached to the inner panel & latching mechanism to the car body.
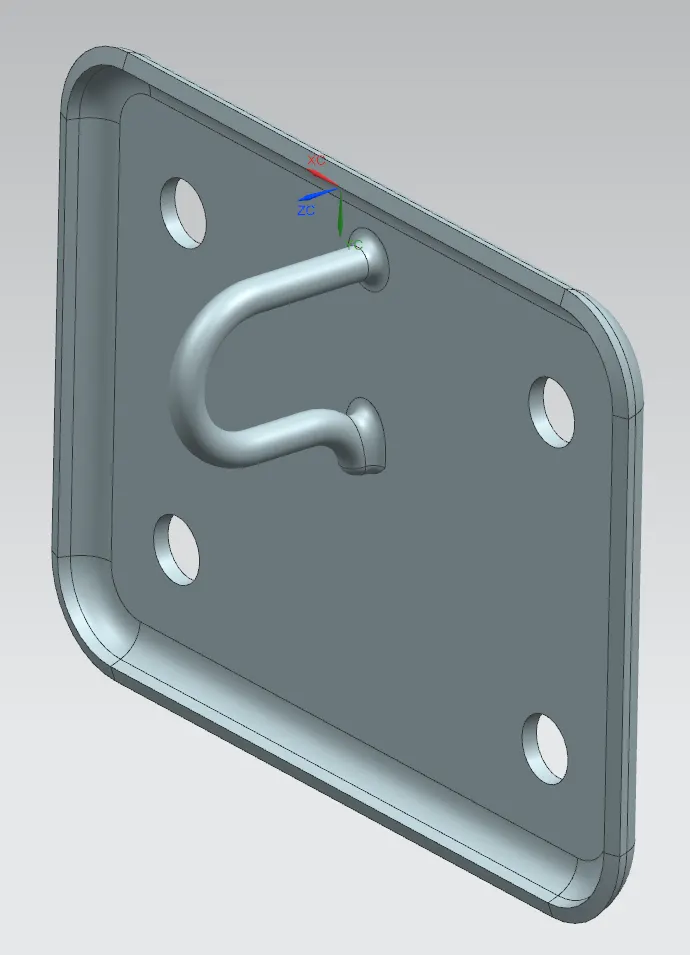
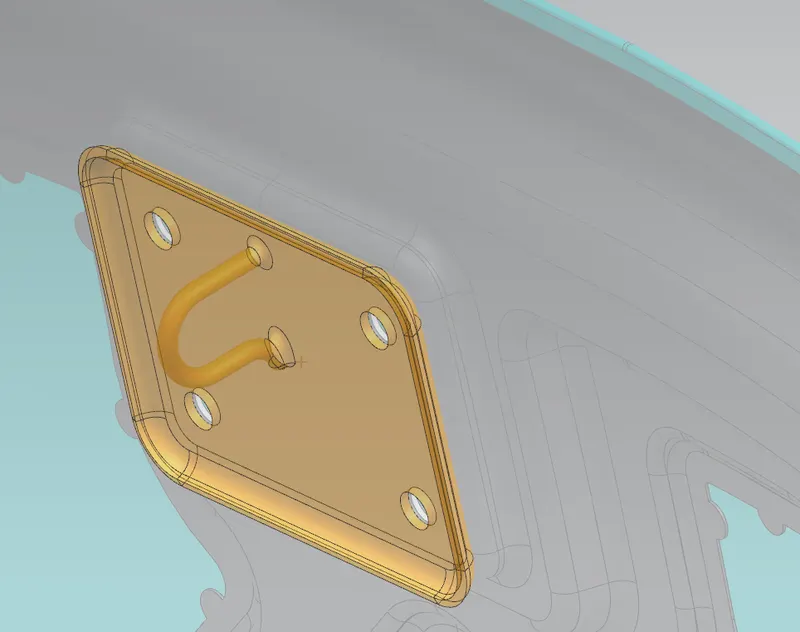
Fig 5:- Striker
6. Reinforcement
Reinforcements are additional strengthening elements in sheet metal design. Generally, thin sheet metal parts needed reinforcement to avoid deformation. In our design reinforcements are used for striker & hinges to improve inner hood panel strength locally.
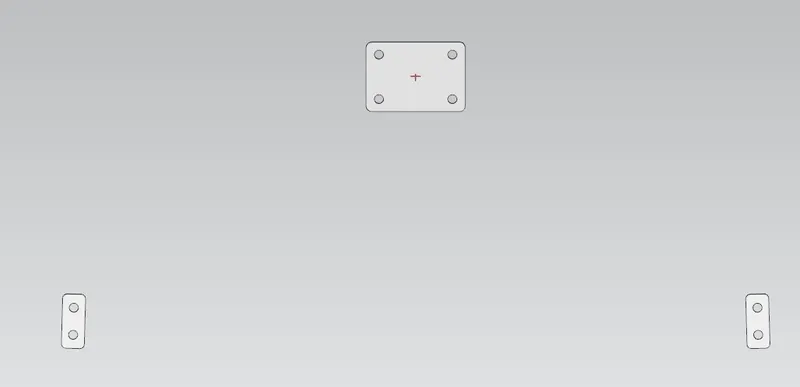
Fig 6:- Hood Reinforcements
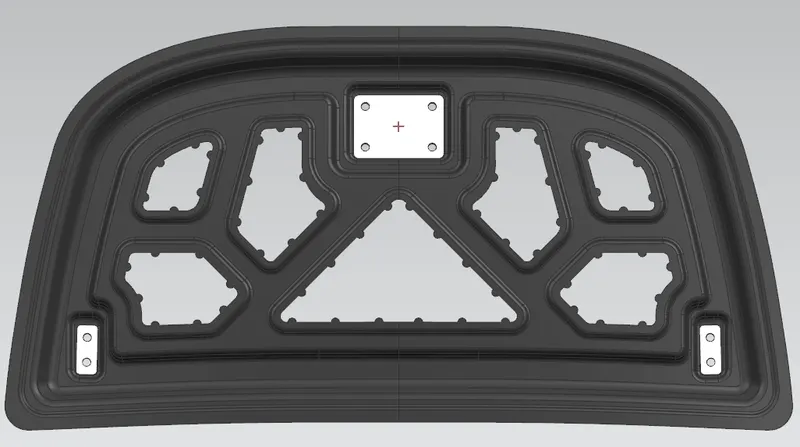
Fig 7:- Position of Hood Reinforcements
Design considerations:-
The human comfort factor is the first consideration for automobile design. It is a method to safeguard and protect space for the human user and the necessary components that make up the vehicle being designed. All safety regulations are ensured during this process. Ergonomic considerations consist of Hood clearance, Hood Opening angle, and location of support rod or gas stay.
The hood opening angle is different for different regions or countries. It is decided by the average height of the human in that particular country.
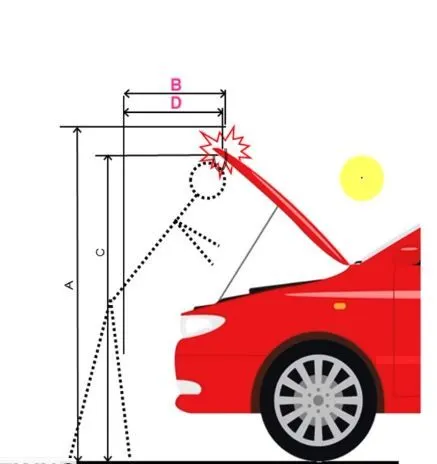
Fig 8:- Hoop Opening height
7. Support Rod/Gas stay
Support Rod/ Gas stays are used to hold the Hood when it is opened. Assembly provisions & reinforcements are to be provided in the hood inner panel for this holding arrangement.
In some designs, the support rod is kept in the engine bay. In some designs, it is kept in the inner hood panel.
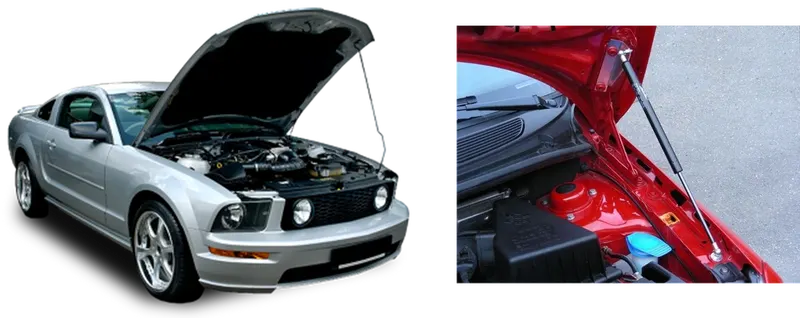
Fig 9:- Support Rod Fig 10:- Gas Stay
Latch Trajectory
Latch trajectory is the path in which, Hood rotates during the opening & closing of the hood. A center line is created along the hinge axis line, the midpoint of this axis line is the actual center of the trajectory. A line is drawn at the center of the striker. The distance between the trajectory center & the tip of the striker is the Radius of the trajectory. It is a very important aspect in hood design, in order to decide on the hinge, latch, and striker installation points.
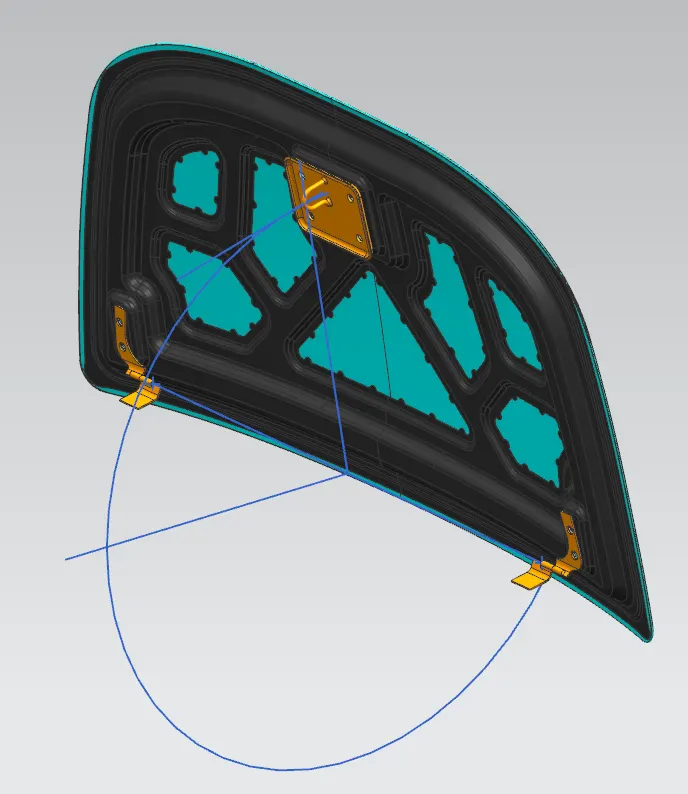
Fig 11:- Latch Trajectory
Mastic Sealant:
Mastic sealant works as an adhesive between the parts & also provides sealing. Generally, it is used to fill the gaps between the parts. This method of joining is adapted to avoid burn marks created during welding and also to avoid the aesthetic appearance of the panels. The mastic sealant between the inner and outer panels of the hood will get hardened inside the furnace. Every mastic sealant point will have a tendency to improve the local strength to around 80 mm in diameter. Considering this, the mastic points are positioned such that most of the hood region is covered.

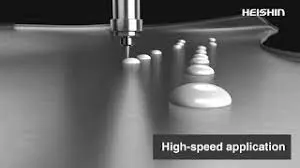
Fig 12:- Mastic points
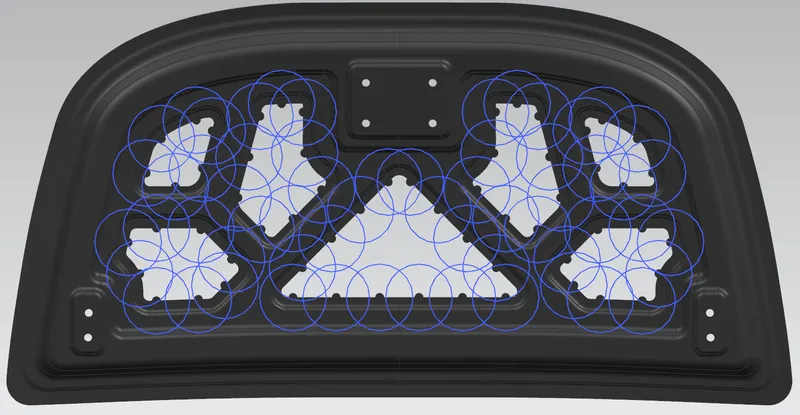
Fig 13:- Mastic points on Inner Hood Panel
Sheetmetal Operations in Car Hood Manufacturing
Deep Drawing
The deep drawing process is a forming process that occurs under a combination of tensile and compressive conditions. A flat sheet metal blank is formed into a hollow body open on one side or a hollow body is formed into a hollow body with a smaller cross-section.
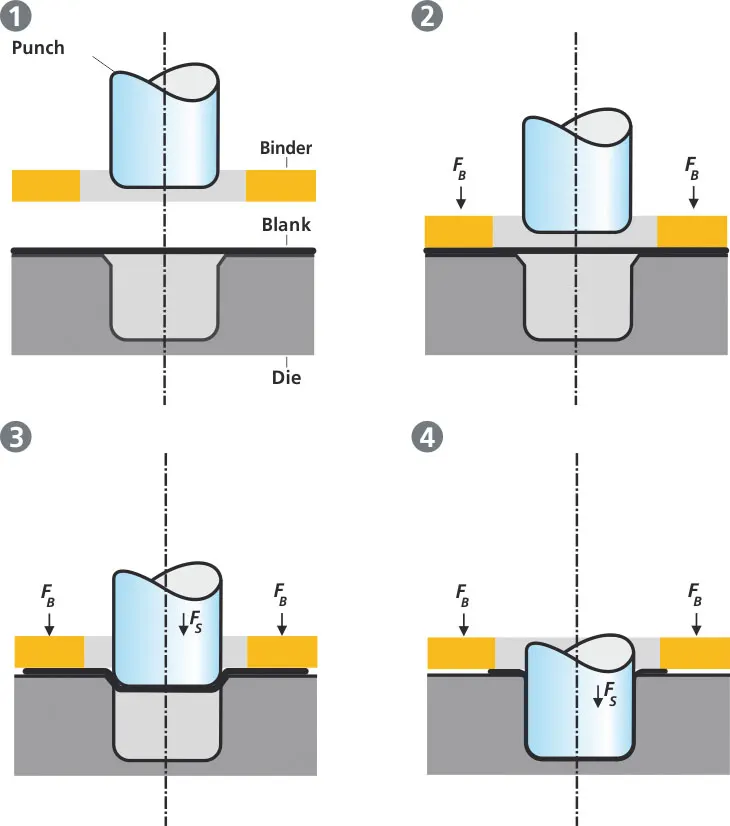
Fig 14:- Sheetmetal Deep Drawing
Hemming
Hemming is a forming operation in which the edges of the sheet are folded or folded over another part in order to achieve a tight fit. Normally hemming operations are used to connect parts together, improve the appearance of a part, and reinforce part edges.
In car part production, hemming is used in assembly as a secondary operation after deep drawing, trimming, and flanging operations to join two sheet metal parts (outer and inner) together. Typical parts for this type of assembly are hoods, doors, trunk lids, and fenders.
The accuracy of the hemming operation is very important since it affects the appearance of the surface and surface quality. Material deformations, which occur during the hemming process, can lead to dimensional variations and other defects in parts. Typical hemming defects are splits or wrinkles in the flange, material overlaps in the corner areas, or material roll-in. This is why it is important to provide the required relief at the corners.
There are two types of hemming operations,
Conventional die hemming
In conventional die hemming, the flange is folded over the entire length with a hemming tool.
Fig 15:- Open Hemming
Roll hemming
It is the roll hemming process that is used for automotive sheet metals. Roll hemming is carried out incrementally with a hemming roller. An industrial robot guides the hemming roller and forms the flange. Roll hemming operation can also be divided into several pre-hemming and final hemming process steps. Roll hemming is very flexible to use and tool costs are significantly lower as compared to those of conventional die hemming. However, the cycle times are much higher since the hemming is realized using a hemming roller that follows a defined path.
Fig 16:- Roller Open Hemming
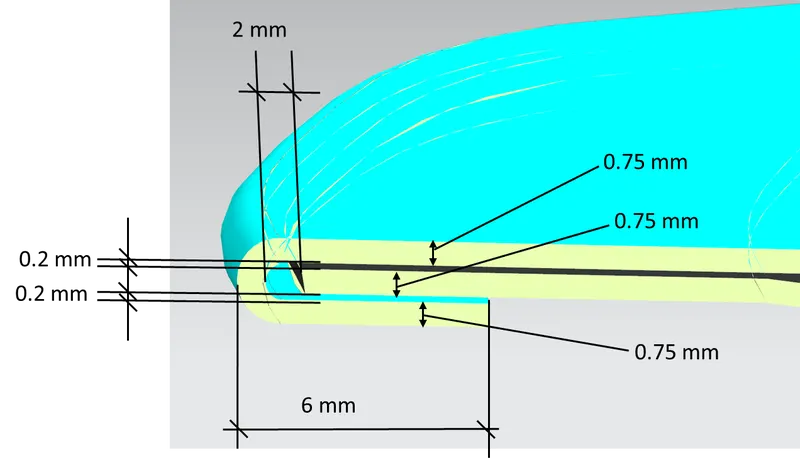
Fig 17:- Open Hemming in Hood Design
Emboss definitions
Sheet metal embossing is a stamping process for producing raised or sunken designs or reliefs in sheet metal. This process can be made by means of matched male and female roller dies, or by passing a sheet or a strip of metal between rolls of the desired pattern.
Fig 18:- Embossing Process
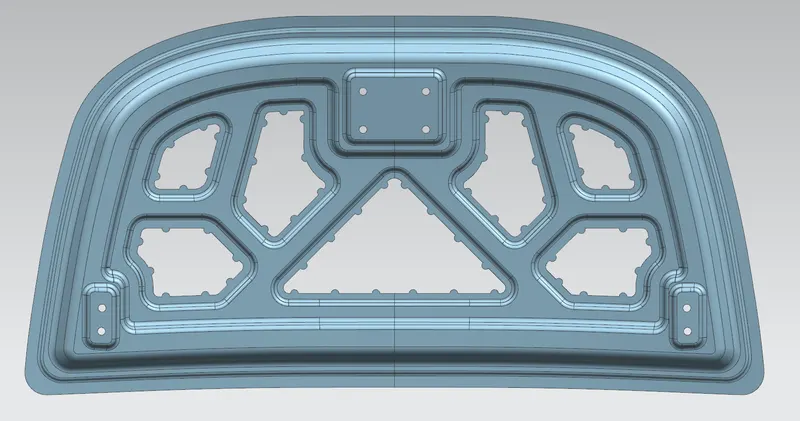
Fig 19:- Hood inner panel with embossing.
Hood Panel Design
Outer Panel
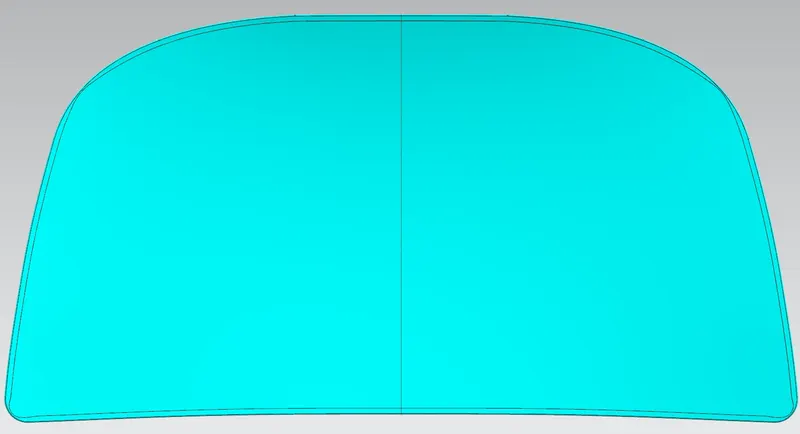
Fig 20:- Hood Outer panel
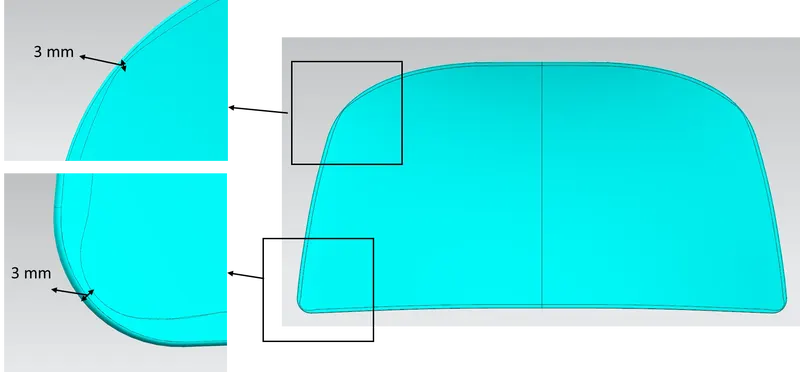
Fig 21:- Corner relief on Hood Outer panel
Pedestrian safety
Design should be in such a way that it should reduce the injuries to pedestrians in the event of a pedestrian-vehicle collision. The objective of these measures is to reduce the number of road accident fatalities and the severity of injuries sustained by pedestrians involved in a collision with a vehicle in urban traffic.
The height, weight, and age of the pedestrian all play a role in the kinematics of the event and in his ability to survive. Most fatalities for the younger population are related to brain damage caused by head impact on the bonnet. For older people, additional risks include rupture of arteries in the lower limbs and pelvis from bumper and bonnet leading edges. Impact frequency and seriousness of injury have been studied for many years, resulting in rating systems and improved design.
Evaluation of pedestrian safety for a bonnet must be carried out in the context of its surrounding elements like Vehicle styling, size (wrap-around distance “WAD”), and under bonnet clearance to other elements (considered as hard points). Local bonnet stiffness is influenced by mounting point stiffness such as hinges, bump stops, and latches. This is better understood by superimposing the kinematics of a dummy onto the test conditions.
Wrap Around Distance (WAD):- It is the geometrically traced distance from the contact point with the Ground Reference Plane, vertically below the front face of the bumper, to any point on the vehicle's front structure.
Side Reference line:- The geometric trace of the highest points of contact between a straight edge, held parallel to the lateral vertical plane of the vehicle and inclined 45 deg. is traversed down the side of the front structure, and the side of the front structure.
Child Head Impact Zone:- 1000 WAD to 1500 WAD
Adult Head Impact Zone:- 1500 WAD to 2100 WAD
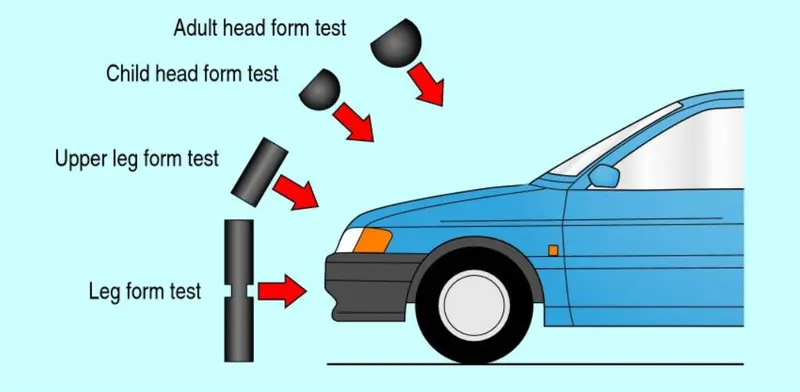
Fig 22:- Pedestrian safety
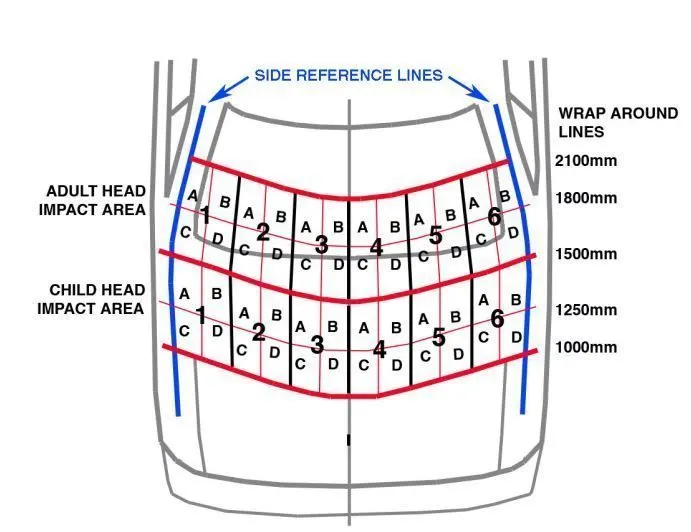
Fig 23:- Pedestrian hitting zones on the hood
Besides functioning as an engine compartment cover, the hood of modern vehicles can also help manage the impact energy of a pedestrian’s head in a vehicle-pedestrian impact. However, a hood’s ability to absorb impact energy may be impeded by the proximity of the hood to components packaged inside the engine compartment, i.e., by its underhood clearance.
For example, for a given hood design, the hood’s ability to absorb impact energy through deformation can be significantly reduced when the hood and engine block are in close proximity.
Therefore, a large underhood clearance would be preferred for pedestrian protection.
The predicted level of protection offered by the vehicle is verified by EURO-NCAP.
Inner Panel
Data Provided to Design inner Panel
Hood Thickness Information
- Outer Panel Thickness = 0.75mm
- Inner Panel Thickness = 0.75mm
- Reinforcement Thickness = 1.5mm
Master Section:
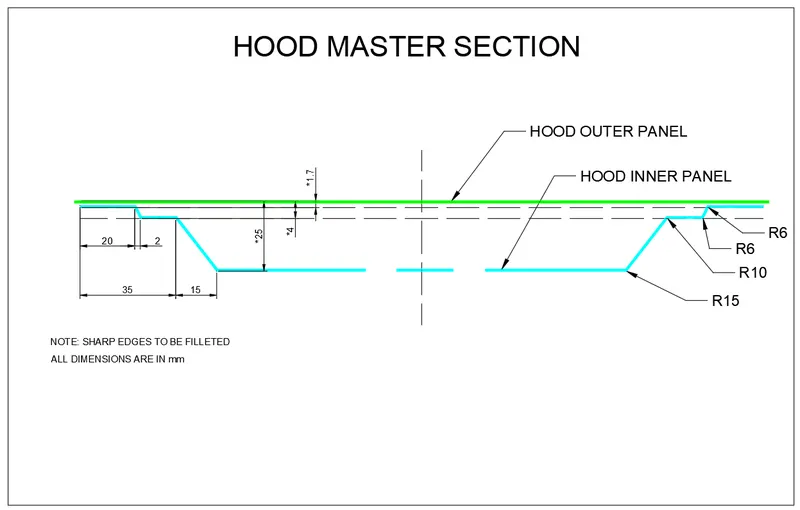
The inner Panel is designed using the data provided & by following design & safety guidelines.
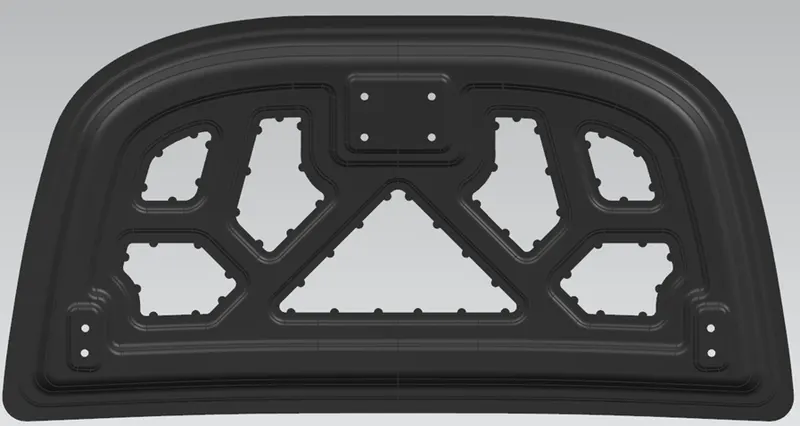
Fig 24:- Inner Panel
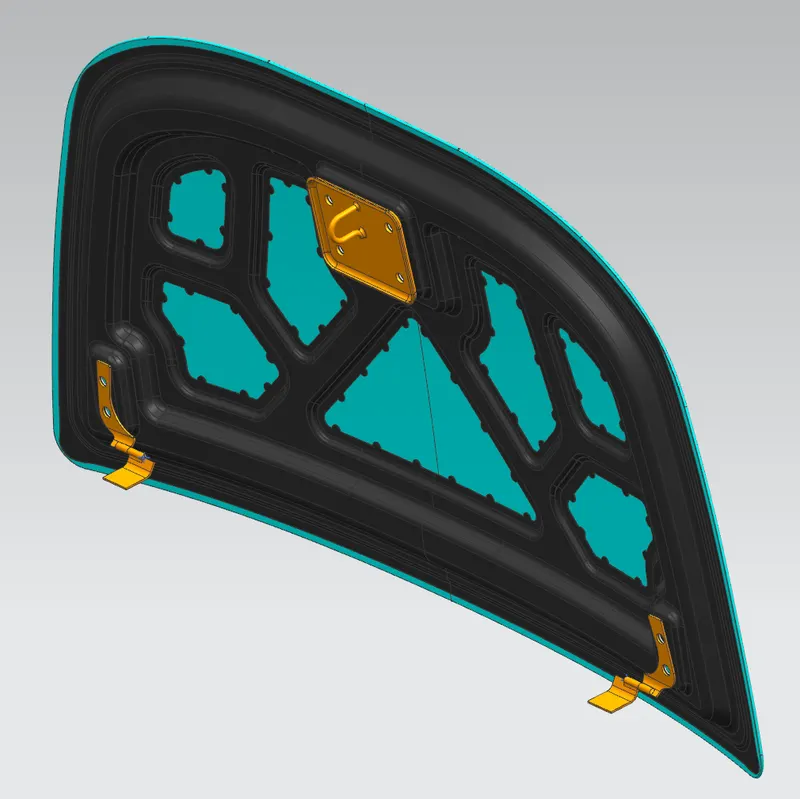
Fig 25:- Hood Assembly