Hood design-Week 2
Introduction
A car hood is the removable front part of a car that covers and protects the engine. In most cars, the hood is hinged at the front end, so it can be lifted up to provide access to the engine compartment. Car hoods come in a variety of designs, depending on the make and model of the car.
There are three main styles of car hoods:
-The conventional hood, which is hinged at the front and opens towards the windshield;
-The clamshell hood, which is hinged at the rear and opens towards the back of the car;
-The lift-off hood, which is not hinged and can be removed completely.
Different materials are used for car hoods, depending on the make and model of the car. Some common materials include aluminum, steel, plastic, and fiberglass. Car hoods are usually painted to match the rest of the car body.
Car Hood Terminology[edit]
There are a few terms that are used to describe different parts of a car hood:
-The bonnet is the British term for what North Americans call a “hood”.
-A scoop is an opening in the bonnet that allows air to enter and cool down the engine. Scoops can be functional or purely cosmetic.
-A vents is an opening in the bonnet that allows heat to escape from under the bonnet. Vents can also be functional or purely cosmetic.
Hood Types
Hoods are an important component of every vehicle, and there are several different styles that are available on the market. The type of hood that you choose will depend on your personal preferences and the type of car that you have. Here is a brief overview of the different types of hoods that you can choose from:
-Standard Hood: This is the most common type of hood, and it is typically made from steel or aluminum. Standard hoods are easy to maintain and they provide good visibility for navigation.
-Release Hood: Release hoods are designed for easy access to the engine compartment, and they are often used on sports cars. These hoods usually have a release mechanism that allows them to be opened without the need for tools.
Materials
While navigation on a car hood is not an easily visible component, it is one of the most important functional aspects of the vehicle. The hood, or bonnet, is the hinged cover over the engine compartment at the front of the car. In addition to providing access to the engine for maintenance, the hood also protects the engine from debris and weather.
There are several styles of hoods, including those with a scoop or vents to improve airflow, and those with a raised section in the center to improve visibility. The terminology can vary between countries, so be sure to check your references before you buy.
Materials
Hoods are typically made from steel or aluminum[1], although some racing cars have composite materials[2] for added strength or weight savings. In general, steel is cheaper and heavier, while aluminum is more expensive and lighter.
Scoops and vents
Scoops and vents are used to improve airflow into the engine compartment. They can also be used for cosmetic purposes only[3]. Hood scoops typically protrude from the surface of the hood, while vents are generally recessed into the hood surface.
Release mechanisms
In order to open the hood, there is typically a release mechanism located inside the vehicle near the driver’s seat[4]. This may be a simple latch that you pull, or it may be a handle that you must depress before pulling the latch. Some vehicles also have an external release mechanism[5], which can be useful if you need to open the hood when there is no one else around to help you.
Styles
There are many different styles of hoods[6], including those with scoops or vents, raised sections in the center (for improved visibility), and even transparent sections (for even better visibility). The style of hood that you choose will depend on your personal preference and your budget.
-Styled Hood: Styled hoods are designed to improve the appearance of the car, and they are often made from fiberglass or carbon fiber. These hoods may require special care during maintenance, but they can give your car a unique look.
-Custom Hood: Custom hoods are made to order, and they can be made from any material that you desire. If you want a truly unique look for your car, then a custom hood is the way to go.
Tesla Car Hood panel

Design Considerations in Hood Design
Head Impact Zone
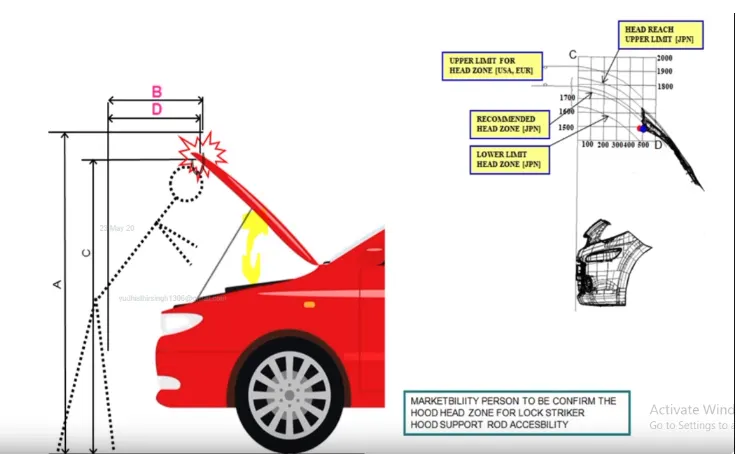
- A lot of engineering happens behind a stylish hood design. When a pedestrian is hit by a car, he falls onto the hood. A side reference line is the trace of the highest contact point between a straight edge inclined at 45 degrees from the ground and the side of the vehicle. If the side reference line touches the fender of the car the hood is of inlaid type. If it touches the hood then it is called a wrap-around hood.
- According to different regions, head zones are defined by considering the average heights of pedestrians. The below image shows American, European, and Japanese head zone standards. The opening angle of the hood is also decided as per predefined standards.
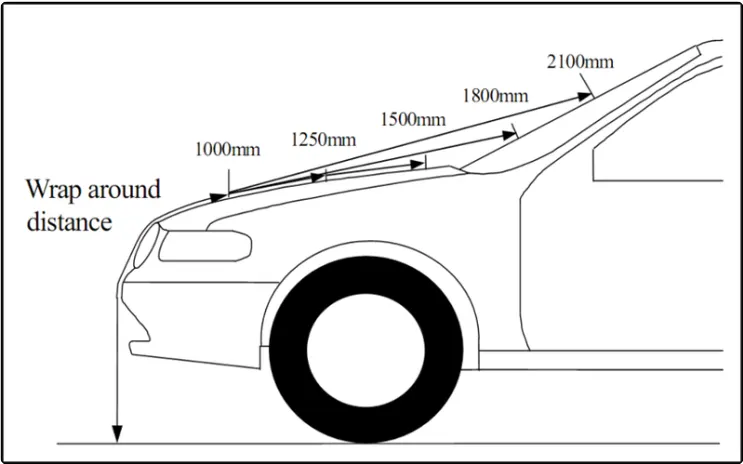
- Wrap around distance is the trace of points received on the front structure when one end of the flexible tape of required length is held at the ground reference line and the other end in contact with the front structure.
-
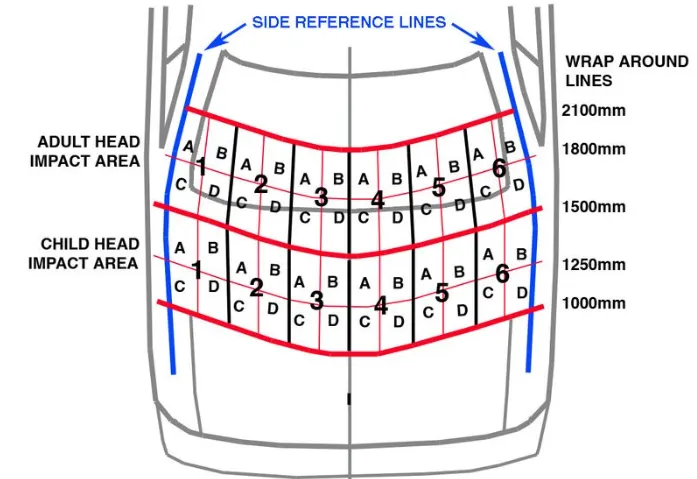
When a child hits on a hood his head will fall between 1000 to 1500 mm area whereas When an adult hits on a hood his head will fall between 1500 to 2100 mm.
EURO NCAP Test
- EURO NCAP Test is performed to check the safety of pedestrians by considering head impact, leg impact, etc.
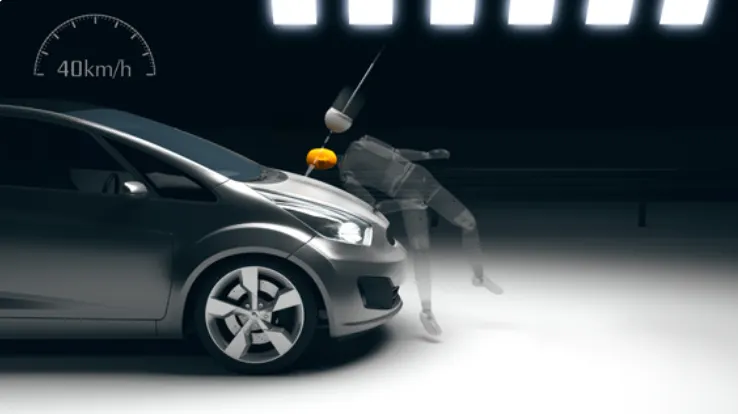
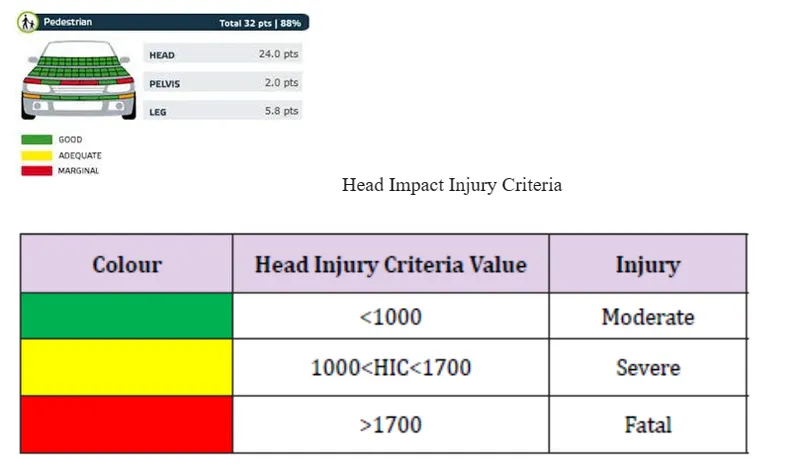
- As per NCAP Head impact criteria should be below 1000 to have a moderate injury. The hood designer's aim is to develop a hood having a major green zone.

- Where t1 and t2 are the initial and final times (expressed in seconds) of the interval during which the HIC attains a maximum value and a(t) is the resultant acceleration (expressed in G) measured at the head CG.
- The time duration (t1-t2) used in the calculation should be taken as the contact time for the impact, however, this is often very difficult to ascertain in physical evaluations using crash test dummies or headform simulators. In using HIC for assessing the potential of concussion than a maximum time duration of 15 msec should be used, which was the maximum time duration for which the original tolerance curve was developed. Longer contact time durations can be used to predict skull fracture.
- The highest acceleration, independent of location or direction, should be used in the Head Injury Criterion, which will therefore be the resultant acceleration measured at the head's center of gravity.
- After a test, points are allocated to the impact portion ( which shows the color code at impact areas ), and accordingly, a pedestrian safety rating is assigned to the vehicle. The below Image shows different color zones for pedestrian safety.
Different ways to Increase Rating
- By removing the excess material from the hood inner panel head injury value can be reduced
- By providing deformable mounting points so that in case of collision they can consume a force by deforming easily leading to an increase in rating.
Hood Stay
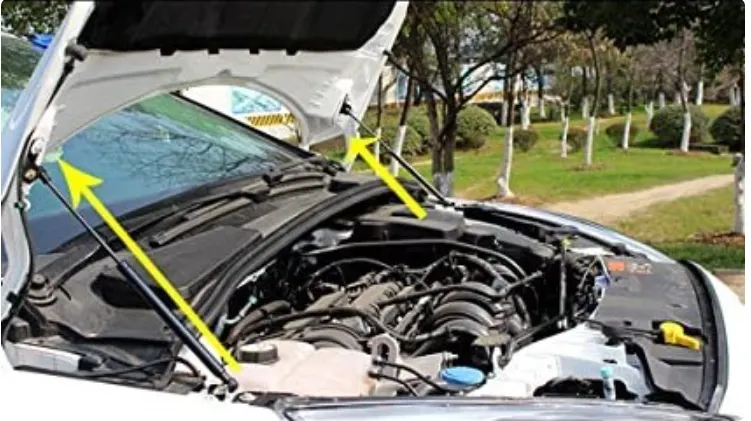
A Hood stay is an apparatus for an engine room of a car, which can safely keep an engine hood in an open state even if an external force is abruptly generated due to vibration, wind and can facilitate an opening/closing of the engine hood.
The hood stay has two types. One is a support rod and the other is gas stay.A support rod is a device used for supporting an engine hood of a motor vehicle in its open position by means of a rod.
Support Rod
Support rods are designed by providing embosses and holes on them to avoid bending of the rod as compared with straight support rods.
Gas Stay
Gas Stay is a device used for supporting an engine hood of a motor vehicle in its open position by means of an actuator that is activated by gas.
Hinge
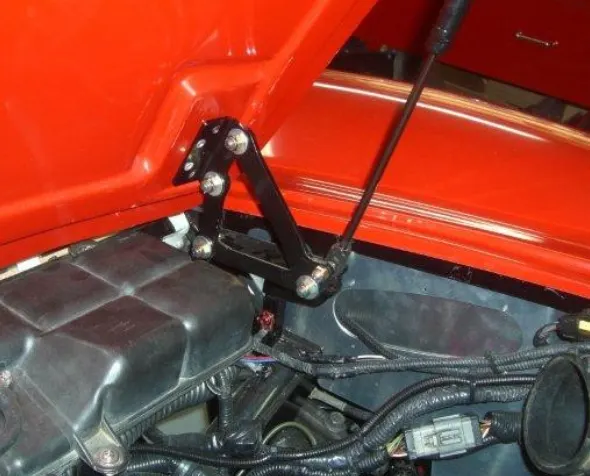
The hood hinge is a pivot and bracket mechanism that makes it possible for you to open and close your hood. Each car typically has a pair of hood hinges installed in the front of the vehicle.
Striker
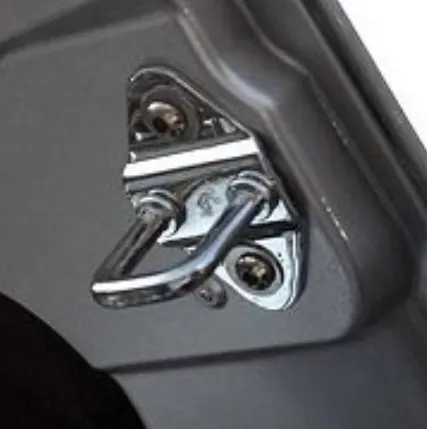
It is attached to the hood and is used to keep the hood panel in the lock position.
Hood Latch Striker is designed for long-lasting use. Its durable steel construction safeguards against body damage, ensuring the vehicle hood won't unexpectedly open while driving.
Manufacturing Processes used in Hood Design
Deep Drawing
The illustration depicts the deep drawing technique. A punch, die, and binder is stiff tools. After inserting the metal sheet blank, the plate holder shuts in deep drawing.
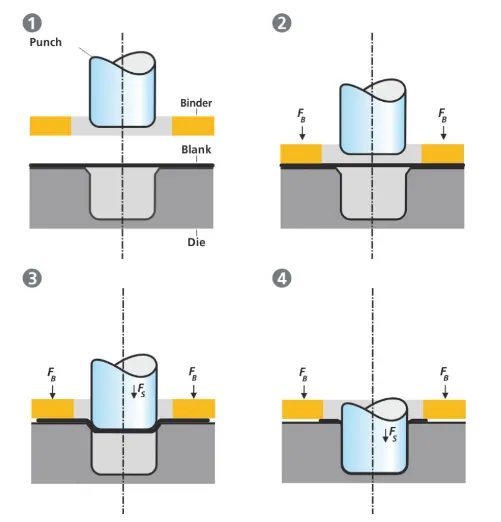
The sheet is then clamped between the die and binder. This procedure slows the flow of the sheet as it is pulled, preventing wrinkles from accumulating under the binder. The punch creates the sheet in the die by stretching it over the die radius. As a result, the amount of punch power required for formation is gradually increased up to the punch's lower dead center.
Hemming
Hemming is a sheet metal forming operation that joins sheets by bending them to 180°.
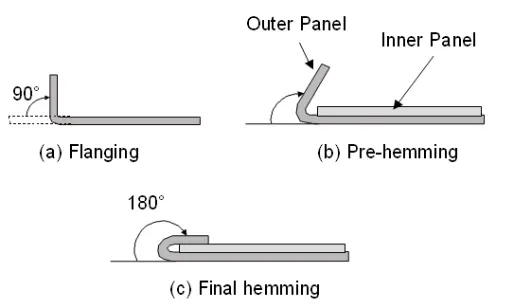
The hemming technique is used to create automobile body panels and pieces such as deck lids, trunk lids, doors, hoods, and tailgates.
Emboss Definetion
Sheet metal embossing is a stamping process for producing raised or sunken designs or relief in sheet metal. This process can be made by means of matched male and female roller dies or by passing sheet or a strip of metal between rolls of the desired pattern. It is often combined with foil stamping to create a shiny, 3D effect.
Latch Trajectory Motion
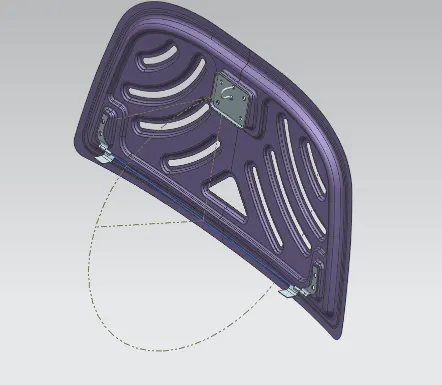
To ensure proper closing and opening of the hood panel, the striker is placed in such a way that its trajectory is perpendicular to the hinge axis( shown in blue).
Mastic Sealant
The Mastic sealant, often known as the Mastic point, is a rubber-like elastic material. Mastic spots are specified on the inner panel of the hood where the hood may readily distort.
They aid in the restoration of the hood's outer panel to its original shape once it has become distorted. The mastic has an 80mm influence area.
Parameter Consider For Hood Design :-
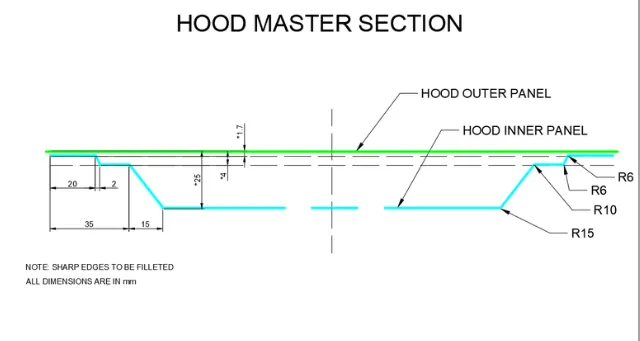
Hood Thickness and other design parameters information
- Outer panel thickness - 0.75 mm
- Inner Panel thickness - 0.75 mm
- Reinforcement thickness - 1.5 mm
- Minimum fillet radius - 3.75 mm
- No sharp corners inside the component
- A minimum draft angle of 7 degrees
Steps Involve in Ceation of Hood Assembly
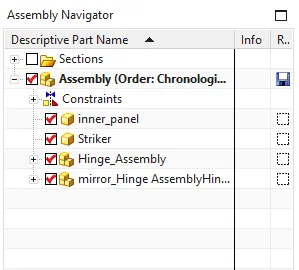
- First of all create assembly file and import all the componets.
- Then activate file of Inner panel hood which is newly created and link face of Outer panel in that part file using Wave Geometry Linker command.
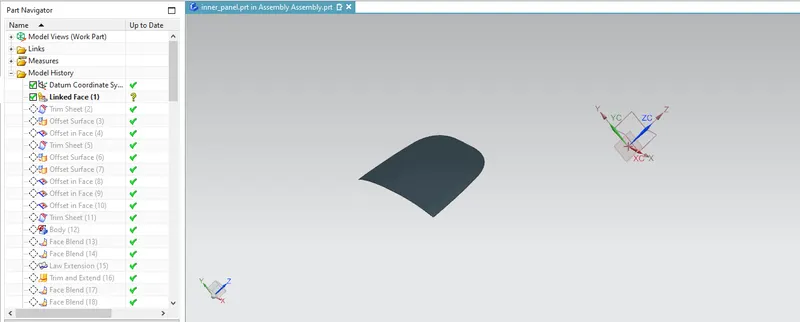
- Now according to design requirement forst of all make Outer panel half by uing Trim sheet. Then offset same plane by 1.7mm as per master section using Offset Surface command.
- Now we need only 20mm sheet potion so Trim sheet after using Offset curve in face command to take offset of curve by 20mm.
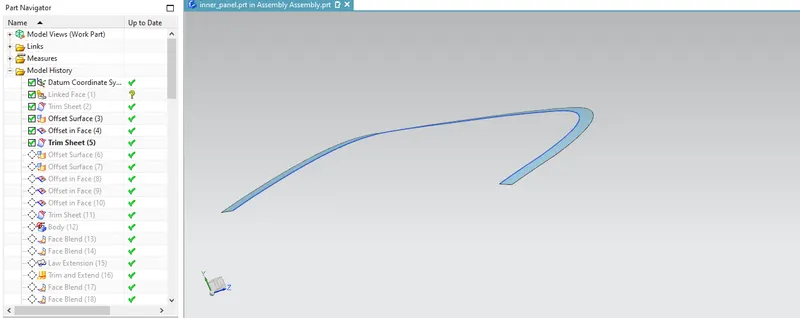
- Follow the same steps to create other layer surface of Inner Hood as per Master section.
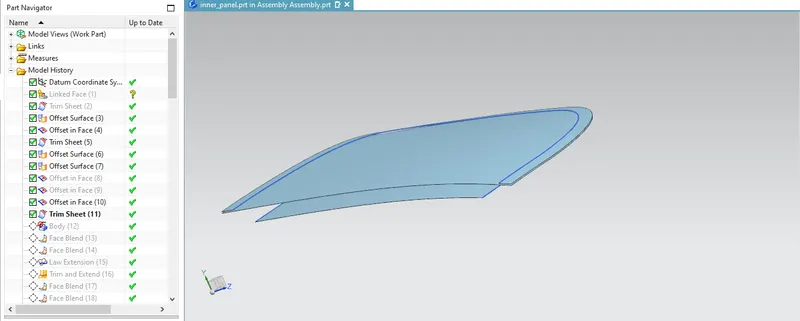
- Now connect upper two surfaces using surface or through curve. And apply Face blend to sharp edges with given radius in master section.
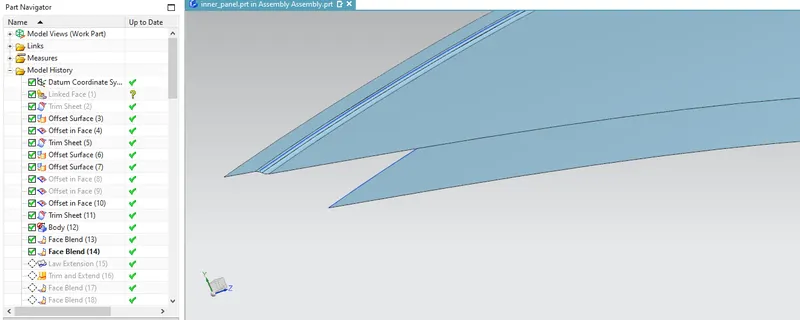
- By using Law of Extension and Trim and Extend command connect third layer with upper layers and give radius using Face blend command.
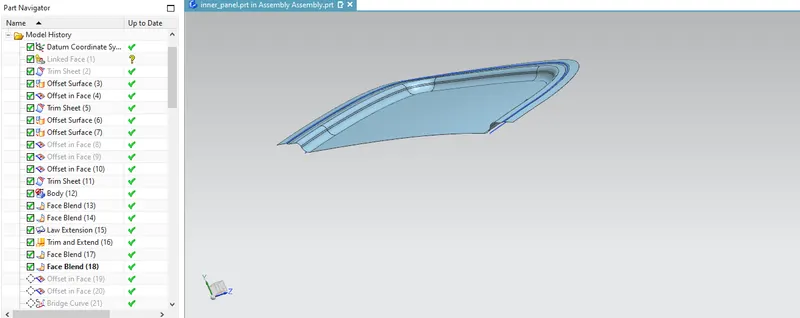
- After this we need to create emboss. First of all create curve in Lower surface using Offset in Face and Bridge curve. Thenafter create Emboss using Emboss command and also blend sharp edges.
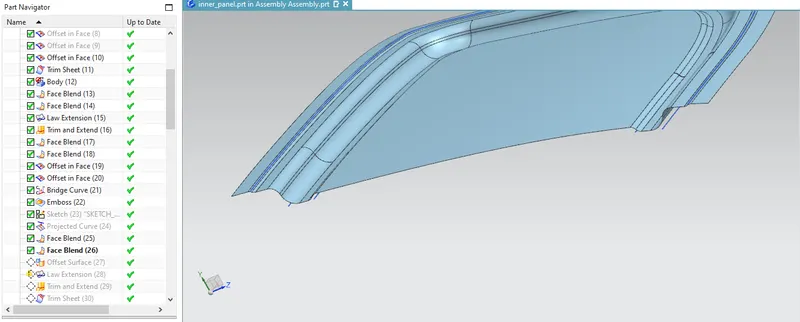
- Now again create another emboss using Sketch, Offset Curve, Law of Extension and Trim and Extend command with height of 10mm. Also apply face blends.
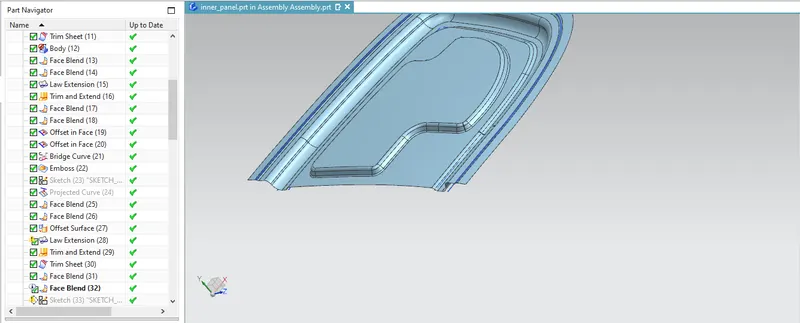
- Create another emoss with 5mm height which is messing with Mastic sealant. And create Mastic Points as circle in sketch and trim that section from Inner Panel.
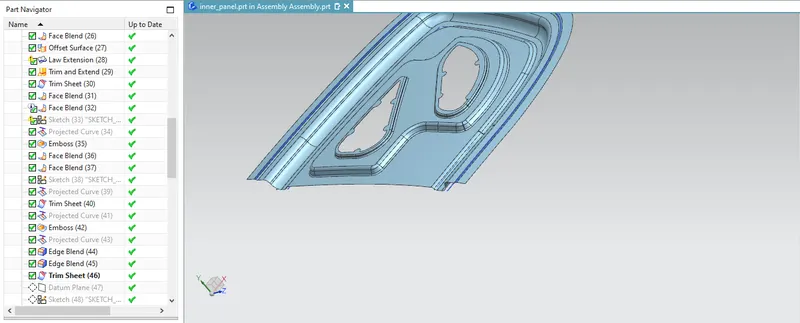
- Our Inner Panel is not flat surface. Its curved surface. So, to fix Hinge at two lower ends we need to create emboss which is align with Inner Panel trajectory. For that first of all create datum plane which is as symmetrical align to Inner Panel.
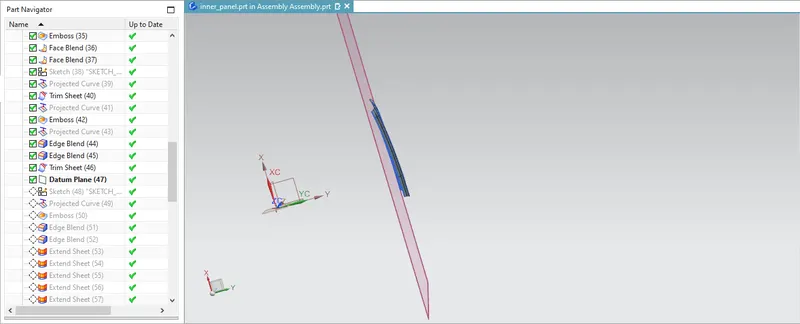
- Create Emboss which is parallel to this datum plane and give fillet to edges using Edge Blend Command.
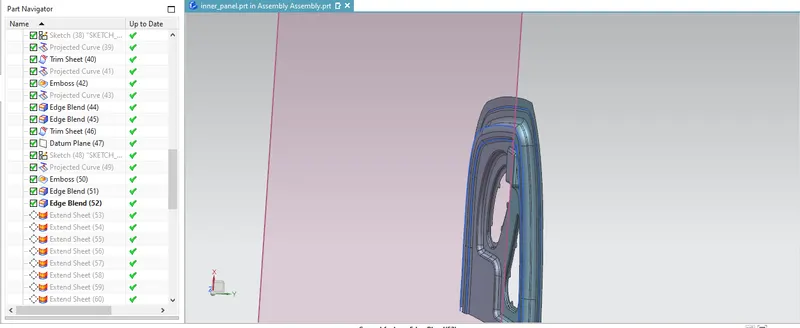
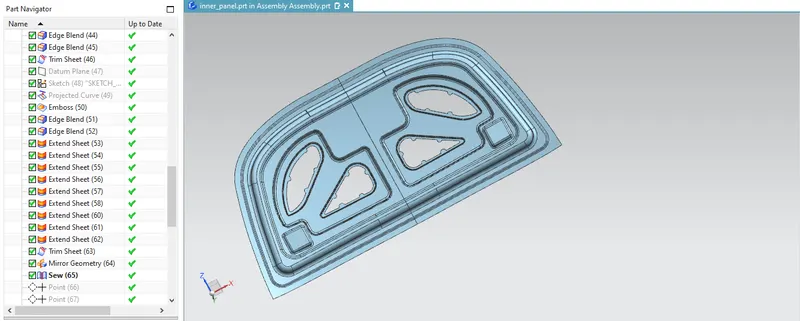
- Extend sheet and make trim from middle datum plane to assure flateness of surface of Inner Panel before Mirroring Geometry.
- After Mirroring Geometry join Geometry using Sew Command.
- To see any flaws or error in geometry use Examine Geometry Command.
- Generate Point and Line for Hinge assembly mirroring as a referance. But before that assemble Hinge Asembly to Inner panel.Fix Inner panel in assembly using Assembly Constraint command. Give Assembly constraint to Touch hingh surface to Inner panel emboss and then move assembly using Move assembly Command and assemble hinge assembly. Thenafter Mirror Assembly using above point and Lines.
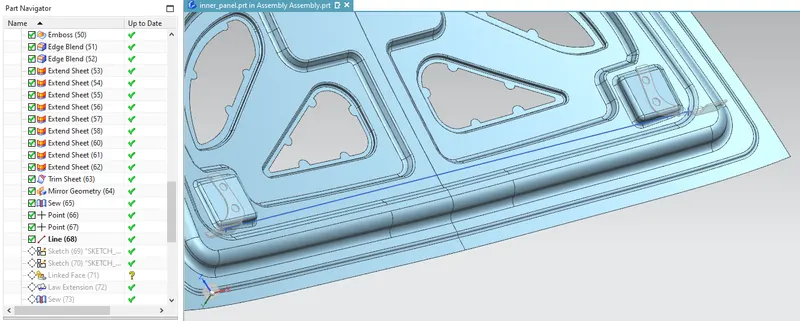
- Now creating Trajectory for striker. Create a circle from center point of hinge and create Tangent to the circle on which striker axis co-align.
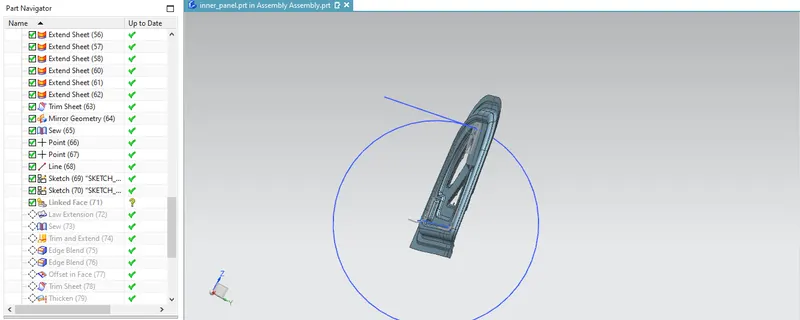
- For Striker emboss first link Lower face of striker to part file of Inner hood by Wave Geometry Linker and by using Law of extension and Trim and extend command create emboss.
- Also give necesary edge blend to sharp edges.
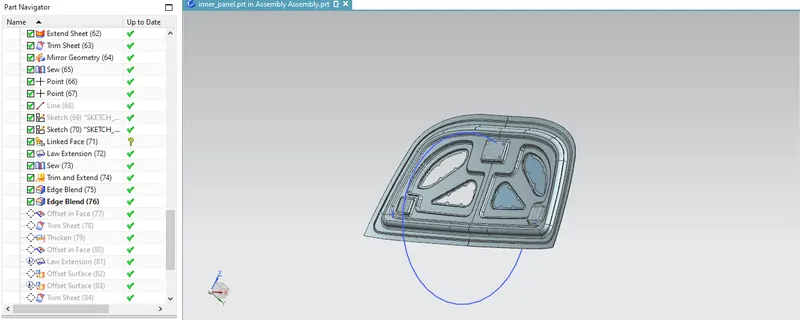
- Then apply thickness of 0.75mm to part using Thicken command.
- Next step is to create hemming to Outer surface with Inner panel according to given dimension in chellenge.
- Using offset surface and law of extension create hemming edge. Then trim it.
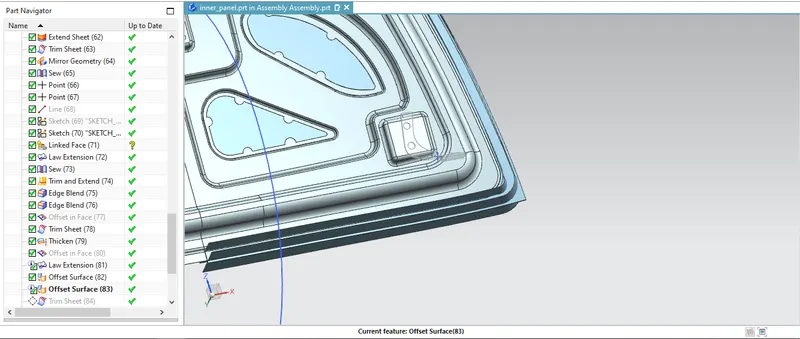
- Then create bending renif cuts.
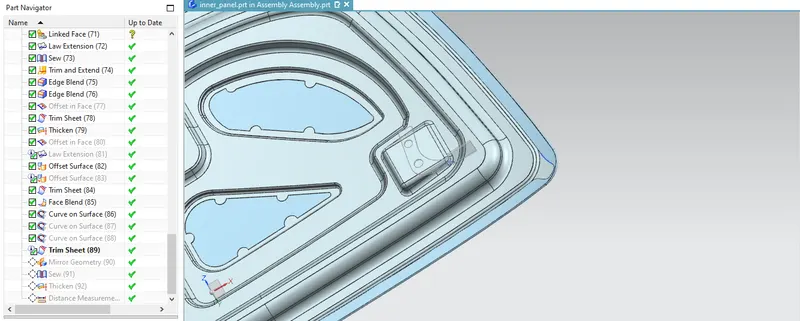
- At last mirror geometry of outer panel and thicken it to 0.75mm thickness.
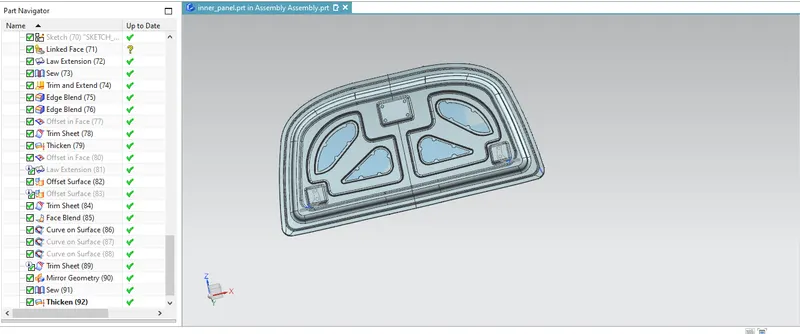
- Now assembly of hood is ready in assembly nevigator.
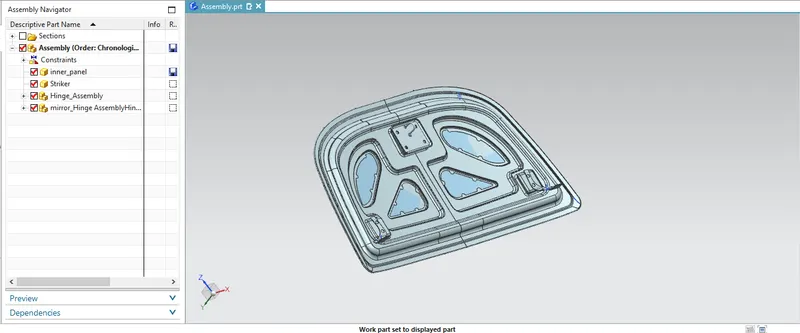
- So, these are the steps involved in design and assembly of Inner Panel and Hood assembly.