Fender Design
AIM:
To create a fender utilizing input class A surface, a drip area using a specified master section as a reference, and a variety of mountings such as sill mount, bumper mount, and A-pillar mount.
INTRODUCTION:
What is a fender?
A fender is a component of a car, truck, motorbike, or other vehicle that frames or covers the wheel well. Its primary purpose is to keep dirt,pebbles, mud, liquids, sand, and other road debris from being flung into the air while the tires rotate. Sometimes we can build provisions for indicators and rear-view mirrors on the fender.
There are two types of Fener available.
- Full Fender
- Half Fender
Full Fender:
The conventional full-bumper kind of fender uses more material than other types. This kind is utilized in older car designs, where it raises the total weight and thus lowers performance. Due to the increased surface area, upkeep is also comparatively higher.
Half Fender:
The Half Bumper type is a contemporary design that uses less material. Therefore, productivity rises by lowering the blank size and delivering more performance. When compared to complete bumper types, the maintenance is also comparatively minimal.
Function of Fender:
- The amount of dangerous exterior elements that your body and engine are exposed to is reduced by a car fender.
- It protects both the driver and the passengers in the event of an accident or collision. They are designed to bend during frontal and side crashes.
- Fender flares are connected to ensure that the body and engine come into contact with as few corrosive substances as possible.
- It reduces wind resistance and makes your automobile more aerodynamic.
IMPORTANT AREAS WERE CONSIDERED IN DESIGNING THE FENDER:
- A Pillar Mounting
- Drip Mounting
- Bumper Mounting
- Baffel Mounting
- Sill Mounting
PROCEDURE FOR DESIGNING THE FENDER:
- A PILLAR MOUNTING:
In a vehicle, pillars are vertical supports. On a car, they are found all around the glass. They are crucial for giving structural stability to a car, especially the roof, and for concealing glass in place.
The winshield is secured in place by the A pillar, while the first door's B pillar is at its end. They generally provide a vehicle's roof with significant structural support. They usually wrap all the way into the ceiling and are fastened to the body structure. Several parts may be added to improve the roof's integrity, depending on the design. They are also in charge of the location where a door's latch fastens to its body. The rear window of a car is held in place by a C-pillar.
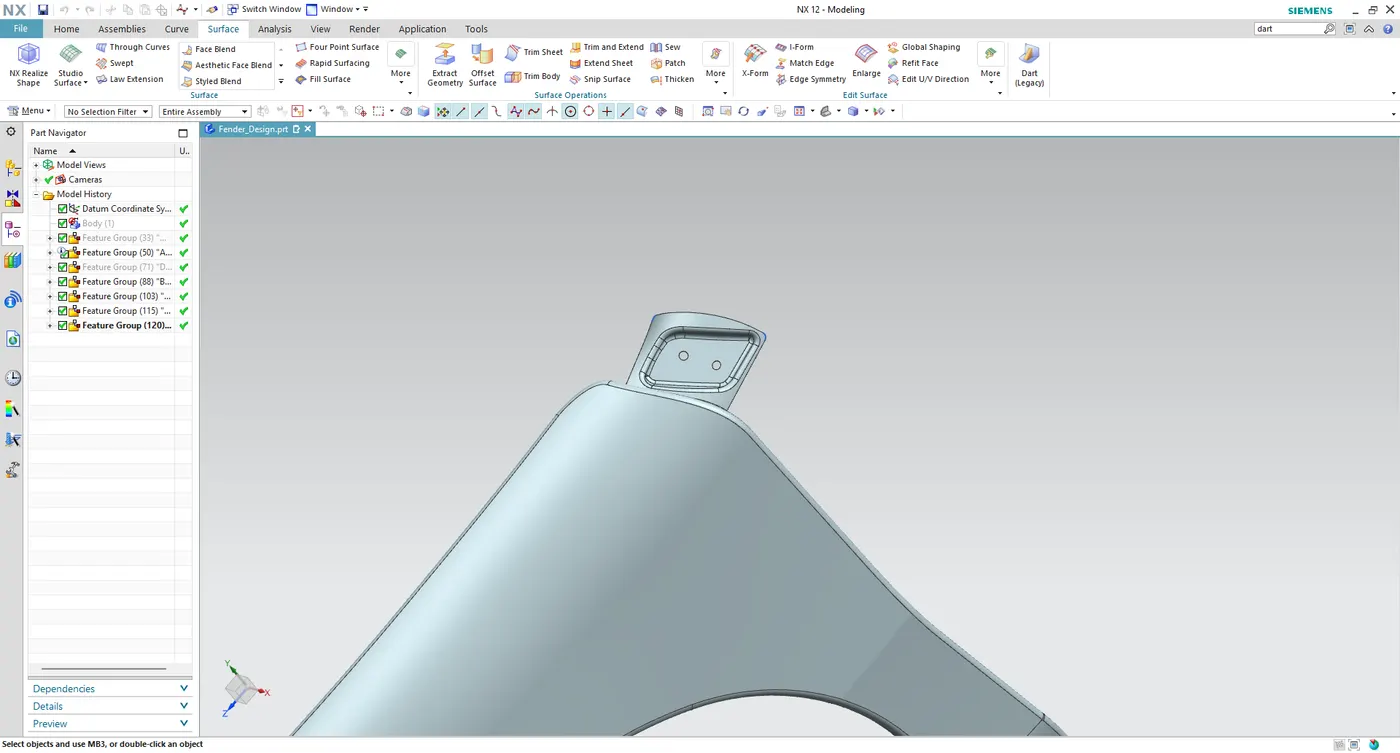
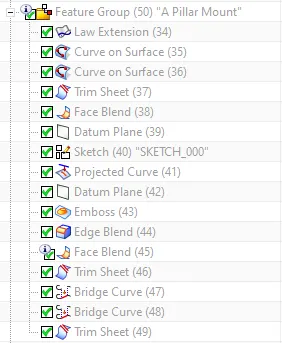
- First, we import the Class A surface into the tool, then create the curve on surface using the option "Curve on surface" for our requirement of design
- Now, use the "Law Extension" Command to develop the the surface and blend the two surface using the "Face Blend" option
- Now that we have the surface, create the sketch on that surface for the shape we need Once we have finished the sketch, project the curve using the command "Projected Curve."
- Use "Emboss" command to create the emboss structure and create the hole We create the circle in the sketch and we trim using "Trim Sheet" command
- Then given "Edge Blend" for the Embossed structure Finally, we got what we mentioned below.
- DRIP MOUNTING:
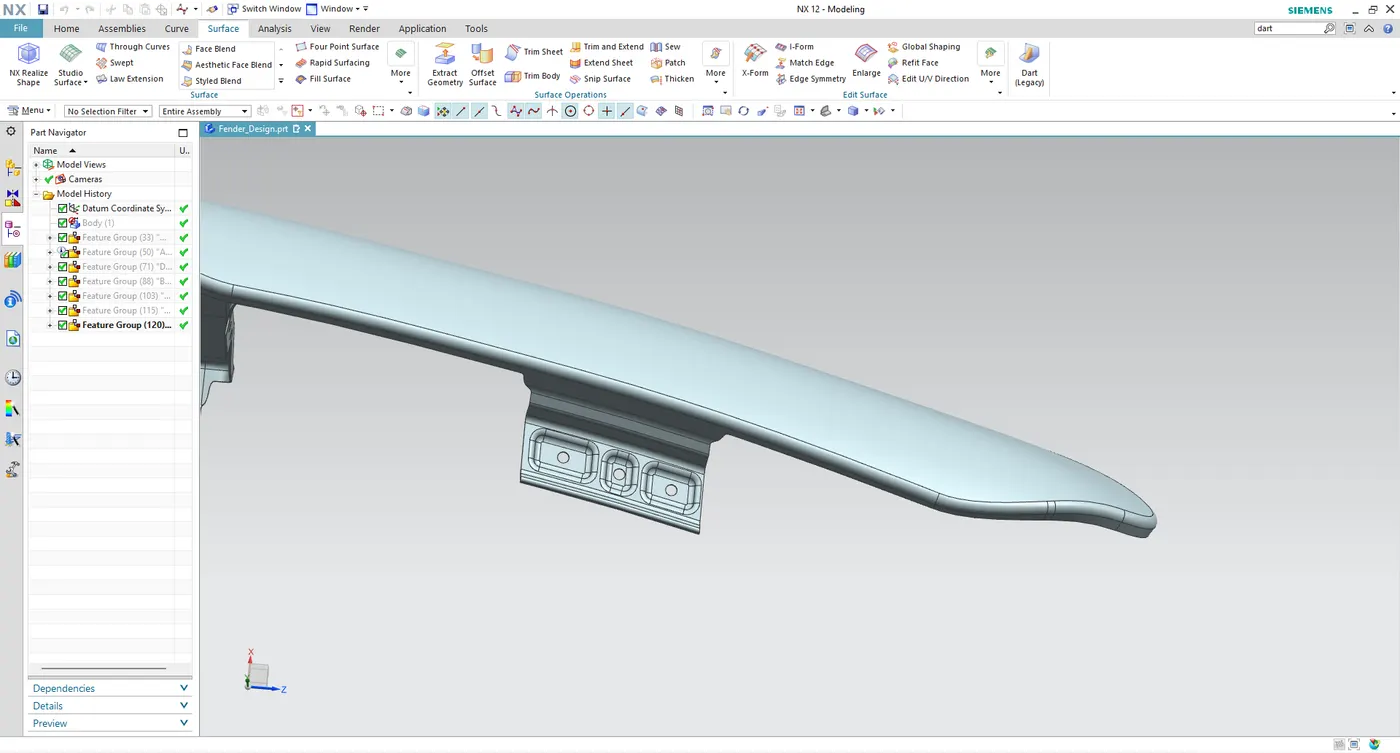
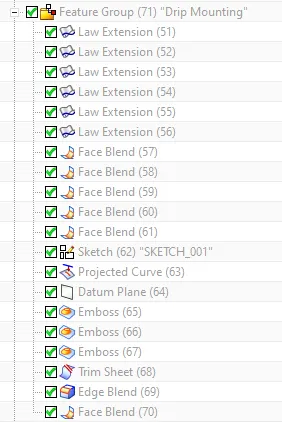
Fender's basic design is to build the drip area, which is a significant mounting zone that has to take certain factors into account in order to reach standard values. This design plays a crucial part in maintaining the appropriate space between the hood and the fender, which is invisible to the naked eye.
- First, we create the curve on surface using the option "Curve on surface" for our design requirement.
- Now, create the drip mounting using the given master section in the question and using the "Law Extension" Command to develop the the surface and blend the surface using the "Face Blend" option
- Now that we have the surface, create the sketch on that surface for the shape we need Once we have finished the sketch, project the curve using the command "Projected Curve."
- Use "Emboss" command to create the emboss structure and create the hole We create the circle in the sketch and we trim using "Trim Sheet" command
- Then given "Edge Blend" for the Embossed structure Finally, we got what we mentioned below.
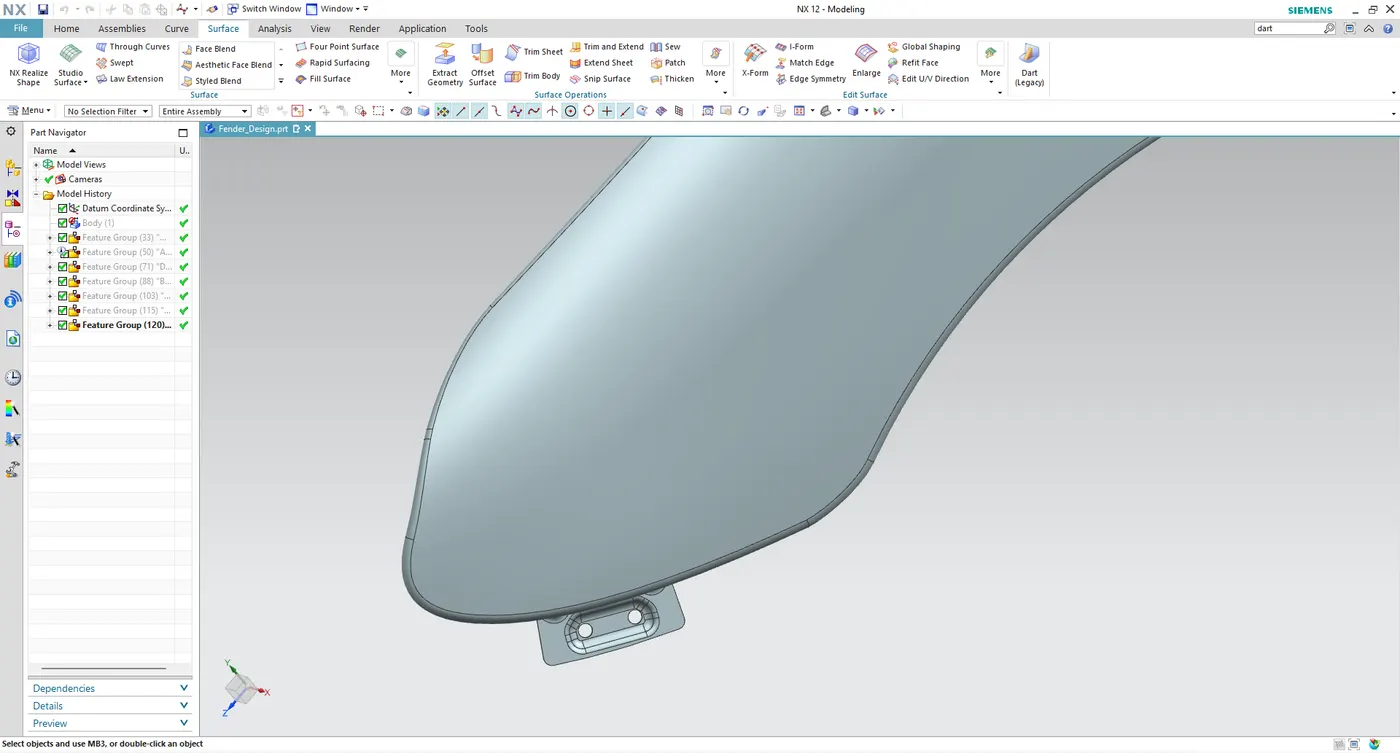
- BUMPER MOUNTING:
A bumper is a piece of equipment that is integrated into or connected to an automobile's front and back ends in order to lessen accident damage and, hopefully, save on maintenance expenses. More and more of them are being produced to lessen the harm that automobiles do to people that they hit, including bumper coverings made of flexible materials. To lessen the force of contact on legs, front bumpers in particular have been lowered and constructed of softer materials like foam and crushable plastic.
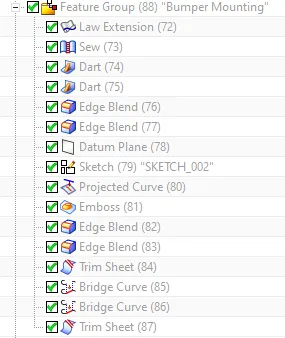
- First, we create the curve on surface using the option "Curve on surface" for our design requirement.
- Now, use the "Law Extension" Command to develop the the surface and blend the two surface using the "Face Blend" option
- Using the command "Dart" for the better strength of the bumper side, select the two faces on the surface, and given that the depth is D 5mm and the radius is R 3.75mm,.
- we have the surface, create the sketch on that surface for the shape we need Once we have finished the sketch, project the curve using the command "Projected Curve."
- Use "Emboss" command to create the emboss structure and create the hole We create the circle in the sketch and we trim using "Trim Sheet" command
- Then given "Edge Blend" for the Embossed structure Finally, we got what we mentioned below.
- BAFFEL MOUNTING:
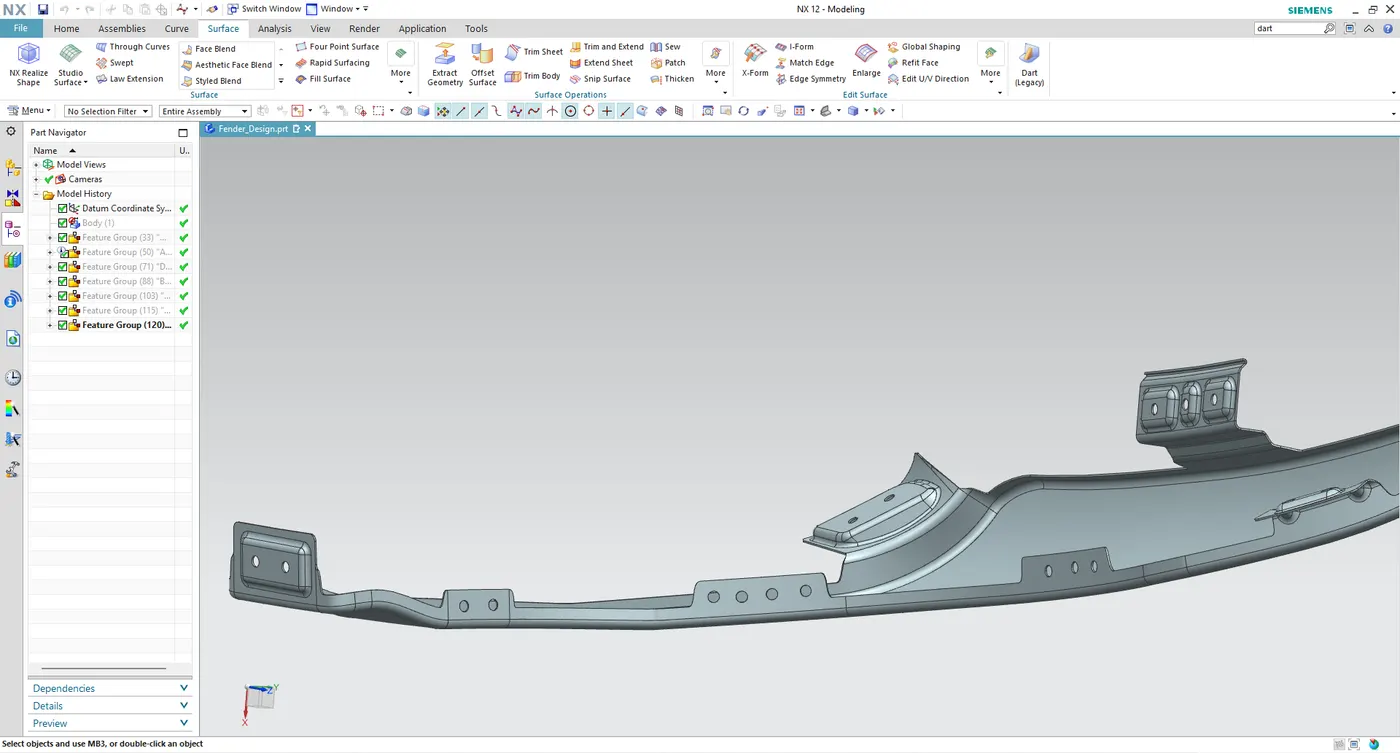
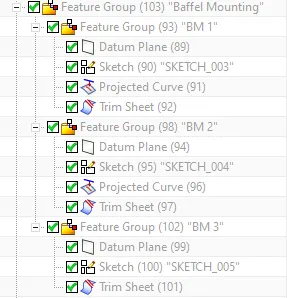
Splash protector mountings were designed to prevent debris from getting into the engine room and other components. All that is needed is a place to put the splash guard, so whatever holes or slots are needed are supplied.
- First, we create the curve on surface using the option "Curve on surface" for our design requirement.
- we have the surface; create the sketch on that surface for the shape we need Once we have finished the sketch, project the curve using the command "Projected Curve."
- Create the hole We create the circle in the sketch and we trim using "Trim Sheet" command
- Finally, we got what we mentioned below.
- SILL MOUNTING:
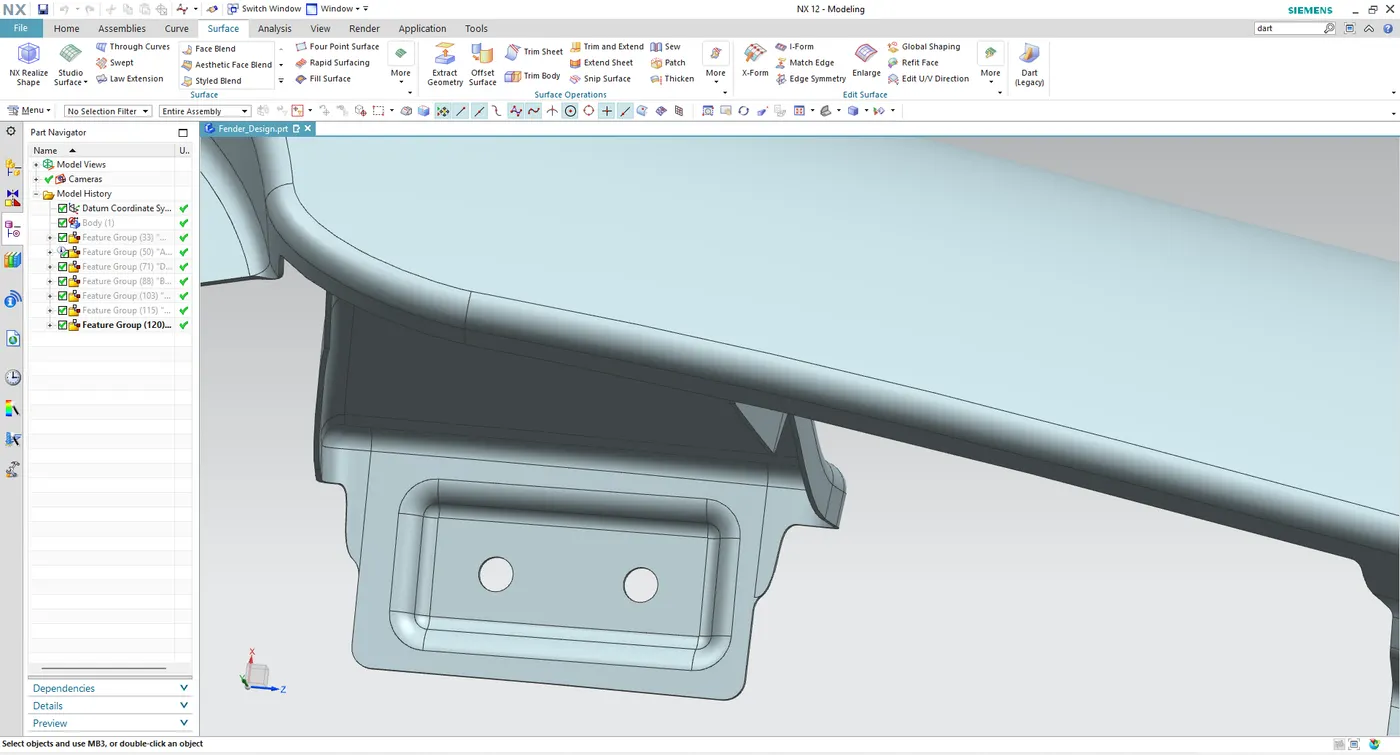
An automobile must have large holes on both sides of its body to accommodate doors. It is necessary to provide adequate rigidity to the parts of the vehicle body that surround the door openings, particularly the lower portion, because the vehicle body is subject to a variety of externally derived forces, including longitudinal twists and vertical bends that act around the axis of the body. In order to meet this requirement, side sills that are independently positioned at the bottom left and lower right portions of a vehicle body and that extend in the longitudinal direction of the vehicle body are often used.
- First, we create the curve on surface using the option "Curve on surface" for our design requirement.
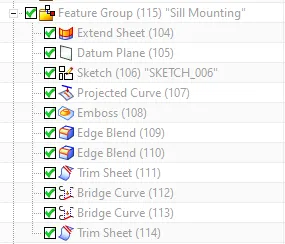
- Now, create Sill mounting for extent sheet using the "Extend Sheet" Command to develop the the surface
- Now we have the surface, create the sketch on that surface for the shape we need Once we have finished the sketch, project the curve using the command "Projected Curve."
- Use "Emboss" command to create the emboss structure and create the hole We create the circle in the sketch and we trim using "Trim Sheet" command
- Then given "Edge Blend" for the Embossed structure Finally, we got what we mentioned below.
- THICKEN SURFACE:
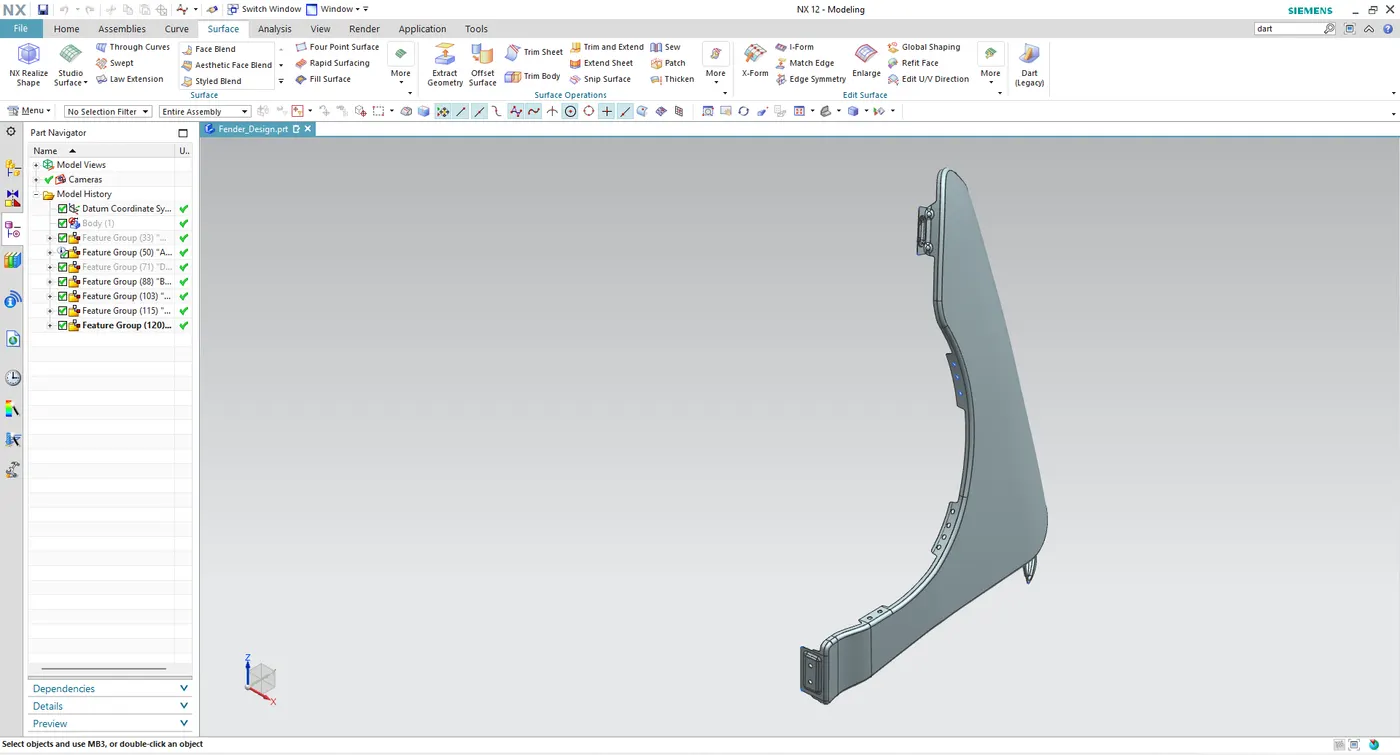
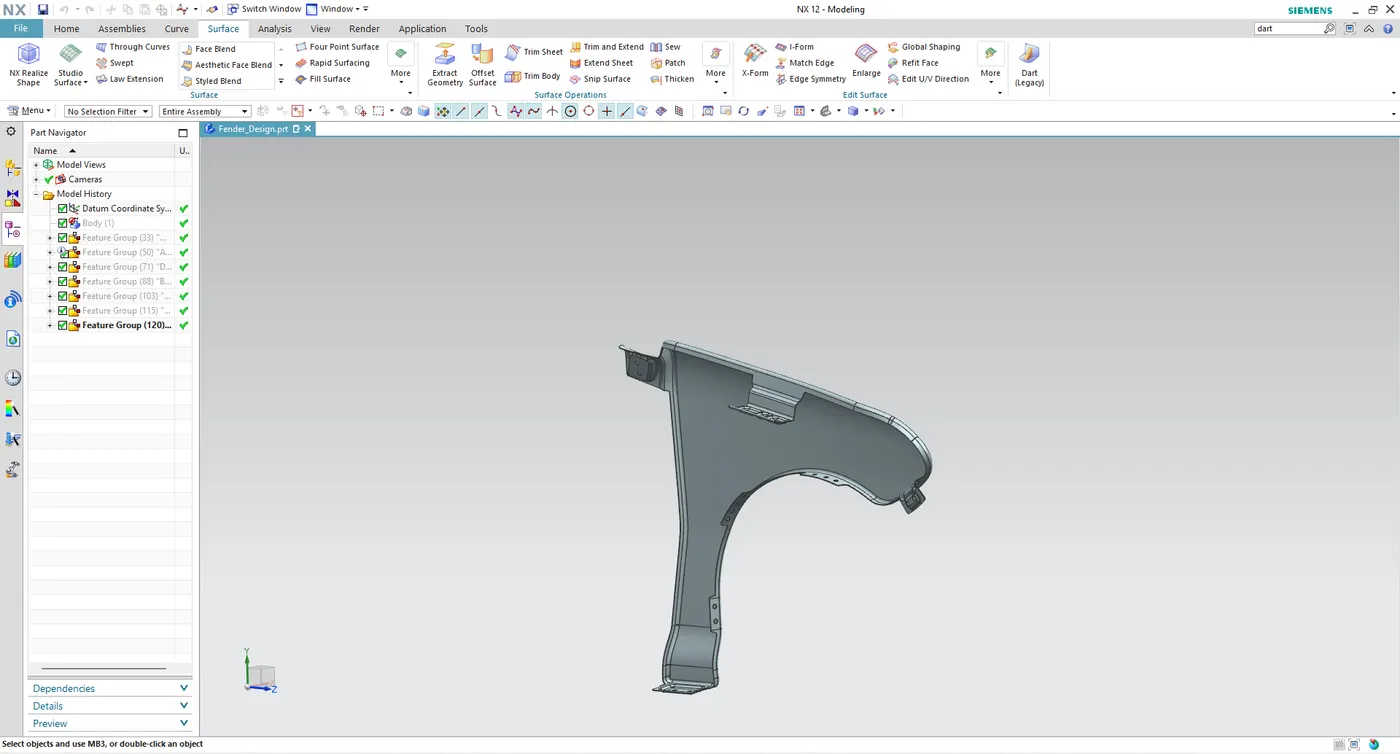
- Finally, we got surface and thickened the surface with 0.75mm using the "Thicken" command, and then we got what we mentioned below
- CONCLUSION:
Utilizing NX as a CAD program, the front fender is finally designed utilizing the specified skin data and the master section's drip mounting, A-pillar, sill, bumper, and splash mountings.
- FILES:
- Files were uploaded in the browse option in the name of "Challenge 3 (Fender Design).zip" and images also upladed in same folder