Fender Design
Objective:
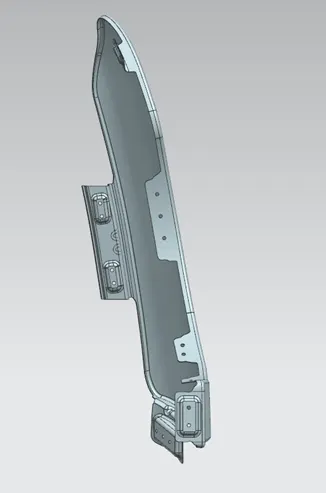
Design a front fender using provided skin data and master section and develop part incorporating fixing techniques.
Fender:
A car tire fender is a plastic, metal, or rubber panel that bends over the wheel on the side of the car, extending from the front bumper to the car door. The main function of car fenders is to protect tires and braking systems from mud or other impurities so that they are safer and more efficient.
Fenders also help prevent mud, dirt, dust particles and other liquids from being thrown into the air when the tires are rolling. This component is installed as well as part of the car frame, and is available in various models and sizes. Curved shape, located right near the wheel.
Fenders do not only cover the car tires. There are many functions that this component has, including:
<!-- [if !supportLists]-->01. <!--[endif]-->Wheel guard
Fenders are useful as wheel protectors from unexpected things that could happen on the road. This also applies to protecting pedestrians and other road users. The debris that comes from the street can potentially cause discomfort to others.
For example rocks, mud, or other liquids so they don't get thrown into the air. The debris will be stuck when the wheels are moving. As a result, driving becomes more comfortable and does not disturb other road users.
<!-- [if !supportLists]-->02. <!--[endif]-->Protector of scratch
The function of this one actually comes from the fender cover. This one part is the front cloth which is located on the right and left side of the fender. Its function is to protect the car when it is being serviced or routine check. The service that is carried out will not cause scratches, so that the car parts are maintained. Keys used for this service can cause scratches accidentally, requiring protection.

<!--[endif]-->
Types of fenders design:
Full bumper type:
These types of bumpers can be seen in an old type of cars. Full bumper type fenders have more area and carry lot of weight. Also wastage is more while manufacturing these kinds of design products.
Half bumper type:
In order to overcome drawbacks facing in full bumper type fenders this design was introduced. Steel usage is very less comparatively and material wastage is decreased. We can have two fenders in a single blank which will save the cost of material and wastages.
Fender mounting areas:
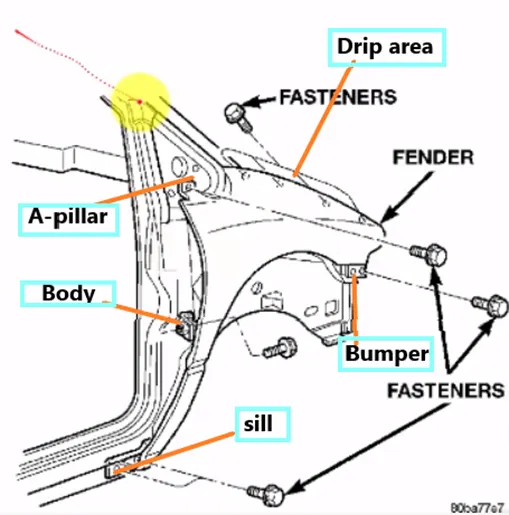
In order to have stable fixing of fender we fasten the fender body on the outer edges. There are different mounting regions and are,
<!-- [if !supportLists]-->· <!--[endif]-->Drip area mounting
<!-- [if !supportLists]-->· <!--[endif]-->A Pillar mounting region
<!-- [if !supportLists]-->· <!--[endif]-->Hood mounting
<!-- [if !supportLists]-->· <!--[endif]-->Baffle mounting
<!-- [if !supportLists]-->· <!--[endif]-->Sill mounting
 <!--[endif]-->
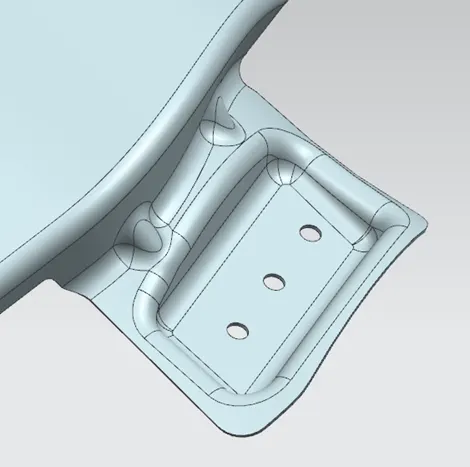
Drip area mounting:
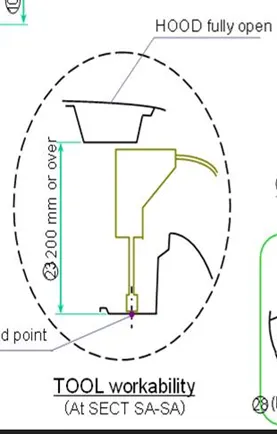
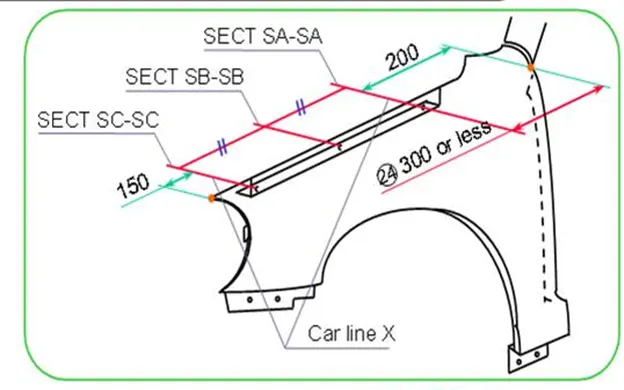
It is important fasten area where fender is mounted on the engine compartment. Proper space relief considerations to be followed while designing dip area mounting. Few design considerations followed while designing the dip area mount.
<!-- [if !supportLists]-->Ø <!--[endif]-->Min 50mm space should be provided between dip mount edge and engine outer.
<!-- [if !supportLists]-->Ø <!--[endif]-->Min 150 space from head light corner to dip mounts edge.
<!-- [if !supportLists]-->Ø <!--[endif]-->Max 200mm distance from A pillar.
<!-- [if !supportLists]-->Ø <!--[endif]-->There should be sufficient space for the tool to insert inside for fastening bolts.
<!--[endif]-->
Drip mounting
For design of drip area mount we have provided with master section. Follow the master section to create a drip area mount.
<!-- [if !supportLists]-->Ø <!--[endif]-->The skin data provided has the flange extended and we use the same flange for the design. Flange length will be reduced to 5mm from the fillet edge using offset curve in face and trim command.
<!-- [if !supportLists]-->Ø <!--[endif]-->Define the A pillar mount area in order to maintain design consideration of 150mm from A pillar.
<!-- [if !supportLists]-->Ø <!--[endif]-->Taking reference of A pillar and front light area take a proper distance and start drip mount design using law extension command.
<!-- [if !supportLists]-->Ø <!--[endif]-->Follow the master sections and use law extensions to create a surface with proper angulations.
<!-- [if !supportLists]-->Ø <!--[endif]-->Edges are provided with fillet radius as per master sections.
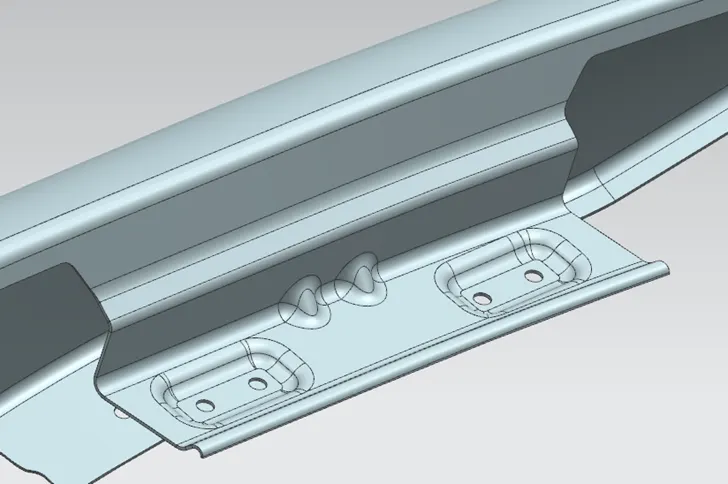
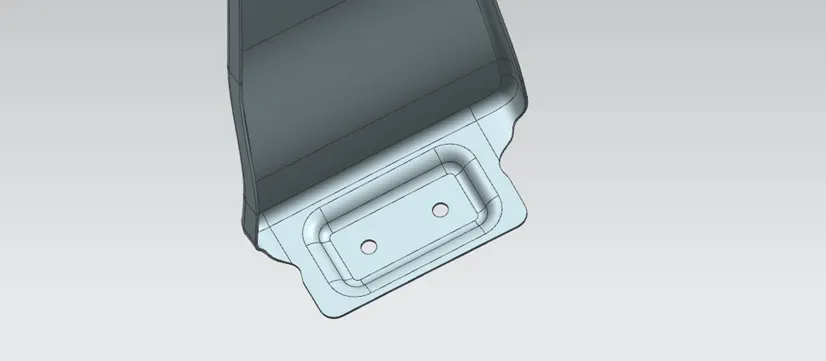
<!-- [if !supportLists]-->Ø <!--[endif]-->Ribs are created to enhance the sheet strength. Using dart option two ribs are created in the center.
<!-- [if !supportLists]-->Ø <!--[endif]-->Emboss is created on the mount area to have drill on the sheet.
<!--[endif]-->
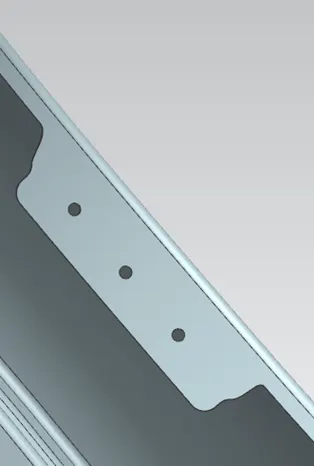
A pillar mounting:
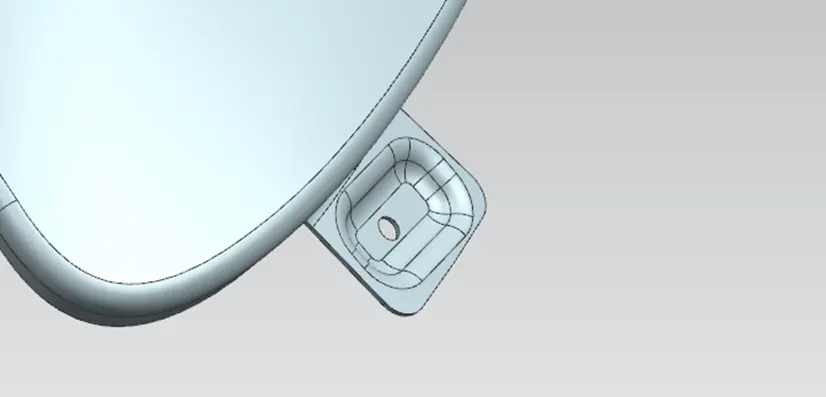
<!-- [if !supportLists]-->Ø <!--[endif]-->The Sheet is extended using law extension at an angle of 90 deg.
<!-- [if !supportLists]-->Ø <!--[endif]-->Emboss is created on extended sheet with drill holes on it using sketch.
<!-- [if !supportLists]-->Ø <!--[endif]-->All the sharp corners are filleted and trimmed off with stress relief curve on surface.
<!--[endif]-->
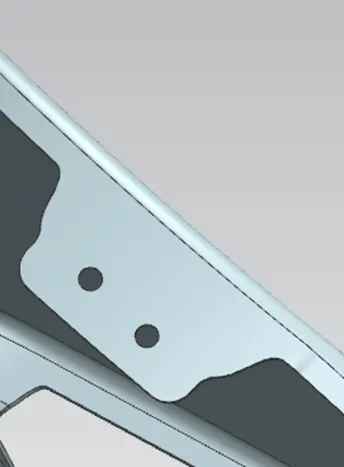
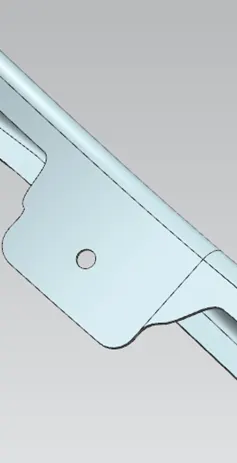
Baffle mounting:
Baffle mounting is an area where the baffle trim or mud guard is fixed using push clips. Create a drill holes on the baffle region to fix the trims.
Finally we thicken the surface to 0.75 mm to get the part.
 <!--[endif]-->
Sill mounting and hood mounting
<!--[endif]-->
Conclusion:
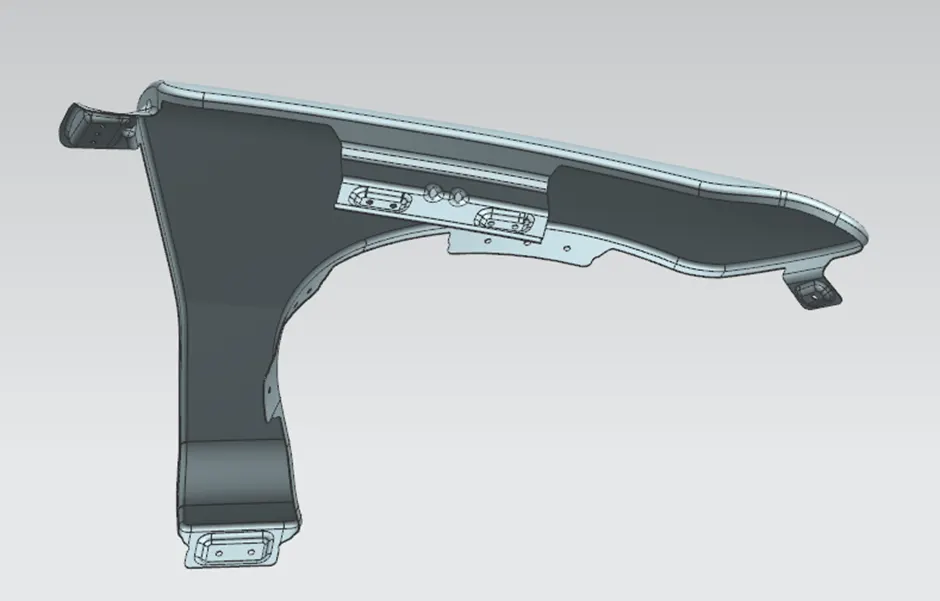
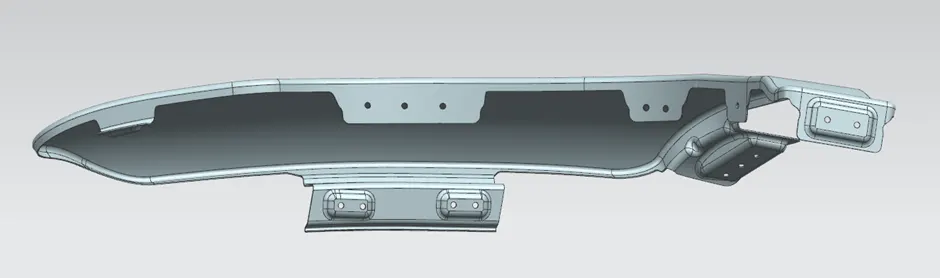
Fender design completed following the design guidelines and master sections.
All the mounting options provided with ribs for support where ever required.