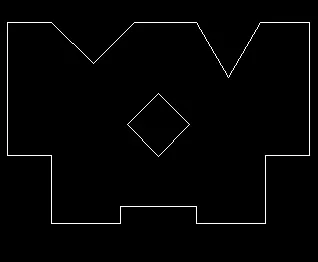
Drafting of various geometries using Chamfer, Fillet tool in AutoCad
AIM To draw the given figures in autocad
FIG1
PROCEDURE
- SELECT the line command
- specify the first point
- follow the series of command
- (@3,0)(@2.12<45)(@2.83<135)(@2<180) close
- select circle with center (1.5,1) from origin with radius 1.2 and press enter
- select circle with center (1.5,2.5) from the origin with radius as 0.8 and press enter
RESULT
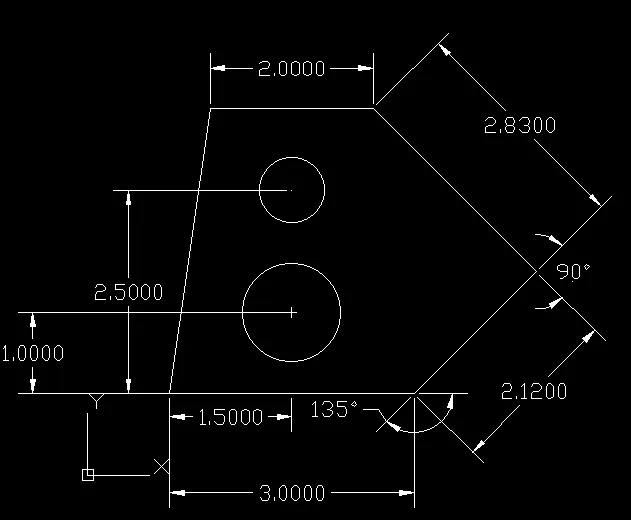
FIG2
PROCEDURE
- SELECT the line command
- specify the first point eg-Origin
- follow the series of command
- (@5,0)(@0,1.6)(back to origin)(@0,3.3)(@2.6,0) close the figure
- select circle command with center as (1.6,1.3) and radius as 1.6
RESULT
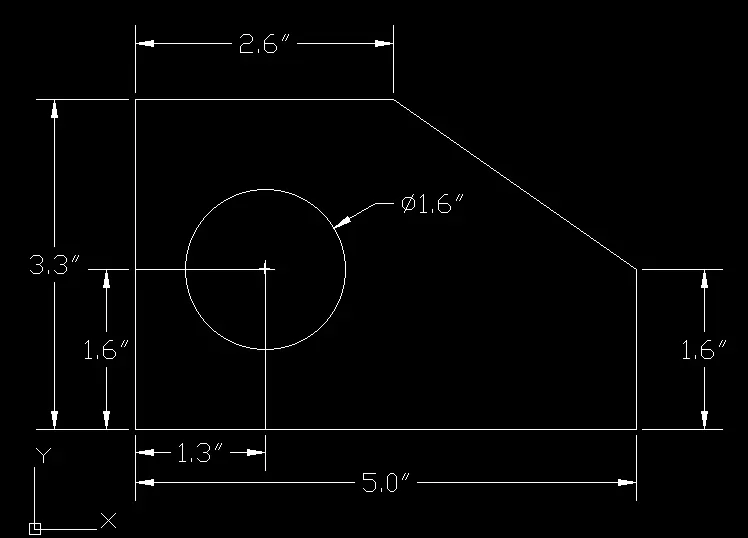
FIG3
PROCEDURE
- SELECT the line command
- specify the first point
- follow the series of command
- (@8,0)(@1.9<270)(@2.1<225)(@2.7<180)(BACK TO ORIGIN)(@2.5<270)
- Create a right angle triangle with base 2.6 and perpendicular as 3 and join it to the original figure
RESULT
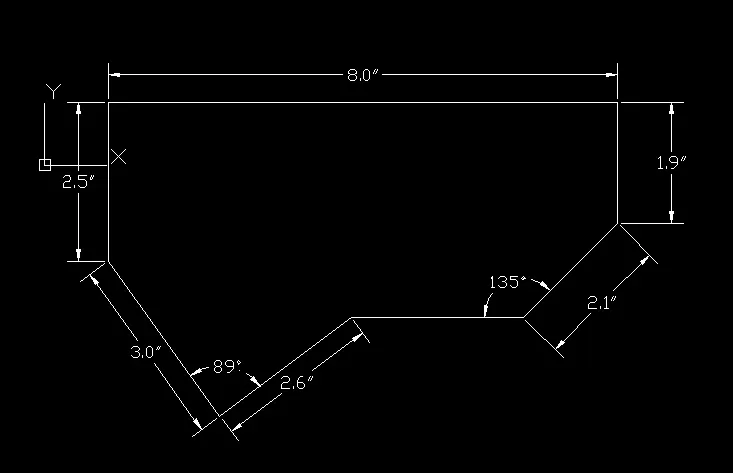
FIG4
PROCEDURE
- SELECT the line command
- specify the first point
- follow the series of command
- (@0,3)(@0,0.5)(@2.5,0)(@0,2.5)(@-2,0)(@0,3)(@-2.5,0)(@0,-2)(back to origin)(@0,3) close the figure
RESULT
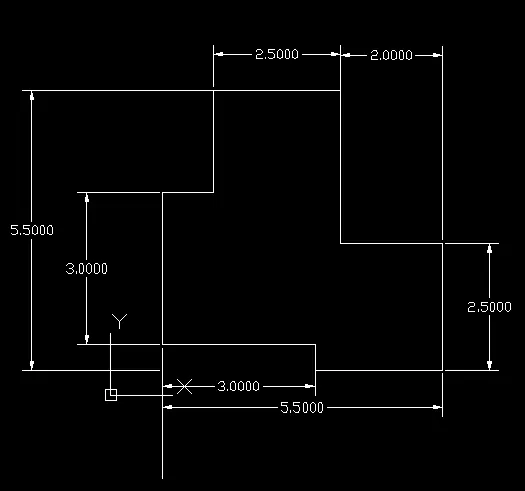
FIG5
PROCEDURE
- SELECT the line command
- specify the first point
- follow the series of command
- (@3,0)(@0,6)(@0,-6)(@5.5,0)(@0,6)(@0,-6)(@3,0)(@0,6)(@-3,0)(@-5.5,0)(@-3,0)CLOSE
- SELECT circle with center (1.5,3) and draw two concentric circle with dia 1 and 2
- SELECT circle with center (10,3) and draw two concentric circle with dia 1 and 2
- SELECT circle with center (5.75,3) and draw circle of dia 3
RESULT
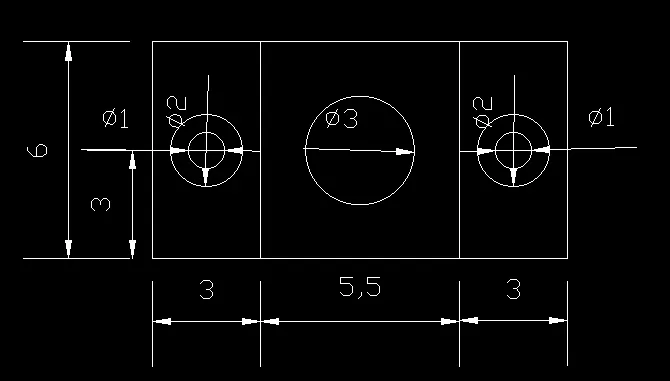
FIG6
PROCEDURE
A)
- SELECT the line command
- specify the first point
- follow the series of command
- (@0.5,0)(@0.5,0)(@0.5,0)(@0,0.5)(@0,1.5)(@-1.5,0)(@0,-1.5)(@0,-0.5) Manually close the intercepting lines
B)
- SELECT the line command
- specify the first point
- follow the series of command
- (@0,-0.5)(@2,0)(@0,1.5)(@-0.5,0)(@0,-1)CLOSE AND JOINT THE DIAGONAL
C)
- SELECT the line command
- specify the first point
- follow the series of command
- (@1.5,0)(@0.5,0)(@0,0.5)(@0,0.5)(@0,0.5)(@-2,0)CLOSE Manually close the intercepting lines
RESULT
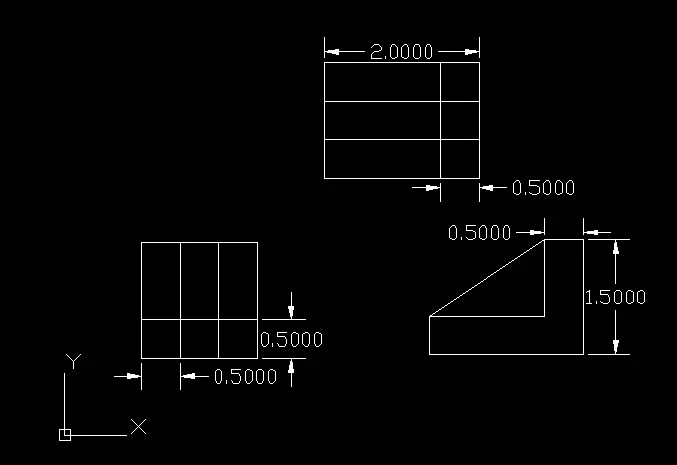
FIG7
PROCEDURE
- SELECT the line command
- specify the first point
- follow the series of command
- (@0,100)(@210,0)(@0,-75)
- SELECT CHAMFER TOOL and take radius as 15
- select dynamic mode create two square of side 35 and 25 on the base of the figure and chamfer their corner with radius of 35 and 25 respectively
- create a line 60 unit below the base line trim and chamfer its corner with radius of 20 and 6
- SELECT the circle command select the circle command and create the circle of 30 and 50 unit recpectively in the diagram with ceter as the center of the chamfer
- create a rectangle using line command with length 70 and width 30 as specified
RESULT
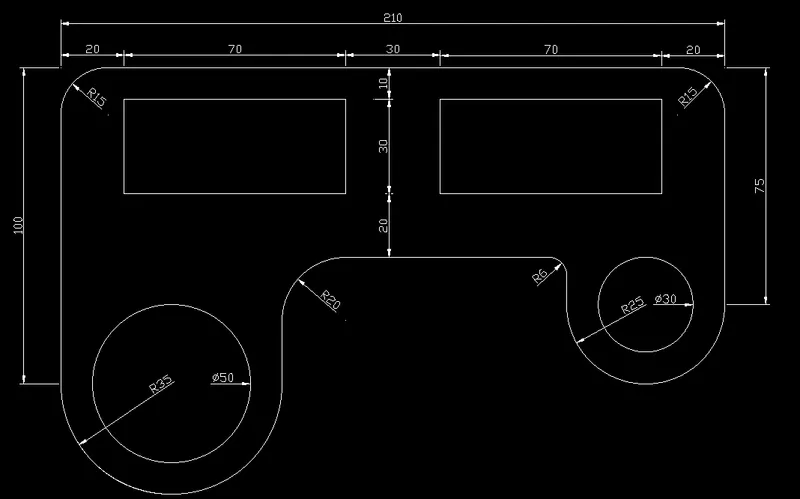
FIG8
PROCEDURE
- SELECT the line command
- specify the first point
- follow the series of command
- SELECT a circle and draw a concentric circle with dia 0.9 and 1.8
- draw another circle of dia 4 and 5 whoes center is 4.3 feet from the center of previous circle
- draw another concentric circle of dia 0.9 and 1.8 whoes center is 4.3 feet from the center of previous circle
- trim and join the tangents
RESULT
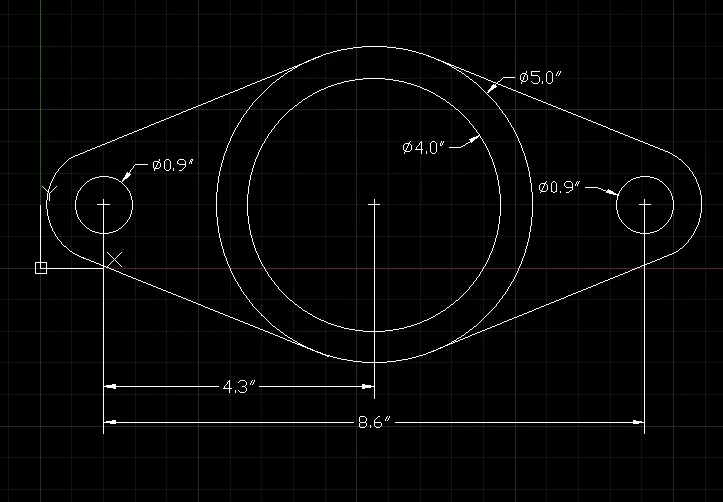
FIG9
PROCEDURE
- SELECT the circle command
- specify the first point
- follow the series of command
- draw a circle of radius 8
- draw another circle of radius 9 from center of the previous circle
- create arc of radius 41'8" joining these two circle from there top
- create arc of radius 20'10" joining these two circle from there bottom
- trim remaining things
RESULT
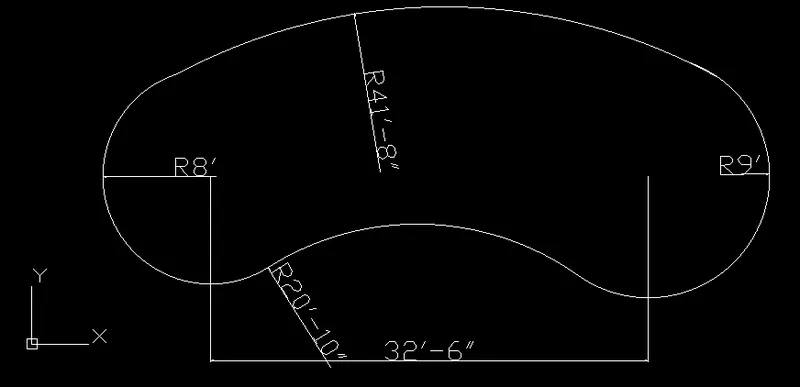
FIG10
PROCEDURE
- SELECT the RECTANGLE command
- specify the first point
- follow the series of command
- draw concentric rectangle with thickness 0.5
- draw another set of concentric rectangle with thickness 0.5 and diagonal to be horizontal
- merge the figure and trim the intersecting point as mentioned
RESULT
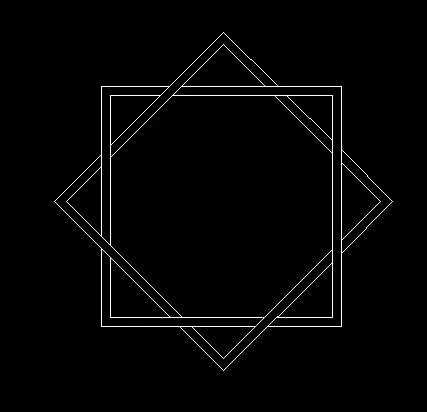
FIG11
PROCEDURE
- SELECT the line command
- specify the first point
- follow the series of command
- (@0,-9')(@3',0)(@0,4'6")(4'6",0)(0,1'2")(@5'2",0)(@0,-1'2")(@4'6",0)(@0,4'6")(@3',0)(@0,9') CLOSE
- DRAW SQUARE and TRIANGLE as specified
RESULT