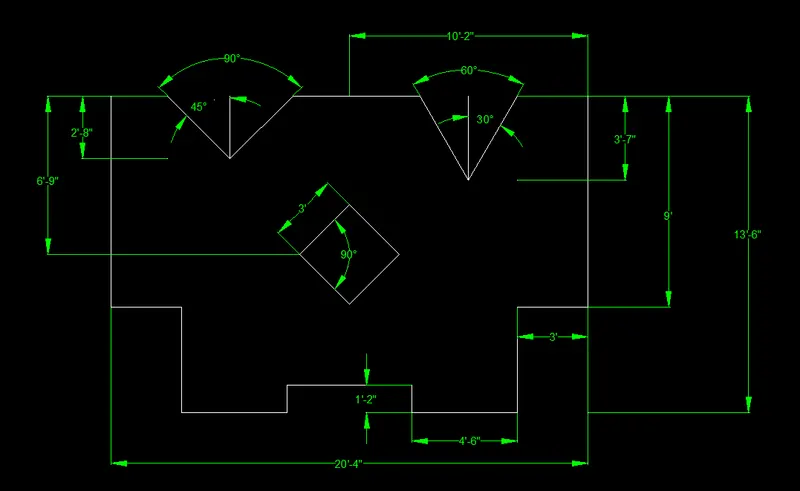
Drafting of various geometries using Chamfer, Fillet tool in AutoCad
QUE- DRAW THE GIVEN FIGURES.
FIGURE-1
AIM-TO DRAW FIRST FIGURE GIVEN IN ATTACHMENT.
COMMAND USED IN FIGURE -1
- LINE
- CIRCLE
- DIMSTYLE
- UNITS
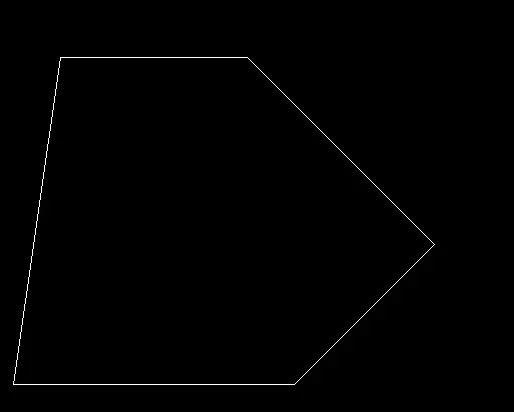
PROCEDURE FOR DRAWING -1
- Open Autocad And Set the Decimal Precision to 0.00.
- take Line Command And Draw The line of 1.5 and another line of 1.5 in x direction.
- take next line at @2.12<45 from the end of last line.

- next take the last point and draw the line at @2.83<135.
- then same as above draw next point @2<180.
- close the geometry by joining the last and first point.
- now take the circle command .
- take diameter of 0.80 and put the circle at the point of 1.50,2.50 .
- same as above take new diameter of 1.20 and put that circle 1.50,1 .
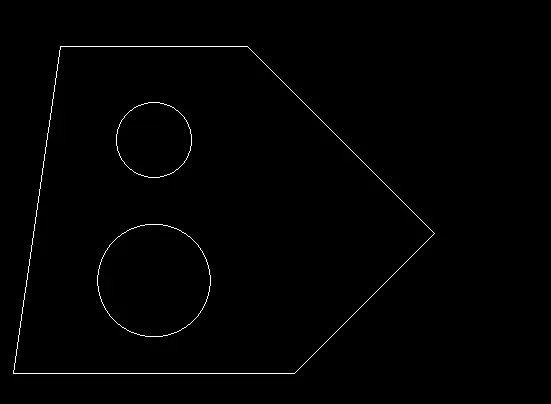
RESULT:- GIVEN DRAWING IS SUCCESFULLY DRAWN.
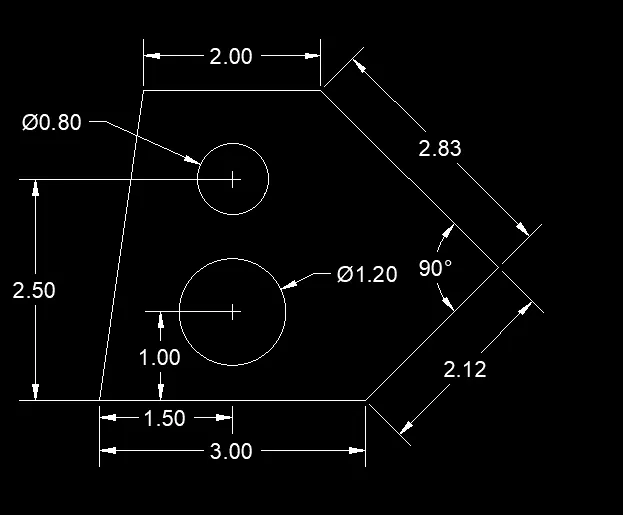
FIGURE-2
AIM-TO DRAW FIGURE-2 GIVEN IN ATTACHMENT.
COMMAND USED IN FIGURE-2
- LINE
- DIMSTYLE
- UNITS
PROCEDURE FOR FIGURE-2
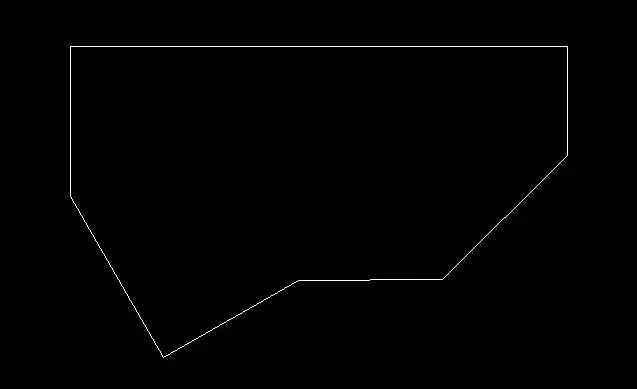
- Open autocad use command UNIT and set units to arctitectural from decimal give precision of 0'0"
- take LINE command draw line of @2'10"<45
- draw next line @ 1'9"<90

- continue with line command and draw net line @8'<180
- from last point draw line @2'5"<270
- continue with same method measure all next dimension and complete geometry.
- show all dimension using dimention tool.
RESULT :- GIVEN DRAWING IS SUCCESFULLY DRAWN.
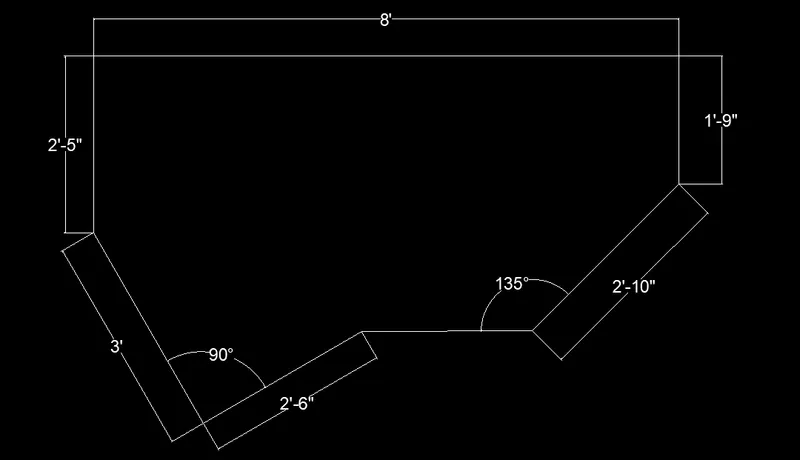
FIGURE-3
AIM-TO DRAW FIGURE-3 GIVEN IN ATTACHMENT.
COMMAND USED IN FIGURE-3
- LINE
- CIRCLE
- DIMSTYLE
- UNITS
PROCEDURE FOR FIGURE-3
- Open autocad set units to engineering from decimal and give precision of 0'0.0"
- take LINE command draw vertical line of 1'3.0"
- from last point draw line of @5' 0.1" in horizontal direction
- next line @1' 6" in vertical direcction
- continue with same method measure all next dimension and complete geometry.
- now take CIRCLE command .
- now take the diameter of circle 1' 6" and put the circle at point of (1' 3" , 1'6").
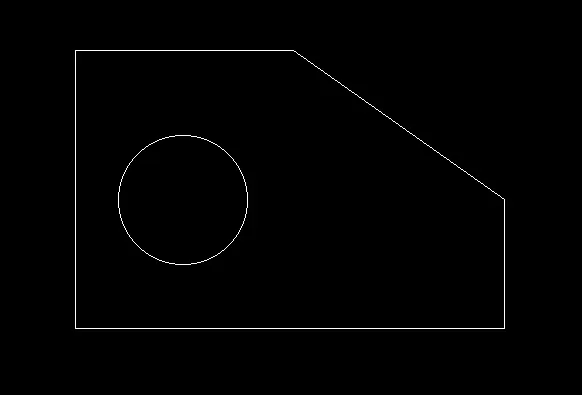
RESULT :- GIVEN DRAWING IS SUCCESFULLY DRAWN.
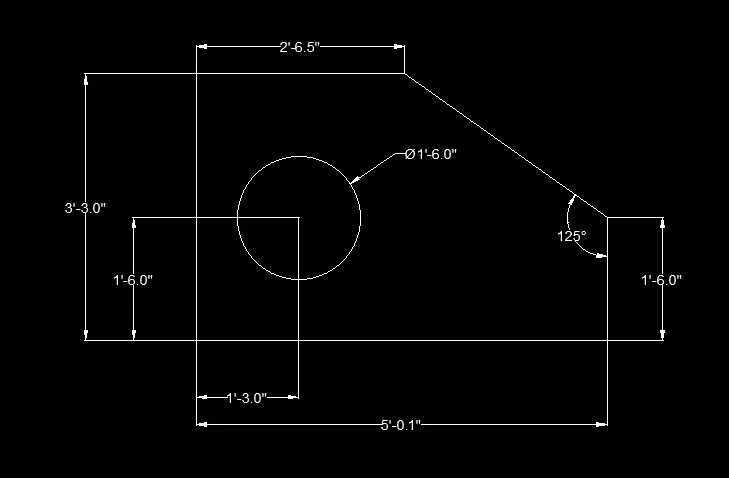
FIGURE-4
AIM-TO DRAW FIGURE-4 GIVEN IN ATTACHMENT.
COMMAND USED IN FIGURE-4
- LINE
- DIMSTYLE
- UNITS
PROCEDURE FOR FIGURE-4
- take LINE command draw vertical line of 3 units in horizontal diraction.
- draw next line of 0.5 in downword of last point.
- draw next line in same diraction of 2.5 unit.
- now draw next line of 2.5 units in vertical direction from last point.
- continue with same method measure all next dimension and complete geometry.
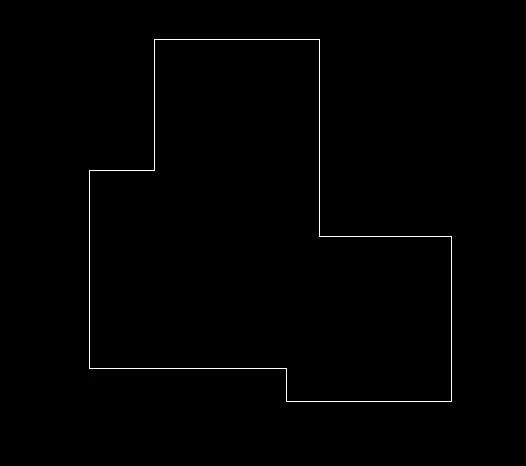
RESULT :- GIVEN DRAWING IS SUCCESFULLY DRAWN.
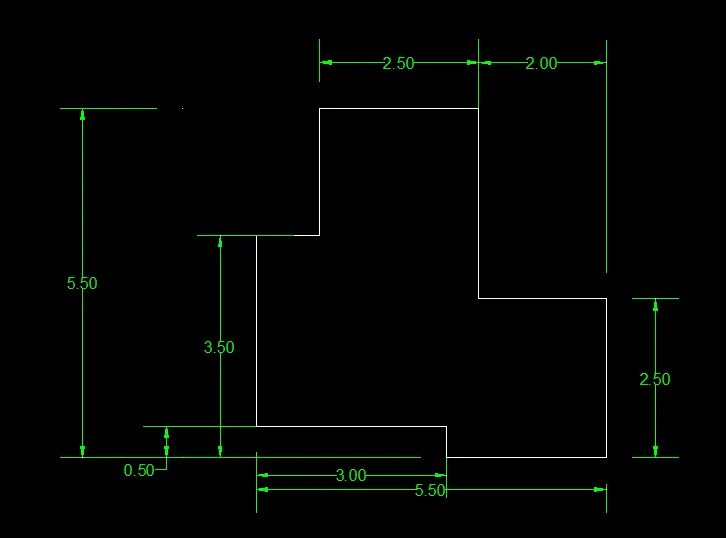
FIGURE-5
AIM-TO DRAW FIGURE-5 GIVEN IN ATTACHMENT.
COMMAND USED IN FIGURE-5
- LINE
- RECTANGULAR
- CIRCLE
- DIMSTYLE
- UNITS
PROCEDURE FOR FIGURE-5
- open autocad take ractangular command and draw rectangular of in dimension of 11.5x6.0
- now take line command and draw two lines at 3 lents units from both ends.
- take CIRCLE command draw two circle diameter of 1 and 2 then put that circle in center of both rectangular
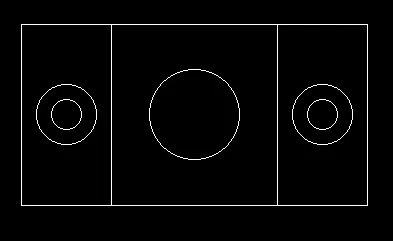
- show all dimension using dimention tool.
RESULT :- GIVEN DRAWING IS SUCCESFULLY DRAWN.
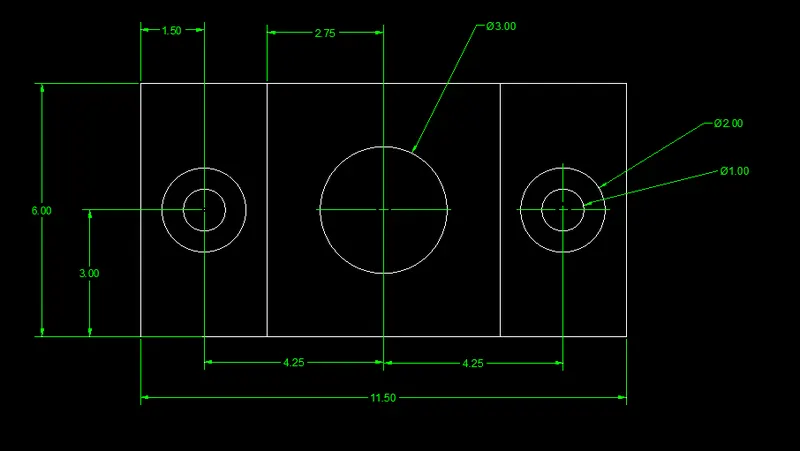
FIGURE-6
AIM-TO DRAW FIGURE-6 GIVEN IN ATTACHMENT.
COMMAND USED IN FIGURE-6
- LINE
- DIMSTYLE
- UNITS
PROCEDURE FOR FIGURE-6
- open autocad take line command draw line of 1.5 in horizontal diraction then drae next line of 0.5 units in vertical direction of last point
- draw simmular three box of 0.5x1 in vertical diraction.
- from last figuer take both bottom line in horizontal direction nd draw 2 units line.
- give height of 1.5 from bottom.and complete second figure.
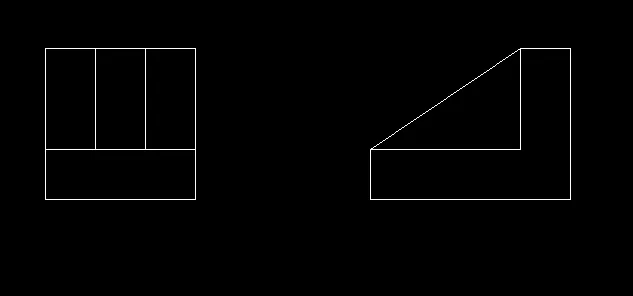
- from last figure take measurment of vertical lines and draw line of 1 units.
- continue with same method measure all next dimension and complete third figure.
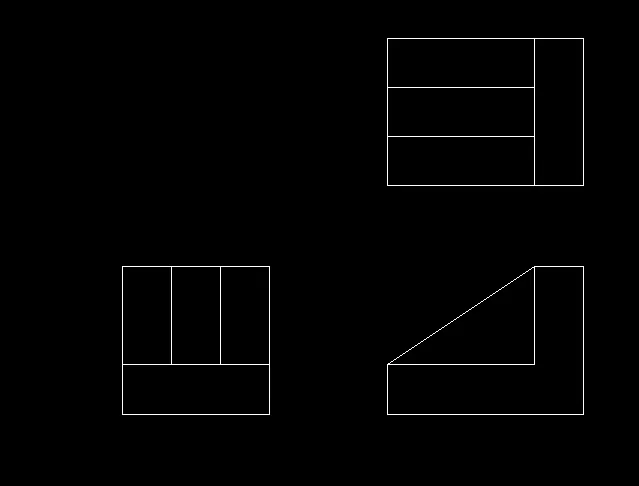
- show all dimension using dimention tool.
RESULT :- GIVEN DRAWING IS SUCCESFULLY DRAWN.
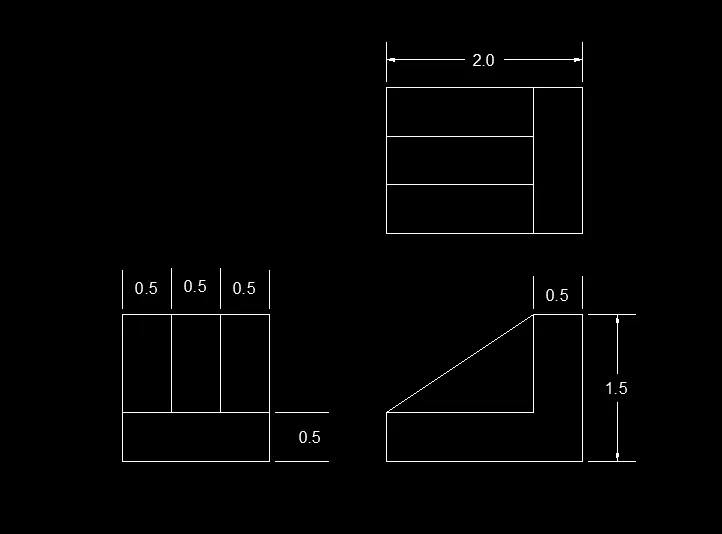
FIGURE-7
AIM-TO DRAW FIGURE-7 GIVEN IN ATTACHMENT.
COMMAND USED IN FIGURE-7
- LINE
- CIRCLE
- FILLET
- TRIM
- DIMSTYLE
- UNITS
- OFFSET
- RECTANGULAR
PROCEDURE FOR FIGURE-7
- take line command and draw the line of 100 units in vertical direction continue with last point draw next line of 210 units in right side direction .
- from last point draw line of 75 units in downword directon.
- now take the FILLET command and give fillet of 15Radius at the both end.

- now take CIRCLE command and draw 50diameter and 35 radius circle on the left side bottom.
- same as above draw 30 diameter and 25 radius circle on right side bottom.
- now take offset command nd offset the line of 210 units in downword direction.
- give fillet at both side wich is touch the circle nd dimension of fillet is 20 radius and 6 radius.
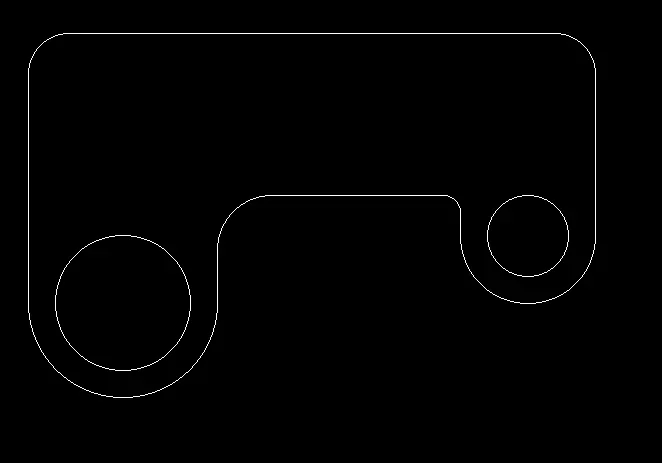
- take RECTANGULAR command and give dimension of 70x30 and put as given in drawing
- show all dimension using dimention tool.
RESULT :- GIVEN DRAWING IS SUCCESFULLY DRAWN.
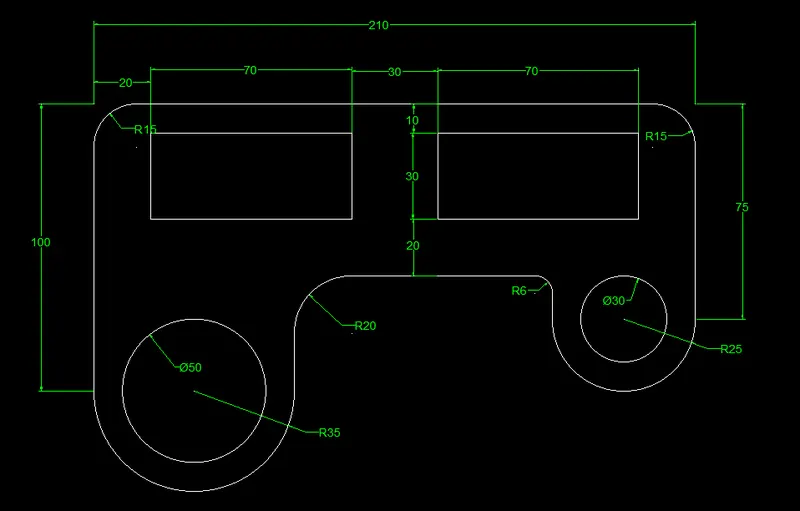
FIGURE-8
AIM-TO DRAW FIGURE-8 GIVEN IN ATTACHMENT.
COMMAND USED IN FIGURE-8
- LINE
- CIRCLE
- FILLET
- TRIM
- DIMSTYLE
- UNITS
PROCEDURE FOR FIGURE-8
- using LINE command draw line of 8.55 units in horizontal direction.
- now take CIRCLE command nd draw circle at midpoint of line with two diffrent diameter 5 and 4.
- now draw circle of 0.90 diameter at the both end of line.
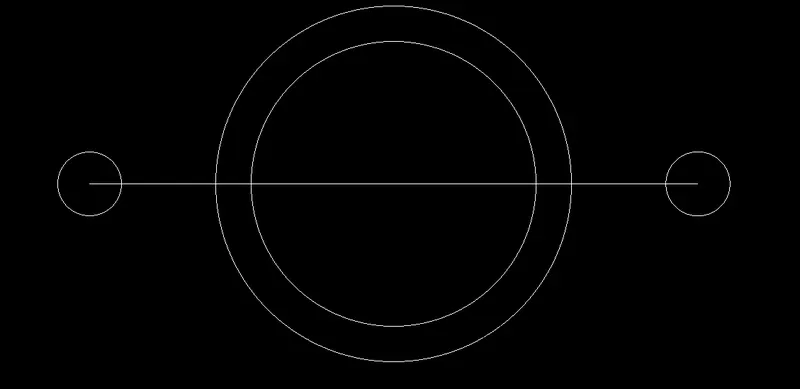
- now take line command and draw line of 1.8 units at both end andconnect thta line to the tangant of bigger circle.
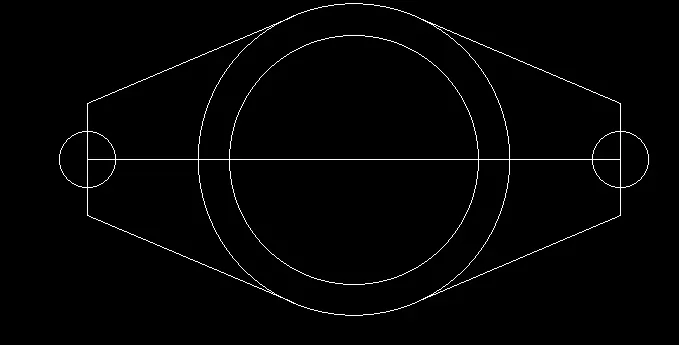
- now use FILLET command and give fillet of 0.90 radius at the both line.
- using TRIM command remove unneccesory part in figure.
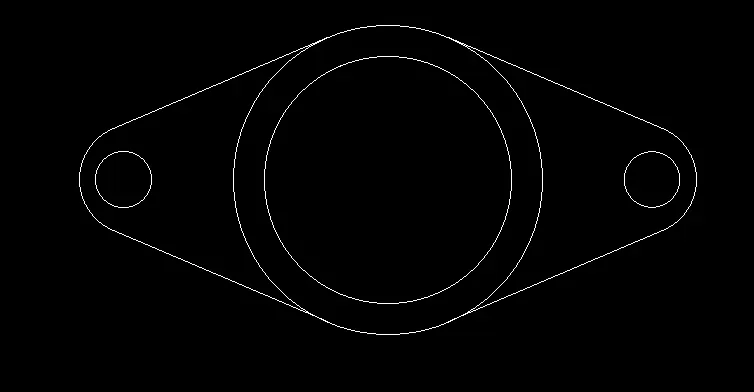
- show all dimension using dimention tool.
RESULT :- GIVEN DRAWING IS SUCCESFULLY DRAWN.
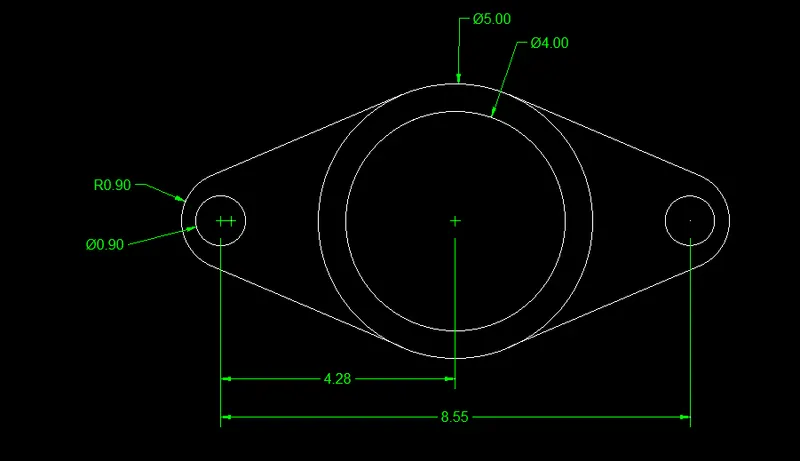
FIGURE-9
AIM-TO DRAW FIGURE-9 GIVEN IN ATTACHMENT.
COMMAND USED IN FIGURE-9
- LINE
- CIRCLE
- CURVE
- TRIM
- DIMSTYLE
- UNITS
PROCEDURE FOR FIGURE-9
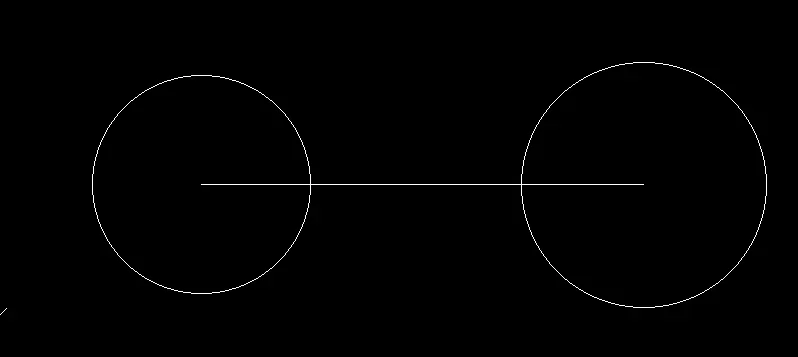
- Take LINE command and draw the line of 32'6" horizontaly.
- now using CIRCLE command draw two circle 8radius at left side and 9 radius right side.
- now use CURVE command and give upper side curve of 41'8"radius with conecting two tangent of circle.
- same as above lower curve of20'10" with connecting tangant of circle.
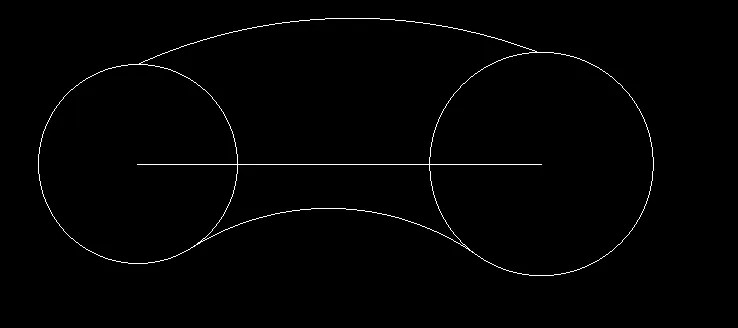
- use TRIM command and remove unneccesory part .
- show all dimension using dimention tool.
RESULT :- GIVEN DRAWING IS SUCCESFULLY DRAWN.
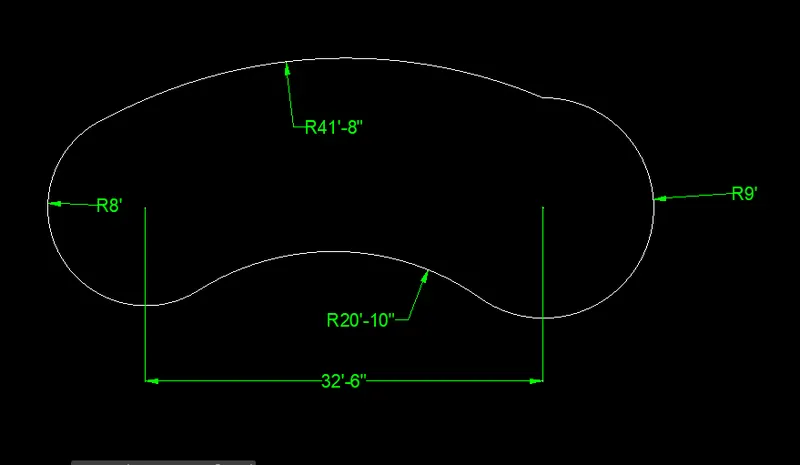
FIGURE-10
AIM-TO DRAW FIGURE-10 GIVEN IN ATTACHMENT.
COMMAND USED IN FIGURE-10
- RACTANGULAR
- ROTATE
- OFFSET
- TRIM
- DIMSTYLE
- UNITS
PROCEDURE FOR FIGURE-10
- draw ractangular of 10x10 using RACTANGULAR command.
- now take OFFSET command and give offset of 0.5.
- now use ROTATE command and using copy option give rotation of 45 degree.
- use TRIM command and remove unneccesory part .
RESULT :- GIVEN DRAWING IS SUCCESFULLY DRAWN.
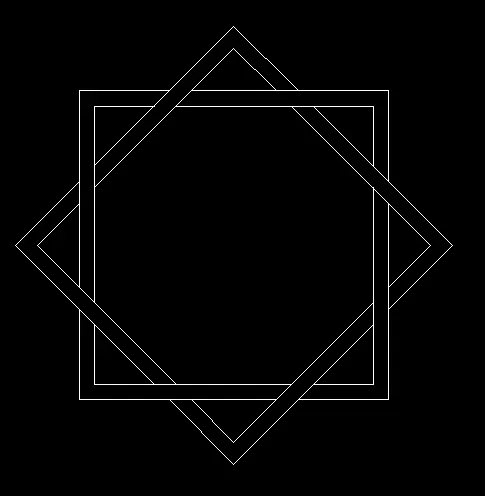
FIGURE-11
AIM-TO DRAW FIGURE-11 GIVEN IN ATTACHMENT.
COMMAND USED IN FIGURE-11
- LINE
- RECTANGULAR
- MOVE
- ROTATE
- TRIM
- DIMSTYLE
- UNITS
PROCEDURE FOR FIGURE-11
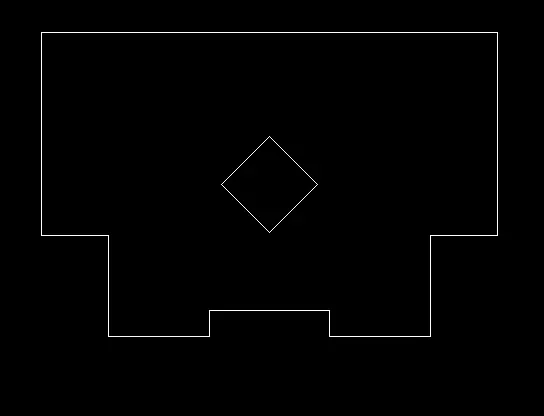
- using LINE command draw line of 4'6" horizontaly.
- continue with last point draw line of 1'2" downwords.
- next draw line of 4'6" to horizontal in right side.
- next draw line of 4'6" to upside from last point.
- continue with same method measure all next dimension and complete geometry.
- now we take RECTANGULAR command and draw rectangular of 3x3 separately.
- now we give ROTATE to that circle of 45 degree.
- now using MOVE command move that rectangular to the center of last geometry.
- Now we put angle of 45 and 50 degree at the left side distance of 5'1"
- same as above angle of 30 degree at the right side of distance 5'1"
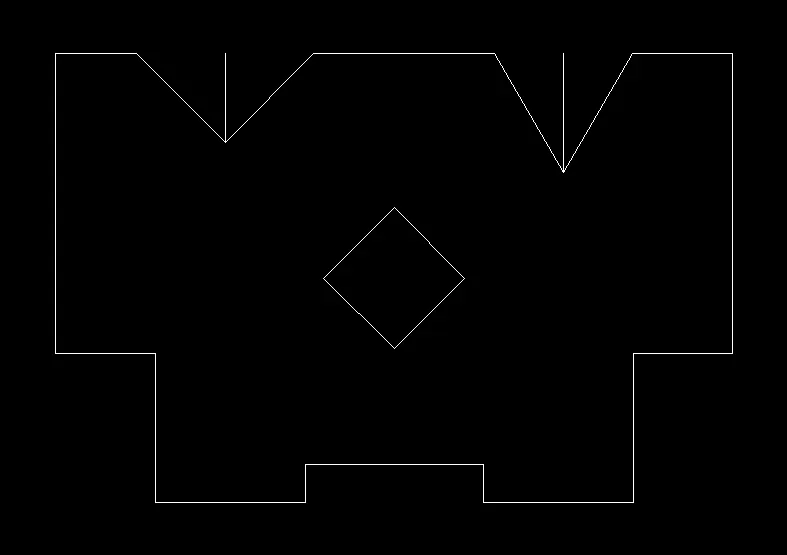
- use TRIM command and remove unneccesory part .
- show all dimension using dimention tool.
RESULT :- GIVEN DRAWING IS SUCCESFULLY DRAWN.