Drafting of various geometries using Chamfer, Fillet tool in AutoCad
AIM:- Drafting of various geometries using Chamfer, Fillet tool in AutoCad
INTRODUCTION:-
In this project we are using some advance and usefull tools and command which are used for the drafting and editing in the autocad . some of the commands are FIILET, CHAMFER, OFFSET, OBJECT SNAP, POLAR SNAP,LINE, etc
1. DRAWING -1
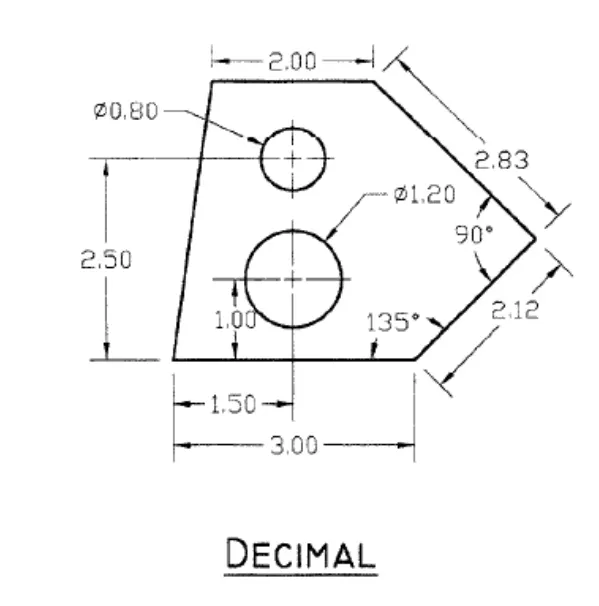
ANSWER:-
procedure for drafting this drawing are as below;
- Open a autocad sheet , with decimals of a precisoion 0.00
- Make sure ORTHO MODE is ON in this drafting to get presize results
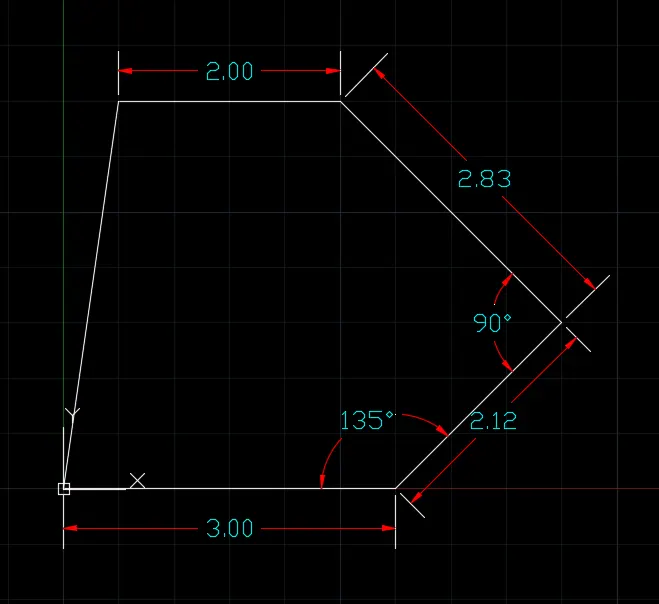
- Then ,type "L" in command line to involk the line command , and specify the first point at 0,0 in XY plane
- Then specify the next point in +x direction of 3 units
- Specify the next point @2.12<45
- Specify the next point @2.83<135
- Specify the next point in - X direction of 2 units
- Then click on CLOSE ( in the command line)to close the drawings at first point i.e 0,0
- Result we get;
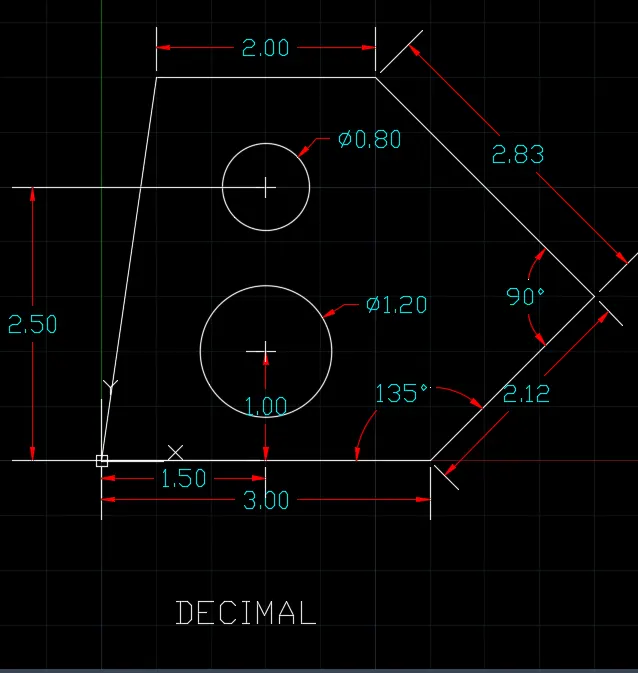
- Then , type C in the command line to involk the CIRCLE command
- Then draw a circle at x=1.5 and y=1 of diameter 1.20 units
- Similarly ,draw a circle at x=1.5 and y=2.5 of diameter 0.80 units
- Lable the figure with dimensions
RESULT:-
2. DRAWING -2
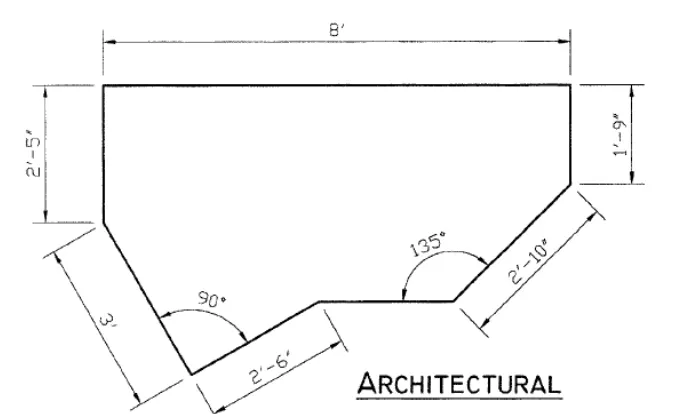
procedure for drafting this drawing are as below;
- Open autoCad with new drawing , with architectural and with precison 0'.00"
- Make sure ortho, Object snap both are ON
- Give "l" in the command line to involk the Line command
- Draw a line of 8' in the xy plane
- From the left draw a line in -y direction of 2'5" (make sure ORTHO is ON)
- Simalarly, draw line in opposite direction of 1'9"
- Draw an line at an angle of 315 degree with a distance of 3'
- Then draw an perpendicular line of 2'6" at anngle of 45 to the x axis
- Then draw to the right side , a line of 2'10 at an angle of 225 degree
- Lastly, draw an line for close the drawing
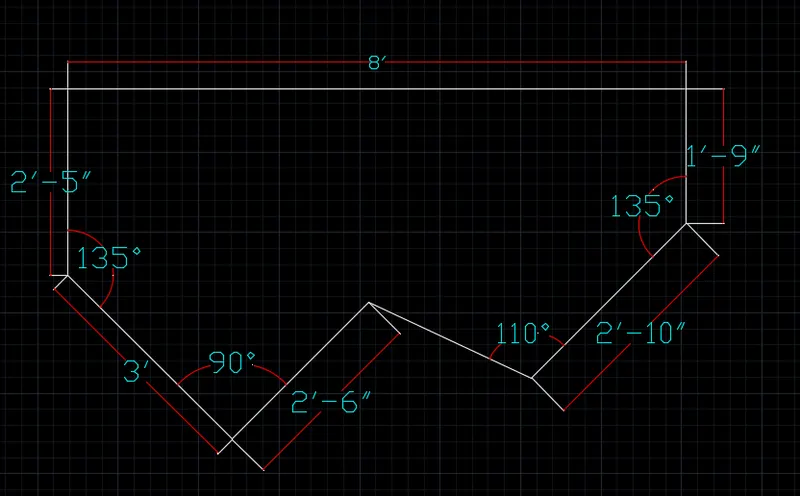
- Lable the drawing with dimensions
RESULT:-
3. DRAWING -3
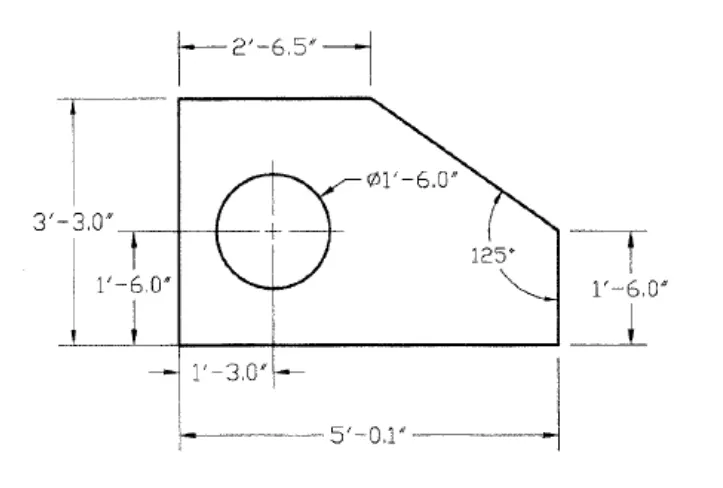
procedure for drafting this drawing are as below;
- Open autoCad with new drawing , with architectural and with precison 0'.00"
- Make sure ortho, Object snap both are ON
- Give "l" in the command line to involk the Line command
- Wes started with point specified at where the slope down
- Specify the next point by 2'6.5" in -x direction
- Specify the next point at 3'3.0" unit in -y direction
- Specify the next point in +x direction of 5'1" units
- Specify the next point at 1'6" unit from +y direction
- Then click on CLOSE to close the drawing
- Give the command "o" to involk the OFFSET command
- Give offset of 1'3" and 1'6" to find the centre of circle
- With the help of circle command draw the circle having diameter 1'6"
- Using tools trim and erase erase all unwanted object
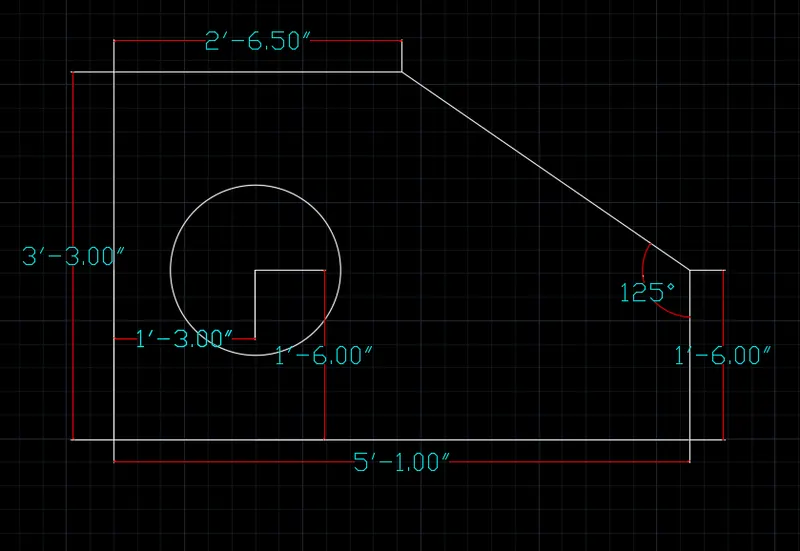
- Lable the drawing with dimensions
RESULT:-
4. DRAWING -4
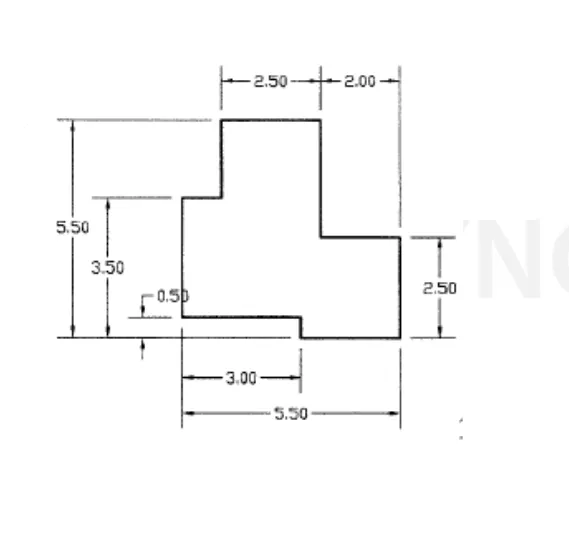
ANSWER:-
procedure for drafting this drawing are as below;
- Open a autocad with new sheet , with decimals of a precisoion 0.00
- Make sure ORTHO MODE is ON in this drafting to get presize results
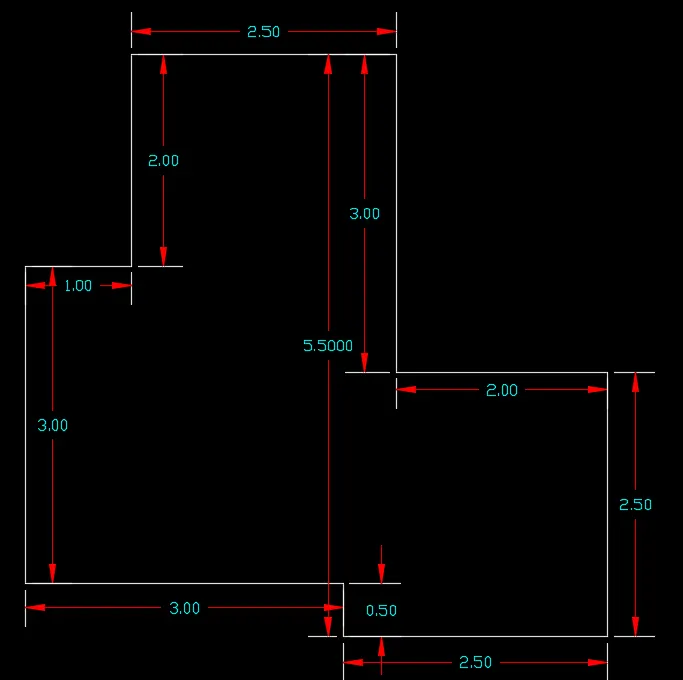
- Then ,type "L" in command line to involk the line command , and specify the first point at 2,2 in XY plane
- Then specify the next point in +y direction of units
- Specify the next point at 3 unit from + y direction
- Specify the next point at 1 unit in +x direction
- Specify the next point in +y direction of 2 units
- Specify the next point at 2.50 unit from + x direction
- Specify the next point at 3 unit in -y direction
- Specify the next point in +x direction of 2 units
- Specify the next point in -y direction of 2.50 units
- Specify the next point at 2.50 unit from - x direction
- Specify the next point at 0.50 unit in +y direction
- Specify the next point in -x direction of 3 units or click on CLOSE ( in the command line)to close the drawings at first point i.e 2,2
- Result we get;
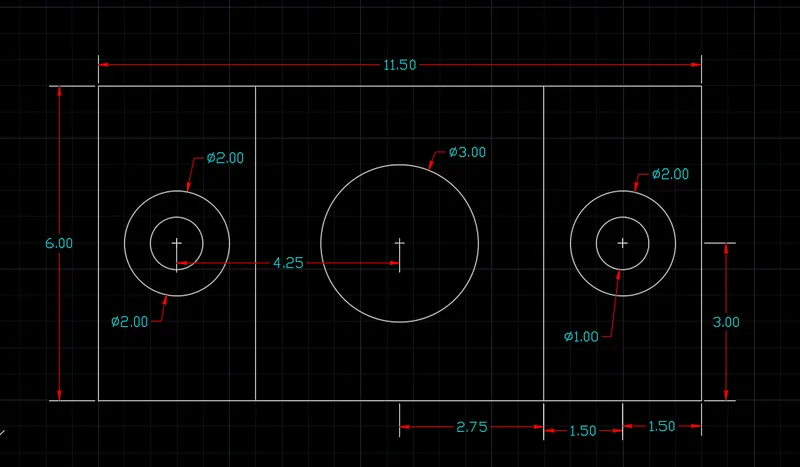
5. DRAWING-5
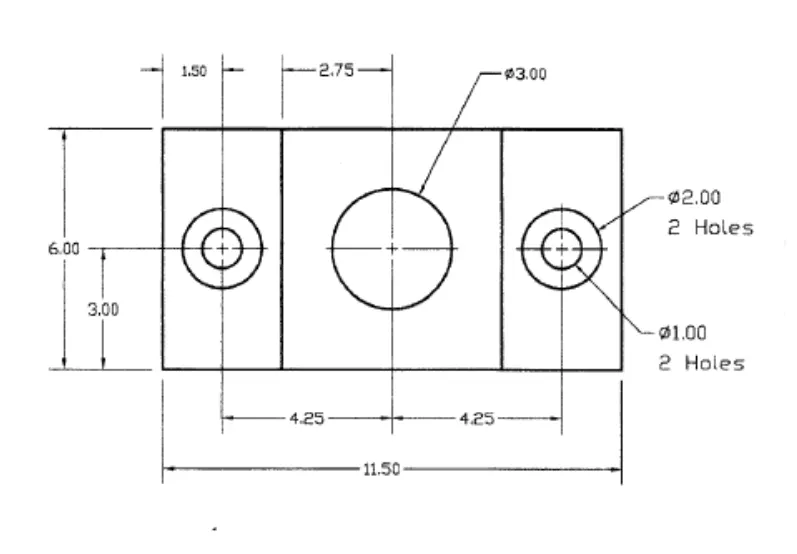
Procedure for drafting this drawing are as below;
- Open a autocad with new sheet , with decimals of a precisoion 0.00
- Make sure ORTHO MODE is ON in this drafting to get presize results
- Then ,type "L" in command line to involk the line command , and specify the first point at 3,3 in XY plane
- Specify the next point at 6 unit from + y direction
- Specify the next point at 11.50 unit in +x direction
- Specify the next point in - y direction of 6 units
- Then click on the CLOSE to close the drawing
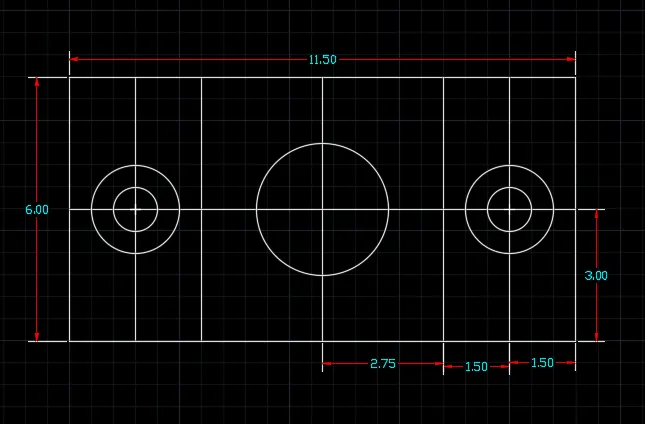
- Give "O" command to the command line to involk the OFFSET command
- Give offset of 1.5 units twice to both the 6 units vertical line in inner side
- Give 3 units offset to the 11.50 unit longer line
- Give 2.75 unit offset to the 6 unit , which is lies in the middle of the drawing vertically
- Then, give the "C" command to the involk the circle command
- Make circle in the middle of diameter 3
- Also , make circle of 2 and 1 unit in the both the sides of drawing
- The outcomes are as below;
- Then with the help of "TR" command trim all the unwanted objects
- Then objects which are not trimmed with the help of "TR" command , erase with them with "ERASE" command
RESULT:-
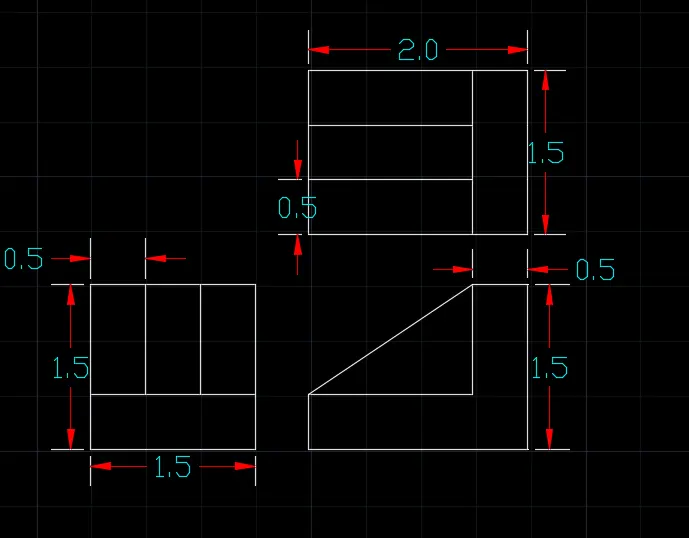
6. DRAWING -6
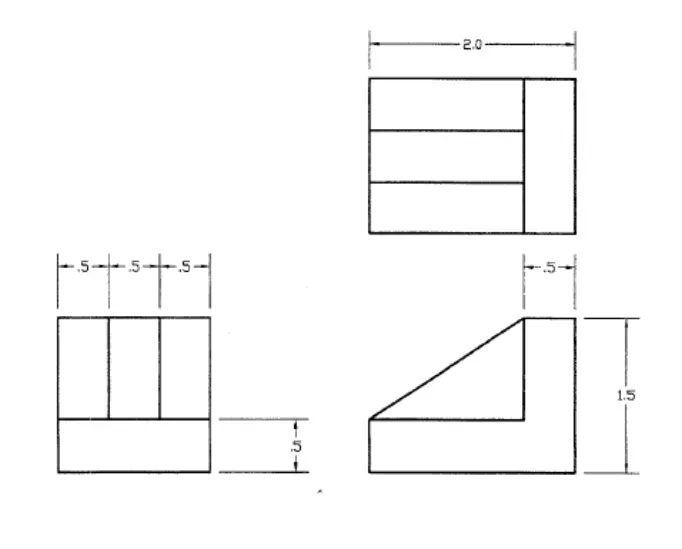
procedure for drafting this drawing are as below;
- Open a autocad with new sheet , with decimals of a precision 0.00
- Make sure ORTHO MODE is ON in this drafting to get presize results
- Then ,type "L" in command line to involk the line command , and specify the first point in XY plane
- Select line command and draw a two rectangles od 1.5*1.5 and 2*1.5 , and draw a middle portion
- Then select OFFSET command and give offset wherever required
- Lastly. by using "TR " command trim all unwanted objects.
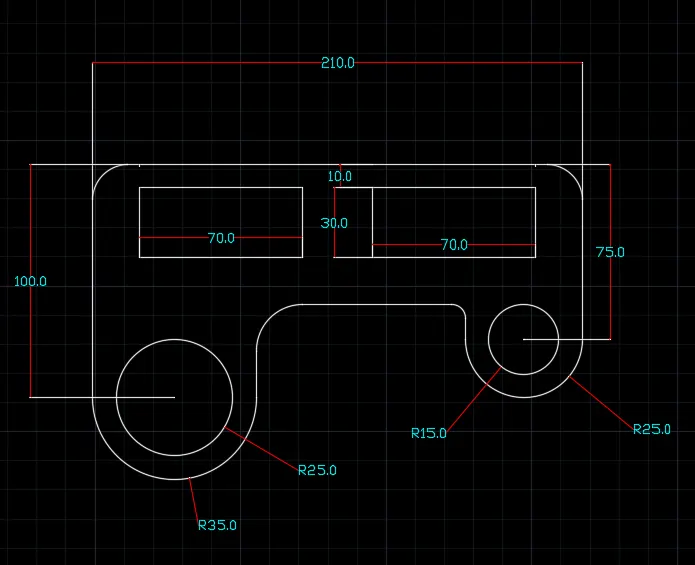
7. DRAWING -7
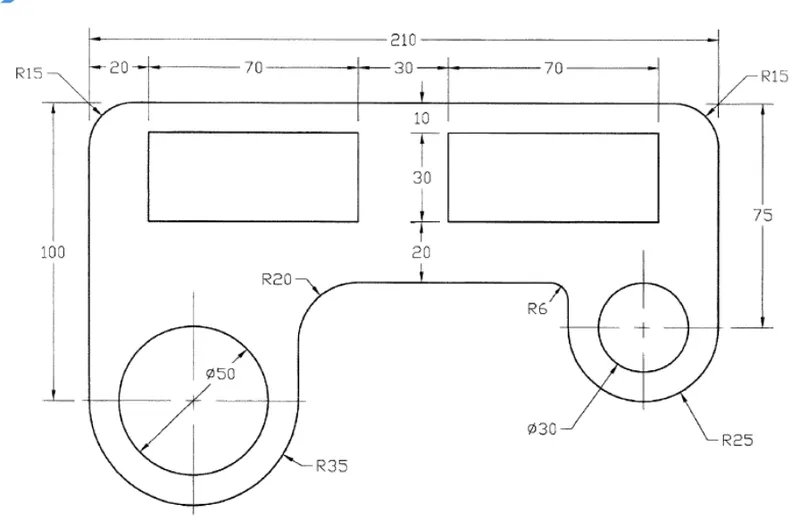
procedure for drafting this drawing are as below;
- Open a autocad with new sheet , with decimals of a precision 0.00
- Make sure ORTHO MODE is ON in this drafting to get presize results
- Then ,type "L" in command line to involk the line command , and specify the first point in XY plane
- Make a horizonatal line of 210 units
- Secify the point in -y direction 100 unit
- Simalarly on the other side , specify the point at 75 unit
- Using OFFSET draw offset of 75 and 100 to the line which is of 210 unit
- Draw line parallel to upper line (210) at offset of 60 units
- By using FILLET command draw a fillet of R -35, R-25, R-6,R-20, R-15,R-15 respectively.
- Then draw middle boxes by using OFFSET command
- Draw a circles by using CIRCLE command . with respect to the centre of fillet curves.
- By using "TR" command trim unwanted objects
RESULT:-
8. DRAWING -8
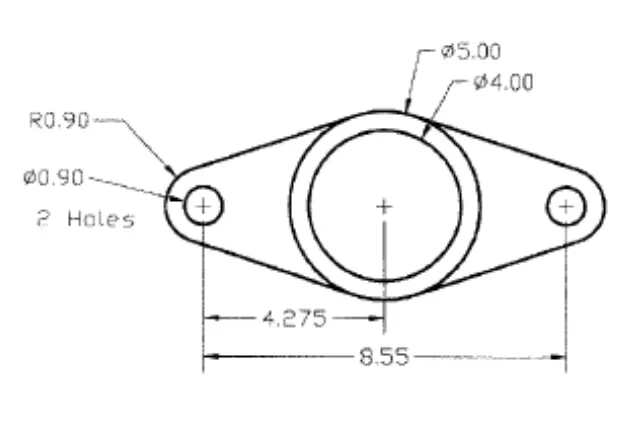
- Open a autocad with new sheet , with decimals of a precisoion 0.00
- Make sure ORTHO MODE is ON in this drafting to get presize results
- Give "C" command to the command line to involk the circle command , specify the the centre point and give dimeter of the circle as 4 units
- Similarluy , make circle of diamter 5 unit from the same centre
- Then , form the centre point of circle , tracking by object snap tool(centre) make a line of 4.275 unit in +x and_x directions withy the help fof LINE command
- Make a cicle of radius 0.90 and diameter of 0.90 on both the sides
- With the help of object snap (tangent) , marks the tangents from 5 unit circle to circle of radius 0.90 units
- Repeat that tangent drawing procedure on four occassions
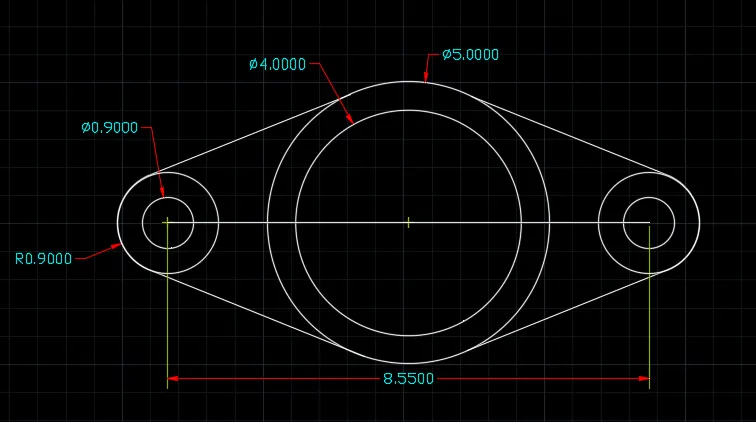
- Give "TR" command to the command line ti involk the TRIM command and press enter
- Trim all the unwanted objects in the drawing
- Lable the drawing with dimensions
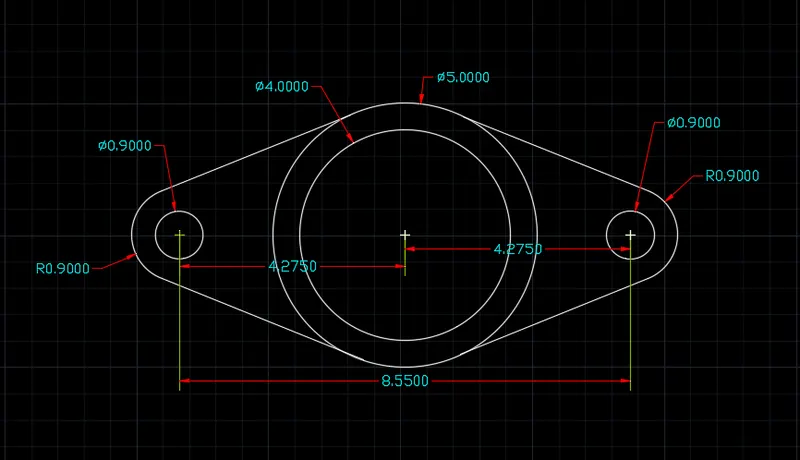
9. DRAWING- 9
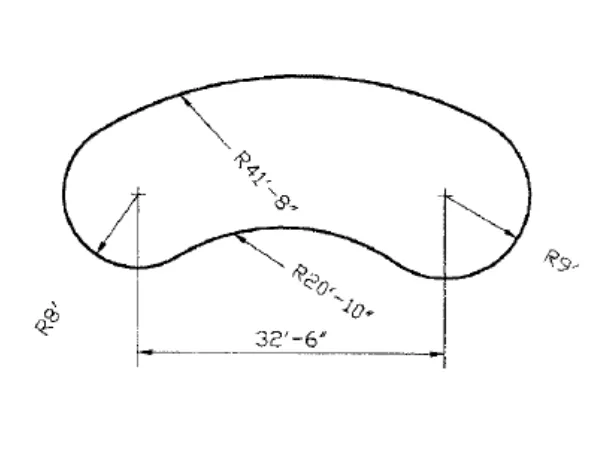
procedure for drafting this drawing are as below;
- Open a autocad with new sheet , with architectural of a precisoion 0.00 which means the units are in feets now .
- Make sure ORTHO MODE is ON in this drafting to get presize results
- Make the line of 32'6" in the drawing sheet
- Give "C" command to the command line to involk the circle command
- Draw a circles of 8' and 9' in the both sides W
- With the help of FILLET command draw a curve of 20'10"
- The for the second curve of the drawing, use curve (tan atan curve )to form a whole circle
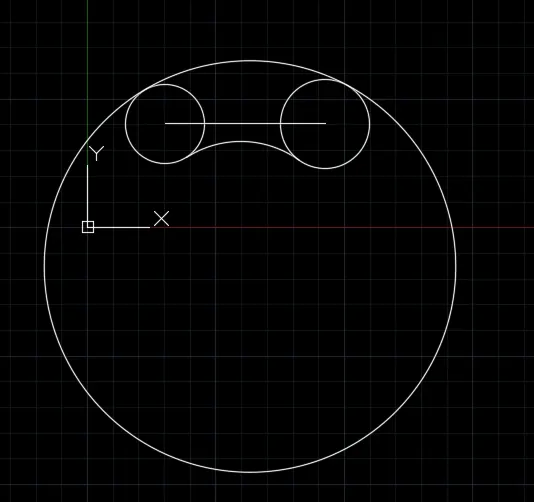
- After that, using TR command (TRIM command ) trim all unwanted objects
- With help of erase command ,erase in the line which is in middle
RESULT :-
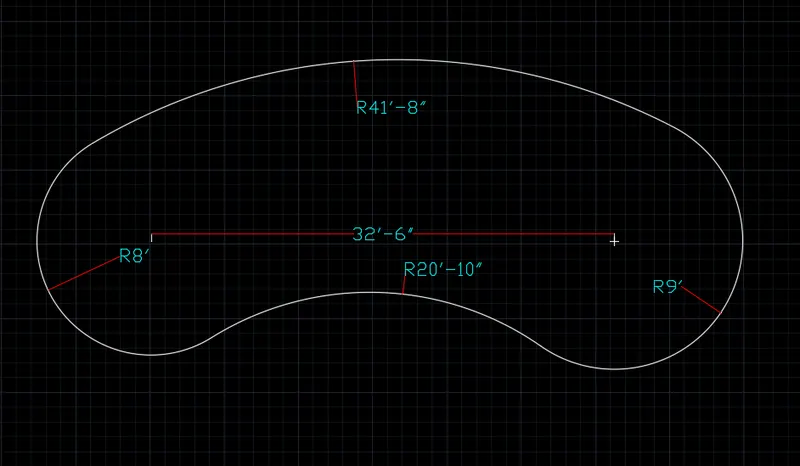
10. DRAWING -10
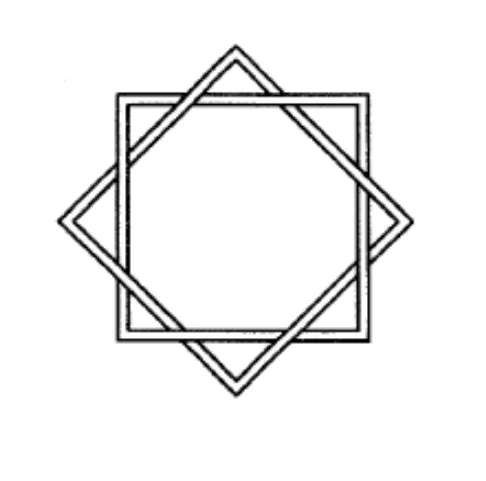
procedure for drafting this drawing are as below;
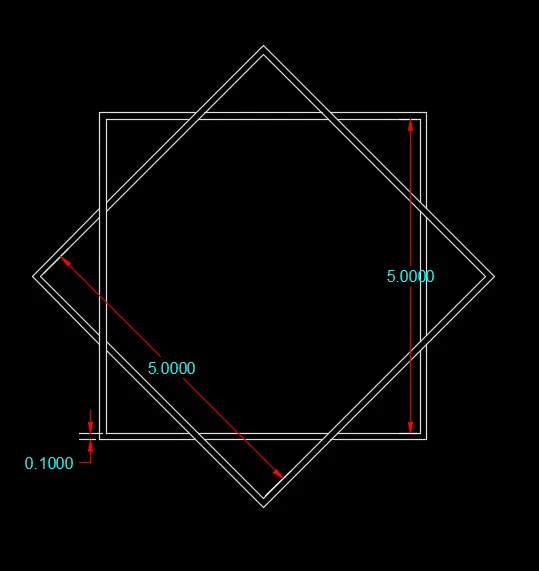
- Open autoCad with new drawing , with decimals and with precison 0.00
- Give , REC command to the command line to involk the rectangle
- Then , make width af 0.1 , and take a point and with the help of dimensions in the command line make the square desig as we take square as size of 6,6
- Then, give "o" command to the command line to involked the OFFSET, and give offset of 0.1 unit to whole square
- Then, give "RO" command to the command line to involk the ROTATE command ,
- Select the whole drawing and rotate it with 45 degree , and make reference drawing as it is with the help of COPY command in the rotate command .
11. DRAWING -11
procedure for drafting this drawing are as below;
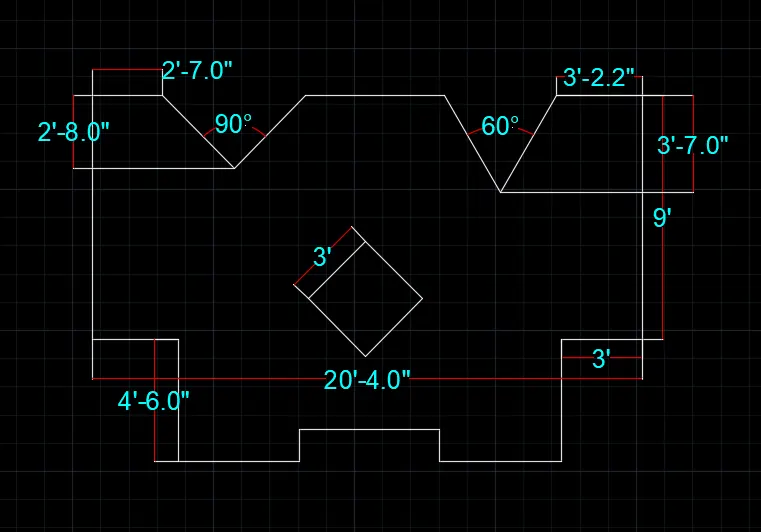
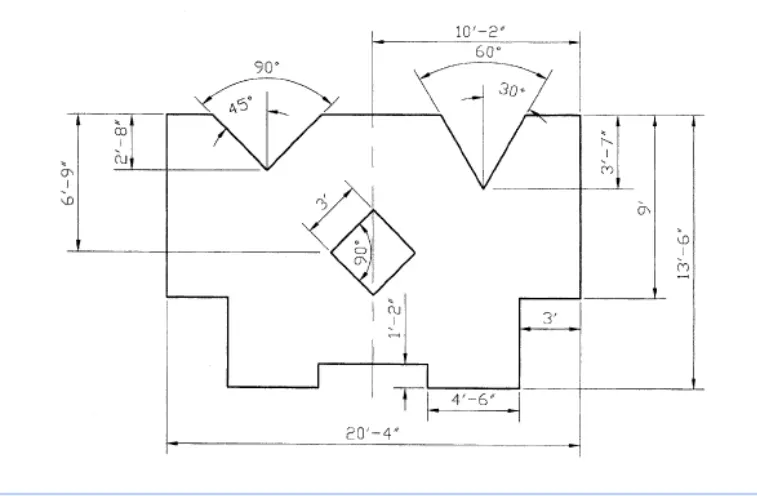
- Open autoCad with new drawing , with architectural and with precison 0'.00"
- Make sure ortho, Object snap both are ON
- Give "l" in the command line to involk the Line command
- With the help of line command specify the point
- Specify the first point at 2,2 in XY plane
- Specify the next point by 9' in +y direction
- Specify the next point by 20'4" in the +x direction
- Specify the next point 9' in -y direction
- Specify the next point by 3' in -x direction
- Specify the next point by 4'6"in -y direction
- Specify the next point by 4'6" in _x direction
- Specify the next point by 1;2" in+y direction
- Specify the next point by 5'2" in +x direction
- Specify the next point by 1'2" in -y direction
- Specify the next point by 4'6" in-x direction
- Specify the next point by 4'6" in +y direction
- Then, click on close to close the drawing
- By OFFSET command give offset og 2'8" and 2'7" to the upper lomg line to specify the centre of angle
- Give offset of 5'3" to the both sides of left and right
- The intersections of offsets is our angle mid
- With the help of line command give angle of 45,45 ans 30,30 in both sides with extended lines
- With the help of offsets and geometric centre , able to draw a titltes 45 degree sqaure
- Lable the drawing with dimensions
RESULT:-