Design of backdoor
AIM-To design Back door and necessary reinforcements of car using the given Class ‘A’ surface.
Introduction
Backdoor
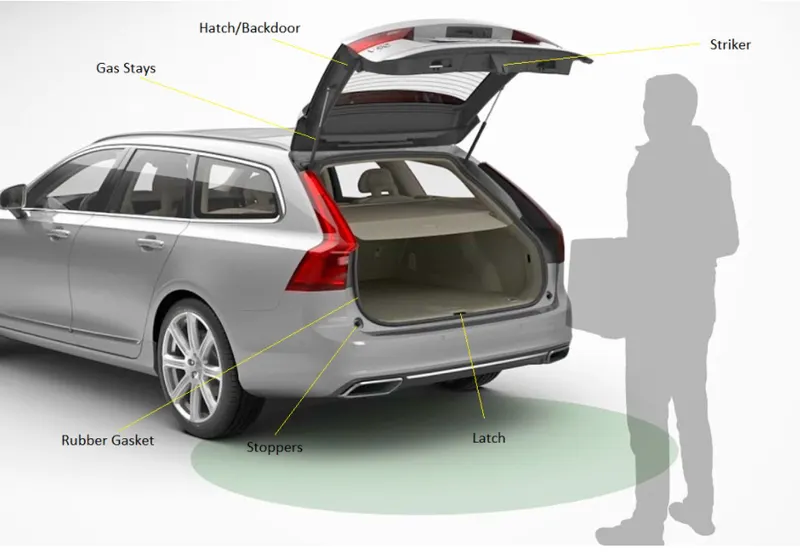
- Backdoor also known as tail gate/reardoor/Truck is next two passenger seat which is used for storage of luggages, and other items.
- It can be open both upward and downward as well as side direction.
- Mostly backdoor are operated with the help of gas stay and some of luxurious car are operated using electric motor.
- It consists of following parts 1-inner panel,2-Outer panel(Upper and lower) which are joined using hamming and spot welding as well as mastic sealant
Materials Selection
The material in backdoor is usually a steel or aluminium depending on how expensive the vehicle and the budget.
| Aluminium | Steel | |
| Parts manufacturing | Parts are casted | Parts are stamped |
| Reinforcements | Reinforcements can be neglected | Reinforcements are necessary |
| Thickness | Thickness can be varied | Remain same |
| Weight | Lighter in weight | Heavier in weight |
| No. of Components | Less no. component | More No. of components |
| Cost | More costly than steel | Less costly as compared to Aluminium |
So when we choose Steel it will surely reduce the cost of car but it will also reduce the car performance since weight will increase but if we use aluminium that will increase the cost but will improve car performance .
Design criteria in back door
- Real visibility criteria
- Latch and striker positions
- bootcamp space
- Hinges and gas stay position
- Force distribution
- Corner Relief
Types of backdoors
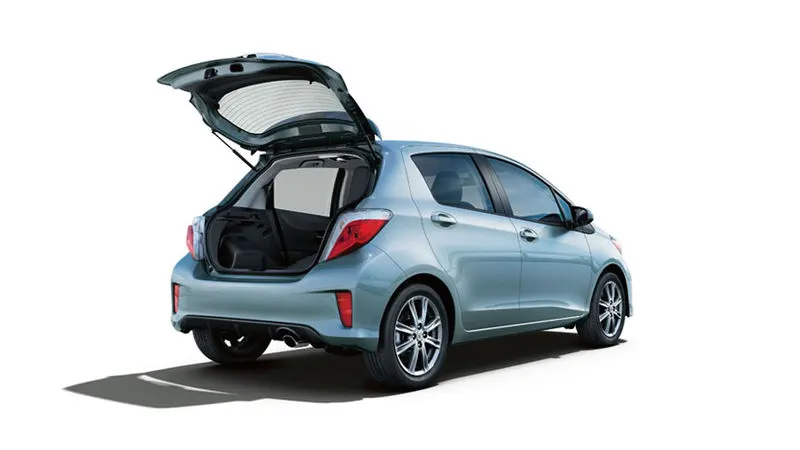
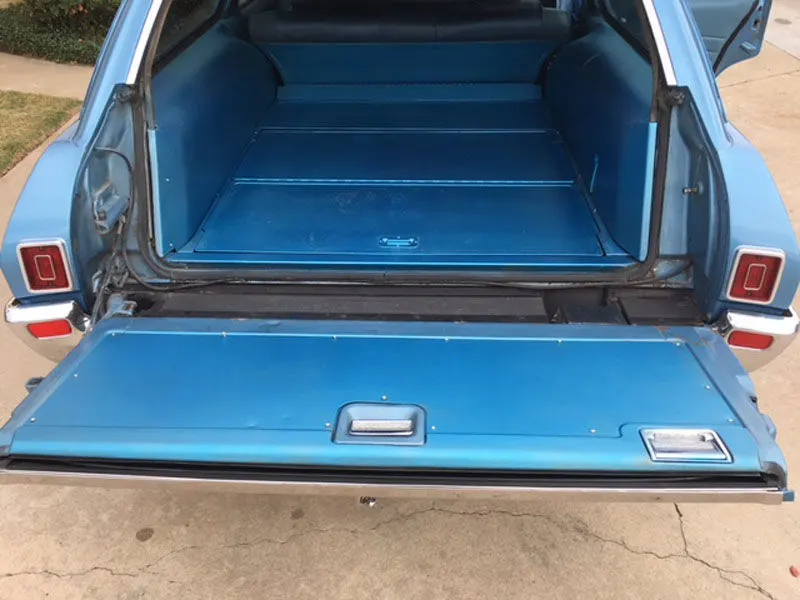
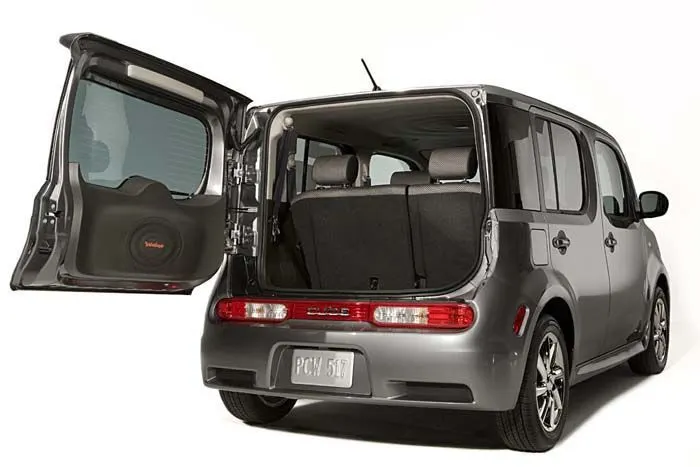
The type of backdoors depend on the position of Hinges. So there are basically 3 type.
- Top mounted door
- Bottom mounted door
- Side Mounted door.
COMPONENTS OF BACK DOOR:
- 1-inner panel
- 2-Outer panel(Upper and lower)
- Hinge reinforcements(LH and RH)
- Gas Stay Reinforcements(LH and RH)
- Wiper motor Reinforcement
- Latch reinforcement
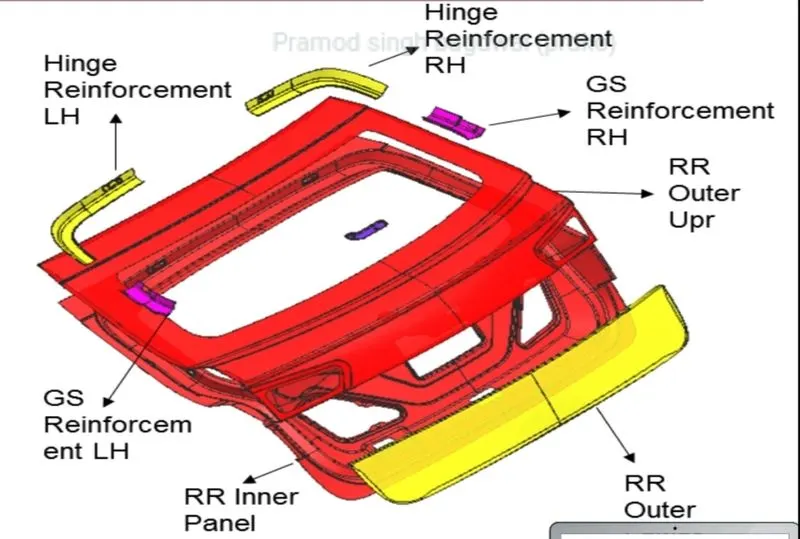
- Thickness of outer and inner panel is 0.75mm
- Reinforcements is 1.5 mm
PROCEDURE:
1. Checking the Class-A surface
- After receiving class a surface with the help of SEW command we will check the surface.
- Since all the surface are not join proper,so we have to repair the surface using Through curve mesh, brigde, offset curve in face and trim option and also see them.
Assembly of back door
- Now after repairing we will create assembly "BACK DOOR ASSEMBLY".
- We will divide our improved class A surface, and create two parts - Door outer panel-Upper and Door outer panel-lower part.
- Next we will create parts inside Assembly for inner panel , Hinges reinforcement, gas stray reinforcement, latch reniforcement and wiper reniforcement.
- Now first we will work at outer panel-lower side and create the flange for it.
- Now we have to work on inner panel we will extract the improve class a surface using wave geometry linker.
- And first we will make tooling axis in inner panel.
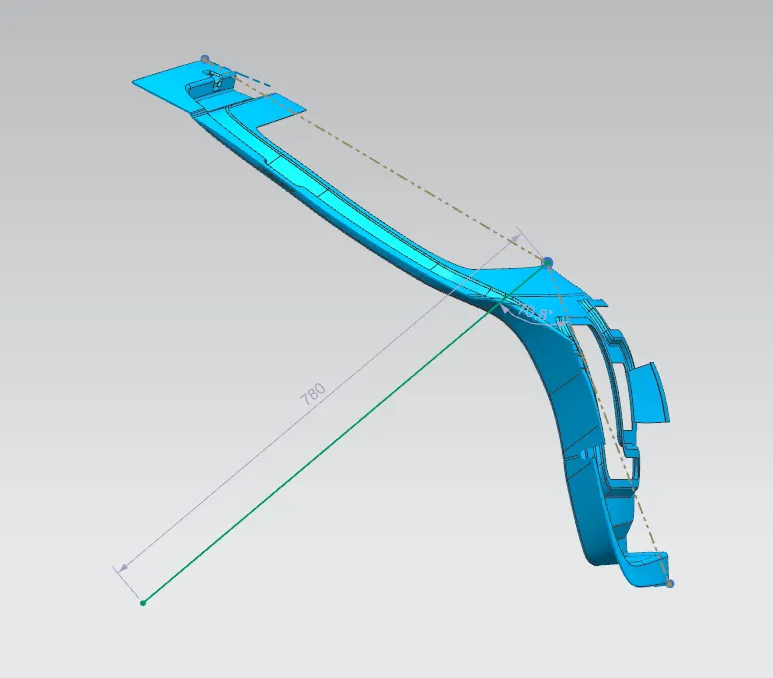
Designing Components of the Backdoor
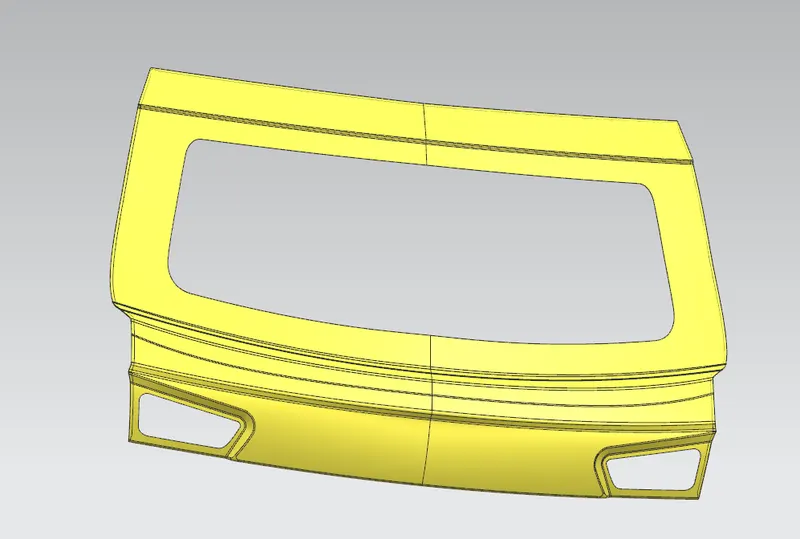
OUTER PANEL UPPER
- It is Styling skin surface of back door. With the help of class a surface we have prepared it and made outer panel upper surface.
- After this we have done having hamming on it to join with inner panel and provided a corner relief where it is necessary.
- Heming and corner relief are explained later on.
- The thickness of this will be 0.75 mm
(IMAGE OF OUTER PANEL- UPPER PART)
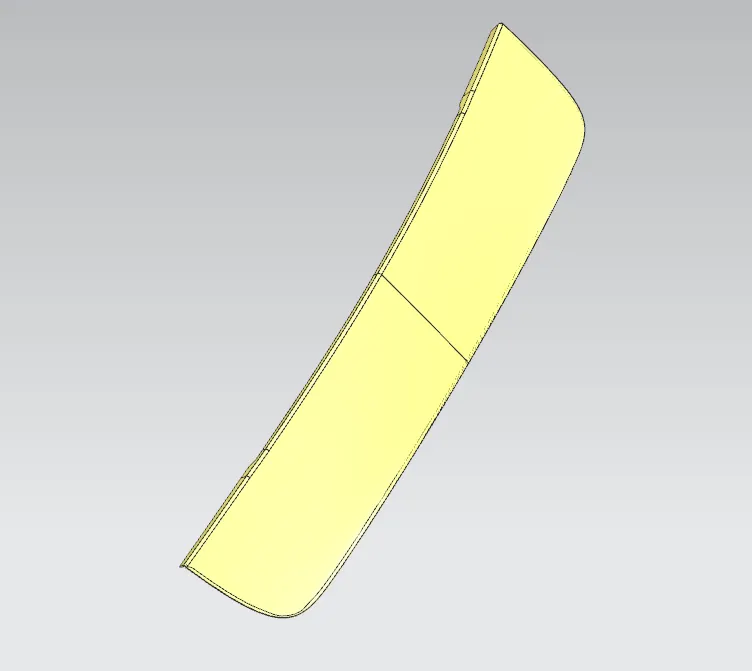
OUTER PANEL LOWER
- With the help lower part of our class A surface we have made this part .
- We have made flange to join it with outer panel-upper part with spot welding.
- Next we have provide hemming to join it with inner panel.
(IMAGE OF OUTER PANEL- LOWER PART)
(IMAGE OF OUTER PANEL- UPPER AND LOWER PART)
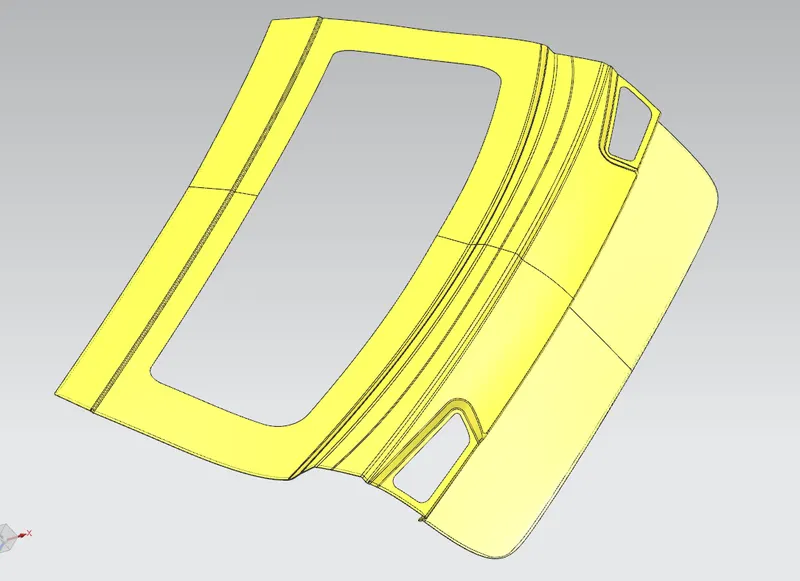
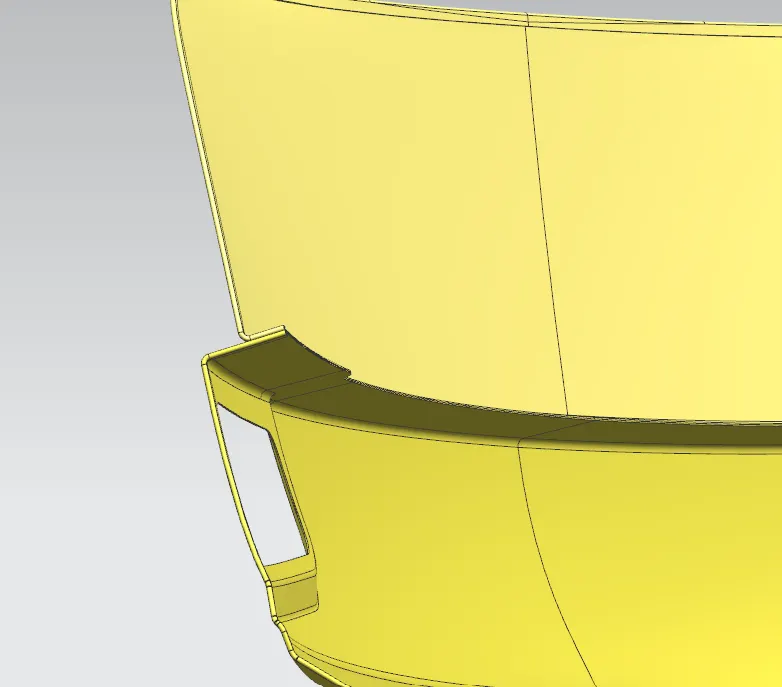
The above image shows the flange where Outer panel-upper will join with Outer panel lower part using spot welding, so the length of flange should be minimum 10 mm.
INNER PANEL
- The inner panel is the most important part of our backdoor panel.
- It contains cut out which will make assembly easy and also emboss are provided for strengthening the door and disspiating the force.
- It is where the hinges,gas stay,latch and striker and wiper mounting is done.
- It is produced by either casting (Aluminium) or through deep drawing process(Steel).
- We will create sealing flange and we will make connecting flange(for join with outer panel) and than for windsheild glass, we will make windshield panel and join with sealing flange.
Sealing flange fans provide dust free and block water coming inside , which ensure the component inside do not get rusting.
(IMAGE OF SEALING FLANGE)
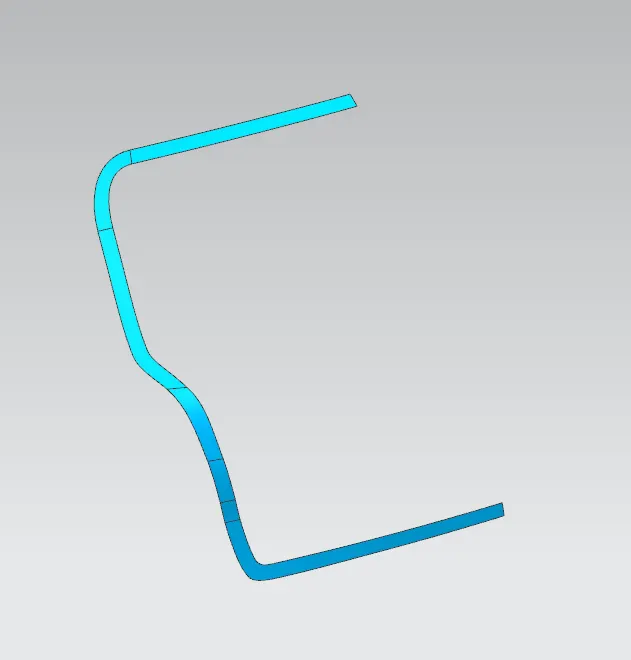
(IMAGE OF SEALING FLANGE WITH CONNECTING FLANGE)
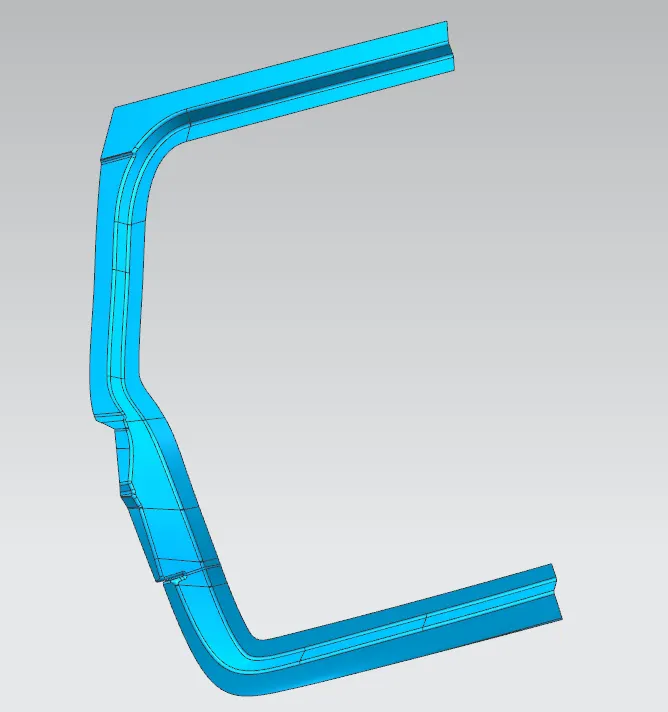
(IMAGE OF SEALING FLANGE WITH CONNECTING FLANGE AND WINDSHIELD PANEL )
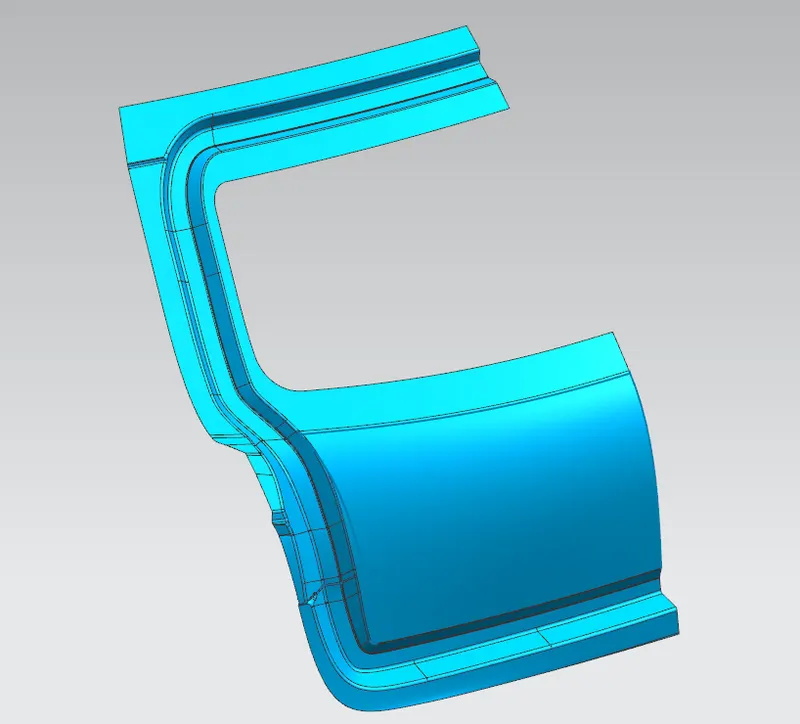
- Now we will provide emboss ,cut out and flanges in lower part of our inner panel.
The flange is use to connect or join with outer panel using mastic sealent, so a gap of 5 mm must be provided.
(IMAGE OF FLANGE AND EMBOSSES WITHCUT OUT)
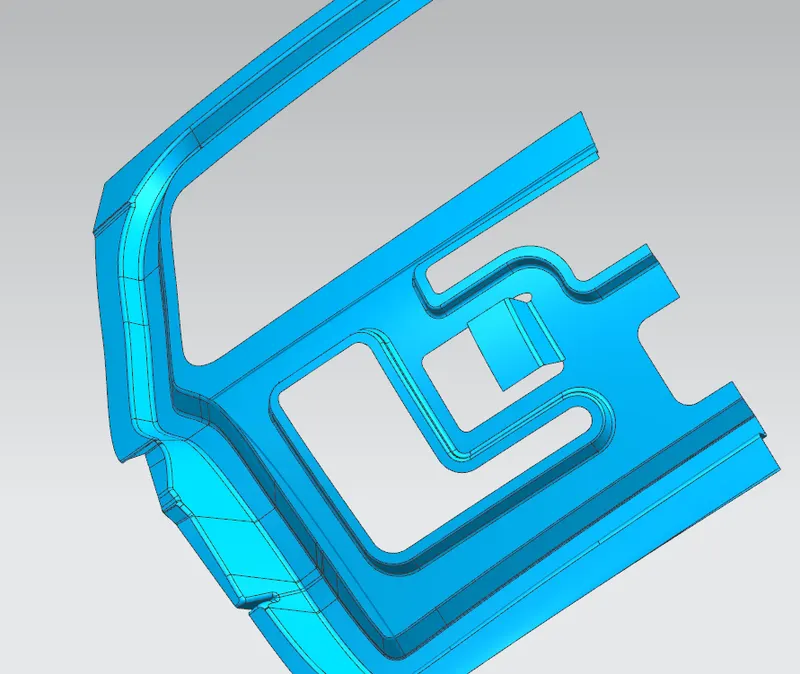
- We will now create embosses for hinges mounting, gas stay mounting and make holes.
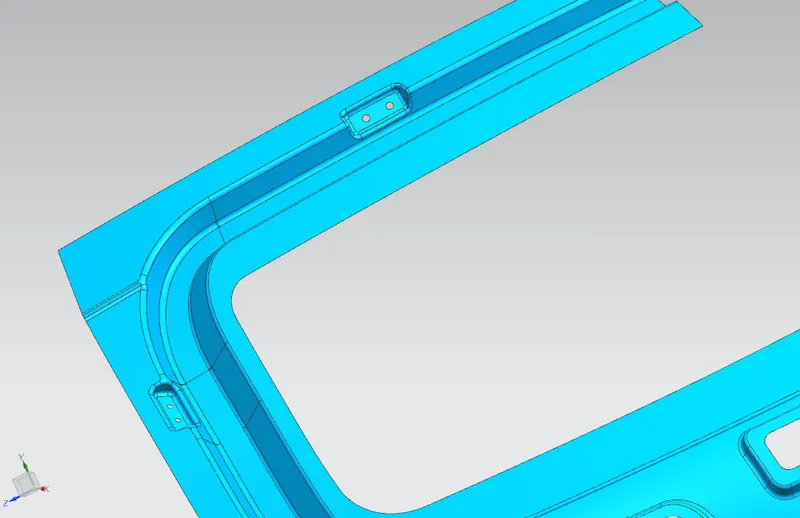
- Next we will mirror it and and sew it.
- We have to make mounting embass for latch and striker.
- To make this emboss we need to follow latches method.
LATCH TRAJECTORY
It is used to position the striker.
- First we will make points on centre of the holes of both sides Hinges and now we have to make a line using these two points.
- Make up point on the centre of this line.
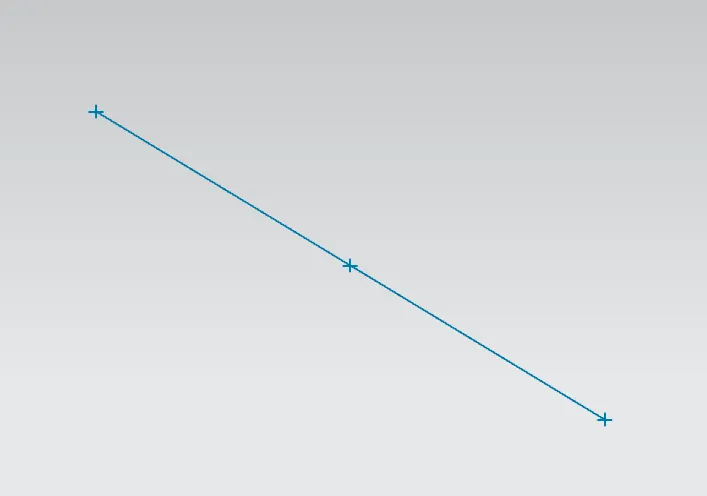
- We will go sketch and make a circle taking center point of circle as the above point.
- We have to draw a line which is tangent to circle and one more LINE which will be perpendicular to this line as soon in given figure.
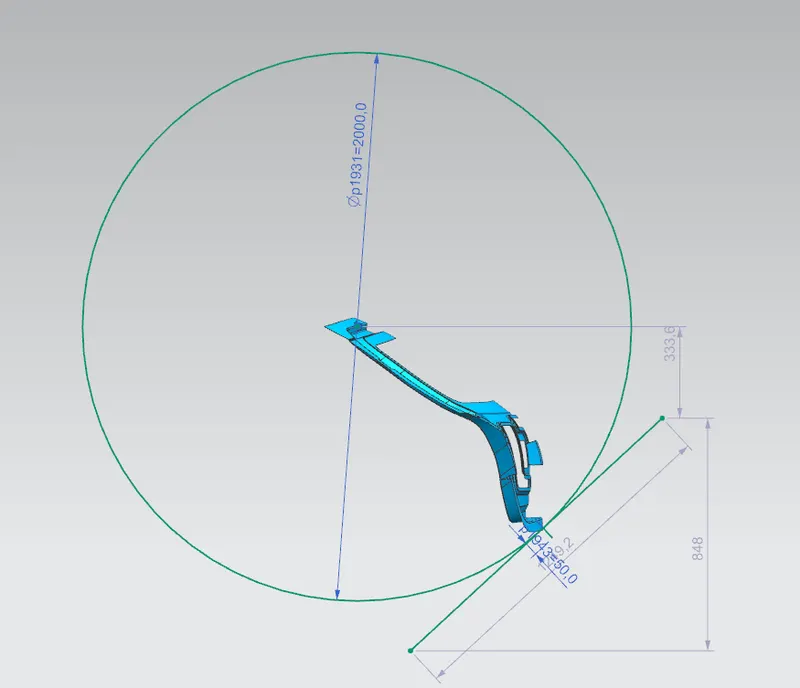
- Now with the perpendicular line we have made latch and striker emboss.
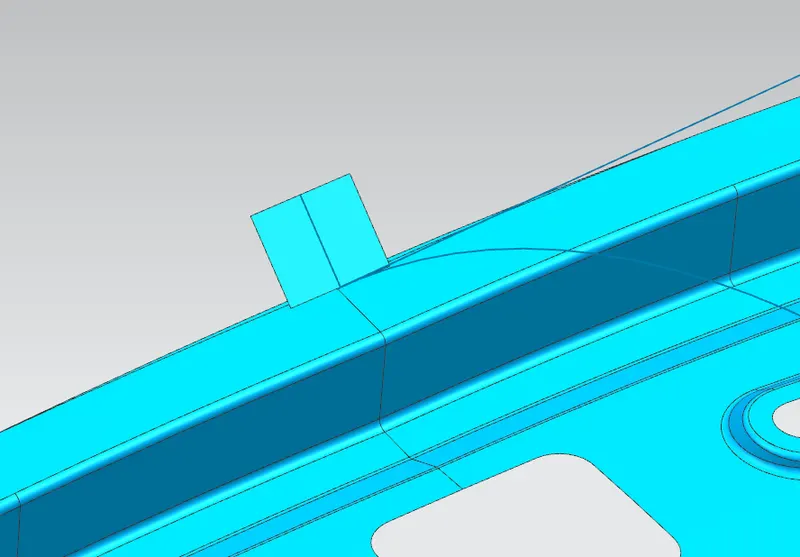
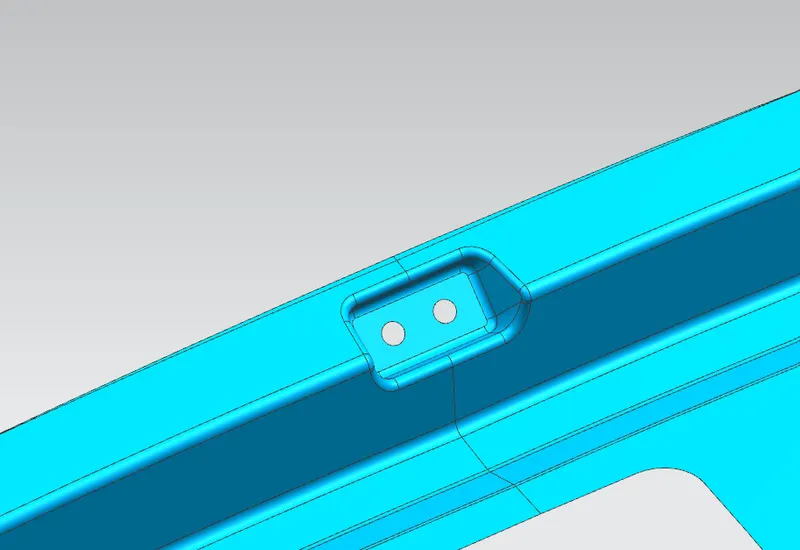
- And in the last we have made mounting emboss for wiper.
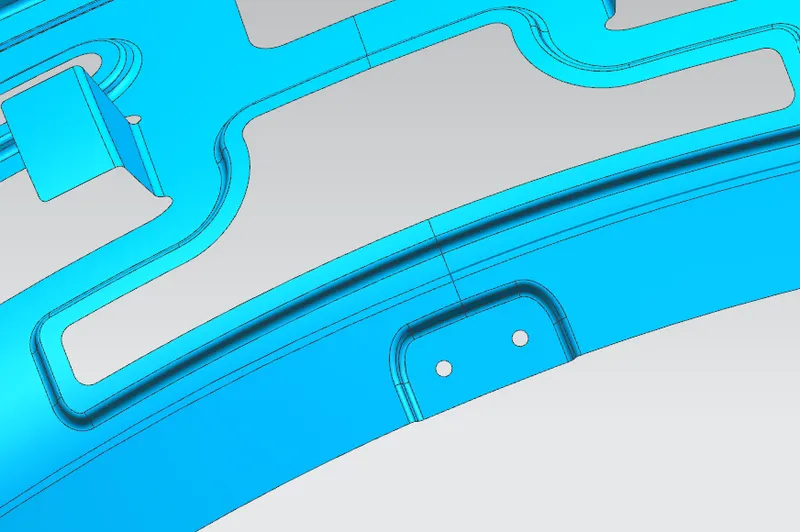
- Next is we have to cut to 2mm distance for proper hemming.
(IMAGE OF INNER PANEL)
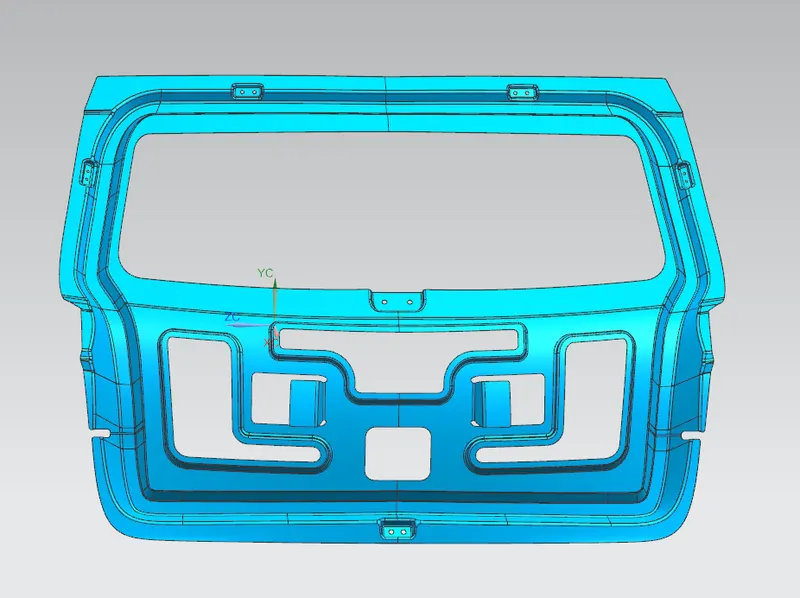
GAS STAY REINFORCEMENTS
- Gas stay is used to live backdoor automatic and manually.
- It support the back door in open position
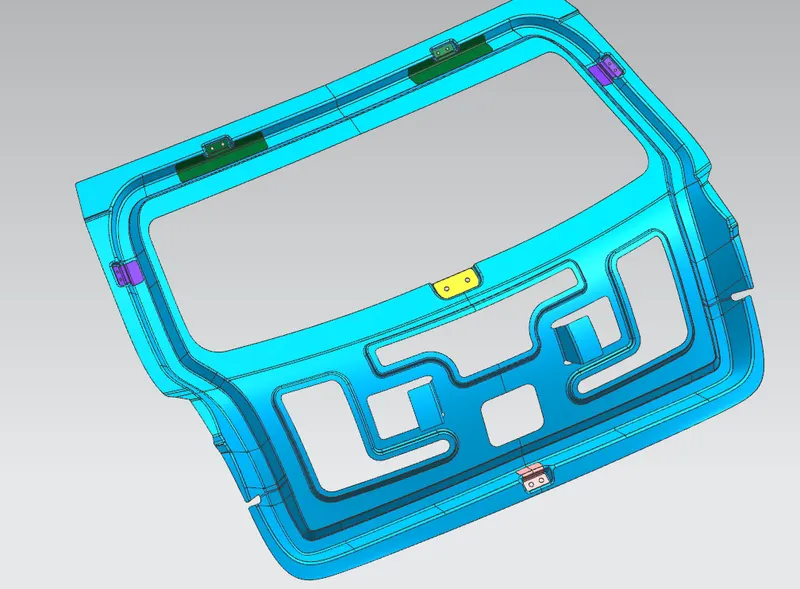
- So to provides extra strength at the gas stay mountings, we will add reniforcement on the inner panel.
- The gap should be 0mm between inner panel and reniforcement
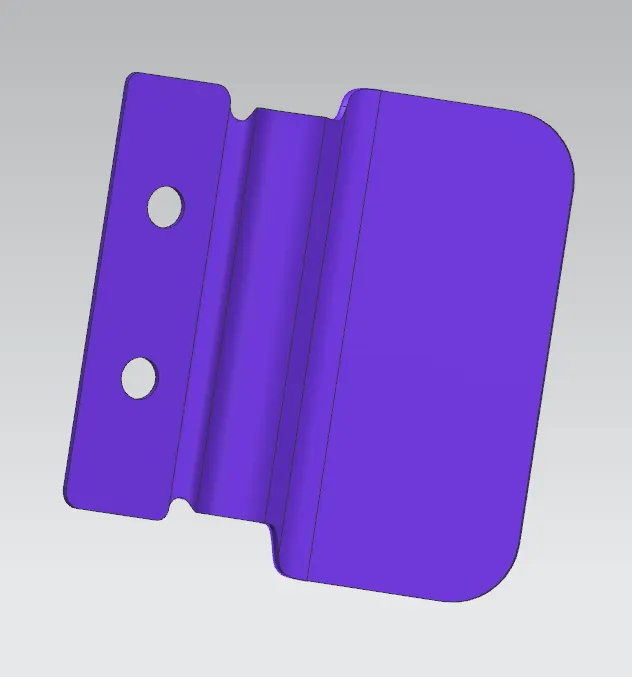
HINGE REINFORCEMENTS
- As he know hinges support the total weight of backdoor so reinforcement are added for strength.
- The gap should be 0mm between inner panel and reniforcement
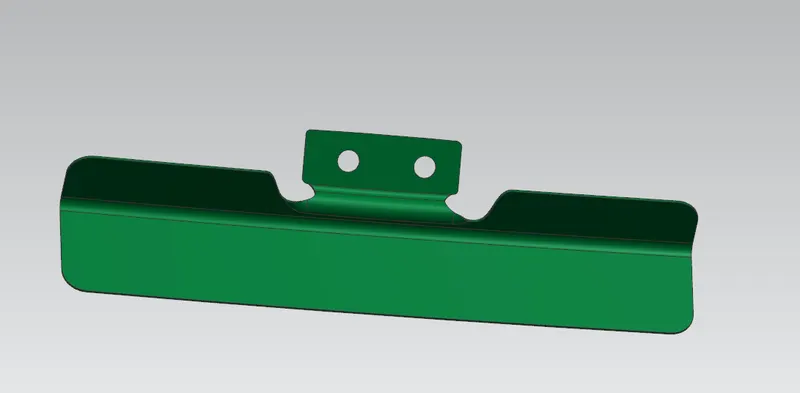
LATCH AND STRIKER REINFORCEMENTS
- Latch and striker is located at bottom of back door provide locking mechanism
- Legis and striker rainforcement provide extra strength at mounting in inner panel.
- The gap should be 0mm between inner panel and reniforcement.
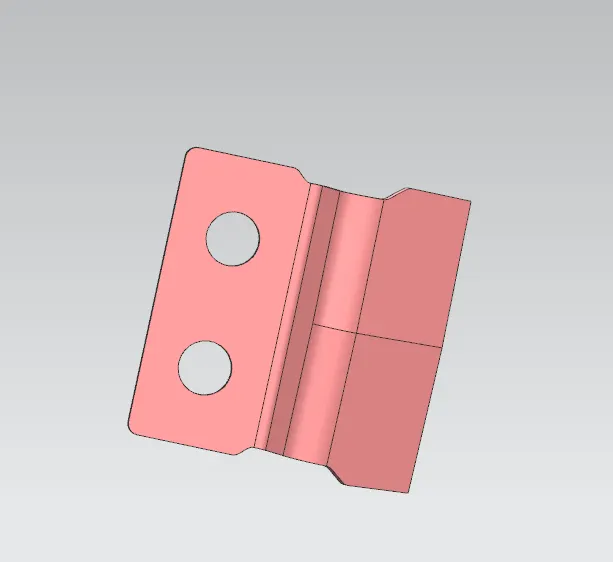
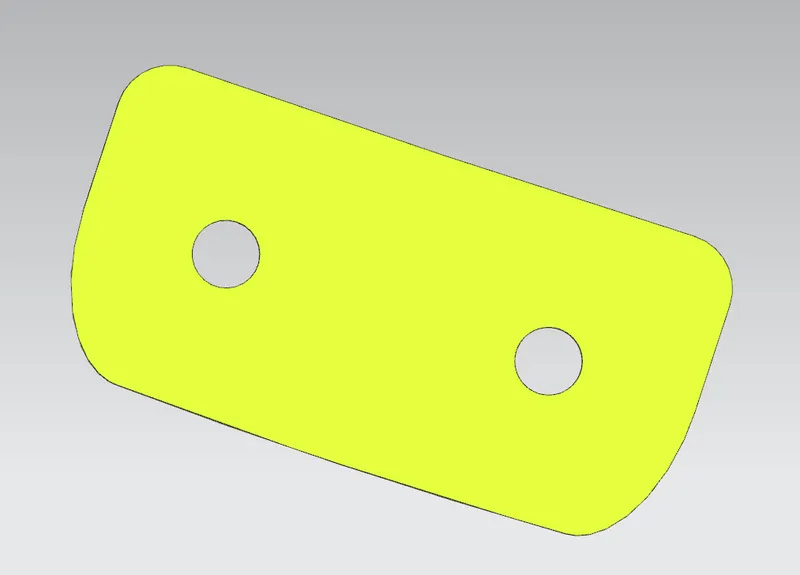
WIPER MOTOR REINFORCEMENTS
- The work of wiper is to clean dust particles and water on windshield glass.
- It is actuated by motor which is mounted on inner panel so we have to provide reinforcement in the viper mounting reason for strength and rigidity.
- The gap should be 0mm between inner panel and reniforcement.
(IMAGES OF INNER PANEL WITH REINFORCEMENTS)
Hemming
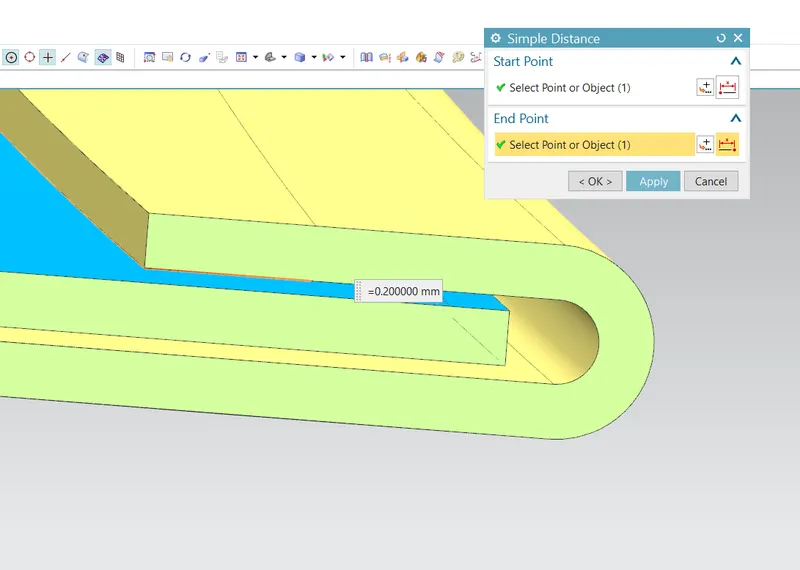
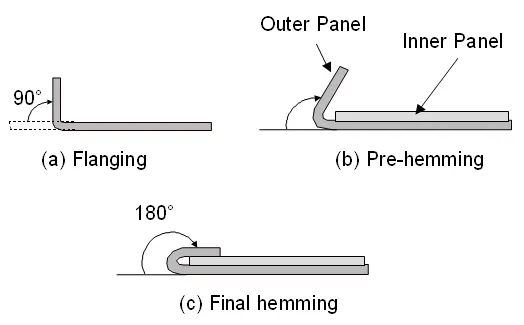
- In hemming operation the edges of the parts are created round or folded, so we connect another part together to achieve a tight fit.
- It is used to connect parts together,and improve the appearance.
- In back door we will join outer and inner panel with the help of hemming
- Since our outer panel is aesthetic surface so we cannot use spot welding here because that will leave mark on the surface and it will not look good from outside so that why we use this process.
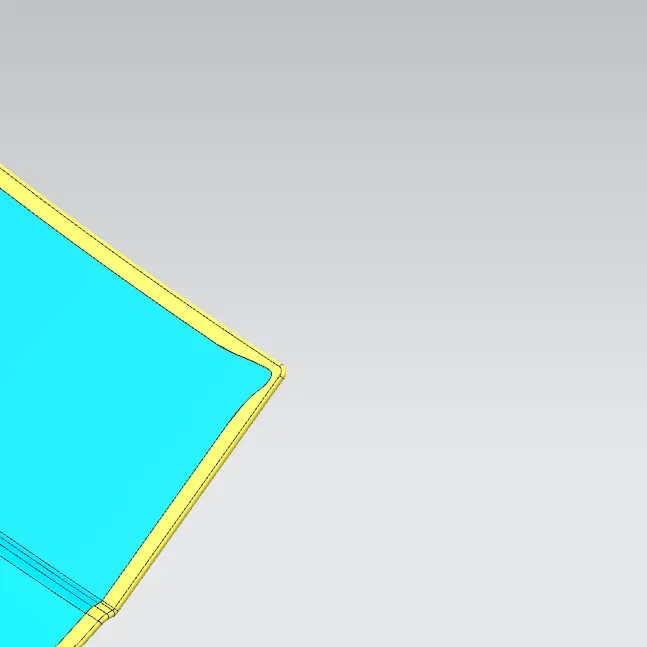
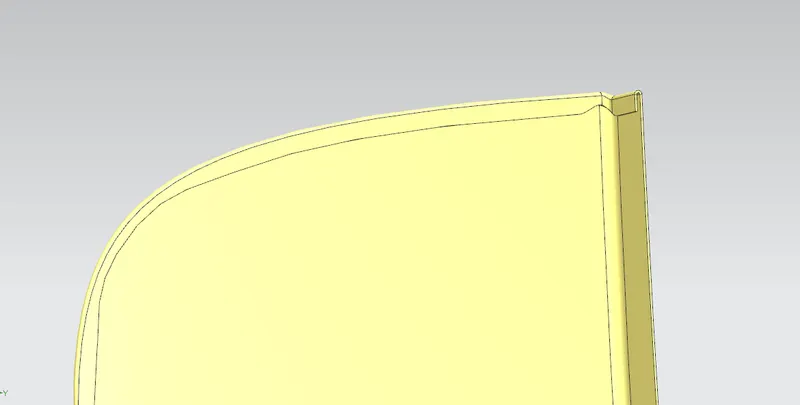
Corner relief
This is provided to prevent overlapping of sheet in corner and provide relief to the stress concentration in the area.
Deep Drawing
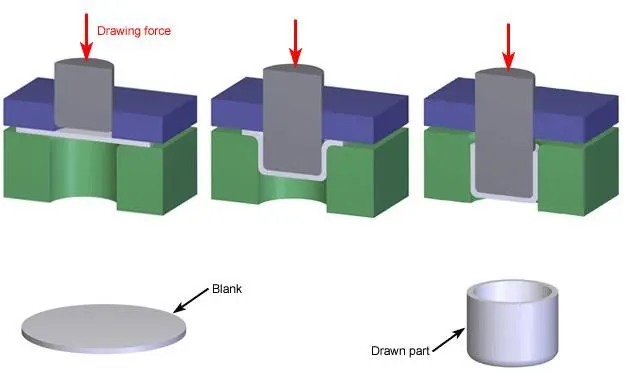
- This is a forming operation which used to produce a cup or a shell shapes in a sheet metal.
- So in this sheet is placed over a die and the sheet is pressed into die using a punch action.
Draft Analysis
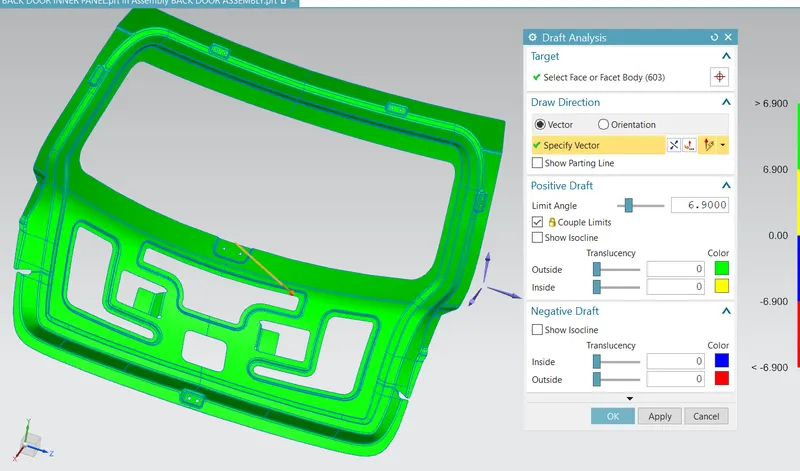
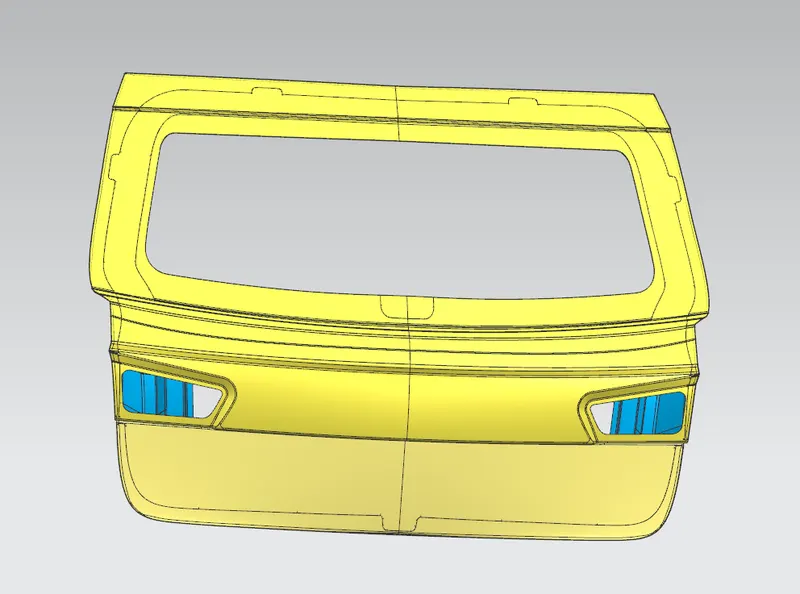
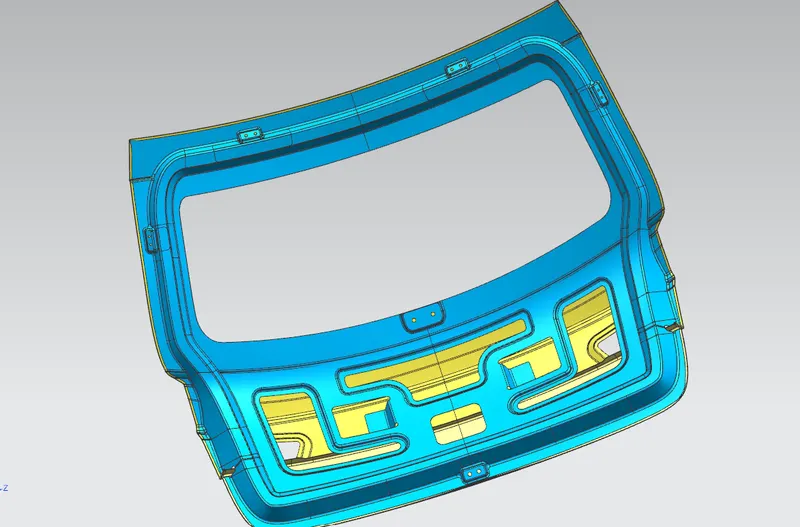
- For easy manufacturing of our component we provide at least 7 degree draft.
- The images below shows the draft analysis results and also the tooling direction and the draft analysis satisfying the manufacturing criteria at all location.
VIEWS
Conclusion:
The backdoor was designed with given class A surface and following all the standards.