Design of backdoor
AIM :-
To create a Back Door assembly by using the provided styling surface to come up with a back door design, use appropriate design methodologies, and provide the necessary reinforcements and embosses.
Here we got a back door part file Styling surface, from which we need to create an assembly by follow the design guidelines. By this we follow the procedure to finish the work.
PROCEDURE_1 :- Open the file & Repaire the Surface.
After opening the part file we found the 2 seperate unattached parts like 2 backdoor seperatly. One is upper one & another is bottom seperate backdoor. Which will be welded by flange.
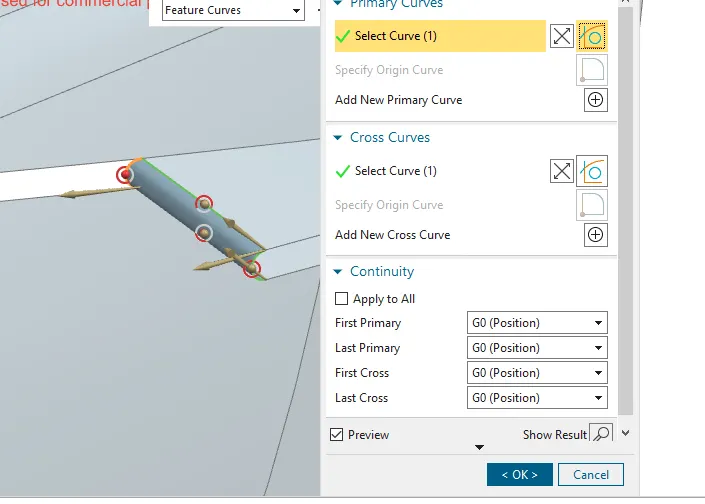
So to fill upp this gap we need to extrapolate the edges to get proper spot weld. Before thet we use the sew operation to join the all surfaces to getting a single finish surface. But the swe operation are not perform due to the some gap reason. So we can hide the surface to create new one except of that parent surface. Create a bridge curve & apply a through curve mesh operation.
Like this one by one we need to sew the surfaces each other & where the gap has found we need to use there through curve mesh operaion & again use the sew to join properly.
Upto this region sew work but this hided blends we need to extend a sheet to get a corner for apply a proper blends to this. So for that we extend a sheet upto 10mm both side and apply a trim & corner operation.
The patch is found at the bends this is not good so we can use blend corner to remove the patch at this region.
After useing the blend corner we get a smooth surface here.
In case of upper panel & bottom panel we need to keep 8mm distance for the spot weld. But the upper panel & lower panel this 2 are seperate parts. so we need to hide all upper panel & get mesh with the bottom panel to spot weld region. So here we have extract the horizontal bottom surface & hide the upper outer panel.
PROCEDURE_2 :- Create a New assembly _ Back_Door_Assembly.
The assembly is created by the Top Down approach. While creating a new back door assembly we have to create a new model seperate, that is Back door outer upper panel. So we need to copy the finish upper panel extracted panel to the new created model. After we need to save this model at a seperate folder. Like this we need to again create a model for the lower panel & same procedure copy & paste that 2ndly extracted panel to that model. Finally save that models & close.
After that we need to create a New assembly name as Back_Door_Assembly. Within that assembly we need to add the models that are created & saved that same folder location. So add first model & fixed it likely add 2nd model.
PROCEDURE_3 :- Creation of Back_Door_Inner_Panel
We have create a new model again as name back door inner panel. Saved at same location & added to the assembly once.
Moving towards the creation of inner panel we need to take a copy of that outer panel for the referance, we used a tool commond that is wave geometry liner that directly give us surfaces from the outer panel to the inner panel model. Like this we can copy the lower & upper panel both are in single inner panel as aeperately. And add both are in a feature group as reference geometry.
The first move to design the inner panel we need to create a tooling direction. The core part is heavy & it it passes a single line & come & punches the entire part. Hence the motion of a core part is called a tooling direction. There are multiple ways for creation the tooliing direction. we can simply create a 2 line at the edges of the panel. I will create a bisecting line by this 2 line, as a derieved line.After creating a tooling direction we need to covert that 2 lines into the referance line. & Exit the sketch.
Procedure _4 :- Sealing Flange Creation
Now we are moving towards creatingg the sealing flange. The sealing flange is a which allows back door to sit the body on the car. There should be the 15mm gap between each other. The rubber is is provided between that region. While designing a inner panel there should be a gap from the edges of a outer panel shoulbe be between 12 to15 mm. Why because we need to keep hemming with the outer panel.
So while creating the sealing surface or flange we need to take exetract of that parent surface , we not take it directly original to the real design to it. So we keep that parent as it is not for taking editing we can take extract of that surface.
Here we hided the outer & inner panel, but before that we have offseted the inner panel 25 mm at an downward. Then we can create a offset curve in face with 55 mm. For creation the flange to the inner panel guide we need to creates a curves on the surfaces to getting a specific surface by trimed option. With the offseted curve on surfaces diamensions are 60,P30,145,40,P30 & 75 AS well.
Here we have created the outer Sealing flange, from this we need to create a offset of upeer & lower inner panel surfaces with the help of sealing flange & join the ineer & outer as well.
After that we need to crreate a law extension for the trimming & joining the inner & outer panel. So here we have created the law extension with 120 mm with an angle 36 degree towards the tooling direction. And finally provided the blend is 5mm.
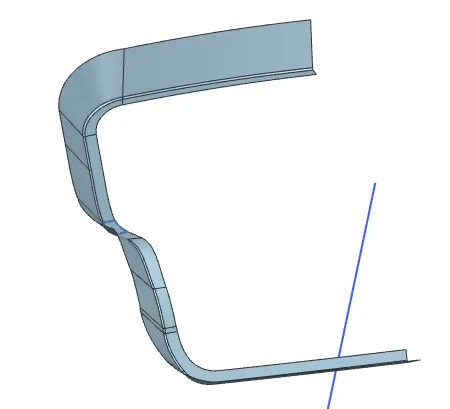
After the law extension we have unhided the upper panel & Lower panel. But before moving towards the trimming , we need to create a copy/ used the Xtract command for the 1 law extension & 2 times for the blend. For the purpose of proper seperate parts, that trim with one time with upper panel & another for the lower panel as well.
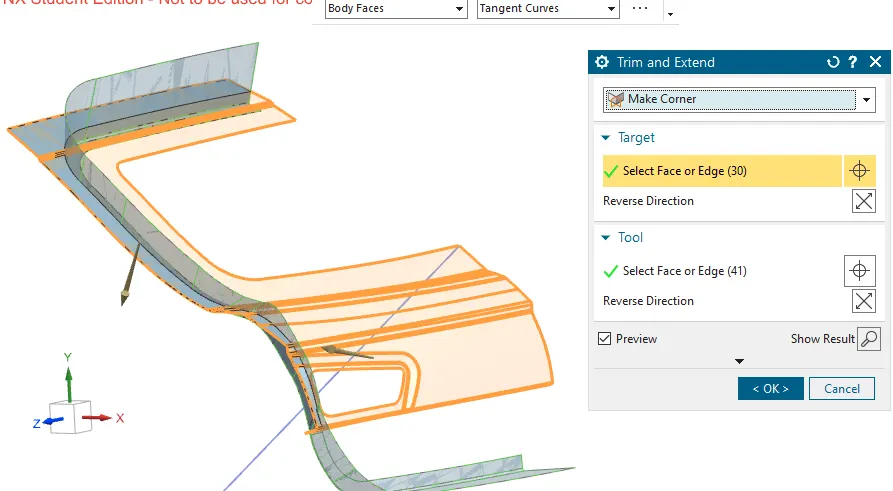
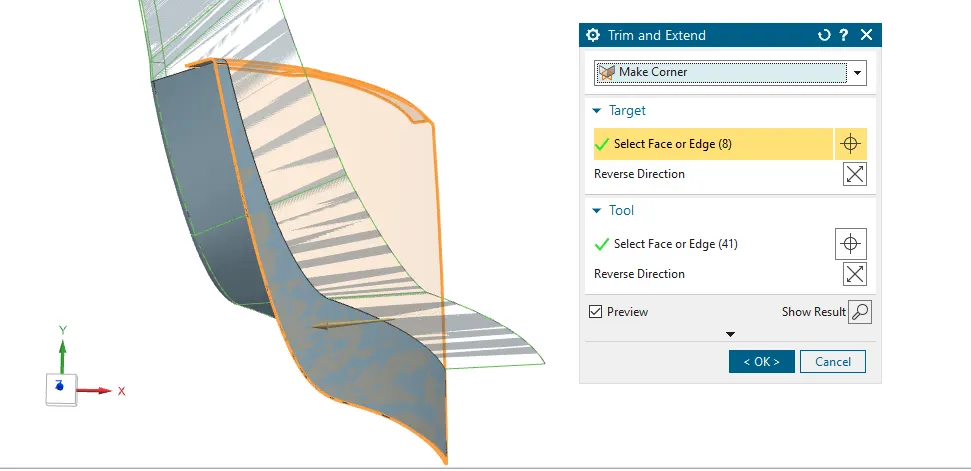
Finally we got a outer sealing flange or the inner panel.
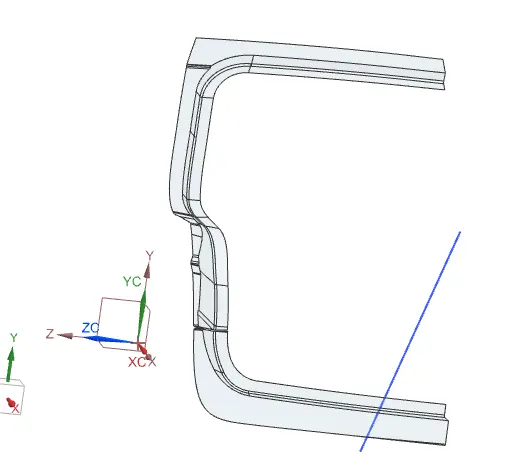
Then we need to join the upper & lower trimed surfaces or parts to getting a fresh inner panel.
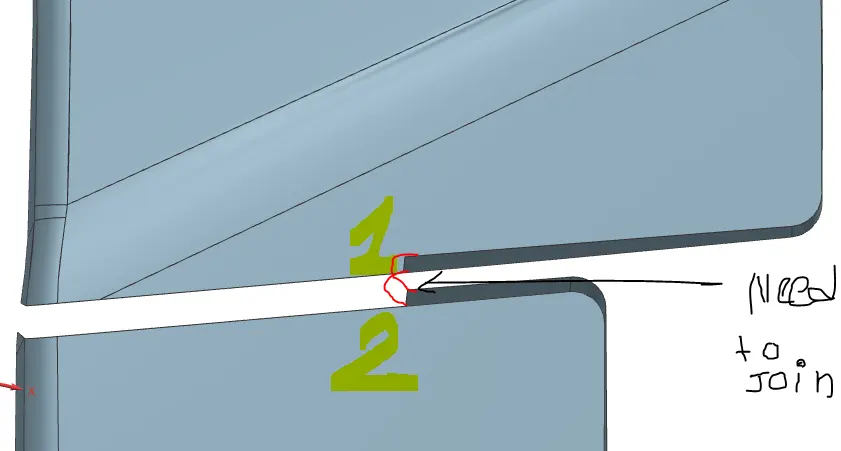
Here we have created a bridge curve at 2 end & apply a command through mesh curve for the joing of this surfaces.
NOTE :_
In this way i studied all assembly creation on NX software, but the software issue lagging, hanging, all times need to create a different referance sets & assembly saving issue...Now i consult with the mentor so i sbumit this challenge here. But i have studied & proper understand the challenge & projects also watched 4 times vidios as well understanding.
Thank you.