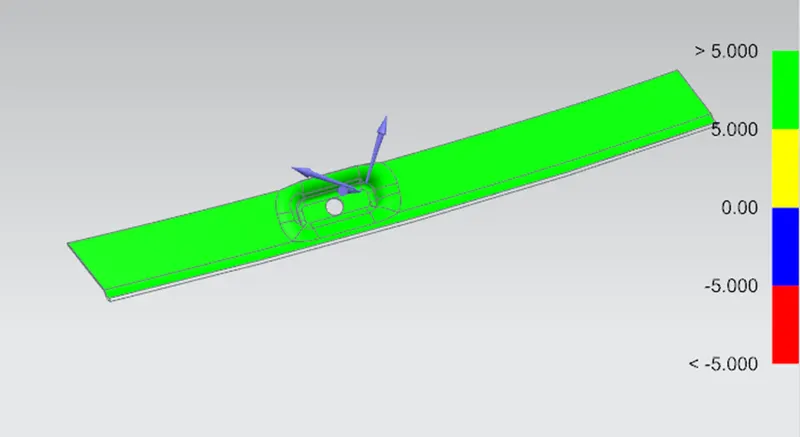
Design of backdoor
CAR BACK DOOR DESIGN
Back Door Introduction: -
A passenger car is a wheeled motor vehicle used for transporting passengers, which also carries its own engine or motor. Tailgate is the closing door of the luggage compartment. It provides the aesthetic outer appearance to the vehicle as well as wind flow aerodynamic surface. Tailgate is a single stamped or split outer panel. It integrates with the inner reinforcement panel. To avoid air rushing noise as well metal rubbing noise, protected with the sealer application process. Outer edges hemmed by Robot hemming process with 3 pass hemming to ensure sealer fill rate uniformly as well clinch tightness rigidly. in such a way easy to open at the same time, it should not pass external environmental noise inside the passenger compartment and should not lead to any water leak. High closing effort leads to improper locking. Gas Stay is used to easily access opening and closing.
A door which is located at the rear side of a car which gives access for the boot space to store luggage, spare wheel etc.
Also, tailgate is a door that provides access to the rear of a vehicle. It is a common feature on trucks, vans, SUVs, and other vehicles with large storage compartments.
The tailgate keeps items loaded onto the back of the vehicle secure while it is stationary. It also prevents cargo and payloads, such as dirt or gravel, from slipping out while driving on the road.
Types of doors: -
- Top Mounted Door
- Side mounted Door
- Bottom Door
Parts of Back Door: -
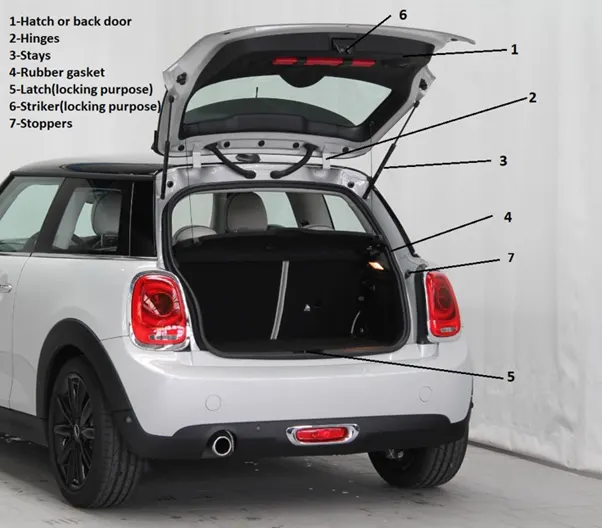
Parts of Back Door Assembly: -
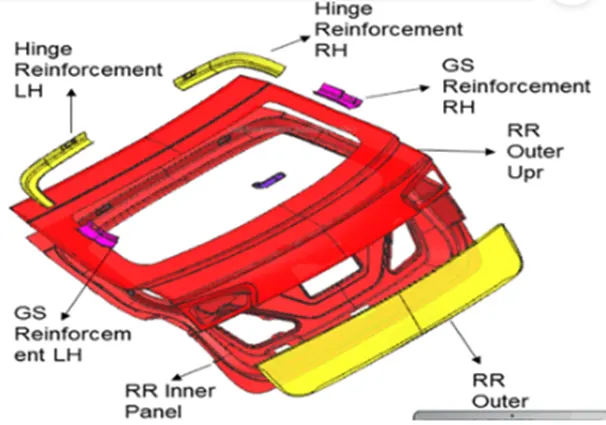
- Inner Panel
- Outer Upper Panel
- Outer Lower Panel
- Hinge Reinforcement
- Gas stay Reinforcement
- Latch and Striker assembly
- Wiper Motor Reinforcement
Back Door Manufacturing Processes
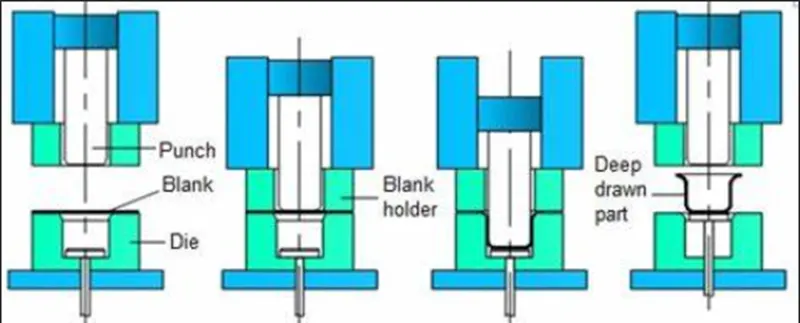
Deep Drawing:
The metal deep drawing process is an effective method of manufacturing of cups, cans and other similar deep drawing products. The deep drawings having two main categories.
- First- stage drawing: The blank shape of metal is placed on the die and contact with the punch. When the metal specimen is flat piece of sheet metal used in forming and finish the product. Initially the punch moves in downward direction. The outer rim of blank is subjected to pure radial drawing (drawing toward in vertical axes) between die and blank metal. The metal become a bend and sliding over die and also stretched between die and punch. The metal in vicinity of punch head and contact with it bend and slide over radii and stretch over punch head.
- Redrawing: The components drawn from first stage again it is redrawn convert into more depth to form a cup shape in the die and punch. The second stage of drawing is called as redrawing.
Embossing:
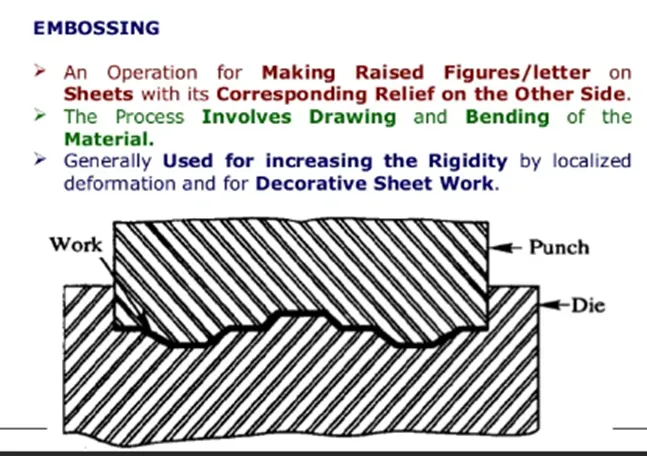
- Embossing is a metal forming process for producing raised or sunken designs or relief in sheet materials by means of matched male and female roller dies, theoretically with no change in metal thickness or by-passing sheet or a strip of metal between rolls of the desired pattern. Metal sheet is drawn through the male and female roller dies producing a pattern or design on the metal sheet. Depending on the roller dies used, different patterns can be produced on the metal sheet.
Hemming: -
Hemming in sheet metal operations refers to the bending of sheet metal edge onto itself. It is very similar to edge stitching in clothes. Similar to how an edge stitch strengthens the edge and makes it more durable, a hem imparts strength to the metal edge and improves its appearance. The edge of one part may also be folded onto another part to create a joint.
Hemming is usually done in two stages. The first stage creates an acute bend using acute tooling (V die) followed by a flattening of the return flange using a flattening die.
A complete list of hemming benefits on a sheet metal product is as follows:
- Hems strengthen the sheet metal edge
- They improve the surface appearance and surface quality
- They hide defects such as rough edges and burrs
- They can connect parts
- They make the edges safer to handle
Hem Types
The different sheet metal hems based on the hem shape are as follows:
- Flat or closed hem
- Open hem
- Teardrop hem
- Rope hem
- Rolled hem
- Flat or closed hem
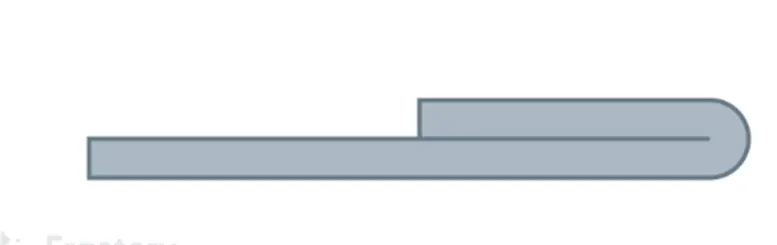
In a flat or closed hem, the part of the edge that bends sits completely flush over the rest of the metal sheet. The angle between the returning flange and the sheet metal is 180 degrees. The inside radius is zero and thus, there is no gap between the returning flange and the metal sheet.
Closed hems require a lot more power and tonnage from the presses than open or teardrop hems and it is also not advised for metal sheets that are over 2-3mm in thickness since the sheets are likely to fracture.
- Open hem
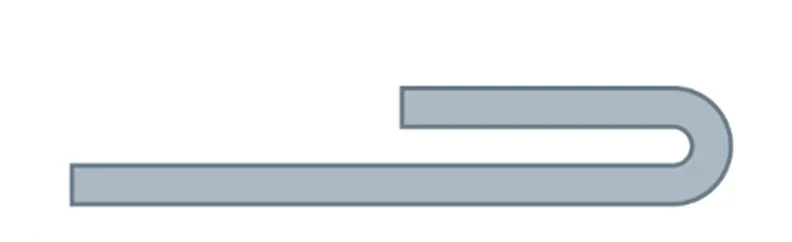
In an open hem, the returning flange is folded over the sheet metal but there remains an air pocket between the two. The bend angle in this hem type is also 180 degrees.
- Teardrop hem
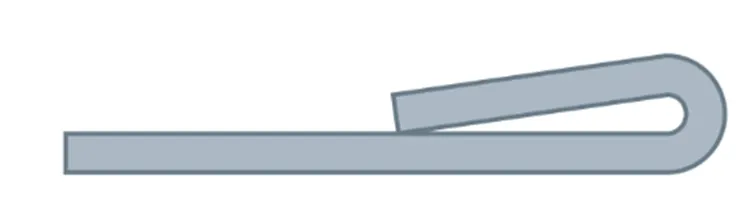
In a teardrop hem, the returning flange is bent beyond 180 degrees. The resulting shape resembles a teardrop.
It is perfect for materials that do not have the required ductility to provide closed hems. Teardrop hems are used for fragile materials such as aluminium.
- Rope hem
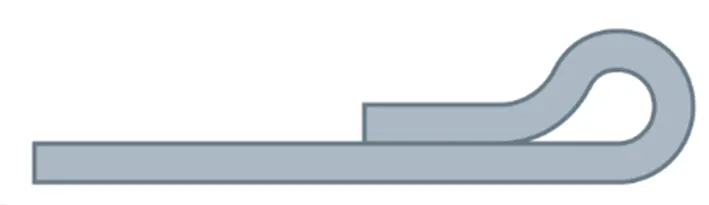
A rope hem has a returning flange at a bent of more than 180 degrees. Once the hem achieves the shape of an open hem, the returning flange is pressed onto the part surface through a flattening die.
The edge is bent in shape similar to an open hem and then the second piece to be connected is inserted into the gap between the metal sheet and the returning flange. Further pressing takes place making the second parts sit flush between the metal sheet and the returning flange and create a joint.
- Rolled hem
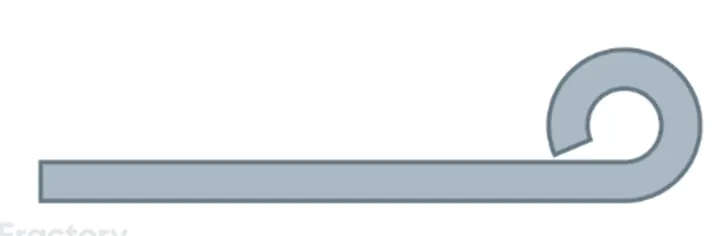
In a rolled hem, the bent portion of the sheet metal is tucked back into itself. This creates smooth round edges all around for holding the part from the hemmed edges. This process is also commonly referred to as curling.
Process for Hemming: -
- Conventional die hemming: In conventional die hemming, the flange is folded over the entire length with a hemming tool.
- Roll hemming: In roll hemming, the hemming roller is guided by an industrial robot to form the flange.
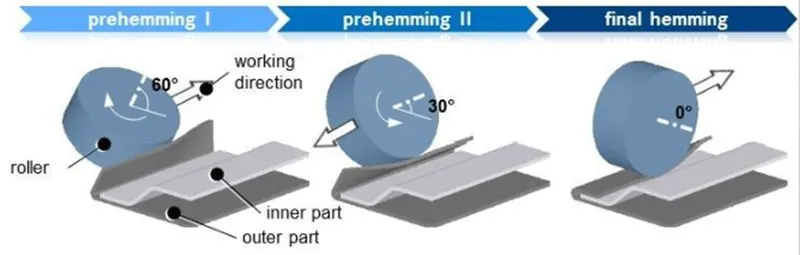
- Open Hem: A Hem has a full round feature and a return flange. In open hem bend angle is equal to 180 degrees.
- Tear drop Hem: In tear drop hem the bend angle is greater than 180 degrees.
- Closed Hem: Hems without any inside radius are called as closed hem. Closed hems are not recommended if the hem geometry is to be painted or if the material used is SST or Aluminium.
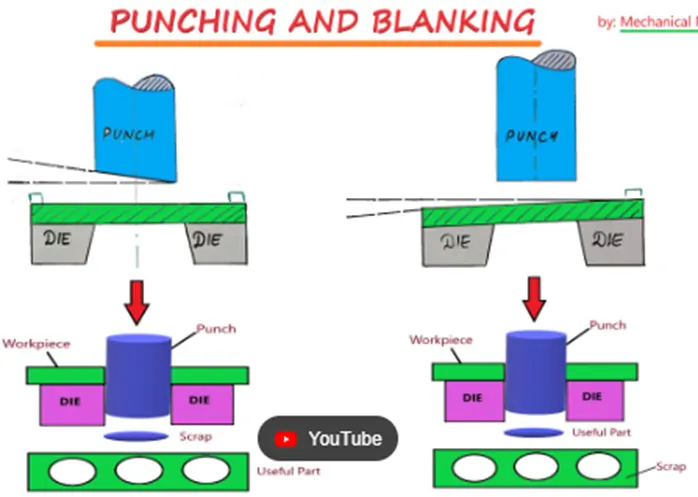
Blanking: -
Blanking is a cutting operation of a flat metal sheet and the article punched out is known as blank. Blank is the required product of the operation and the metal left behind is considered as a waste.
Punching: -
It is similar to blanking only the main difference is that, the hole is the required product and the material punched out from the hole is considered as a waste.
Design Considerations for Back Door
- Functional Requirement: Hinge and gas stay are functional requirements.
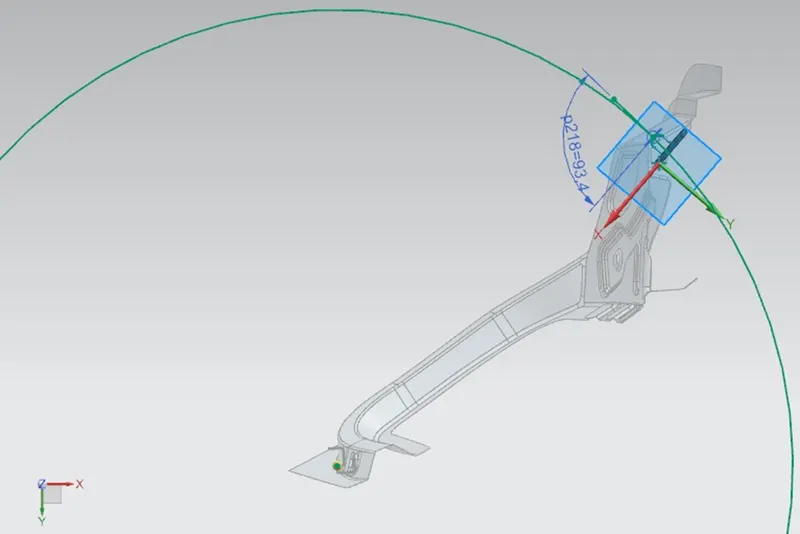
- Striker Position: The position of the hinge should be perpendicular to the latch when the latch and striker meets. for that, a circle is drawn from the centre of hinge axis to find the path of the striker. and positioned it perpendicular to the path.
- Rear visibility criteria: Federal motor vehicle safety standard (FMVSS) No. 111, “Rear Visibility,” currently requires that vehicles be equipped with rear-view mirrors to provide drivers with a view of objects that are to their side or to their side and rear.
- Rear crash regulation.
- Requirement of sealing and its function: In order to prevent water from entering the cabin we are introducing a sealing area where the sealing flange is provided on the inner panel and rubber mounting area is provided on the body side.
- Joining techniques: To join inner and outer panels the Hemming process is used and to join outer upper and lower panels laser brazing welding is used.
- Laser brazing welding: Joining methods, in which the brazing solder is melted with the help of an industrial laser, have been used mainly in the mass production of vehicle bodies. There, laser beam brazing is mostly used for joining galvanized metal sheets or lightweight components made of aluminium, but also for other brazing material. Laser automobile brazing is usually realized with a brazing optic that is integrated in a robot. The laser beam is guided along the joint where it melts the brazing solder.
- Spot welding: Also used to join Ferrous material with each other. Minimum flange required for spot welding is 12mm.
- Gap and flushness requirement: Mastic Seals: Mastic Seals place b/w Inner and outer panel to reduce noise, vibration, and harshness. Every Mastic will have an effect of 80mm Dia. The inner and outer panel gap is 4 to 5mm. 0.2mm gap is required for the Hemming and that gap will be filled by sealed past.
- Adding reinforcements and stiffener pad: reinforcements are added were and all the weight is added. On the inner panel, we have Hinges and striker, which are attached to the inner panel so due to this attachment the strength of the inner panel is going weak. In order to strengthen the inner panel reinforcements will play a very important role. A stiffener pad is a sponge-like material place b/w Inner and outer panel to reduce vibrations.
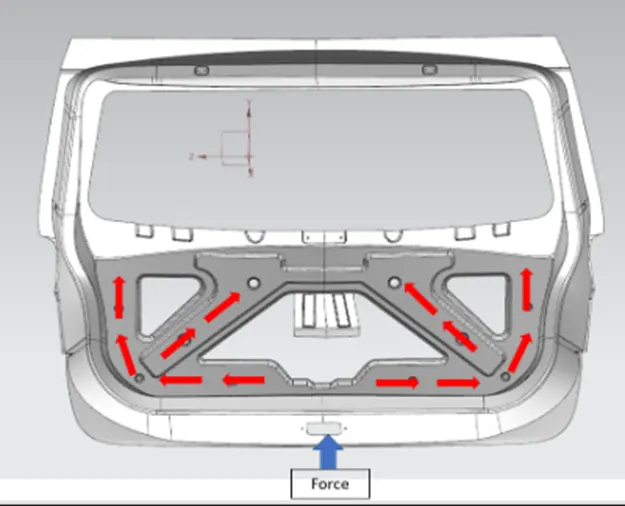
- Emboss definition: Embosses are provided in the inner panel of the hood assembly. This helps in the weight reduction of the hood and also dissipates the force during the collision. Force dissipate is shown in the figure.
- Sealing Flange: To prevent foreign material tot enter in car from door.
- Load Distribution.
Design
Given Styling Surface:
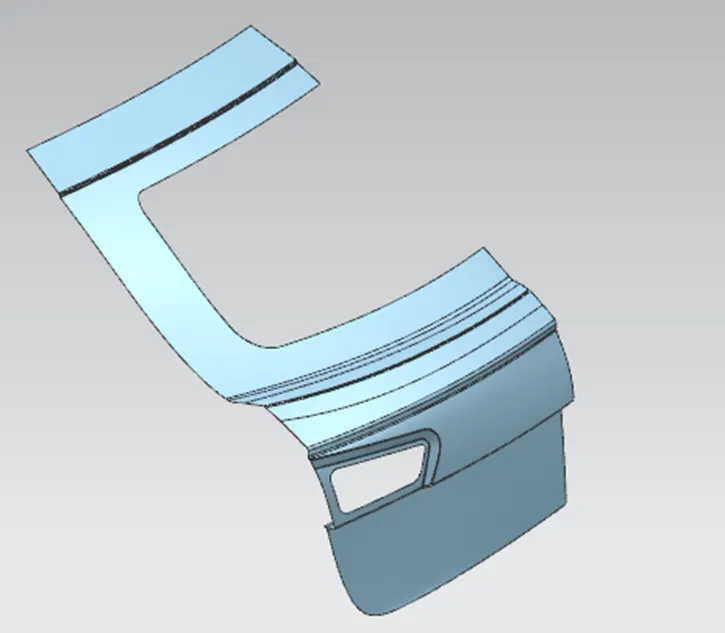
- Given surfaces has to be repaired according to the smoothness. After repairing the surfaces, the door is divided into two parts as Door Outer Upper and Doo Lower Panel.
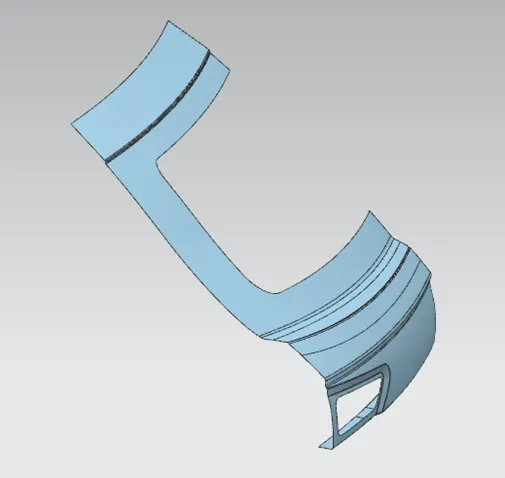
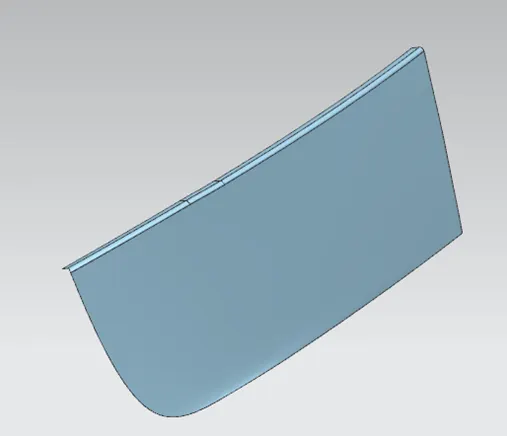
- First of all, need to create the Tooling direction for the Deep drawing operation. It shows that all the operations as embossing is done by considering this vector direction and it will help for manufacturing the part.
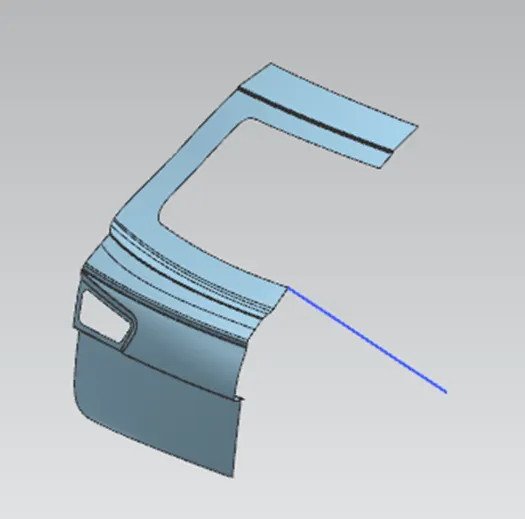
- Then create Sealing Flange by offsetting the outer panel to the specific distance as per sealing requirement dimension.
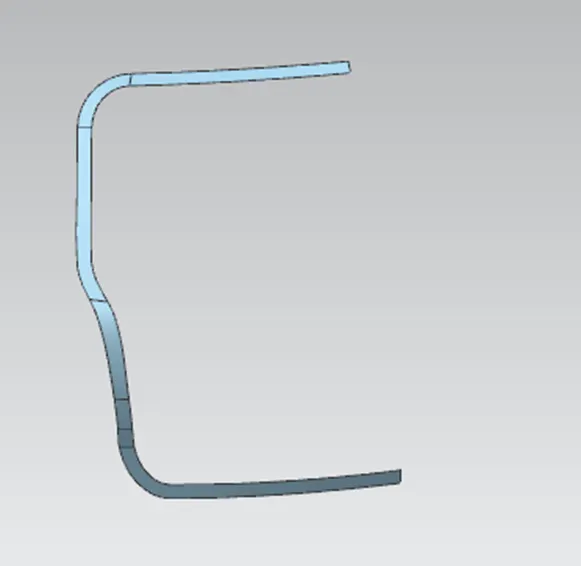
- Then we will be creating the Back door inner panel flange by offsetting the outer surface at a distance considering the sheet thickness and thickening direction.
- Then created the connecting flange to join the inner panel and sealing flange. The nominal thickness of the inner panel is 0.75.
- The clearance gap between the inner and outer panel is 0.2mm
- Then for the windshield panel mounting, windshield panel is created and joined with sealing flange.
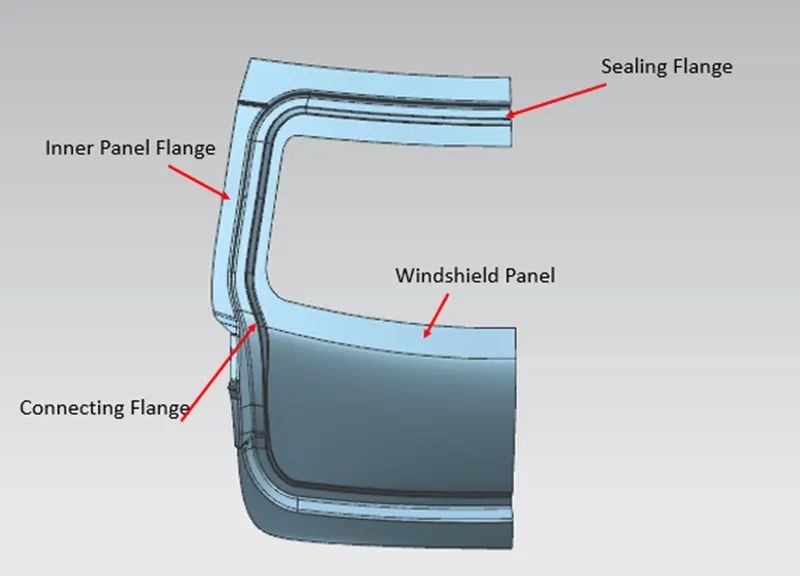
- Then to improve the strength of the inner panel and to reduce the weight 'Y' type emboss and other cut-outs are created. Also, for Latch and Stricker mounting cut-out is created. This cut-out is also done on other side of the inner panel to maintain the centre of gravity of the Back door.
- Another Emboss is created for Wiper motor mounting, Gas Stay and Hinge.
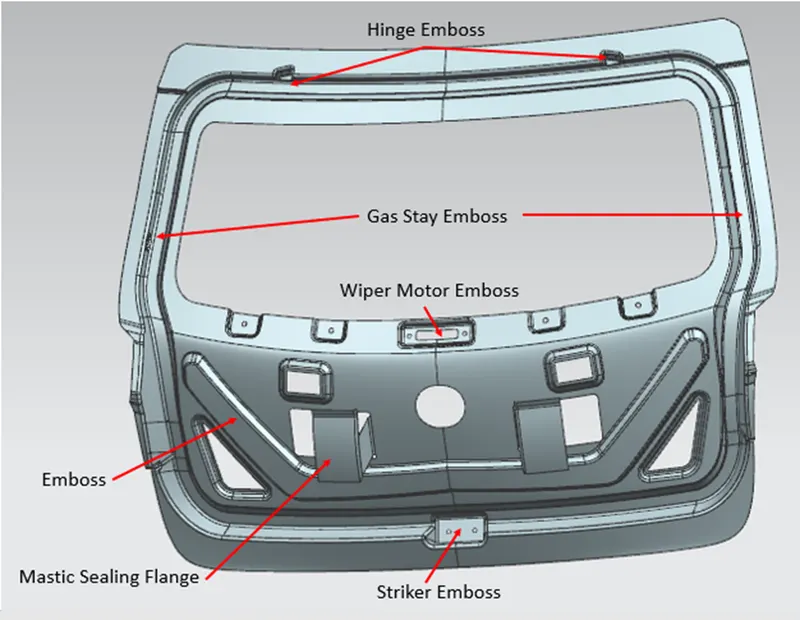
- Now to assemble the back door with the vehicle Hinges are used to open and close the door. For that to increase the local area strength we have to design the emboss and provide the appropriate reinforcements to withstand the load acting upon it.
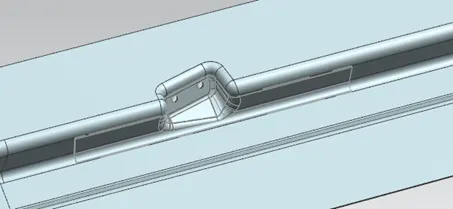
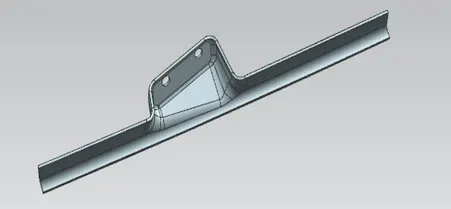
- Same operation is repeating in below embosses and reinforcement too.
- Gas Stay Emboss and Reinforcement:
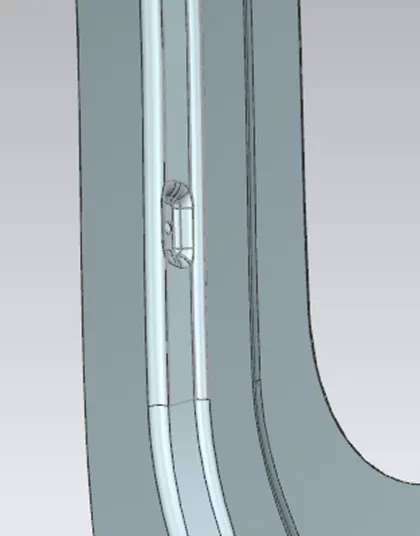
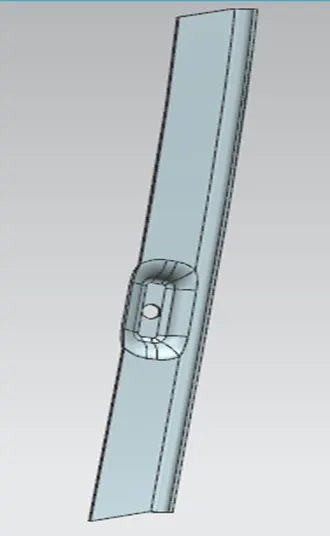
- Wiper motor mounting emboss and reinforcement:
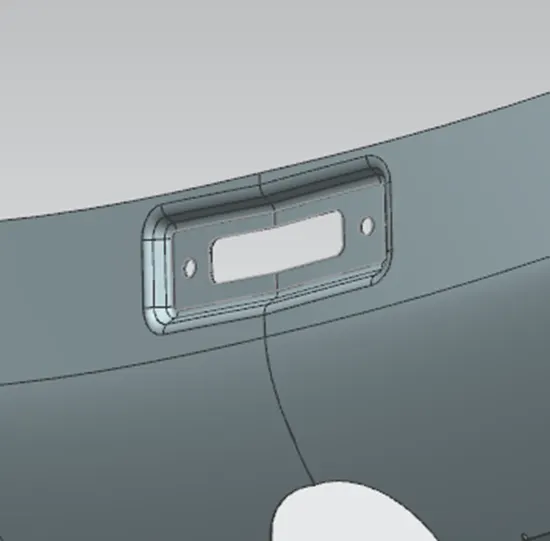
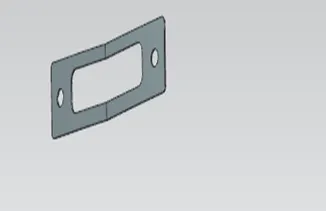
- For positioning the Latch and Stricker, we have to create a trajectory passing through a midpoint of axis of two hinge mounting holes.
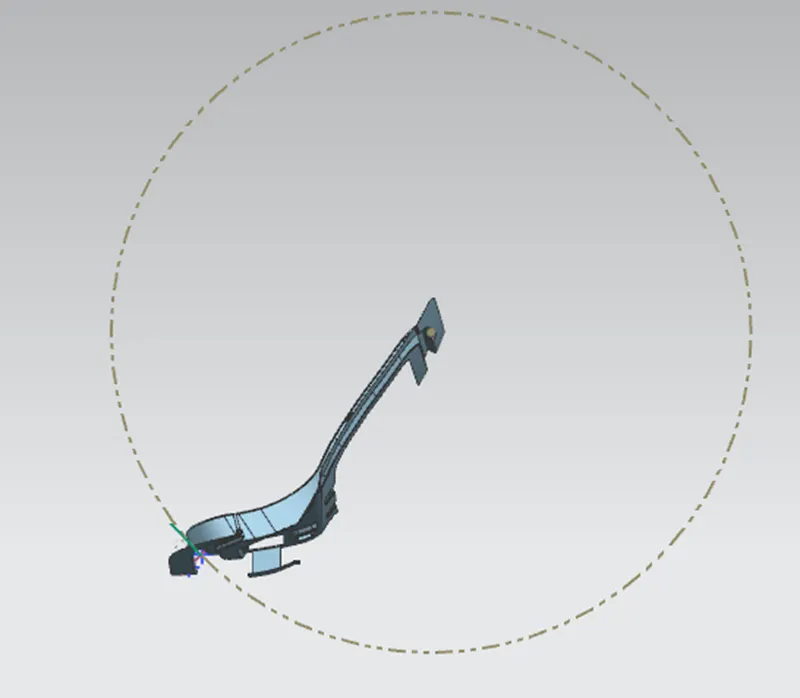
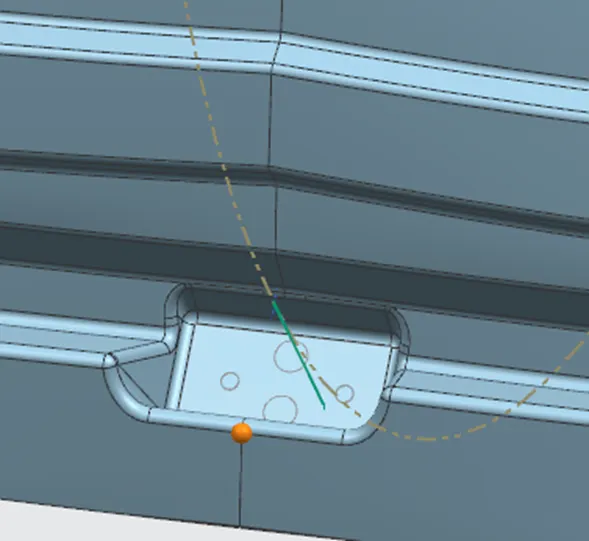
- Striker mounting emboss and reinforcement:
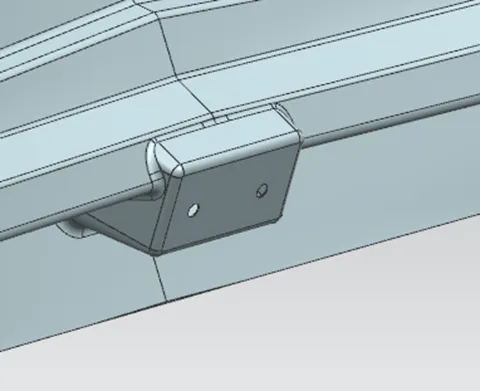
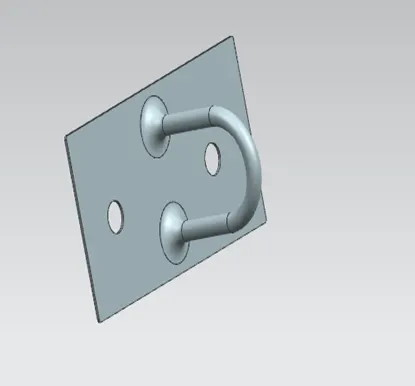
- Hemming:
Required:
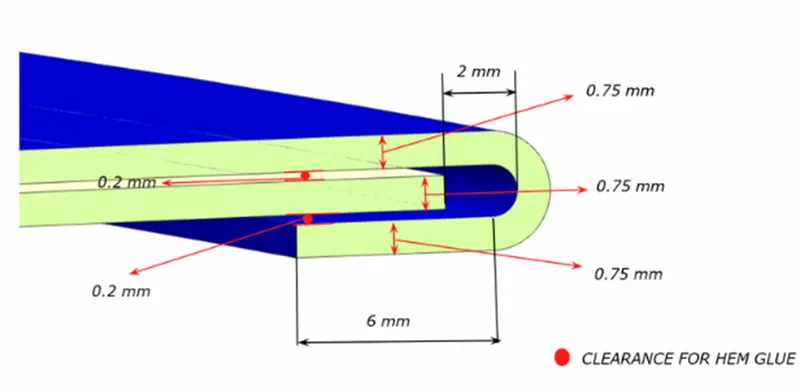
Observed:
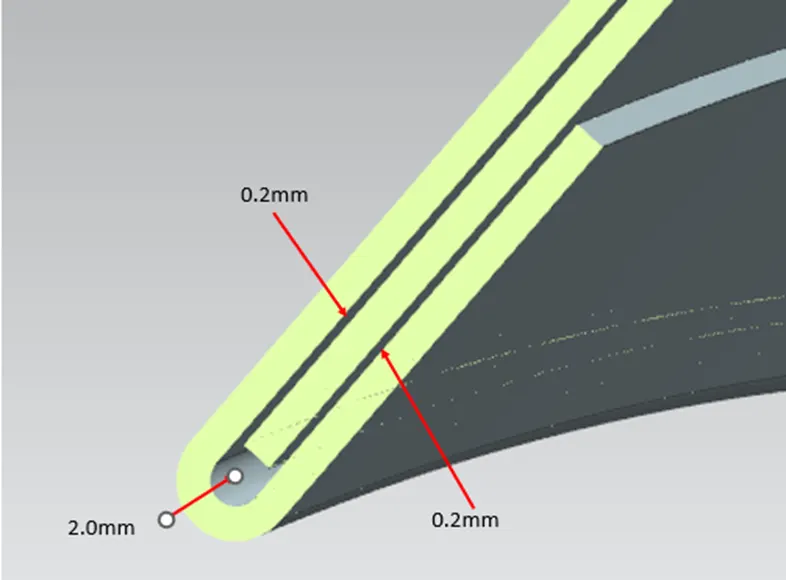
- Hem Relief:
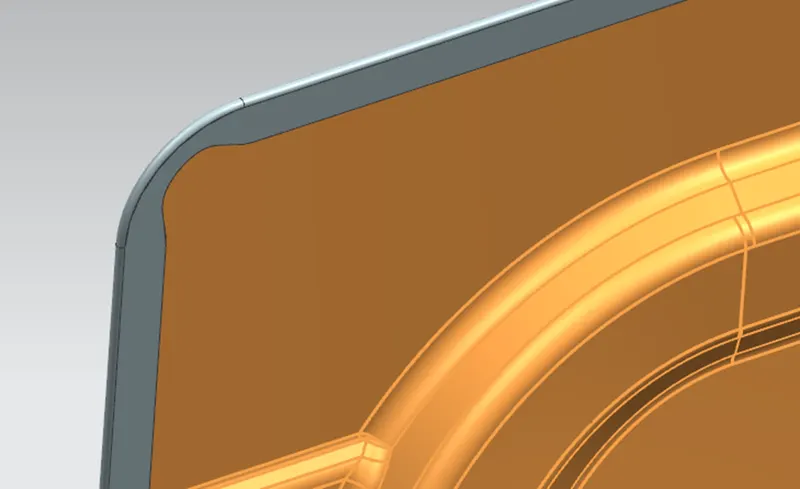
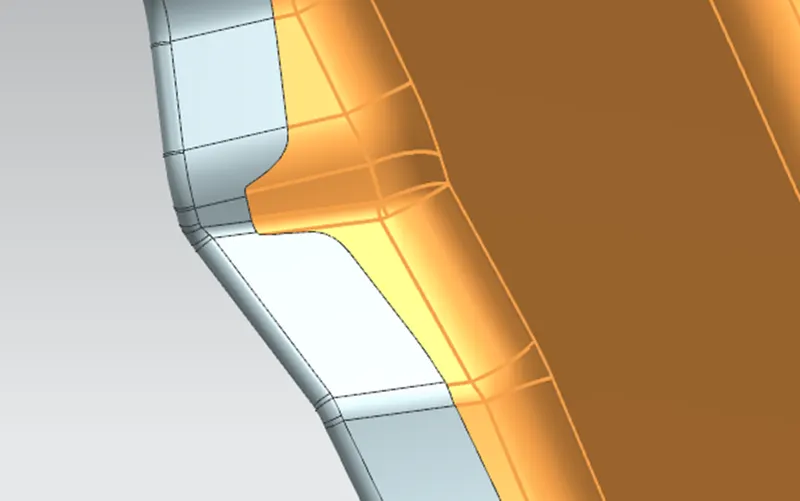
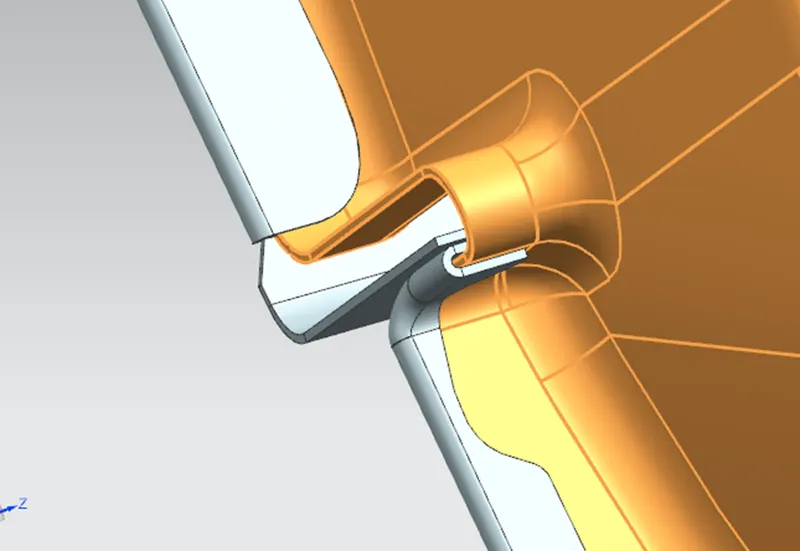
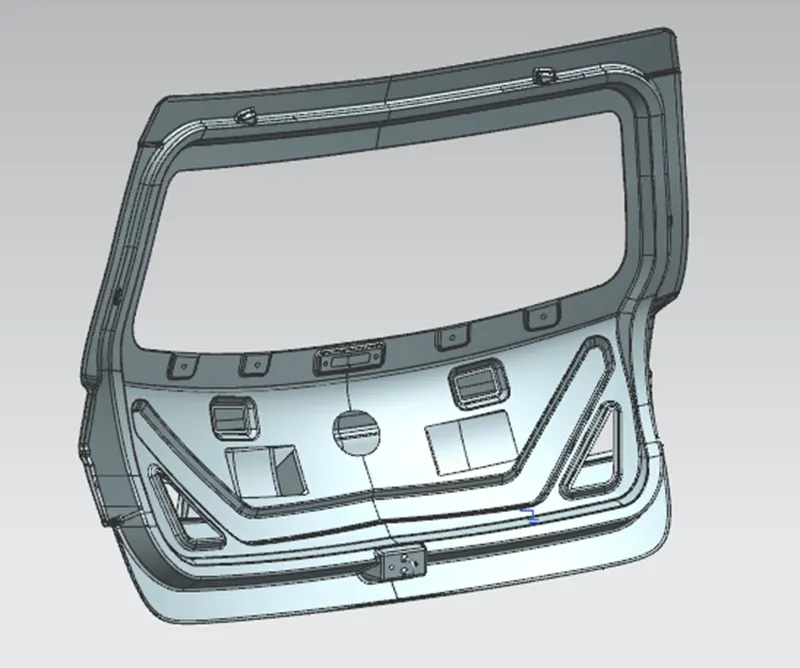
Final Assembly of Inner Panel with Reinforcement
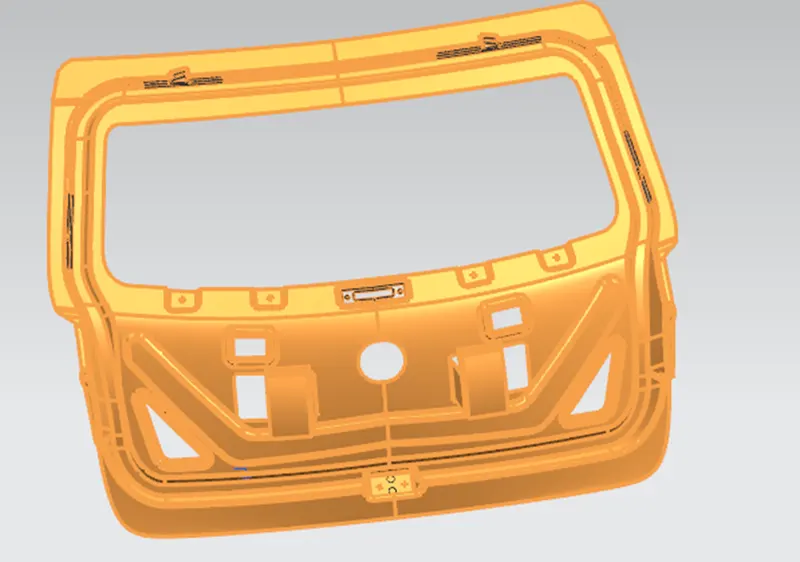
Backdoor Full Assembly
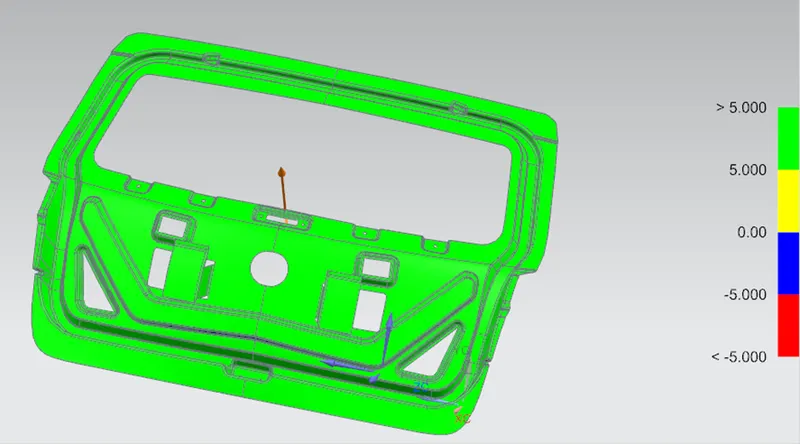
Draft Analysis
- Inner Panel
- Hinge Reinforcement LT/RT
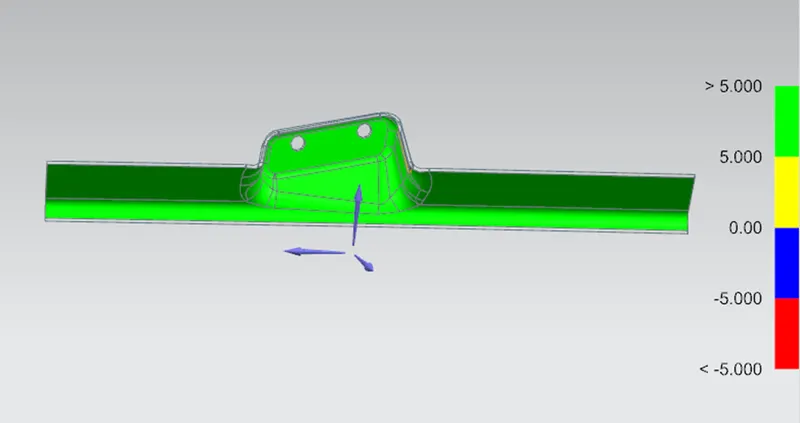
- Gas Stay Reinforcement LT/RT