Creation of Multiple viewports, Scaling the drawing and setting in Template in AutoCad
AIM : To create multiple viewports, scaling the drawing and setting in template in AutoCad
Introduction :
- Open autocad application
- Type Qnew and open new drawing
- Set units according to drawing
- Switch on object snap and object snap modes
- Ortho mode is ON
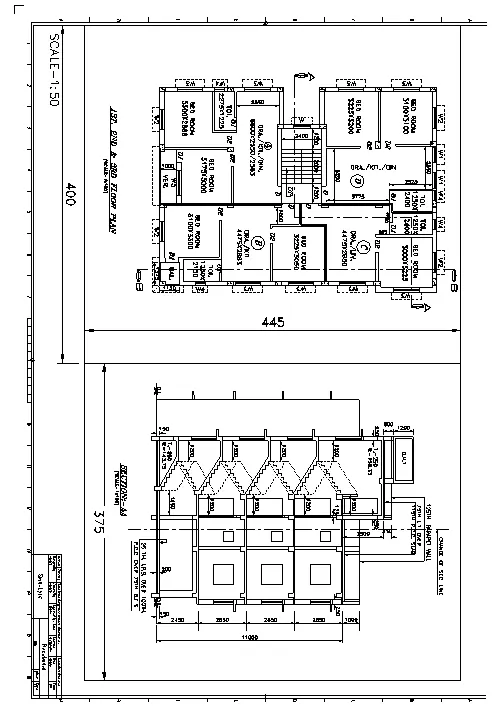
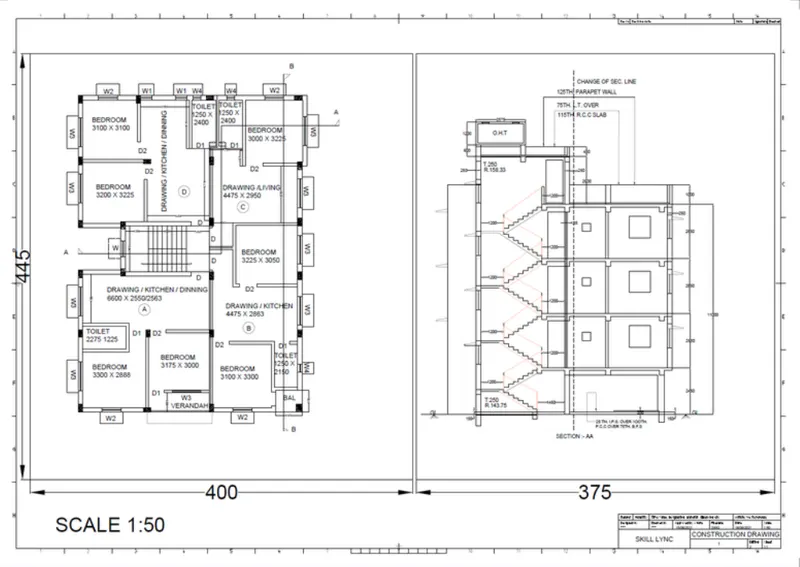
AIM 1. Create a layout of the Plan and Section A of the project in Challenges 7, using the template Tutorial-mArch.dwt in a scale as given in the Figure. Use the MV command to create the viewport of the size as shown in Figure. Also, use ATTEDIT command to edit the information in the title block. Use A1 size for the layout. Take a plot.
Procedure :
- Open plan and section drawings from challenge 7
- Select layout at the bottom
- Right click on template and open "march template file"
- Erase existing drawing
- Rename the layout to "PLAN and SECTION"
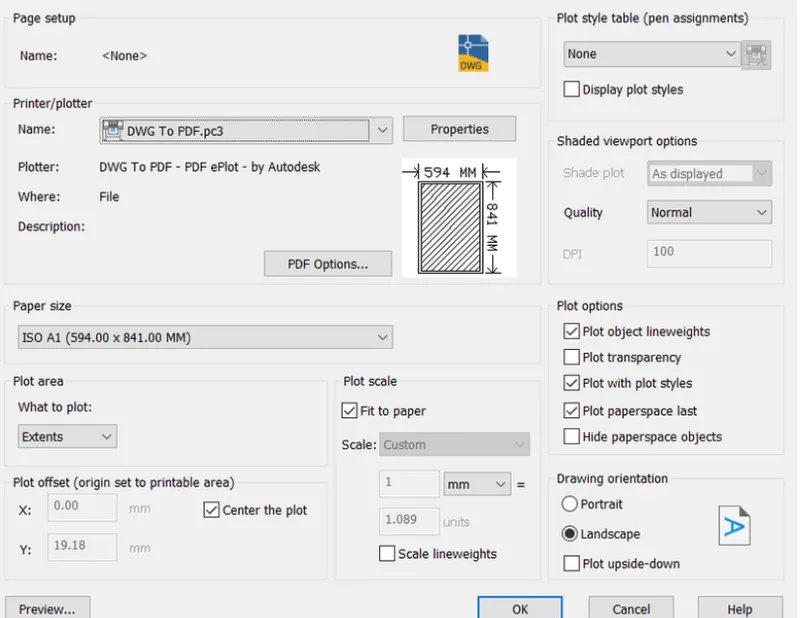
- Right click on the layout and click on page setup manager
- Click on modify and change the name, papersize, plotscale etc as shown below
- Now draw two rectangles of size 400 x 445 and 375 x 445
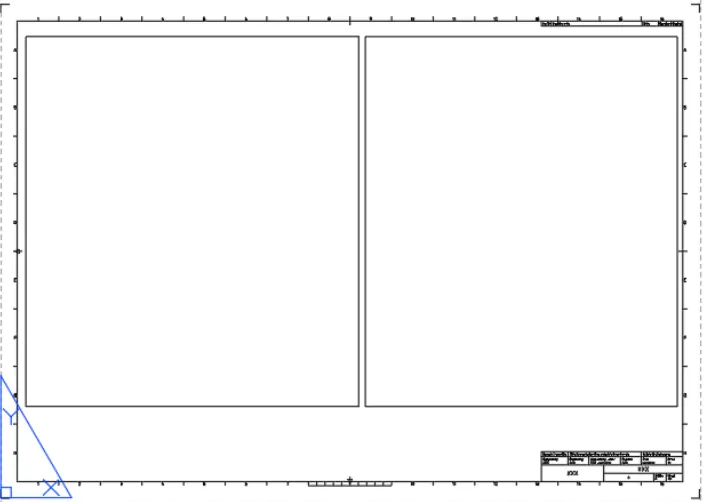
- Enter "MV" (MVIEW) in the command
- Specify the corner points of rectangle
- Repeat it for another rectangle
- Enter "MS" (MSPACE) in the command
- Select and adjust the view and set scale 1:50 in each view
- Enter "PS" in command and enter
- Enter command "ATTEDIT" and Select the block to be edited
- Using "dimlinear" mark the dimensions of rectangle
- Now export the current layout to "PDF" format and save it
RESULT :
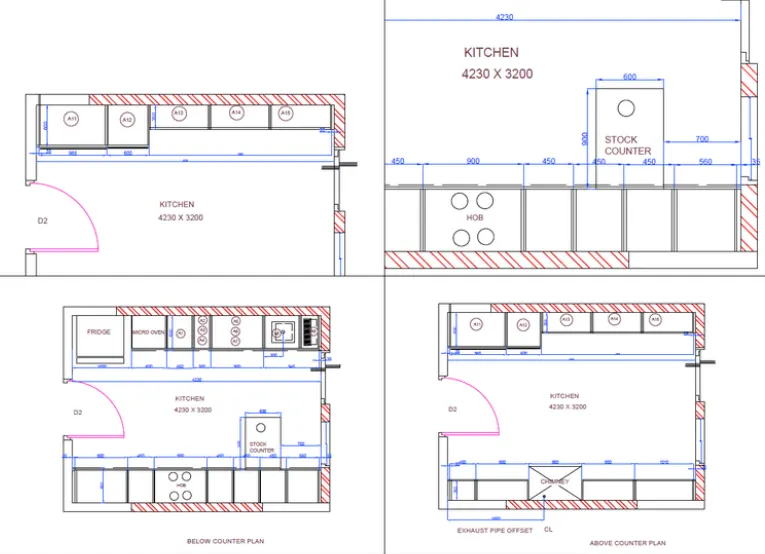
AIM 2 : To create a layout of the kitchen on a A4 size sheet
Procedure :
- Open kitchen drawing from challenge 9
- Open view tab and click on view configuration
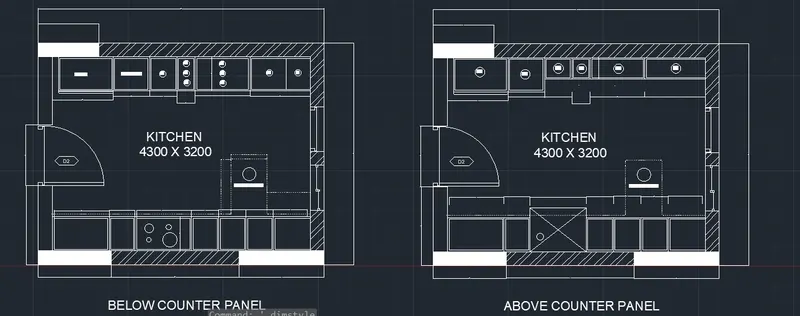
- Select four equal parts
- Click on new view, enter the name and select view as per diagram using window option
- Press ok and similarly take other three views as shown below
- Now, in the command prompt type V to create the model view of the plan.
- Then provide the view name and choose the boundary option
- Now, click ok then apply and again ok.
- Hence, the model view is created.
- Now, go to layout option in the window.
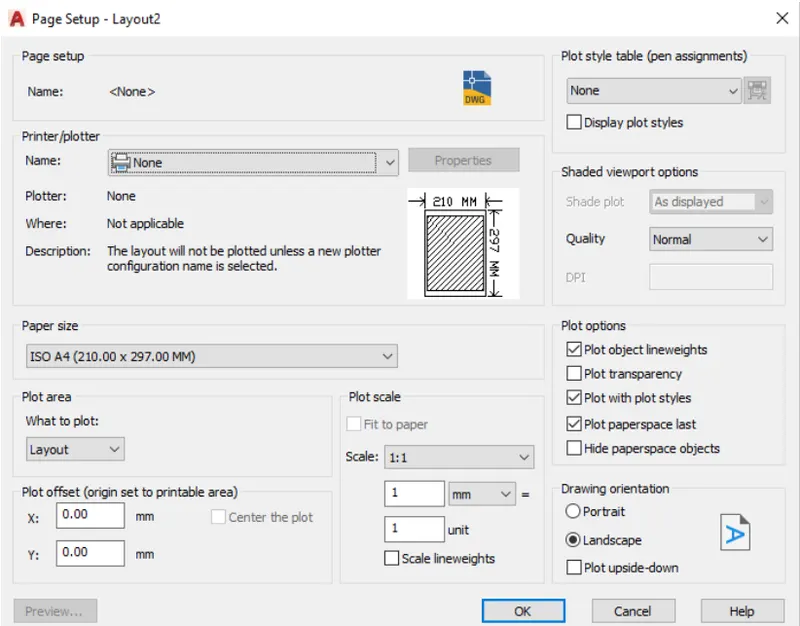
- Now, type page setup in the command prompt and page setup manager dialogue box opens
- Then modify the settings- provide the size of the paper(A4), then provide the plot area as layout and then click ok
- Now, type MV to create multiple viewports and create viewports as necessary.
- Then provide the views as given in the question.
- Then type ms in command prompt to zoom in and out the views in the viewport and PS command to return back to paper space where zooming in and out is not possible.
RESULT :
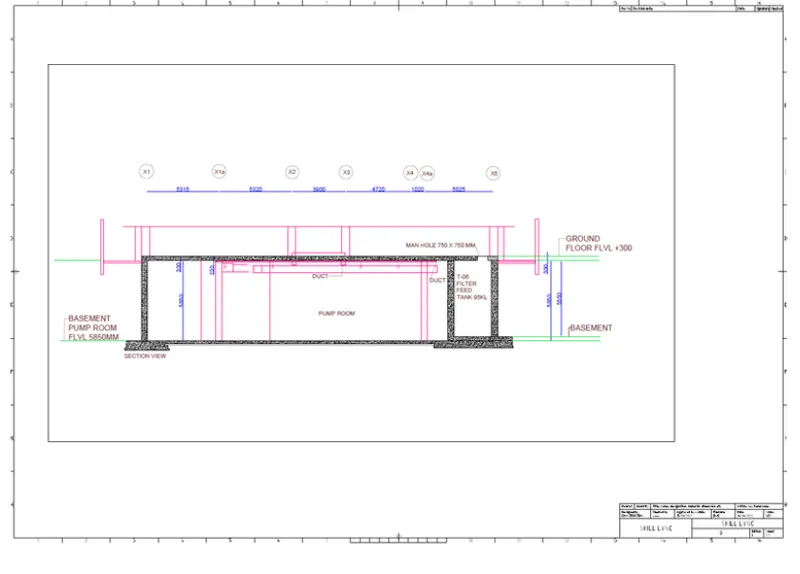
AIM 3 : To create a layout of a section
Procedure :
- Open section drawing from challenge 9
- Select layout at the bottom
- Click on template and open "march template file"
- Erase existing drawing in the layout
- Rename the layout to "SECTION"
- Right click on the layout and click on page setup manager
- Click on modify and change the name, papersize, plotscale etc as shown below
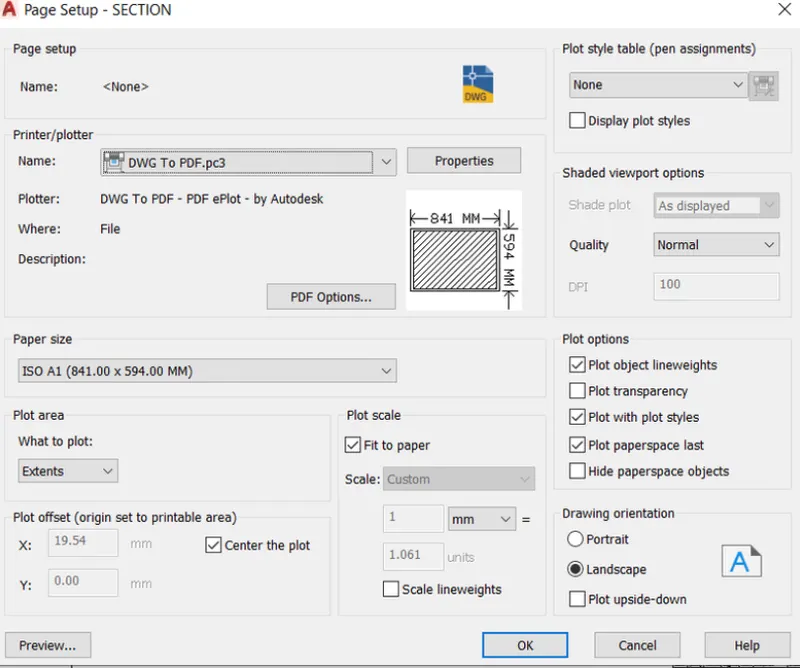
- Enter "MV" (MVIEW)
- Specify the corner points of the sheet
- Enter "MS" (MSPACE) in the command
- Select and adjust the drawing to the scale 1:50
- Enter command "ATTEDIT" and Select the block to be edited
- Now export the current layout to "PDF" format and save it
RESULT :