Creation of Multiple viewports, Scaling the drawing and setting in Template in AutoCad
Aim 1:
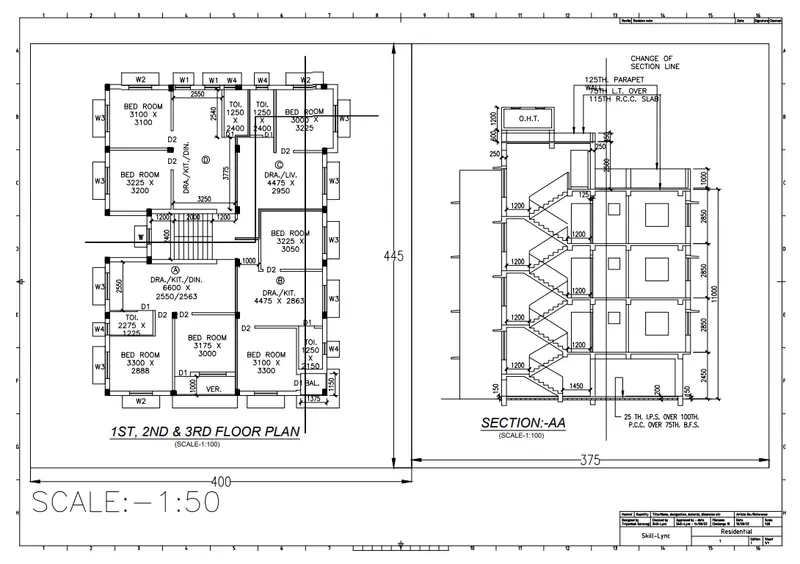
Create a layout of the Plan and Section A of the project in Challenges 7, using the template Tutorial-mArch.dwt in a scale as given in the Figure.
Introduction:
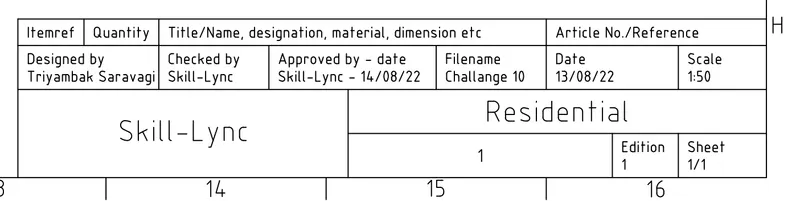
Use the MV command to create the viewport of the size as shown in Figure. Also, use ATTEDIT command to edit the information in the title block. Use A1 size for the layout. Take a plot.
Steps:
- Select the From Template option by Right Click the Layout1.
- Select the Tutorial-mArch.dwt from the dialogue box appears.
- And Click on Open and the template will be open in AutoCAD.
- Edit the Details of the Block Attributes in the Template as given in the figure.
- Enter the MV command.
- Select 2 in MV command.
- Select Vertical in 2 of MV command.
- Now pick the starting point of viewport and second point of viewport to be displayed.
- Enter the MSPACE command and set the viewports.
- Select the scale to 1:50.
- Enter the PSPACE command to exit the MSPACE.
- Select the viewports and lock them.
- Now enter the linear dimension command and annotate the dimension as per the given figure.
- Enter the TEXT command and write scale under the viewport.
- Enter the PLOT command and save the layout of the sheet.
Final Result:
Aim 2:
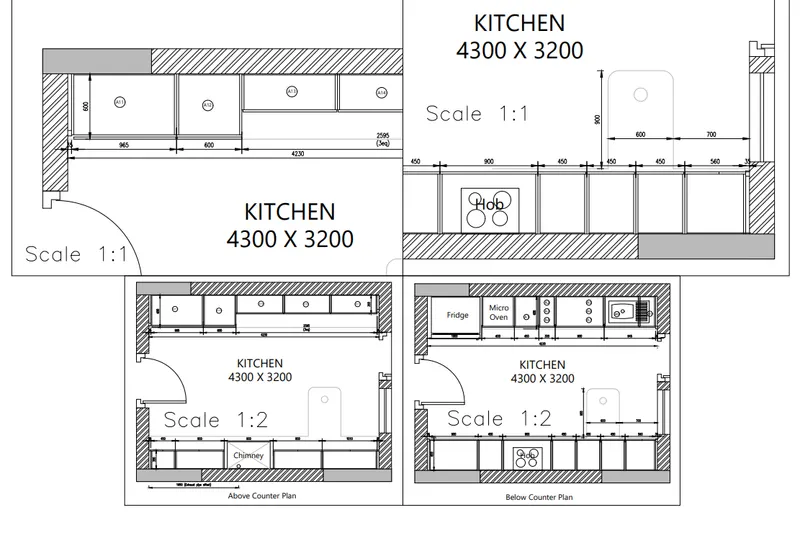
Create a layout of the Kitchen drawn in Challenge 9 as shown in Figure.
Introduction:
Use the scale as shown in the Figure. Use A4 Size page for the layout. Take a plot.
Steps:
- First Create the 4 views as given in figure using New View.
- in View manager save the Views as required
- Create the new layout.
- Right Click the new layout and set the Page in Page setup Manager.
- Set A4 sheet as given.
- Enter MV command to insert the viewports..
- Select the Name in MV command.
- Enter the name of the view as saved.
- and insert the view in the Sheet.
- Arrange the view as per the given figure.
- Using text command Enter the scale and the View name in the sheet.
- Plot the sheet and save it.
Final Result:
Aim 3:
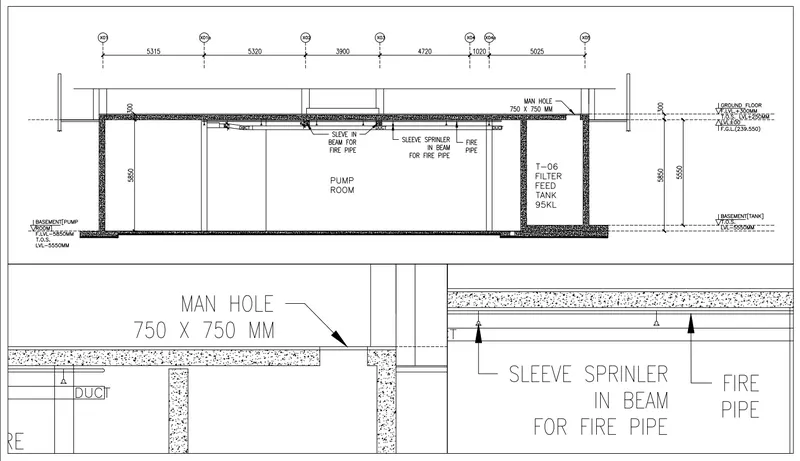
Create a layout of the section created in Challenges 9.
Introduction:
Use scale as mentioned in the Figure. Use MV command create multiple viewports. Take a plot.
Steps:
- Create the New Layout.
- Rename the Layout.
- Right Click the layout name and go to Page Setup Manager...
- Select the Modify option.
- Set the Printer name to AutoCAD PDF (Hight Quality Print).
- Set the Paper size to ISO Full Bleed A3.
- Set ok
- Now select the layout name and set it as current.
- Enter the MV command to insert the viewports.
- Select the 3 in MV command.
- Select Above in 3 of MV command.
- Now pick the starting point of viewport and second point of viewport to be displayed.
- Enter the MSPACE command and set the viewports.
- Set viewports 1 as (1:100) given in the figure.
- Set viewports 2 as (1:30) given in the figure.
- Set viewports 3 as (1:30) given in the figure.
- Enter PSPACE to exit MSPACE.
- select the viewports and lock them.
- Move and adjust the viewports as given figure.
- Enter the PLOT command and save the layout of the sheet.
Final Result: