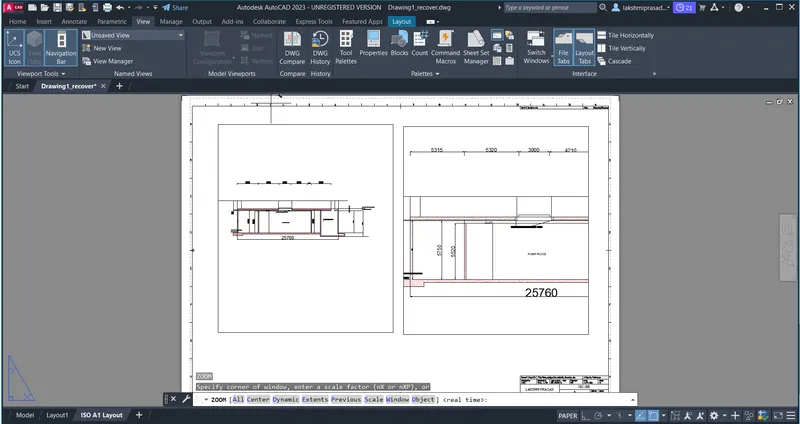
Creation of Multiple viewports, Scaling the drawing and setting in Template in AutoCad
TASK 1 : 1.
Create a layout of the Plan and Section A of the project in Challenges 7, using the template Tutorial-mArch.dwt in a scale as given in the Figure. Use the MV command to create the viewport of the size as shown in Figure. Also, use ATTEDIT command to edit the information in the title block. Use A1 size for the layout. Take a plot.
ANS: As the entire plan was drawn before on project 7, hereonly the required drawings are like paln and section are shown to understand view ports.
In view tab the new view option was selected to create a new view called using v1, using the window option and seleecting the plan from the drawing.
In the similar manner v2 view of section was also created.
It can be seen by selecting two : vertical from the view point configuration window as shown.
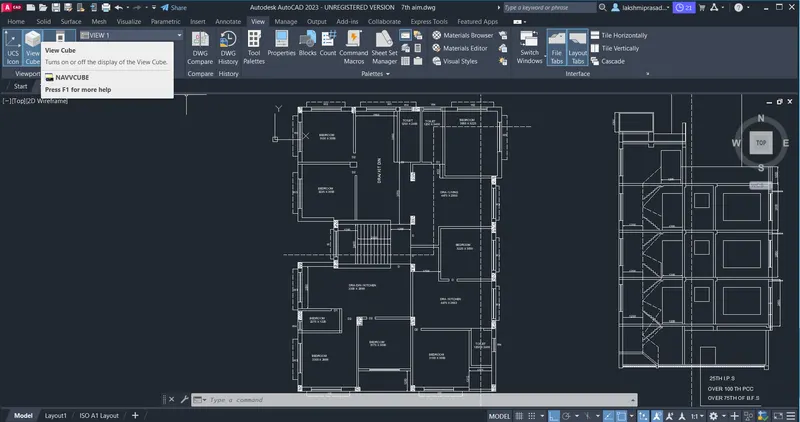
A new layout is now created using the command layout and select a template and as required m.arch.dwt template was selected and delete the existing viewport.
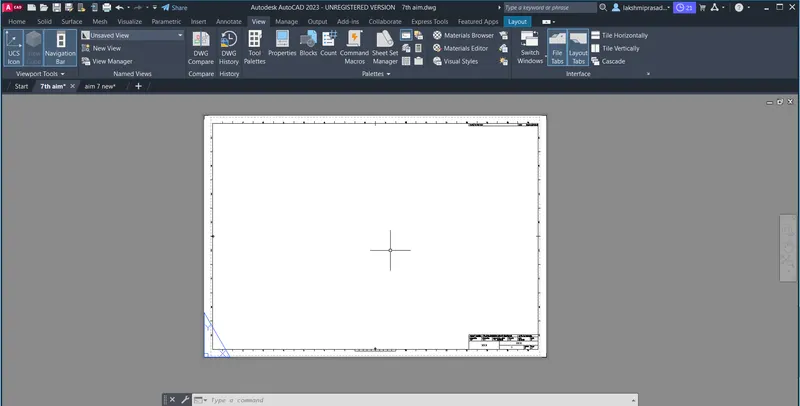
Right click on the layout page and selct page setup manager and modified the pafe settings as required.
Now using the rec command 2 rec of equal sizes are drawn so that it will fit in paper.
mow click MV and select object as these rectangles and in this way two model spaces are created.
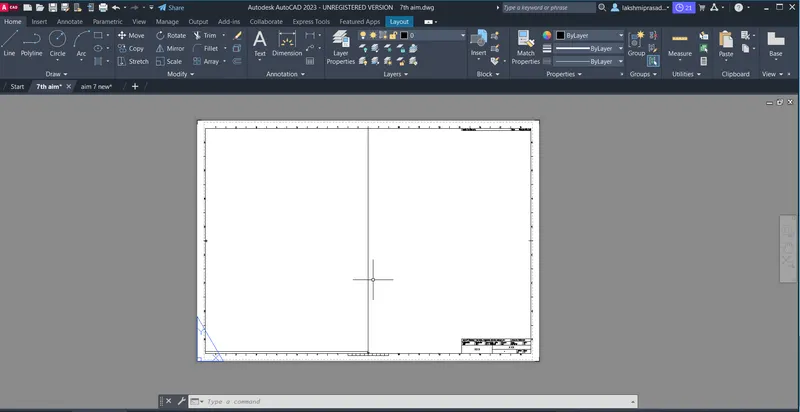
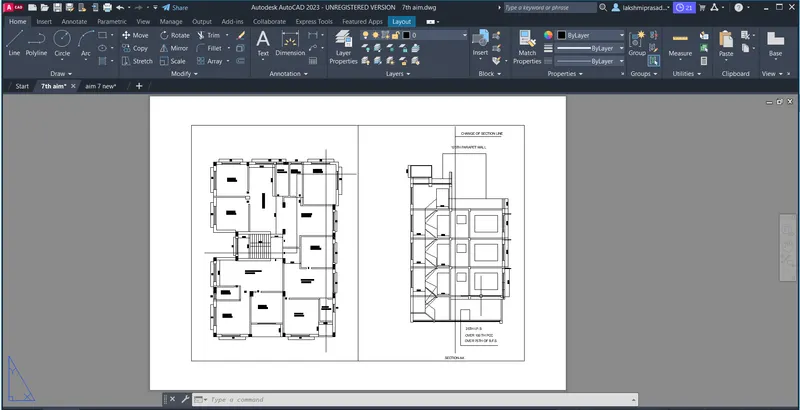
Type V in the command bar to open the view manager. select the req models v1& v2 and apply it for both the rectangles.
Type attedit to open the edit attributes dialogue box and apply the required comments and click ok.
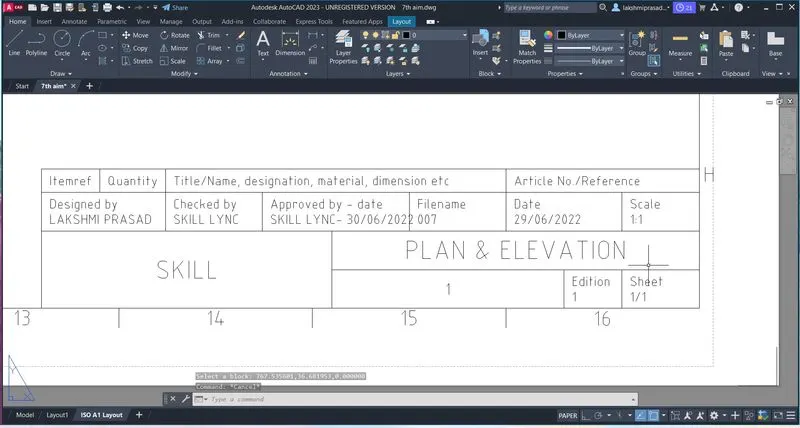
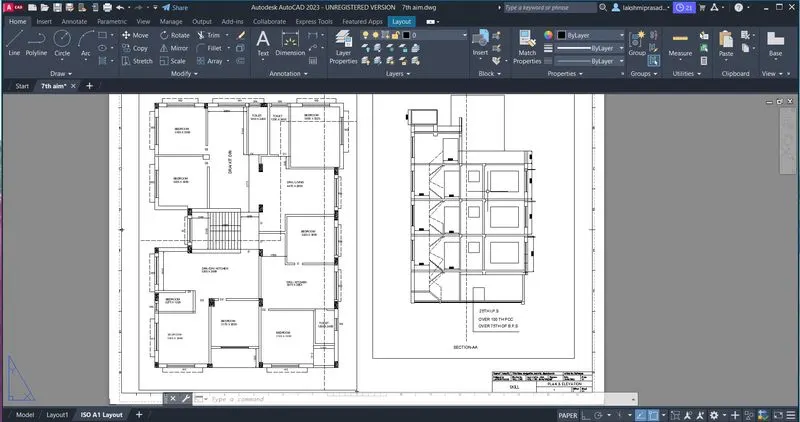
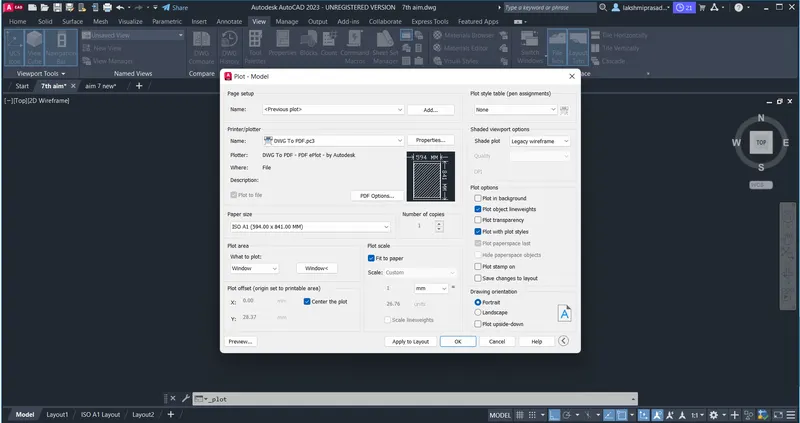
Type plot to open the page st up manager the follwwwing set up was applied and click on the preview option at the bottom.
The preview of the drawing is as shown below.
Task :2
Create a layout of the Kitchen drawn in Challenge 9 as shown in Figure. Use the scale as shown in the Figure. Use A4 Size page for the layout. Take a plot.
ANS: As the entire plan was drawn before on project 9 ,hereonly the required drawings are like paln and section are shown to understand view ports.
In view tab the new view option was selected to create a new view called using v1, using the window option and seleecting the plan from the drawing.
In the similar manner v2 view of section was also created.
It can be seen by selecting two : vertical from the view point configuration window as shown.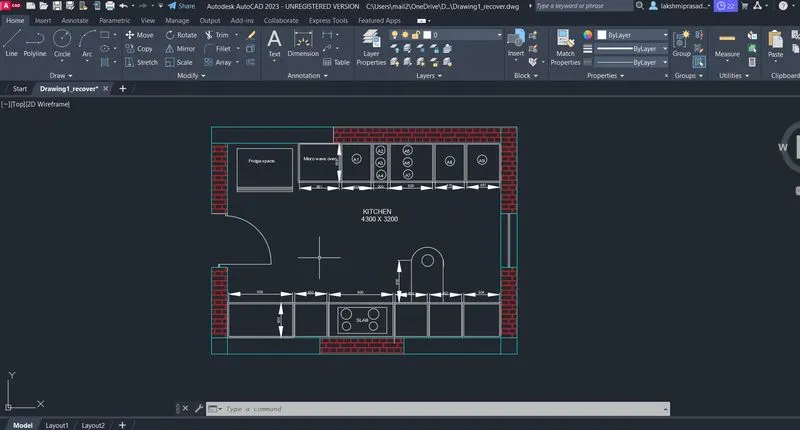
A new layout is now created using the command layout and select a template and as required m.arch.dwt template was selected and delete the existing viewport.
Right click on the layout page and selct page setup manager and modified the pafe settings as required.
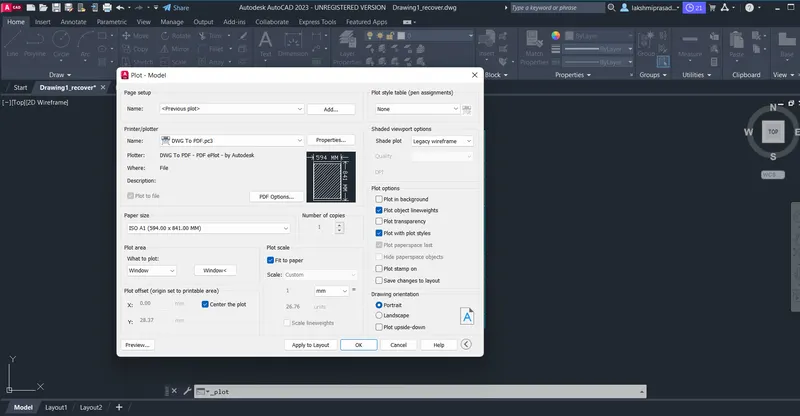
Now using the rec command 2 rec of equal sizes are drawn so that it will fit in paper.
mow click MV and select object as these rectangles and in this way two model spaces are created.
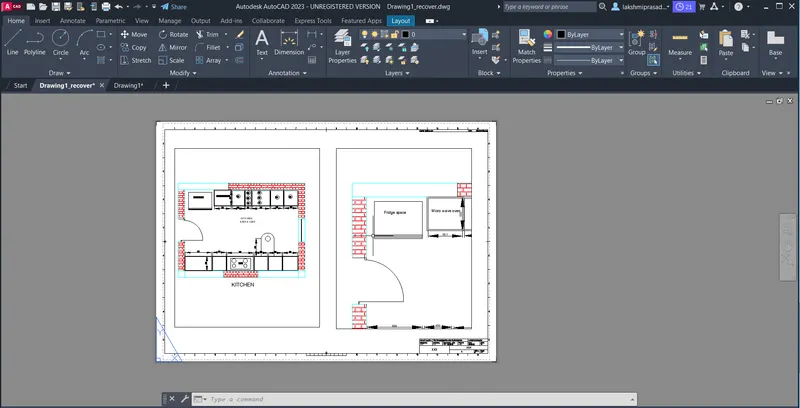
Type plot to open the page st up manager the follwwwing set up was applied and click on the preview option at the bottom.
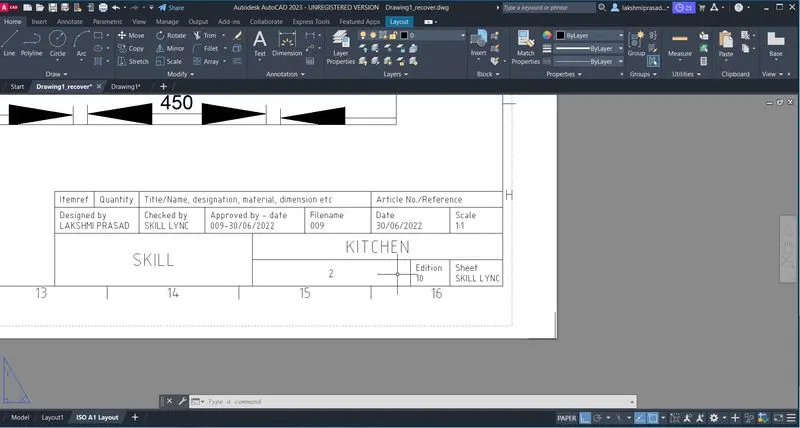
TASK :3
3. Create a layout of the section created in Challenges 9.
Use scale as mentioned in the Figure. Use MV command create multiple viewports. Take a plot.
Create a layout of the Section drawn in Challenge 9 as shown in Figure. Use the scale as shown in the Figure. Use A4 Size page for the layout. Take a plot.
ANS: As the entire plan was drawn before on project 9 ,hereonly the required drawings are like paln and section are shown to understand view ports.
In view tab the new view option was selected to create a new view called using v1, using the window option and seleecting the plan from the drawing.
In the similar manner v2 view of section was also created.
It can be seen by selecting two : vertical from the view point configuration window as shown.
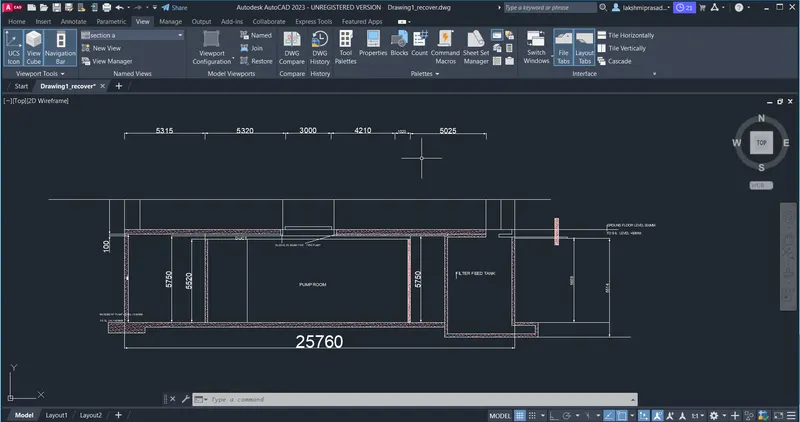
A new layout is now created using the command layout and select a template and as required m.arch.dwt template was selected and delete the existing viewport.
Right click on the layout page and selct page setup manager and modified the pafe settings as required.
Now using the rec command 2 rec of equal sizes are drawn so that it will fit in paper.
mow click MV and select object as these rectangles and in this way two model spaces are created.
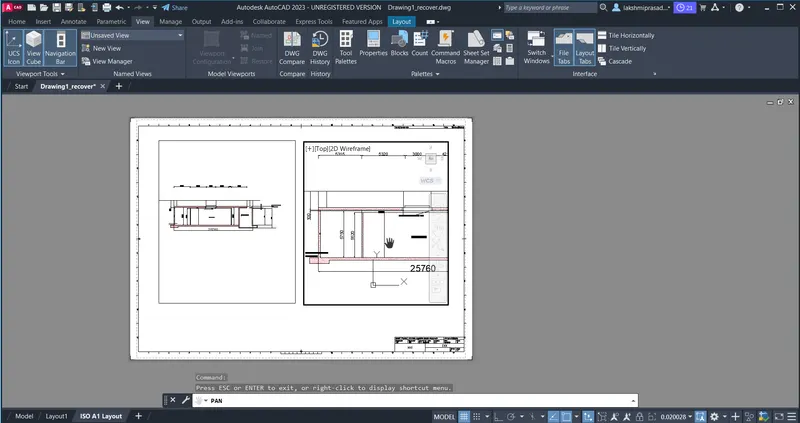
Type plot to open the page st up manager the follwwwing set up was applied and click on the preview option at the bottom.
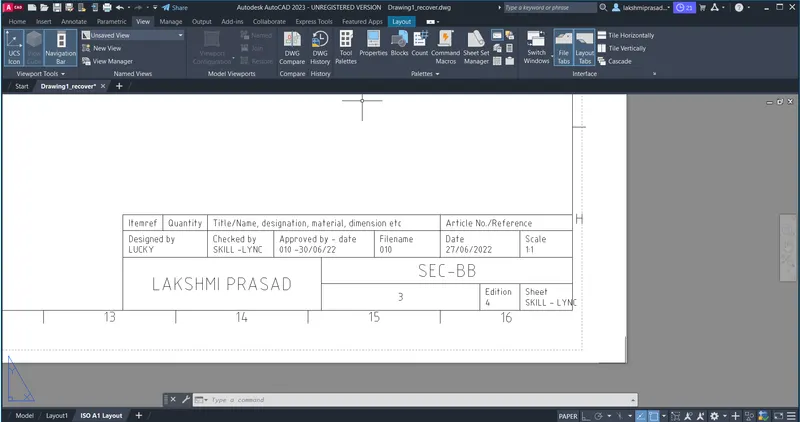
RESULT:
TASK -1
TASK-2
TASK-3