Creation of geometries by Coordinate system methods using AutoCad
AIM :
Create the geometries from P1 to P2 using all the coordinates system methods. we need to use the Line tool to create the geometries. Where required we need to use the circle tool.Using the Imperial Template and the Decimal Units to draft the features.
INTRODUCTION :
for the autocad users, understanding the coordinate system is very important. in autocad every point in identified by its X, Y, Z coordinates. this system of coordinates is referred as the world coorcinate system or wcs in autocad. to locate a single point in autocad workspace, the user may use any of the following three coordinate system.
a. absolute coordinate system - in these, all inputs points are specified using standard cartesian coordinates X and Y. the syntax of the absolute coordinate system is [ X, Y].
b. relative coordiante system - after locating the first point, your next point can be entered by specifying the next coordinate relative to the first points. the syntax of the relative coordinate system is [@X, Y].
c. polar coordinate system- after lcating the first point, the polar coordinate system can be used when you need to draw the next points at a specified angle. the syntax of polar coordinate system is [@diastance<angle].
PROCEDURE :
-open the autocad in window.
- select new and then template
- use line command
1. P-1 -
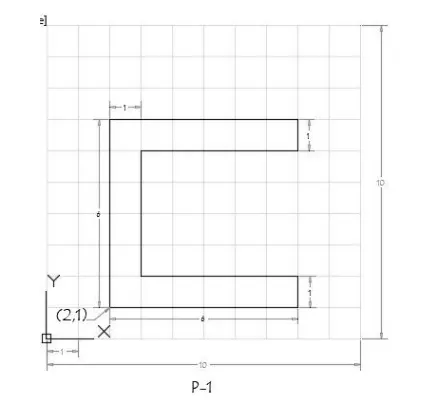
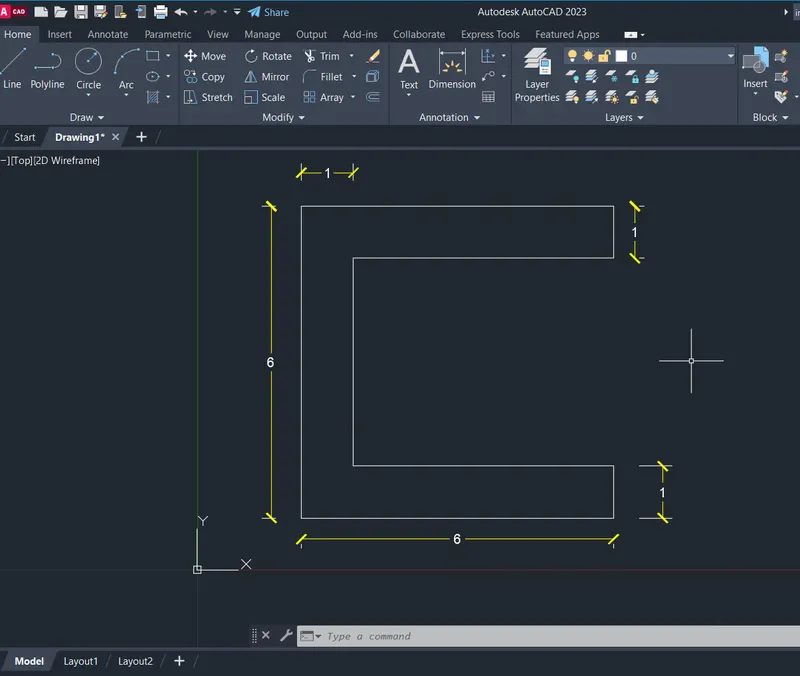
absolute coordiante system :
select line command specify the first point- 2,1 and press enter ( specifying first point)
specify next point - 8,1 press enter
specify next point - 3,2 press enter
specify next point - 3,6 press enter
specify next point - 8,6 press enter
specify next point - 8,7press enter
specify next point - 2,7 press enter
specify next point - 2,1 press close
relative coordinate system :
select line command specify the first point- 2,1 and press enter ( specifying first point)
specify next point - @6,0 press enter
specify next point - @0,1 press enter
specify next point - @-5,0 press enter
specify next point - @0,4 press enter
specify next point - @5,0 press enter
specify next point - @0,1 press enter
specify next point - @-6,0 press enter
specify next point - @0,-6 press enter
polar coordinate system :
select line command specify the first point- 2,1 and press enter ( specifying first point)
specify next point - @6<0 press enter
specify next point - @1<90 press enter
specify next point - @5<180 press enter
specify next point - @4<90 press enter
specify next point - @5<0 press enter
specify next point - @1<90 press enter
specify next point - @ 6<180 press enter
specify next point - @6<270press enter
2. P-2 -
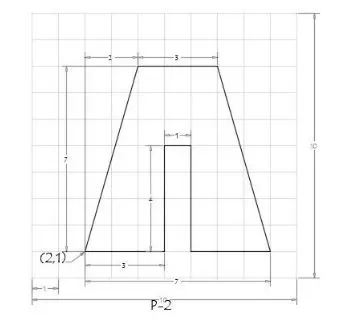
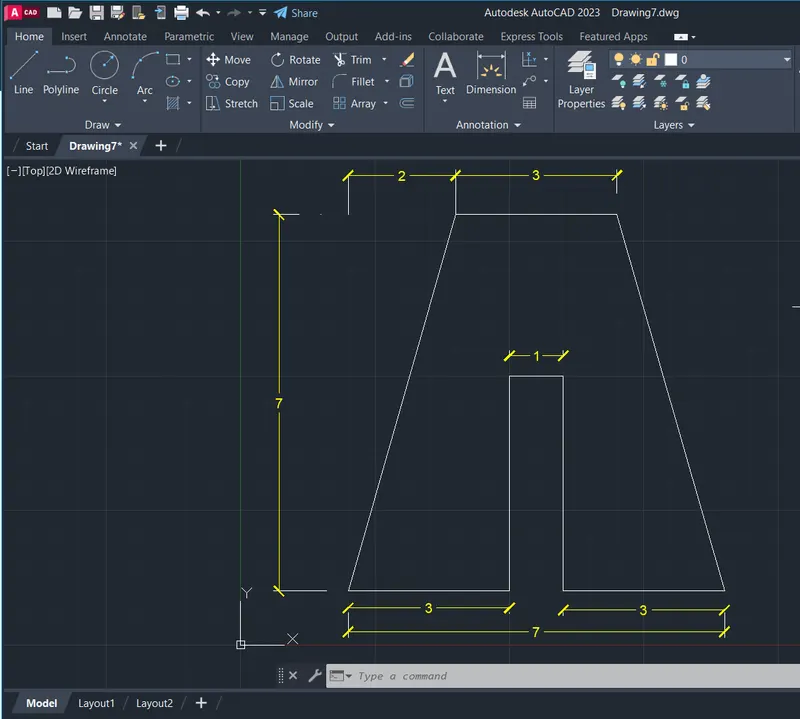
absolute coordinate system:
select line command specify the first point- 2,1 and press enter ( specifying first point)
specify next point - 3,1 press enter
specify next point - 5,5 press enter
specify next point - 6,5 press enter
specify next point - 6,1 press enter
specify next point - 9,1press enter
specify next point - 7,8 press enter
specify next point - 4,8 press enter
specify next point - 2,1 press close
relative coordiante system :
select line command specify the first point- 2,1 and press enter ( specifying first point)
specify next point - @3,0 press enter
specify next point - @0,4 press enter
specify next point - @1,0press enter
specify next point - @0,-4press enter
specify next point - @3,0 press enter
specify next point - @-2,7 press enter
specify next point - @-3,0 press enter
specify next point - @-2,-7 press enter
polar coordinate system :
select line command specify the first point- 2,1 and press enter ( specifying first point)
specify next point - @3<0 press enter
specify next point - @4<90 press enter
specify next point - @4<270press enter
specify next point - @3<0press enter
specify next point - @7<106 press enter
specify next point - @3<180press enter
specify next point - @7<214 press enter
3. P-4 -
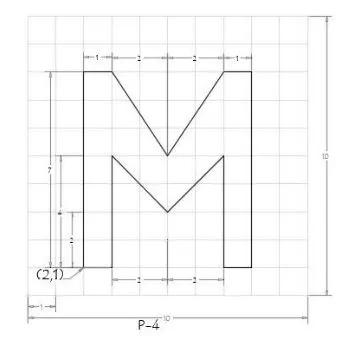
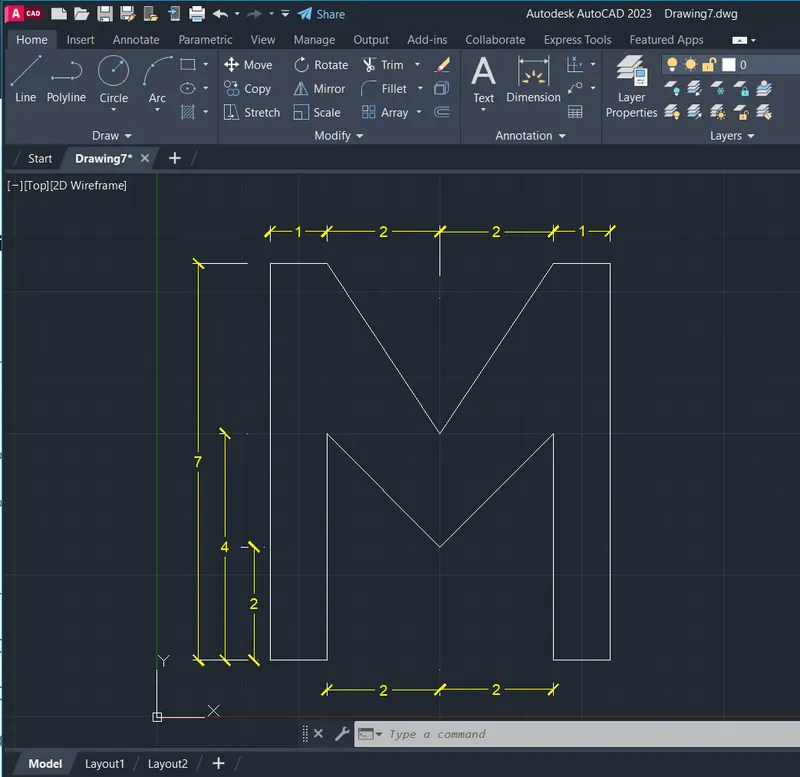
select line command specify the first point- 2,1 and press enter ( specifying first point)
specify next point - @1,0 press enter
specify next point - @0,4 press enter
specify next point - @2,-2 press enter
specify next point - @2,2 press enter
specify next point - @0,-4 press enter
specify next point - @1,0 press enter
specify next point - @0,7 press enter
specify next point - @-1,0 press enter
specify next point - @-2,-2press enter
specify next point - @-2,2 press enter
specify next point - @-1,0 press enter
specify next point - @0,-7 press enter
4. P-4 -
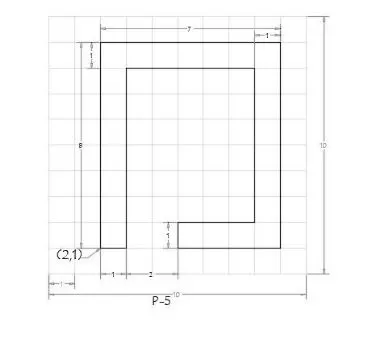
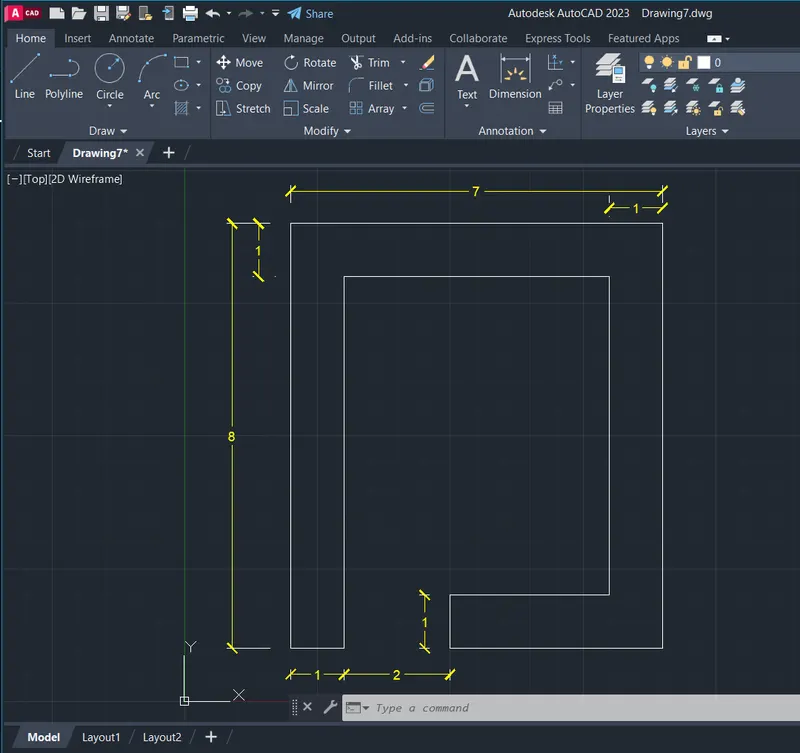
select line command specify the first point- 2,1 and press enter ( specifying first point)
specify next point - @1,0 press enter
specify next point - @0,7 press enter
specify next point - @5,0 press enter
specify next point - @0,-6 press enter
specify next point - @-3,0 press enter
specify next point - @0,-1 press enter
specify next point - @4,0 press enter
specify next point - @0,8 press enter
specify next point - @-7,0press enter
specify next point - @0,-7 press enter
5. P-7 -
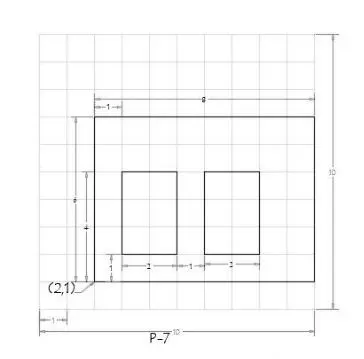
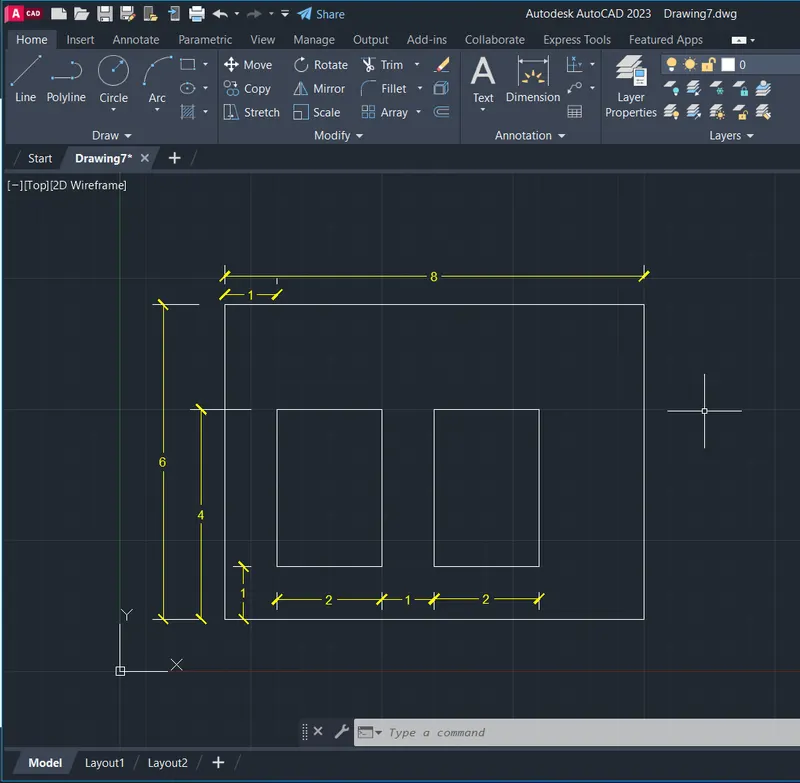
select line command specify the first point- 2,1 and press enter ( specifying first point)
specify next point - @8,0 press enter
specify next point - @0,6 press enter
specify next point - @-8,0 press enter
specify next point - @0,-6 press enter
select line command specify the first point- 3,2 and press enter ( specifying first point)
specify next point - @2,0 press enter
specify next point - @0,3 press enter
select line command specify the first point- 6,2 and press enter ( specifying first point)
specify next point - @2,0 press enter
specify next point - @0,3 press enter
specify next point - @-2,0press enter
specify next point - @0,-3 press enter
6. P-8 -
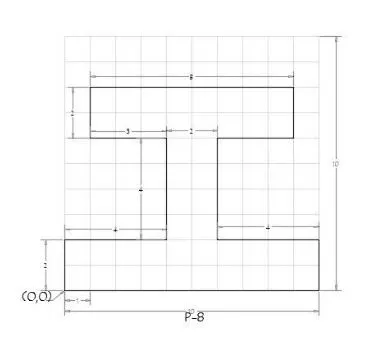
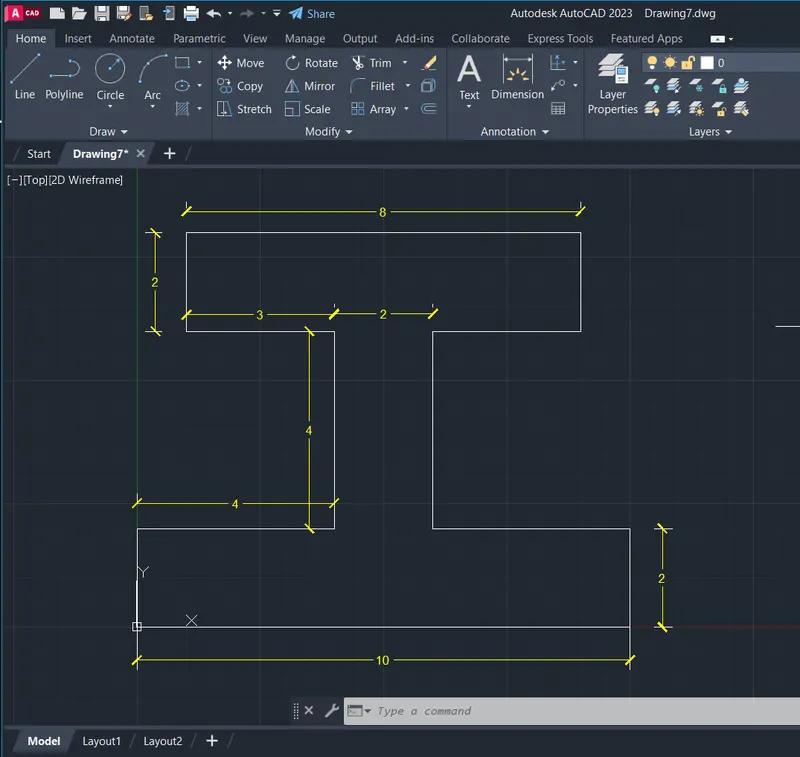
select line command specify the first point- 0,0 and press enter ( specifying first point)
specify next point - @10,0 press enter
specify next point - @0,2 press enter
specify next point - @-4,0 press enter
specify next point - @0,4 press enter
specify next point - @3,0 press enter
specify next point - @0,2 press enter
specify next point - @-8,0 press enter
specify next point - @0,-2 press enter
specify next point - @3,0press enter
specify next point - @0,-4 press enter
specify next point - @-4,0press enter
specify next point - @0,-2 press enter
7. P-9 -
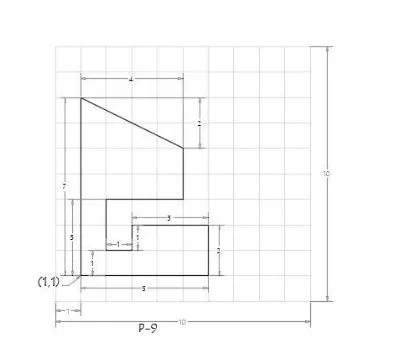
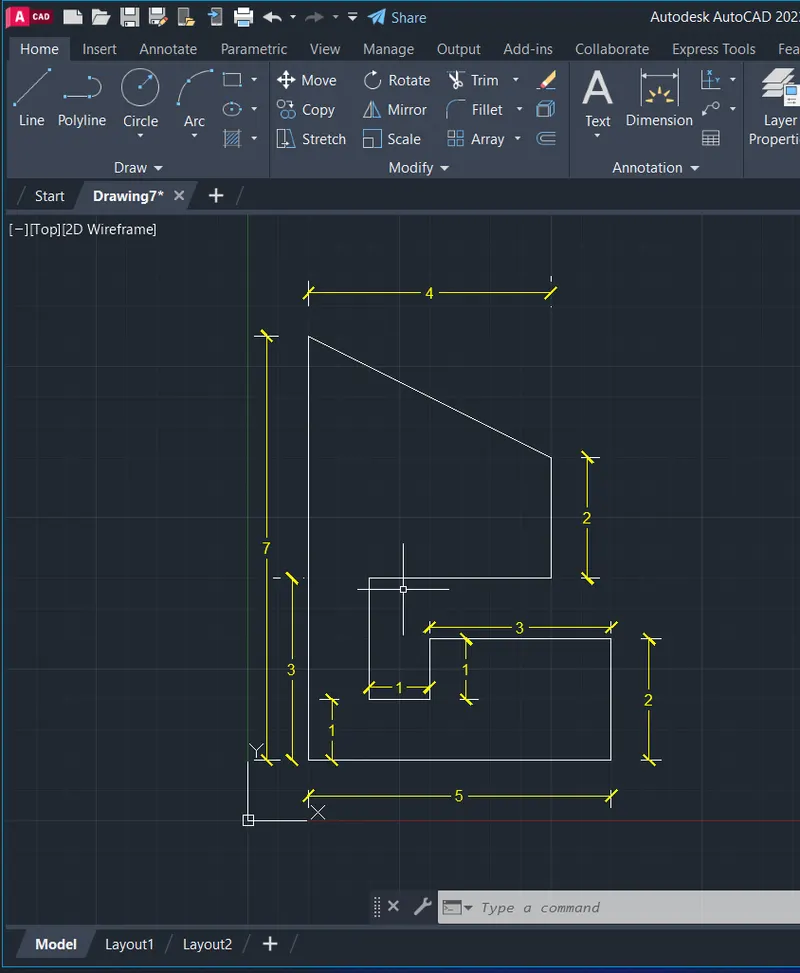
select line command specify the first point- 1,1 and press enter ( specifying first point)
specify next point - @5,0 press enter
specify next point - @0,2 press enter
specify next point - @-3,0 press enter
specify next point - @0,-1 press enter
specify next point - @-1,0 press enter
specify next point - @3,0 press enter
specify next point - @-4,2 press enter
specify next point - @0,-7 press enter
8. P-10 -
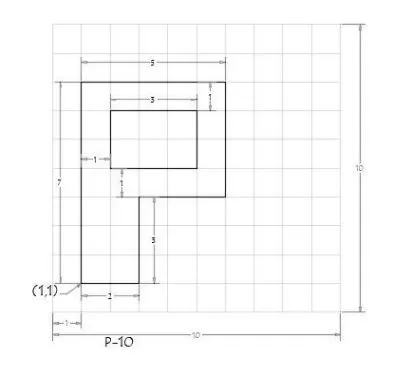
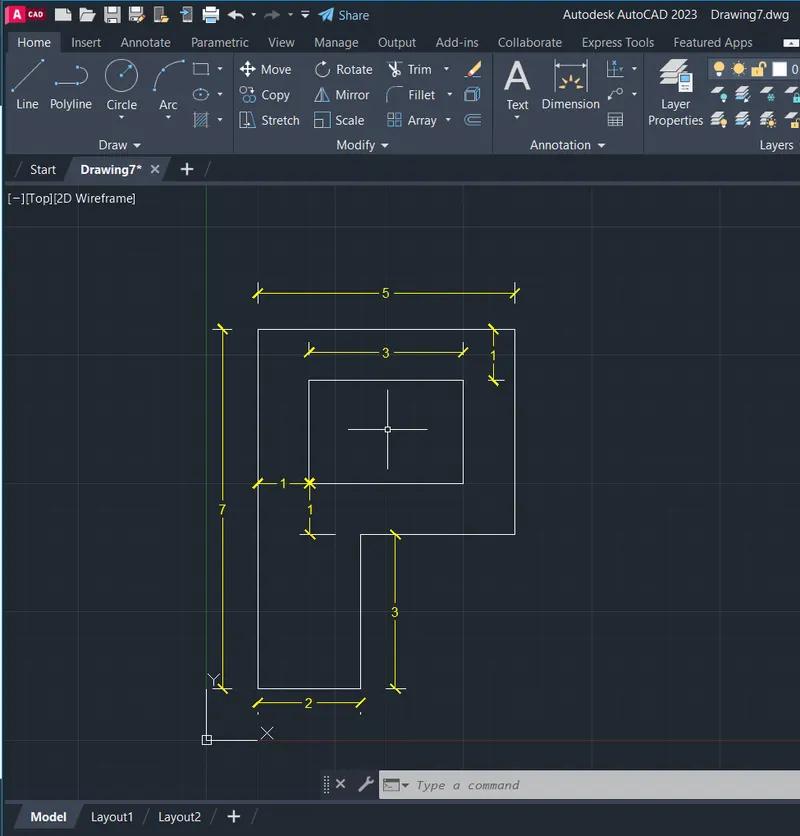
select line command specify the first point- 1,1 and press enter ( specifying first point)
specify next point - @2,0 press enter
specify next point - @0,3 press enter
specify next point - @3,0 press enter
specify next point - @0,4 press enter
specify next point - @-5,0 press enter
specify next point - @0,-7 press enter
select line command specify the first point- 2,5 and press enter ( specifying first point)
specify next point - @3,0 press enter
specify next point - @0,2 press enter
specify next point - @-3,0 press enter
specify next point - @0,-2 press close
9. profile wood -
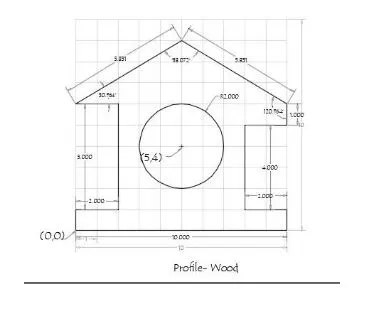
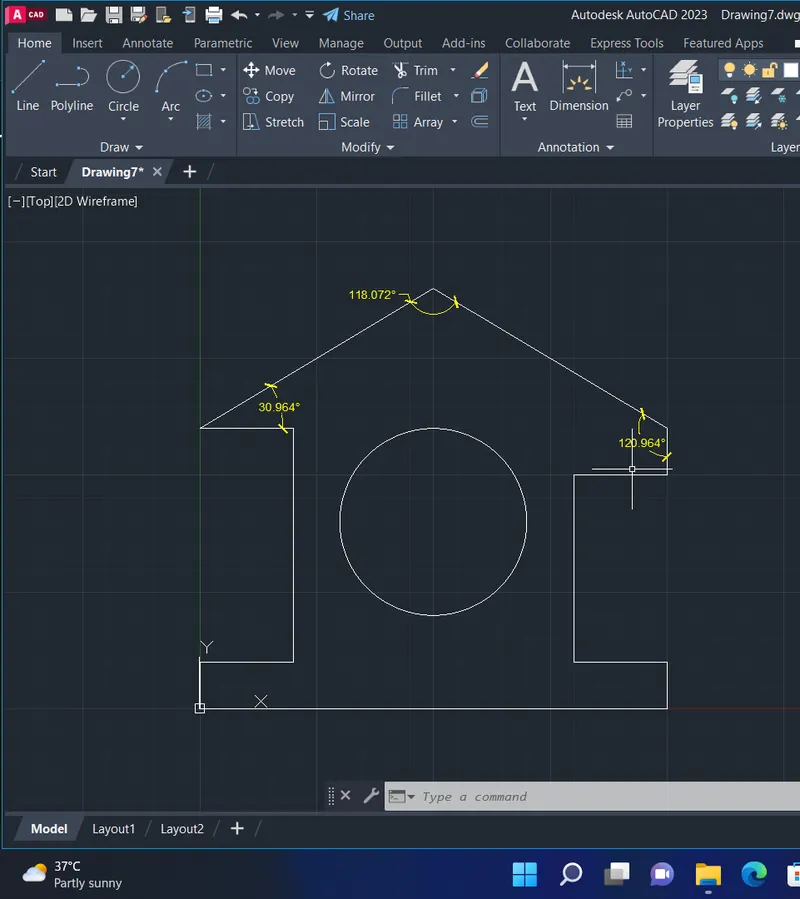
select line command specify the first point- 0,0 and press enter ( specifying first point)
specify next point - @10,0 press enter
specify next point - @0,1 press enter
specify next point - @-2,0 press enter
specify next point - @0,4 press enter
specify next point - @0,1 press enter
specify next point - @5.831< 149.036 press enter
select line command specify the first point- 0,0 and press enter ( specifying first point)
specify next point - @0,1 press enter
specify next point - @0,2 press enter
specify next point - @2,0 press enter
specify next point - @0,5 press close
specify next point - @-2,0 press enter
specify next point - @5.831<30.964 press close
select circle command specify the first point- 5,4 and press enter ( specifying first point)
specify radius - 2 press enter
10. queen post truss -
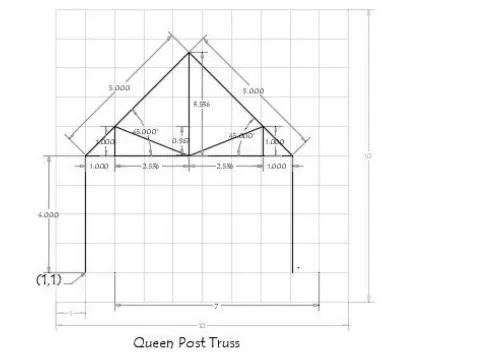
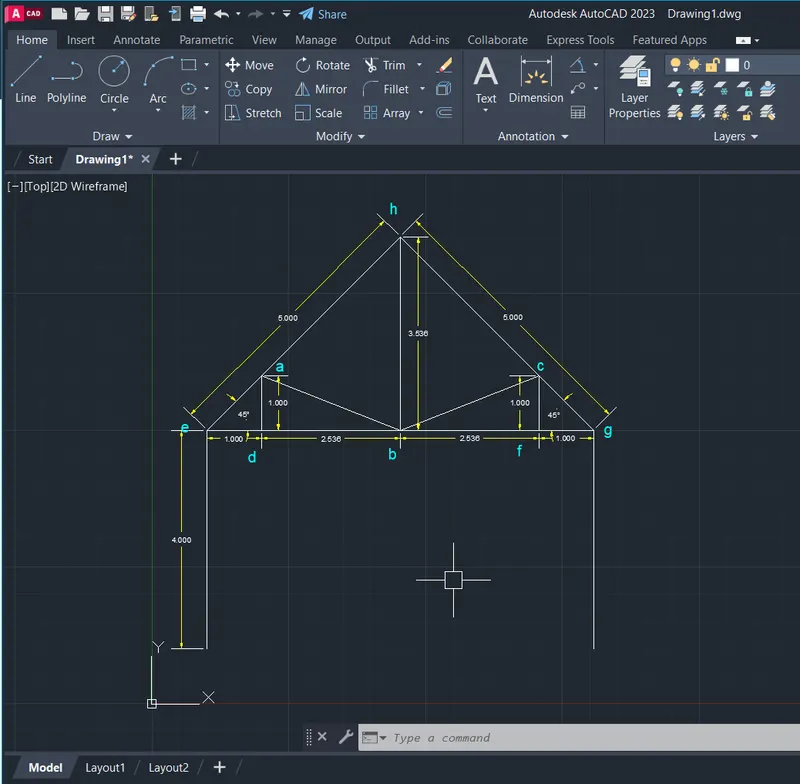
select line command specify the first point- 1,1 and press enter ( specifying first point)
specify next point - @0,4press enter
specify next point - @5<45 press enter
specify next point - @0,-3.536 press enter
specify next point - @-2.536,0 press enter
specify next point - @0,1 press close
selece line command connect the point from a to b
select line command connect to b point
specify next point - @2.536,0 press enter
specify next point - @0,1 press enter and then connect it to b point
select line command connect to f
specify next point - @1,0 press enter
select line command connect the line from h to g
specify next point - @0,-4 press close
11. mono pitch -
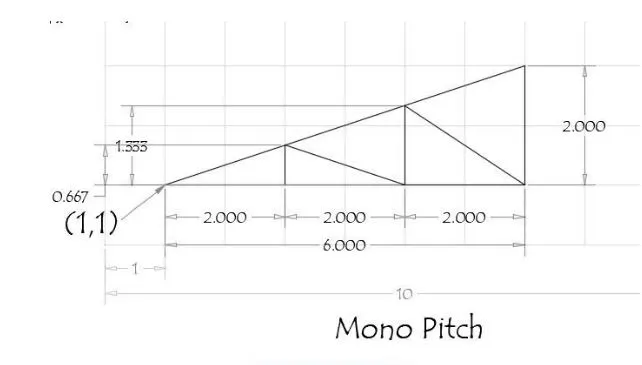
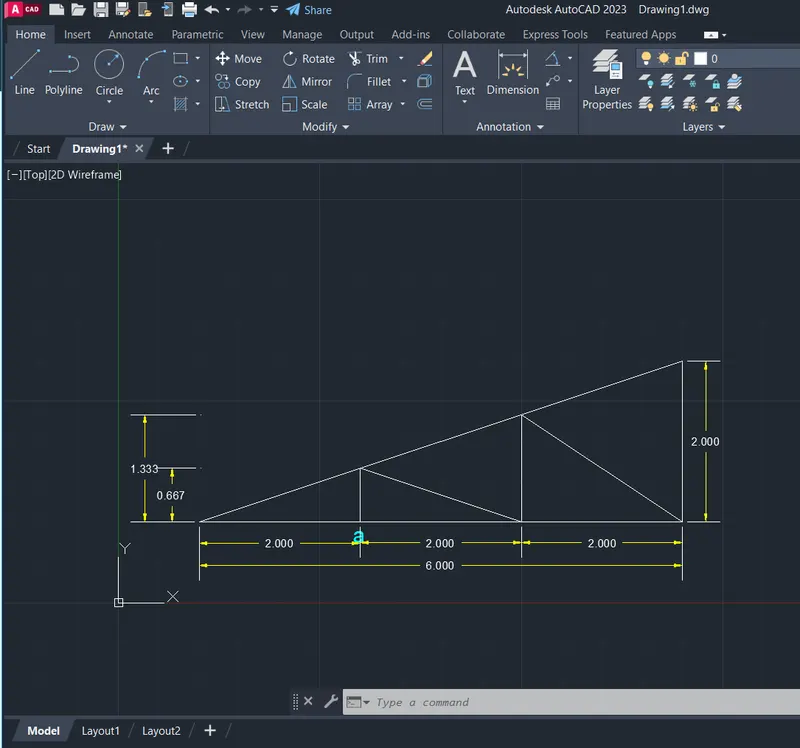
select line command specify the first point- 1,1 and press enter ( specifying first point)
specify next point - @2,0 press enter
specify next point - @2,0 press enter
specify next point - @2,0 press enter
specify next point - @0,2 press enter
specify next point - @-6,-2 press enter
select line command connect to a point
specify next point - @0,0.667 press enter
specify next point - @2,0.667 press enter
specify next point - @0,1.333 press enter
specify next point - @2,-1.333 press close
RESULT :
thus, we Created the geometries from P1 to P2 using all the coordinates system methods. i.e absolute coordinate system, relative coordinate system and polar coordinate system. we used the Line tool and circle tool to create the geometries.
Draw the profile and the trusses using relative and polar coordinate system methods.