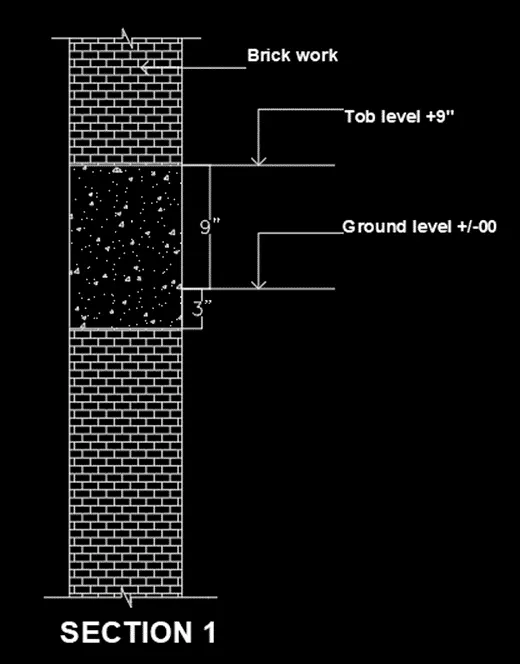
Creation of Column Schedule and Drawing Template using AutoCad
AIM:
To Create a column schedule by using the tools in the AutoCAD.
INTRODUCTION:
Column Schedule:
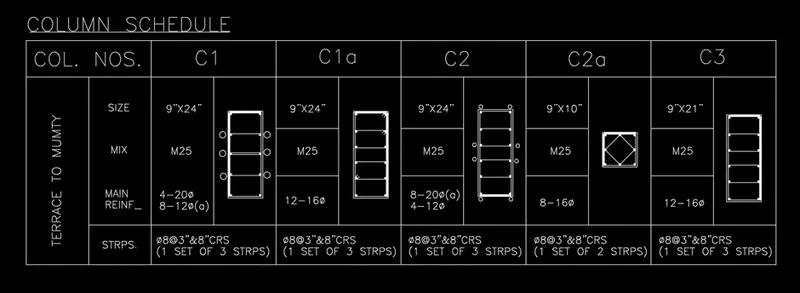
Structural columns are identified in a column schedule by inserting grid lines and by their top and bottom constraints and offsets. They are placed into the column schedules according to these identifications.
PROCEDURE:
Important work to be done before start the sketching. We have to give the limits to the screen.
- Units = Engineering
Giving the screen resolution by using the command:
- LIMMAX = (100’,100’)
- ZOOM = all (save the values)
Now set limits for the screen:
- In lower left corner = (0,0)
- In upper right corner = (70’,70’)
- ZOOM = all (save the values)
Step-1:
- The first step after giving limits to the screen, we have to create a new text style for texting.
- The text style includes the font name asshx, height of text as 8”, justify as Left, width factor of text as 1 etc.
- The text style to be selected as set current for use.
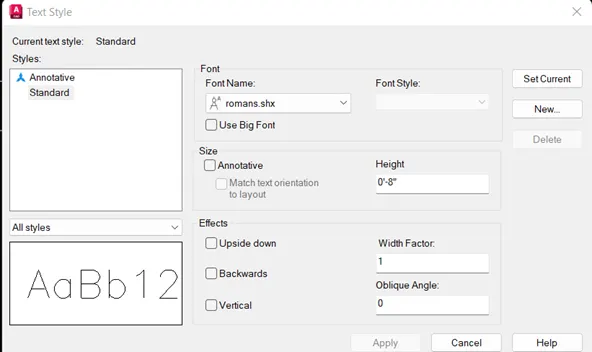
Step-2:
- After creating the text style use the command DTEXT and write the required text.
- Use the command DTEXT and select the option rotate for write the text in 900
- After the write the text, use the command LINE and command OFFSET to sketch the table around the text.
- Use command TRIM to eliminate the unwanted lines.
- Use the command MOVE to place the text at the centre of specified place.
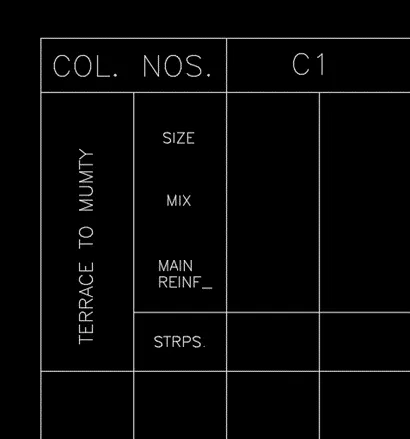
Step-3:
- To create a reference for column scheduling, we use the command LINE and command CIRCLE to complete the column scheduling.
- Use command TRIM to eliminate the unwanted lines.
- Use the command HATCH to highlight the sketch.
- For symbol of diameter, we use (%%c).
- Use the command MOVE to place the text at the centre, between the table.
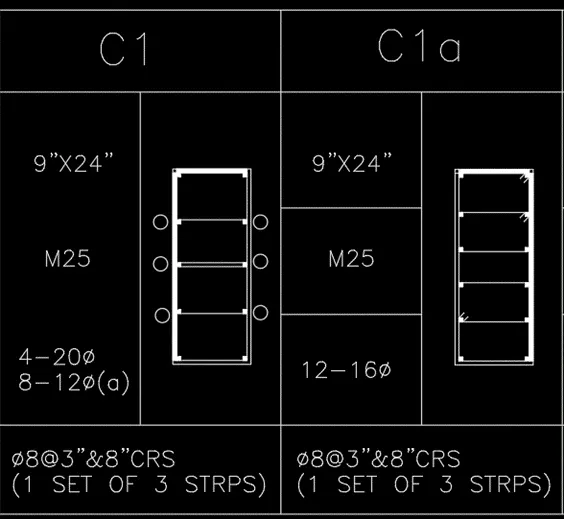
- Continue the process up to the completion of column scheduling
RESULT:
AIM:
To create a window schedule by using the tools in AutoCAD.
INTRODUCTION:
Window Schedule:
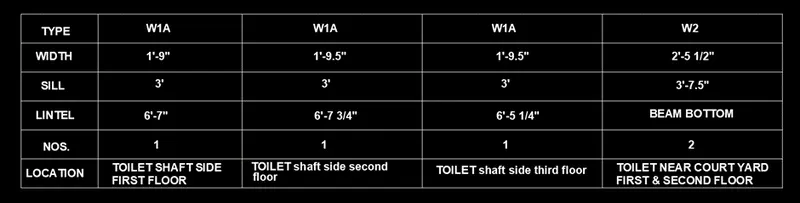
A tabulation, usually on a blueprint or in specifications, which lists all windows required on a construction job, indicating the sizes, number of lights, types, locations and special requirements.
PROCEDURE:
STEP-1:
- The first step is, we have to create a new text style for texting.
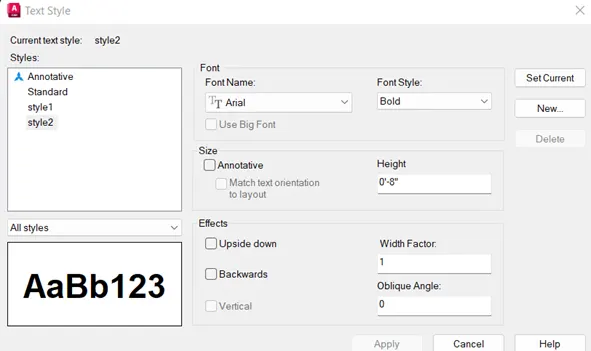
- The text style includes the font name as Arial, font style as Bold, height of text as 8”, justify as Left, width factor of text as 1
- The text style to be selected as set current for use.
Step-2:
- After creating the text style use the command DTEXT and write the required text.
- After the write the text, use the command LINE and command OFFSET to sketch the table around the text.
- Use command TRIM to eliminate the unwanted lines.
- Use the command MOVE to place the text at the centre of specified place.
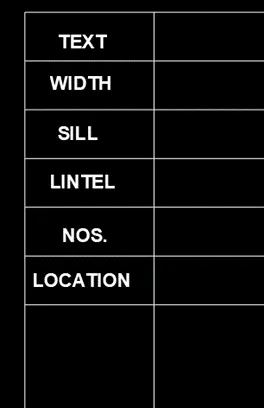
- Continue the process up to the completion of window scheduling
RESULT:
AIM:
To create the drawing template by using the tools in the AutoCAD.
INTRODUCTION:
Drawing Template:
A drawing template file is drawing file that has been saved with a .dwt file extension, and it specifies the styles, settings and layouts in a drawing including tittle blocks.
PROCEDURE:
Step-1:
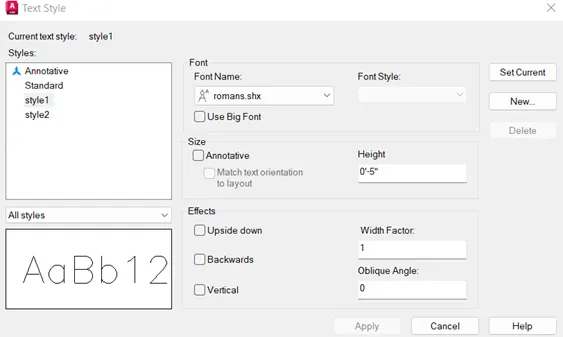
- The first step is we have to create a new text style for texting.
- The text style includes the font name as shx, height of text as 5”, justify as Left, width factor of text as 1 etc.
- The text style to be selected as set current for use.
Step-2:
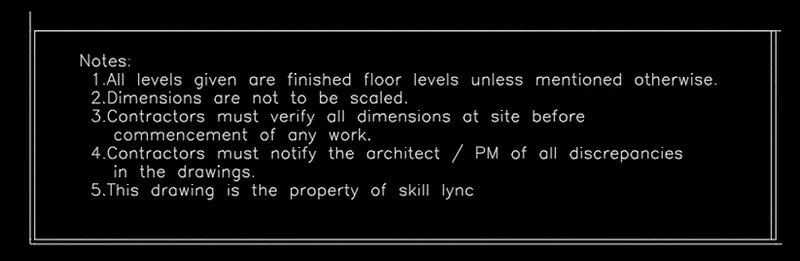
- After creating the text style use the command DTEXT and write the required text.
- After the write the text, use the command LINE and command OFFSET to sketch the table around the text.
- Use command TRIM to eliminate the unwanted lines.
Step-3:
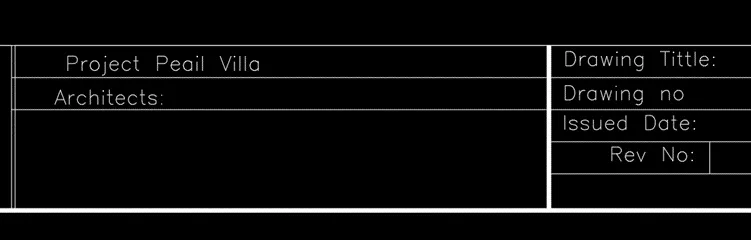
- Use the command DTEXT and write the required text.
- After the write the text, use the command LINE and command OFFSET to sketch the table around the text.
- Use command TRIM to eliminate the unwanted lines.
- Use the command MOVE to place the text at the specified place.
- Use the command HATCH to highlight the sketch.
- Continue the process up to the completion of template.
RESULT:

AIM:
To create the list of drawing schedule by using the tools in the AutoCAD
INTRODUCTION:
Drawing Schedule:
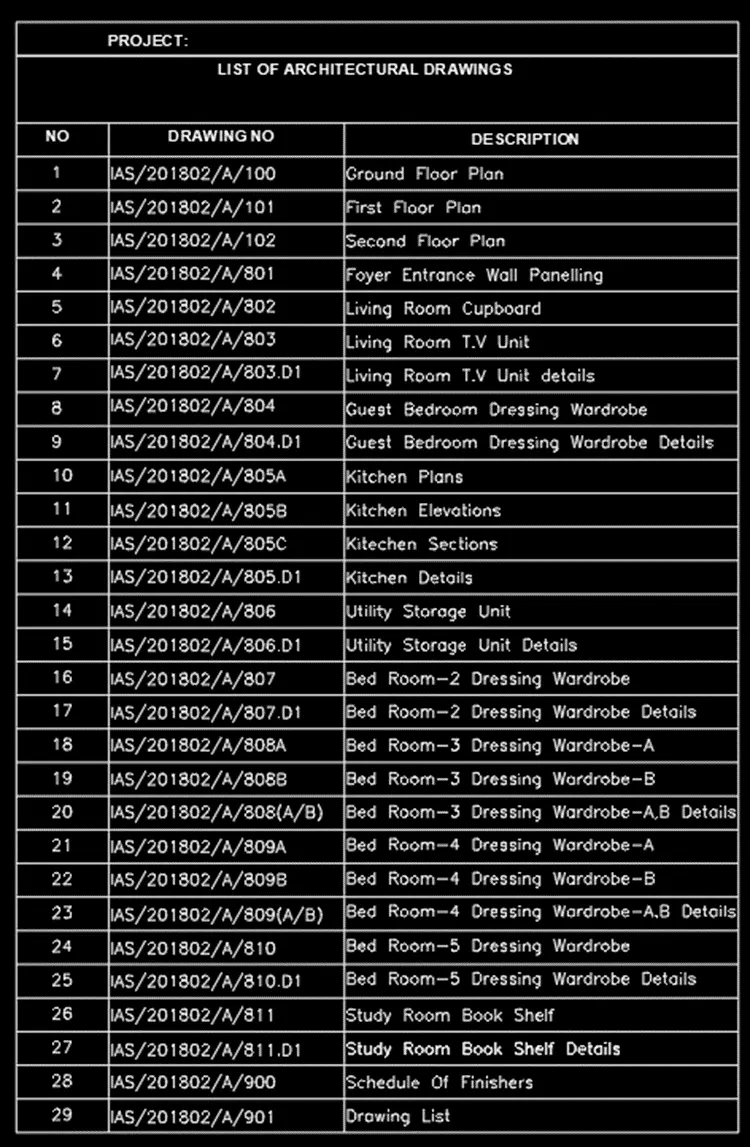
A schedule of drawing is an itemised list of drawings required for a building project. It can be included as part of an invitation to tender, or may be prepared as part of a design management plan.
PROCEDURE:
Step-1:
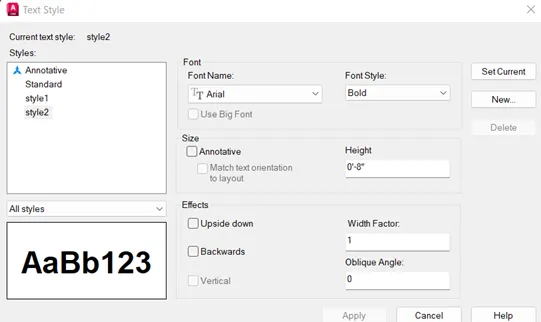
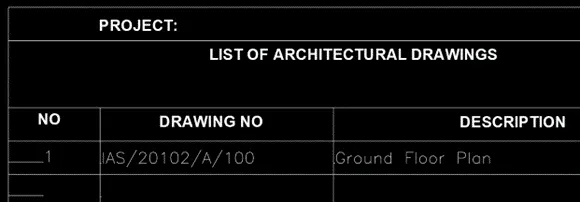
- The first step is, we have to create a new text style for Tittle.
- The text style includes the font name as Arial, font style as Bold, height of text as 8”, justify as Left, width factor of text as 1
- The text style to be selected as set current for use.
Step-2:
- After creating the text style use the command DTEXT and write the required text.

- After the write the text, use the command LINE and command OFFSET to sketch the table around the text.
- Use the command MOVE to place the text at the specified place.
- Use command TRIM to eliminate the unwanted lines.
Step-3:
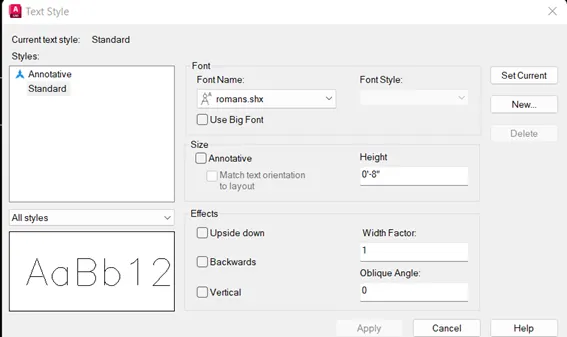
- We have to create text style for Data.
- The text style includes the font name as shx, height of text as 8”, justify as Left, width factor of text as 1 etc.
- The text style to be selected as set current for use.
- Use the command DTEXT and write the required text.
- After the write the text, use the command LINE and command OFFSET to sketch the table around the text.
- Use command TRIM to eliminate the unwanted lines.
- Use the command MOVE to place the text at the specified place.
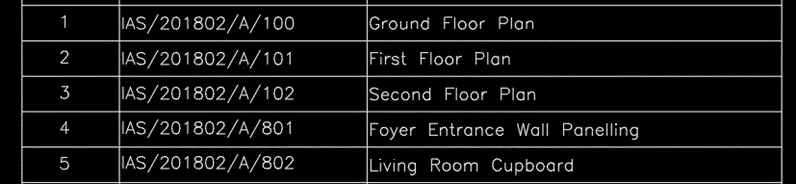
- Continue the process up to the completion of drawing schedule.
RESULT:
AIM:
To create the Beam in detail by using the tools in AutoCAD.
PROCEDURE:
- To sketch the beam, we have to draw the outer line of the beam using command LINE.
- Then use the command HATCH and select the pattern BRICK, AR-CONC.
- Then use the command DIMLIN to identify the dimensions.
- Use the command DTEXT to complete the labelling for beam detail.
RESULT: