Creating Walls, Partition walls and Floors for a residential layout using REVIT
1. Aim: To change or update the thickness and material of the walls of the residential building of the week 2 challenge in the rivet soft ware.
- The given below plan shows the plan of a residential building and the floor of the residential building can be changed to the desired thickness and the material of the floor is also changed to required material based on the economic condition.
- The material or thickness is changed due to the requirement of the house inmates and the material availability near to the site which is more economical and available in the ample quantity.
Procedure:
- Click on the new option and select the required template architectural or construction and click on OK then the file with the required template is formed.
- To create the lay out of the building select the floor option in the ribbon and select the boundry line and plot the size of the lay out in the rectangular shape to a size of 40'x30'. The lay out is now divided in to the rooms and it is now converted in to the plan of the building.
- The above building is already plotted or created in the week 2 assignment and it can be used as reference for this week challenge or we can recreate the model again.In this challenge the model in the week 2 assignment is taken as a reference.
- In week 2 assignment the floor of the residential model is made with concrete floor cast in situ and the floor is updated to the another material with the desired thickness.
- The floor can be changed to the wooden flooring by the following steps.
- Click on the floor of the building model and select the floor of the building and now click on the edit type option in the properties browser.
- Now click on the structure edit option and it will shows the window to update the material and thickness of the flooring.
- Click on the material category and select the material which we desired or select the wooden flooring of type Cherry in the material browser and click on ok.
- Now select the thickness option and edit the thickness of the floor to the desird thickness of 6" for the material.
- The material is updated and the thickness of the material is also updated.Now click on ok option and click on the apply option and the material can be applied to the building and click on ok.
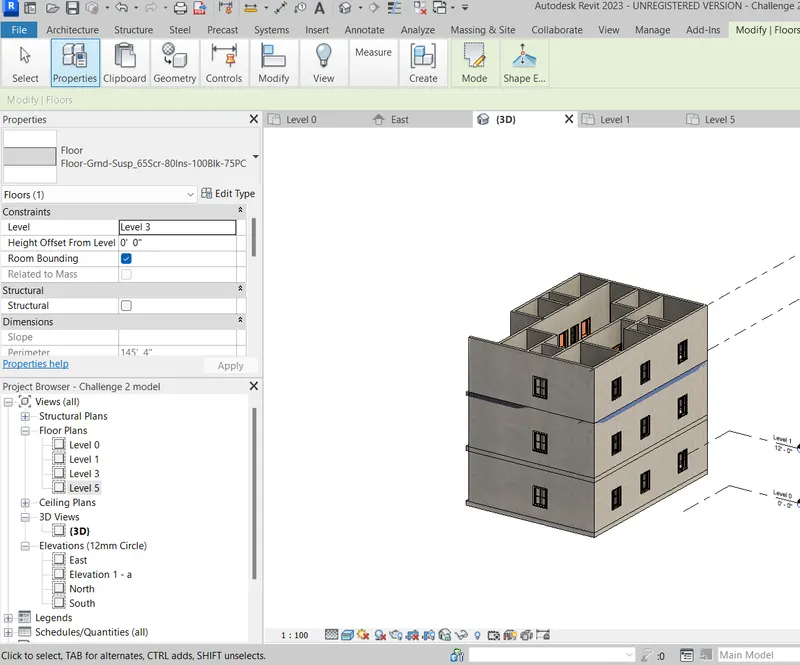
- The flooring of the building is updated to the flooring made by the cherry to the thickness of 6".properties bar with various types of the wall is opened in the left side of the window.Now select the appropraite wall which may be concrete,brick or made of any other materials then the wall is now selected and the click on the edit type and edit the strutural details that is thickness of the wall and apply the required thickness of the wall.
- Now the residential building with the updated floor material and the thickness is shown below.
2. Aim: To add walls for the floor lay out and to edit the material or thickness of the walls of the residential building in the rivet soft ware.
- The walls are the partion item which will separate the rooms of the building, the walls can be made with the various items with the desired thickness .
- The walls may be partition walls or the walls may be the main walls, In general the thickness of the main walls is slightly greater than the partition walls.The material in the main walls and the partition walls is same the basic difference between the main and partition walls is their thickness.
Procedure:
- Click on the new option and select the required template architectural or construction and click on OK then the file with the required template is formed.
- To create the lay out of the building select the floor option in the ribbon and select the boundry line and plot the size of the lay out in the rectangular shape to a size of 40'x30'. The lay out is now divided in to the rooms and it is now converted in to the plan of the building.
- Click on the architecture and select the wall option, now select the draw option and it shows variuos options like line,rectangular,polygonal option and pick lies option we can draw wall swith any on eof the option.
- Select the pick lines option in the bar and the wall lines is selected on the floor lay out.The pick lines option is used to plot the outer walls of the layout and the interior walls can be plotted by the selecting the line option in the ribbon.The walls can be formed to the required length.
- Now the walls can be checked to their proprties in the properties browser.The thickness or the material of the walls can be changed to desired thickness and the material.
- Select the wall which is developed in the layout and the properties of the wall is displayed in the left of the window.The wall hieght is based on the level which we created in the elevation view. In the elevation view levels of the building with respect to the base line is created.
- The walls are created with respect to the levels and the wall height is decided on the distance between the two levels. The wall height is edited using the wall constraint with respect to the level.
- The height is edited by editing the wall constraint height in the properties bar i.e select the wall and the wall constraint is is changed to some fixed offset and click on ok then the wall hieght is increased or decreasedwith respect to the particular level.Positive offset may increase the wall above the level where as the negative offset may decrease the wall below the offset.
- The material and the thickness of the wall is changed to the other material and thickness based on the requirements of the house inmates.The formed lay out in the week 2 assign ment the walls are made with concrete walls and the walls are now changed to the brick walls of desired thickness.
- The walls can be changed to the brick masonry by the following steps.
- Click on the wall of the building model and select the walls of the building and now click on the edit type option in the properties browser.
- Now click on the structure edit option and it will shows the window to update the material and thickness of the flooring.
- Click on the material category and select the material which we desired or select the wooden brick masonry in the material browser and click on ok.
- Now select the thickness option and edit the thickness of the floor to the desird thickness of 10"" for the material.
- The material is updated and the thickness of the material is also updated.Now click on ok option and click on the apply option and the material can be applied to the building and click on ok.
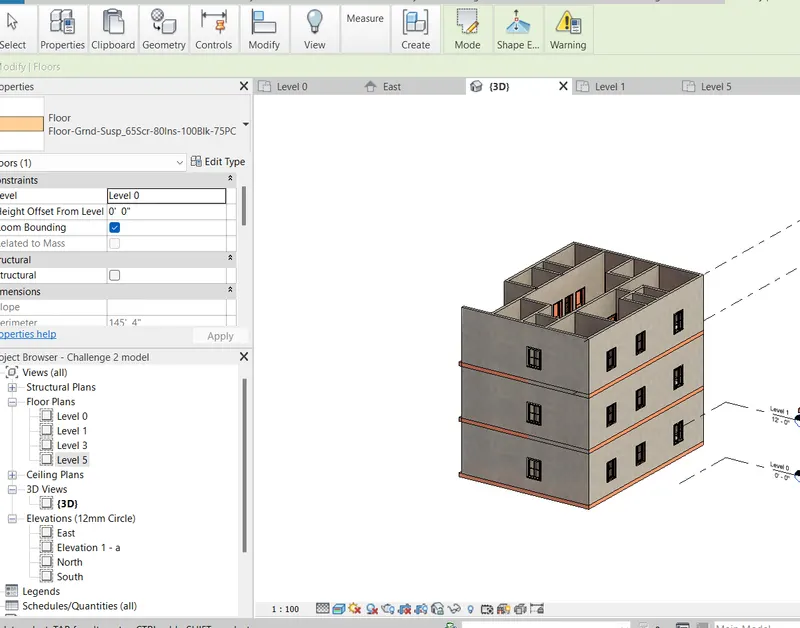
- The walls of the building is updated to the walls made with the brick masonry to the thickness of 10".The walls in all the levels are updated to the brick masonry walls.
- Now the residential building with the updated brick masonry material and the thickness is shown below.
- In general the height of the walls can be modified using the offset from the base constraint i.e by chnaging the height or depth of the wall but it is more preferable to edit thr height of the wall.
- The height of the wall is edited when we fix a base line with a specified level i.e when we fix a base line the wall can be elevated to the height only and it avoid the disturbance during the model creation.
- In my point of observation the wall creation by height will be clear as well as the wall creation can also be done by depth and it depends on the choice of the designer or architect.
3. Aim: To copy the elements,floors and walls of a residential building to the next leve and align the items with respect to base level in the rivet soft ware.
- The elements,floors and walls can be copied to the next level if the the ground floor and the first floor may undergo same requirements.
- It may take time to draw all the floors so we can align the elements,walls,floors with respect to the levels and after we can edit the elements if we require nay minor changes.
Procedure:
- Click on the new option and select the required template architectural or construction and click on OK then the file with the required template is formed.
- To create the lay out of the building select the floor option in the ribbon and select the boundry line and plot the size of the lay out in the rectangular shape to a size of 40'x30'. The lay out is now divided in to the rooms and it is now converted in to the plan of the building.
- The ground floor is created by plotting the walls in the with repective size and thickness and if the first floor also follows the same requirements then the ground floor is aligned to the first floor level and also the other levels also.
- If we require then create the level in the elevation view at the specific height with reference to the base level.
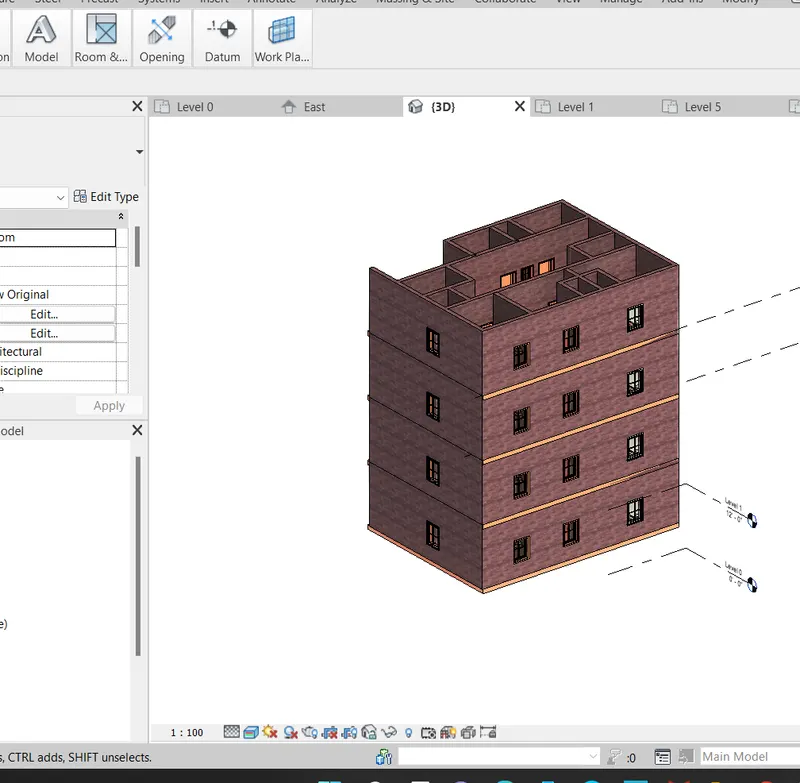
- The given plan require G+3 floors so we create the three levels with reference to th base level.Select the elevation view and click on the architecture and select the level option in the ribbon and plot three levels with repect to the base levels then the three new levels are formed.
- Now select the ground floor level and select the whole layout of the building and click on the click on clipbaord on the ribbon and selct the clipboard icon and slect the option aligned to the selected levels then the a window displaying the levels is obtained and select the levels in which the ground floor is to be aligned and click on ok option.
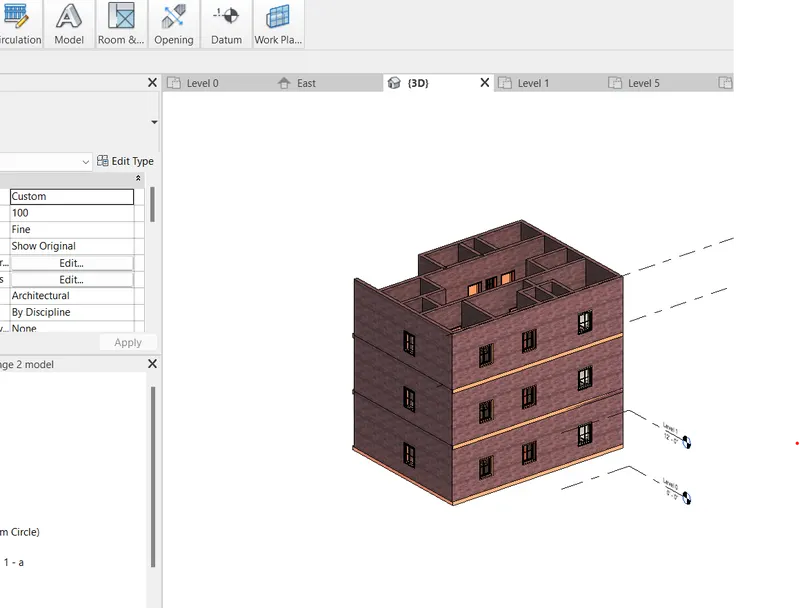
- Then the ground floor layout is aligned to all the levels which we selected.
- The model formed with the ground floor aligned to the other levels is formed as below.
4.Aim: To convert the layout of the residential building in to the plan of the residential building in the rivet soft ware.
- The plan is slightly different from the layout but it reflects the details of the layout. The lay out is converted in to the plan by adding the wall thickness and the plotting the projections present any for the building unit.
- The plan is nothing but the top view of the building.The paln should be plotted and it gives the main important out look information required for the building to start the execution work in the site.
- The paln consists of the dimensions of the room in the desired unit system
Procedure:
- Click on the new option and select the required template architectural or construction and click on OK then the file with the required template is formed.
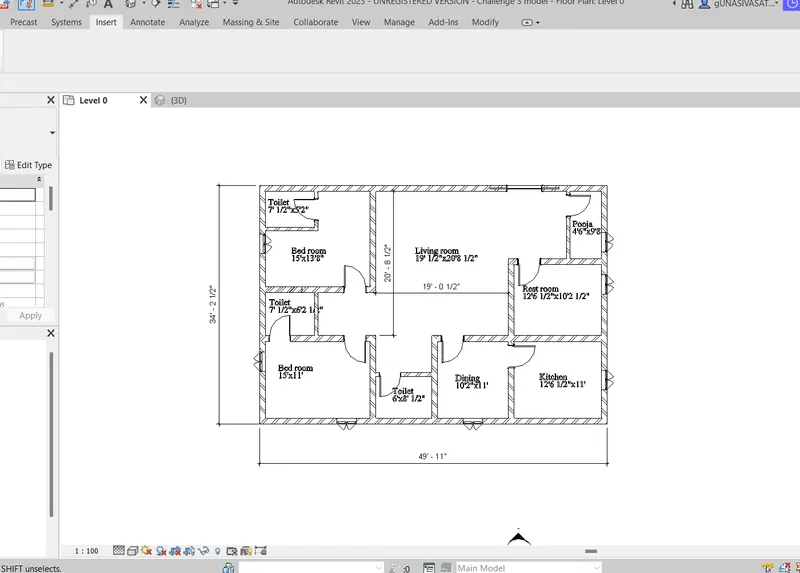
- To create the lay out of the building select the floor option in the ribbon and select the boundry line and plot the size of the lay out in the rectangular shape to a size of 49'11"x34' 2 1/2". The lay out is now divided in to the rooms and it is now converted in to the plan of the building.
- The lay out is converted in to the plan by adding the wall thickness, click on the architecture option in the ribbon and select the wall option in the building the properties bar with various types of the wall is opened in the left side of the window.Now select the appropraite wall which may be concrete,brick or made of any other materials then the wall is now selected and the click on the edit type and edit the strutural details that is thickness of the wall and apply the requiredd thickness of the wall.
- Here select the wall thickness in to 10" and the type of the wall to the brick masonry wall.
- Now change the location constraint of the wall which may be the finish exterior,finish interior,core exterior,interior and the wall center line in which the wall is fixed and when we change the wall thickness the update is occured by keeping the location constarint constant.
- The wall is plotted from the one of the corners of the layout of the residential building and the wall are developed to the end of the rooms.
- The wall thickness mary from the main wall and the partition wall of the building, the thickness of the main wall is 10" and the thickness of the partition wall is 6" and select the walls and change the constraint height is equal to the 10' from the base level.
- So the select the same wall option again and plot the walls of the building. If we require any change or update of the walls we can also update them after the plotting also.
- The rooms are divided in such a way that the bed room should possess a size of 15'x11',15'x13'8" Toilet size of 7'1/2"x5'2",7'1/2"x6'2' 1/2" and the common toilet of size 6'x8'1/2".
- The Living room should be of size 19'1/2"x20'8 1/2",dining room of size 10'2"x11'and kitchen of size 12'6 1/2"x11' and the guest room and pooja room should be divided according to the area and the requirements of the inmates.
- Now For the plan dimensions are inserted using the annotate option in the ribbon in the window .Click on the annotate option in the ribbon and select the linear option and the dimensioning is plotted for all the rooms.
- After the completion of the dimensioning of the walls, the rooms are titled with their appropraite names using the model text option in the ribbon bar.By clicking the model text option the rooms and the sizes are texted and click on the Ok option and they are placed in the respective rooms in the plan.
- Now click on the insert option and select the load family option and insert the doors and windows of the building.The door for the entarnce of the building should be more wide when compared to the doors of the bed rooms and kitchen and the doors of the toilets should be slighlty smaller than the other doors.
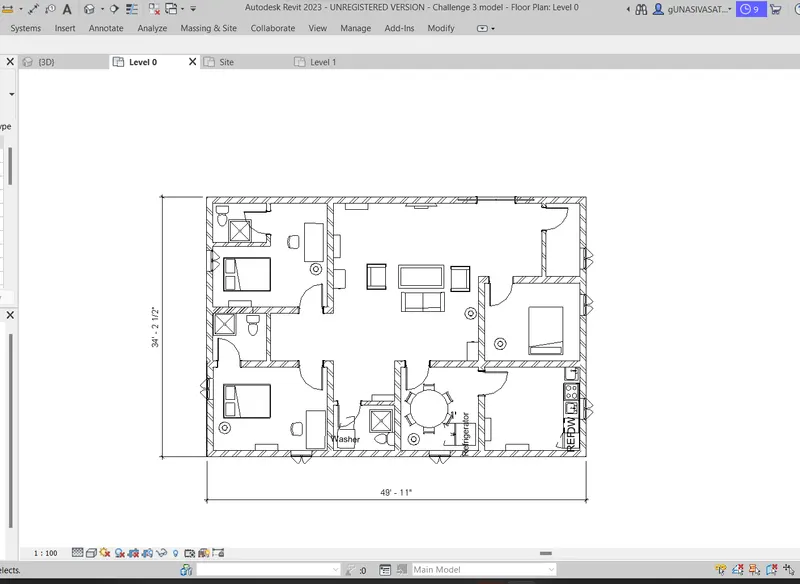
- Now the fianl residential building with the various rooms obtained is shown below.
5. Aim: To insert the furniture in the various rooms of the residential building using the rivet soft ware.
- After completing the plan of the building all the rooms are to be inserted with the variuos furniture units and the furniture should include all types of units according to the requirements of the inmates.
- Each room should include individual units and inserted from the respective family of the furniture from the rivet software.
- The furniture should be comfortable and it should not disturb the carpet area of the building and it should br flexible to change the orientation when ever required.
Procedure:
- Click on the new option and select the required template architectural or construction and click on OK then the file with the required template is formed.
- To create the lay out of the building select the floor option in the ribbon and select the boundry line and plot the size of the lay out in the rectangular shape to a size of 49'11"x34' 2 1/2". The lay out is now divided in to the rooms and it is now converted in to the plan of the building.
- After the plotting the plan of the building the rooms are inserted with furniture, The bed room should consists of the bed,shelves and a table desk with the chair for studying.
- Click on the insert option and select the load family option and select the us folder and it contains the various folders like doors,windows,furniture and select the furniture option and it contains the families of various units.
- Select the familes of the Table and click on the table which is used for study desk and click on the open option now select the architectural option and click on the coponet option and select the table in the properties browser and place it in the bed rooms where it is necessary.
- Now again select the insert option and load family and again select the bed and click on the open option then click on the architectural option and select the coponent option and place the bed in the bed rooms and as well as in the rest room. The size of the furniture also can be changed according to the carpet area available in the rooms.
- In the bed rooms for the storage of the clothes or any other belongings shelves are inserted from the the storage family inthe furniture category.The shelves are also provided in the kitchen also.
- The kitchen items like stove,sink etc are inserted from the Specilty euipment category.
- The toilets are inserted with the urinals,water closets,shower heads from the plumbing category.In additional for the coomon bath room in the living room washing machine is inserted from the same special equipment category.
- For the dining room a table with the seating arrangement is inserted,The dining table should be circular or rectangular in the given residential building it is better to insert the circular dining table.
- The Living room should inserted with the sofa set and it inserted from the furniture category and seating family.The size of the sofa is selected according to the area of the living room.
- In the living room a small table is inserted in front of the sofa set for the serving purpose.The lighting is inserted from the lighting category,the lighting is provided in all the rooms,kitchen,toilets,rest room etc.
- Now the residential building with all the furniture inserted in the various rooms is shown below.