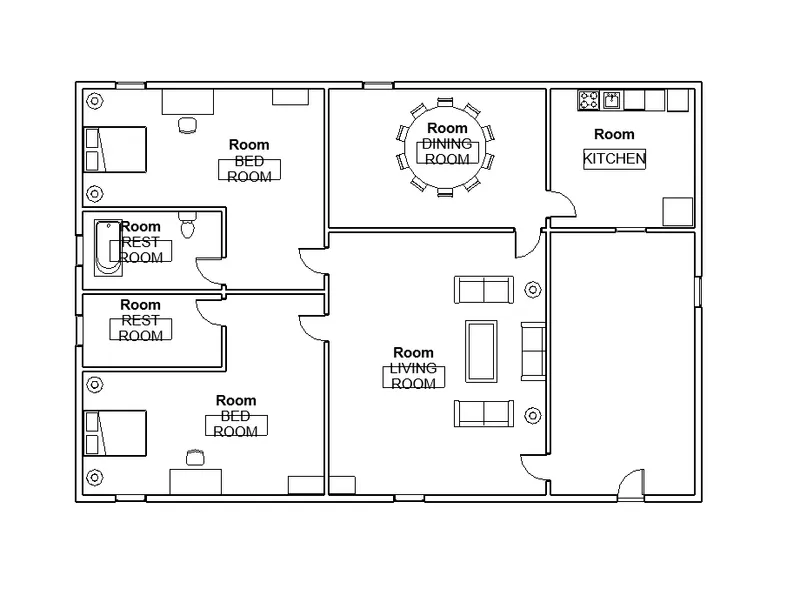
Creating Walls, Partition walls and Floors for a residential layout using REVIT
ANS 1)
Aim: Create a floor and select the floor with appropriate material and thickness using the property browser and creating a layout in the Ground floor Level also align the floor plan with grids.
Procedure:
- Firstly open the existing drawing which we created in week 2 challenge.
- In the Project browser there is Floor Plan, in floor plan select the level 1(Ground Floor).
- Now go in Architecture tab and select the FLOOR option.
- Modify tab is open, in that select the option for pick a line.
- Now select the outer lines of the plan and click on Finish Edit Mode.
- In 3D view our floor is visible.
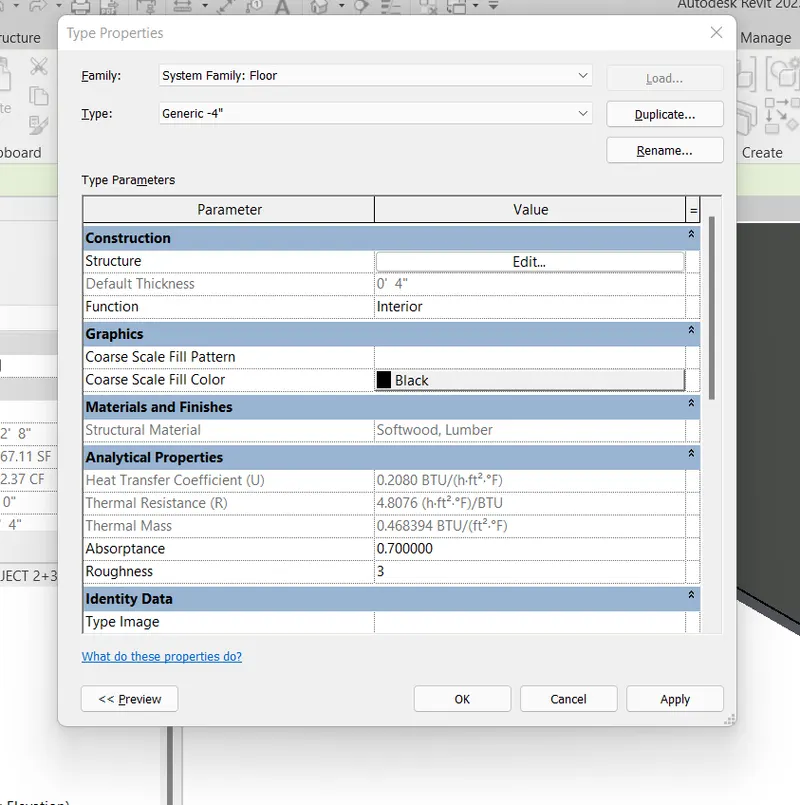
- Now for the material and thickness, selct the floor and at the top right of the Property browser there is "EDIT TYPE" option click on it.
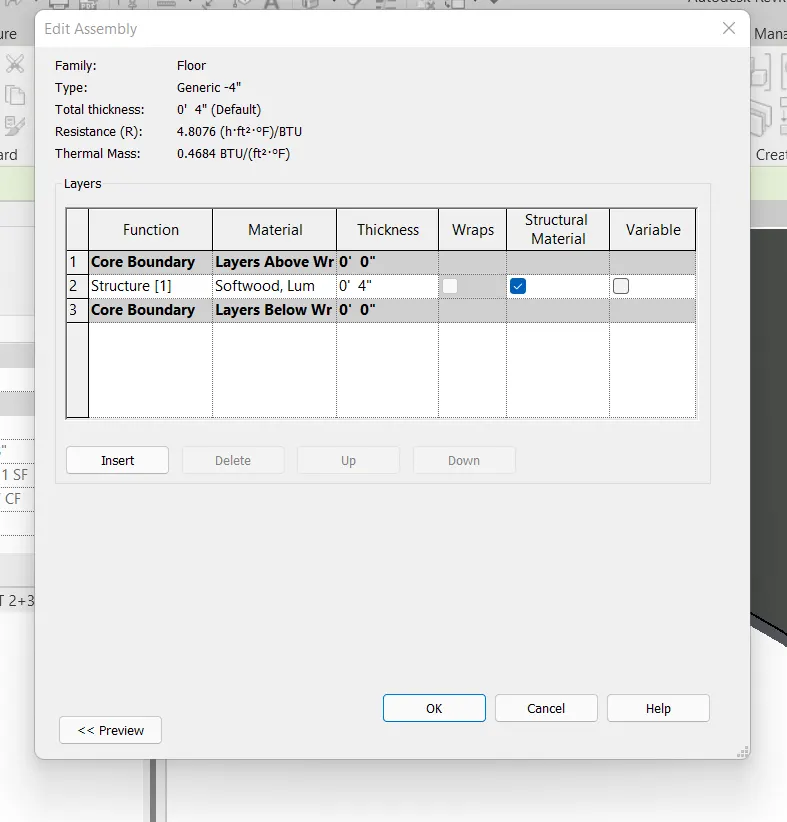
- TYPE PROPERTY tsb is open, in struture option there is edit option click on it.
- In material option give the material as Softwood,Lumber click OK
- And in the thickness give thickness as 4" and press OK.
- Again click on APPLY and then click on OK.
ANS 2)
Aim: Create the walls and select the appropriate material and thickness of walls using the property browser and checking the walls are constraint or not also discussing about the pros and cons of the connected and unconnected walls with associated levels.
Procedure:
- Firstly open the existing drawing which we created in week 2 challenge.
- In the Project browser there is Floor Plan, in floor plan select the level 1(Ground Floor).
- Now go in Architecture tab and select the WALL option.
- Modify tab is open, in that select the option for "pick a line" option.
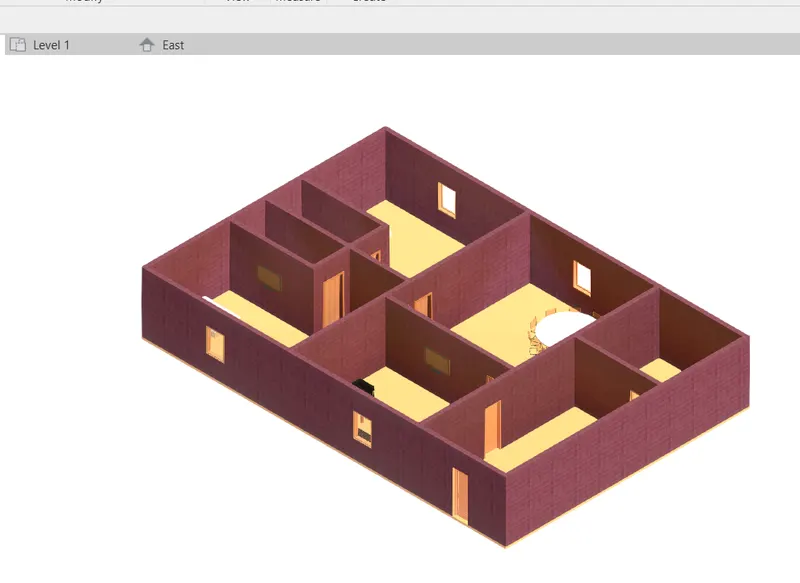
- Now select the outer lines of the plan and press esc to finish.
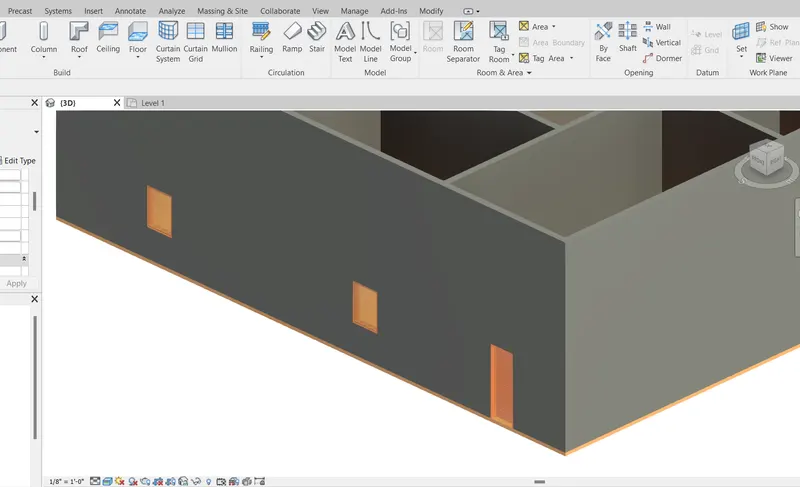
- In 3D view our WALLS are visible.
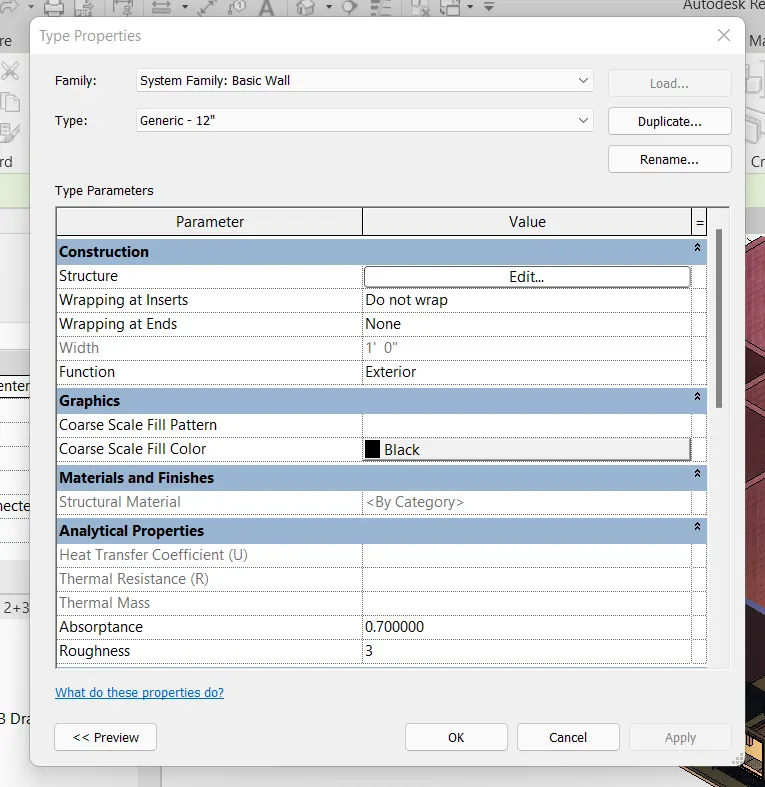
- Now for the material and thickness, selct the wall and at the top right of the Property browser there is "EDIT TYPE" option click on it.
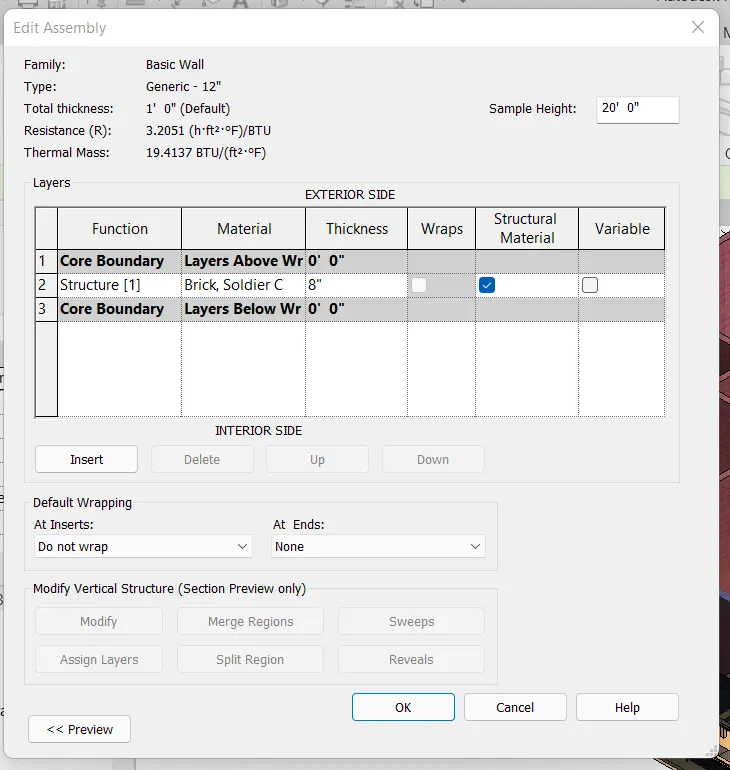
- TYPE PROPERTY tsb is open, in struture option there is edit option click on it.
- In material option give the material as Brick, Soldier Course click OK
- And in the thickness give thickness as 8" and press OK.
- Again click on APPLY and then click on OK.
a) Connected walls are better option than the unconnected walls as we can change the height of the walls by decresing or incresing the level height other than this there are many options whicch are working on the level height as we have to copy the ground floor to first floor we can select the level and it will be copied so atlast according to my view connected walls are godd option.
b) Normally, for the walls height option is more convinient than the depth one. For basements and the other part below the ground level depth option is good but for above the ground floor height option must be preferred.
ANS 3)
Aim: Copy the model elements ( wall, floor ) modelled to Ground Floor Level and paste it aligned to First Floor Level .
Procedure:
- Firstly open the existing drawing which we created in week 2 challenge.
- In the Project browser there is Floor Plan, in floor plan select the level 1(Ground Floor).
- Now Select the whole drawing, and go to MODIFY tab.
- In modify tab, click on the copy to clipboard option.
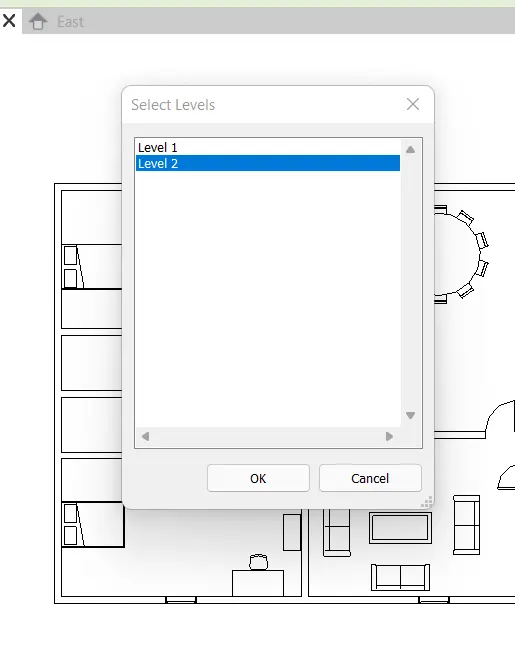
- Again in modify tab, there is a option for paste option click on it and select the option "ALIGNED TO SELECTED LEVELS".
- Select level 2 and click OK.
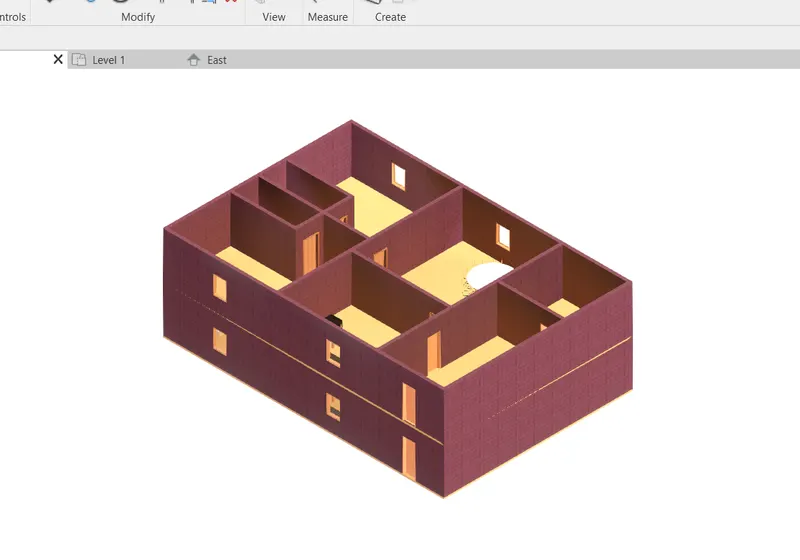
- All the Ground floor elements are copied to the first floor.
- Go to 3D view to see the model.
ANS 4)
Aim: By Using interior partition walls to create separate rooms within your residential unit.
Procedure:
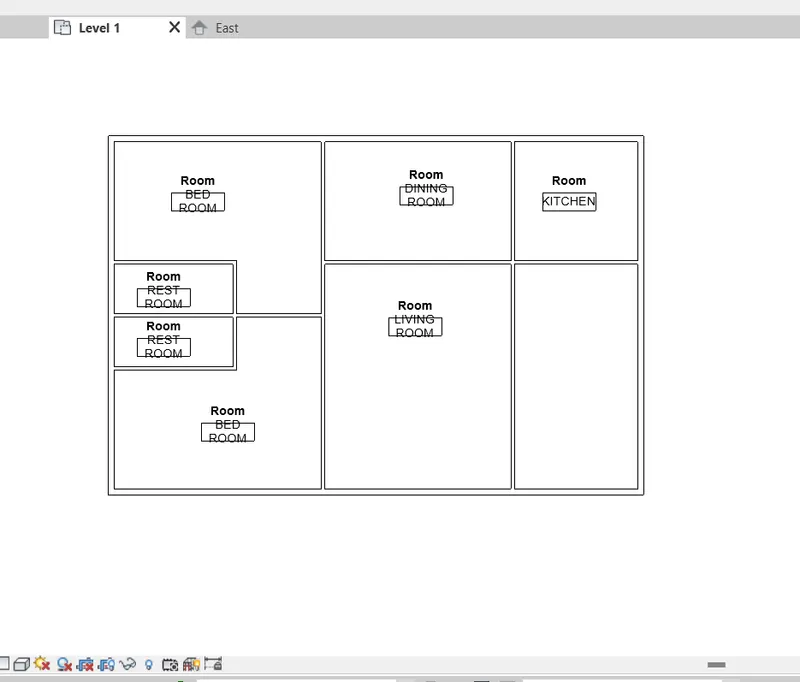
- As we already created the drawing in week 2. Similiarly draw all the interior walls as per the dimensions.
- Select the wall option and from the propeties select the 'INTERIOR 5" PARTITION WALL'
- Now Start drawing the interior walls as per dimendion.
ANS 5)
Aim: Adding the components to the building like doors, windows and other components as per the requirements of the individual rooms.
Procedure:
- First go in the architecture tab and select the DOOR in the architect tab.
- Now place all the doors in the model and press ESC.
- Again similiarly go inn the architect tab and now select the WINDOW .
- Place the windows where ever required and press ESC.
- To set the furniture in the living room, go in INSERT tab and click on Load family option.
- In Furniture load furniture set, couch table and TV desk and shelf cabinets.
- Now in the Project Browser go in families>furniture and insert the furniture one by one.
- Similiarly for the Dining Room load table and chairs and insert in the model.
- Again for the bed room, kitchen and rest room do the same process that is load the family and then from project browser insert it in the model.