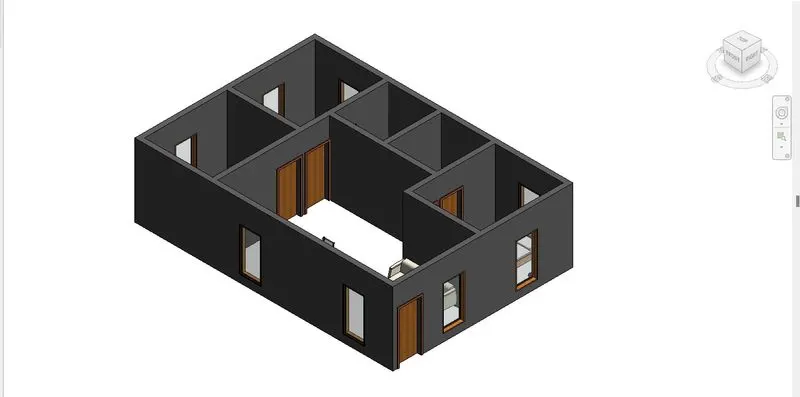
Creating Levels, Grids, Layout and model elements for a residential unit using REVIT
AIM
To create Levels, Grids, Layout and model elements for a residential unit using REVIT
INTRODUCTION
Autodesk is a BIM(Building Information Modeling) software civil engineers, architects, mechanical,electrical,plumbing (MEP )engineers
PROCEDURE
- What is BIM? Summarize the features of BIM and benefits of using BIM over 2D CAD tools.
- BIM is a visual representation of the physical and functional characteristics of facility from inception onwards.As such it serves as a shared information repository for collaboration throughout a facility’s life cycle
- BIM is used for creating and managing data during the design, construction, and operations process. BIM integrates multi-disciplinary data to create detailed digital representations that are managed in an open cloud platform for real-time collaboration
The features of BIM and benefits of using BIM over 2D CAD tools
- BIM offers a more complete representation of a building’s design. It takes more than the building’s core components into account.This means the project team can take full advantage of the space and resources available
- BIM pulls your documents into a single database. Several people can work on the same model and save it to the cloud. This allows for instant updates, so you won’t waste time searching for documents when you need to make changes
- BIM is a collaborative and integration-based design method; the different actors involved can enrich the information model, insert, extract, update or modify information
- BIM will allow you to prefabricate important components ahead of time. You won’t have to adjust them based on the building design. Instead, such components are part of the initial design
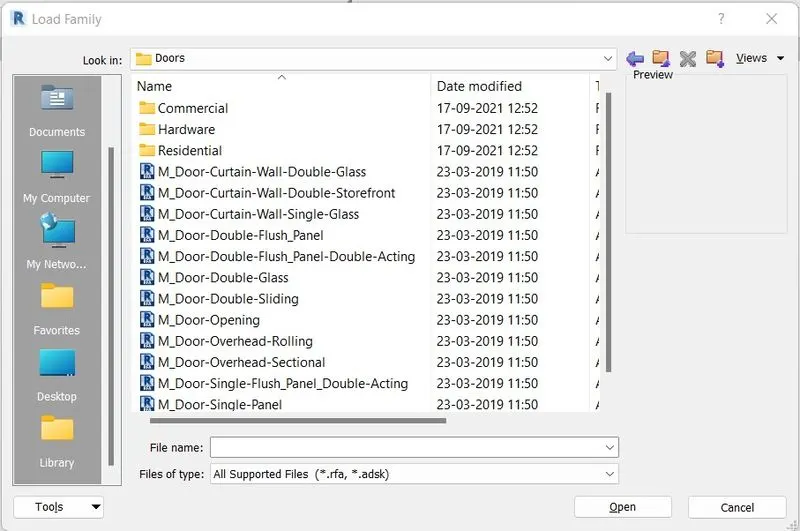
2.Understand the concept of Categories, Families, Elements, Instances in Revit. Go to Insert Tab, choose a category. Pick a family and element. Understand the instances and insert it to Revit model
- Category:It is one of the Revit element hierarchy,category controls the organization, visibility, graphical representations, and scheduling options of Families within the Project
- Family:It is a grouping of 2D and/or 3D information that serves to represent a discrete building or documentation element in the Project
- Instance:It is an individual representation of a Type in the Project defined by unique parametric, graphical, and documentation characteristics which makes it unique from other Instances in the Project
- Open revit software
- Click on insert tab
- Select load families
- Select doors
- Select families of elements
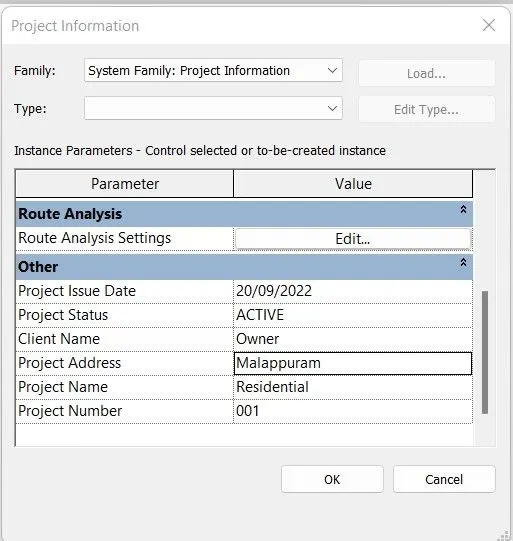
3.Setting up a Project – Open a project file with an architectural template. Save the file with the appropriate name. Set up the project units to Imperial / Metric based on your convenience of modeling. Complete the project information under the Manage tab. Set up the maximum backups for project file to 3
Step 1:Open Revit software
Select new
Select the template
Select the browse option
Select imperial or metric template
Save the file
Step 2:Select manage tab
Select ‘project information’
Add the datas
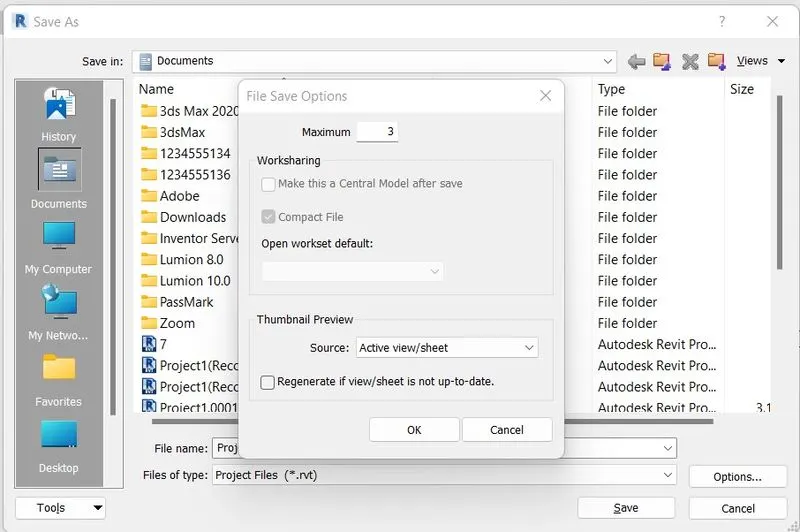
Step 3:Select ‘save as’ in file
Select options
Enter the maximum number to 3
4.Understand the concept of Levels and Grids. Follow the naming and conventions. Create the following Levels: ( Convert to metric equivalents if metric is your units)
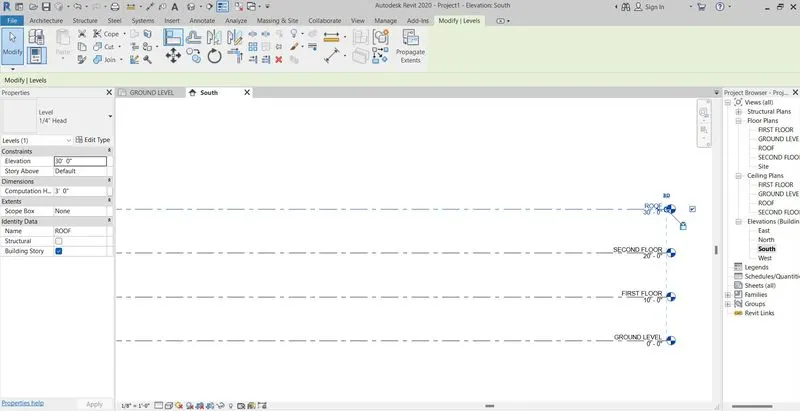
Ground Floor @ 0’
First Floor @ 10’
Second Floor @ 20’
Roof @ 30’
Step 1:Open Revit software
Select new
Select the template
Select the browse option
Select imperial or metric template
Save the file
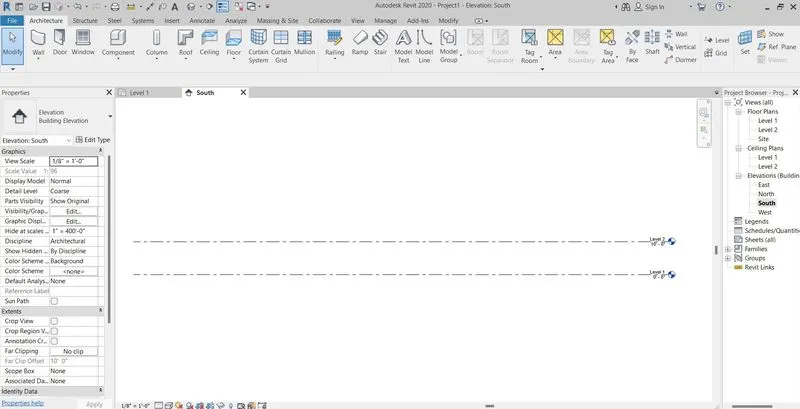
Step 2:Select elevation option
Change the name of level 1 and level 2
Select level option in tab
Select pick line option
Enter offset 10’
Pick line and draw the offset line
Step 3:Name four levels
Step 4:Select grid option
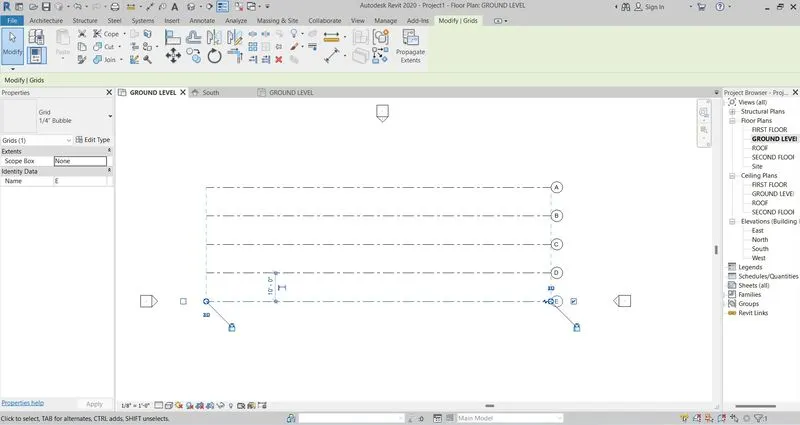
Select line option draw a line
Name it a
Select pick line option
Enter offset diatance10’
Step 5:Select grid option
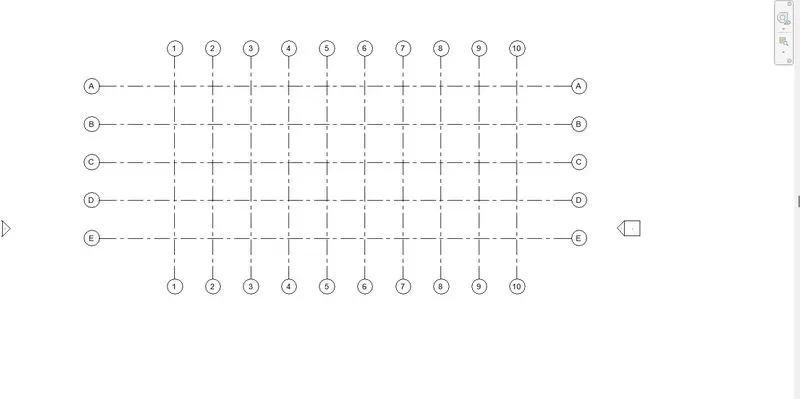
Draw longitudinal grid
Name it 1
Select pick line option
Enter offset distance 10’
RESULT
Studied about use and benefits of Revit
Studied about levels and grids in Revit
AIM
- 3D modeling of residential unit – From looking at your house / or a place you aspire. Create a conceptual layout of the residential unit. You can measure using a tape oryou can access your residential plan to create a similar layout
- In the layout created draft the level of details you are planning to include – Dimensions of room, components you plan to add in the residential unit
- Identify the residential model elements such as Door, Windows, Tables, Chair, Couch, Bed, Lamps from the library and insert them to the model . Save the project for usefor Assignment 3
INTRODUCTION
Autodesk is a BIM(Building Information Modeling) software civil engineers, architects, mechanical,electrical,plumbing (MEP )engineers
PROCEDURE
Step 1:Open Revit software
Select new
Select the template
Select the browse option
Select imperial or metric template
Save the file
Step 2:Select architecture tab
Select wall option
Draw walls
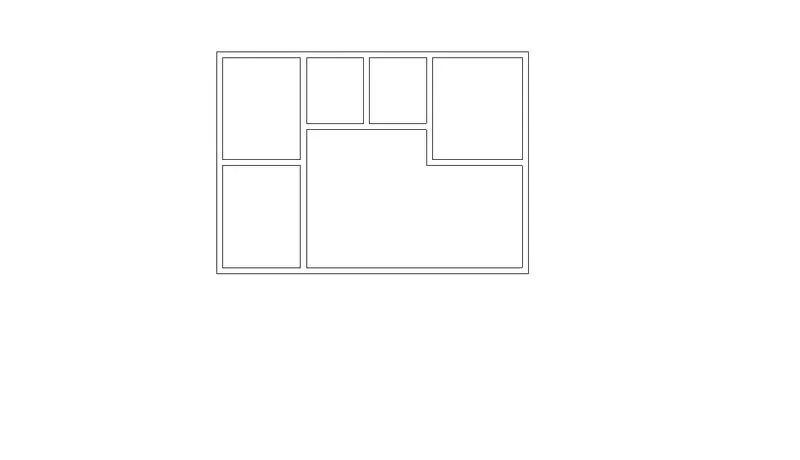
Step 3:Select annotate tab
Select aligned dimension
Mark the dimension
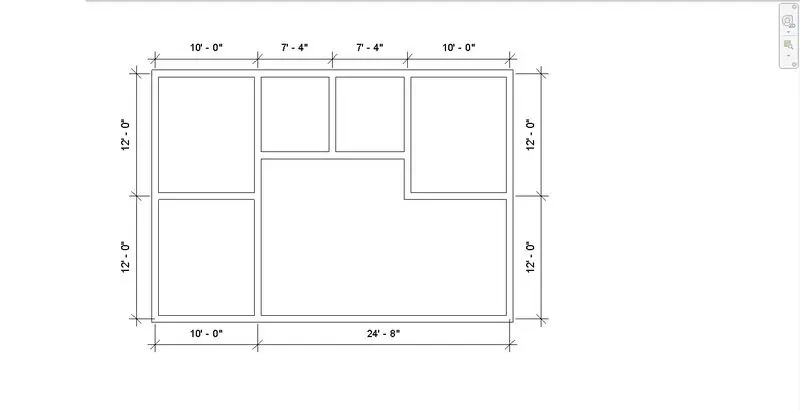
Step 4:Select insert option
Load family
Select the family need to place
Select the element
Place the elements
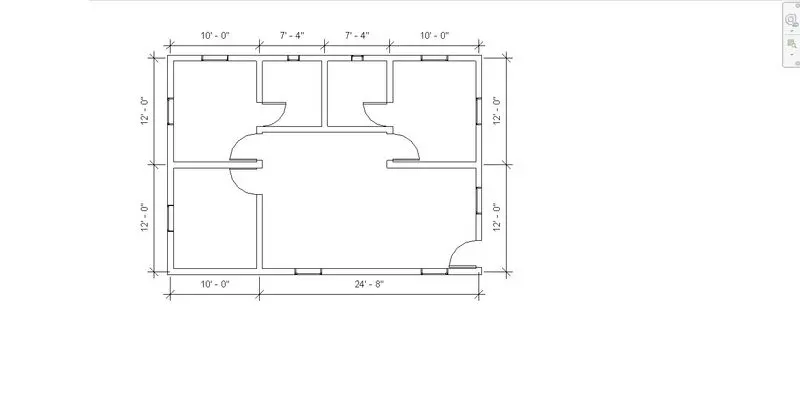
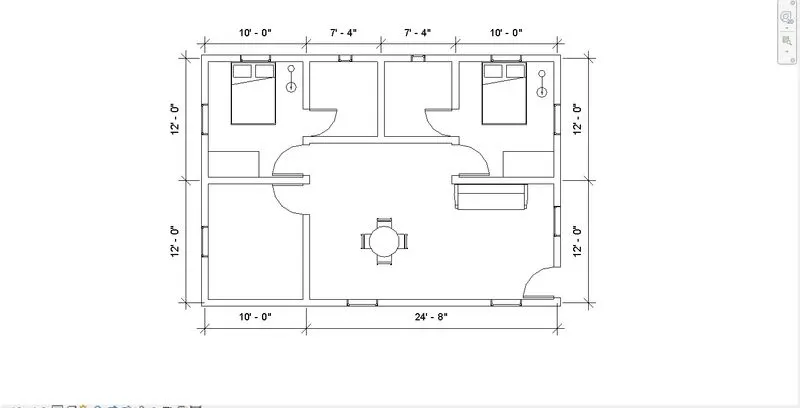
Step 5:Select file option
Select ‘save as’
Name and save the file
RESULT