Creating Levels, Grids, Layout and model elements for a residential unit using REVIT
1) What is BIM? Summarize the features of BIM and benefits of using BIM over 2D CAD tools.
ANSWER-->
BIM
- Building information modelling (BIM) is the holistic process of creating and managing information for a built asset
- BIM is the foundation of digital transformation in the architecture , engineering and construction (AEC ) industry
- Based on an intelligent model and platform , BIM intergrates structured , multi disciplinary data to produce a digital representation of an asset across its lifestyle , from planning and design to construction and operation
- BIM software is used by indivituals , businessess and government agencies who plan , design, construct, operate and maintain buildings and diverse physical infrastructures , such as water , refuse , electricity , gas , communication utilities , roads, railways , bridges , ports and tunnels
FEATURES OF BIM
- BIm is a physical representation of the physical and functional characterastics of the building process , that provide very minute detail of the project
- Every stakeholder makes their discipline - specific input to make it a comprehensive shared information resource about the structure
- One can easily acess the right information at the right time that provides a reliable basis for decision making during a structures entire life
- BIM allows to work on 5dimension apart from length, breadth and depth it include time and cost
- BIM model not only represent 3D geometric view of the structure , they provide a more comprehensive overview of the entire building process
- BIM desihn tools allow you to obtain various views from a building model and produce high-quality , accurate drawings
- These views are based on a single definition of each object and thus gives a more realistic and accurate idea from final structure
BENEFITS OF BIM OVER 2D CAD TOOLS
- The greatest advantage of BIM is that it can capture the reality in a way that 2D drawings are unable to capture
- Availability of various mapping tools , aerial imagery and laser scans of existing infrastructure have made this information to be starting point of a project . This information can be integrated with the BIM model
- BIM has a multidisciplinary approach to design. A single BIM software can be used to design all the disciplines such as architecture , structure and MEP . This is achieved by assimilating the design parameters from all the disciplines in the model which results in a better- coordinated design
- A lot of time and labor is saved when deriving the quantities from BIM model with the use of tools such as element counts , volumes, areas etc
- The BIM toolset helps in resolving conflicts between elements of different disciplines that arise in the design. For e.g. it can resolve clashes that arise when an electrical conduit runs into a beam
--------------------------------------------------------------------------------------------------------------------------------------------
2) Understand the concept of Categories, Families, Elements, Instances in Revit. Go to Insert Tab, choose a category. Pick a family and element. Understand the instances and insert it to Revit model
ANSWER--->
AIM
To Understand the concept of Categories, Families, Elements, Instances in Revit and insert it to Revit model
INTRODUCTION
CATEGORY:It controls the organization, visibility , graphical representations and scheduling options of families within the project
FAMILIY: Family is a group of 2D/3D information that serves to represent a discrete building or documentation element in the project . It defines parametric , graphical and documentation requirements also
INSTANCE: Instance is an individual representation of a type in the project defined by unique parametric , graphical and documentation characterastics which makes it unique from other instances in the project
ELEMENTS: Everything in revit is an element
PROCEDURE
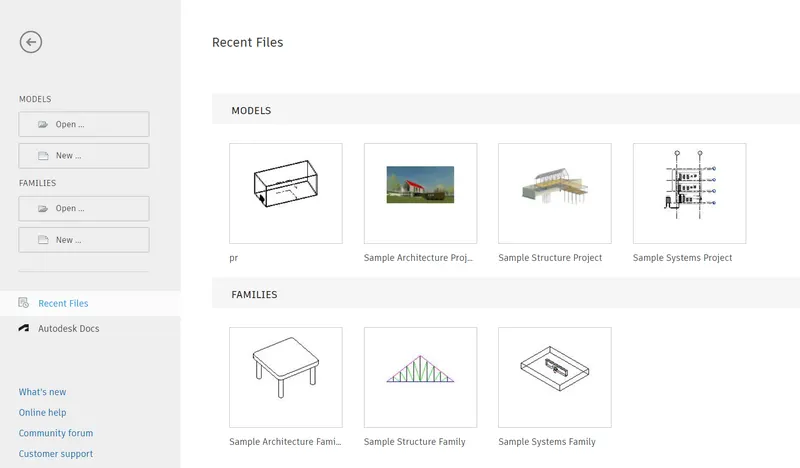
- Open rivet
-
- Once the rivet is openeed , the home page is as given below
STEP 2
CREATING ARCHITECTURAL TEMPLATE
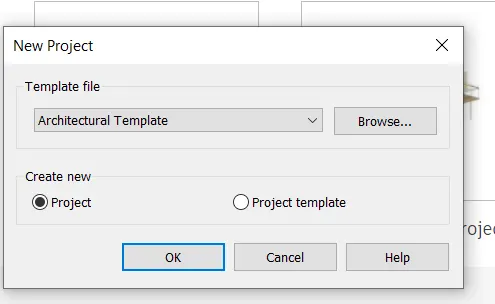
- From the home page click on 'NEW'
- A dialogbox will appear from that select architecture template
- Create new project
- Click ok
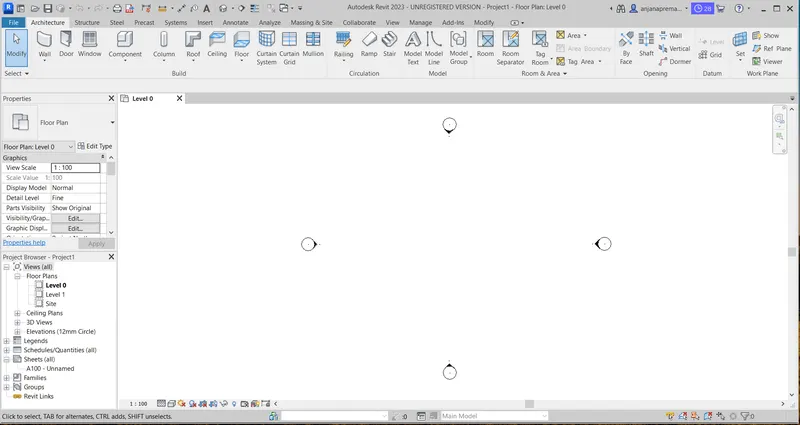
- The archirectural template will be opened
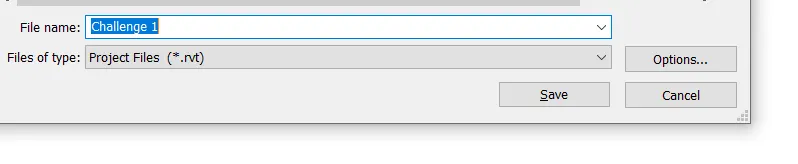
- For naming the project , open the file toolbar
- Then click on the save option
- New tab will be visible
- Name the project as 'Challenge 1'
- Go to the architectural tab of the ribbon and then select the wall
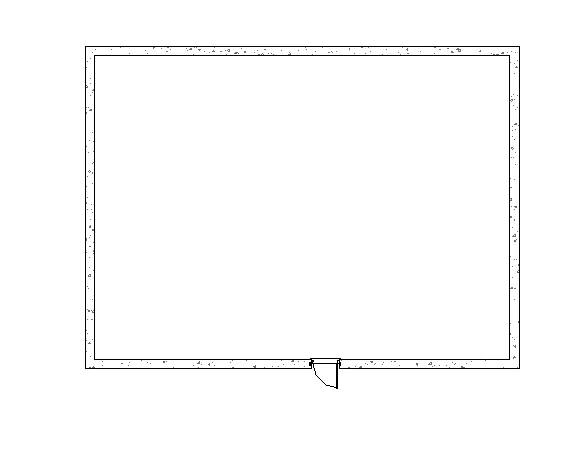
- then using rectangle draw a room
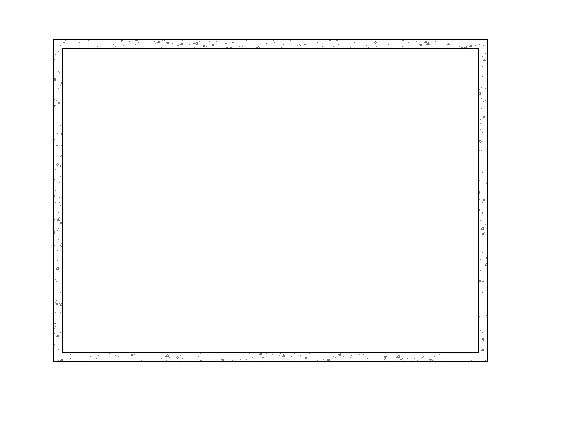
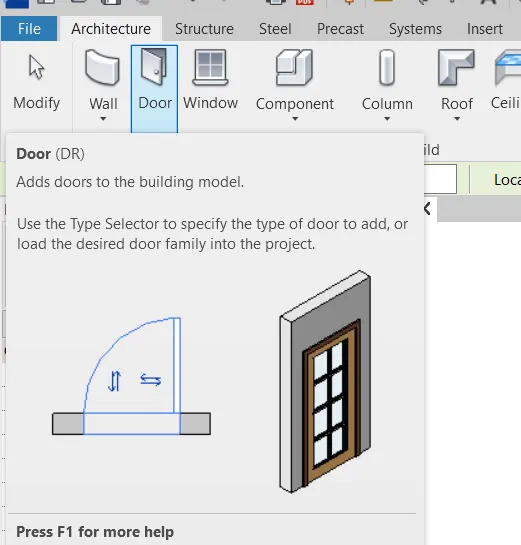
- Then we need to insert door
- For that go to the architectural tab and select door
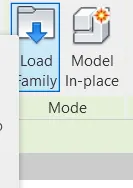
- then go to the load family and list of categories will be displayed and select door
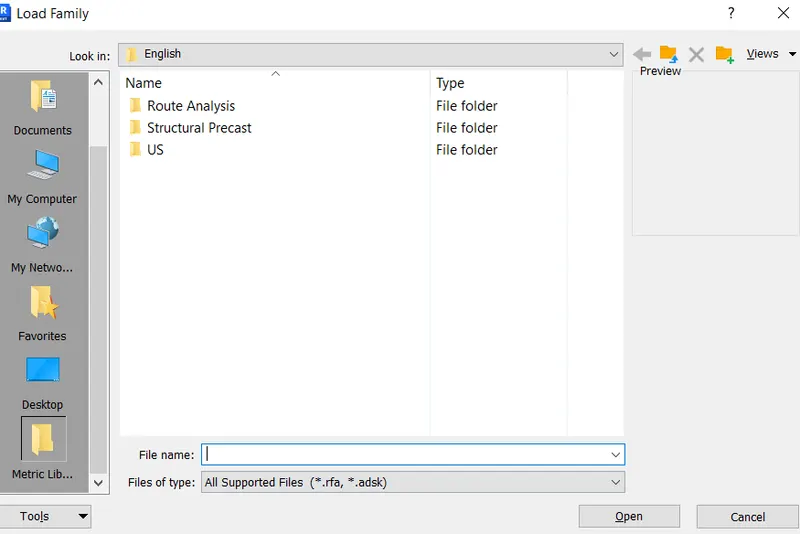
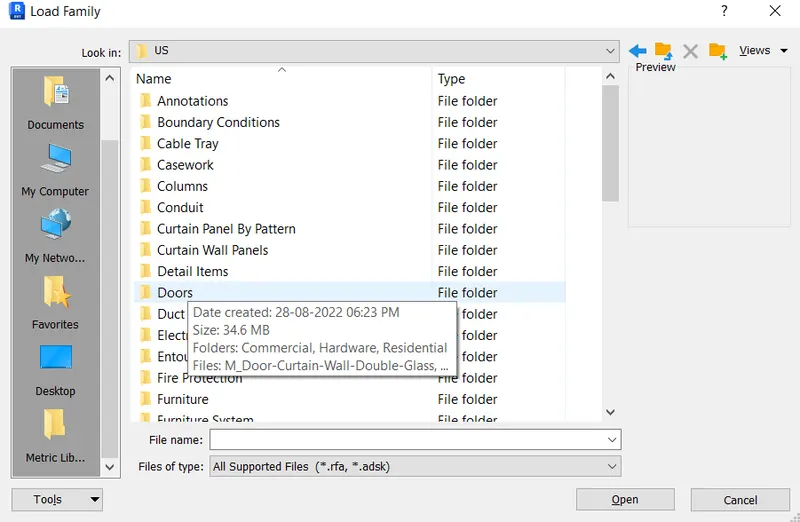
- then select the family as per the requirement
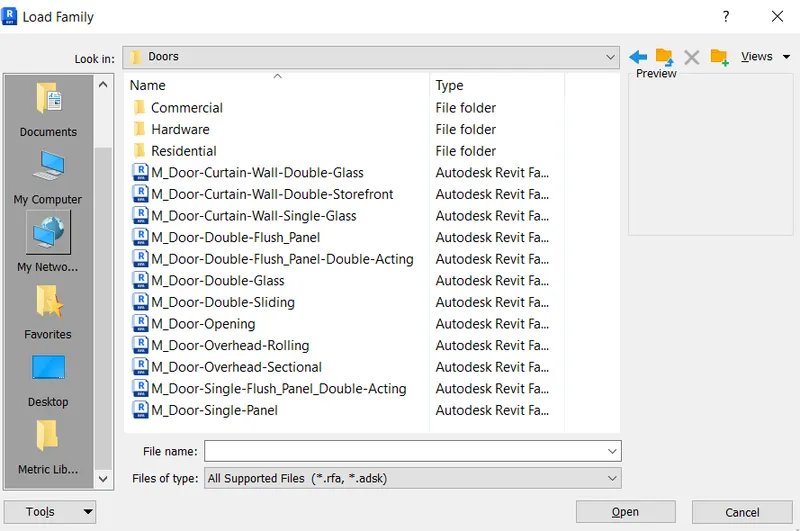
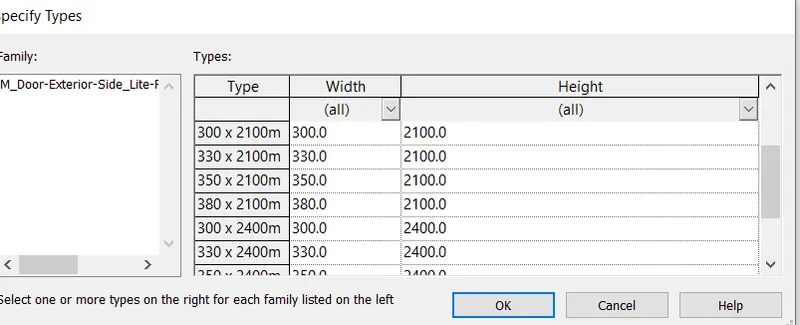
- select type and size of the door
- insert the door to the room that we have created before
--------------------------------------------------------------------------------------------------------------------------------------------
3.AIM
To Set up a Project
INTRODUCTION
- Autodesk Revit is a building information modelling software tool for architects , landscape architects , structural engineers , mechancial, electrical and plumbing (MEP) engineers, designers and contractors .
- The software allows users to design a building and structure and its component in 3D , annotate the model with 2D drafting elements , and access the building information from the building model's database.
- The revit sotware offers the following
- Revit customization and support
- Revit plugin development
- Revit mobile app development
- Custom Revit add-ins for MEP
- Some of the major advantages of revit are as follows
- parametric modelling
- collaboration
- coordination
- scheduling
- energy analysis
- rendering presentation
- construction documentation
PROCEDURE
STEP 1
- Open rivet
- Once the rivet is opened , the home page is as given below
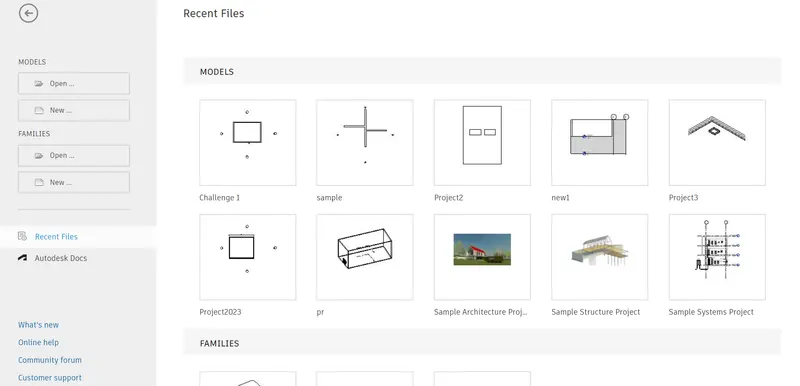
STEP 2
CREATING ARCHITECTURAL TEMPLATE
- From the home page click on 'NEW'
- A dialogbox will appear from that select architecture template
- Create new project
- Click ok
- The archirectural template will be opened
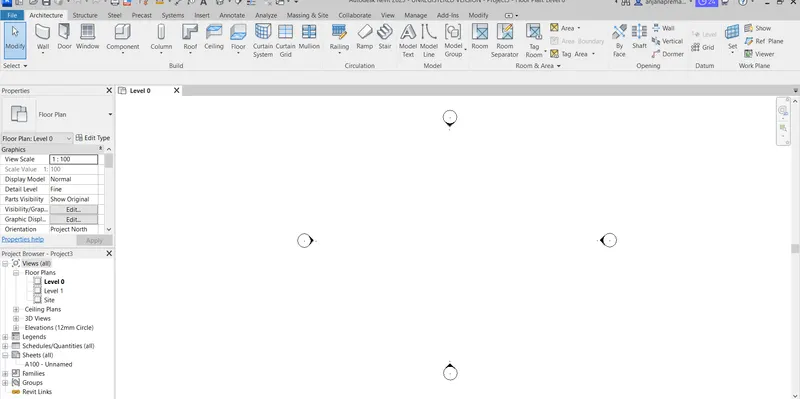
- Now we need to save the file
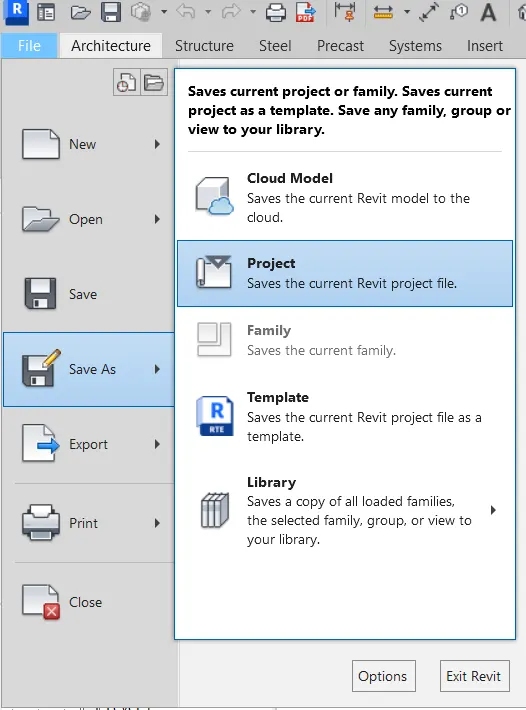
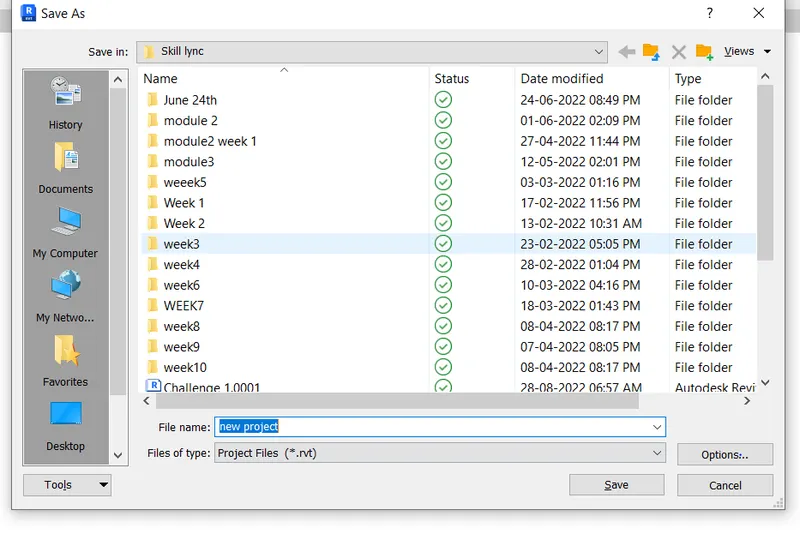
- Go to the options in the above shown window and set the maximum backups to 3
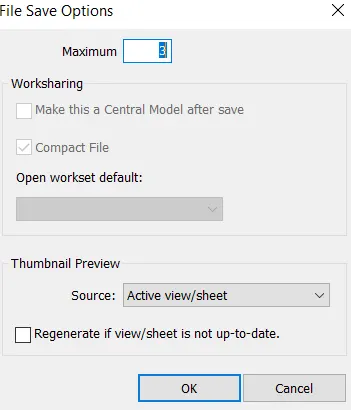
- Then click ok then save
STEP 3
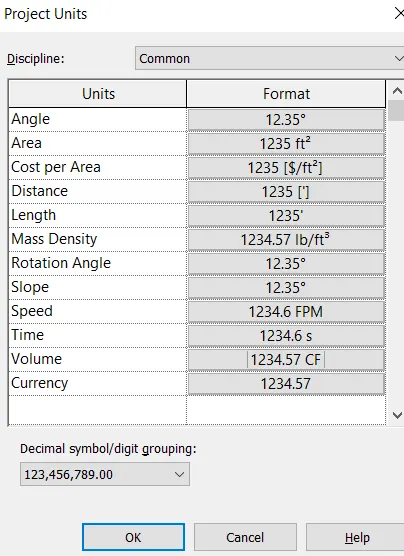
TO SET UNITS
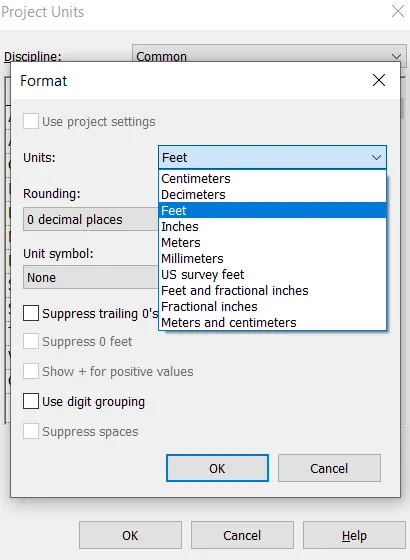
- Now we have to change the units
- for that we have to type UN and change the units to feet
STEP 3
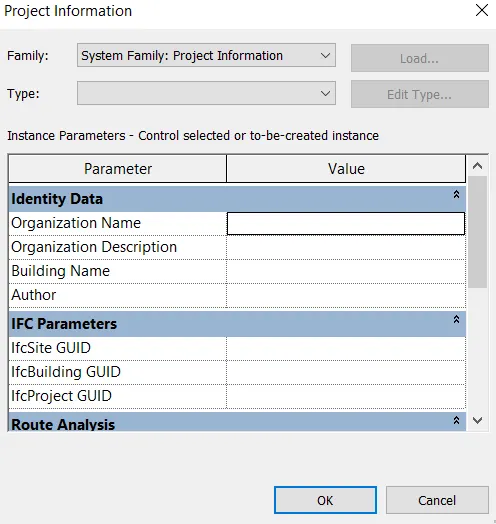
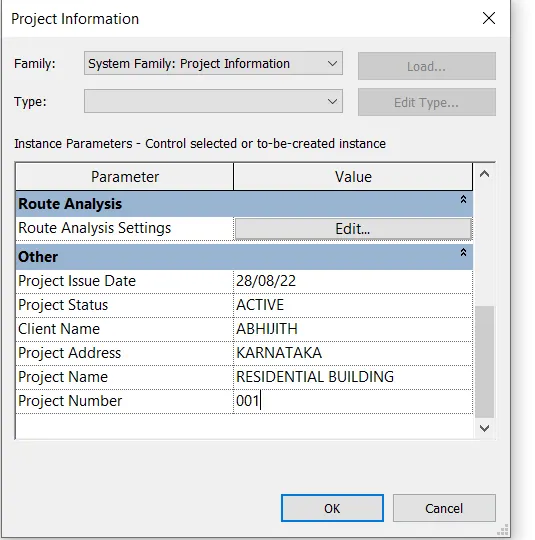
TO SET PROJECT INFORMATION
- Go to the manage tab
- Click on the project information
- Dialog box will appear
- edit as per the requirement
RESULT
Setting up of a project is done using revit in detailed manner
---------------------------------------------------------------------------------------------------------------------------------------------
4.AIM
To understand the concept of Levels and Grids and to create levels and grids
INTRODUCTION
- Grids and levels are really the skeleton of building projects
- Typically levels in revit are used to indicate the locations of floors , foundations and the roof of a building in section and elevation views
- Grids are used to host columns and walls
- Grids can be straightlines , arcs or multi segmented.You can hide grid lines after you add them
PROCEDURE
- Open new revit file
- then select new from home page
- a dialog box will appear and from that select the template and click ok
CREATING LEVELS
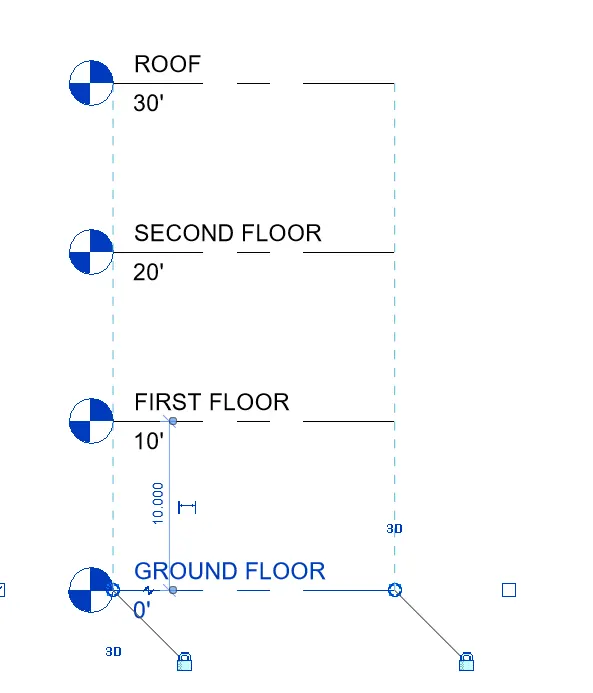
- for creating levels , select elevation east from the project browser
- Two levels will be displayed on the screen
- keep the bottom level and delete the other one
- rename the bottom level as ground level and height 0'
- using pickline and offset as 10' offset 3times
- and rename it as ground floor, first floor, second floor and roof
CREATING GRIDS
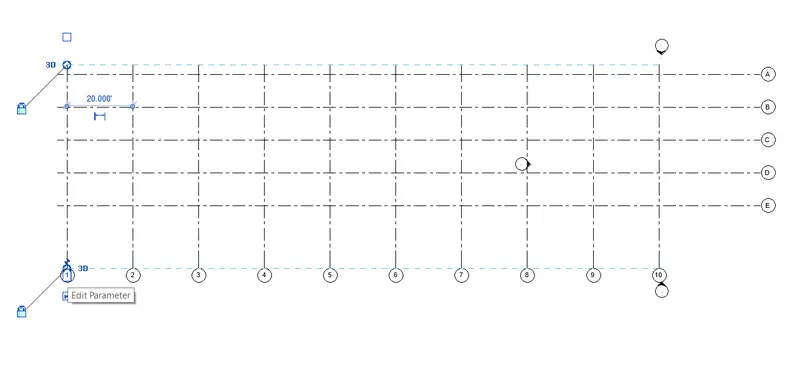
- Go to the architectural tab and from that select the grid option
- draw a grid in horizontal manner
- use pick line and offset it by 10' 4times and rename it as A,B,C,D,E
- Using line draw vertical grid line in such a way that it intersect the horizontal grid line
- use pick line and offset it to 9 times and names it as 1 to 10
RESULT
Levels and grids are created
---------------------------------------------------------------------------------------------------------------------------------------------
5.AIM
To create 3D model of a residential unit in the revit software
INTRODUCTION
- 3D models represent a physical body using a collection of points in 3D space, connected by various geometric entities such as triangles, lines , curved lines etc
- Being a collection of data ,3D models can be created manually or by scanning
- Their surface may be further defined with texture mapping
PROCEDURE
STEP1
- Open the revit software
-
- Once the rivet is opened , the home page is as given below
STEP 2
CREATING ARCHITECTURAL TEMPLATE
- From the home page click on 'NEW'
- A dialogbox will appear from that select architecture template
- Create new project
- Click ok
- The archirectural template will be opened
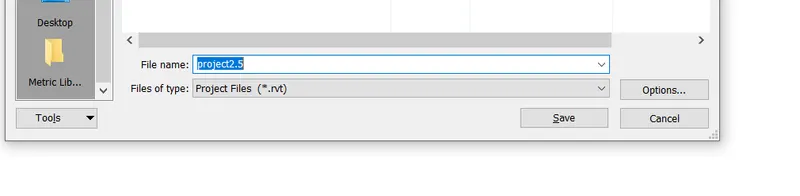
- Now we need to save the file
STEP 3
TO SET PROJECT INFORMATION
- Go to the manage tab
- Click on the project information
- Dialog box will appear
- edit as per the requirement
STEP 4
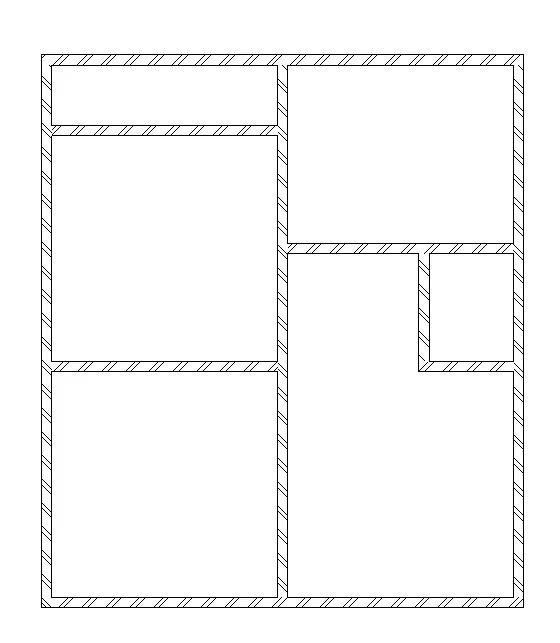
LAYOUT OF THE PLAN
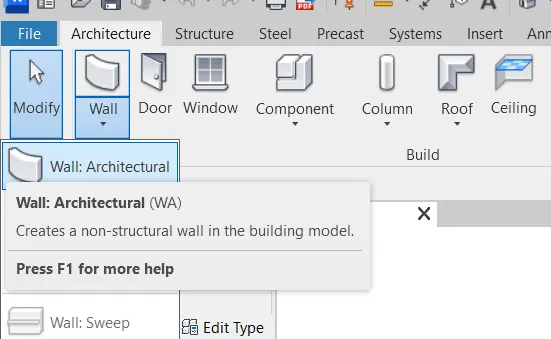
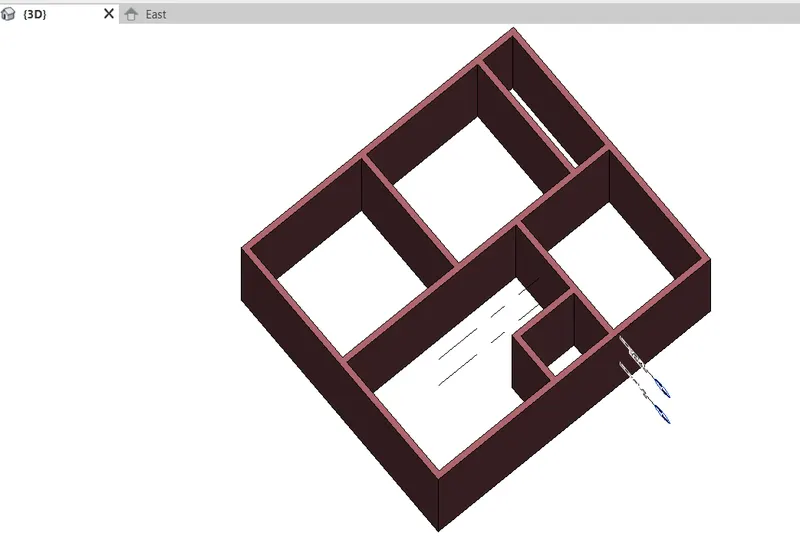
- Go to the architectural tab of the ribbon and choose the wall to create the layout of the plan
RESULT
3D model of residential layout is created
--------------------------------------------------------------------------------------------------------------------------------------------
6.AIM
To draft the level of details which include Dimensions of room, components you plan to add in the residential unit.
INTRODUCTION
- Dimensions are by definition a measurement of an object in physical phase.
- In revit , they are annotation elements that can measure the size of components and elements such as height, width and depth
- Dimensions also convey an objects angle , radius, diameter and arc length
PROCEDURE
- From the previous drawn residential unit
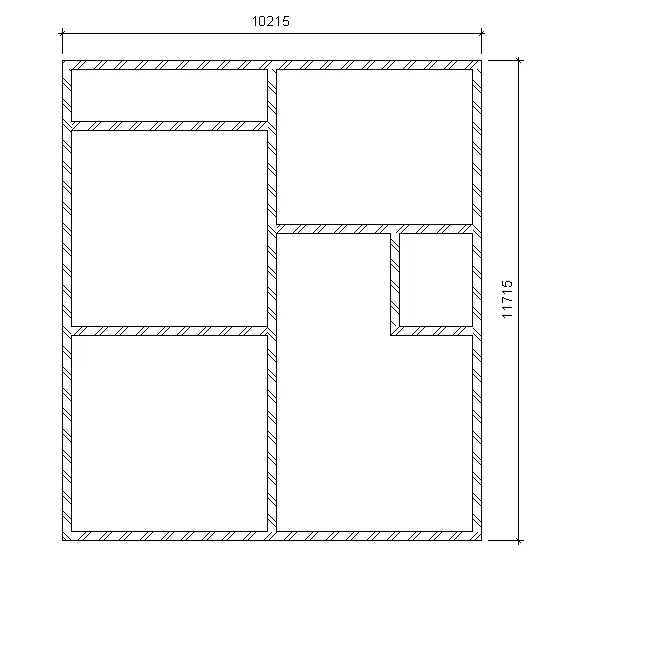
- We need to put the dimensions
- Dimensions are marked using the annotate tab linear dimension
- Again go to the architectural tab select door then load family
- select the appropriate size
- place the door in appropriate location
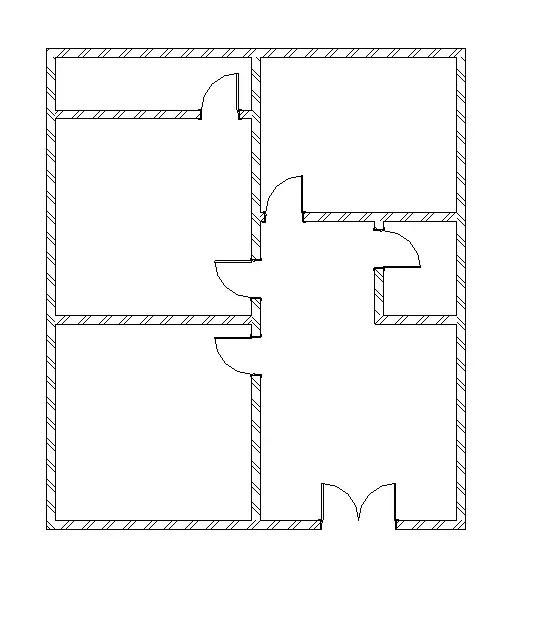
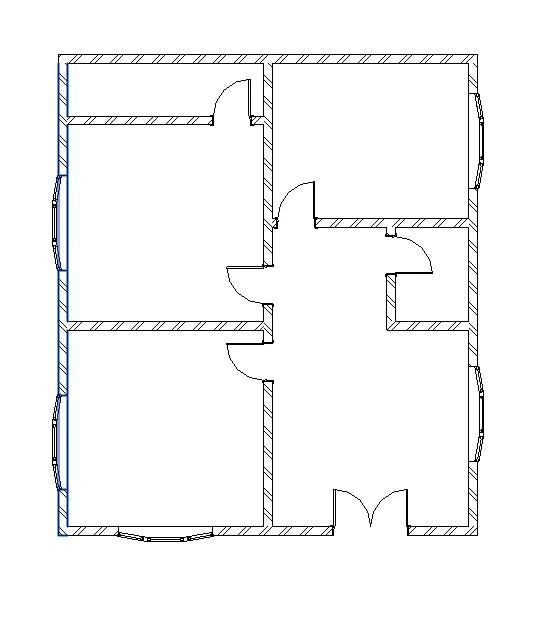
- Go to the architectural tab
- select window then load family
- select the window and size of the window and place it in the plan
- Then go to the annotate tab select text
- markings are done using this
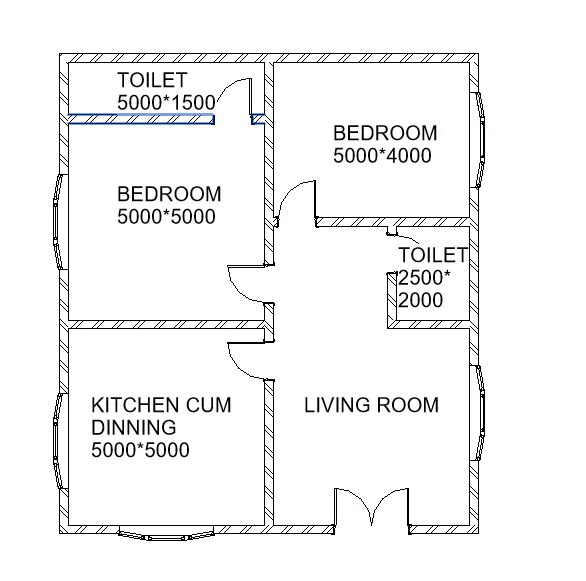
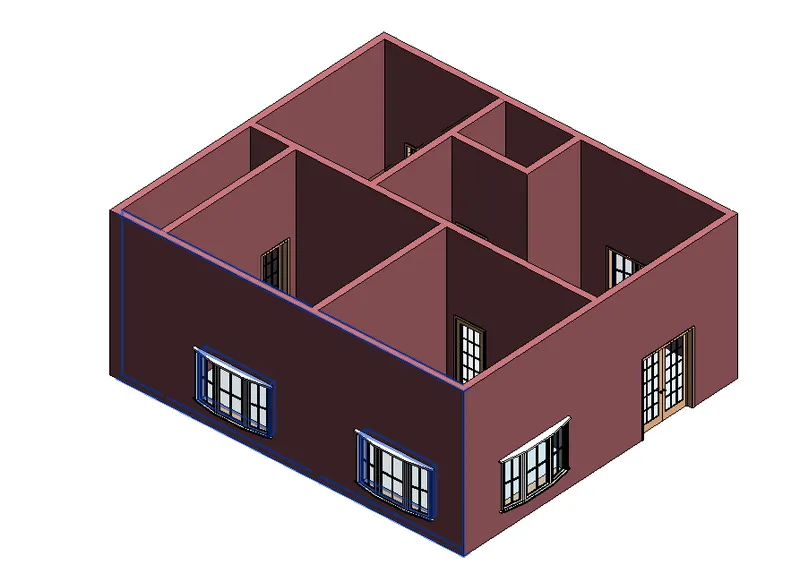
RESULT
-------------------------------------------------------------------------------------------------------------------------------------
7.AIM
To Identify the residential model elements such as Door, Windows, Tables, Chair, Couch, Bed, Lamps from the library and insert them to the model
INTRODUCTION
- 3D models represent a physical body using a collection of points in 3D space, connected by various geometric entities such as triangles, lines , curved lines etc
- Being a collection of data ,3D models can be created manually or by scanning
- Their surface may be further defined with texture mapping
PROCEDURE
- we have to place furnitures in the previously created layout
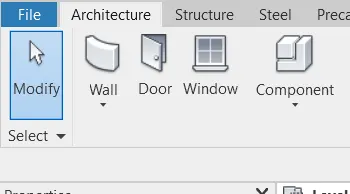
- for that we need to go to the architectural tab then components then place components
- load family -us
- then choose the components that we want to place in the plan
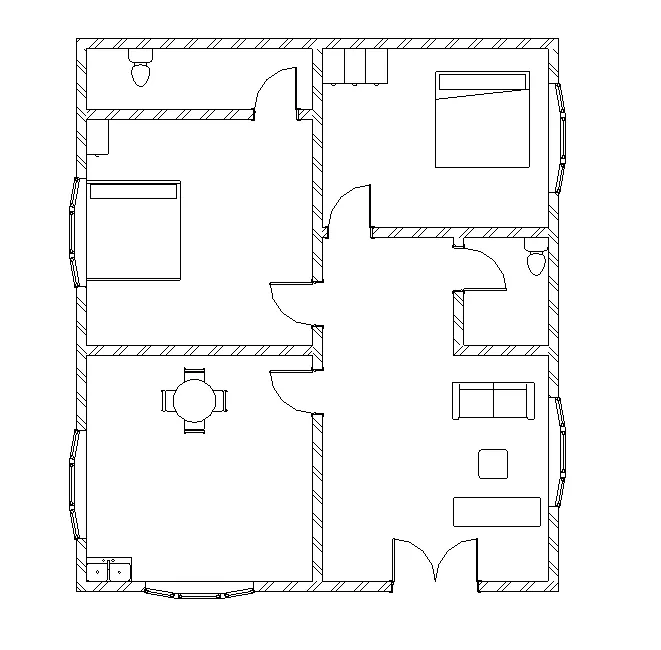
- bed ,shelves , dinning table , sofa etc are placed
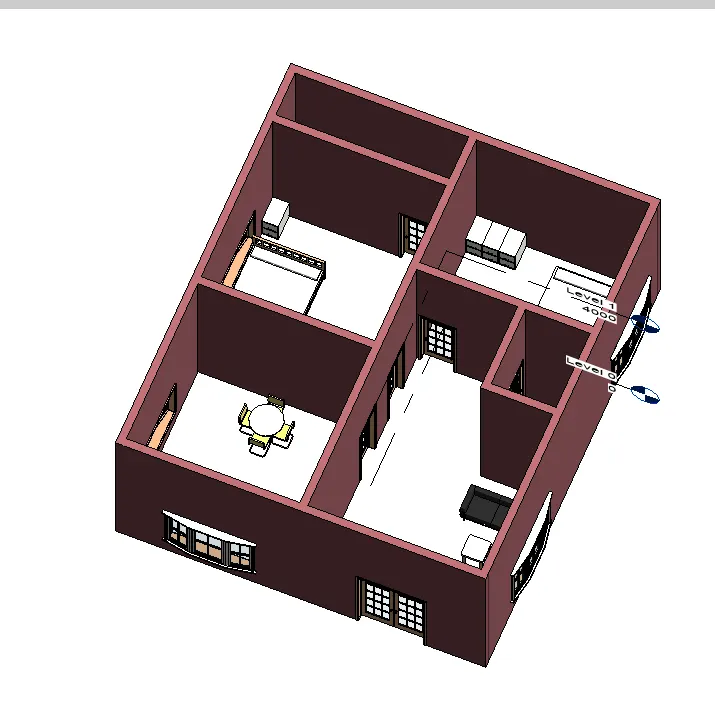
- 3D view
RESULT
residential model elements such as Door, Windows, Tables, Chair, Couch, Bed, Lamps from the library and inserted to the model
---------------------------------------------------------------------------------------------------------------------------------------