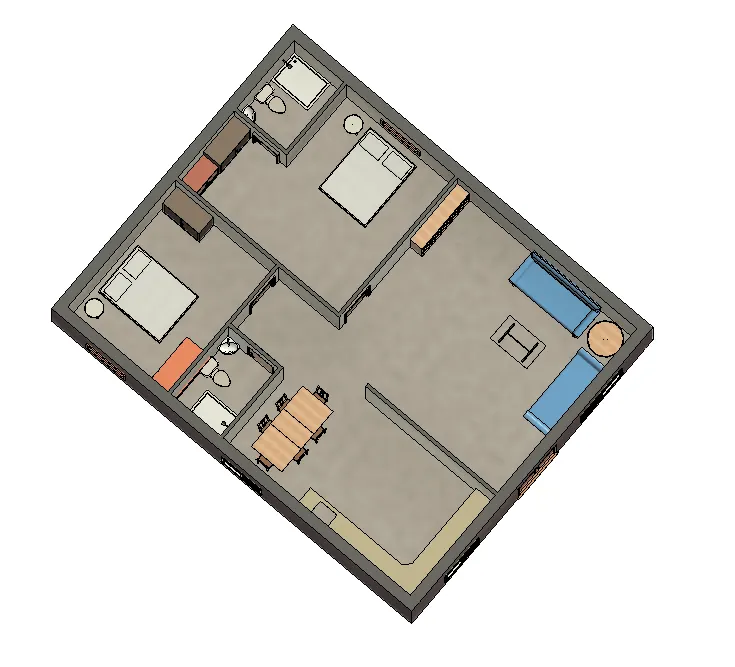
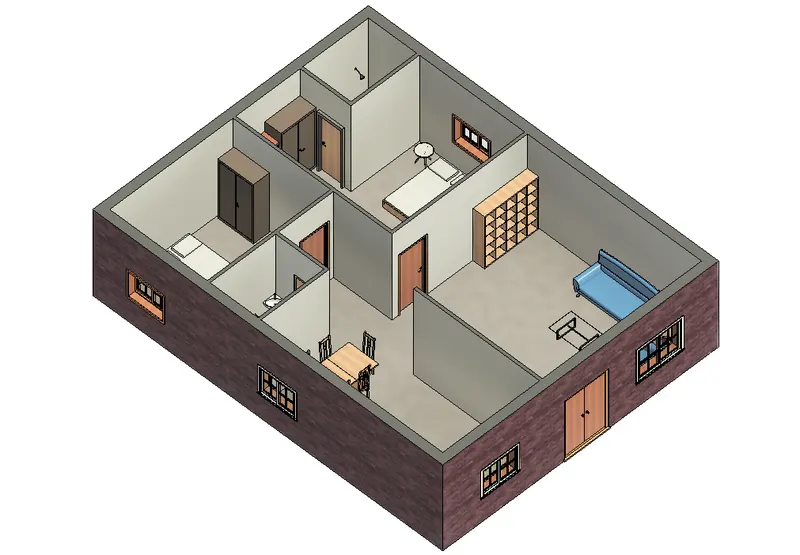
Creating Levels, Grids, Layout and model elements for a residential unit using REVIT
AIM: Creating Levels, Grids, Layout and model elements for a residential unit using REVIT
1) What is BIM? Summarize the features of BIM and benefits of using BIM over 2D CAD tools.
Ans:
- BIM (Building information modelling) is one of the more promising developments in the architecture, engineering, and construction fields. It is changing the way contractors and engineers do business, but its application is still relatively new and there is much to learn. One way to learn is from observing how other businesses are using BIM and their trials and tribulations along the way. BIM was introduced over a decade ago mainly to distinguish the information-rich architectural 3D modeling from the traditional 2D drawing. It is being acclaimed by its advocates as a lifesaver for complicated projects because of its ability to correct errors early in the design stage and accurately schedule construction.
Features of BIM
- Real-time reporting
- Customizable templates
- Multiple board views
- Project scheduling
- Real-time collaboration
- Resource management
- Automations
- Mobile support
Benefits of using BIM over 2D CAD tools.
- Three-dimensional Building Information Modeling (BIM) provides many advantages over 2D CAD due to the vast capabilities of parametric modeling.
- All components modeled in 3D BIM software contain real world information about that component.
- For instance, if you were to place a wall within a BIM model, that wall would automatically include information about it such as its length, width, volume, weight, etc. with little to no additional input from the user. Because of this, once the 3D model is complete the information can quickly and easily be translated into schedules, drawings, and much more.
2) Understand the concept of Categories, Families, Elements, Instances in Revit. Go to Insert Tab, choose a category. Pick a family and element. Understand the instances and insert it to Revit model
Ans:
Catogories:-
- The Revit Categories can be broadly classified into 2 as Annotation Categories and Model Categories.The model categories comprise of all elements confined to building model like doors, windows, floors, walls etc. whereas the annotation categories consist of elements like texts, tags and dimensions.
- Catogaries are present in content library and in the project browser
Families:-
- A family is a group of elements with a common set of properties, called parameters and a related graphical representation.
- All the elements we use in revit software are grouped under families
Elements:-
- They are the building blocks of a revit model
- They represent the real world components that we add to a 3D model
- This elements consist of walls, windows, doors and all the things we use in a model
Instances:-
- Instances are individual Geometric elements that are placed in model
- Instances inherit a series of parameters in their category
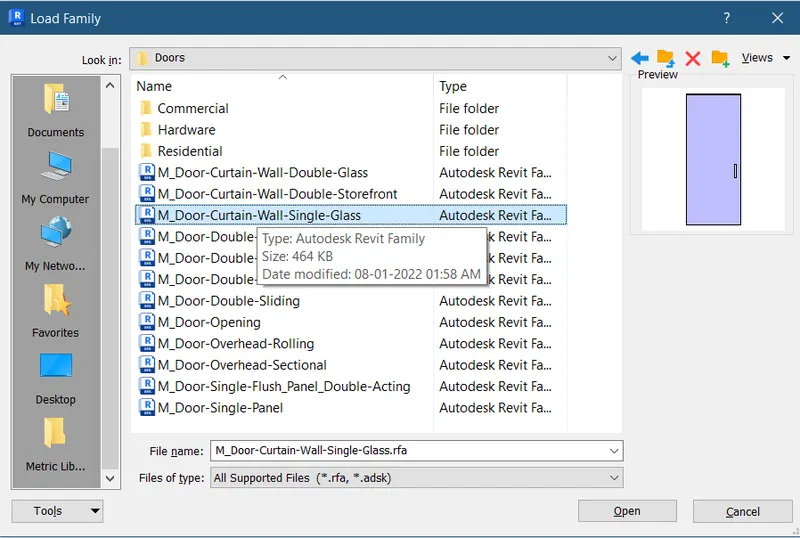
Now fig that shows categories, families their elements

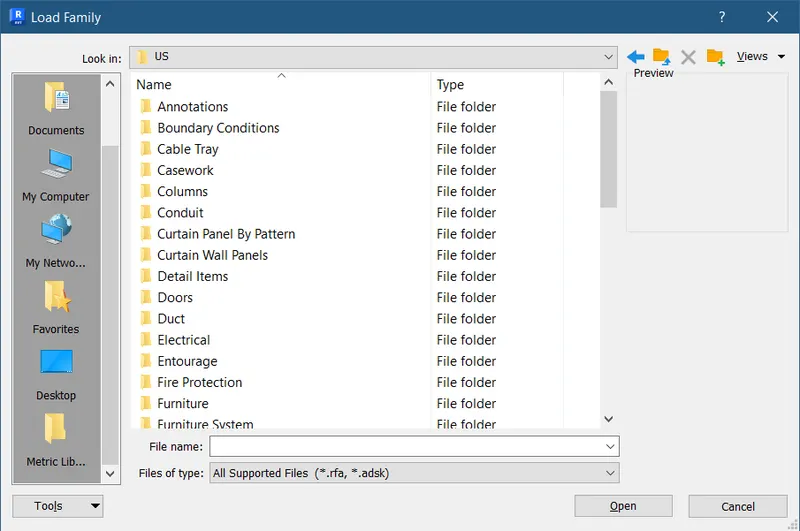
Doors family:-
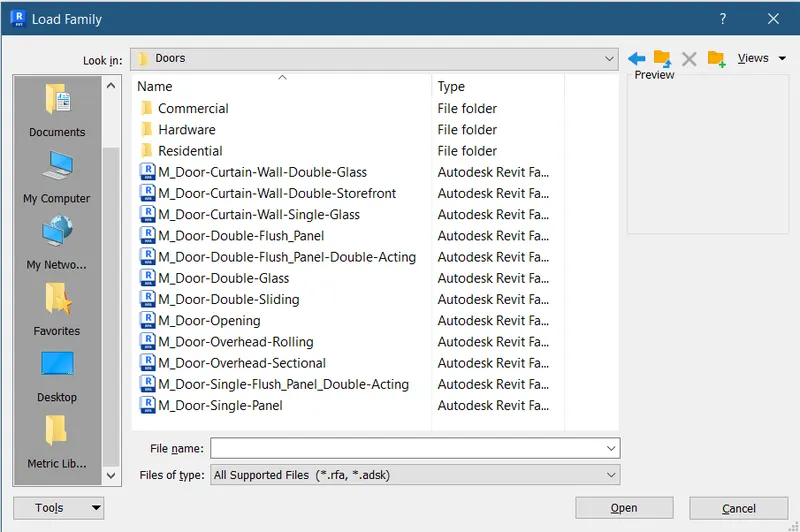
Element of a door family
3) Setting up a Project – Open a project file with architectural template. Save the file with appropriate name. Set up the project units to Imperial / Metric based on your convenience of modelling. Complete the project information under Manage tab. Set up the maximum backups for project file to 3
Ans: Setting a project in a revit software
Procedure:
Steps:
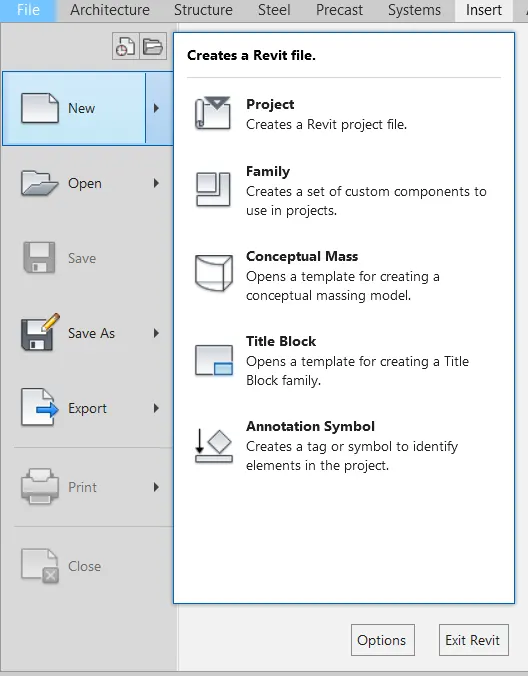
- Open revit software
- Goto file tsb > select the new option > select the project
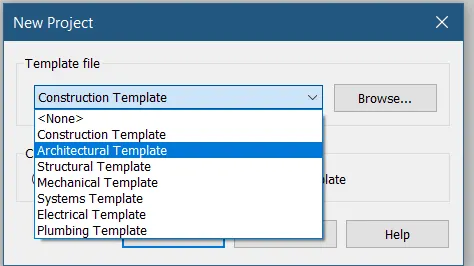
- now select the architectural template in the new project menu
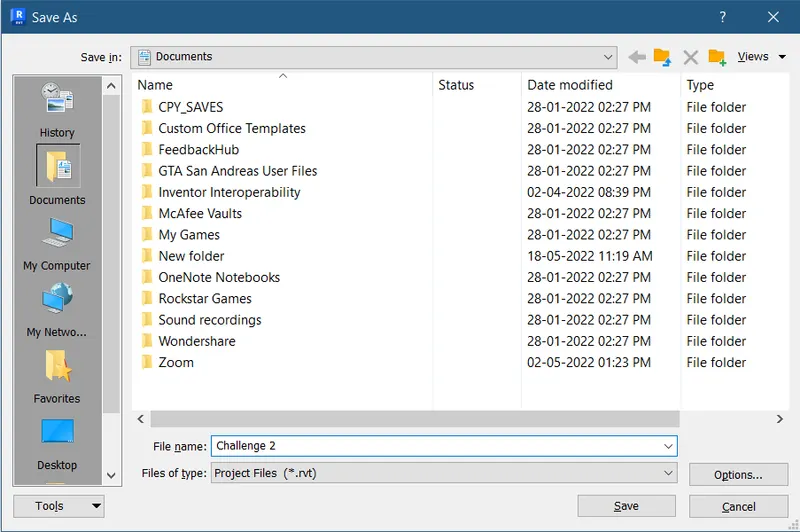
- Now we save the file
- To save the file goto file tab> select the save option
- Now enter the file name in the save as menu openend
- Also select the no. of backups u want for the file
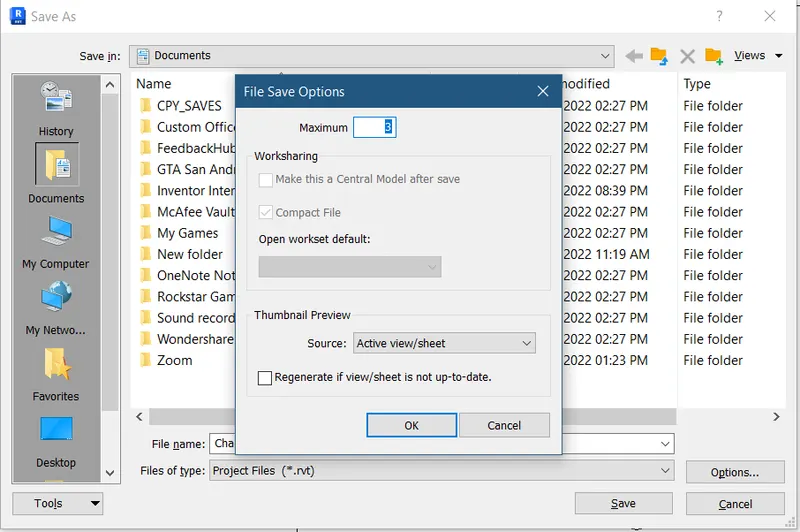
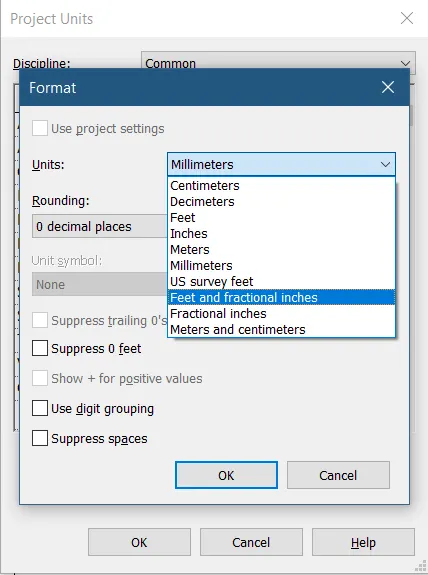
- Now we set units from the units from the projects unit in the manage tool bar
- set the units to Feet and fractional inches
- Now we give the project information from tthe manage toll bar
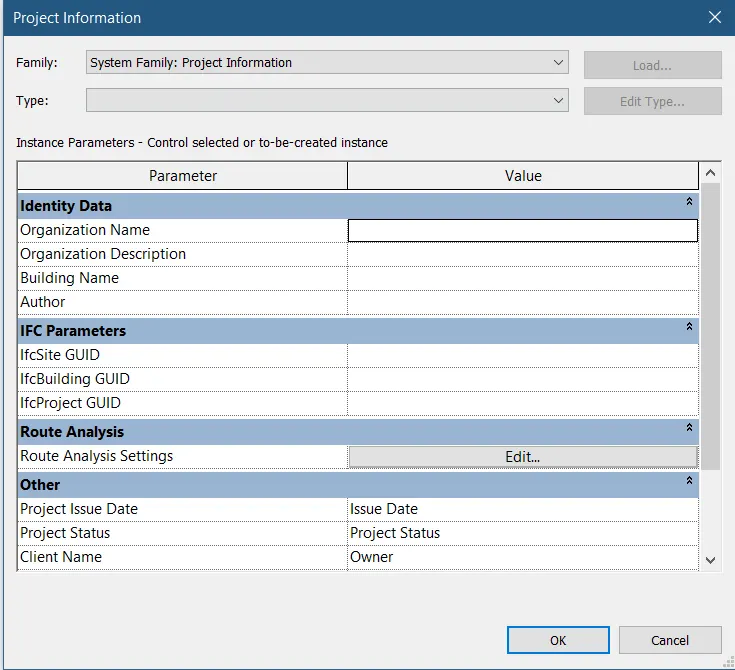
Result:-
Setting up the project and provide the project information i a revit model
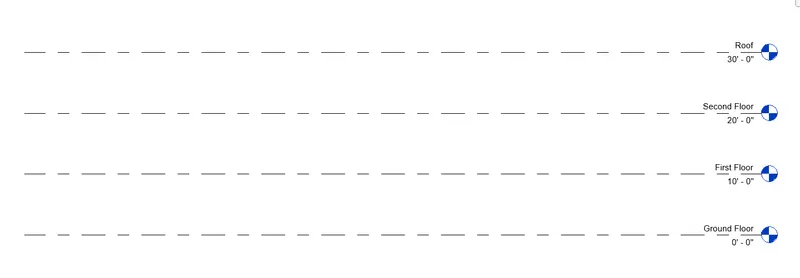
4) Understand the concept of Levels and Grids. Follow the naming and conventions. Create the following Levels: ( Convert to metric equivalents if metric is your units)
Ground Floor @ 0’
First Floor @ 10’
Second Floor @ 20’
Roof @ 30’
Procedure:
Steps:
- open revit software
- Now goto elevaations option in views in project browser
- For seeing the levels select the east view
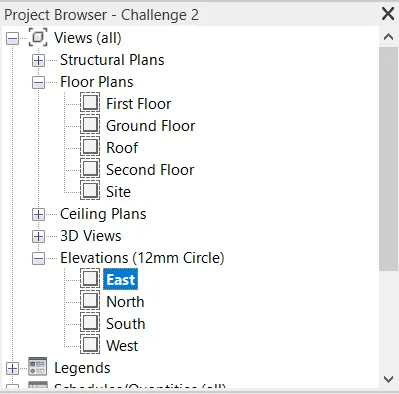
- There is default 2 levels level 1 and level 2
- Select the level in the datum option in architectural bar
- Create 2 more levels at 10' distance each
- Rename the levels to first, second & Roof
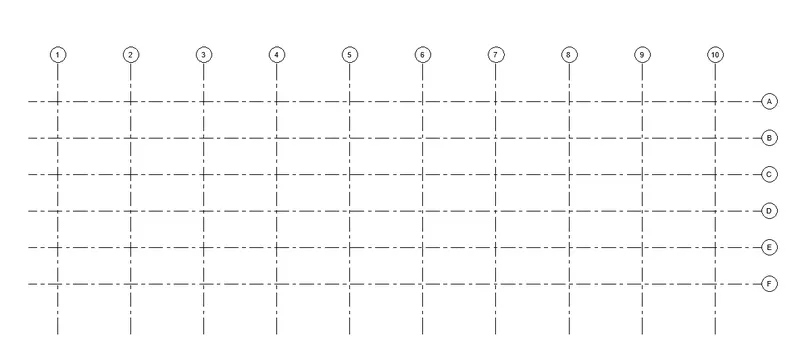
- Now for creating grids first goto to floor plan view
- Select the grid option in architectural menu
- Draw horizontal grid lines at a spacing of 10' and name the lines as A,B,C,D,E
- Draw the vertical grid lines at a spacing of 20' and name the from 1 to 10
Result:
Floor levels and grids are drawn successfully
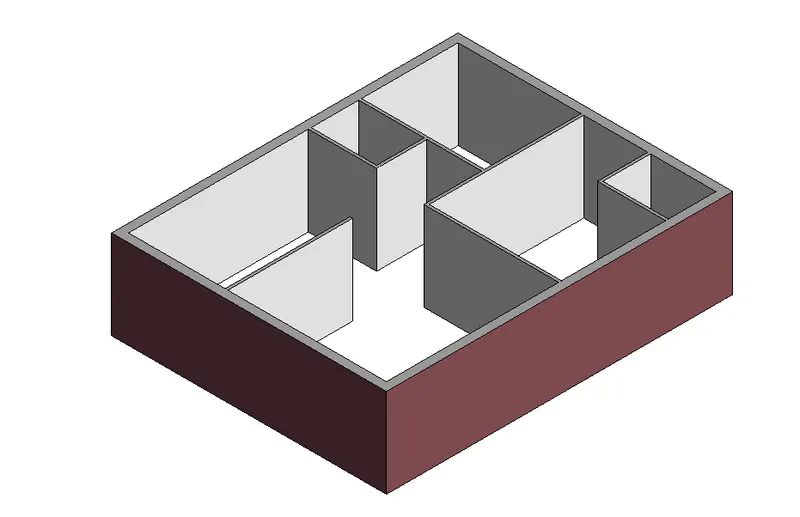
5) 3D modelling of residential unit – From looking at your house / or a place you aspire. Create a conceptual layout of the residential unit.
Procedure:
Steps:
- First we draw the residential layout with proper dimensions and tools
- Choose appropriate walls for the layout
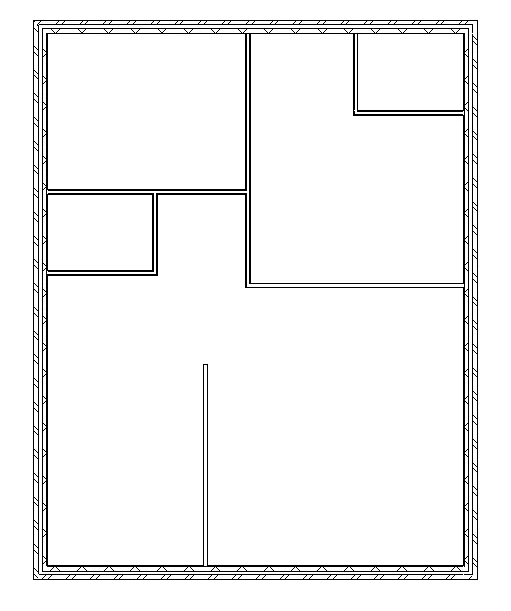
- Now we change the visiblity of layout to shaded
- Now we add the dimensions to the plan
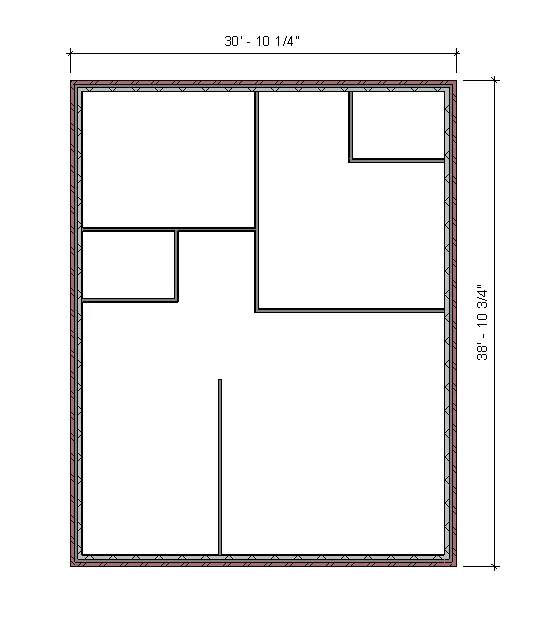
- Now we goto view tab and click the 3D view to see the 3D view of the residential building
Result:
Conceptual layout of the residential unit is created view proper
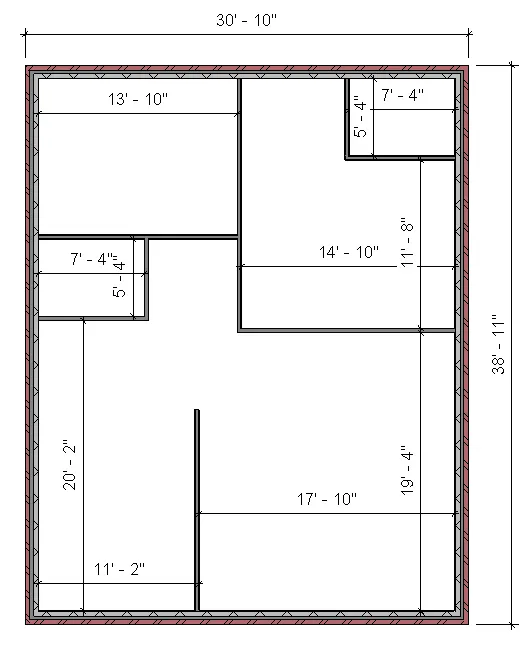
6) In the layout created draft the level of details you are planning to include – Dimensions of room, components you plan to add in the residential unit.
Procedure:
Steps:
- As the residential layout is created in the above section
- Now we provide the dimensions for the rooms
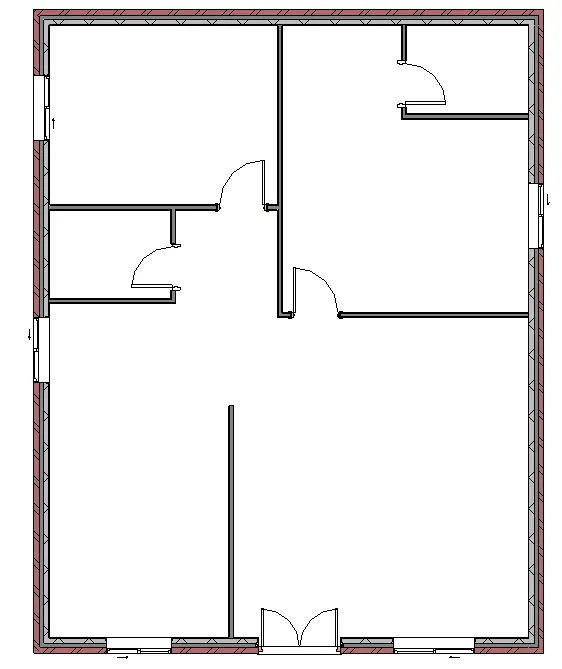
- Now we add doors and windows from the architectural tool bar
- Now we provide the room text and the dimensions of the room below it using the text command
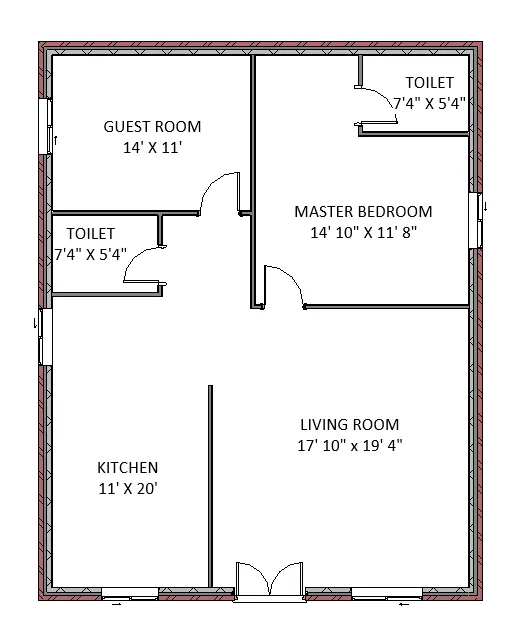
- Now we use the floor option present in the architectural tool bar to provide floor to the residential building
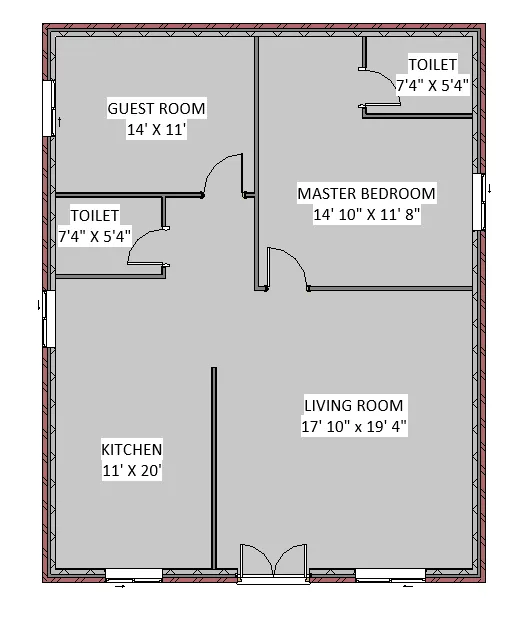
Result:
Dimensions of the room are provided and also the components like doors and floors are provided
7) Identify the residential model elements such as Door, Windows, Tables, Chair, Couch, Bed, Lamps from the library and insert them to the model.
Procedure:
Steps:
- As we have provided doors in above section
- Now we turn off the floor and text in visiblity option
- Now we start providing elements
- We use component option in architectural menu to provide elemnents
- Also we load elements from load family option
Result: