Creating Levels, Grids, Layout and model elements for a residential unit using REVIT
1. BIM, Features and Benefits
- BIM stands Building Information Modelling, It is an 3D modelling facility to provide all information through out the lifecycle of the structure from planing to all construction phases
- BIM is the visual representation of physical and functional charaterisitcis of the facility from inception onwards. As such, it serves as a shared information repository for collaboration throughout the facility lifecycle
Features of BIM
- Easy access to information
- Making the process more expressive
- Comprehensive view of the project
Benefits of BIM
- Complete representation
- Instant updates
- Time constraint
- Resource tracking
2. The Concept of Category, Family, Type and Instances
Category - it is heriarchy it consists of family
Family - It is the 2d and 3d information of common features example doors, windows etc
Type - It is sub division in family which specifices its usage such as residential, commercial
Instances - It is basic unit in revit have unique features by which we can select the dimension which we need
Inserting a element
- Open Revit software, In home page select the project
- Select place component in tab
- Then select pick desk family
- Then choose student desk type
- Then choose the element and its dimension
3.Setting Project, Project Information, Steeing Backups
Aim
To create project, give project information and Setting Backups
Steps
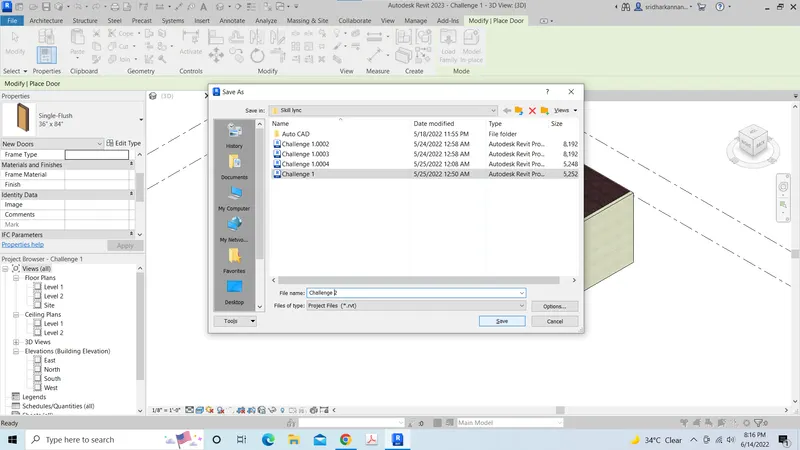
- tap the file tab on upper left corner, then select save as
- then give project name as challenge 2
- While saving give backups 3
4. Concepts of Levels and grids
Aim
To Give Levels as given in the challenge
Steps
- Open New project
- Select Elevation in properties browser then levels will be accessible
- Then tap levels
- Two levels level 1 and level 2 will come as default
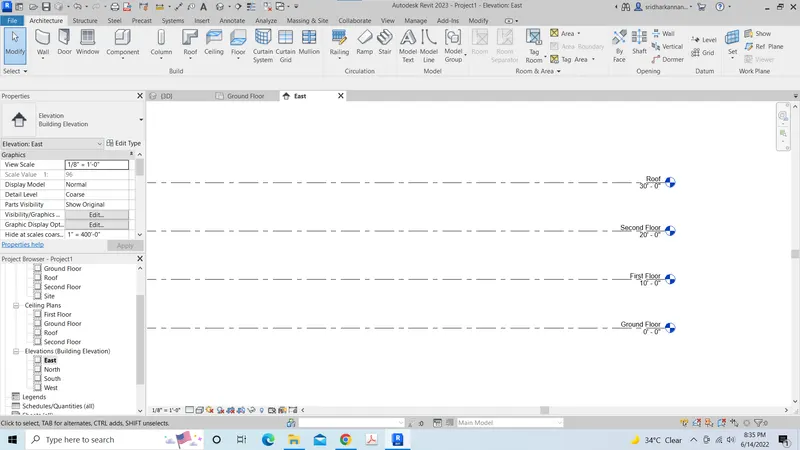
- Then rename as ground floor and first floor
- Then again tap level , then pick line option will be available
- Then give offset 10'0'', then give 2 more levels
- Then rename it as second floor and roof
Result
Aim
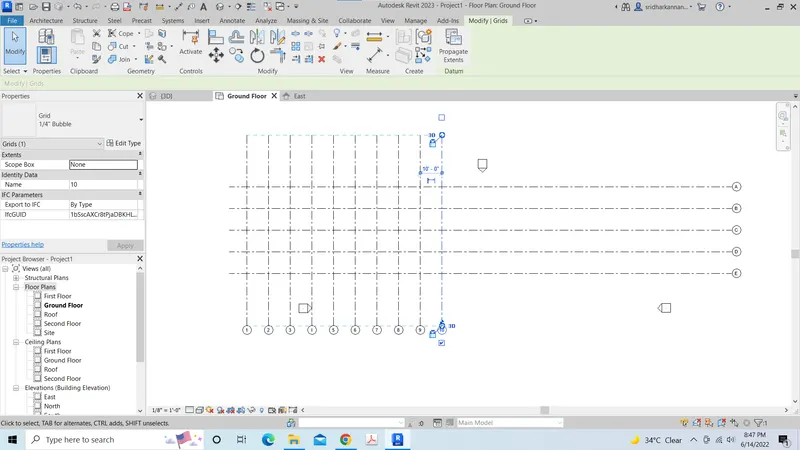
To Give grids as given in the challenge
Steps
- Open New project
- Tap Architerure tab, then select grid
- Draw Horizontal line
- Then select pick a line, give offset 10'0''
- Then offset the grid lines then give name A to E
- Repeat the steps for vertical lines
- Then gice names from 1 to 10
Result
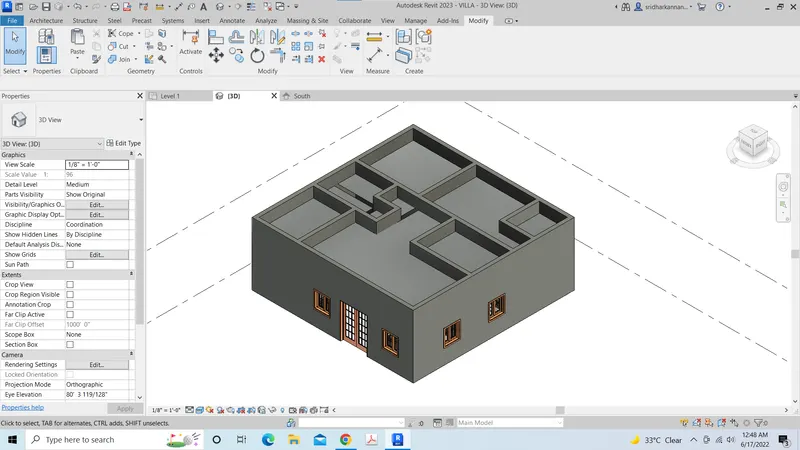
5.3D modelling of residential unit
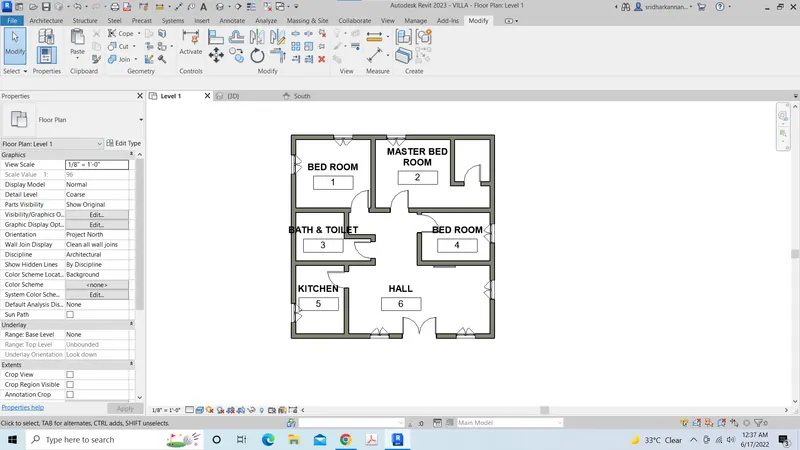
Aim
To create the residential unit using revit
Steps
- Open new project in revit software
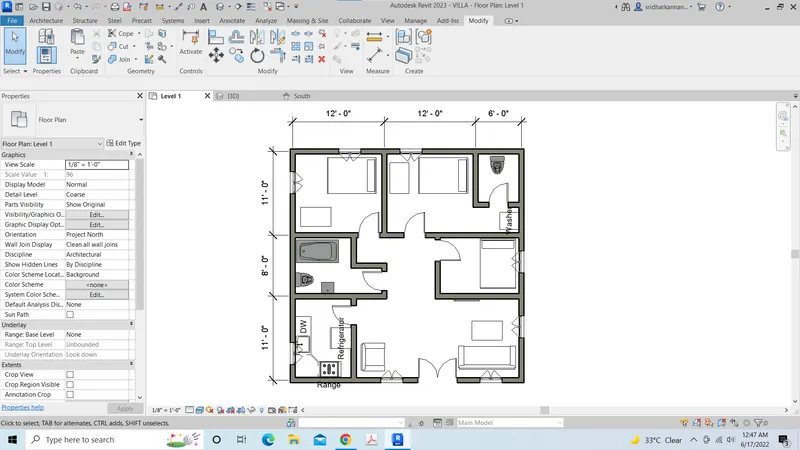
- Create one residential layout of 3BHK flat
- Draw the wall outline of flat 30' *30'
- Create partitions master bedroom, 2 bedrooms, kitchen, hall and toilets of size 18'*11', 12'*11', 11'*8', 11'*6', 19'*11', 6'*4' respectively
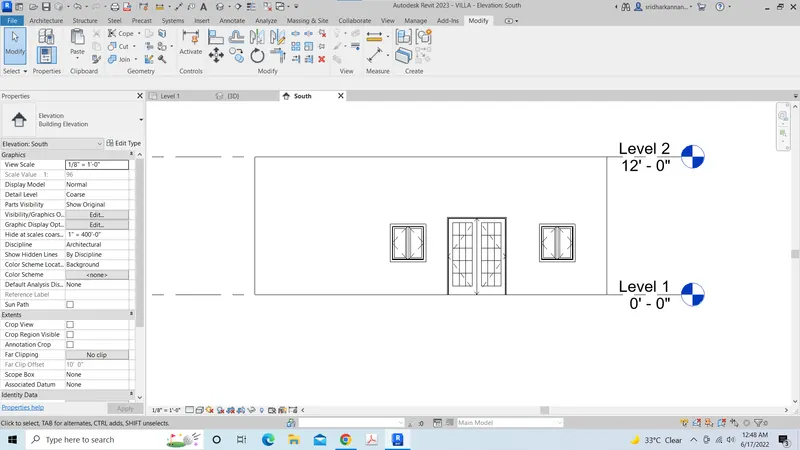
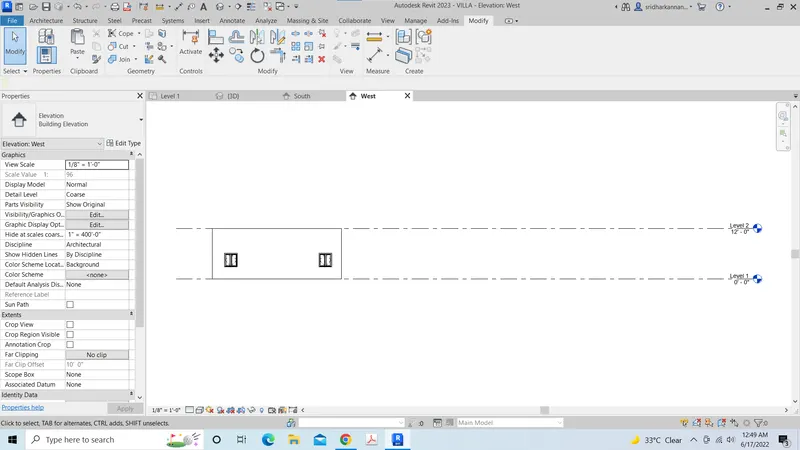
- Load doors and windows from library, main door double glass door, room door single glass door, toilet door single flush door, window double casework window
- Give room tag
Result
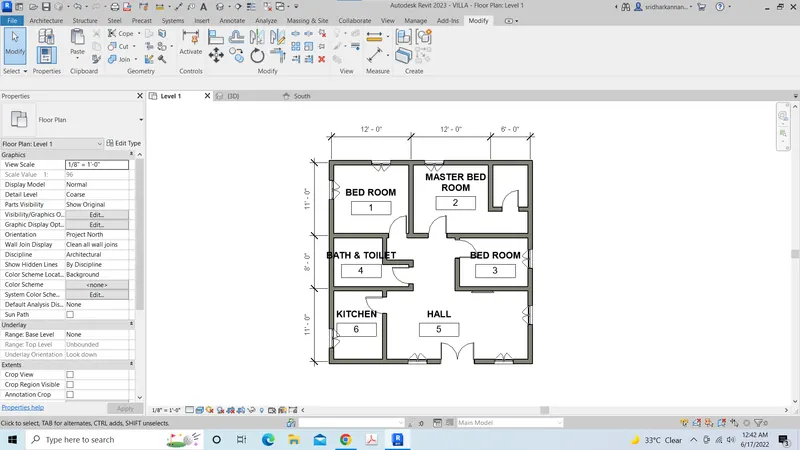
6. Give dimension for the residential unit
Steps
- Go to annotate tab,
- Choose aligned
- Give dimensions to the rooms
Result
7. Load Components to the model
Steps
- Go to components tab
- Select place components
- Then go to load library
- Then select english imperial
- Then go to residential,then select doors, windows, (waterclosets, bathtub and sink select from plumbing mep fixures) and kitchens equipments from special equipments and then place the components
Result