Creating Levels, Grids, Layout and model elements for a residential unit using REVIT
1.)Building Information Modeling (BIM) is the foundation of digital transformation in the architecture, engineering, and construction (AEC) industry.
As the leader in BIM, Autodesk is the industry's partner to realize better ways of working and better outcomes for business and the built world.
- Improve Onsite Collaboration and Communication.
- Model-Based Cost Estimation.
- Visualize Projects in Preconstruction.
- Better Coordination and Clash Detection.
- Mitigate Risk and Reduce Cost.
- Improved Scheduling/Sequencing.
- Increase Productivity with Prefabrication
Advantages of BIM over 2D cad tools.
BIM integrates multi-disciplinary data to create detailed digital representations that are managed in an open cloud platform for real-time collaboration.
Using BIM gives you greater visibility, better decision-making, more sustainable options, and cost-savings on AEC projects.
BIM allows you to bring all your designs, including CAD models, into a single database.
Using the cloud, BIM provides access to this database to all project members. You'll all work on the same models, which allows for quick changes as needed.
When used correctly, BIM helps the entire team visualise the project.
2.)Understand the concept of Categories, Families, Elements, Instances in Revit.
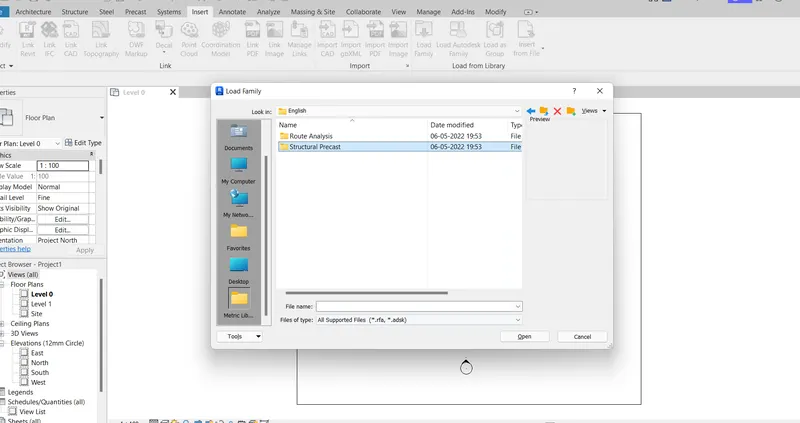
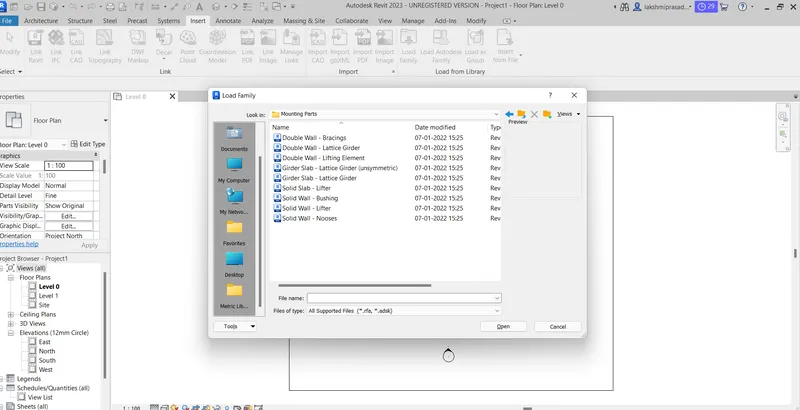
Go to Insert Tab, choose a category.
Pick a family and element.
Understand the instances and insert it to Revit model.
in order to get started with the family editor, it is important to understand some basic concepts and terminology. All elements in the Revit platform are part of a family and they fit into a clearly defined hierarchy.
At the top level of this hierarchy, are Categories. Categories are pre-defined within the software and cannot be added, deleted or renamed. A wide variety of categories are included in Revit and distributed among a few overall master groups including: model and annotation (but there are a few others).
Model Categories include all elements that comprise your building model such as: Walls, Doors, Floors, Stairs and Beams. Annotation categories include items like Text, Dimensions and Tags. Categories are by definition very broad. It would not be enough to simply have a Walls or Doors category.
These items come in all shapes, sizes and behaviors. Therefore, the next level of the hierarchy is the Family. All Revit elements belong to a family. Families are best thought of simply as a collection of like items sharing the same overall look and behavior.
Revit includes many families such as the “Basic Wall” wall family, the “Single-Flush” door family and many annotation families like “Text” or “Linear Dimension Style.” Even the views themselves like floor plans and sections are system families in Revit.
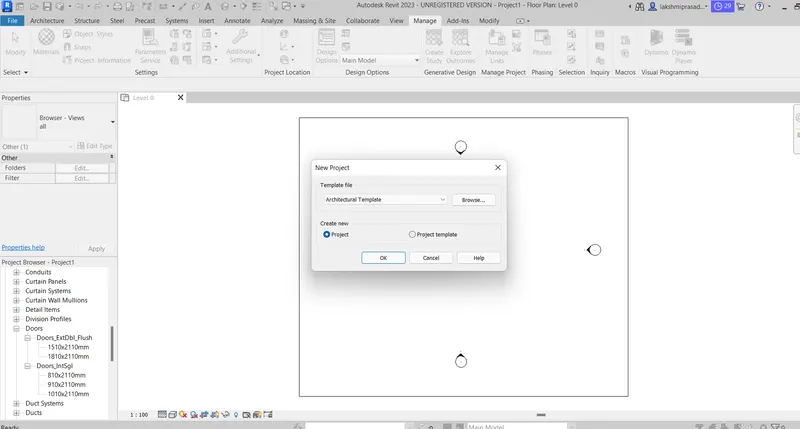
Q.3)etting up a Project – Open a project file with architectural template. Save the file with appropriate name. Set up the project units to Imperial / Metric based on your convenience of modelling. Complete the project information under Manage tab. Set up the maximum backups for project file to 3
Opening the project with architectural template.
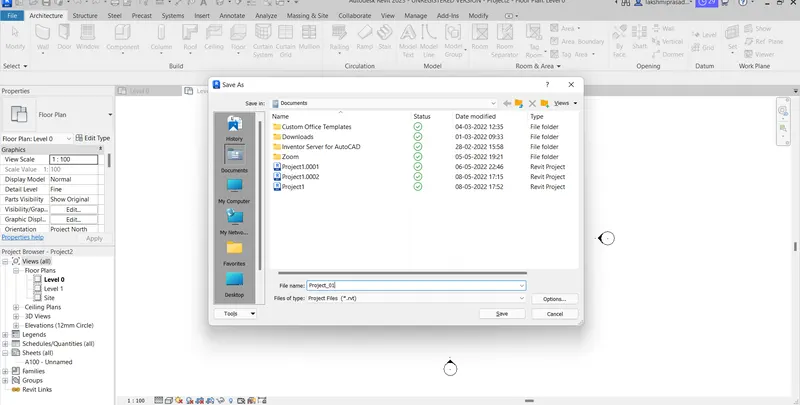
save the project with name as project_01.
project information in the manage tab.
- go to mangae tab
- select the project information.
- complete fill the formation in the details.
creating back up of files.
- go to file menu
- select save as option and select project file.
- a save as dialoguee box will appear in the screen.
- click option in the tab in the left bottom og the dialogue box and set maximun space as 3.
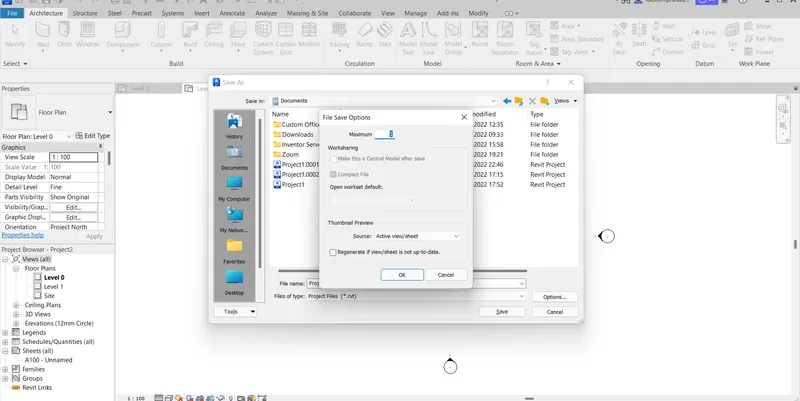
4) Understand the concept of Levels and Grids. Follow the naming and conventions. Create the following Levels: ( Convert to metric equivalents if metric is your units)
Ground Floor @ 0’
First Floor @ 10’
Second Floor @ 20’
Roof @ 30’
Procedure: Creating a different levels in revit 2023.
- Open revit
- Open architectural template and select project.
- Change the units MM to FEETS & INCHES.
- Command UN a dialogue box will be appearing on screen.
- Change the units to feets.
- Now for creation of different levels go to the view tab oon the top bar,select elevation.
- From the project browser section in the left to screen select the option elevation and select east.
- Two basic levels will be displayed on the screen.
- keep the bottom most level and delete the second level.
- Rename the bottom level as ground floor and rename the heght as 0'.
- Now go to The modify tab and select copy command.
- copy the levels as 10',20',30'.
- Rename the levels as ground floor, first floor,second floor,& roof level.
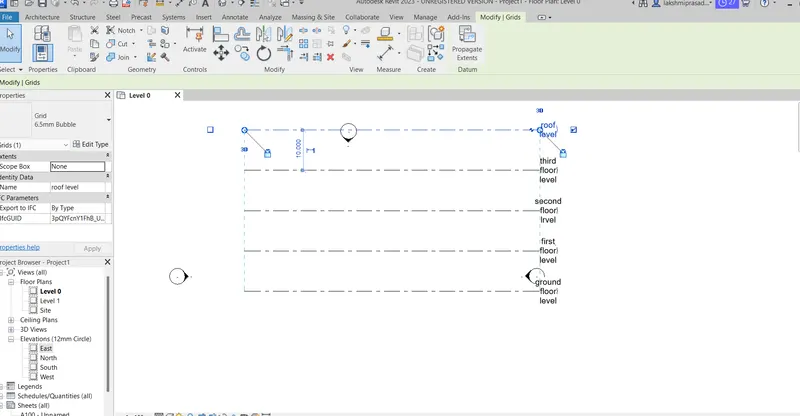
creating a different grids in 2023.
- open revit 2023.
- Open architectural template and select project.
- Change the units MM to FEETS & INCHES.
- Command UN a dialogue box will be appearing on screen.
- Change the units to feets.
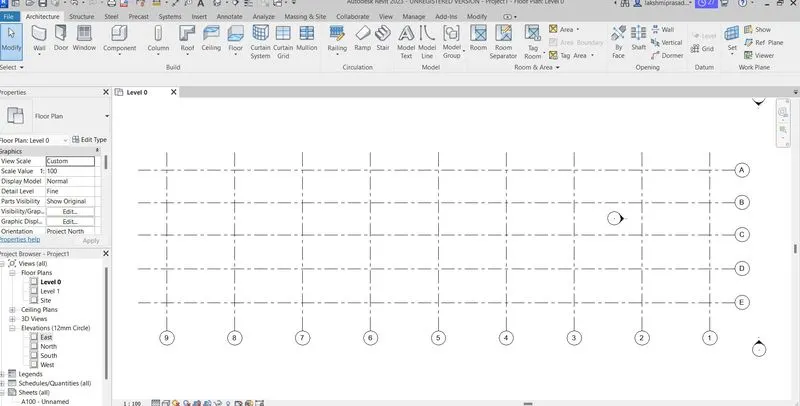
- Go to the architectural tab and in that select grid option.
- Draw the grid in vertical manner which is already named as 1.
- copy the grid from the modify command and copy the grid as the interval of 20' spacing.
- draw the grid intersecting the vertical grids in the same manner and named it as A,B,C,D,& E.
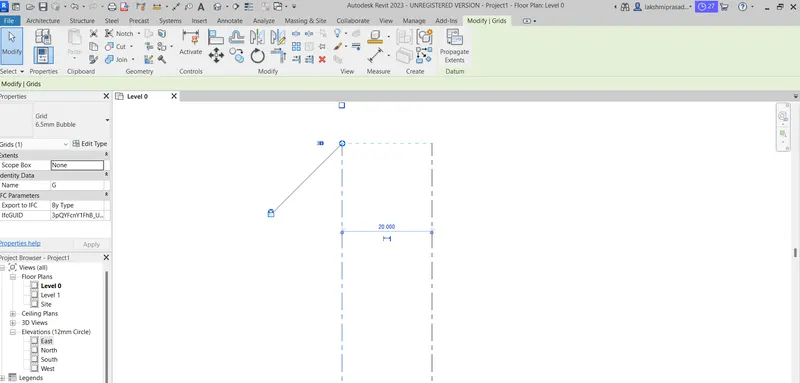
Give Vertical spacing as 20'
5)D modelling of residential unit – From looking at your house / or a place you aspire. Create a conceptual layout of the residential unit. You can measure using a tape or
you can access your residential plan to create a similar layout.
Procedure:3D Modeling of residential unit.
- Open revit 2023with architectural template.
- enter UN command and change units MMto feets & inches.
- go to wall option in architectural tab.
- draw the external walls.
- again go to wall options and change the internal walls by changing wall settings.
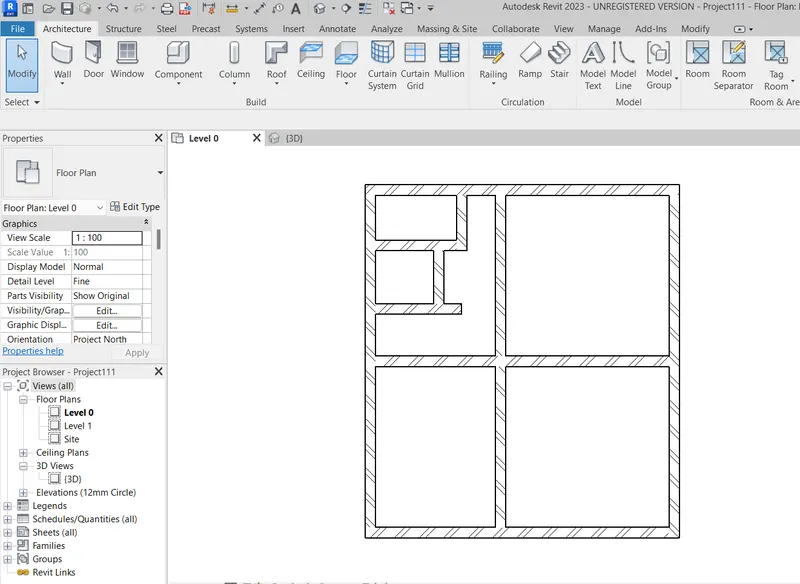
6) In the layout created draft the level of details you are planning to include – Dimensions of room, components you plan to add in the residential unit.
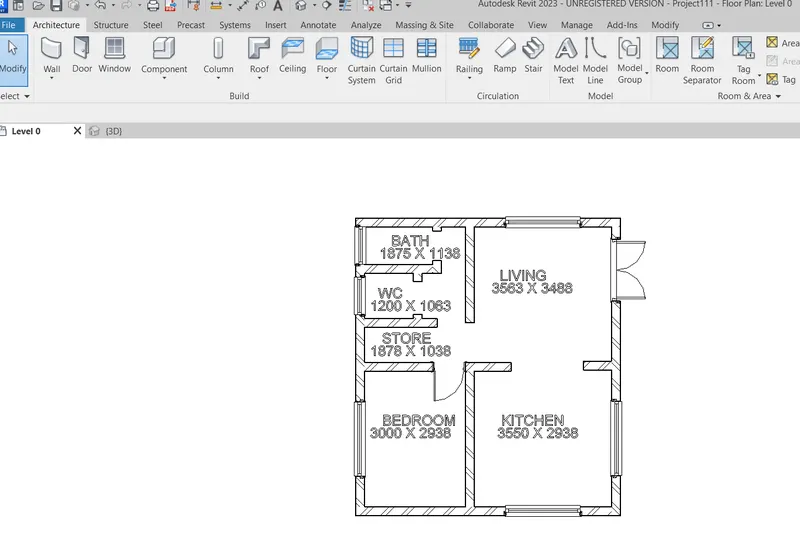
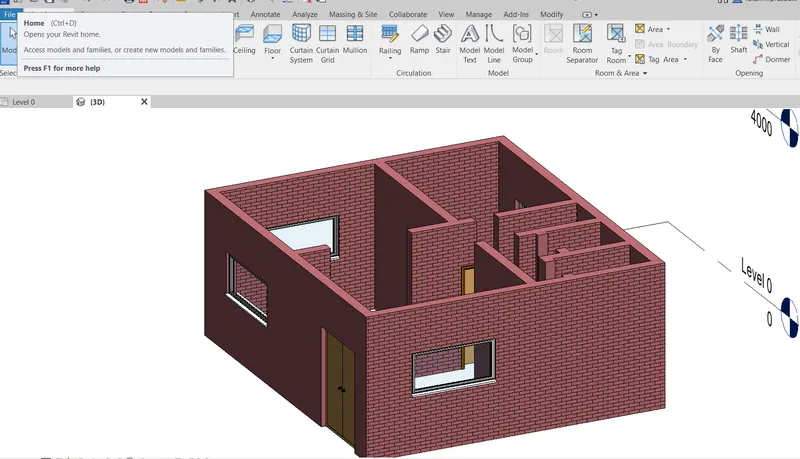
7.)Identify the residential model elements such as Door, Windows, Tables, Chair, Couch, Bed, Lamps from the library and insert them to the model . Save the project for use
for Assignment 3
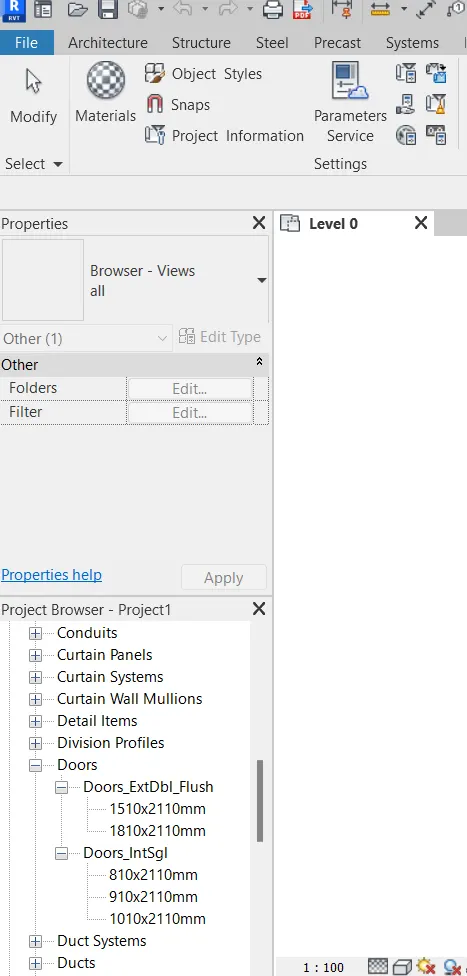
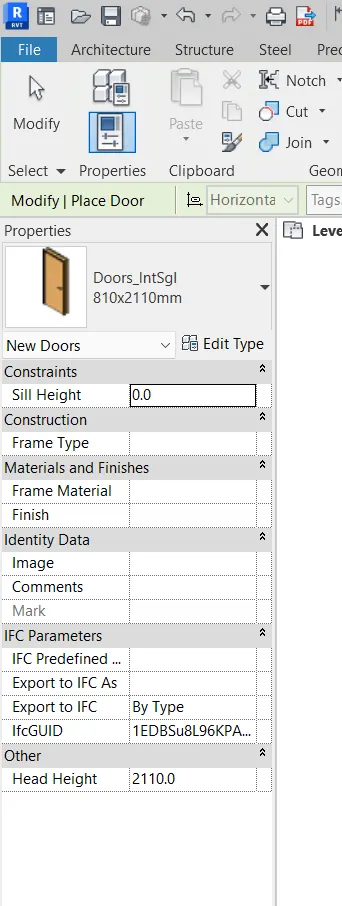
DOOR MODEL DETAILS:
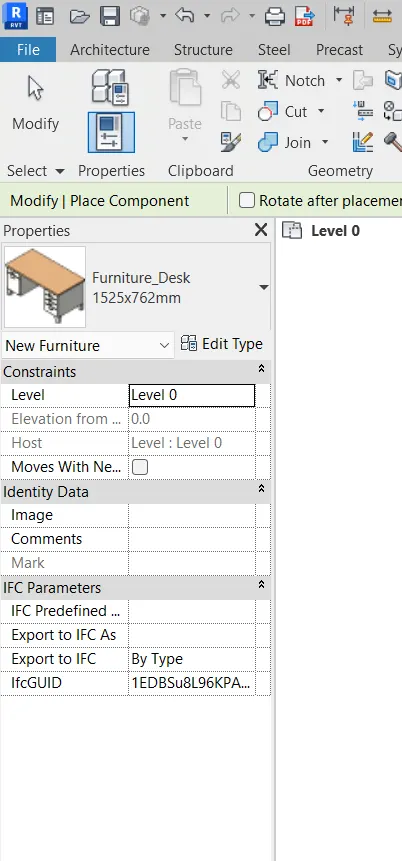
FURNITURE MODEL DESK TABLE:
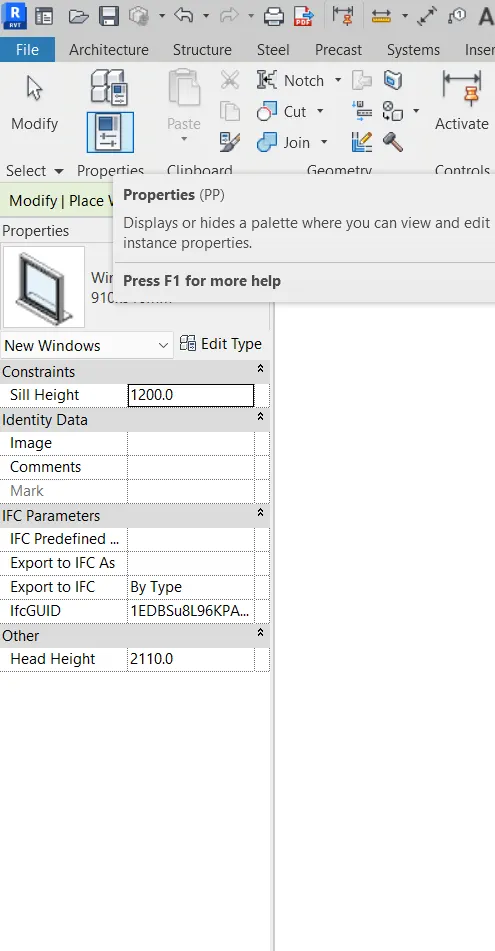
WINDOW DETAILS:
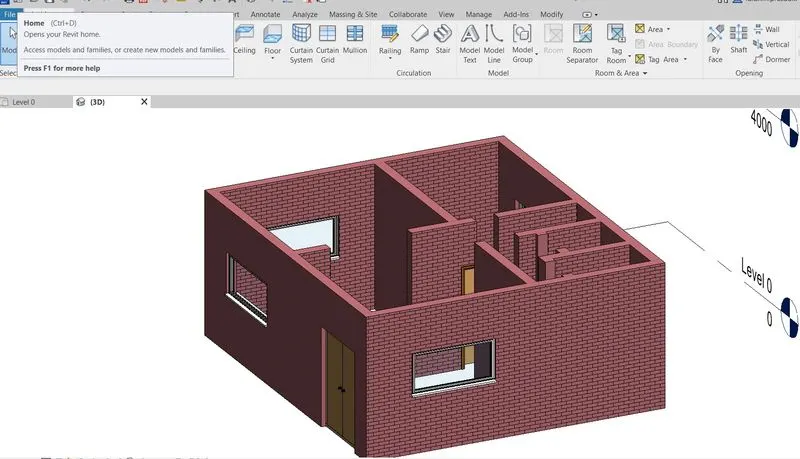
Final 3d drawing result: