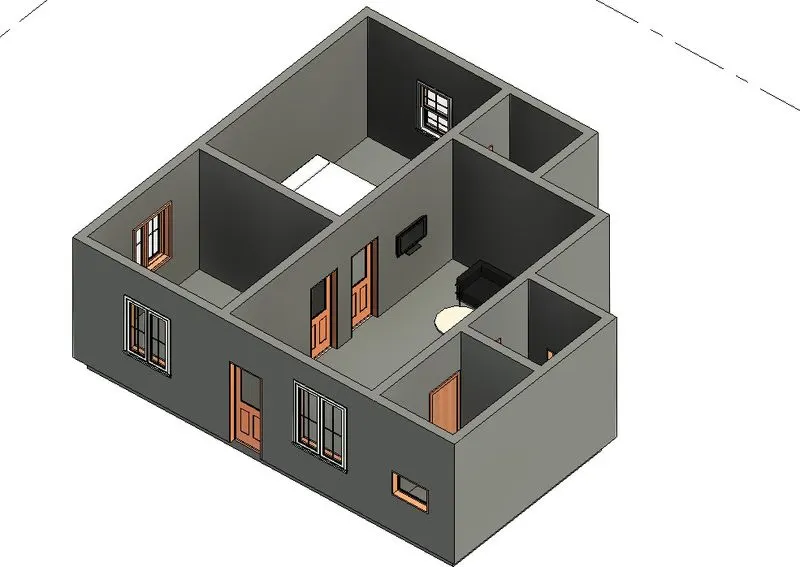
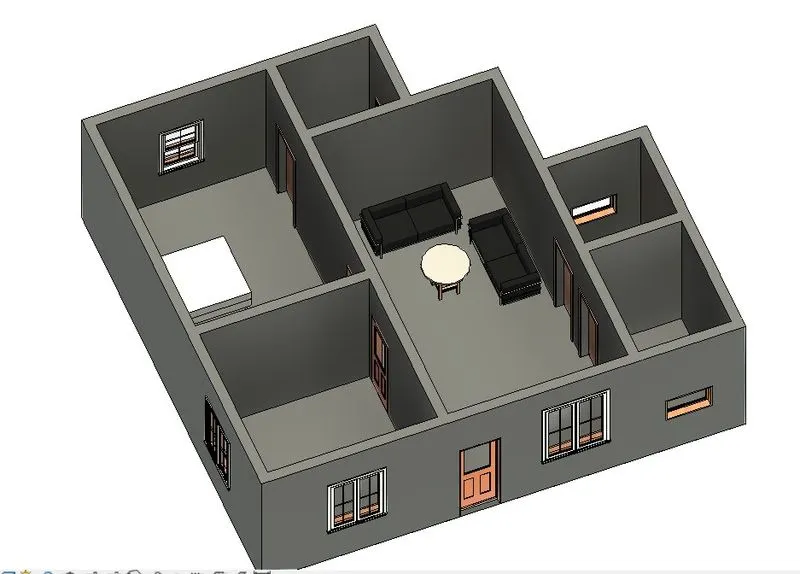
Creating Levels, Grids, Layout and model elements for a residential unit using REVIT
1. What is BIM? Summarize the features of BIM and benefits of using BIM over 2D CAD tools.
Aim :-
- To analyze the summarize and benefits of BIM.
Introduction :-
- Building Information Modelling is an advanced technology that assists architects, engineers, and construction professions in planning, designing, constructing, and managing the development and building of infrastructure.
- It may sound like BIM is an application that helps build 3-D Models of infrastructure.
- This technology is widely used in a variety of fields including but not limited to Civil, Plant Management, Mechanical, Electrical, Plumbing Systems, and Structural Design.
Importance :-
- It can be defined as a shared knowledge resource for information and reliable data for decision making regarding various aspects.
- The importance of BIM can be seen in its very application. It helps coordinate, plan, design and construct with data that is precise and accurate.
- It helps project costs, feasibility, and schedules. It also helps in the standardization of data that flows through the project- whether at a desk or on the field.
Elements :-
Revit Building elements are of 3 types.
- View Elements
- Model Elements
- Annotate Elements
Features :-
- Easy Access to Information.
- Making the process more excessive.
- Comprehensive view of the project.
Benefits :-
- This technology allows professionals to get multiple views of the same construction and infrastructure from a model of production.
- These views are consistent with the “objects” such defined.
- It is a powerful technology that allows architects, engineers, and contractors to understand how their work fits best in the big picture- making transitions smooth and effective.
- It can be defined as a shared knowledge resource for information and reliable data for decision making regarding various aspects.
- Instant Updates
- Time constaint.
- Resource tracking.
2. Understand the concept of Categories, Families, Elements, Instances in Revit. Go to Insert Tab, choose a category. Pick a family and element. Understand the instances and insert it to Revit model.
Aim :-
- To Understand the concept of Categories, Families, Elements, Instances in Revit.

Categories :-
- Classification for families, for example door, curtain walls, furniture and many more.
- Families are grouped and sorted by categories in content libraries.
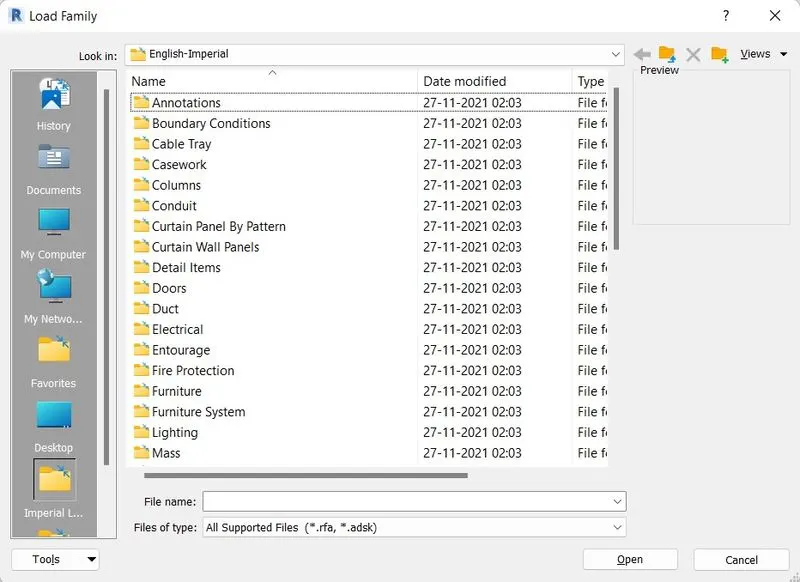
Family :-
- A family is a group of elements with a common set of properties, called parameters, and a related graphical representation.
- Different elements belonging to a family may have different values for some or all of their parameters, but the set of parameters (their names and meanings) is the same.
- The Furniture category includes families and family types that you can use to create different pieces of furniture, like desks, chairs, and cabinets.
- The Structural Column category includes families and family types that you can use to create different wide flanged, precast concrete, angle, and other columns.
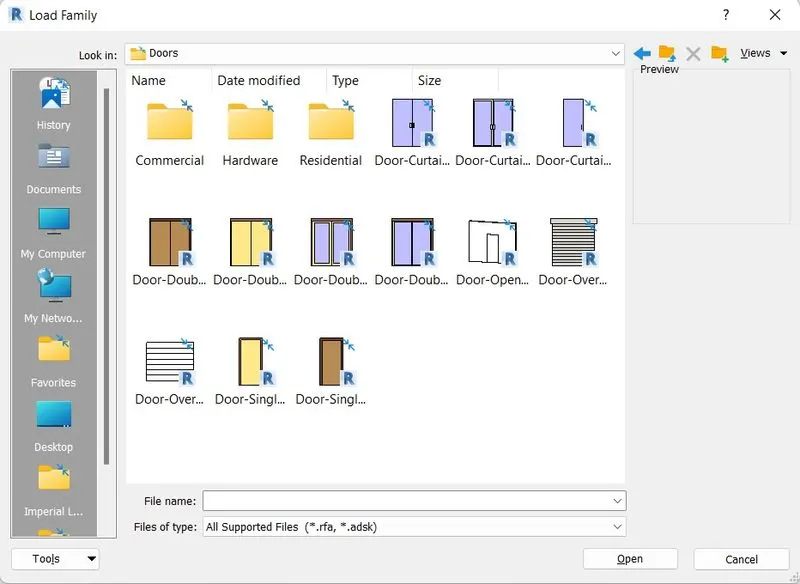
Element :-
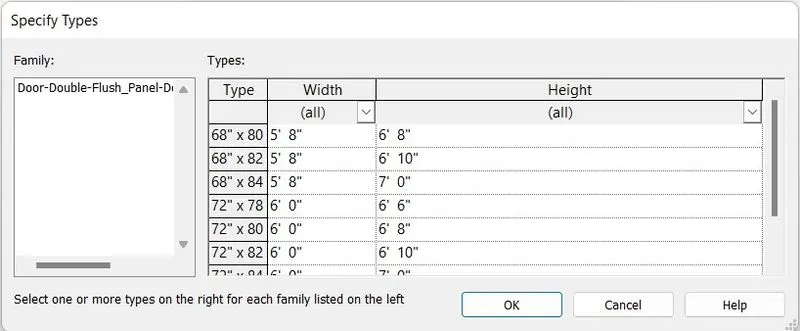
- Elements are building block of 3D Model.
- They represent real-world components that are added in the drawing.
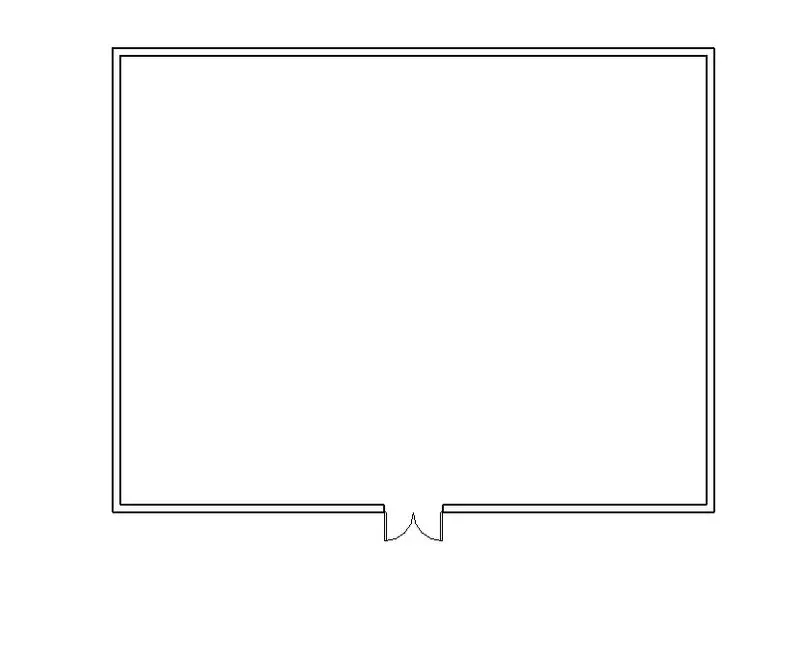
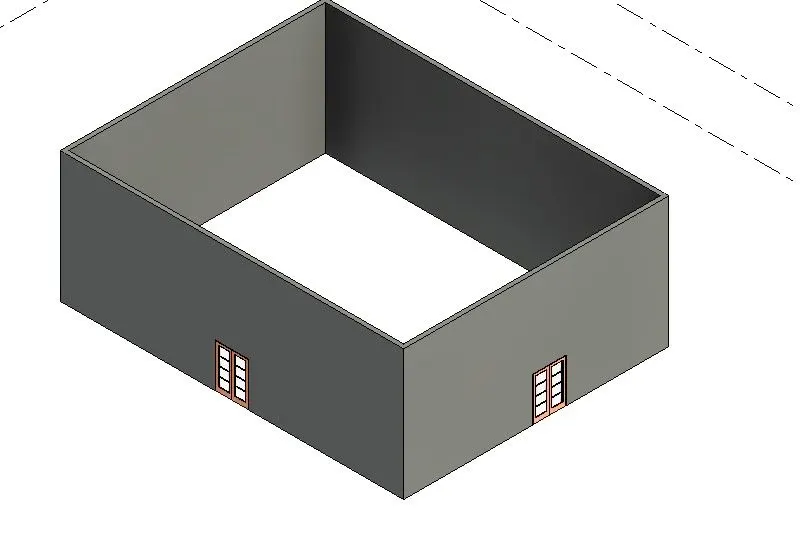
- Such elements are walls, windows, doors.
- Other elements such as tags, dimensions, appear only in the view in which they are placed.
Instances :-
- Instances are individual/graphical elements placed in revit model.
- Instances inherit a series of parameters from their category and type and might have instance parameters as well that only belongs to sengle instance.
3. Setting up a Project – Open a project file with architectural template. Save the file with appropriate name. Set up the project units to Imperial / Metric based on your convenience of modelling. Complete the project information under Manage tab. Set up the maximum backups for project file to 3.
Aim :-
- Setting up a Project in Revit.
Introduction :-
- First, we need to select archetectural template for modelling the architecture plan.
- And save the file with appropriate name.
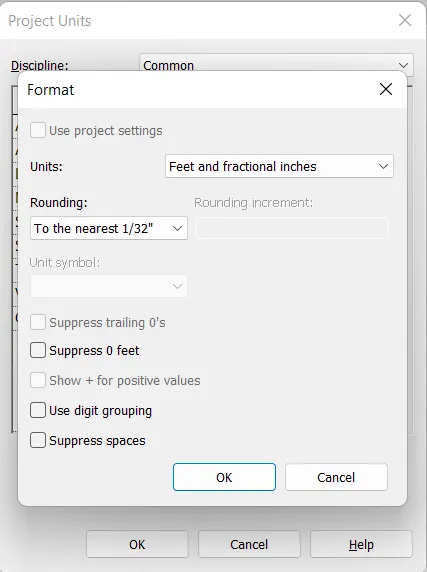
- Type UN and set the units to Imperial.
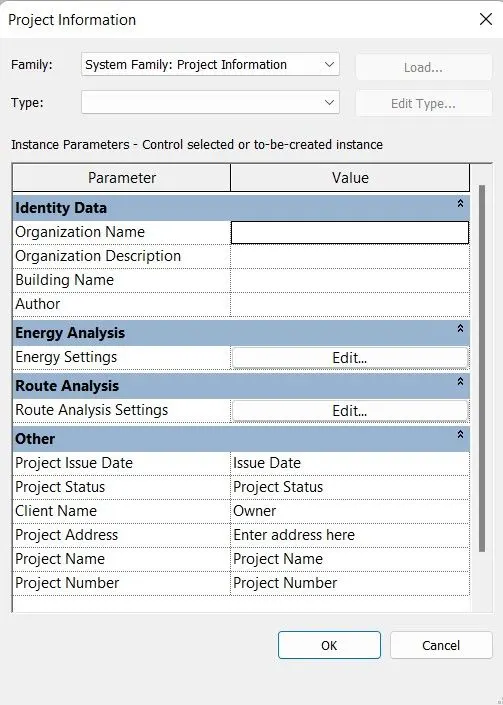
- Project Information option is used to save the information of project.
Procedure :-
- Open Revit 2021.
- Click New from Models.
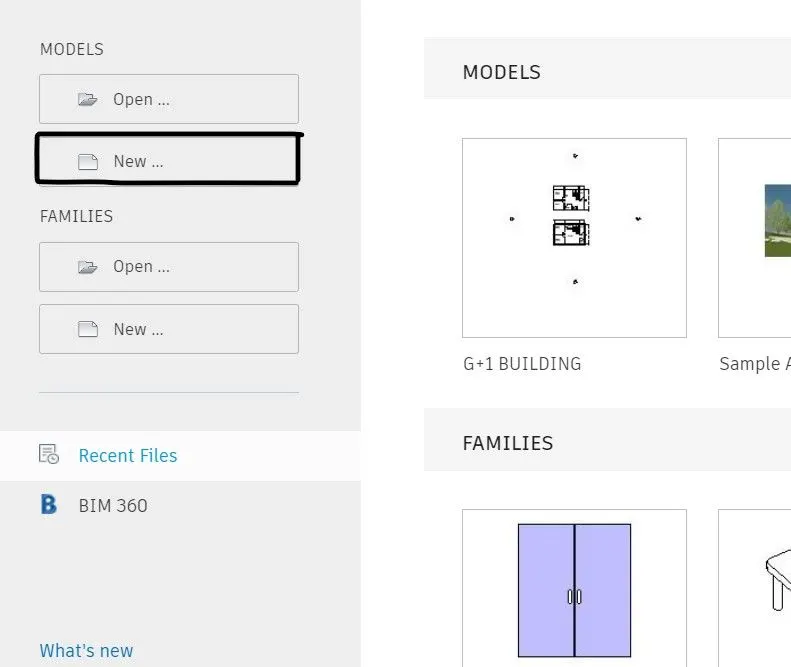
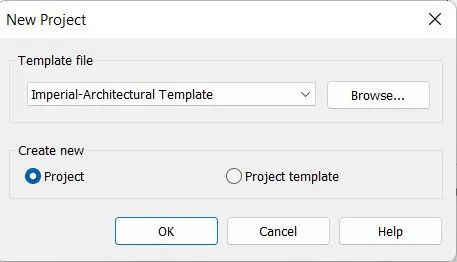
- Then new box will Pop-up named New Project.
- So choose the tempalate file Imperial-Architecture Template.
- Cretae New Project.
- Click Ok.
- New Project file is Created.
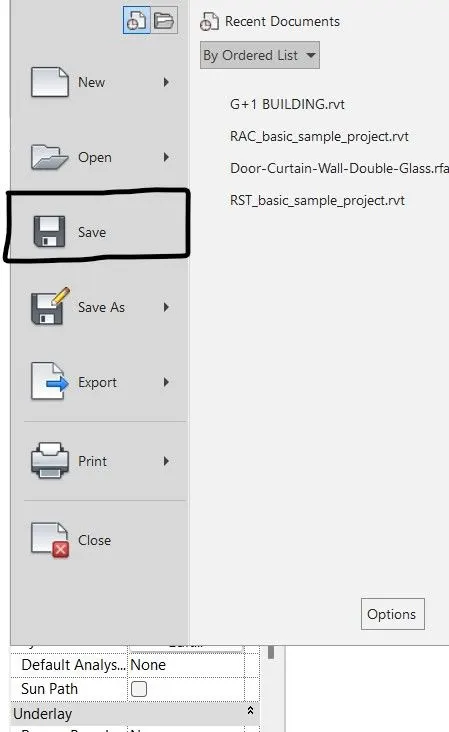
- Now save that file from FILE menu.
- Click Save.
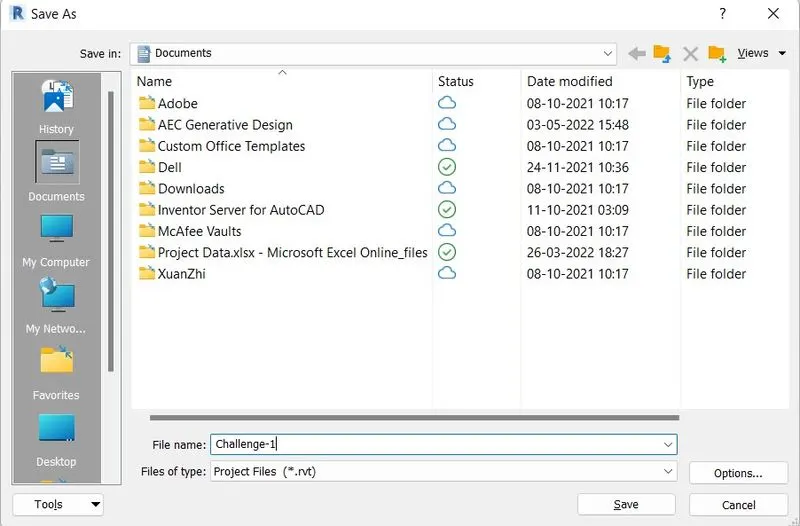
- Type the file name and save the file.
- After selecting the file, new window will popup.
- Enter the new name,before saving the name of the project, click on option at right corner of the save as tab.
- Next we need put maximum backups for project file to 3.
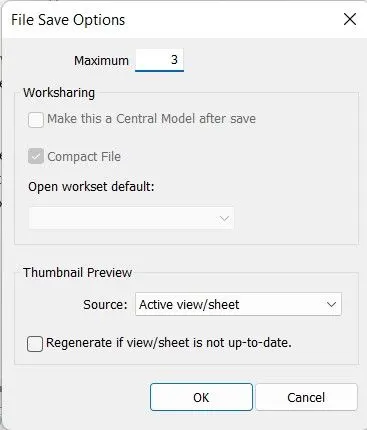
- Next Type UN and set the units to Imperial.
- Put the units in feet and fractional inches.
- Open the manage toolbar and then select the project information.
- New tab will be visible.then enter project details in project information tab.
Result :-
- Setting up a project is done successfully in the revit in detailed manner.
4. Understand the concept of Levels and Grids. Follow the naming and conventions. Create the following Levels: ( Convert to metric equivalents if metric is your units)
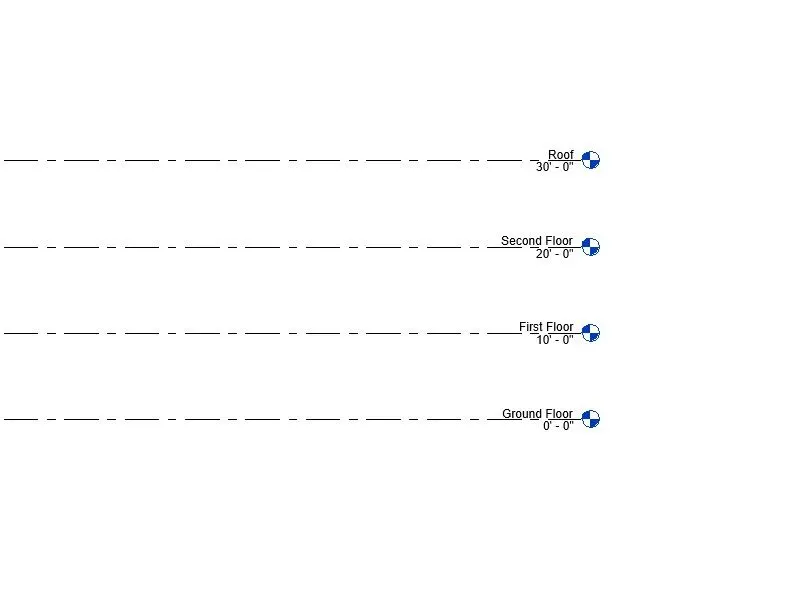
Ground Floor @ 0’
First Floor @ 10’
Second Floor @ 20’
Roof @ 30’.
Aim :-
- To Understand the concept of Levels and Grids and Create the Levels.
Introduction :-
- Revit Levels and Grids are really the skeleton of building projects.
- Levels in Revit are used to indicate the locations of floors, foundations, and the roof of a building in section and elevation views.
- Grids are used to host columns and walls.
- Both Levels and Grids interact in a way that can cause some confusion if not set correctly.
Procedure :-
- First, Go to East elevation from Project browser.
- Architecture -> Datum -> Levels.
- Select the Level Option.
- Place the levels at the distance of 10'.
- Rename all the levels.
Grids :-
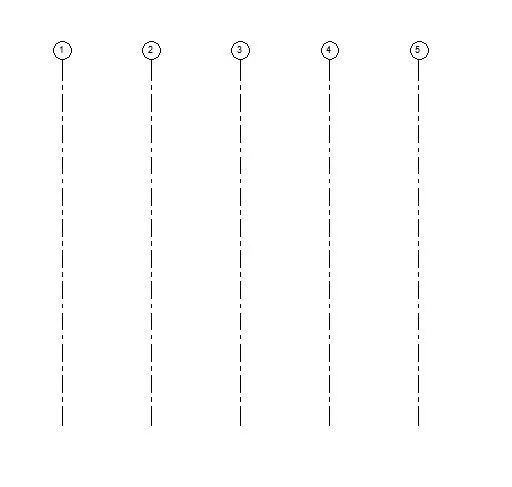
- Architecture -> Datum -> Grids.
- Place the Grids Vertically at the distance of 20'.
- Place the Grids Horizontally at the distance of 10'.
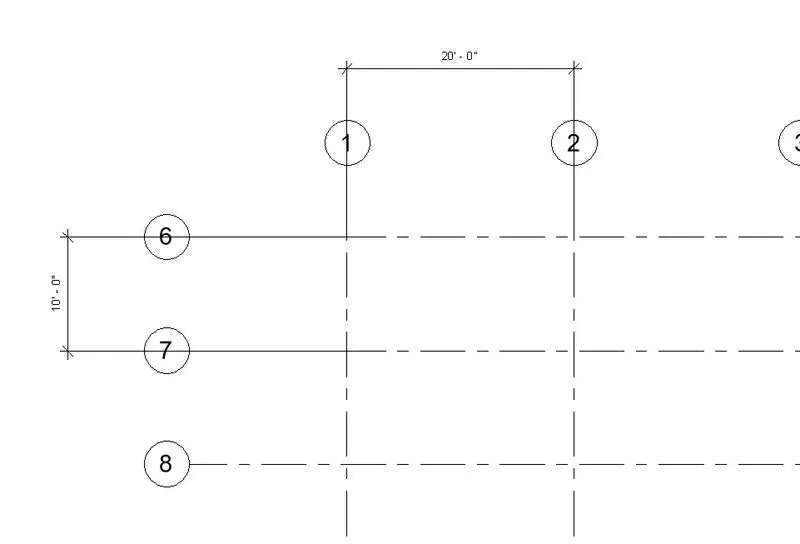
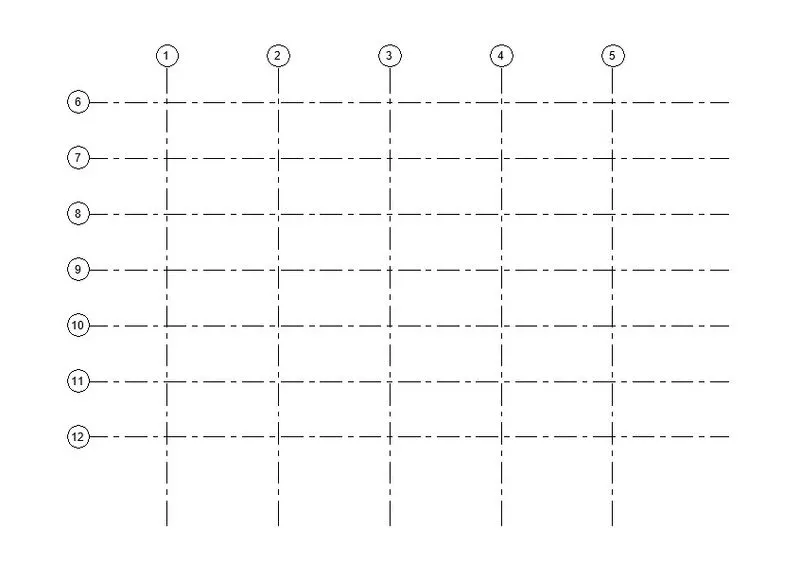
Result :-
- Levels and grids are created.
5. 3D modelling of residential unit – From looking at your house / or a place you aspire. Create a conceptual layout of the residential unit. You can measure using a tape or you can access your residential plan to create a similar layout.
Aim :-
- To Create a conceptual layout of the residential unit.
Procedure :-
- Set the units as Imperial.
- Draw the layout of the house.
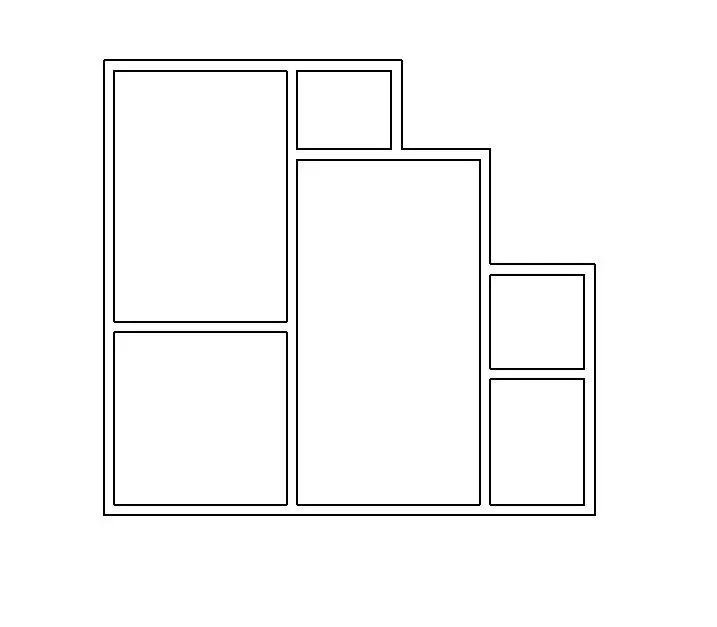
6.In the layout created draft the level of details you are planning to include – Dimensions of room, components you plan to add in the residential unit.
Aim :-
- To insert the Dimensions of room and components.
Procedure :-
- Insert the dimension from Annotate Tool.
- Also Insert the Text from Annotate Tool.
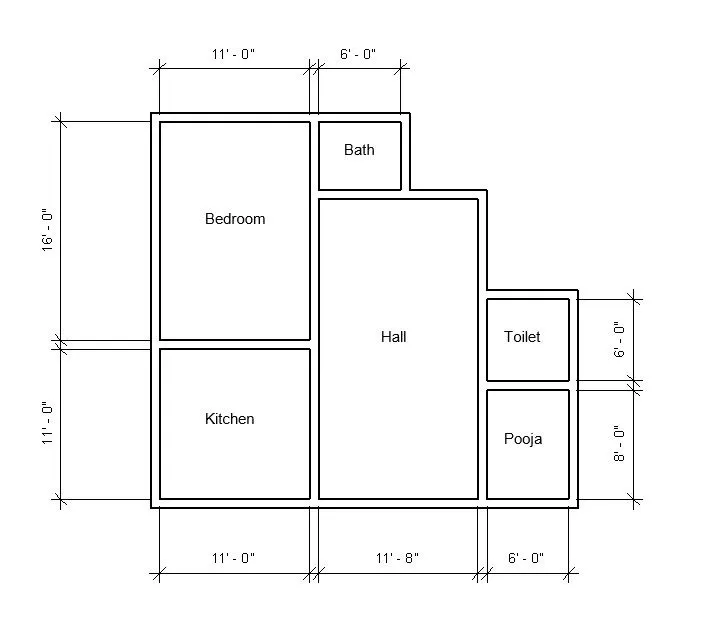
7. Identify the residential model elements such as Door, Windows, Tables, Chair, Couch, Bed, Lamps from the library and insert them to the model .
Aim :-
- To Insert the residential model elements such as Door, Windows, Tables, Chair, Couch, Bed, Lamps from the library.
Procedure :-
- To insert the model elements, Go to Place the Component.
- Select the components as per your requirements.
- Place the Door, Windows, Tables, Chair, Couch, Bed in the drawing.
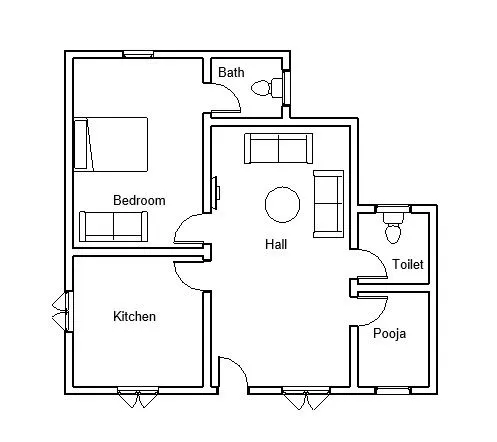
Result :-
- 3D modelling of residential unit is drawn and inserted the components.