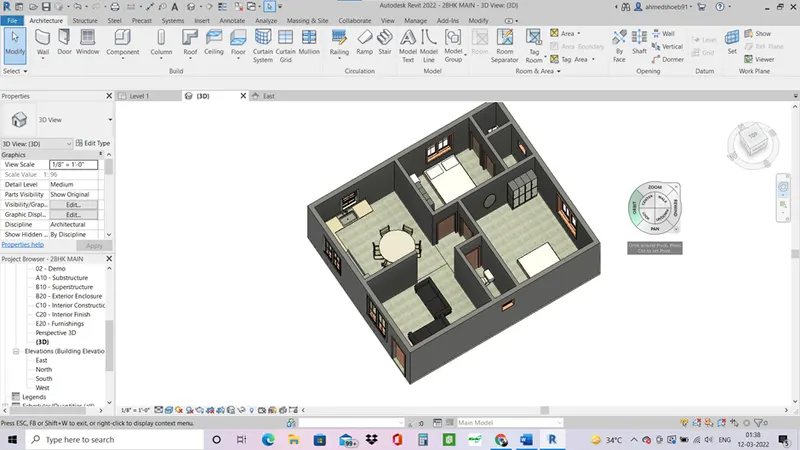
Creating Levels, Grids, Layout and model elements for a residential unit using REVIT
- BIM refers to Building Information Modelling. It is process where engineers use to design and construct the 3d model of the project. It has several design tools and methods which help the end goal of making every part of the construction easy, precise, safe and cost effective. Some of the features of BIM are
- Cost and resource savings
- Greater efficiency
- High quality results
- Real time model analysis.
Advantages of BIM over 2D CAD tools:-
BIM is very effective and time saving comapared to 2d tools. The changes in drawing in BIM is done easily compared to 2d tools. Changes are reflected in all drawing simultaneously in BIM, whereas in 2d tools each change is done manually. BIM has much more to offer such as structural analysis, energy calculations, estimation etc.
2. Aim – Understanding the concept of Categories, Families, Elements, Instances in Revit
Procedure –
- Open revit.
- Go to insert tab .
- Select the load family option.
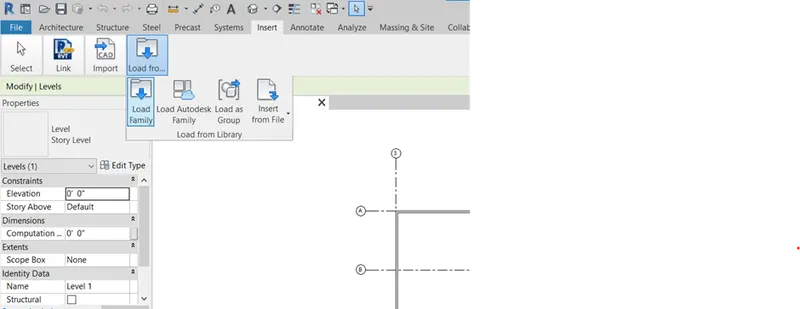
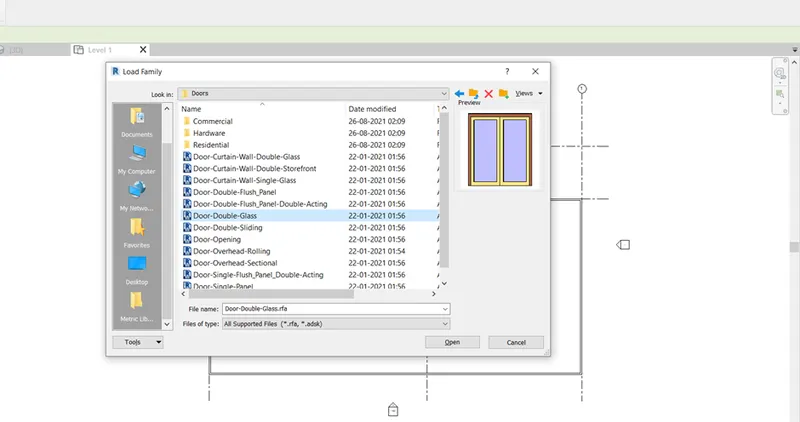
- Select the category for example door, and select a specific family of doors.
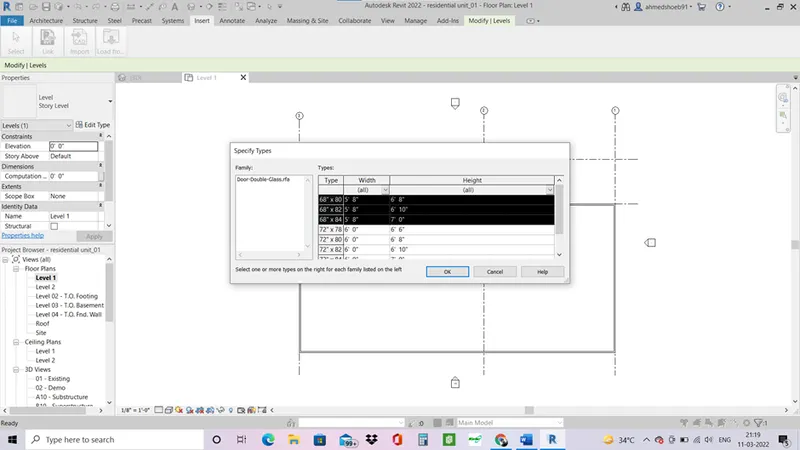
- Once inserted, you can select different types of elements of doors.
- Now insert the door in the model.
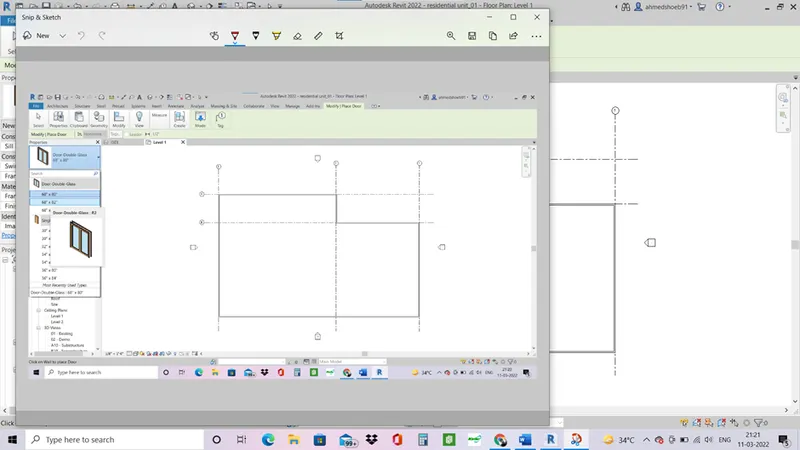
result –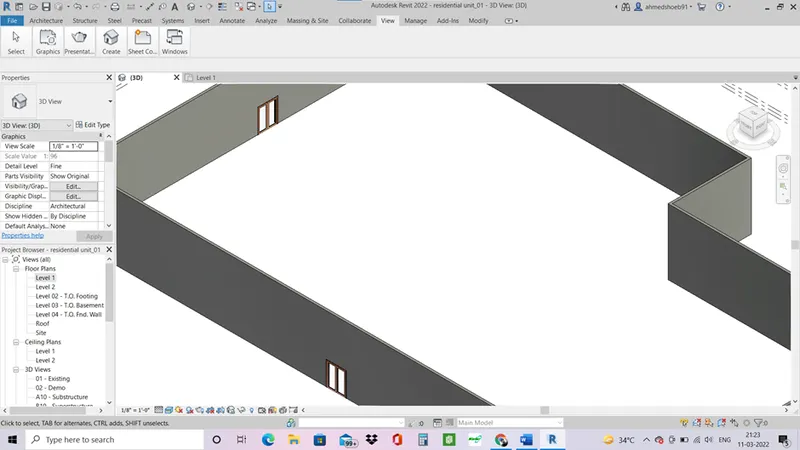
3. Aim – setting up a new project in Revit.
procedure –
- Open revit 2022.
- Select new option, select architectural template and project option.
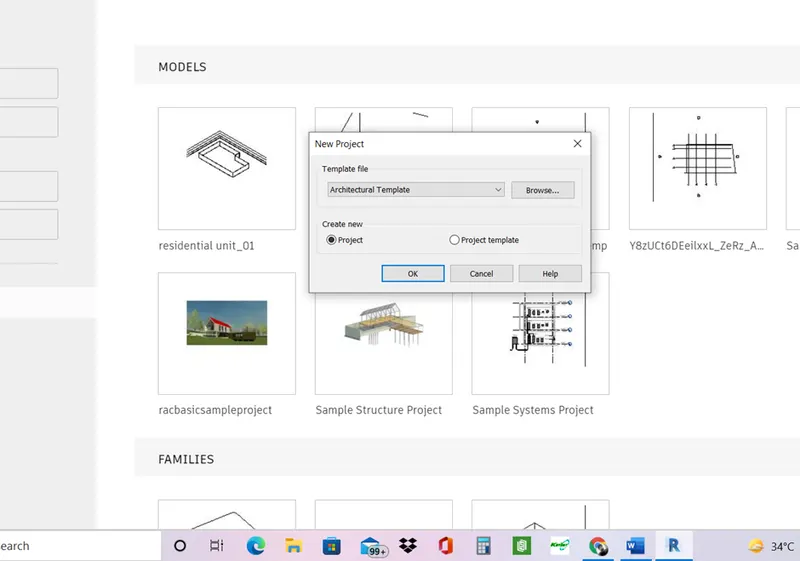
- Got to save ass option and save the project with appropriate name and select maximum back up as 3.
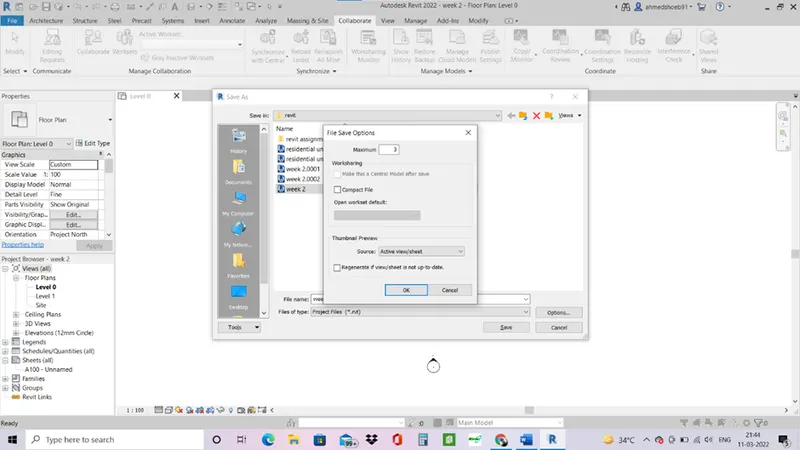
- Press ok, and type UN in project.
- Make the units changes as required.
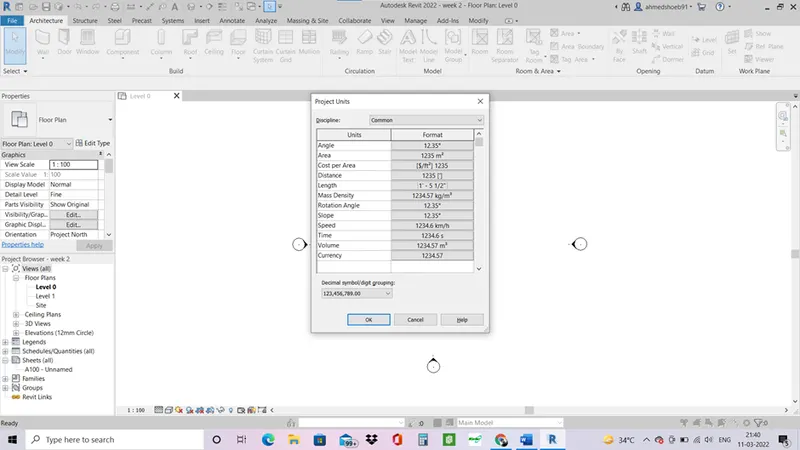
- Go to mange in toolbar.
- Select project information and fill the dialog box.
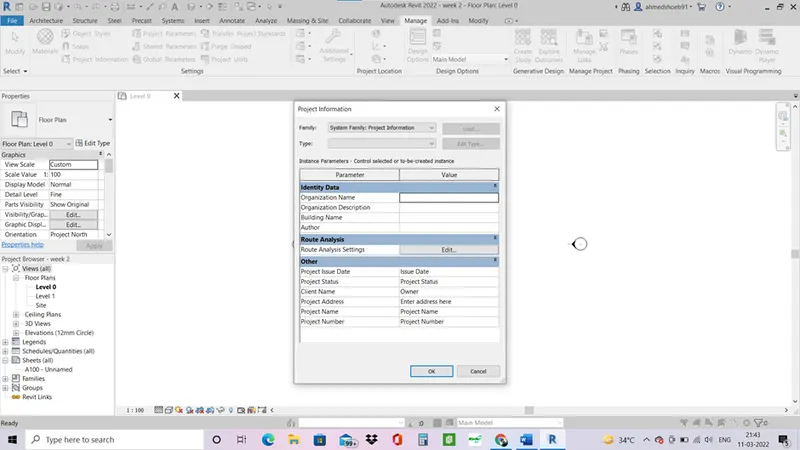
Result-
A new project is set up in revit for drafting.
5. Aim – Understanding the concept of Levels and Grids in Revit.
Procedure –
- Open the project in revit.
- In the project browser go in elevation>east.
- An east view of the project is shown.
- You can add levels in the project.by going in architecture options and selecting levels options.
- After adding levels click on them and edit them as required.
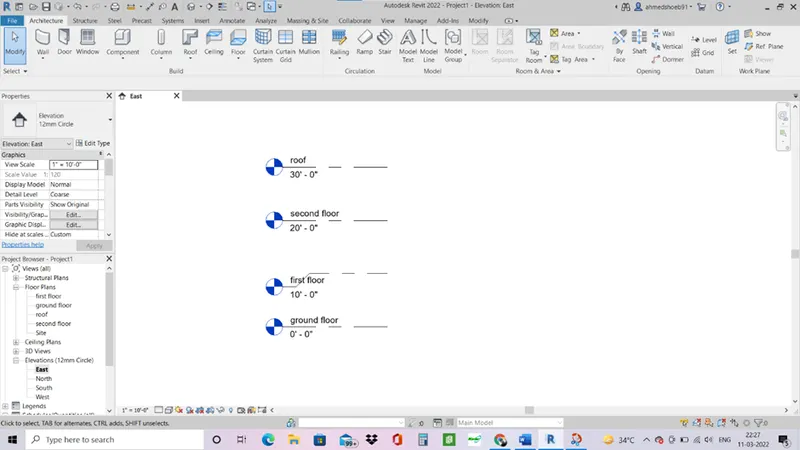
- Now the levels are added.
- Go in ground level and select grid option.
- Place the grids as specified.
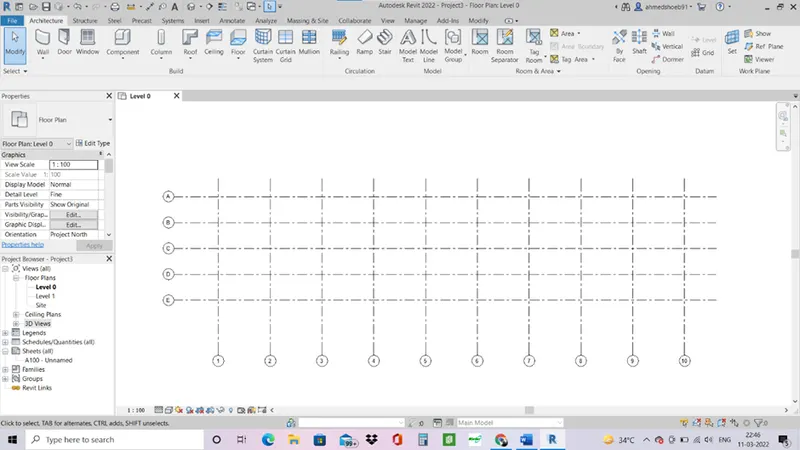
Result –
Levels and grids are placed in Revit software.
5. Aim – to create a layout in Revit for 3d modelling.
Procedure –
- Open revit and select architectural template.
- Set up the project information and units and save the project.
- Set up the levels.
- Go to ground level and select wall command from architectural.
- Draw the external walls.
- Chose a different wall element for internal wall.
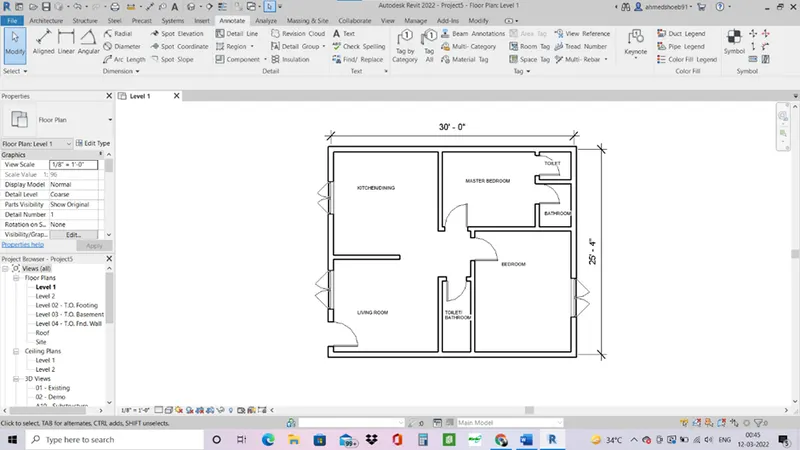
- Place doors and windows.
Result: -
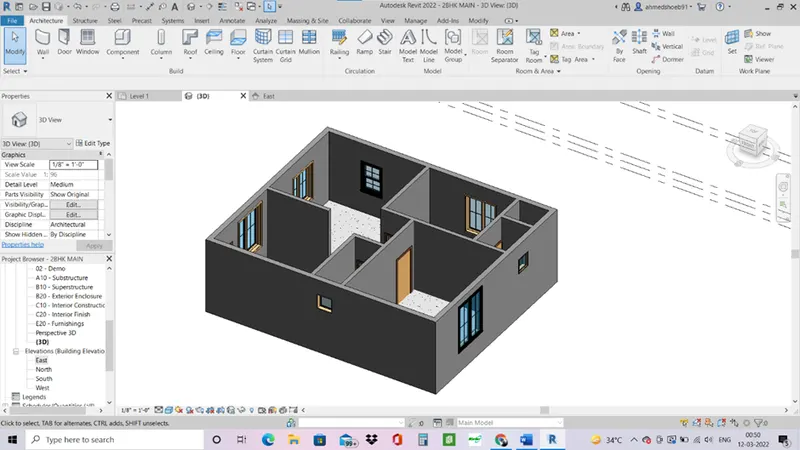
A layout of residential apartment is created in revit.
3d view
6. Aim – in the layout created add dimensions and components. And identify them.
Procedure –
- Go to annotate tab, select linear dimensions.
- Give dimensions to the layout.
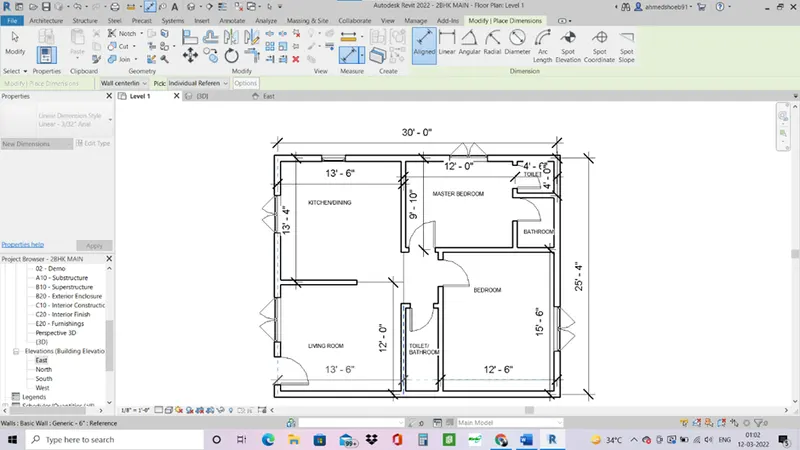
- Go to architecture and select room tag.
- Give room tags to the different rooms.
- Go to annotate and select tag all commands and select the components that needs to be tagged.
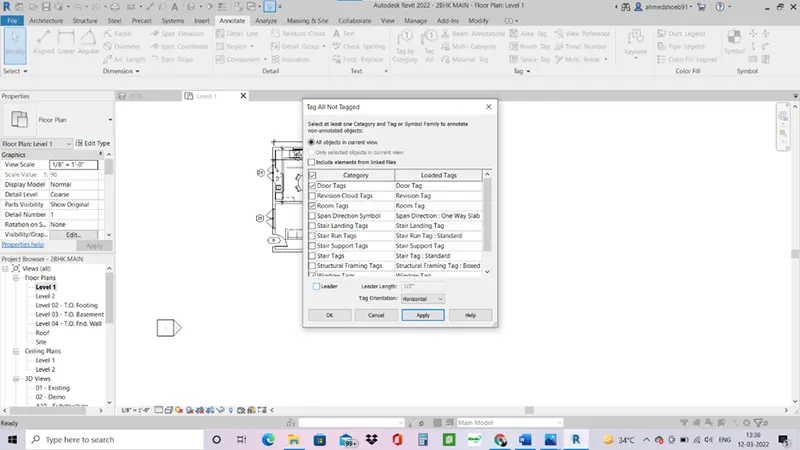
- Add components using load family commands and select and place the required components in the layout.
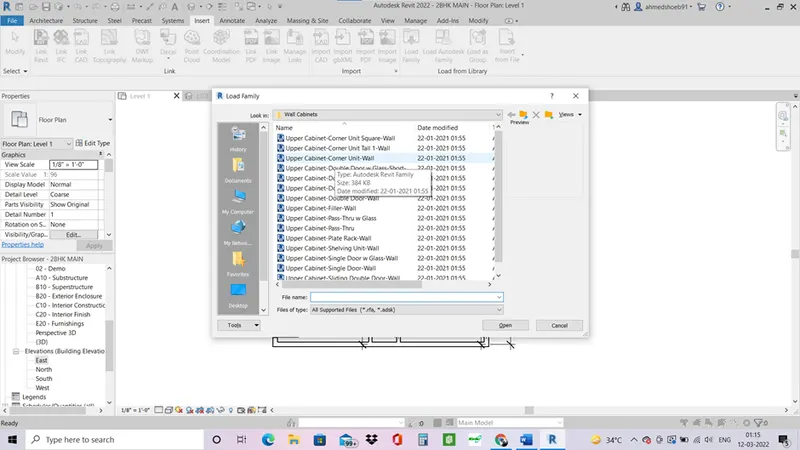
Result –
The dimensions are added and components are identified
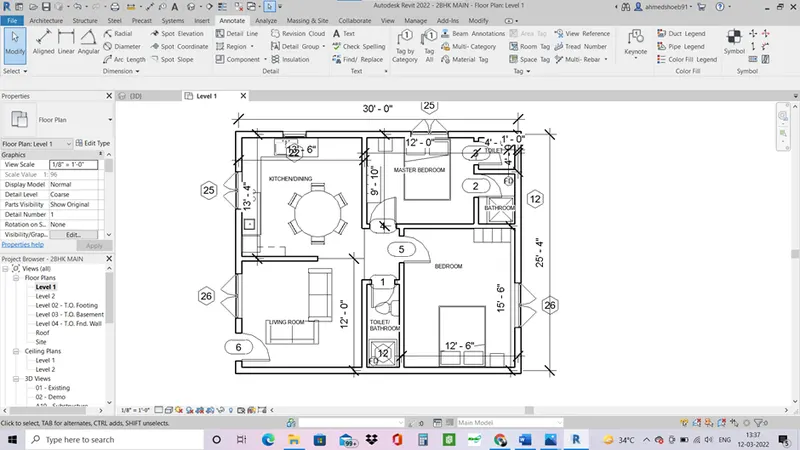
7. Aim – to insert the elements in the layouout such as doors, windows, furniture etc in the model.
Procedure –
- Go in the components>place a components, search for elements which are required.
- If they are not there you can insert them via load family commands.
- Insert furniture such as bed, tables sofa in the model and place it.
- Insert kitchen and toilet supplies and place them in their place.
- Rotate the inserted elements as required.
Result –
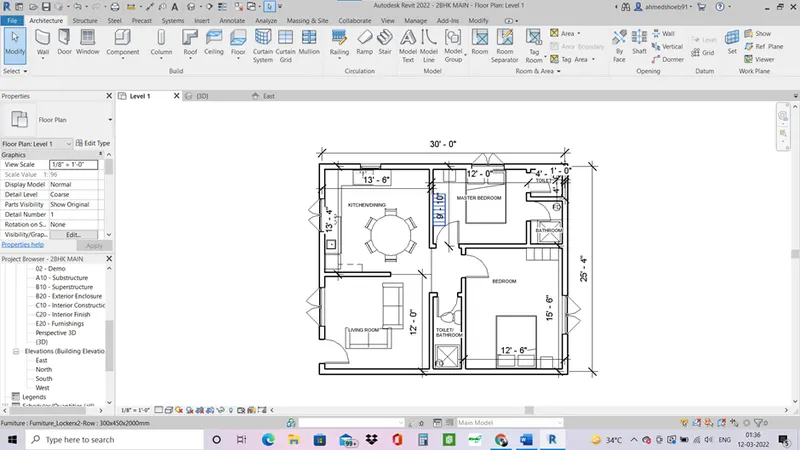
3d view