Creating Levels, Grids, Layout and model elements for a residential unit using REVIT
1)
BIM (Building Information Modelling) is a 3D model based process that gives architecture, structural, construction proffesionals an insight and tools to more efficiently plan, design, manage and construct buildings. It is a methodology by which a team of architects, engineers and contractors work collaboratively to design and build a commercial building utilizing the same database and computer model. This allows the team to analyze and visualize design decisions long before a project even breaks ground,BIM offers a digital representation of the real facility, including function systems (HVAC, electrical) and aesthetics (walls, roof, windows). It does so while being a shared resource from start to finish across multiple disciplines participating in the design and build.
Benefits of using BIM over 2D CAD tools are:
- Early detection of a collision
- Faster design and construction
- More precise planning
- Visualization at an early stage of the project Higher quality of performed work
- Better communication in the project
- Reducing delays and errors
- Increasing efficiency and productivity
- Easy access to information for different branch engineers involved in the project
Advantages of BIM
There are several BIM advantages, including the following:
- BIM offers a more complete representation of a building's design. It takes more than the building's core components into account. For example, BIM allows you to design electrical and HVAC systems too.
- BIM includes your documents into a single database. Several people can work on the same model and save it to the cloud. This allows for instant updates, so changes can be done at any phase of drawing.
- A BIM model will allow you to prefabricate important components ahead of time.
- The models you give to your clients update constantly as you work on your project. Your client can check in any time, which leads to quicker approval for milestones and more efficient project development.
2)
AIM: To understand the concept of Categories, Families, Elements, Instances in Revit.
PROCEDURE:
STEP 1:
- Open a previous project that is created in challenge 1
- Click on INSERT tab then on LOAD FAMILY.

STEP 2:
- Click on any of the category and select the elements like doors, windows.
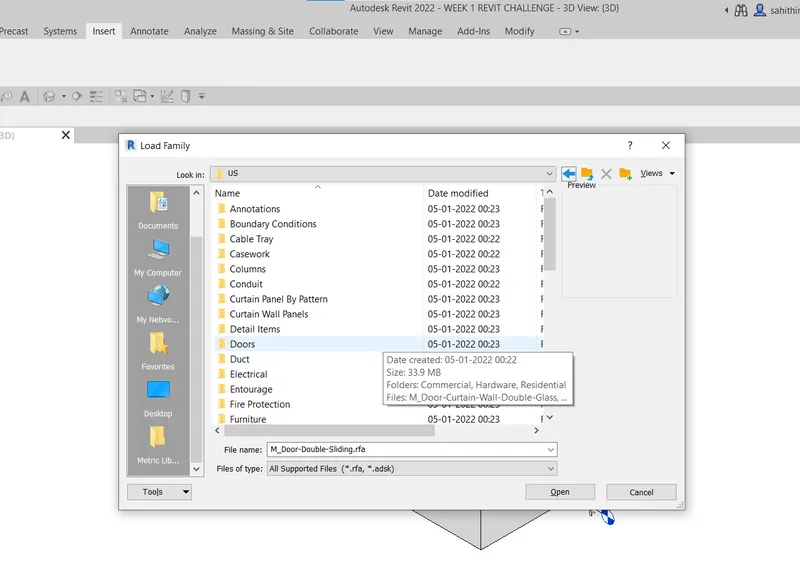
- Now select any of the door family
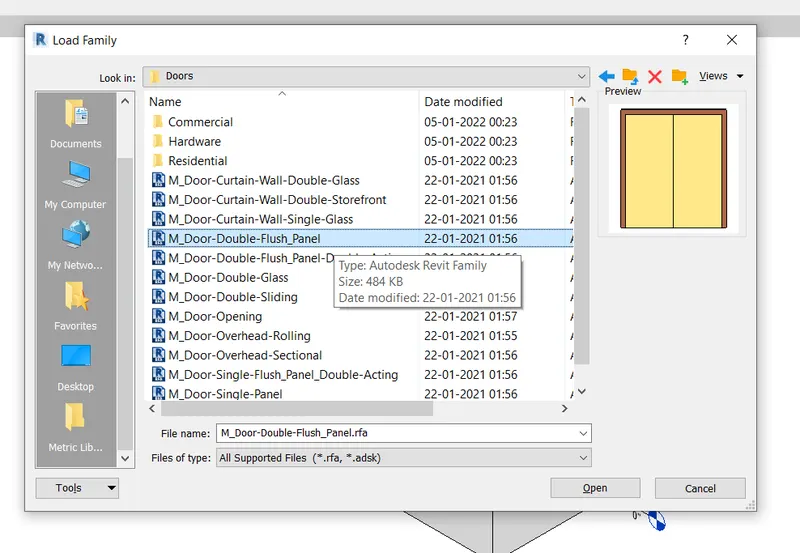
- Select any of the element
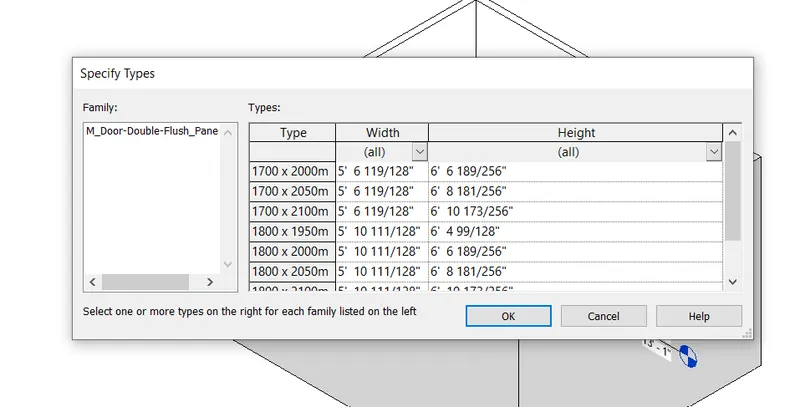
- Insert this in the project that is opened
RESULT:
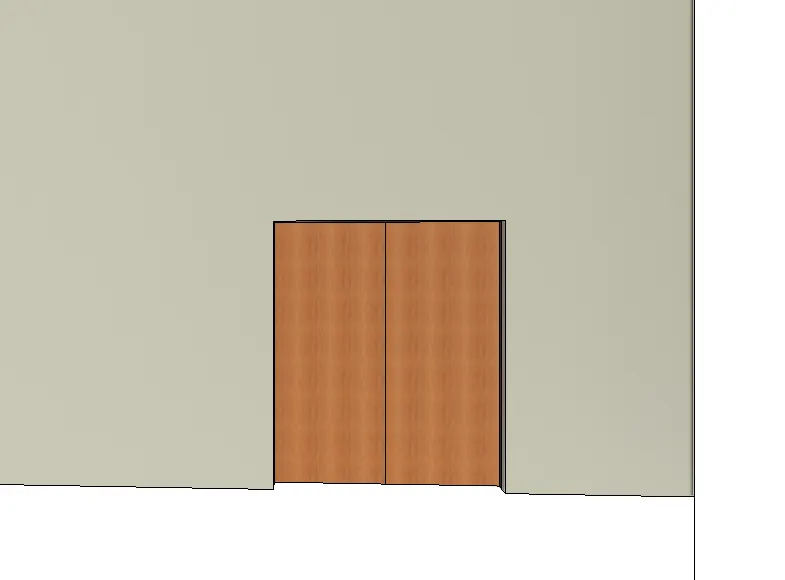
- Required door type is placed in the wall in the project
3)
AIM: To setup a project with a maximum of 3 backups
PROCEDURE:
STEP 1:
- Open a new file
- Select the template as architectural template
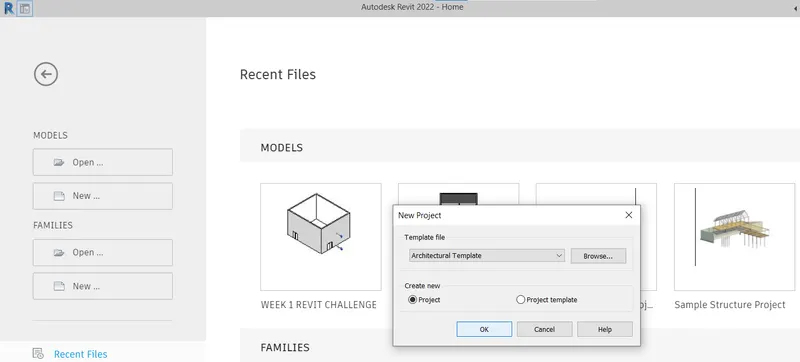
STEP 2:
- Now save it with an appropriate name
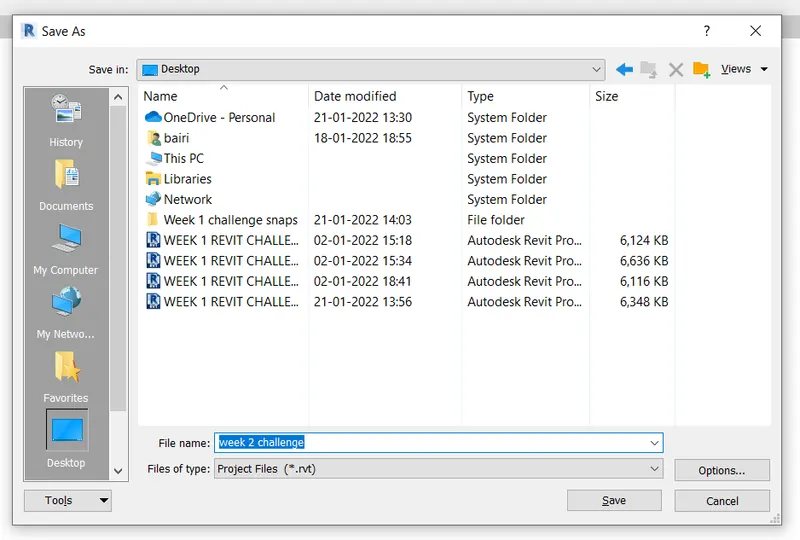
- Click on more options right beside the naming tab
- Now type the number of maximum projects needed
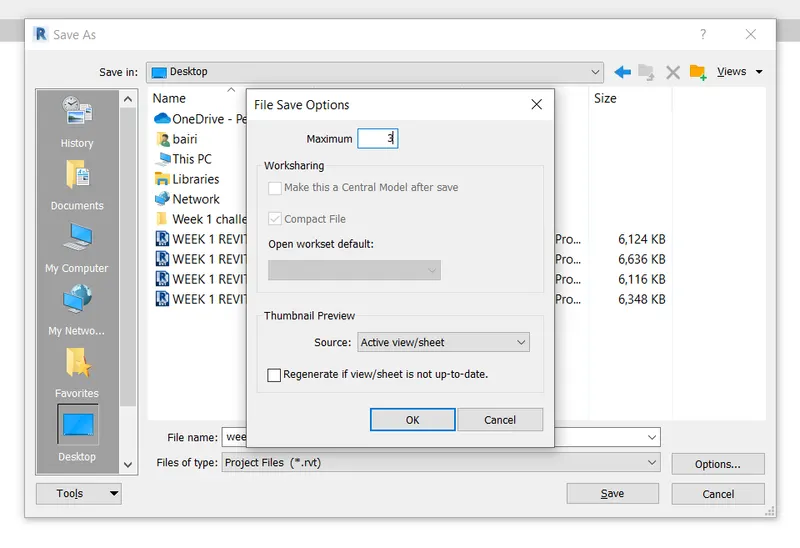
STEP 3:
- Go to manage tab
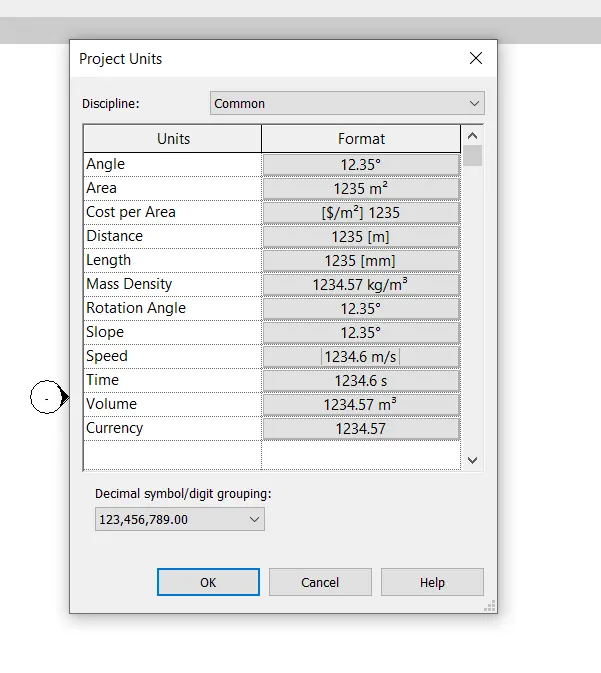
- Then to settings > project units
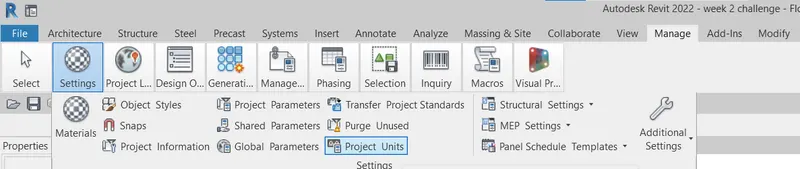
- Change units to metric system
STEP 4:
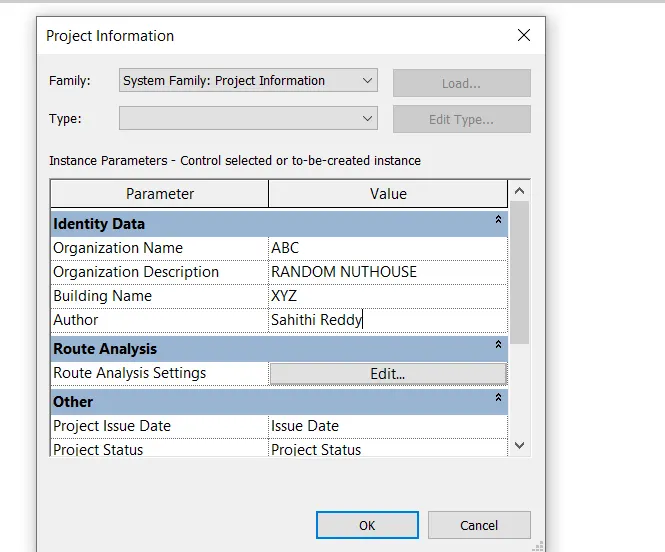
- Go to manage tool > project information
RESULT:
- Basic setting of the project is done.
4)
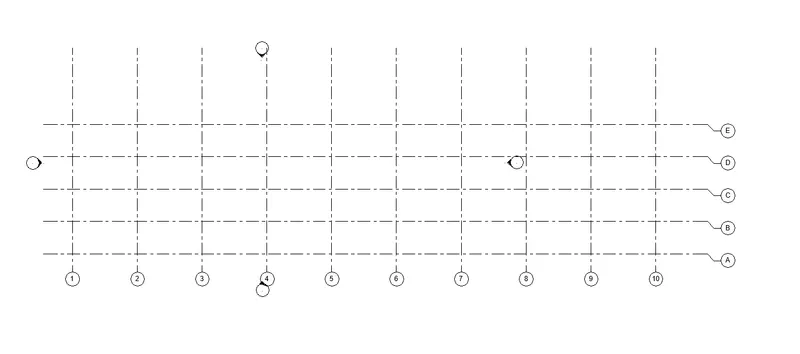
AIM: To create or draw grids and levels of following
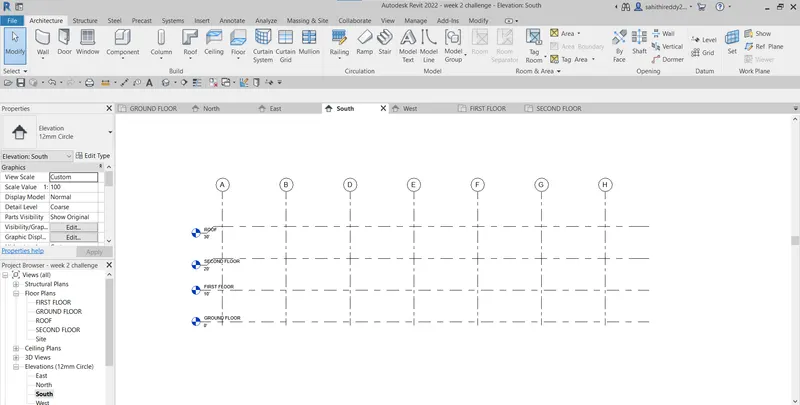
- Ground Floor @ 0’
First Floor @ 10’
Second Floor @ 20’
Roof @ 30’
PRCEDURE:
STEP 1: GRIDS
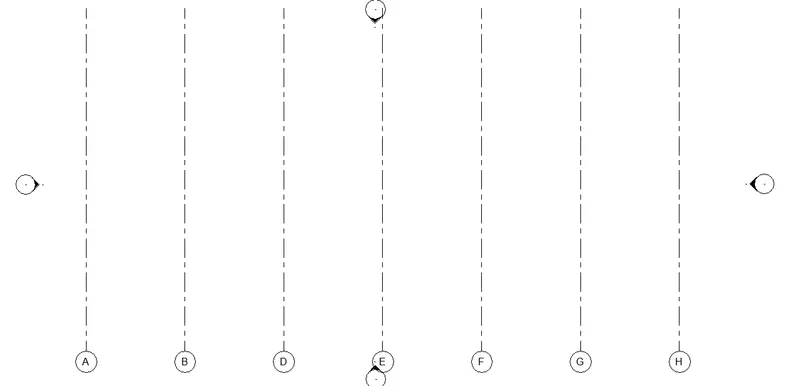
- Go to architectural tab> datum > grids
- Draw longitudinal grids 1 to 10 of 20' spacing
- Draw transverse grids A to E of 10' spacing
STEP 2: LEVELS
- Go to elevation view
- Click on levels then create ground floor, first floor, second floor and roof with the given spacing
RESULT:
5)
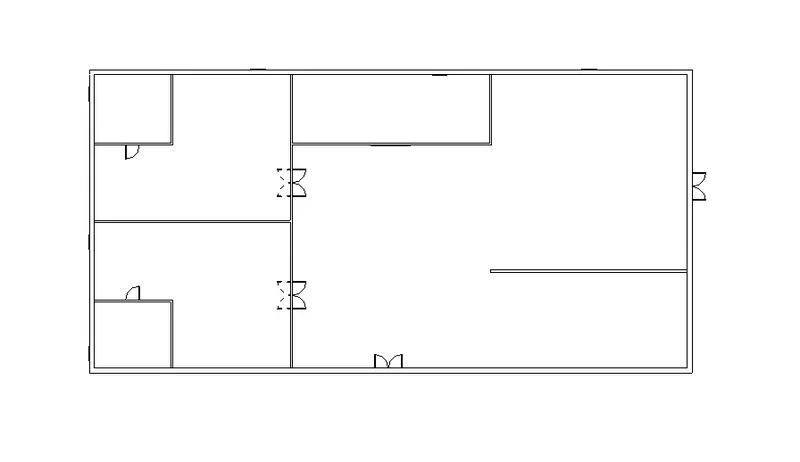
AIM: To create a conceptual layout of the residential unit
PROCEDURE:
STEP 1:
- Open revit file
- Select architectural template
- Draw a layout of any random residential unit
STEP 2:
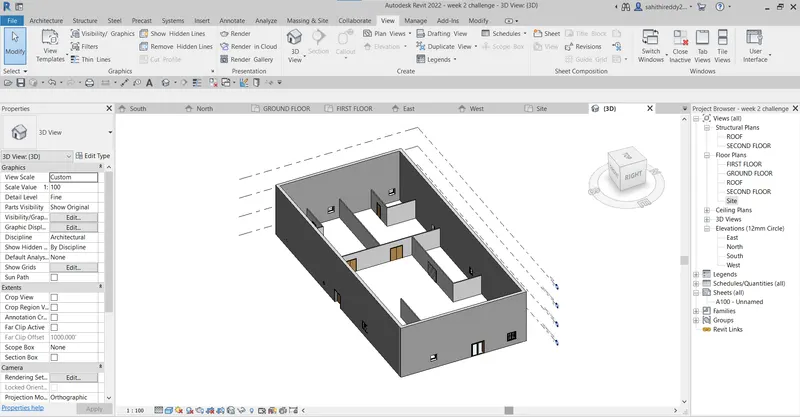
- Select the view toolbar and view in 3D
RESULT:
3D layout of the residential unit has been created.
6)
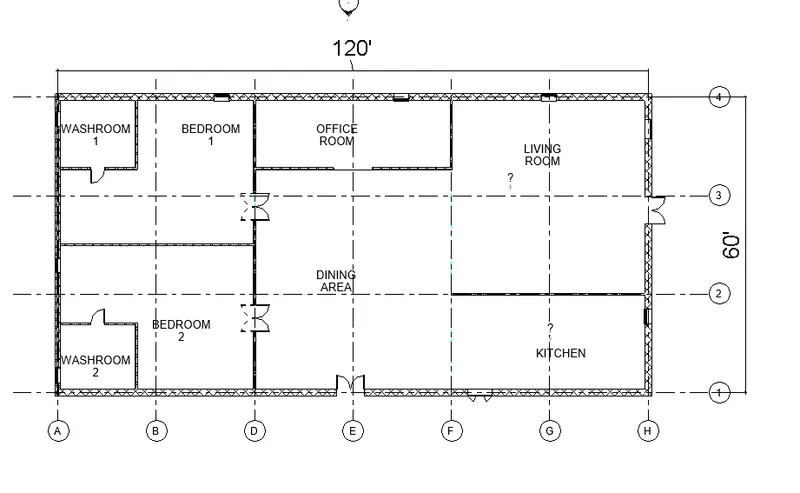
AIM: To include dimensions and components in the residential plan created above
PROCEDURE:
STEP 1:
- Open the above created residential unit layout
- Align the dimensions to the rooms
- Add the doors at the places required
- Click architectural tab> room toolbar
- Under that select rooms and tag rooms for tagging
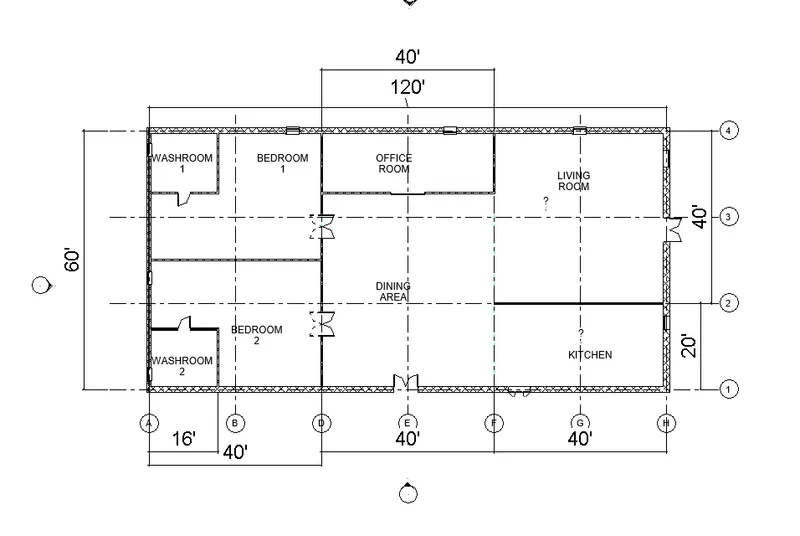
RESULT:
Final layout is created by drafting the level of details that includes dimensions and components essential in the rooms.
7)
AIM: To insert the residential model elements such as Door, Windows, Tables, Chair, Couch, Bed, Lamps from the library to the model
PROCEDURE:
STEP 1:
- Open the above created layout
- Click on Insert > load family> select any element like doors, windows etc
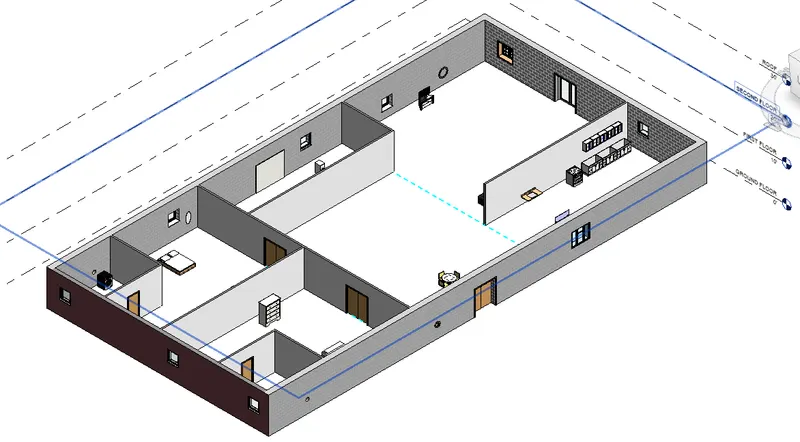
RESULT:
Final model with included elements such as doors ,windows and tables is ready.